Instrukcja obsługi Yealink WF50
Yealink
Klucz sprzętowy
WF50
Przeczytaj poniżej 📖 instrukcję obsługi w języku polskim dla Yealink WF50 (8 stron) w kategorii Klucz sprzętowy. Ta instrukcja była pomocna dla 10 osób i została oceniona przez 2 użytkowników na średnio 4.5 gwiazdek
Strona 1/8

Wi-Fi USB Dongle
WF50
www.yealink.com
User Guide(V1.1)
1
Wi-Fi USB Dongle is used in following scenarios:
• For IP phones: connect to the wireless network.
• For video conferencing systems: connect to the wireless
network or provide wireless AP (Access Point) for other
devices.
To assemble the Wi-Fi USB Dongle:
1. Insert the Wi-Fi USB Dongle to the USB port on the IP
phone or video conferencing system.
Introduction
Connecting to the Wireless Network
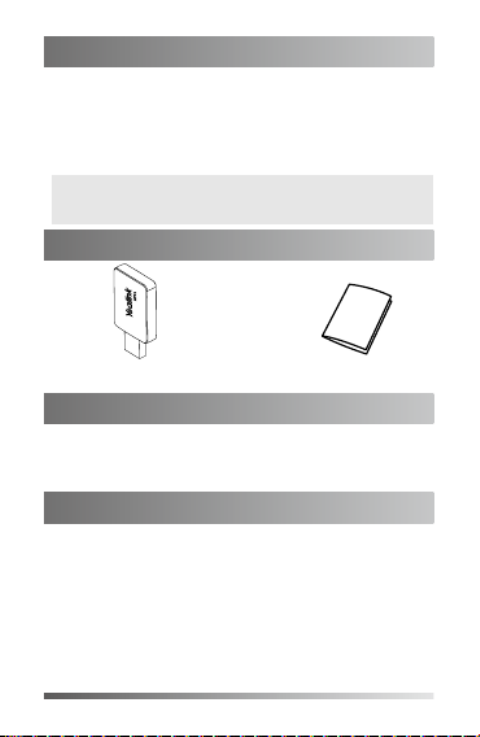
Package Contents
Wi-Fi USB Dongle WF50 User Guide
Assembling the Wi-Fi USB Dongle
Note: Not all IP phones and video conferencing systems support
Wi-Fi USB Dongle. For more information, contact your
system administrator.
To connect to an available wireless network via the IP
phone (take the SIP-T46S phone for an example):
1. Assemble the Wi-Fi USB Dongle.
The LCD screen prompts “Wi-Fi adapter has been added,
scanning the available wireless network right now?”
2. soft key. Press the OK
3. . Select X available network(s)

2
4. Select the desired wireless network and then press the
Connect soft key.
5. (Optional.) Enter its password in the field.Password
6. soft key. Press the OK
Once the connection completes successfully, the icon
appears after the SSID.
To connect to an available wireless network via the video
conferencing system:
1. Assemble the Wi-Fi USB Dongle.
The monitor prompts "Wi-Fi adapter is connected".
2. On your remote control, navigate to -> -> More Setting
Advanded Wi-Fi-> .
3. Check the checkbox. Wi-Fi
4. If you already enabled wireless AP, press OK to disable it.
5. Select the desired wireless network and then press OK.
6. (Optional.) Enter its password in the field.Password
7. . Select Join to Network
Once the connection completes successfully, the icon
appears on your monitor.
To provide wireless AP via the video conferencing system:
1. Assemble the Wi-Fi USB Dongle.
The monitor prompts "Wi-Fi adapter is connected".
2. On your remote control, navigate to -> -> More Setting
Advanced Wireless AP-> .
3. Check the checkbox. Wireless AP
4. If you already enabled Wi-Fi, press OK to disable it.
Other devices can connect to this wireless AP. Once the
connection is successful, the number of connections
appears beside the icon.
Providing Wireless AP for Other Devices
Specyfikacje produktu
| Marka: | Yealink |
| Kategoria: | Klucz sprzętowy |
| Model: | WF50 |
Potrzebujesz pomocy?
Jeśli potrzebujesz pomocy z Yealink WF50, zadaj pytanie poniżej, a inni użytkownicy Ci odpowiedzą
Instrukcje Klucz sprzętowy Yealink

3 Października 2024
29 Sierpnia 2024
Instrukcje Klucz sprzętowy
- Klucz sprzętowy Huawei
- Klucz sprzętowy Asus
- Klucz sprzętowy Nedis
- Klucz sprzętowy D-Link
- Klucz sprzętowy Garmin
- Klucz sprzętowy Evolveo
- Klucz sprzętowy Alcatel
- Klucz sprzętowy Icy Box
- Klucz sprzętowy Tacx
- Klucz sprzętowy Wacom
- Klucz sprzętowy GoGen
- Klucz sprzętowy Optoma
- Klucz sprzętowy Marmitek
- Klucz sprzętowy Ubiquiti Networks
- Klucz sprzętowy Engel Axil
- Klucz sprzętowy Billow
- Klucz sprzętowy Epcom
- Klucz sprzętowy CGV
Najnowsze instrukcje dla Klucz sprzętowy

13 Grudnia 2024

9 Grudnia 2024
9 Grudnia 2024
1 Października 2024
1 Października 2024
1 Października 2024
30 Września 2024
29 Września 2024
29 Września 2024
29 Września 2024