Instrukcja obsługi Roberts Stream 64i

Roberts radio Stream 64i

Przeczytaj poniżej 📖 instrukcję obsługi w języku polskim dla Roberts Stream 64i (116 stron) w kategorii radio. Ta instrukcja była pomocna dla 2 osób i została oceniona przez 2 użytkowników na średnio 4.5 gwiazdek

Strona 1/116
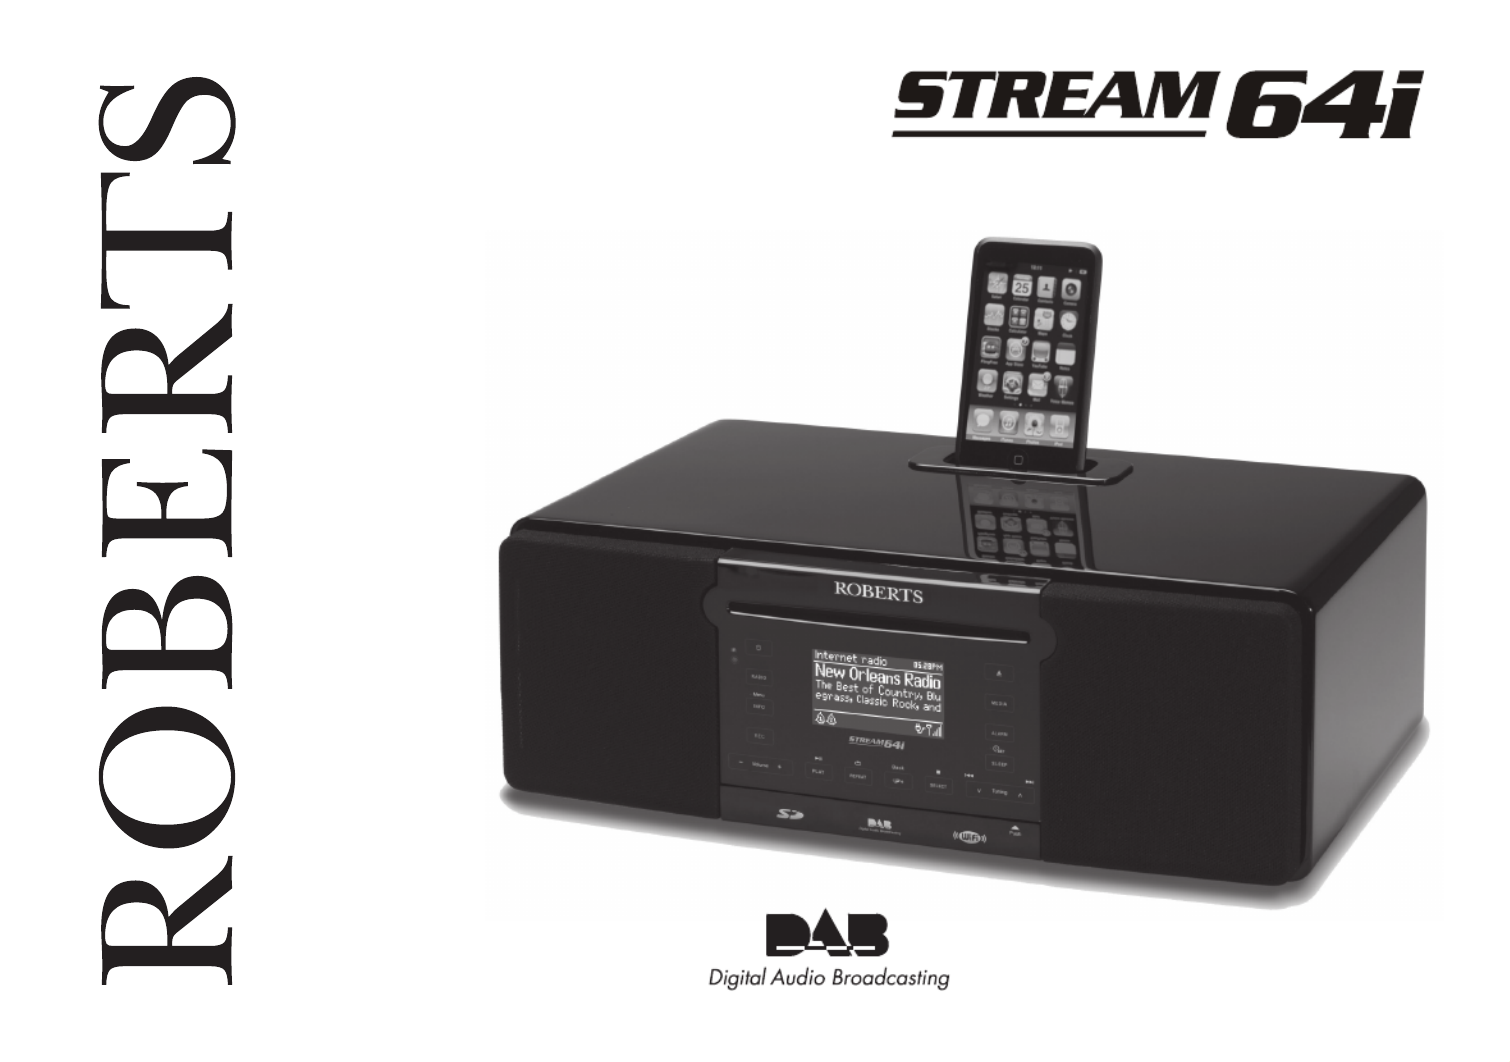
Reassuringly Roberts
CD/DAB/FM RDS/WiFi Internet Radio with dock for iPod
Please read this manual before use
iPod is a trademark of Apple Inc., registered in the U.S. and other countries.
"Made for iPod" means that an electrical accessory has been designed to connect speci cally to
iPod and has been certi ed by the developer to meet Apple performance standards.
Apple is not responsible for the operation of the device or its
compliance with safety and regulatory standards.
Introduction ....................................................................................... 2-12
Stream 64i Internet radio features ....................................................... 3
Before you can use this product .......................................................... 4
About this instruction manual............................................................ 5-6
Controls and connections ................................................................. 7-8
Remote control operation ............................................................... 9-10
Navigation controls ....................................................................... 11-12
Network con guration ................................................................... 13-21
Connecting your radio to your computer network ......................... 13-21
Internet Radio mode ....................................................................... 22-35
Internet Radio - the basics................................................................. 22
Selecting a radio station by location and genre ............................ 23-25
Searching for a radio station by name ............................................... 26
Selecting a new or popular station .................................................... 27
Selecting a podcast / BBC Listen Again ............................................ 28
Presetting stations ............................................................................. 29
Display modes .............................................................................. 30-31
Customising your radio ................................................................. 32-33
Selecting favourite stations................................................................ 34
Music Player mode ......................................................................... 36-46
Use with Windows, Apple Mac and Linux .......................................... 36
Accessing your les via UPnP ...................................................... 37-38
Locating and playing media les using UPnP ................................... 39
Media selection.................................................................................. 40
Controlling playback ..................................................................... 41-42
Display modes ................................................................................... 43
Playlists ........................................................................................ 44-46
DAB mode ....................................................................................... 47-55
Selecting a DAB radio station ............................................................ 48
Display modes ............................................................................. 49-50
Finding new DAB radio stations ........................................................ 51
Station order setup ............................................................................ 54
FM mode .......................................................................................... 56-61
Manual tuning .................................................................................... 57
Scan setting ....................................................................................... 59
Stereo / Mono switching .................................................................... 60
Presetting stations in DAB and FM modes ........................................ 61
Contents
CD / MP3 / WMA .............................................................................. 62-70
Compact discs ................................................................................... 62
Playing a CD................................................................................. 63-65
CD track programming ...................................................................... 66
CD / MP3 / WMA mode ................................................................ 67-70
SD / USB playback and recording................................................. 71-79
SD/USB le and folder selection .................................................. 72-74
Recording to SD/USB ................................................................... 75-77
Deleting les ................................................................................. 78-79
iPod docking ................................................................................... 80-82
Navigating your iPod .................................................................... 80-82
Clock and Alarms .......................................................................... 83-91
Automatically updating the clock ....................................................... 83
Manually setting the clock ............................................................ 85-86
Setting the alarm clock ................................................................ 87-90
Sleep timer ....................................................................................... 91
Display and Audio .......................................................................... 92-99
Equaliser............................................................................................ 92
Brightness control .............................................................................. 94
Touch sensitivity control panel ........................................................... 96
Headphone socket and Line out socket ............................................ 97
Auxiliary input socket ......................................................................... 98
Information .................................................................................. 100-114
Factory reset.................................................................................... 100
Software update .............................................................................. 101
Network pro les ............................................................................... 102
Audio FAQ ....................................................................................... 103
Troubleshooting ........................................................................ 104-105
Audio codecs ................................................................................... 108
Cautions and Speci cations ..................................................... 109-110
Mains supply.....................................................................................111
Guarantee.........................................................................................114
2
Introduction
3
Introduction
Stream 64i Internet Radio features
The Roberts Stream 64i provides the following features in an attractive
compact unit:-
Listen to local, regional, national and international broadcasts using
FM, DAB and Internet radio. Listen to over 1000 radio stations from
around the country, and over 10,000 from around the world without
using your PC.
Listen to previously broadcast material from the BBC (using Listen
Again)
Listen to podcasts from a wide range of broadcasters.
30 radio station presets (10 Internet Radio, 10 DAB and 10 FM).
Use the Music Player to play your music collection from your
computer (using Windows Media Player 11 or 12). Connection to
Apple and Linux based computers is also possible.
Plays MP3, WMA, AAC, FLAC, WAV and Real Audio formats (Real
Audio for Internet Radio only; CD, USB and SD play MP3 and WMA
les only).
Play from CD, USB memory and SD cards (including MP3 and WMA
les from CD).
Play from iPod (iPhone and iPod touch also supported). Charges
your iPod when docked.
Record CD or radio to USB memory and SD cards.
The Stream 64i connects to your home computer network, either
using WiFi or via a wired Ethernet connection. WiFi Protected Setup
(WPS) is supported with compatible wireless routers.
All radio station presets, network con guration details and user
settings are retained in the event of a power failure.
Large clock display with time and date when in Standby.
Two alarm timers with snooze feature to wake you to radio, CD, USB,
SD card, iPod or buzzer alarm.
Adjustable sleep timer, can be set to turn the radio off between 15
and 120 minutes.
Easy-to-read graphic display with adjustable display backlight.
Easy to use, wipe clean, touch sensitive control panel.
Auxiliary input for playing audio from MP3 players, iPods or other
audio equipment.
A standard 3.5mm Line Output socket for connecting the audio signal
to an external ampli er or recorder.
A standard 3.5mm headphone socket for private listening.
High quality stereo speaker system in an acoustically tuned piano
gloss cabinet.
Before you can use this product
Before you can use your internet radio, you must have the following:
A broadband Internet connection (not required for DAB, FM or Music
Player functions).
A wireless access point (WiFi) or a wired Ethernet connection connected
to your broadband Internet Service Provider, preferably via a router.
In many cases the broadband modem, router and wireless access
point will be a single combined unit supplied by your Internet Service
Provider or bought from a computer store.
If your wireless network is con gured to use Wired Equivalent Privacy
(WEP) or WiFi Protected Access (WPA/WPA2) data encryption then you
either need to know the WEP, WPA or WPA2 key used for encryption
so you can get the internet radio to communicate with the network,
or your router needs to offer WiFi Protected Setup (WPS).
If connecting using WiFi, the interent radio will typically work within a 10-20
metre radius from your wireless access point. The actual range achieved will
depend upon the building type, other nearby wireless networks, and possible
interference sources. DAB and FM radio functions can operate wherever
the internet radio is able to receive a suitable broadcast signal.
IMPORTANT: Before you continue, make sure that your wireless access
point or router is powered up and working with your broadband Internet
service (use your computer to verify this). To get this part of the system
working you must read the instructions supplied with the wireless access
point or router.
4
Introduction
About this instruction manual
This instruction manual is divided into sections for each of the operating
modes of your Roberts Stream 64i internet radio. Each section is identi ed
by the shaded heading in the top right hand corner of each pair of pages.
Before using the Internet Radio or Music Player functions, you will need
to connect your radio to your computer network using either the WiFi or
Ethernet connection. This is covered in the section titled Con guration.
The Internet Radio section describes how to nd radio stations to listen
to. These can be radio stations that you already know and listen to
conventionally, or new stations that you search for. You may set up stations
that you like as Favourites so that they are more readily accessible.
The section for the describes how you may play music Music Player les
that you may have stored on a computer connected to your network. The
use of Shared Media (using UPnP) is explained.
The section for describes how to use the radio to listen to DAB Radio
conventional DAB radio broadcasts.
The section for describes how to use the radio to listen to FM Radio
conventional FM radio broadcasts.
Con guration (page 13)
Music Player (page 36)
Internet Radio (page 22)
DAB Radio (page 47)
FM Radio (page 56)
5
About this instruction manual - cont.
The section for CD / MP3 / WMA player describes how to play digital
audio or MP3 / WMA les which have previously been recorded to CD-R
or CD-RW.
The section for describes playback and recording using SD / USB media
SD card and USB memory devices.
The section for describes how to use your Stream 64i to iPod docking
play audio les or video soundtracks directly from your iPod.
The section titled describes the different ways by Clock and Alarms
which the clock in the radio may be set, as well as explaining the use of
the alarms, snooze and sleep timer features.
The Display and Audio section shows how to adjust the display, use the
equaliser and connect your internet radio to other audio equipment.
The Information section includes troubleshooting, speci cations and
warranty information.
6
Introduction
CD / MP3 / WMA (page 62)
iPod Docking (page 80)
SD / USB (page 71)
Clock and Alarms (page 83)
Display and Audio (page 92)
Information (page 100)
7
Controls and connections
Front view
1. Volume Up / Down buttons
2. Record button
3. Info / Menu button
4. Radio button
5. Remote control sensor
6. On / Standby button
7. CD slot
8. iPod dock connector
9. LCD display
10. CD Eject button
11. Media button
12. Alarm button
13. Sleep / Clock set button
14. Menu Up / Fast-forward button
15. Loudspeakers x 2
16. Menu Down / Rewind button
17. Select / Stop button
18. USB memory socket (behind panel)
19. Play / Pause button
20. Repeat button
21. Back button
22. SD card slot (behind panel)
8 9
22 18 15
10
11
12
13
14
16
6
4
3
2
1
7
5
1719202115
8
Controls and connections - cont.
Rear view
23. Telescopic aerial
24. Wi-Fi antenna
25. Mains input socket
26. Ethernet socket (RJ-45)
27. Optical output socket (Toslink)
28. Auxiliary input socket
29. Line output socket
30. Headphone socket
Introduction
2627282930
23 24
25
9
Controls and connections - cont.
Remote control handset
1. On / Standby button
2. Mute button
3. Key pad buttons 1-10/0
4. Menu Up / Folder Up button
5. Menu Left / Rewind button
6. Info / Menu button
7. Record button
8. Media button
9. Sleep / Clock set button
10. Repeat button
11. Equaliser button
12. Random button
13. Alarm button
14. Radio button
15. Auto-tune / Program tracks button
16. Play / Pause button
17. Menu Down / Folder Down button
18. Menu Right / Fast-forward button
19. Select / Stop button
20. Back button
21. Volume Up / Down buttons
22. CD eject button
1
12
16
17
18
19
20
10
6
5
3
2
13
15
4
22
8
9
11
14
21
7
Introduction
10
Remote control battery replacement
1. Remove the battery cover on the rear of your remote control by
applying pressure to the catch in the direction shown by the arrow in
the diagram, and then lifting the cover.
2. Insert 2 x AAA size batteries into the compartment. Make sure the (+)
and the (-) ends of the batteries are positioned as shown inside the
compartment.
3. Close the battery cover by inserting the retaining lugs rst, then
apply pressure to the free end such that the catch latches the cover
securely.
4. If the remote is not to be used for an extended period of time it is
recommended that the batteries are removed.
IMPORTANT: The batteries should not be exposed to excessive heat
such as sunshine, re or the like. After use, disposable batteries should
if possible be taken to a suitable recycling centre. On no account should
batteries be disposed of by incineration.
Do not leave batteries within reach of young children. They can be a
choking hazard.
1
2
3
1. Battery compartment
2. Latch
3. Retaining lugs (inside)
11
Using the touch panel
The Stream 64i has a stylish touch panel instead of conventional buttons.
To operate the buttons simply touch the button area with the tip of a nger
for about half a second. The clock set and system menu functions marked
with a dot ( ) are accessed by means of a long touch (2-3 seconds) on the
appropriate button until the display on the radio shows that the command
has been accepted.
You may nd at rst that the radio does not always detect that you have
touched a button. If so, try touching with a little more pressure, or for slightly
longer. You will soon nd the optimum touch needed to control your radio.
(See also Touch Panel Sensitivity Control on page 96.)
The panel may be cleaned using a dry cloth. Do not use abrasives,
cleaning uids or solvents.
Remote control functions
Most of the functions of the Stream 64i radio can be controlled using either
the touch panel or the remote control. However, there are a few functions
which are only accessible using the remote control. These are:
Radio station presets DAB / FM auto-tune
CD track access by numbers CD / iPod random function
Audio mute
As with the front panel, some operations require a longer operation of the
button (explained in the relevant sections). In this case simply keep your
nger held on the remote control button for 2-3 seconds until the display
on the radio shows that the command has been accepted.
Navigation controls
This page describes the basic means of controlling your Stream 64i internet radio.
Instructions for each operating mode are given in the later sections of this book.
1. Pressing the On/Standby button brings your radio out of Standby mode.
Pressing On/Standby while the radio is in use will cause it to return to the Standby
mode with the clock display.
2. Pressing the Radio button gives you access to each of the operating modes in
turn: Internet Radio, DAB radio, FM radio and Auxiliary Input.
3. Pressing the Media button gives you access to each of the operating modes in
turn: CD, USB memory device, SD card, iPod, and Music player.
4. Pressing and holding the button will access the menu system. The Info/Menu
info button also allows the display of information relating to the radio station or
music le being played.
5. Many operations require the user to make a selection from the menu. Highlight
the menu item using the Menu Up or Down buttons. Press the Select button
to select that item. If there are more than ve items in a menu, then the display
will automatically scroll up or down so that the additional items become visible.
A sliding bar on the right will give an indication showing the current portion of the
menu that is displayed.
If there are many items in a menu, then the radio allows the menu to 'wrap around'
in either direction. This can make it easier to reach items at the end of a long
menu, such as a list of countries or Internet radio stations.
6. If an error is made when navigating the menus, it is generally possible to go back
to a higher level menu by pressing the button. Back
Although controls on the internet radio are shown, all functions are also available
using the remote control.
1
Internet radio
Music player
DAB
FM
CD
12
2
3
4
Introduction
6
5
Con guration
Connecting your radio to your computer network
1. Place your radio on a at surface and plug the mains lead into the
mains socket located on the back of your radio ensuring that the plug
is pushed fully into the socket.
2. If you wish to use a wired network connection, plug the Ethernet cable
into the RJ-45 socket (marked LAN) at the back of the radio.
3. Plug the other end of the mains lead into the wall socket and switch
on the wall socket.
IMPORTANT: The mains plug is used as the means of connecting the
radio to the mains supply. The mains socket used for the radio must
remain accessible during normal use. In order to disconnect the radio
from the mains completely, the mains plug should be removed from
the mains socket outlet completely.
4. When you apply power, the display on the radio will light up and say:
'WELCOME' 'STARTING' and with a progress indicator. The rst time
that you use your radio (or after a Factory Reset) the display will show
'Setup wizard' and 'YES' will be highlighted on the screen. Press the
Select button to start the setup wizard. You will then have a choice to
set the clock to use the 12 or 24 hour format.
You are recommended to run the setup wizard, but if you do not wish
to then press the is highlighted Menu Up or Down buttons until 'NO'
on the display then press the Select button. The screen will ask if you
wish to run the setup wizard again at the next start up. This will lead
to the main menu.
5. Press the Menu Up or Down buttons to highlight the desired clock
format (either 12 or 24 hour) then press the button to enter Select
your selection. A menu allowing you to specify the auto update option
for the clock will appear on the display. The default of 'Update from
Network' will be the best option for most users.
13
4,5
4,5 4,5
Con guration
14
Connecting to your computer network - cont.
6. Press the Menu Up or Down buttons to choose an auto-update option for
the clock. This can be updated from DAB or FM radio, from the Network, or
not updated. The default is to auto update from the network. If you choose
any other option, go to step 9. Otherwise you will rst need to select the
correct time zone and daylight savings setting, see steps 7 and 8. If you
choose 'No update' you will need to set the clock manually later, see page
85. Press the button to conSelect rm your choice.
7. Press the Menu Up or Down buttons to highlight the time zone which is
applicable to your location. Press the button to enter the setting. Select
8. You will then need to set the Daylight Savings option according to your
location (Daylight Savings is also known as Summer/Winter time or BST/
GMT adjustment).
Press the Menu Up or Down buttons to highlight to turn on daylight 'YES'
savings if required or if you do not wish to use daylight savings then 'NO'
press the button to conSelect rm the setting.
In the UK, is equivalent to British Summer Time and is equivalent 'ON' 'OFF'
to Greenwich Mean Time.
9. The display will then show a list of WiFi regional options for the network
set up (for the UK choose ). Press the 'Most of Europe' Menu Up or Down
buttons to highlight the required region and then press the Select button
to select it. Do this even if planning to use the wired Ethernet connection.
Your radio will then scan for available WiFi networks. If using WiFi we
recommend that the WiFi antenna is positioned vertically.
10. . The radio will enter the Network Settings Wizard and will display 'Scanning...'
After a short while the display will show a list of the available WiFi networks.
If you are intending to use the WiFi connection, go to step 11.
To use the Ethernet connection to your router (with automatic con guration),
Press the buttons to point to the menu item. Menu Up or Down '[Wired]'
Press the button and the radio will attempt to connect. Select
6-10
6-10 6-10
15
Connecting to your computer network - cont.
If your network allows automatic con guration (which is normal) the radio will
acquire a network address. The screen should say , and then 'Connecting...'
'Setup wizard completed'. Press the button to exit the setup wizard Select
and show the main menu. You can then skip to paragraph 18 on page 17.
There are two indicator lights incorporated into the RJ-45 connector. If you
have problems with your wired connection, they may help you to identify the
possible cause of the problem.
Yellow ON = Link established; OFF = no connection
Yellow Flashing = Data transfer
Green ON = 100 Mbits/sec link; OFF = 10 Mbits/sec link
If your network does not support automatic con guration or if you wish to set
it up manually then you should select '[Manual con g]' instead of selecting
'[Wired]' in the Network Wizard, then see page 19.
11. If you plan to use a WiFi connection, you will rst need to identify your network
in the list of network names presented by the Network Wizard. If no networks
are found then you may have to get your wireless router working (please see
the instructions supplied with it) or you may be too far from the router.
When the radio nds your wireless network, it displays the Network Name
(SSID) for the wireless access point on the screen. This is a name that is
allocated to the access point in your router by the person who set up the
network - for example: or . If the router supports 'Jones family' 'Paul's network'
WiFi Protected Setup, then will be shown in front of the SSID.'[WPS]'
It is possible, and in some locations highly likely, that your radio will nd more
than one wireless network, in which case you should choose which one you
need to connect to.
12. Press the Menu Up or Down buttons to see the SSID for each wireless
network that has been found. If your network is shown proceed to step 14 on
the next page. If it is shown then proceed to step 13.not
If you make a mistake at any point, use the button to go back to the Back
previous screen.
Internet radio
Music player
DAB
FM
CD
11,12
11,12 11,12
16
Con guration
Connecting to your computer network - cont.
13. If your network is not found, it may be because the router is con gured not to broadcast the SSID. You
should then use the buttons to highlight and select the Menu Up or Down and Select '[Manual con g]'
option in order to enter the network details manually. This is described in 'Manual Network Con guration',
see page 19.
If your network name is being broadcast, and it was not found, then try re-scanning (press the Back
button), and if necessary try moving your radio to a location closer to your access point / router.
14. When the SSID for the wireless network you wish to connect to is highlighted on the screen, press the
Select . button If WiFi Protected Setup (WPS) was indicated, you will see an additional menu at this point,
otherwise proceed to step 15.
Choose one of the WPS menu options as required for your router (WPS may be via push button, or using
an identi cation number).
'Push Button' - the display prompts you to press the WPS button on your router and then the Select
button on the radio. The two devices should then connect with the encryption key sent automatically to
the radio.
'PIN' - the display shows an identi cation number which you must enter into your router using a web
browser (refer to your router's user documentation). You should then press the Select button on the radio.
The two devices should then connect with the encryption key sent automatically to the radio.
- if you wish to enter the encryption key yourself (or if it was previously entered).'Skip WPS'
If you chose Push Button or PIN the screen will then show and then 'Connecting...' 'Setup wizard completed'.
Press the button to exit setup wizard and then go to paragraph 18 on the next page.Select
15. If your network is con gured without an encryption key, the screen should say , and then 'Connecting...'
'Setup wizard completed'. Press the button to exit the setup wizard and show the main menu. If this Select
is the case then you have successfully connected your radio to your network, so please go to paragraph
18 on the next page.
16. If the screen displays , it is because the network is using one of the encryption systems: Wired 'Key:'
Equivalent Privacy (WEP) or WiFi Protected Access (WPA). You will need to enter the correct WEP or
WPA key into the radio to allow it to communicate with your wireless network. If you do not have the WEP
or WPA key, then you should obtain it from the person who set up your network. Some wireless routers
may come with an encryption key already set up by the supplier, in which case you should refer to the
documentation provided with it. WPA is used here to also include WPA2.
17
Connecting to your computer network - cont.
WEP keys are 10 or 26 characters long (using 0 - 9, and A - F). Some wireless
routers can also use pass-phrases for WEP but these are not supported. WPA
keys are usually set up using a pass-phrase of between 8 and 63 characters.
Your radio accepts pass-phrases for WPA keys.
17. To enter the WEP or WPA key, characters are selected and entered using the
Menu Up Down, Left Right or or (on the remote control) and Select buttons. The
highlight scrolls through the available characters as well as the three controls on
the right. The character currently highlighted will be entered when you press the
Select button.
Do this as needed until the complete key has been entered. Remember, WEP
keys only use the numbers 0-9 and letters A-F. WPA keys are sensitive to upper
and lower case characters. You must enter the key or the radio will not exactly
connect to the network.
The three controls on the right-hand side of the screen have special functions.
You can quickly access these by pressing the button and then use the Info Up
or and buttons as needed: Down Select
select ' ' to erase a character just entered (long press to clear)
select ' ' when the complete key has been entered
select ' ' to cancel and re-run the Network Wizard
If a WEP or WPA key has previously been entered for the selected SSID then
the display will show . If you have previously entered a different key, 'Key: [Set]'
you must clear this by selecting the ' ' symbol. This will remove the '[Set]'
indication.
After the nal character of the WEP or WPA key has been entered, highlight the '
' symbol and press the Select button. The screen will show 'Connecting...' and
then 'Setup wizard completed'. Press the Select button to the exit setup wizard.
The radio should now be able to connect to the network.
18. Once you have connected your radio to the network (and therefore also to the
Internet) it will display the main menu. Press the to put the On/Standby button
radio in Standby mode. It should then display the time as obtained from the
Internet. If the time display is not correct for any reason, it can easily be adjusted
later, see page 85, 'Manually setting the clock'.
Internet radio
Music player
DAB
FM
CD
13-18
13-18 13-18
17
18
17
18
Con guration
Connecting to your computer network - cont.
If you have followed the steps on the preceding pages successfully, your radio will have connected to your
router, and then made a connection to the Internet and set its clock. If this is the case, then you can try
listening to radio stations via the Internet as described on page 22 onwards.
Changing the network connection
In the sections above, you chose how your radio would be connected to your network, either using a WiFi
connection or using a wired Ethernet cable. From time to time, you may nd that you need to connect to
different computer networks. The Internet setup menu allows you to change your radio’s network settings,
scan for an alternative wireless network, or to manually con gure the network parameters.
The steps outlined below describe how you can do this - see also the section 'Network pro les' on page 102.
If you have no need to do this, however, please skip to page 22.
Con guring the radio to use an alternative WiFi connection
1. From the Network settings menu select . This will present you with details of any WiFi 'Network wizard'
networks that are found. Scroll down the list using the buttons to the desired network Menu Up or Down
name. Press the button to select this network. Select
The radio will then use its WiFi system to communicate with the network. Depending on the settings
for the new network you may need to enter an encryption key (see pages 16-17). By default the radio
will then acquire an IP address and other network settings from your router using DHCP.
Con guring the radio to use the wired Ethernet connection
2. Connect your radio to your router using an Ethernet cable plugged into the RJ-45 socket (marked LAN)
at the back of the unit. From the Network settings menu select . This will present you 'Network wizard'
with details of any WiFi networks that are found. Scroll down the list to the '[Wired]' option using the
Menu Up Down Select or buttons. Press the button to select this.
The radio will then use its Ethernet connection to communicate with the network. By default the unit
will then acquire an IP address and other network settings from your router using DHCP.
19
Manual network con guration
If you do not wish to use DHCP for automatic con guration, or if your network is con gured with a hidden
SSID, then you will need to enter some network settings manually. (Note - a hidden SSID may prevent casual
observers from detecting your network, but it is not recommended as a means of network security.)
1. From the radios Network settings menu, select 'Manual settings'. You must then choose whether to
connect using or connections. If you choose there are as many as nine 'Wired' 'Wireless' 'Wireless'
settings screens, shown by the progress marker in the top right corner of the display. If you '1 of 9'
choose 'Wired' there are ve screens and the progress marker will re ect this, although the steps to
set up the network parameters are basically the same.
2. The next menu asks whether you wish to use DHCP to con gure your network parameters (IP address,
subnet mask, gateway address, etc.). Unless you are familiar with networking and related terminology,
we recommend that you allow the use of DHCP. Choose 'DHCP enable' unless you need to specify
the network details manually.
If you have chosen and then 'Wired' 'DHCP enable', your radio should now establish a connection to
the router using the Ethernet cable. Please skip to step 11 on page 21.
If you chose and 'Wireless' 'DHCP enable', please skip to step 6 on page 20 in order to set up the
wireless connection details.
If you chose for either connection method, the next step is to set up the IP address.'DHCP disable'
3. The manually speci ed IP address should be chosen to be compatible with the settings in your router
and must be a unique address on your network. If you are using DHCP for some devices and static
(manually con gured) IP addresses for others, the IP address used should fall outside the range that
the router may allocate using DHCP. Typically, the rst three groups of digits will be the same for all
devices on your network. To enter the IP address, press the buttons to set the Menu Up or Down
value for each group of digits and then press the button or the or buttons (on the Select Left Right
remote control) to enter the value and to move on to the next group. When the IP address has been
entered, the subnet mask should be entered. The subnet mask de nes which parts of the IP address
are common across your network. For most small networks the subnet mask will be 255.255.255.0
and this is entered in the same way.
4. The Gateway address is normally the IP address of the router through which the radio connects to the
internet and is entered in the same way as the previous addresses.
20
Con guration
Manual network con guration - cont.
5. In most installations the DNS settings (DNS = Domain Name Server) will be set to the same IP address
as your router. In this case the secondary DNS may be left at zero.
To enter the DNS address, press the buttons to set the value for each group of digits Menu Up or Down
and then press the Select button or the or buttons (on the remote control) to enter the value Left Right
and to move on to the next group. Repeat this until all eight groups of digits have been entered.
If you previously speci ed 'Wired' and then , your radio should now connect to the router 'DHCP disable'
using the Ethernet cable (in which case skip to step 11).
6. If you speci ed 'Wireless', the next step is to set up the WiFi connection, starting with the name of the
wireless network (SSID) followed by the encryption options and password.
To enter the SSID, characters are selected and entered using the Menu Up or Down, Left or Right
(on the remote control) buttons. The radio scrolls through the available characters as well Select and
as the three controls on the right. The character currently highlighted will be entered when you press
the button. Select
Do this as needed until the complete network name has been entered. The SSID setting is sensitive to
upper and lower case characters and symbols. You must enter it exactly as set up in your router.
The three controls on the right-hand side of the screen have special functions. You can quickly access these
by pressing the button and then use the or and buttons as needed:Info Menu Up Down Select
select ' ' to erase a character just entered (long press to clear); again to continueInfo
select ' ' when the complete SSID has been entered
select ' ' to cancel and go back to the DNS settings screen
7. Having entered the SSID, you must enter details of the encryption system used on your wireless network.
This should be the same as speci ed in your router settings. If your network does not use encryption,
then select the option. Your radio should then connect to the network, so skip to step 11. If your 'Open'
network uses WEP (Wired Equivalent Privacy) select the option then go to step 8. 'Pre-Shared Key'
The remaining options are for WPA or WPA2 (WiFi Protected Access) - see step 9.
8. If you chose in step 7, you should then choose the WEP option. The key should be 'Pre-Shared Key'
entered using only the numbers 0-9 and the letters . The key will be 10 characters long for 64-bit A-F
encryption and 26 characters long for 128-bit encryption. The radio will accept lower-case letters a-f as
equivalent to upper-case . Spaces or special symbols are not permitted in WEP keys.A-F
21
Manual network con guration - cont.
The three controls on the right-hand side of the screen have special functions. You can quickly
access these by pressing the buttons as Info button and then use the Menu Up or and Down Select
needed:
select ' ' to erase a character just entered (long press to clear); again to continueInfo
select ' ' when the complete encryption key has been entered
select ' ' to cancel and go back to the SSID settings screen
Once the key is entered the radio should connect to your network. Please skip to step 11.
9. WPA and WPA2 are similar, although WPA2 offers a higher level of security. Whichever you selected
in step 7, you then have to specify the variant used. They are TKIP (Temporal Key Integrity Protocol)
and AES (Advanced Encryption Standard). As previously, the setting should match that used by your
router. Some routers allow both to be speci ed, and the router will use whichever variant is supported
by the connected device. AES is regarded as the more secure option if it is available.
10. The radio will then require you to enter the encryption key. This must be a string of between 8 and
63 characters and must be identical to the key which has been entered into your router. Note - the
encryption key is sensitive to the use of upper and lower case letters and symbols. Take care to enter
the key exactly, or the radio will not be able to connect to your router.
The three controls on the right-hand side of the screen have special functions. You can quickly
access these by pressing the buttons as Info button and then use the Menu Up or and Down Select
needed:
select ' ' to erase a character just entered (long press to clear); again to continueInfo
select ' ' when the complete encryption key has been entered
select ' ' to cancel and go back to the TKIP / AES options screen
Once the key is entered the radio should connect to the network.
11. While the radio is trying to connect to the network, it will display when checking the 'Processing...'
encryption key (if using the WiFi connection) and then . If the connection is made 'Connecting...'
successfully, the radio will return to the Network settings menu. If the unit cannot connect, then it will
display a message and will return to the SSID entry screen (step 6).'Failed to connect'
Once connected, the network settings are stored in the radio. The settings are retained when the radio
is disconnected from the mains.
You may now use the and or buttons to access the functions of your radio.Back Radio Media
22
Internet Radio
Internet Radio
Internet Radio - the basics
Before you can use your radio to listen to broadcasts via the Internet, it is necessary to have
connected it to your computer network using either the wireless (WiFi) connection or the
wired Ethernet connection (RJ-45 socket) located on the back of the unit. Please see page
13 for details.
There are literally many thousands of radio broadcasts available via the Internet as well as
'Podcasts'. Your radio provides several ways of searching for broadcasts in order to make
nding and choosing them easier. Once you have found radio stations which you like, you may
either store them as presets within the radio, or add them to a list of your favourite stations
which your radio can access. The number of presets is limited (there are ten presets on the
radio), but you can store as many favourites as you like.
You may search for an internet radio station by Location. If you know the name of the station
and the country from which a station is broadcast this may be the easiest method to nd a
station. It is also a great way to experience radio from other parts of the world.
You may also search for an internet radio station by Genre. If you prefer a particular type of
music, Blues for example, you may search for a radio station that broadcasts that type of
music, and you can choose from a list of Blues radio stations regardless of location, or taking
location into account.
If you know part of the name of an internet radio station, you can enter it into the radio and
it will search for stations that match that name. This can be helpful if you are unsure of the
location or genre of a particular station.
The Stream 64i radio connects to a radio station database which serves many users in many
countries. This means that there is a very wide range of programme content available. You
can also search for stations which have been recently added to those available (new stations)
or you can search for the most popular.
23
Selecting a radio station by location
1. Press the On/Standby button to switch the radio on. Then press the
Radio button to select the mode display.Internet radio
2. Press and hold the Menu button to enter the main Internet radio menu.
Press the is highlighted Menu Up or Down buttons until 'Station list'
on the display and then press the button to select the option.Select
3. Press the Menu Up or Down buttons until 'Stations' is highlighted on
the display and then press the button.Select
Note that the menu may offer one or more local selections based upon
the country in which the unit is being used, according to your internet
IP address ( and stations, for example).'United Kingdom' 'BBC'
4. Press the Menu Up or Down buttons until 'Location' is highlighted on
the display and then press the button to select.Select
5. Press the or buttonsMenu Up Down to scroll through the list of
continents. When the desired continent is highlighted press the Select
button to enter your selection.
6. The display will show a list of countries within the chosen continent.
If there are many countries shown you can scroll through the list
continually in either direction. For example, if the chosen continent
was Europe, then to nd the United Kingdom scroll up from the top
of the list to the bottom by pressing the button. Press the Menu Up
Select button to choose the desired country.
7. You will typically nd that you then have the option to select either 'All
Stations' or one of a number of categories. The lists are always sorted
alphabetically, and long lists will wrap around from top to bottom or
bottom to top.
1
2
2-7
2-7 2-7
24
Internet Radio
Selecting a radio station by location - cont.
8. Press the Menu Up Down or buttons to highlight your chosen radio
station and then press the Select button to enter your selection. The
display will show while the radio connects to the new 'Connecting...'
station. The station should then start playing. Adjust the volume as
needed.
9. If the station has on-demand content, that is, it gives the option of
listening to programmes which have already been broadcast or to
Podcasts, there will be an additional screen showing the radio station
name as well as a option. 'Podcasts'
These are selected using additional menus, determined by the radio
station and the content. There may simply be a list of programmes,
or there may also be options to chose from broadcasts on particular
dates or days of the week. The examples shown here are typical.
Podcasts and Listen Again content can also be accessed separately
from the main Internet Radio menu, see page 28.
If your radio cannot connect to a radio station
Note: If your radio is unable to connect to an internet radio station it will
generally either display or . This can be for many 'Network Error' 'Stopped'
reasons, but typically will be due to one of the following:
The radio station may not be broadcasting at the present time.
The radio station may not be able to accommodate any more connections
from internet listeners.
The broadcaster may limit listening to speci c countries or regions
There may be network congestion (either locally or at a distance)
which is affecting the reliability of the connection.
If your radio can connect, but the audio is not continuous and the radio
keeps having to reconnect, this may be due to the radio station only having
limited connection capacity.
Please also refer to the Troubleshooting section on page 104.
8-9
8-9 8-9
25
Selecting a radio station by genre
1. Press and hold the Menu button to enter the main Internet radio menu.
Press the is highlighted Menu Up or Down buttons until 'Station list'
on the display and then press the button.Select
2. Press the Menu Up or Down buttons until 'Stations' is highlighted on
the display and then press the button.Select
3. Press the or buttons untilMenu Up Down 'Genre' is highlighted on
the display and then press the button.Select
4. Press the Menu Up or Down buttons to scroll through the list of content
types. This menu is normally cyclic - you can scroll the list continually
in either direction. When the chosen genre is highlighted, press the
Select button.
5. You then have the choice of of the chosen genre, or a list 'All Stations'
of countries. Note if a country is not shown then the station may still
appear in the 'All Stations' list. Press the Menu Up or buttons Down
and the button to choose as needed Select
6. A list of radio stations is then shown. Press the Menu Up or Down
buttons until the desired station name is highlighted on the display.
7. Press the buttonSelect to select the station. The display will show
'Connecting...' while it nds the new station. If the radio is unable to
connect this may be for one of the reasons explained on page 24.
8. Adjust the Volume as needed to set the listening level.
1
1-7
1-6 1-6
Internet Radio
26
Searching for a radio station by name
There may be occasions when you know the name of a radio station but
you do not know the location or genre. This facility allows you to search for
the station using a part (or parts) of the radio station name.
1. Press and hold the Menu button to enter the main menu. Internet radio
Press the Menu Up or Down buttons until 'Station list' is highlighted on
the display and then press the button.Select
2. Press the or buttons untilMenu Up Down 'Stations' is highlighted on
the display and then press the button.Select
3. Press the Menu Up Down or buttons until 'Search stations' is highlighted
on the display and then press the button.Select
4. To enter the search word(s) press the Menu Up or Down, Left or Right
buttons (on the remote control) to highlight each character for the search
in turn, and press the Select button to enter. If you make an error press
the Info button to access the delete character ' ' on the screen and
then press the Select button. Press the Info button again to go back to
the character selection. After the nal character of the search has been
entered, use the button and then the Info Menu Up or buttons Down
to highlight the ' ' symbol on the screen and then press the Select
button to nish.
5. The radio will search for radio stations that match your search data. If
you include a space between two search items the radio will look for
station names which include both items. Thus a search for 'ROCK 100'
could nd a station called '100 Classic Rock Hits' as well as a station
called '100.FM Rocks'
6. Press the Menu Up or Down buttons to highlight the station that you
wish to listen to and press the to conSelect button rm your choice.
The display will show while it 'Connecting...' nds a new station.
1,4
1-6
1-6 1-6
1-6
4
27
Selecting a new or popular station
As described in the section 'Internet Radio - the basics' on page 22, your
radio connects via the Internet to a database of radio stations. This option
is provided to highlight stations which are newly added to the list of those
available, or stations which are particularly popular with listeners around
the world. Your radio allows you to easily choose stations from these two
categories, using menus very similar to those used when nding stations
by location and genre.
1. Press and hold the Menu button to enter the main Internet radio menu.
Press the or is highlighted Menu Up Down buttons until 'Station list'
on the display and then press the button.Select
2. Press the Menu Up or Down buttons until 'Stations' is highlighted on
the display and then press the button.Select
3. Press the Menu Up or Down buttons until 'Popular stations' or 'New
stations' is highlighted on the display. Press the Select button to enter
your choice.
4. Press the Menu Up or Down buttons to highlight the station that you
wish to listen to and then press the Select button to enter your choice.
The display will show while the new station is found.'Connecting...'
If the radio is unable to connect to a particular radio station this may be
for one of the reasons explained on page 24.
1
1-4
1-4 1-4
28
Internet Radio
Selecting a podcast / BBC Listen Again
Some radio stations allow you to listen to programmes that have already
been broadcast. The BBC's Listen Again service is an example of this. In
addition, radio broadcasters and individuals may make programmes which
are intended normally to be downloaded into a computer or copied onto a
portable media player. These are commonly known as Podcasts.
On your radio, both Listen Again programmes and Podcasts are grouped
together as Podcasts, and the same menu is used to access and listen to
both types of programming. Listen Again programmes are also accessible
via the menu (see pages 23-24).Stations
1. Press and hold the Menu button to enter the main Internet radio menu.
Press the is highlighted Menu Up or Down buttons until 'Station list'
on the display and then press the button.Select
2. Press the or buttons untilMenu Up Down 'Podcasts' is highlighted
on the display and then press the button.Select
3. You may then search by location, genre, or using part of the name of
the podcast. The searches operate in exactly the same way as when
searching for a conventional radio station.
Searching by location is done rst by continent, then by country. You
may then list or search within a country by genre.'All shows'
Searching by genre is more direct, since once the genre is chosen
the next menu display shows a list of available podcasts.
Searching by name operates in the same way as when searching
for a named radio station, selecting the ' ' symbol when you have
entered the text. You may enter one or more pieces of text which will
be used for the search.
4. Press the Menu Up or Down buttons and then press the Select button
to con rm your chosen podcast. The display will show 'Connecting...'
while it nds the new programme.
1
1-4
1-4 1-4
29
Presetting stations
With so many Internet radio stations available, it is desirable to have a
means of rapidly selecting the stations that you listen to most frequently.
Your radio has ten memory presets which can easily be set to store the
details of any Internet radio station. The radio station presets are retained
in memory even when the radio is switched off.
Please see also the sections 'Last Listened' on page 30 and 'Con guring
My Favourite Stations' on page 33.
Storing a preset
1. Press the On/Standby button to switch on your radio. Tune to the
required station using one of the methods described on the preceding
pages.
2. To store the currently playing radio station as a preset, press and
hold the required (1 - 10) on the remote control until Preset button
the display shows . The station will be stored using 'Preset stored'
the chosen preset button. Repeat this procedure as needed for the
remaining presets.
3. Stations which are already stored in the presets may be over-written
by following the above procedure.
Recalling a preset
1. Press the On/Standby button to switch on your radio. Select the
Internet radio mode using the button.Radio
2. Momentarily press the required Preset button on the remote control.
Your radio will then connect to the station stored in preset memory.
The preset used will be shown at the bottom of the display screen.
1
1
2
2
30
Internet Radio
Last Listened
It is often helpful to be able to go back to a station that you have recently
listened to. Your radio has a 'Last Listened' feature which provides you
with quick access to the ten most recently listened to radio stations or
podcasts. As each new radio station is listened to the oldest item is
deleted from the list. The Last Listened list is stored when the radio is
disconnected from the mains.
1. With the radio switched on and in Internet radio mode, press and
hold Menu the button. The rst item on the menu is 'Last listened'.
With this item highlighted press the button.Select
2. The display will then show a list of the last ten Internet radio stations or
podcasts. Press the buttons to highlight whichever Menu Up or Down
you wish to listen to and then press the button to cause your Select
radio to reconnect to that radio station or podcast.
Display modes
Your radio has a range of display options when in Internet Radio mode. Note
that not all information may be available for all Internet radio stations
1. Press and release the button to cycle through the different Info
options.
a. Description Displays information about the radio
station or scrolling text messages such
as artist/track name, phone number etc.
b. Genre Displays programme type information
e.g. Pop, Classic, News, etc. and the
location of the current radio station
1
1-2
2 2
1
31
Display modes - cont.
c. Reliability Displays the reliability of the data
stream from the station currently being
received.
d. Format Displays the bit rate and format of the
station being received.
e. Playback buffer Displays status when connecting to and
playing a radio station. This indicates
the reliability of the data stream to your
radio. If there are no bars shown to the
right of the dividing line then the data
stream reliability may be poor and you
may nd that there are many breaks in
the audio (this is not always the case
for REAL audio streams).
f. Date Displays the current date.
Additional or alternative information may be displayed when listening to
Podcasts. Categories displayable can include...
Episode name Show description
Show genre Show language
Episode URL Bit rate
Codec Sampling rate
Whenever the radio is displaying an information screen (as opposed to a
menu screen), the time is displayed in the top-right corner of the display,
and a WiFi strength or Ethernet connection indicator is shown in the
bottom-right corner.
32
Internet Radio
Customising your radio
In addition to storing your favourite radio stations in the radio presets,
your radio allows you to create customised lists of stations which can
appear in two special menus on the radio called 'My Favourites' and 'My
Added Stations'.
Your radio uses a database which is accessed via the Internet in order
to nd out which radio stations are available and how it should connect
to them. You are able to add your personal selections to this database.
These will only be accessible by you using your PC or your radio. You can
choose the stations which will appear in the ' menu from My Favourites'
the large selection already listed. Additionally, if you nd a radio station
that is not listed then you may also add the Internet address (URL) of the
station's audio stream to your selection. It will then appear on your radio
via the menu item.'My Added Stations'
Registering an account
1. Open the web site http://www.wi radio-frontier.com using the
Internet browser on your computer. Click on the link ‘Register here’
and follow the on-screen instructions to register an account. During
the registration process the web site asks for an access code. This
allows it to uniquely identify your internet radio from the many others
that it also provides data for. To obtain the access code, please follow
these steps.
2. With your radio switched on and in Internet radio mode, press and
hold Menu the button, then select using the or 'Station list' Menu Up
Down Select and buttons.
3. Scroll down the Station list menu to the item called . Press the 'Help'
Select button to enter the Help menu.
4. In the Help menu, select the menu item . Provided 'Get access code'
that the radio is connected to the Internet, a code will be displayed of
typically seven characters (upper case letters and numbers). Make a
note of this code for the next step. If you need to re-register later you
must repeat this process to get a fresh access code.
5. You should then use the code displayed by the radio to ll in the Access
Code eld on the web page when you set up your account.
Once you have your account set up, if you have other radios which use the
same database, you may also add them to your account. You will need to
get an access code from each radio in order to add it to the account. They
may then share your favourite and added radio station details.
33
Con guring My Added Stations
1. If you wish to listen to a radio station which is not currently held in
the database at http://www.wi radio-frontier.com it is possible to
add the details yourself. You will need to obtain the internet address
(URL) for the audio stream for the station that you wish to add. This
may be information provided by the radio station itself, via its web site,
or perhaps passed to you from another listener.
Note: The URL for the audio stream will generally not be the URL for
the web page from which you listen to the station on your PC.
2. Use the 'My added stations' 'My account' link in the area on the web
site. This allows you to add details of new stations or to modify those
already added. You can provide a name for the radio station which
will be shown on your radio. You must also provide the web address,
location and format details.
3. Once you have Internet radio stations available in your My Added
Stations list, you may play these stations from your radio. These
stations will be available on your radio from the Internet radio menu
item .'My Added Stations'
4. It is possible to add the web addresses for audio streams which may
not be playable by your radio. If you attempt to play such a stream,
your radio will normally display an error message of some kind. The
Roberts Stream 64i can only play MP3, WMA, AAC and Real Audio
internet radio streams.
5. To look at, modify or delete your added stations list on the web site, use
the link 'My added stations' 'My account' in the area. To delete an added
radio station, click on the icon with a heart and minus symbol.
Customising your radio - cont.
Con guring My Favourite Stations
1. Using the web site at http://www.wi radio-frontier.com it is possible
to search among the many radio stations that are available by location,
genre, or language. You may also choose from new or popular
stations.
2. When the radio stations that you have found are shown on your
computer screen, they are shown with a 'Play' icon and an 'Add to
favourites' icon (the plus symbol and heart). Clicking on the 'Play' icon
will allow you to hear the radio station via your computer. Clicking on
the 'Add to favourites' icon will cause the radio station to be added to
the list accessible via your radio.
3. To help you organise your favourites, and since you may have a great
many after a while, the web site will allow you to specify the name for
a category or group under which the radio station will be listed on your
radio. Suitable names might be 'Rock', 'Smooth', 'Mum's stations', and
so on. When ever you add another radio station to your favourites you
can either add it to an existing category or create a new one.
4. Once you have Internet radio stations available in your My Favourite
Stations list, you may play these stations from your radio. These
stations will be available on your radio from the Internet radio menu
item .'My Favourites'
5. To look at, modify or delete your favourite stations lists on the web
site, use the link in the area. To delete 'My favourites' 'My account'
a favourite radio station, click on the icon with a heart and minus
symbol.
34
Internet Radio
Selecting your favourite stations
1. Press and hold the Menu button to enter the main Internet radio
menu.
2. Press the Menu Up Down or buttons until is highlighted 'Station list'
on the display. Press the button to enter the menu.Select
3. Press the Menu Up Down or buttons until is highlighted 'My Favourites'
on the display. Press the button and your favourite stations Select
list will appear on the display (set up as described on the preceding
page).
4. Press the Menu Up Down or buttons to highlight the required station
and then press the button to conSelect rm your selection.
The display will show while it 'Connecting...' nds the new station.
If the station has on-demand content (that is, it gives the option of listening
to programmes which have already been broadcast), please see page 28,
'Selecting a podcast / BBC Listen again'.
Should you be unable to connect to a particular station, please note that
some radio stations do not broadcast 24 hours per day, and some stations
are not always on-line.
1
2-4
2-4 2-4
35
Selecting your added stations
1. Press and hold the Menu button to enter the main Internet radio menu.
Press the is highlighted Menu Up or Down buttons until 'Station list'
on the display and then press the button.Select
2. Press the or buttons untilMenu Up Down 'My Added Stations' is
highlighted on the display and then press the button.Select
3. Press the Menu Up Down or buttons to highlight the required station
and then press the button to conSelect rm your selection.
The display will show while it 'Connecting...' nds the new station.
Should you be unable to connect to a particular station, please note that
some radio stations do not broadcast 24 hours per day, and some stations
are not always on-line.
In addition, as mentioned on page 33, it is possible to specify audio streams
for 'My added stations' which are not compatible with your radio. In this
event the station will not be playable. The Roberts Stream 64i can only
play MP3, WMA, AAC and Real Audio internet radio streams.
Note that the audio coding formats listed are generic terms. There are
many variations of each format, as well a variety of streaming protocols
in use by different radio broadcasters. Your radio has been designed to
play the vast majority of coding and streaming formats in current use by
broadcasters.
1
1-3
1-3 1-3
36
Music Player
Music Player
Use with Windows, Apple Mac and Linux
The Music Player allows you to play audio les which are stored on a
computer on your network.
In order to play les from a computer on your network, your radio must
connect to a le server application which uses the Universal Plug and Play
(UPnP) protocol. If your computer uses Windows 7, Vista or XP, then it is
likely that your computer already has a UPnP server application available.
Windows Media Player (versions 11 and 12) has this capability, and it is
able to make your les available to your radio. It also allows you to select
les by Album, Artist, and so on.
Windows Media Player 12 can serve MP3, WMA, AAC and WAV les to
your radio. Windows Media Player 11 is only able to serve MP3 and WMA
les to your radio. If you have your audio les stored in the FLAC format,
or if you are an Apple Mac or Linux user, there are other UPnP server
applications which you may use with your radio.
The Music Player on the radio can playback audio les in MP3, WMA,
AAC, FLAC and WAV formats. WMA Lossless les can also be played
when using Windows Media Player as it will convert these to a compatible
format before streaming them to the radio. Note that the playback of les
encoded using WMA Voice, WMA 10 Professional, and for les which have
DRM protection is not supported.
When using a UPnP server, the search and selection criteria are determined
by the server software, but typically include Artist, Album and Genre. Many
server applications also allow you to access your les according to the
folders within which they are stored as well as other criteria.
Windows Media Player is less exible than some other UPnP servers,
but is generally easier to set up. It is supplied as a standard component
of Windows 7, Vista or XP.
Many UPnP server applications are also capable of sharing pictures and
video les to other network connected devices. If this is the case (as it is
with Windows Media Player 11 and 12) you may see the option of choosing
between 'Music', 'Video' and 'Pictures' on the Music Player's menu. You
should only select the 'Music' option. Content offered via the alternative
options will not be playable on your radio.
Some third party server applications allow customisation of the search
criteria and indexing methods. This can be useful if you have a very large
collection of stored music les.
Here is a short selection of alternative UPnP server applications, although
many others are available:
Twonky Media Server (Windows, Apple Mac, Linux)
TVersity (Windows) *
Elgato EyeConnect (for Apple Mac OS X) *
MediaTomb (Linux, MAC OS X) *
* = free of charge versions available at the time of writing
Please refer to the documentation for your chosen server application for
full details of its con guration and usage.
37
Accessing your audio les via a UPnP server
If your computer is running Windows 7, then Windows Media Player
version 12 includes a UPnP server which will make your les available to
your radio. If you have Windows Vista or XP please see page 106. There
are other UPnP server solutions available for non-Windows users and for
Windows users who may wish to use an alternative (see the preceding page).
It is beyond the scope of this instruction book to cover all possible options
for UPnP. We explain the use of Microsoft's Windows Media Player here
since that will be the rst choice for the majority of users.
Set up UPnP access with Windows Media Player 12
1. Windows Media Player 12 (referred to here as WMP 12) can create a
library from all the media les available to it on your PC. To add new
media les to the library, select 'Library', then 'Music', then 'All music'
or etc 'Artist', 'Album' . This will show you the current library contents.
You may then simply drag and drop les from other locations into the
library. Alternatively, with media les or folders on the screen, you may
right-click on the le or folder and select and then 'Include in library'
select 'Music'. In this way you can quickly add additional content to
your music library.
2. In WMP 12 , click on 'Stream' (see picture at right) and then select
'Automatically allow devices to play my media'. Then accept the
'Automatically allow all computer and media devices' option. There
are other options (see overleaf) but this is the simplest if you just wish
to quickly enable media streaming to your radio.
3. Press the On/Standby button to switch the unit on. Then press the
Media button as needed until the mode display is shown. Music Player
The main menu will then be displayed.'Music Player'
Selecting Media Streaming in Windows Media Player 12
3
38
Music Player
Allowing a device to connect to Windows Media Player 12
Set up UPnP access on a Windows PC - cont.
4. Press the Menu Up Down or buttons until 'Shared media' is highlighted
and press the button to select. The radio will scan for all available Select
UPnP servers. It may take a few seconds for the radio to complete its
scan. The radio will display if no UPnP servers are found.'<Empty>'
5. After scanning, select your UPnP server using the Menu Up or Down
and Select buttons. If you allowed automatic connection previously,
your radio should now connect and you may skip to the next page. If
you did not permit automatic connections, your radio will then normally
display ' at this stage.'Unauthorised
6. Your PC may prompt you that there has been a connection to your
UPnP server. Whether prompted or not, in order that the radio may
access the music les, you will need to click the tab in WMP 12 'Library'
and select the item to open the window. 'Stream...' 'Media Streaming'
Select 'Automatically allow devices to play my media' then select
'Automatically allow all computer and media devices'.
Alternatively select 'More Streaming options' to enable sharing on a
'per device' basis.
7. In the 'More streaming options' window, the radio will be listed as a
blocked device. Click on the button shown to select 'Allowed'.
Note: If you are using Microsoft Windows' rewall software, this should
be correctly con gured by WMP 12. If you are using third party rewall
software you may need to manually con gure it to allow your unit
and WMP 12 to communicate (see the 'Troubleshooting' section on
page 104).
8. On the radio, select the again using the named server Menu Up or
Down and Select buttons. If WMP 12 is now able to communicate with
your radio you will be presented with some media selection options
on the display.
4-8
4-8 4-8
39
Locating and playing media les using UPnP
Once the UPnP server has been con gured to share media les with your
radio, you may select the les that you wish to play as follows:-
1. Press the On/Standby button to switch on the unit. Press the Media
button as needed until the mode display is shown. The Music Player
main Music Player menu will then be displayed.
2. Press the Menu Up Down or buttons until is highlighted 'Shared media'
on the display and then press the Select button to cause the radio to
scan for UPnP servers. Note that it may take a few seconds for the
radio to complete its scan. The display will return to the Music Player
menu if no UPnP servers are found.
3. After a successful scan, press the buttons to Menu Up or Down
highlight your UPnP server and then press the button. If the Select
display shows multiple media types, select 'Music'. (Some UPnP
servers can serve pictures and video content to suitable devices.)
4. The radio will now list the media categories which are made available
by the UPnP server - for example, 'Album', 'Artist' 'Genre' and . Press
the orMenu Up Down buttons to highlight which category you wish
to browse, then press the button to conSelect rm your choice.
If you wish to use the search function press the Menu Up or Down
buttons until 'Search' is selected on the display. You may select
characters to build a keyword for searching for content to play.
When you rst set up sharing with a UPnP server, not all of your les will
be available immediately. The UPnP server must look inside each le to
identify the artist and album information from 'tags' embedded in them.
The server may also need time to access the Internet to obtain additional
information such as 'album art' which it can display when you examine
your music library on your PC. For a library of many les this can take
some time.
1
2-4
2-4 2-4
Music Player
40
Media selection
When searching via UPnP you will have a selection of search criteria as
determined by the UPnP server software on your computer. This allows
you to search by a given information type (Album, Artist, Genre, etc.) and
then to narrow the search to an album or to a particular track within an
album.
Some UPnP server applications allow the search options to be customised.
The searches described here are just examples of the possibilities.
Listening to a complete album
1. Use the Menu Up or Down buttons to choose content by Artist, Album,
Genre, etc. according to your needs then press the Select button to
enter your choice.
2. When you reach the album or folder the menu will then switch to
showing the tracks in that album or folder. When searching by UPnP
they will normally be listed in track number order (but as with the search
criteria, this can vary according to the server application used).
3. With the rst track in the album indicated, press the Select button.
The album will then begin playing.
While the radio is playing from your media library, you may use the menus
as described above to choose a different selection. When you select the
track from which to play, the radio will then immediately begin playing the
new selection.
Please see also 'Playlists' on page 44.
1-3
1-3 1-3
41
Listening to a particular track
1. If you wish to play only a particular track from an album or folder, rst
choose the album or folder as described on the preceding pages.
2. Press the orMenu Up Down buttons until the required track is
highlighted.
3. Press and release the button. The track will begin playing. Select
The radio will then play subsequent tracks from the same album or
folder.
Controlling playback
1. Press the Play/Pause button to pause playback of the current track.
2. If you press the Play/Pause button, playback will resume from the
point where it was paused.
3. Press the Rewind button to start playback of the previous track in the
list.
4. Press the Fast-forward button to start playback of the next track in
the list.
5. Press and hold the button to move through Fast-forward or Rewind
the current track. The longer the button is pressed, the greater the
speed at which the player will move through the track. Release the
button when the desired point is reached. (Note that this feature is
not supported when playing les encoded using the FLAC format.)
1-3
1-3 1-3
3,5 4,5
1,2
42
Music Player
Controlling playback cont.
Repeat tracks
1. When playing a track activate the repeat option by pressing the Repeat
button. Your selected tracks will be played repeatedly and the repeat
indicator will show on the display.
2. To turn off the repeat option press the button again.Repeat
Shuf e tracks
1. When playing a track activate the shuf e option by pressing the
Random button. Your selected tracks will be shuf ed and the shuf e
indicator will show on the display.
2. To turn off shuf e press the button again.Random
If both Repeat and Shuf e playback options are activated then both Repeat
and Shuf e icons will be shown in the display.
Note: The shuf e play function may only be used if the current selection
comprises fewer than 512 tracks.
1,2
1,2
43
Display modes
Your radio has a range of display options when in mode. Music Player
Note that the availability of information depends on the speci c media les,
their format and upon the server capability. (Not all UPnP servers make
information from the media les available in the same way.)
1. Press the Info button to cycle through the different options.
a. Progress bar Displays the playback progress for the
track currently playing.
b. Artist Displays the artist information for the
track currently playing.
c. Album Displays the album information for the
track currently playing.
d. Format Displays the bit rate and format of the
track currently playing.
e. Buffer Displays the radios internal buffer status
during media playback.
Whenever the Music Player is displaying an information screen (as
opposed to a menu screen), the time is displayed in the top-right corner of
the display, and a WiFi strength or Ethernet connection indicator is shown
in the bottom-right corner together with an indicator showing the radio is
obtaining the media from a UPnP server.
a
e
d
c
b
1
44
Music Player
Playlists
Sometimes you may wish to set up a list of music tracks or albums which
can then be played without further action - as background music for a
party, for example.
Your radio can be con gured to hold a queue of up to 500 tracks in a
playlist menu. The tracks or albums for the playlist can be selected from
your UPnP server. The playlist is held in memory in your radio until external
power is removed, or until the playlist is cleared from the menu.
Adding a single track to your playlist
1. When selecting (or when playing) a track using a UPnP server press
and hold the Select button and the display will show 'Added to My
playlist'.
2. The track will be added to the playlist for playback later.
Adding an entire album or folder
3. When using a UPnP server highlight the chosen album, artist or folder
and press and hold the Select button. The display will show 'Added
to My playlist'.
4. Each of the tracks within the album, artist or folder selection will be
added to the playlist individually. This allows any unwanted tracks to
be removed from the playlist if needed (see next page).
1
3
45
Viewing your playlist
1. Press the On/Standby button to switch on the unit. Press the Media
button as needed until the mode display is shown. The Music Player
Music Player menu will then be shown on the display.
2. Press the Menu Up Down or buttons until is highlighted 'My Playlist'
on the display. Press the button to enter the playlist.Select
3. Press the Menu Up Down or buttons to scroll through the playlist.
Tracks which are served via UPnP will show their track name.
Erasing a track from the playlist
1. Press and hold the Menu button to enter the main Music Player
menu.
2. Press the Menu Up Down or buttons until is highlighted 'My Playlist'
on the display. Press the button to enter the playlist.Select
3. Press the Menu Up or Down buttons until the track you wish to erase
is highlighted. the button.Press and hold Select
4. You will be asked to con rm the deletion. To delete the track press the
Menu Up Down or buttons until is highlighted on the display. 'YES'
Press the button to cause the track to be deleted.Select
5. If you do not wish to delete the track highlight 'NO' and press the
Select button to cancel the operation.
1
2
2,3 2,3
1
2-5 2-5
2-5
Music Player
46
Clearing the playlist
1. Press and hold the Menu button to enter the main Music Player
menu.
2. To clear the whole playlist press the buttons until Menu Up or Down
'Clear My playlist' is highlighted on the display. Press the Select
button.
3. To clear the whole playlist press the buttons until Menu Up or Down
'YES' is highlighted on the display. Press the button to cause Select
the playlist to be cleared.
4. If you do not wish to clear the playlist highlight and press the 'NO'
Select button to con rm.
Playing your playlists
1. Press and hold the Menu button to enter the main Music Player
menu.
2. Press the Menu Up or Down buttons until 'My playlist' is highlighted
on the display. Press the button.Select
3. To play the playlist from a particular track, press the Menu Up or Down
buttons until the desired track is highlighted then press the Select
button to start play.
4. While playing from the playlist, you can use this function to jump to a
particular track within the playlist. While playing from the playlist, you
may add additional tracks or albums or remove speci c tracks (please
see the preceding pages).
1
2-4
2,4 2-4
1
2-4
2,4 2-4
47
DAB Radio
Using DAB mode for the rst time
1. Carefully extend the telescopic aerial.
2. Press the On/Standby button to switch on the radio. If the radio has
been used before the last used mode will be selected.
3. Press the Radio button as needed so that mode is selected DAB radio
on the display.
4. If this is the rst time that DAB mode is used a quick scan of the Band III
DAB channels will be carried out. The display will show . (If 'Scanning'
the radio has been used before the last used station will be selected
instead.)
During the scanning process, as new stations are detected the station
counter will increase and the stations will be added to the list which
is stored in the radio. The bar graph indicates the progress of the
scan.
5. When scanning is completed the radio will list the stations found (in
numeric-alpha order 0....9...A...Z), unless it has previously been tuned
to a DAB station.
Press the Menu Up Down or buttons to scroll through the list of
available DAB radio stations.
Press the Select button to select the highlighted station. The display
may show while the radio re-tunes.'Connecting...'
Use the Volume buttons to set the sound level as needed.
6. If the station list is still empty after the scan the display will show
'Service not available'. If no stations are found it may be necessary
to relocate your radio to a position giving better reception.
3
5 5
2
5
5 5
48
DAB Radio
Selecting a DAB radio station
1. When playing a DAB radio station, the display normally shows the
name of the current station with other related information.
2. Press the Menu Up Down or buttons to access the radio station list
and to scroll through the available stations.
3. Press the Select button to select the highlighted station. The display
may show while the radio re-tunes.'Connecting...'
4. Use the Volume buttons to set the sound level as needed.
Note: If the display shows 'Station Not Available' it may be necessary to
relocate your radio to a position giving better reception.
A question-mark in front of the station name merely indicates that the station
has not recently been detected by the radio. It may still be available.
The use of the radio station presets is described on page 61.
Secondary services
Some DAB radio stations can have one or more secondary stations
associated with them. Typically these are not broadcast continually. If a
station has a secondary station available then the secondary will appear in
the list of station names beneath the main (or primary) station. Examples
are the programmes and on BBC Radio 4. 'Daily Service' 'Parliament'
1. To listen to a secondary service, press the Menu Up or Down buttons
to scroll to the chosen station, and press the button to tune to Select
the station.
If the secondary service is not available (off-air) then the primary
service will be selected.
3
2 2
1
1 1
49
Display modes
Your radio has a range of display options when in DAB mode:-
1. Press the Info button to cycle through the different options.
a. Text Displays text messages such as the
artist or track name, phone in number,
traf c alerts, etc.
b. Program Type Displays the type of station being listened
to such as Pop, Classic, News etc.
c. Multiplex Name / Displays the name of the DAB multiplex
Frequency to which the current station belongs as
well as its broadcast frequency.
d. Signal error / strength Displays the signal error and strength
for the station being listened to. A lower
error number indicates a better quality
of radio signal. The signal strength
graph can be used when positioning
the radio or its antenna. For good
reception the graph should occupy
three or more blocks.
1


Specyfikacje produktu

Marka: Roberts
Kategoria: radio
Model: Stream 64i

Potrzebujesz pomocy?

Jeśli potrzebujesz pomocy z Roberts Stream 64i, zadaj pytanie poniżej, a inni użytkownicy Ci odpowiedzą


Instrukcje radio Roberts

Instrukcje radio

Najnowsze instrukcje dla radio