Instrukcja obsługi Pioneer HTZ-BD30
Pioneer
System domowy
HTZ-BD30
Przeczytaj poniżej 📖 instrukcję obsługi w języku polskim dla Pioneer HTZ-BD30 (167 stron) w kategorii System domowy. Ta instrukcja była pomocna dla 14 osób i została oceniona przez 2 użytkowników na średnio 4.5 gwiazdek
Strona 1/167

P/NO: MFL67205130
ENGLISH FRANÇAIS
HTZ-BD50
XV-BD707
S-BD50T
S-BD50SW
HTZ-BD30
XV-BD707
S-BD30
Blu-ray Disc surround system | Système de cinéma maison Blu-ray Disc
Blu-ray Disc receiver | Récepteur Blu-ray Disc
Speaker System | Enceintes acoustiques
Speaker System (Only subwoofer) | Enceinte acoustique
Register your product at:
http://www.pioneerelectronics.com (US)
http://www.pioneerelectronics.ca (Canada)
http://www.pioneerelectronics.com (US)
http://www.pioneerelectronics.ca (Canada)
・ Protect your new investment
The details of your purchase will be on file for reference in the event of an insurance claim such as loss or theft.
・ Improve product development
Your input helps us continue to design products that meet your needs.
・ Receive a free Pioneer newsletter
Registered customers can opt in to receive a monthly newsletter.
・ Receive free tips, updates and service bulletins on your new product

2Safety Information
Safety Information
1
CAUTION
RISK OF ELECTRIC SHOCK
DO NOT OPEN
CAUTION: TO REDUCE THE RISK OF ELECTRIC
SHOCK DO NOT REMOVE COVER (OR BACK) NO
USER-SERVICEABLE PARTS INSIDE REFER SERVICING
TO QUALIFIED SERVICE PERSONNEL.
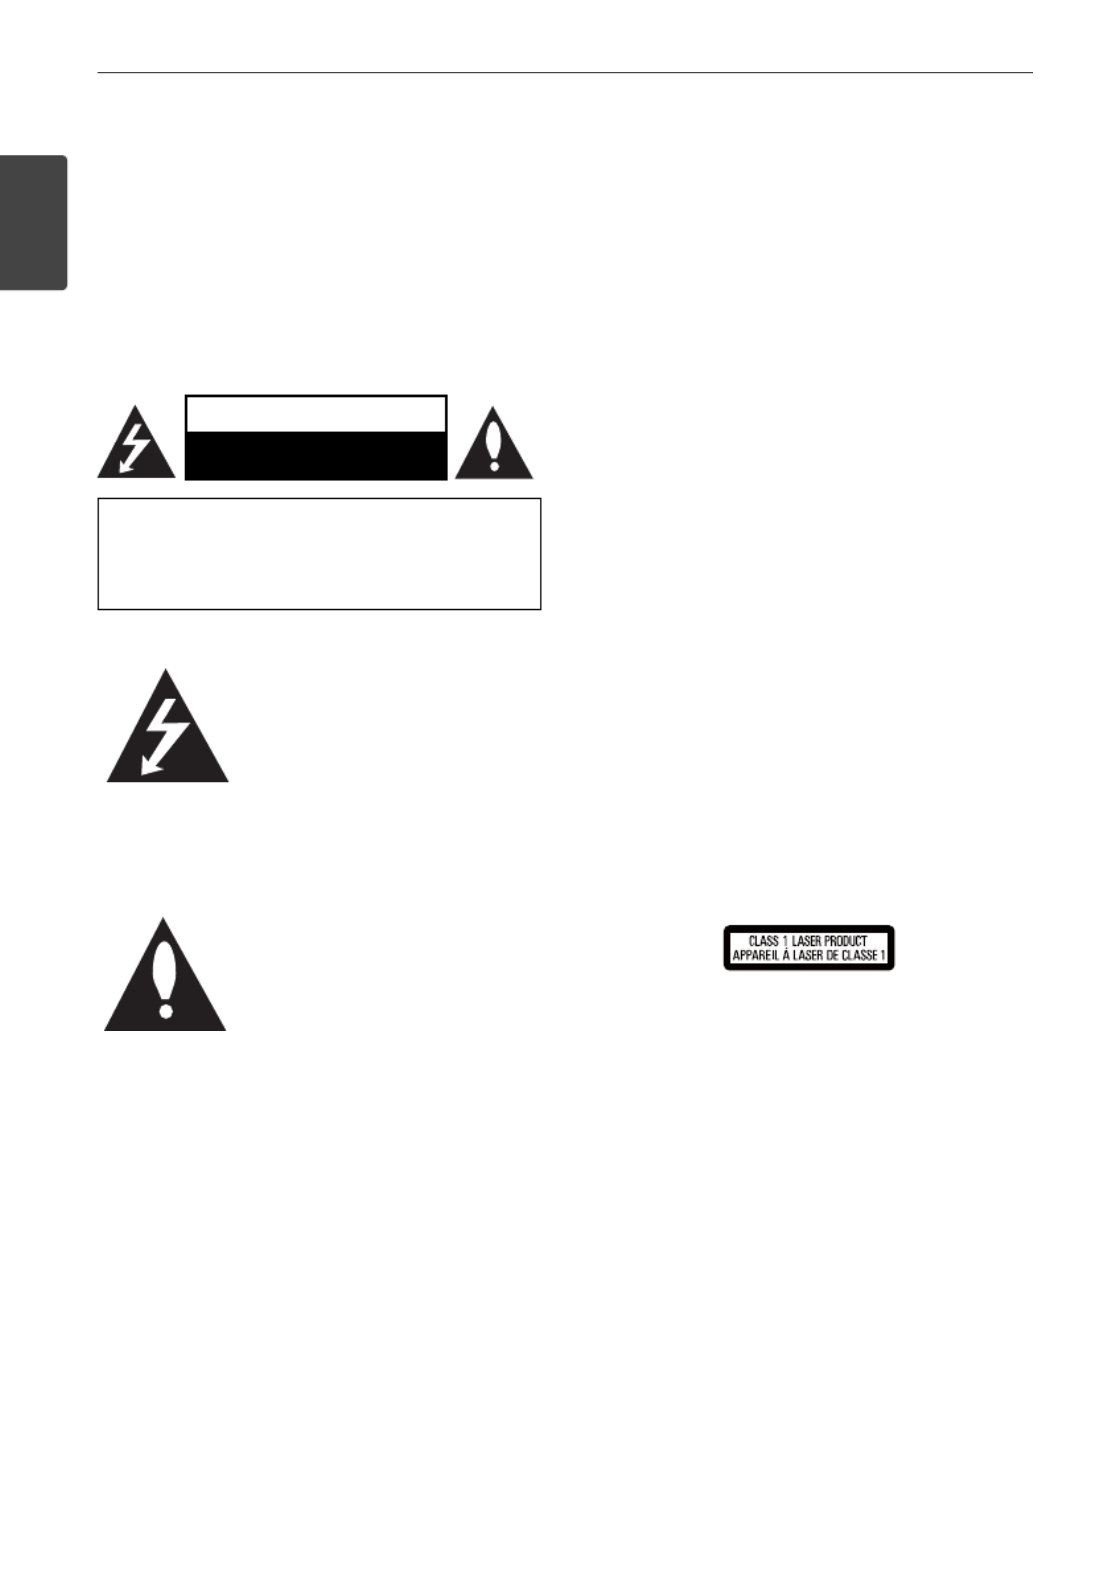
This lightning ash with arrowhead
symbol within an equilateral
triangle is intended to alert the
user to the presence of uninsulated
dangerous voltage within the
product’s enclosure that may be of
su cient magnitude to constitute
a risk of electric shock to persons.
The exclamation point within an
equilateral triangle is intended
to alert the user to the presence
of important operating and
maintenance (servicing)
instructions in the literature
accompanying the product.
Cautions and Warnings
WARNING: TO PREVENT FIRE OR ELECTRIC SHOCK
HAZARD, DO NOT EXPOSE THIS PRODUCT TO RAIN
OR MOISTURE.
WARNING: Do not install this equipment in a
con ned space such as a book case or similar unit.
CAUTION: Do not block any ventilation openings.
Install in accordance with the manufacturer’s
instructions.
Slots and openings in the cabinet are provided for
ventilation and to ensure reliable operation of the
product and to protect it from over heating. The
openings shall be never be blocked by placing
the product on a bed, sofa, rug or other similar
surface. This product shall not be placed in a built-
in installation such as a bookcase or rack unless
proper ventilation is provided or the manufacturer’s
instruction has been adhered to.
CAUTION: This product is a class 1 laser product
classi ed under the Safety of laser products,
IEC60825-1:2007. To ensure proper use of this
product, please read this owner’s manual carefully
and retain it for future reference. Shall the unit
require maintenance, contact an authorized service
center.
Use of controls, adjustments or the performance of
procedures other than those speci ed herein may
result in hazardous radiation exposure.
To prevent direct exposure to laser beam, do not try
to open the enclosure. Visible laser radiation when
open. DO NOT STARE INTO BEAM.
1
Safety Information

Safety Information
3Safety Information
1
CAUTION concerning the Power Cord
Most appliances recommend they be placed upon a
dedicated circuit;
That is, a single outlet circuit which powers only
that appliance and has no additional outlets or
branch circuits. Check the speci cation page of this
owner’s manual to be certain. Do not overload wall
outlets. Overloaded wall outlets, loose or damaged
wall outlets, extension cords, frayed power cords, or
damaged or cracked wire insulation are dangerous.
Any of these conditions could result in electric
shock or re. Periodically examine the cord of your
appliance, and if its appearance indicates damage
or deterioration, unplug it, discontinue use of the
appliance, and have the cord replaced with an exact
replacement part by an authorized service center.
Protect the power cord from physical or mechanical
abuse, such as being twisted, kinked, pinched, closed
in a door, or walked upon. Pay particular attention
to plugs, wall outlets, and the point where the cord
exits the appliance. To disconnect power from the
mains, pull out the mains cord plug. When installing
the product, ensure that the plug is easily accessible.
WARNING: To prevent a re hazard, do not place any
naked ame sources (such as a lighted candle) on
the equipment.
This device is equipped with a portable battery or
accumulator.
Safety way to remove the battery or the battery
from the equipment: Remove the old battery
or battery pack, follow the steps in reverse order
than the assembly. To prevent contamination of
the environment and bring on possible threat
to human and animal health, the old battery or
the battery put it in the appropriate container at
designated collection points. Do not dispose of
batteries or battery together with other waste.
It is recommended that you use local, free
reimbursement systems batteries and accumulators.
The battery shall not be exposed to excessive heat
such as sunshine, re or the like.
CAUTION: The apparatus shall not be exposed to
water (dripping or splashing) and no objects lled
with liquids, such as vases, shall be placed on the
apparatus.
When disposing of used batteries, please comply
with governmental regulations or environmental
public instruction’s rules that apply in your
country or area.
Notes on Copyrights
• Because AACS (Advanced Access Content System)
is approved as content protection system for BD
format, similar to use of CSS (Content Scramble
System) for DVD format, certain restrictions are
imposed on playback, analogue signal output,
etc., of AACS protected contents. The operation of
this product and restrictions on this product may
vary depending on your time of purchase as those
restrictions may be adopted and/or changed by
AACS after the production of this product.
• Furthermore, BD-ROM Mark and BD+ are
additionally used as content protection systems
for BD format, which imposes certain restrictions
including playback restrictions for BD-ROM
Mark and/or BD+ protected contents. To obtain
additional information on AACS, BD-ROM Mark,
BD+, or this product, please contact an authorized
Customer Service Center.
• Many BD-ROM/DVD discs are encoded with
copy protection. Because of this, you should only
connect your player directly to your TV, not to a
VCR. Connecting to a VCR results in a distorted
picture from copy-protected discs.
• This product incorporates copyright protection
technology that is protected by U.S. patents
and other intellectual property rights. Use of
this copyright protection technology must be
authorized by Rovi Corporation, and is intended
for home and other limited viewing uses only
unless otherwise authorized by Rovi Corporation.
Reverse engineering or disassembly is prohibited.
• Under the U.S. Copyright laws and Copyright
laws of other countries, unauthorized recording,
use, display, distribution, or revision of television
programmes, videotapes, BD-ROM discs, DVDs,
CDs and other materials may subject you to civil
and/or criminal liability.

4Safety Information
Safety Information
1
FCC Compliance Statement
This device complies with part 15 of the FCC rules.
Operation is subject to the following two conditions:
(1) This device may not cause harmful interference,
and
(2) This device must accept any interference received,
including interference that may cause undesired
operation.
NOTE: This equipment has been tested and found
to comply with the limits for a Class B digital device,
pursuant to Part 15 of the FCC Rules. These limits are
designed to provide reasonable protection against
harmful interference in a residential installation. This
equipment generates, uses, and can radiate radio
frequency energy and, if not installed and used in
accordance with the instructions, may cause harmful
interference to radio communications. However,
there is no guarantee that interference will not occur
in a particular installation.
If this equipment does cause harmful interference
to radio or television reception, which can be
determined by turning the equipment o and
on, the user is encouraged to try to correct the
interference by one or more of the following
measures:
• Reorient or relocate the receiving antenna.
• Increase the separation between the equipment
and receiver.
• Connect the equipment into an outlet on a
circuit di erent from that to which the receiver is
connected.
• Consult the dealer or an experienced radio/TV
technician for help.
CAUTION : Any changes or modi cations not
expressly approved by the party responsible for
compliance could void the user’s authority to
operate this equipment.
FCC RF Radiation Exposure Statement : This
equipment complies with FCC radiation exposure
limits set forth for an uncontrolled environment.
This equipment should be installed and operated
with minimum distance 20 cm (7.9 inch) between
the radiator and your body. End users must follow
the speci c operating instructions for satisfying RF
exposure compliance. This transmitter must not be
co-located or operating in conjunction with any
other antenna or transmitter.
CAUTION: Regulations of the FCC and FAA prohibit
airborne operation of radio-frequency wireless
devices because their signals could interfere with
critical aircraft instruments.
WARNING: Handling the cord on this product or
cords associated with accessories sold with the
product may expose you to chemicals listed on
proposition 65 known to the State of California and
other govermmental entities to cause cancer and
birth defects or other reproductive harm.
Wash hands after handling !
This Class B digital apparatus complies with
Canadian ICES-003
“To prevent radio interference to the licensed
service, this device is intended to be operated
indoors and away from windows to provide
maximum shielding. Equipment (or its transmit
antenna) that is installed outdoors is subject to
licensing.”
Operation is subject to the following two
conditions :
(1) This device may not cause Interference, and
(2) this device must accept any interference,
including interference that may cause undesired
operation of the device.

6
Contents
1
Safety Information
2 Cautions and Warnings
5 IMPORTANT SAFETY
INSTRUCTIONS
2
Preparation
8 Introduction
8 About the “ ” Symbol
Display
8 Symbols Used in this Manual
9 Supplied Accessories
10 Playable Discs
11 File compatibility
12 Regional Code
12 AVCHD (Advanced Video
Codec High De nition)
12 Certain System Requirements
12 Compatibility Notes
13 Remote control
14 Front panel
15 Rear panel
3
Installation
16 Assemble the speakers
16 Speaker Setup for HTZ-BD50
18 Speaker Setup for HTZ-BD30
19 Wall mounting the center speaker
19 Additional notes on speaker
20 Positioning the system
21 Connecting to Your TV
21 HDMI Connection
22 Component Video
Connection
23 Video Connection
23 Resolution Setting
24 Antenna connection
24 Connections with external device
24 AUX Connection
25 PORTABLE IN connection
25 OPTICAL IN 1/2 connection
26 connection Bluetooth®
28 Connecting to your Home Network
29 Network Setup
31 USB device connection
32 Settings
32 Adjust the Setup Settings
33 [DISPLAY] Menu
34 [LANGUAGE] Menu
35 [AUDIO] Menu
36 [LOCK] Menu
37 [NETWORK] Menu
37 [OTHERS] Menu
39 Sound E ect

7
1
2
3
4
5
6
7
8
4
Operation
40 General Playback
42 Advanced Playback
44 On-Screen display
48 Enjoying BD-LIVE
49 Playing movie le and VR discs
51 Viewing a photo
53 Listening to music
56 Playing the iPod
58 Radio Operations
59 Playing content via your home
network
5
Maintenance
63 Notes on Discs
63 Handling the Unit
6
Troubleshooting
64 General
65 Picture
65 Sound
66 Network
7
Appendix
67 Controlling a TV with the Supplied
Remote Control
68 Area Code List
69 Language code List
70 Video output resolution
71 Trademarks and Licences
73 Speci cations
75 Software License Notice

8Preparation
Preparation
2
2
Preparation
Introduction
About the “ ” Symbol Display
“ ” may appear on your TV display during
operation and indicates that the function
explained in this owner’s manual is not
available on that speci c media.
Symbols Used in this Manual
NOTE
Indicates special notes and operating features.
CAUTION
Indicate cautions for preventing possible
damages from abuse.
A section whose title has one of the following
symbols are applicable only to the disc
represented by the symbol.
BD
BD-ROM disc
DVD
DVD-Video, DVD±R/RW in
Video mode or VR mode
and nalized
AVCHD
DVD±R/RW in AVCHD
format
ACD
Audio CDs
MOVIE
Movie les
MUSIC
Music les
PHOTO
Photo les

9Preparation
2
Preparation
Supplied Accessories
Video cable (1) Remote control (1)
Battery (1) FM antenna (1)
iPod cradle (1)
Accessaries of speaker box
(S-BD50T)
Color-coded Speaker
cables (5)
Screws (12)
Speaker stand bases
(4)
Small non-skid pads
(1)
Middle non-skid
pads (1)
Accessaries of speaker box
(S-BD50SW)
Speaker cable (1) Large non-skid pads
(1)
Accessaries of speaker box
(S-BD30)
Color-coded Speaker
cables (6)
Small non-skid pads
(1)
Large non-skid pads
(1)

10 Preparation
Preparation
2
Playable Discs
Blu-ray Disc
-Discs such as movies that can
be purchased or rented.
-BD-R/RE discs that contain
Movie, Music or Photo les.
DVD-VIDEO
8 / 12 cm disc
Discs such as movies that can be
purchased or rented.
DVD±R
8 / 12 cm disc
-Video mode and nalized only
-Supports the dual layer disc
also
-Finalized AVCHD format
-DVD±R discs that contain
Movie, Music or Photo les
DVD-RW
8 / 12 cm disc
-VR mode, Video mode and
nalized only
-Finalized AVCHD format
-DVD-RW discs that contain
Movie, Music or Photo les.
DVD+RW
8 / 12 cm disc
-Video mode and nalized only
-AVCHD format
-Finalized AVCHD format
-DVD+RW discs that contain
Movie, Music or Photo les.
Audio CD
8 / 12 cm disc
CD-R/RW
8 / 12 cm disc
-CD-R/RW discs that contain
audio titles, Movie, Music or
Photo les.
NOTE
• Depending on the conditions of the recording
equipment or the CD-R/RW (or DVD±R/RW)
disc itself, some CD-R/RW (or DVD±R/RW) discs
cannot be played on the unit.
• Depending on the recording software & the
nalization, some recorded discs (CD-R/RW,
DVD±R/RW, BD-R/RE) may not be playable.
• BD-R/RE, DVD±R/RW and CD-R/RW discs
recorded using a personal computer or a DVD or
CD Recorder may not play if the disc is damaged
or dirty, or if there is dirt or condensation on the
player’s lens.
• If you record a disc using a personal computer,
even if it is recorded in a compatible format,
there are cases in which it may not play because
of the settings of the application software used
to create the disc. (Check with the software
publisher for more detailed information.)
• This player requires discs and recordings to meet
certain technical standards in order to achieve
optimal playback quality.
• Pre-recorded DVDs are automatically set to
these standards. There are many di erent
types of recordable disc formats (including
CD-R containing MP3 or WMA les) and these
require certain pre-existing conditions to ensure
compatible playback.
• Customers should note that permission is
required in order to download MP3 / WMA les
and music from the Internet. Our company has
no right to grant such permission. Permission
should always be sought from the copyright
owner.

11Preparation
2
Preparation
File compatibility
Overall
Available File extensions:
“.jpg”, “.jpeg”, “.png”, “.avi”, “.divx”, “.mpg”, “.mpeg”,
“.mkv”, “.mp4”, “.mp3”, “.wma”, “.wav”
• Available le extensions di er depending
on the DLNA servers.
• Some “.wav” les are not supported on this
player.
• The le name is limited to 180 characters.
• Depending on the size and number of the
les, it may take several minutes to read the
contents on the media.
Maximum Files/Folder: Less than 2 000 (total
number of les and folders)
CD-R/RW, DVD±R/RW, BD-R/RE Format:
ISO 9660+JOLIET, UDF and UDF Bridge format
MOVIE
Available resolution size:
1 920 x 1 080 (W x H) pixels
Playable subtitle: SubRip (.srt / .txt), SAMI
(.smi), SubStation Alpha (.ssa/.txt), MicroDVD
(.sub/.txt), VobSub (.sub), SubViewer 1.0 (.sub),
SubViewer 2.0 (.sub/.txt), TMPlayer (.txt), DVD
Subtitle System (.txt)
• VobSub (.sub) is not available in the
[Home Link] feature.
Playable Codec format: “DIVX3.xx”, “DIVX4.
xx”, “DIVX5.xx”, “XVID”, “DIVX6.xx” (Standard
playback only), H.264/MPEG-4 AVC, MPEG1 SS,
MPEG2 PS, MPEG2 TS
Playable Audio format: “Dolby Digital”, “DTS”,
“MP3”, “WMA”, “AAC”, “AC3”
• Not all the WMA and AAC Audio formats are
compatible with this unit.
Sampling frequency:
between 32 kHz to 48 kHz (WMA),
between 16 kHz to 48 kHz (MP3)
Bit rate:
between 20 kbps to 320 kbps (WMA),
between 32 kbps to 320 kbps (MP3)
NOTE
• HD movie les contained on the CD or USB
1.0/1.1 may not played properly. BD, DVD or USB
2.0 are recommended to play back HD movie
les.
• This player supports H.264/MPEG-4 AVC pro le
Main, High at Level 4.1. For a le with higher
level, the warning message will appear on the
screen.
• This player does not support the les that are
recorded with GMC*1 or Qpel*2. Those are video
encoding techniques in MPEG4 standard, like
DivX or XVID have.
*1 GMC – Global Motion Compensation
*2 Qpel – Quarter pixel
MUSIC
Sampling frequency:
between 8 kHz to 48 KHz (WMA),
between 11 kHz to 48 kHz (MP3)
Bit rate:
between 8 kbps to 320 kbps (WMA, MP3),
NOTE
• This unit cannot support the ID3 Tag embedded
MP3 le.
• The total playback time indicated on the screen
may not be correct for VBR les.
PHOTO
Recommended size:
Less than 4,000 x 3,000 x 24 bit/pixel
Less than 3,000 x 3,000 x 32 bit/pixel
Less than 4 MByte/ le
• Progressive and lossless compression photo
image les are not supported.

12 Preparation
Preparation
2
Regional Code
This unit has a regional code printed on the
rear of the unit. This unit can play only BD-ROM
or DVD discs labeled same as the rear of the
unit or “ALL”.
AVCHD (Advanced Video Codec
High De nition)
• This player can playback AVCHD format
discs. These discs are normally recorded and
used in camcorders.
• The AVCHD format is a high de nition
digital video camera format.
• The MPEG-4 AVC/H.264 format is capable
of compressing images at higher e ciency
than that of the conventional image
compressing format.
• Some AVCHD discs use the “x.v.Color”
format.
• This player can playback AVCHD discs using
“x.v.Color” format.
• Some AVCHD format discs may not play,
depending on the recording condition.
• AVCHD format discs need to be nalized.
• “x.v.Color” o ers a wider color range than
normal DVD camcorder discs.
Certain System Requirements
For high de nition video playback:
• High de nition display that has
COMPONENT or HDMI input jacks.
• BD-ROM disc with high de nition content.
• HDMI or HDCP capable DVI input on your
display device is required for some content
(as speci ed by disc authors).
• For up-conversion of standard de nition
DVD, a HDMI or HDCP capable DVI input
on your display device is required for copy
protected content.
Compatibility Notes
• Because BD-ROM is a new format,
certain disc, digital connection and other
compatibility issues are possible. If you
experience compatibility problems, please
contact an authorized Customer Service
Center.
• Viewing high-de nition content and up-
converting standard DVD content may
require a HDMI-capable input or HDCP-
capable DVI input on your display device.
• Some BD-ROM and DVD discs may restrict
the use of some operation commands or
features.
• You can use a USB device that is used
to store some disc related information,
including downloaded on-line content. The
disc you are using will control how long this
information is retained.

14 Preparation
Preparation
2
Front panel
a Disc Tray
b Operation buttons
1 STANDBY/ON Button
Z (OPEN/CLOSE)
FUNCTION
Changes the input source or function
B/X (PLAY / PAUSE)
x (STOP)
./> (SKIP)
- TUNE + (Radio tuning)
c
Remote sensor
d
Display window
e PORTABLE IN
f
USB Port
g Volume control
1
2
3 4 5 6 7

15Preparation
2
Preparation
a AC Power cord
Plug into the power source.
b
Speakers connectors
c
Cooling Fan
d
Antenna Connector
e
VIDEO OUT
f
AUX (L/R) INPUT
g COMPONENT VIDEO (Y PB PR)
OUTPUT (PROGRESSIVE SCAN)
h OPTICAL IN 1(TV) / 2
i iPod (24 pin)
Connect to the furnished iPod cradle.
j HDMI OUT (type A, Version 1.3)
Connect to TV with HDMI inputs.
k LAN port
Rear panel
1 2 3 4 5
6 7 8 9 10 11

16 Installation
Installation
3
Assemble the
speakers
Speaker Setup for HTZ-BD50
Preparing the speakers
1. Attach the non-skid pads to the base of
each speaker stand bases, the subwoofer
and the center speaker.
For speaker stand bases:
Use the supplied adhesive to attach four
middle pads to the base (bottom) of each
speaker stand base.
middle non-skid pads
For subwoofer:
Use the supplied adhesive to attach four
large pads to the base of subwoofer.
large non-skid pads
For center speaker:
Use the supplied adhesive to attach four
small pads to the base of center speaker.
small non-skid pads
2. Attach the speaker stand bases to the stems
using the screws provided.
Once you have aligned the stem and base,
secure with the small screws at the points
shown below. Note that the speaker should
face in the direction of the base of the
isosceles triangle.
Rear
Front
3
Installation

17Installation
3
Installation
3. Connect the wires to the player.
Connect the white wire with gray line into
(+) side and the other wire into (–) side. To
connect the cable to the player, press each
plastic nger pad to open the connection
terminal. Insert the wire and release the
nger pad.
CAUTION
• Do not connect any speakers other than those
supplied to this system.
• Do not connect the supplied speakers to any
ampli er other than the one supplied with this
system. Connection to any other ampli er may
result in malfunction or re.
Securing your front and surround
speakers
Secure each of the front and surround speakers
using the plastic catch provided. Screw two
supporting hooks into the wall behind the
speaker. Pass a thick cord around the hooks
and through the plastic catch so that the
speaker is stabilized (make sure to test that
it supports the weight of the speaker). After
installing, make sure the speaker is securely
xed.
thick cord
Plastic catch
CAUTION
• The plastic catch is not a mounting xture, and
the speaker should not be hung directly from
the wall using this catch. Always use a cord
when stabilizing the speaker.
• Pioneer disclaims all responsibility for any
losses or damage resulting from improper
assembly, installation, insu cient strength of the
installation materials, misuse, or natural disasters.
• When placing this unit, ensure that it is rmly
secured and avoid areas where it may be likely
to fall and cause injury in the event of a natural
disaster (such as an earthquake).
Colored (+)

18 Installation
Installation
3
Speaker Setup for HTZ-BD30
Preparing the speakers
1. Attach the non-skid pads to the base of
each speaker.
For speaker stand bases:
Use the supplied adhesive to attach four
middle pads to the base (bottom) of each
speaker stand base.
small non-skid pads
For subwoofer:
Use the supplied adhesive to attach four
large pads to the base of subwoofer.
large non-skid pads
For center speaker:
Use the supplied adhesive to attach four
small pads to the base of center speaker.
small non-skid pads
2. Connect the wires to the player.
Connect the white wire with gray line into
(+) side and the other wire into (–) side. To
connect the cable to the player, press each
plastic nger pad to open the connection
terminal. Insert the wire and release the
nger pad.

19Installation
3
Installation
Wall mounting the
center speaker
The center speaker have a mounting hole
which can be used to mount the speaker on
the wall.
Before mounting
Remember that the speaker system is heavy
and that its weight could cause the screws
to work loose, or the wall material to fail to
support it, resulting in the speaker falling. Make
sure that the wall you intend to mount the
speakers on is strong enough to support them.
Do not mount on plywood or soft surface
walls.
Mounting screws are not supplied. Use screws
suitable for the wall material and support the
weight of the speaker.
CAUTION
• If you are unsure of the qualities and strength of
the wall, consult a professional for advice.
• Pioneer is not responsible for any accidents or
damage that result from improper installation.
5 mm
10 mm
5 mm to 7 mm
Mounting screw
(not supplied)
Additional notes on
speaker
Install the main front left and right speakers at
an equal distance from the TV.
Precautions:
Make sure that all the bare speaker wire is
twisted together and inserted fully into the
speaker terminal. If any of the bare speaker
wire touches the back panel it may cause the
power to cut o as a safety measure.
The front, center and surround speakers
supplied with this system are magnetically
shielded. However, depending on the
installation location, color distortion may occur
if the speaker is installed extremely close to the
screen of a television set. If this case happens,
turn the power switch of the television set
OFF, and turn it ON after 15 min. to 30 min. If
the problem persists, place the speaker system
away from the television set.
The subwoofer is not magnetically shielded
and so should not be placed near a TV or
monitor. Magnetic storage media (such as
oppy discs and tape or video cassettes)
should also not be kept close to the subwoofer.
Do not attach the front/surround speakers and
subwoofer to a wall or ceiling. They may fall o
and cause injury.

20 Installation
Installation
3
Positioning the system
The following illustration shows an example
of positioning the system. Note that the
illustrations in these instructions di er from the
actual unit for explanation purposes.
For the best possible surround sound, all the
speakers other than the subwoofer should be
placed at the same distance from the listening
position (
A
).
A
B
D
E
F
AAA
A
A
G
C
A
Front left speaker (L)/
B
Front right speaker (R):
Place the front speakers to the sides of the
monitor or screen and as ush with the screen
surface as possible.
C
Center speaker:
Place the center speaker above or below the
monitor or screen.
D
Surround left speaker (L)/
E
Surround right speaker (R):
Place these speakers behind your listening
position, facing slightly inwards.
F
Subwoofer:
The position of the subwoofer is not so
critical, because low bass sounds are not
highly directional. But it is better to place
the subwoofer near the front speakers. Turn
it slightly toward the center of the room to
reduce the wall re ections.
G
Unit
CAUTION
• Be careful to make sure children do not put their
hands or any objects into the *subwoofer duct.
*subwoofer duct: A hole for plentiful bass sound
on subwoofer cabinet (enclosure).
• Place the center speaker at a safe distance from
the child’s reach.
Otherwise it may result in the speaker falling
down and causing personal injury and/or
property damage.
• The speakers contain magnet parts, so color
irregularity may occur on the TV screen or PC
monitor screen. Please use the speakers away
from the TV screen or PC monitor screen.

21Installation
3
Installation
Connecting to Your TV
Make one of the following connections,
depending on the capabilities of your existing
equipment.
• HDMI connection (pages 21-22)
• Component Video connection (page 22)
• Video connection (page 23)
NOTE
• Depending on your TV and other equipment
you wish to connect, there are various ways you
could connect the player. Use only one of the
connections described in this manual.
• Please refer to the manuals of your TV, stereo
system or other devices as necessary to make
the best connections.
• Make sure the player is connected directly to
the TV. Tune the TV to the correct video input
channel.
• Do not connect your player via your VCR. The
image could be distorted by the copy protection
system.
HDMI Connection
If you have a HDMI TV or monitor, you
can connect it to this player using a HDMI
cable(Type A, Version 1.3). Connect the HDMI
OUT jack on the player to the HDMI IN jack on
a HDMI compatible TV or monitor.
HDMI Connection
Player
TV
TV
Player
Set the TV’s source to HDMI (refer to TV’s
Owner’s manual).

22 Installation
Installation
3
NOTE
• Changing the resolution when the connection
has already been established may result in
malfunctions. To solve the problem, turn o the
player and then turn it on again.
• When the HDMI connection with HDCP is not
veri ed, TV screen is changed to black screen.
In this case, check the HDMI connection, or
disconnect the HDMI cable.
• If there is noise or lines on the screen, please
check the HDMI cable (length is generally
limited to 4.5 m and use a high speed HDMI
cable (version 1.3).
• If a connected HDMI device does not accept the
audio output of the player, the HDMI
device’s audio sound may be distorted or may
not output.
• When you use HDMI connection, you can
change the resolution for the HDMI output.
(Refer to “Resolution Setting” on page 23.)
• Select the type of video output from the HDMI
OUT jack using [HDMI Color Setting] option on
the [Setup] menu (see page 34).
• When you connect a HDMI or DVI compatible
device make sure of the following:
- Try switching o the HDMI/DVI device and this
player. Next, switch on the HDMI/DVI device
and leave it for around 30 seconds, then switch
on this player.
- The connected device’s video input is set
correctly for this unit.
- The connected device is compatible with
720x576p (480p), 1280x720p, 1920x1080i or
1920x1080p video input.
• Not all HDCP-compatible HDMI or DVI devices
will work with this player.
- The picture will not be displayed properly with
non-HDCP device.
- This player does not playback and TV screen is
changed to black screen.
Component Video Connection
Connect the COMPONENT VIDEO OUT jacks on
the player to the corresponding input jacks on
the TV using Y Pb Pr cables. You can hear the
sound the through the system’s speaker.
Component Connection
Player
TV
Green
Blue
Red
PR
PB
Y
COMPONEN T
VID EO
INPUT OUTPUT
L
AUX
R
VIDEO
Player
Green
Blue
Red
TV
NOTE
When you use COMPONENT VIDEO OUT
connection, you can change the resolution for the
output. (Refer to “Resolution setting” on page 23.)

23Installation
3
Installation
Video Connection
Connect the VIDEO OUT jack on the player to
the video in jack on the TV using a video cable.
You can hear the sound through the system’s
speakers.
Video Connection
TV
Yellow
PR
PB
Y
COMPONENT
VIDEO
INPUT OUTPUT
L
AUX
R
VIDEO
Player
TV
Yellow
Resolution Setting
The player provides several output resolutions
for HDMI OUT and COMPONENT VIDEO OUT
jacks. You can change the resolution using
[Setup] menu.
1. Press HOME MENU ( ).
2. Use I/i/U/u to select the [Setup] and
press ENTER ( ). The [Setup] menu appears.
3. Use U/u to select [DISPLAY] option then
press i to move to the second level.
4. Use U/u to select the [Resolution] option
then press ENTER ( ) or i to move to the
third level.
5. Use U/u to select the desired resolution
then press ENTER ( ) to con rm your
selection.
NOTE
• If your TV does not accept the resolution you
have set on the player, you can set resolution to
576p (480p) as follows:
1. Press Z to open the disc tray.
2. Press x for more than 5 seconds.
• Since several factors a ect the resolution of
video output, see “Video Output Resolution” on
page 70.

24 Installation
Installation
3
Antenna connection
Connect the supplied antenna for listening to
the radio.
Antenna Connection
Player
Player
NOTE
After connecting the FM wire antenna, keep it as
horizontal as possible. Be sure to fully extend the
FM wire antenna.
Connections with
external device
AUX Connection
You can enjoy the sound from an external
component through the speakers of this
system.
Connect the analogue audio output jacks of
your component into the AUX L/R (INPUT) on
this unit. And then select the [AUX] option by
pressing INPUT/TUNER, I/i and ENTER ( ).
AUX Connection
Player
To the audio output jacks
of your component
(TV, VCR, etc.)
Red
White
PR
PB
Y
COMPONENT
VIDEO
INPUT
L
AUX
R
VIDEO
Red
White
Player
To the audio output jacks
of your component
(TV, VCR, etc.)

25Installation
3
Installation
PORTABLE IN connection
You can enjoy the sound from your portable
audio player through the speakers of this
system.
Connect the headphones (or line out )
jack of the portable audio player into the
PORTABLE IN socket of this unit. And then
select the [PORTABLE] option by pressing
INPUT/TUNER, I/i and ENTER ( ).
PORT.IN Connection
twZGSGUUU
OPTICAL IN 1/2 connection
You can enjoy the sound from your component
with a digital optical connection through the
speakers of this system.
Connect the optical output jack of your
component into the OPTICAL IN 1/2 jacks on
the unit. And then select the [OPTICAL 1/2]
option by pressing INPUT/TUNER, I/i and
ENTER ( ). Or press OPTICAL to select directly.
Optical Connection
To the digital
optical output jack
of your component
To the digital
optical output jack
of your component

26 Installation
Installation
3
Bluetooth® connection
About Bluetooth
Bluetooth® is wireless communication
technology for short range connection.
The available range is within 10 meters.
(The sound may be interrupted when the
connection interfered by the other electronic
wave or you connect the bluetooth in the other
rooms.)
Connecting individual devices under
Bluetooth wireless technology does not incur
any charges. A mobile phone with Bluetooth
wireless technology can be operated via
the Cascade if the connection was made via
Bluetooth wireless technology.
Available Devices : Mobile phone, MP3, Laptop,
PDA (This units be supported the Stereo
Headset.)
Bluetooth Pro les
In order to use wireless technology, Bluetooth
devices must be able to interpret certain
pro les.
This unit is compatible with following pro le.
A2DP (Advanced Audio Distribution Pro le)
Listening to music of a Bluetooth
device
Pairing your unit and Bluetooth device
Before you start the pairing procedure, make
sure the feature is turned on in to Bluetooth
your Bluetooth device. Refer to your Bluetooth
device’s user guide. Once a pairing operation is
performed, it does not need to be performed
again.
1. Select the Bluetooth function by using the
INPUT/TUNER or BT AUDIO.
Appears “BT AUDIO” and then “BT READY” in
display window.
2. Operate the Bluetooth device and perform
the pairing operation. When searching for
this unit with the Bluetooth device, a list
of the devices found may appear in the
Bluetooth device display depending on the
type of Bluetooth device. Your unit appears
as “PIONEER AUDIO”.
3. Enter the PIN code.
PIN cord : 0000
4. When this unit successfully paired with your
Bluetooth Bluetooth device, LED of this unit
lights up and appears “BT SINK”.
NOTE
Depending on the Bluetooth device type, some
device have a di erent pairing way.
5. Listening to music.
To play a music stored on your Bluetooth
device, refer to your device’s user Bluetooth
guide.
NOTE
• If you change the function of the unit, the
Bluetooth function is disconnected, operate
pairing again.
• AVRCP cannot be available in this mode.

27Installation
3
Installation
Checking the information of connected
Bluetooth device
This function is operated after pairing. You can
check the information.Bluetooth
Press DISPLAY repeatedly.
Bluetooth information is changed as follows.
Local Device Address Bluetooth t Device
Name t None t ...
NOTE
• This units dose not be supported the Mono
Headset Pro le (Hands Free Pro le).
• The sound may be interrupted when the
connection interfered by the other electronic
wave.
• You cannot control the Bluetooth device with
this unit.
• Pairing is limited one Bluetooth device per one
unit and multi-pairing is not supported.
• Although the distance between your Bluetooth
and the set is less than 10 m, there are obstacles
between both, your Bluetooth device cannot be
connected.
• Depending on the type of the device, you may
not be able to use the function.Bluetooth
• When not connected the Bluetooth, “BT READY”
appears on the display window.
• The Electrical malfunction due to devices using
same frequency such as Medical equipment,
Microwaves or wireless LAN devices, the
connection will be disconnected.
• When someone stands and interrupts
communication between Bluetooth device and
the player, the connection will be disconnected.
• If the gotten away of the distance between
Bluetooth and the unit, the sound quality is lower
and lower the connection will disconnect when
the space between the and the unit Bluetooth
gets out of the operating range of .Bluetooth
• The device with wireless technology Bluetooth
is disconnected, if you turn o the main unit or
put the device away from the main unit more
than 10 m.

28 Installation
Installation
3
Connecting to your
Home Network
This player can be connected to a local area
network (LAN) via the LAN port on the rear
panel.
Please refer to the documentation for your
network device for further instructions.
Connect the player’s LAN port to the
corresponding port on your Modem or Router
using a commercially available LAN or Ethernet
cable (CAT5 or better with RJ45 connector).
In the example con guration for wired
connection below, this player would be able to
access content from either of the PCs.
Network Connection
Broadband
Service
Router
WAN
LAN 1
LAN 2
LAN 3
Player
PC
PC
Router
Broadband
Service
Player
NOTE
• When plugging or unplugging the LAN cable,
hold the plug portion of the cable. When
unplugging, do not pull on the LAN cable but
unplug while pressing down on the lock.
• Do not connect a modular phone cable to the
LAN port.
• Since there are various connection
con gurations, please follow the speci cations
of your telecommunication carrier or internet
service provider.
• If you want to access content from PCs or DLNA
servers, this player must be connected to the
same local area network with them via a router.

29Installation
3
Installation
Network Setup
Before setting the wired network, you need to
connect the broadband internet to your home
network.
If there is a DHCP server on the local area
network (LAN) via wired connection, this player
will automatically be allocated an IP address.
After making the physical connection, a small
number of home networks may require the
player’s network setting to be adjusted. Adjust
the [NETWORK] setting as follows.
1. Select [Connection Setting] option in the
[Setup] menu then press ENTER ( ).
2. Use U/u/I/i to select the IP mode
between [Dynamic] and [Static].
Normally, select [Dynamic] to allocate an IP
address automatically.
NOTE
If there is no DHCP server on the network and you
want to set the IP address manually, select [Static]
then set the [IP Address], [Subnet Mask], [Gateway]
and [DNS Server] using
U/u/I/i and numerical
buttons. If you make a mistake while entering a
number, press CLEAR to clear the highlighted part.
3. Select [OK] and press ENTER ( ) to apply
network settings.
4. The player will ask you to test the network
connection. Select [OK] and press ENTER
( ) to complete the network connection.
5. If you select [Test] and press ENTER ( )
at step 4 above, the network connection
status is displayed on the screen.
You can also test it on the [Connection
Status] in the [Setup] menu.

30 Installation
Installation
3
Notes on Network Connection:
• Many network connection problems during
set up can often be xed by re-setting the
router or modem. After connecting the
player to the home network, quickly power
o and/or disconnect the power cable of
the home network router or cable modem.
Then power on and/or connect the power
cable again.
• Depending on the internet service provider
(ISP), the number of devices that can
receive internet service may be limited by
the applicable terms of service. For details,
contact your ISP.
• Our company is not responsible for
any malfunction of the player and/or
the internet connection feature due to
communication errors/malfunctions
associated with your broadband internet
connection, or other connected equipment.
• The features of BD-ROM discs made
available through the Internet Connection
feature are not created or provided
by our company, and our company is
not responsible for their functionality
or continued availability. Some disc
related material available by the Internet
Connection may not be compatible with
this player. If you have questions about such
content, please contact the producer of the
disc.
• Some internet contents may require a
higher bandwidth connection.
• Even if the player is properly connected and
con gured, some internet contents may
not operate properly because of internet
congestion, the quality or bandwidth of
your internet service, or problems at the
provider of the content.
• Some internet connection operations may
not be possible due to certain restrictions
set by the Internet service provider (ISP)
supplying your broadband Internet
connection.
• Any fees charged by an ISP including,
without limitation, connection charges are
your responsibility.
• A 10 Base-T or 100 Base-TX LAN port is
required for wired connection to this player.
If your internet service does not allow for
such a connection, you will not be able to
connect the player.
• You must use a Router to use xDSL service.
• A DSL modem is required to use DSL service
and a cable modem is required to use cable
modem service. Depending on the access
method of and subscriber agreement with
your ISP, you may not be able to use the
internet connection feature contained in
this player or you may be limited to the
number of devices you can connect at the
same time. (If your ISP limits subscription
to one device, this player may not be
allowed to connect when a PC is already
connected.)
• The use of a “Router” may not be allowed
or its usage may be limited depending on
the policies and restrictions of your ISP. For
details, contact your ISP directly.
• Turn o all unused network equipment in
your local home network. Some devices
may generate network tra c.

31Installation
3
Installation
USB device
connection
This player can play movie, music and photo
les contained in the USB device.
1. Insert a USB device to the USB port until it
ts into place.
USB Connection
2. Press HOME MENU.
Select [Movie], [Photo] or [Music] using
U/u/I/i, and press ENTER ( ).
3. Select a le using U/u/I/i, and press PLAY
or ENTER ( ) to play the le.
You can check the space of the USB device
on the screen.
4. Select the other mode. And withdraw the
USB device carefully.
NOTE
• This player supports USB ash memory/external
HDD formatted in FAT16, FAT32 and NTFS when
accessing les (music, photo, movie). However,
for BD-LIVE and Audio CD recording, only FAT16
and FAT32 formats are supported. Use the USB
ash memory/external HDD formatted in either
FAT16 or FAT32 when using BD-LIVE and Audio
CD recording.
• The USB device can be used for local storage for
enjoying BD-Live discs from the Internet.
• This unit can support up to 4 partitions of the
USB device.
• Do not extract the USB device during operation
(play, etc.).
• An USB device which requires additional
programme installation when you have
connected it to a computer, is not supported.
• USB device: USB device that support USB 1.1
and USB 2.0.
• Movie, music and photo les can be played.
For details of operations on each le, refer to
relevant pages.
• Regular back up is recommended to prevent
data loss.
• If you use a USB extension cable, USB HUB or
USB Multi-reader, the USB device may not be
recognised.
• Some USB device may not work with this unit.
• Digital camera and mobile phone are not
supported.
• The USB Port on this unit cannot be connected
to a PC.

34 Installation
Installation
3
1080p Display Mode
When the resolution is set to 1080p, select
[24 Hz] for smooth presentation of lm material
(1080p/ 24 Hz) with a HDMI-equipped display
compatible with 1080p/ 24 Hz input.
NOTE
• When you select [24 Hz], you may experience
some picture disturbance when the video
switches video and lm material. In this case,
select [60 Hz].
• Even when [1080p Display Mode] is set to
[24 Hz], if your TV is not compatible with
1080p/ 24 Hz, the actual frame frequency of
the video output will be 60 Hz to match the
video source format.
HDMI Color Setting
Select the type of output from the HDMI
OUT jack. For this setting, please refer to the
manuals of your display device.
[YCbCr]
Select when connecting to a HDMI display
device.
[RGB]
Select when connecting to a DVI (RGB)
display device.
[LANGUAGE] Menu
Display Menu
Select a language for the [Setup] menu and
on-screen display.
Disc Menu/ Disc Audio/
Disc Subtitle
Select the language you prefer for the audio
track (disc audio), subtitles, and the disc menu.
[Original]
Refers to the original language in which the
disc was recorded.
[Other]
Press ENTER ( ) to select another language.
Use number buttons then ENTER ( ) to
enter the corresponding 4-digit number
according to the language code list on
page 69.
[O ] (for Disc Subtitle only)
Turn o Subtitle.
NOTE
Depending on the disc, your language setting may
not work.

35Installation
3
Installation
[AUDIO] Menu
Speaker Setup
To obtain the best possible sound, use the
speaker setup display to specify the volume
of the speakers you have connected and their
distance from your listening position. Use the
test to adjust the volume of the speakers to the
same level.
[Speaker]
Select a speaker that you want to adjust.
[Volume]
Adjust the output level of each speaker.
[Distance]
Adjust the distance between each speaker
and the listening position.
[Test/ Stop test tone]
The speakers will emit a test tone.
[OK]
Con rms the setting.
[Cancel]
Cancels the setting.
HD AV Sync
Sometimes Digital TV encounters a delay
between picture and sound. If this happens
you can compensate by setting a delay on the
sound so that it e ectively ‘waits’ for the picture
to arrive: this is called HD AV Sync. Use U u to
scroll up and down through the delay amount,
which you can set at anything between 0 and
300 ms.
The delay will vary depending on which digital
TV channel you are on. If you change channel
you may need to readjust the HD AV Sync.
DRC (Dynamic Range Control)
When a title encoded in Dolby Digital or Dolby
Digital Plus is playing back, you may wish to
compress the dynamic range of the audio
output (the di erence between the loudest
sounds and the quietest ones). This allows you
to listen to a movie at a lower volume without
losing clarity of sound. Set [DRC] to [On] for
this e ect.
NOTE
The DRC setting can be changed only when a
disc is not inserted or the unit is in complete stop
mode.

36 Installation
Installation
3
[LOCK] Menu
To access any features in the [LOCK] settings,
you must enter the 4-digit security code you
have created.
If you have not entered a password yet, you are
prompted to do so. Enter a 4-digit password
twice, and press ENTER ( ) to create a new
password.
Password
You can create or change the password.
[None]
Enter a 4-digit password twice, and press
ENTER ( ) to create a new password.
[Change]
Enter the current password and press ENTER
( ). Enter a 4-digit password twice, and
press ENTER ( ) to create a new password.
NOTE
If you make a mistake before pressing ENTER ( ),
press CLEAR. Then input the correct password.
If you forget your password,
If you forget your password, you can clear it using
the following steps:
1. Remove any disc that might be in the player.
2. Select [Lock] option in the [Setup] menu.
3. Use number buttons to enter “210499” on the
[Lock] Menu. The password is cleared.
DVD Rating
Blocks playback of rated DVD based on their
content. (Not all discs are rated.)
[Rating 1-8]
Rating one (1) has the most restrictions and
rating eight (8) is the least restrictive.
[Unlock]
If you select this, parental control is not
active and the disc plays in full.
BD Rating
Sets an age limit for BD-ROM playback.
Use number buttons to input an age limit for
BD-ROM viewing.
[255]
All BD-ROM can be played.
[0-254]
Prohibits play of BD-ROM with
corresponding ratings recorded on them.
NOTE
The [BD Rating] will be applied only for the BD disc
that containing the Advanced Rating Control.
Area Code
Enter the code of the area whose standards
were used to rate the DVD video disc, based
on the list on page 68.

38 Installation
Installation
3
Auto Power O
The screen saver appears when you leave
the player in Stop mode for about ve
minutes. If you set this option to [On], the unit
automatically turns itself o after the Screen
Saver is displayed for 25 minutes.
Set this option to [O ] to leave the screen
saver until the unit is operated by the user.
Initialize
Factory Set
You can reset the player to its original
factory settings.
BD Storage Clear
Removes the BD contents from the
connected USB storage.
NOTE
If you reset the player to its original factory settings
using [Factory Set] option, you have to set all the
activation for the on-line services and network
settings again.
Software Information
Displays the current software version.

39Installation
3
Installation
Sound E ect
You can select a suitable sound mode. Press
SOUND repeatedly until the desired mode
appears on the front panel display or the TV
screen. The displayed items for the equalizer
maybe di erent depending on sound sources
and e ects.
[ ]: Gives you suitable sound setting Pioneer 1
with connecting small type of speakers
(S-BD30).
[ ]: Gives you suitable sound Pioneer 2
setting with connecting tall type of speakers
(S-BD50T).
[Bypass]: Software with multichannel surround
audio signals is played according to the way it
was recorded.
[Bass Blast]: Reinforce the bass sound
e ect from front left and right speaker and
subwoofer.
[PL ll Movie]: Performs Pro Logic ll movie
mode decoding to the input signal and
produces ve full-bandwidth output channels
from 2 channel sources. This setting is ideal for
watching videos of overdubbed or old movies.
This mode is available only to 2 channel
sources.
[ ]: Performs Pro Logic ll music mode PL ll Music
decoding to the input signal and produces
ve full-bandwidth output channels from
2 channel sources. This setting is ideal for
normal stereo sources such as CD. This mode is
available only to 2 channel sources.
[Clear Voice]: This mode makes voice sound
clear, improving the quality of voice sound.
[Game]: You can enjoy more virtual sound
while playing video games.
[Night]: This may be useful when you want to
watch movies at low volumes late at night.
[Mus. ReTouch]: When listening to MP3 les or
other compressed music, you can enhance the
sound. This mode is available only to 2 channel
sources.
[Loudness]: Improves bass and treble sound.

40 Operation
Operation
4
General Playback
Playing Discs
1. Press Z OPEN/CLOSE, and place a disc on
the disc tray.
2. Press Z OPEN/CLOSE to close the disc tray.
For most Audio CD, BD-ROM and
DVD-ROM discs, playback starts
automatically.
3. Press HOME MENU.
4. Select [Movie], [Photo] or [Music] using
U/u/I/i, and press ENTER ( ).
5. Select the Disc option using I/i, and press
ENTER ( ).
When you connect up to two devices, it
appears as above.
6. Select a le using U/u/I/i, and press B
PLAY or ENTER ( ) to play the le.
NOTE
• Playback functions described in this manual are
not always available in every les and medium.
Some functions can be restricted depending on
many factors.
• Depending on the BD-ROM titles, a USB device
connection may be needed for proper playback.
4
Operation

41Operation
4
Operation
To stop playback
Press x STOP during playback.
To pause playback
Press X PAUSE/STEP during playback.
Press B PLAY to resume playback.
To play frame-by-frame
Press X PAUSE/STEP while movie playback.
Press X PAUSE/STEP repeatedly to playback
Frame-by-Frame.
To scan forward or backward
Press m or M to play fast forward or fast
reverse during playback.
You can change the various playback speeds
by pressing m or M repeatedly.
To slow down the playing speed
While the playback is paused, press
M SCAN
repeatedly to play various speeds of slow
motion.
To skip to the next/previous
chapter/track/ le
During playback, press . or > to go to
the next chapter/track/ le or to return to the
beginning of the current chapter/track/ le.
Press . twice brie y to step back to the
previous chapter/track/ le.
Using the disc menu
BD
DVD
AVCHD
To display the disc menu
The menu screen may be displayed rst after
loading a disc which contains a menu. If you
want to display the disc menu during playback,
press MENU.
Use U/u/I/i buttons to navigate through
menu items.
To display the Pop-up menu
Some BD-ROM discs contain a Pop-up menu
that appears during playback.
Press POPUP/ TOP MENU during playback, and
use U/u/I/i buttons to navigate through
menu items.
Resume playback
BD
DVD
AVCHD
MOVIE
ACD
MUSIC
This unit remembers the x STOP depending
on the disc.
If “Xx
(Resume Stop)” appears on the screen
brie y, press B (PLAY) to resume playback
(from the scene point).
If you press x
(STOP) twice or unload the disc,
“x”(Complete Stop) appears on the screen.
The unit will clear the stopped point.
NOTE
• The resume point may be cleared when a
button is pressed (for example; 1 (POWER),
Z (OPEN/CLOSE), etc).
• On BD-Video discs with BD-J, the resume
playback function does not work.
• If you press x (STOP) once during BD-ROM
interactive title playback, the unit will be in
Complete Stop mode .

43Operation
4
Operation
To delete a Marker
1. Press SEARCH and the search menu appears
on the screen.
2. Press u to highlight a marker number. Use
I/i to select a marked scene that you
want to delete.
3. Press CLEAR and the marked scene is erased
from the search menu.
NOTE
• This function may not work depending on discs,
titles, server ability.
• All marked points are cleared if the title is in
complete stop (x) mode, the title is changed or
if you unload the disc.
• If the total length of the title is less than
10 seconds, this function is not available.
Using the search menu
BD
DVD
AVCHD
MOVIE
Using search menu, you can easy to nd the
point where you want to start playback.
To search a point
1. During playback, press SEARCH to display
the search menu.
2. Press I/i to skip the playback 15 seconds
forward or backward. You can select a
point that you want to skip by pressing and
holding I/i button.
To start playback from a marked
scene
1. Press SEARCH and the search menu appears
on the screen.
2. Press u to highlight a marker number. Use
I/i to select a marked scene that you
want to playback from.
3. Press ENTER ( ) to start playback from the
marked scene.
NOTE
• This function may not work depending on discs,
titles, server ability.
• This function may not work on some [Home
Link] contents depending on the le type and
ability of the DLNA server.

44 Operation
Operation
4
Last Scene Memory
BD
DVD
This unit memorizes the last scene from the
last disc that is viewed. The last scene remains
in memory even if you remove the disc from
the unit or switch o the unit. If you load a disc
that has the scene memorized, the scene is
automatically recalled.
NOTE
• Last Scene Memory function for a previous disc
is erased once a di erent disc is played.
• This function may not work depending on the
disc.
• This unit does not memorize settings of a disc if
you switch o the unit before commencing to
play it.
On-Screen display
You can display and adjust various information
and settings concerning the content.
Displaying content information
on-screen
BD
DVD
AVCHD
MOVIE
1. During playback, press DISPLAY ( ) to show
various playback information.
a
h
g
f
e
d
c
b
aTitle – Current title number/total number
of titles
bChapter – Current chapter number/total
number of chapters
cTime – Elapsed playing time/Total
playback time
dAudio – Selected audio language or
channel
eSubtitle – Selected subtitle
fAngle – Selected angle/total number of
angles
gTV Aspect Ratio – Selected a TV aspect
Ratio
hPicture Mode – Selected picture mode

45Operation
4
Operation
2. Select an option using U/u.
3. Use I/i to adjust the selected option
value.
4. Press RETURN (
O) to exit the On-Screen
display.
NOTE
• If no button is pressed for a few seconds, the on-
screen display disappears.
• A title number cannot be selected on some
discs.
• Available items may di er depending on discs
or titles.
• If BD interactive title is playing back, some
setting information is displayed on the screen
but prohibited to be changed.
Playing from selected time
BD
DVD
AVCHD
MOVIE
1. Press DISPLAY (
) during playback. The
time search box shows the elapsed playing
time.
2. Select the [Time] option and then input
the required start time in hours, minutes,
and seconds from left to right.
For example, to nd a scene at 2 hours, 10
minutes, and 20 seconds, enter “21020”.
Press
I/i to skip the playback 60 seconds
forward or backward.
3. Press ENTER () to start playback from
selected time.
NOTE
• This function may not work on some disc or
titles.
• This function may not work on some [Home
Link] contents depending on the le type and
ability of the DLNA server.

46 Operation
Operation
4
Hearing di erent audio
BD
DVD
AVCHD
MOVIE
1. During playback, press DISPLAY (
) to
display the on-screen display.
2. Use U/u to select the [Audio] option.
3. Use I/i to select desired audio language,
audio track or audio channel.
NOTE
• Some discs allow you to change audio selections
only via the disc menu. If this is the case, press
POPUP/ TOP MENU or MENU button and choose
the appropriate audio from the selections on
the disc menu.
• Immediately after you have switched sound,
there may be a temporary discrepancy between
the display and actual sound.
Selecting a subtitle language
BD
DVD
AVCHD
MOVIE
1. During playback, press DISPLAY (
) to
display the on-screen display.
2. Use U/u to select the [Subtitle] option.
3. Use I/i to select the desired subtitle
language.
4. Press RETURN (
O) to exit the On-Screen
display.
NOTE
Some discs allow you to change subtitle selections
only via the disc menu. If this is the case, press
POPUP/ TOP MENU or MENU button and choose
the appropriate subtitle from the selections on the
disc menu.

47Operation
4
Operation
Watching from a di erent angle
BD
DVD
If the disc contains scenes recorded at di erent
camera angles, you can change to a di erent
camera angle during playback.
1. During playback, press DISPLAY (
) to
display the on-screen display.
2. Use U/u to select the [Angle] option.
3. Use I/i to select desired angle.
4. Press RETURN (
O) to exit the On-Screen
display.
Changing the TV Aspect Ratio
BD
DVD
AVCHD
MOVIE
You can change the TV aspect ratio setting
during playback.
1. During playback, press DISPLAY (
) to
display the on-screen display.
2. Use U/u to select the [TV Aspect Ratio]
option.
3. Use I/i to select desired option.
4. Press RETURN (
O) to exit the On-Screen
display.
NOTE
Even if you change the value of the [TV Aspect
Ratio] option in On-Screen display, the [TV Aspect
Ratio] option in the [Setup] menu is not changed.
Changing the Picture Mode
BD
DVD
AVCHD
MOVIE
You can change the [Picture mode] option
during playback.
1. During playback, press DISPLAY (
) to
display the on-screen display.
2. Use U/u to select the [Picture Mode]
option.
3. Use I/i to select desired option.
4. Press RETURN (
O) to exit the On-Screen
display.
Setting the [User setting] option
1. During playback, press DISPLAY ( ) to
display the on-screen display.
2. Use U/u to select the [Picture Mode]
option.
3. Use I/i to select the [User setting] option,
and press ENTER ().
4. Use U/u/I/i to adjust the [Picture Mode]
options.
Select [Default] option then press ENTER
( ) to reset the all adjustments.
5. Use U/u/I/i to select the [Close] options,
and press ENTER () to nish setting.

48 Operation
Operation
4
Enjoying BD-LIVE
This unit allows you to enjoy functions such as
picture-in-picture, secondary audio and Virtual
packages, etc., with BD-Video supporting
BONUSVIEW (BD-ROM version 2 Pro le 1
version 1.1/ Final Standard Pro le).
Secondary video and audio can be played from
a disc compatible with the picture-in-picture
function. For the playback method, refer to the
instructions in the disc.
In addition to the BONUSVIEW function, BD-
Video supporting BD-LIVE (BD-ROM version
2 Pro le 2) that has a network extension
function allows you to enjoy more functions
such as downloading new movie trailers by
connecting this unit to the internet.
1. Check the network connection and settings
(pages 28-30).
2. Insert a USB storage device to the USB port
on the front panel.
A USB storage device is needed to
download bonus content.
USB Connection
3 . Press HOME MENU, and set the [BD-LIVE
connection] option on the [Setup] menu
(page 37).
Depending on the disc, the BD-LIVE
function may not operate if
[BD-LIVE connection] option is set to
[Partially Permitted].
4 . Insert a BD-ROM with BD-LIVE.
The operations may di er depending on
the disc. Refer to the manual supplied with
the disc.
NOTE
• Do not extract the connected USB device while
content is being downloaded or a Blu-ray disc is
still in the disc tray. Doing so may damage the
connected USB device and BD-LIVE features may
not operate properly with the damaged USB
device anymore. If the connected USB device
seems damaged from such an action, you can
format the connected USB device from the PC
and reuse it with this player.
• Some BD-LIVE contents may be restrictively
accessed in some territories by contents
provider’s own decision.
• It may take up to several minutes to load and
start enjoying BD-LIVE contents.

50 Operation
Operation
4
Selecting a subtitle le
MOVIE
If a movie le name and the subtitle le
name are the same, subtitle le is played
automatically when playing the movie le.
If the subtitle le name is di erent with the
movie le name, you need to select the subtitle
le on the [Movie] menu before playing the
movie.
1. Use U/u/I/i to select the subtitle le you
wish to play in the [Movie] menu.
2. Press ENTER ().
Press ENTER ( ) again to deselect the
subtitle le. Selected subtitle le will be
displayed when you play the movie le.
NOTE
• If you press
x STOP during playback, the
subtitle selection is cancelled.
• This function may not work in the [Home Link]
feature.
Changing subtitle code page
MOVIE
If the subtitle is not displayed properly, You
can change the subtitle code page to view the
subtitle le properly.
1. During playback, press DISPLAY (
) to
display the on-screen display.
2. Use U/u to select the [Code Page] option.
3. Use I/i to select desired code option.
4. Press RETURN (
O) to exit the On-Screen
display.

51Operation
4
Operation
Viewing a photo
You can view photo les using this player.
1. Press HOME MENU
2. Select [Photo] using
I/i, and press ENTER
( ).
3. Select the device using I/i, and press
ENTER ( ).
When you connect up to two devices, it
appears as above.
4. Select a le using U/u/I/i, and press
ENTER () to view the photo.
To play a slide show
Press B PLAY to start slide show.
To stop a slide show
Press x STOP during slide show.
To pause a slide show
Press X PAUSE/STEP during slide show.
Press B PLAY to re-start the slide show.
To skip to the next/previous photo
While viewing a photo in full screen, press
I or
i to go to the previous or next photo.
NOTE
• The le requirements are described on page 11.
• You can use various playback functions. Refer to
pages 40-47.

52 Operation
Operation
4
Options while viewing a photo
You can use various options while viewing a
photo in full screen.
1. While viewing a photo in full screen, press
DISPLAY () to display the option menu.
2. Select an option using U/u.
a
g
f
e
d
c
b
h
aCurrent photo/Total number of photos
– Use I/i to view previous/next photo.
bSlide Show – Press ENTER () to start or
pause slide show.
cMusic Select – Select the background
music for the slide show.
dMusic –Press ENTER () to start or pause
background music.
eRotate – Press ENTER ( ) to rotate the
photo clockwise.
fZoom – Press ENTER () to display the
[Zoom] menu.
gE ect – Use I/i to select a transition
e ect between photos in a slide show.
hSpeed – Use I/i to select a delaying
speed between photos in a slide show.
3. Press RETURN (
O) to exit the option menu.
Listening to music during a
slide show
You can display photo les while listening to
music les.
1. Press HOME MENU
2. Select [Photo] or [Home Link] using
U/u/I/i, and press ENTER ( ).
3. Select the [Disc] or [USB] option using
I/i,
and press ENTER ( ).
Selecting a server or a share folder is
needed for [Home Link] menu.
4. Select a le using U/u/I/i, and press
ENTER () to view the photo.
5. Press DISPLAY (
) to display the option
menu.
6. Use U/u to select [Music Select] option,
and press ENTER () to display the [Music
Select] menu.

53Operation
4
Operation
7. Use U/u to select a device, and press ENTER
( ).
Devices that you can select may di er
depending on the location of the photo le
you are displaying in full screen.
Photo location Available Device
Disc Disc, USB
USB Disc, USB
Share Folder on
your PC (CIFS)
CIFS
DLNA server DLNA server
8. Use U/u to select a le or a folder you wish
to play.
Select a folder and press ENTER ( ) to
display the lower directory.
Select and press ENTER ( ) to display
the upper directory.
NOTE
When selecting music from [Home Link], folder
selection is not available. Only le selection is
available on the [Home link].
9. Use i to select [OK], and press ENTER ( )
to complete music selection.
Listening to music
The player can play Audio CDs and music les
1. Press HOME MENU
2. Select [Music] using
U/u/I/i, and press
ENTER ( ).
3. Select the device using I/i, and press
ENTER ( ).
When you connect up to two devices, it
appears as above.
4. Select a music le or audio track using
U/u/I/i, and press ENTER () to play the
music.
NOTE
• The le requirements are described on page 11.
• You can use various playback functions. Refer to
pages 40-47.

54 Operation
Operation
4
Audio CD Recording
You can record one desired track or all of the
tracks in Audio CD to a USB storage device.
1. Insert a USB storage device to the USB port
on the front panel.
2. Press Z (OPEN/CLOSE), and place an Audio
CD on the disc tray.
Press
Z (OPEN/CLOSE) to close the disc
tray. The playback starts automatically.
3. Press DISPLAY (
) to display the option
menu.
Or
Press z USB REC button on the remote
control. You can record all musics in the
audio CD.
4. Use U/u to select [CD Recording] option,
and press ENTER () to display the [CD
Recording] menu.
Repeat this step to select tracks as many as
you want.
5. Use U/u to select a track you wish to copy
on the menu, and press ENTER ( ).
Repeat this step to select tracks as many as
you can.
Select all the tracks on an Audio
CD.
Selects an encoding option from
the pop-up menu (128 kbps,
192 kbps, 320 kbps or Lossless).
Cancels the recording and
returns to the previous screen.
6. Use U/u/I/i to select [Start], and press
ENTER ().
7. Use U/u/I/i to select the destination
folder to be copied.
If you want to create a new folder, use
U/u/
I/i to select [New Folder] and press ENTER
( ).
Enter a folder name using the virtual
keyboard, and press ENTER ( ) while [OK] is
selected.
8. Use U/u/I/i to select [OK], and press
ENTER () to start Audio CD recording.
If you want to stop the Audio CD recording,
press ENTER ( ) while [Cancel] is
highlighted.
9. A message appears when Audio CD
recording is completed. Press ENTER ()
to check the music le created in the
destination folder.

55Operation
4
Operation
NOTE
• The table below shows the average recording
time from an audio track with 4 minutes of
playback time to a music le with 192 kbps as an
example.
stop mode during playback
1.4 min. 2 min.
• All times in the above table are approximate.
• Actual recording time for USB storage device
varies depending on the USB storage device’s
ability.
• Make sure that there is minimum of 50 MB free
space when recording into the USB storage
device.
• The length of the music should be longer than
20 seconds for the proper recording.
• Do not turn o this player or extract the
connected USB storage device during Audio CD
recording.
The making of unauthorized copies of
copy-protected material, including computer
programmes, les, broadcasts and sound
recordings, may be an infringement of copyrights
and constitute a criminal o ense.
This equipment should not be used
for such purposes.
Be responsible
Respect copyrights

57Operation
4
Operation
Enjoying the iPod IN mode
You can operate your iPod by using the
supplied remote control and controls on your
iPod.
1. Connect the iPod rmly.
If you turn this unit on, your iPod is
automatically turned on and recharging
starts.
2. Press INPUT/TUNER to select iPod IN mode.
U/u/I/iSelects an option in the menu.
B
/ENTER
Starts playback the music or
video.
XTo pause while it is playing. To
resume playing, press
B (PLAY)
again.
m/MFast-forward or rewind a song
or video
./>Skip the playback forward or
backward .
REPEAT To select a desired repeat
mode: Track
( ), All
( ), O
(No display).
NOTE
This system is compatible with the audio and video
of the iPod(4th generation), iPod nano, iPod classic,
iPod mini, iPod touch and iPhone (iPod shu e is
not supported.).
NOTE
• An error message “CHECK IPOD” or “Connected
iPod model is not supported.” appears when:
- your iPod is not available for the function to be
operated.
• An error message “CHECK IPOD” or “Please
update iPod’s software.” appears when:
- your iPod has an old software version.
t Update your iPod software to latest version.
• If this unit displays an error message, follow the
message. An error message “CHECK IPOD” or
“Please check your iPod.” appears when:
- the communication between this unit and
your iPod is failed.
t Undock & re-dock your iPod in this unit.
- your iPod is not connected rmly.
- this unit recognises your iPod as unknown
device.
- your iPod is exceptionally low on power.
t The battery needs to be charged.
t If you charge the battery while iPod is
extremely low in power, it may take longer
to charge.
• You may use the dock adapter which should
be supplied with your iPod to the dock for the
stable use of the iPod. If you need an adapter,
consult your iPod dealer.
• Compatibility with your iPod may vary
depending on the type of your iPod.
• iPod touch and iPhone have any di erence in
operation other than iPod. You may need any
additional control to use them with this unit.
(e.g. “slide to unlock”)
• If you use an application, make a call, or send
and receive SMS text message, etc. on iPod
touch or iPhone, disconnect it from iPod dock of
this unit and then use it.
• Depending on your iPod’s software version, it
may not be possible to control your iPod from
this unit. We recommend installing the latest
software version.
• The video quality depends on the video sources
on your iPod.
• If you have a problem with your iPod, please visit
www.apple.com/support/ipod.

58 Operation
Operation
4
Radio Operations
Be sure that the antenna is connected.
(Refer to the page 24)
Listening to the radio
1. Press INPUT/TUNER until TUNER (FM)
appears in the display window. The last
received station is tuned in.
2. Press and hold TUNE (-/+) for about two
seconds until the frequency indication
starts to change. Scanning stops when the
unit tunes in a station. Or Press TUNE (-/+)
repeatedly.
3. Adjust the volume by rotating VOLUME on
the front panel or by pressing VOL (+/- ) on
the remote control.
Presetting the Radio Stations
You can preset 50 stations for FM.
Before tuning, make sure that you have turned
down the volume.
1. Press INPUT/TUNER until the TUNER (FM)
appears in the display window.
2. Select the desired frequency by using TUNE
(-/+).
3. Press ENTER () a preset number will ash
in the display window.
4. Press PRESET to select the preset number
you want.
5. Press ENTER (). The station is stored.
6. Repeat the steps 2 to 5 to store other
stations.
Deleting all the saved stations
Press and hold CLEAR for two seconds.
“ERASE ALL” will ash up. Press CLEAR again.
Then all the saved stations are deleted.
Improving poor FM reception
Press D (blue) (ST/ MONO) colored button on
the remote control. This will change the tuner
from stereo to mono and usually improve the
reception.
Specyfikacje produktu
Marka: | Pioneer |
Kategoria: | System domowy |
Model: | HTZ-BD30 |
Potrzebujesz pomocy?
Jeśli potrzebujesz pomocy z Pioneer HTZ-BD30, zadaj pytanie poniżej, a inni użytkownicy Ci odpowiedzą
Instrukcje System domowy Pioneer

15 Stycznia 2025

9 Sierpnia 2024

4 Lipca 2024

3 Lipca 2024

3 Lipca 2024

3 Lipca 2024

3 Lipca 2024

3 Lipca 2024

2 Lipca 2024

2 Lipca 2024
Instrukcje System domowy
Najnowsze instrukcje dla System domowy

23 Września 2024

15 Września 2024

9 Sierpnia 2024

2 Lipca 2024

30 Czerwca 2024

30 Czerwca 2024

30 Czerwca 2024

28 Czerwca 2024