Instrukcja obsługi Black Box LES422A
Przeczytaj poniżej 📖 instrukcję obsługi w języku polskim dla Black Box LES422A (2 stron) w kategorii serwer. Ta instrukcja była pomocna dla 13 osób i została oceniona przez 2 użytkowników na średnio 4.5 gwiazdek
Strona 1/2

724-746-5500 | blackbox.com724-746-5500 | blackbox.com 724-746-5500 | blackbox.com
Page 5 Page 6
© Copyright 2013. Black Box Corporation. All rights reserved.
Black Box and the Double Diamond logo are registered trademarks of
BB Technologies, Inc. UL is a registered trademark of Underwriters
Laboratories. Any other trademarks mentioned in this manual are
acknowledged to be the property of the trademark owners.
Quick Start Guide
2-Port Hardened Serial Server
LES422A
Black Box Tech
Support: FREE! Live.
24 /7. Tech support
the way it should be.
Great tech support is just 30 seconds
away at 724-746-5500 or blackbox.com.
Order toll-free in the U.S.:
Call 877-877-BBOX
(outside U.S. call 1-724-746-5500)
FREE technical support
24 hours a day, 7 days a week:
Call 724-746-5500 or
fax 724-746-0746
Mailing address:
Black Box Corporation
1000 Park Drive
Lawrence, PA 15055-1018
Web site: www.blackbox.com
E-mail: info@blackbox.com
Customer
Support
Information
LES422A Quick Start Guide
Step 12. Save and logout.
• If you have completed the configuration, click
“Save” to save the configuration to the serial server.
• To logout, click the “Logout” button.
Step 13. Test and verify operation.
• Set up serial server as a TCP server on serial port 1.
• Set serial port to RS-232 on serial port 1.
• Set to 9600, 8, N, 1 on serial port 1.
• Loopback serial port 1 by connecting TD to RD.
• Open a DOS window and type “telnet x.x.x.x yyyy,”
where “x.x.x.x” is the IP address of the serial server
and “yyyy” is the port number of the serial port.
• Type characters on the keyboard. The characters
should appear in the window. If not, double-check
your settings.
Step 1. Check for all required hardware.
Your package includes:
• 2-Port Hardened Serial Server
• CD-ROM containing software
• This Quick Start Guide
You will also need:
• Network and serial cables (not included)
• Power supply (not included)
Step 2: Install the hardware.
• Connect a 10- to 48-VDC (58 VDC max.)
power supply (6.0 W required).
• Connect the network cable from the
Hardened Serial Server to a network drop
using a standard serial cable.
• Connect the serial device(s) to the (2) RS-232
DB9 serial connectors with a straight-through
cable for a DCE device or a null-modem cable
for a DTE device.
NOTE: UL® requires one conductor per terminal,
28 to 16 AWG copper-wire, tightening
torque of 5 kg-cm, and 105° C rating
sized for 60° C ampacity.
LES422A Quick Start Guide, rev. 1
724-746-5500 | blackbox.com724-746-5500 | blackbox.com 724-746-5500 | blackbox.com
LES422A Quick Start Guide LES422A Quick Start GuideLES422A Quick Start Guide
Page 4
Step 5. Install Black Box Hardened Serial Server
software.
• Insert the included CD and it should autostart.
• Follow the prompts to install the software.
NOTE: Make sure you have administrative rights and
disable firewalls.
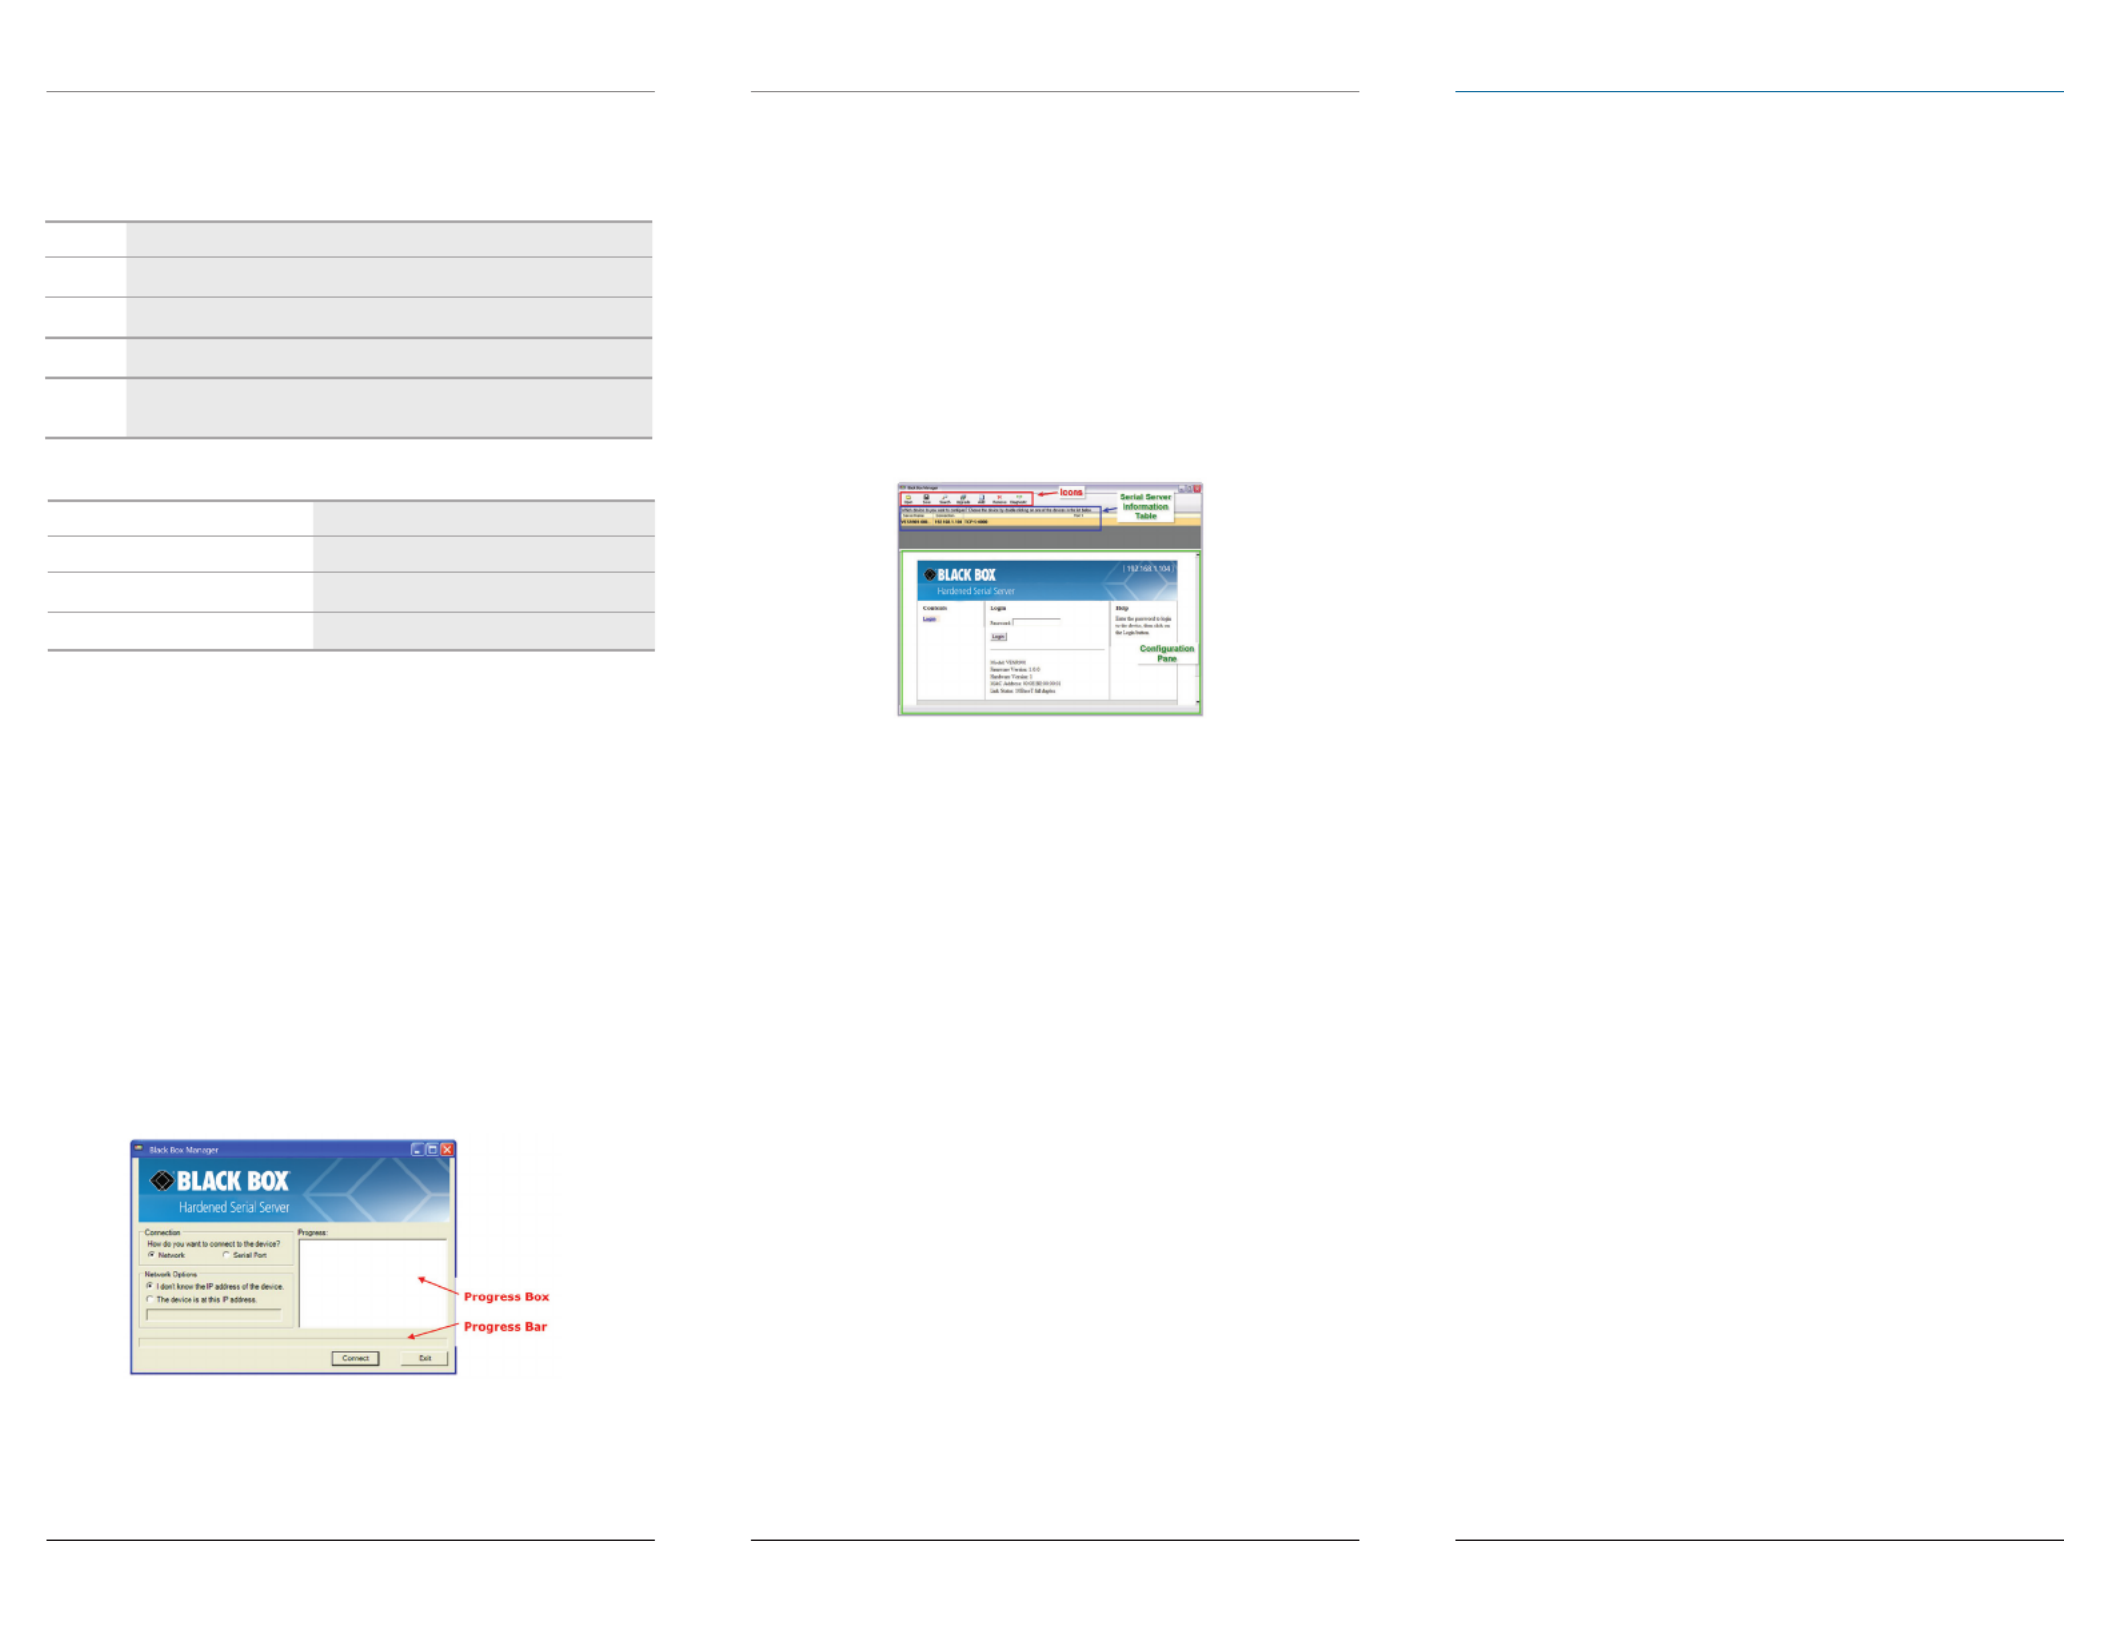
Step 6. Set up Black Box Hardened Serial Server
software.
• Open the software. “Click Start—>Programs—>
Black Box—> Serial Server Software.” The
• To configure via the network, select “Network.”
• If you know the IP address, select “The device is at
• Click “Connect.”
OR
Step 6. Set up the Web interface.
• Open a browser and type the IP address of the
Hardened Serial Server into the address bar.
• When the serial server is found, the “Configuration”
Step 7. Login.
• Click “Login.” (The password is blank from the
factory.)
• The “General” page appears.
Step 8. Set up the network.
• The Hardened Serial Server is set at the factory to
receive an IP assignment from a DHCP server. If a
DHCP server is not available on your network, it will
169.254.102.39
• If this address does not work with your PC, change
- IP Address = 169.254.102.1
- Subnet Mask = 255.255.255.0
- Default Gateway = 169.254.102.100
• If you need to use different settings, refer to the
Step 9. Set up the serial port parameters.
• Click “Port 1 Serial” to open the Serial Port
(RS-232, RS-422, RS-485 2-wire, or RS-485 4-wire).
• Select the baud rate, data bits, stop bits, parity, and
tep 10. Set up the port network parameters.
• Click “Port 1” network to open the “Port Network
• Select the type of network protocol you want to
use: TCP, UDP, VCOM, or Paired Mode.
• If you select TCP, choose whether the Hardened
configure the required IP address, port numbers, and
• If you select UDP, configure the IP addresses, ports
• If you want the serial server to act as a virtual
communications port for a computer, select VCOM.
physical COM port.
• If you want the serial server to operate in Paired
parameters (similar to setting up TCP).
Step 11. Set up advanced parameters.
• If you want to setup Advanced parameters, click
“Advanced” on the Port Network Parameters page.
• If necessary for your application, select “I want to
network,” then set up the Character Count, Forced
Delimiter Removal as required.
• Click “Next.”
Step 3: LED status.
LED Status
Ready
ON when port is open; blinks when data present on serial port.
ON when port is open; blinks when data present on serial port.
ON when device is operating in 100BASE-TX mode. Blinks
Step 4: Mode switch.
Hold in Mode switch for… Result
More than 10 seconds Resets to factory defaults.
Specyfikacje produktu
| Marka: | Black Box |
| Kategoria: | serwer |
| Model: | LES422A |
Potrzebujesz pomocy?
Jeśli potrzebujesz pomocy z Black Box LES422A, zadaj pytanie poniżej, a inni użytkownicy Ci odpowiedzą
Instrukcje serwer Black Box

24 Września 2024
24 Września 2024
10 Września 2024
22 Sierpnia 2024
20 Sierpnia 2024
17 Sierpnia 2024
16 Sierpnia 2024
4 Lipca 2024
11 Maja 2024
Instrukcje serwer
- serwer Sony
- serwer Supermicro
- serwer Lenovo
- serwer Gigabyte
- serwer Acer
- serwer Technics
- serwer Hikvision
- serwer Fujitsu
- serwer Conceptronic
- serwer StarTech.com
- serwer Asus
- serwer Medion
- serwer TRENDnet
- serwer MSI
- serwer Toshiba
- serwer D-Link
- serwer ATen
- serwer APC
- serwer HP
- serwer Tripp Lite
- serwer Cisco
- serwer Moxa
- serwer Synology
- serwer Lindy
- serwer ZyXEL
- serwer Dell
- serwer Linksys
- serwer Digitus
- serwer Vimar
- serwer Netgear
- serwer ELAC
- serwer Intellinet
- serwer HGST
- serwer Revox
- serwer Naim
- serwer SEH
- serwer Planet
- serwer NEC
- serwer LevelOne
- serwer Digi
- serwer Axis
- serwer Asrock
- serwer Abus
- serwer Rocstor
- serwer Western Digital
- serwer Smart-AVI
- serwer Promise Technology
- serwer QNAP
- serwer Chenbro Micom
- serwer Allnet
- serwer Veritas
- serwer IStarUSA
- serwer Silverstone
- serwer Ernitec
- serwer AVerMedia
- serwer Atlona
- serwer Gefen
- serwer Hanwha
- serwer Quantum
- serwer Blackmagic Design
- serwer Kathrein
- serwer Eaton
- serwer Monacor
- serwer Sonnet
- serwer In Win
- serwer Teo
- serwer Megasat
- serwer Areca
- serwer Kramer
- serwer KanexPro
- serwer Raritan
- serwer AMX
- serwer C2G
- serwer Acti
- serwer Sitecom
- serwer Maxdata
- serwer Matrox
- serwer Flir
- serwer Buffalo
- serwer GeoVision
- serwer LaCie
- serwer Valcom
- serwer Asustor
- serwer Intel
- serwer Fantec
- serwer Freecom
- serwer Seagate
- serwer Iomega
- serwer Luxman
- serwer Ibm
- serwer Provision ISR
- serwer TAIDEN
- serwer SIIG
- serwer Advantech
- serwer Extron
- serwer Avocent
- serwer Teradek
- serwer Silex
- serwer Sun
- serwer MvixUSA
- serwer Dual Bay
- serwer Raidsonic
- serwer EMC
- serwer Infortrend
- serwer Opengear
- serwer G-Technology
- serwer EXSYS
- serwer Middle Atlantic
- serwer Mr. Signal
- serwer Atlantis Land
- serwer Lantronix
- serwer NETSCOUT
- serwer Mobotix
- serwer Origin Storage
Najnowsze instrukcje dla serwer
9 Kwietnia 2025
2 Kwietnia 2025

2 Kwietnia 2025
2 Kwietnia 2025
28 Marca 2025
28 Marca 2025
28 Marca 2025

10 Marca 2025
10 Marca 2025
10 Marca 2025