Instrukcja obsługi Telefunken DPF 7911
Telefunken
Cyfrowe ramki na zdjęcia
DPF 7911
Przeczytaj poniżej 📖 instrukcję obsługi w języku polskim dla Telefunken DPF 7911 (126 stron) w kategorii Cyfrowe ramki na zdjęcia. Ta instrukcja była pomocna dla 14 osób i została oceniona przez 2 użytkowników na średnio 4.5 gwiazdek
Strona 1/126

1
Non contractual document subject to change in case of typographical errors (Mktg0609)
ENGLISH
ENGLISH
ENGLISH
ENGLISHENGLISH
DIGITAL PICTURE FRAME INSTRUCTIONS
TELEFUNKEN STYLE SERIES (DPF 7901, DPF 7331, DPF 9321, DPF 10331)
I. Learn about and install your frame ........................................................ 2
1. Box contents ...................................................................................................................... 2
1. Frame diagrams ................................................................................................................. 2
2. Installation ........................................................................................................................... 3
II. Use your frame .......................................................................................... 3
1. Selecting a language ......................................................................................................... 3
2. Reading a memory card or a USB key 3..........................................................................
3. Copying photos to the internal memory ........................................................................ 4
4. Deleting photos .................................................................................................................. 5
III. Selecting the type of files to play ........................................................... 6
1. Photos ................................................................................................................................. 6
2. Videos (only on DPF 7911, DPF 7331, DPF 9331, DPF 10331) ................................. 6
3. Music (only on DPF 7911, DPF 7331, DPF 9331, DPF 10331) .................................. 6
IV. Settings 7......................................................................................................
1. Photo settings .................................................................................................................... 7
2. Calendar settings ............................................................................................................... 9
3. Video settings (only on DPF 7911, DPF 7331, DPF 9331, DPF 10331) .................. 11
4. Music settings (only on DPF 7911, DPF 7331, DPF 9331, DPF 10331) ................. 12
5. System settings ...............................................................................................................13
V. Connecting to a computer .................................................................... 14
VI. Safety instructions .................................................................................. 15
VII. Warranty ................................................................................................... 16
VIII. Specifications .................................................................................... 18

2
Non contractual document subject to change in case of typographical errors (Mktg0609)
ENGLISH
ENGLISH
ENGLISH
ENGLISHENGLISH
I. Learn about and install your frame
Thank you for your recent purchase of a TELEFUNKEN "STYLE Series" digital photo frame. Before
using your device, please consult these operating instructions and keep them so you may refer to them
later on.
1. Box contents
- 1 digital photo frame
- 1 AC adaptor
- 1 remote control
- 1 dust cloth
1. Frame diagrams
Settings
On/Off
Volume
"Up" key
"Right" key
"Down" key
Stop
Slideshow
"Left" key
Copy/Delete
Rotate
Exit
Zoom
Mute
Control buttons
On/Off button
Wall hanger
Adjustable stand
Mini USB port
USB port
SD/MMC card port
XD card port
MS, MSPro, MS Duo, MS Pro
Duo card port
Power input plug
3
Non contractual document subject to change in case of typographical errors (Mktg0609)
ENGLISH
ENGLISH
ENGLISH
ENGLISHENGLISH
2. Installation
- Take your frame and its accessories out of their packaging.
- Remove the plastic film protecting the front of the frame.
- Pull the plastic tab protecting the contacts in the remote control.
- Stand the frame in the desired location, pulling the adjustable stand towards you (see diagram
above).
- Connect the electrical cord to the frame in the space provided.
Plug your frame into an outlet. Your frame will start up automatically.
II. Use your frame
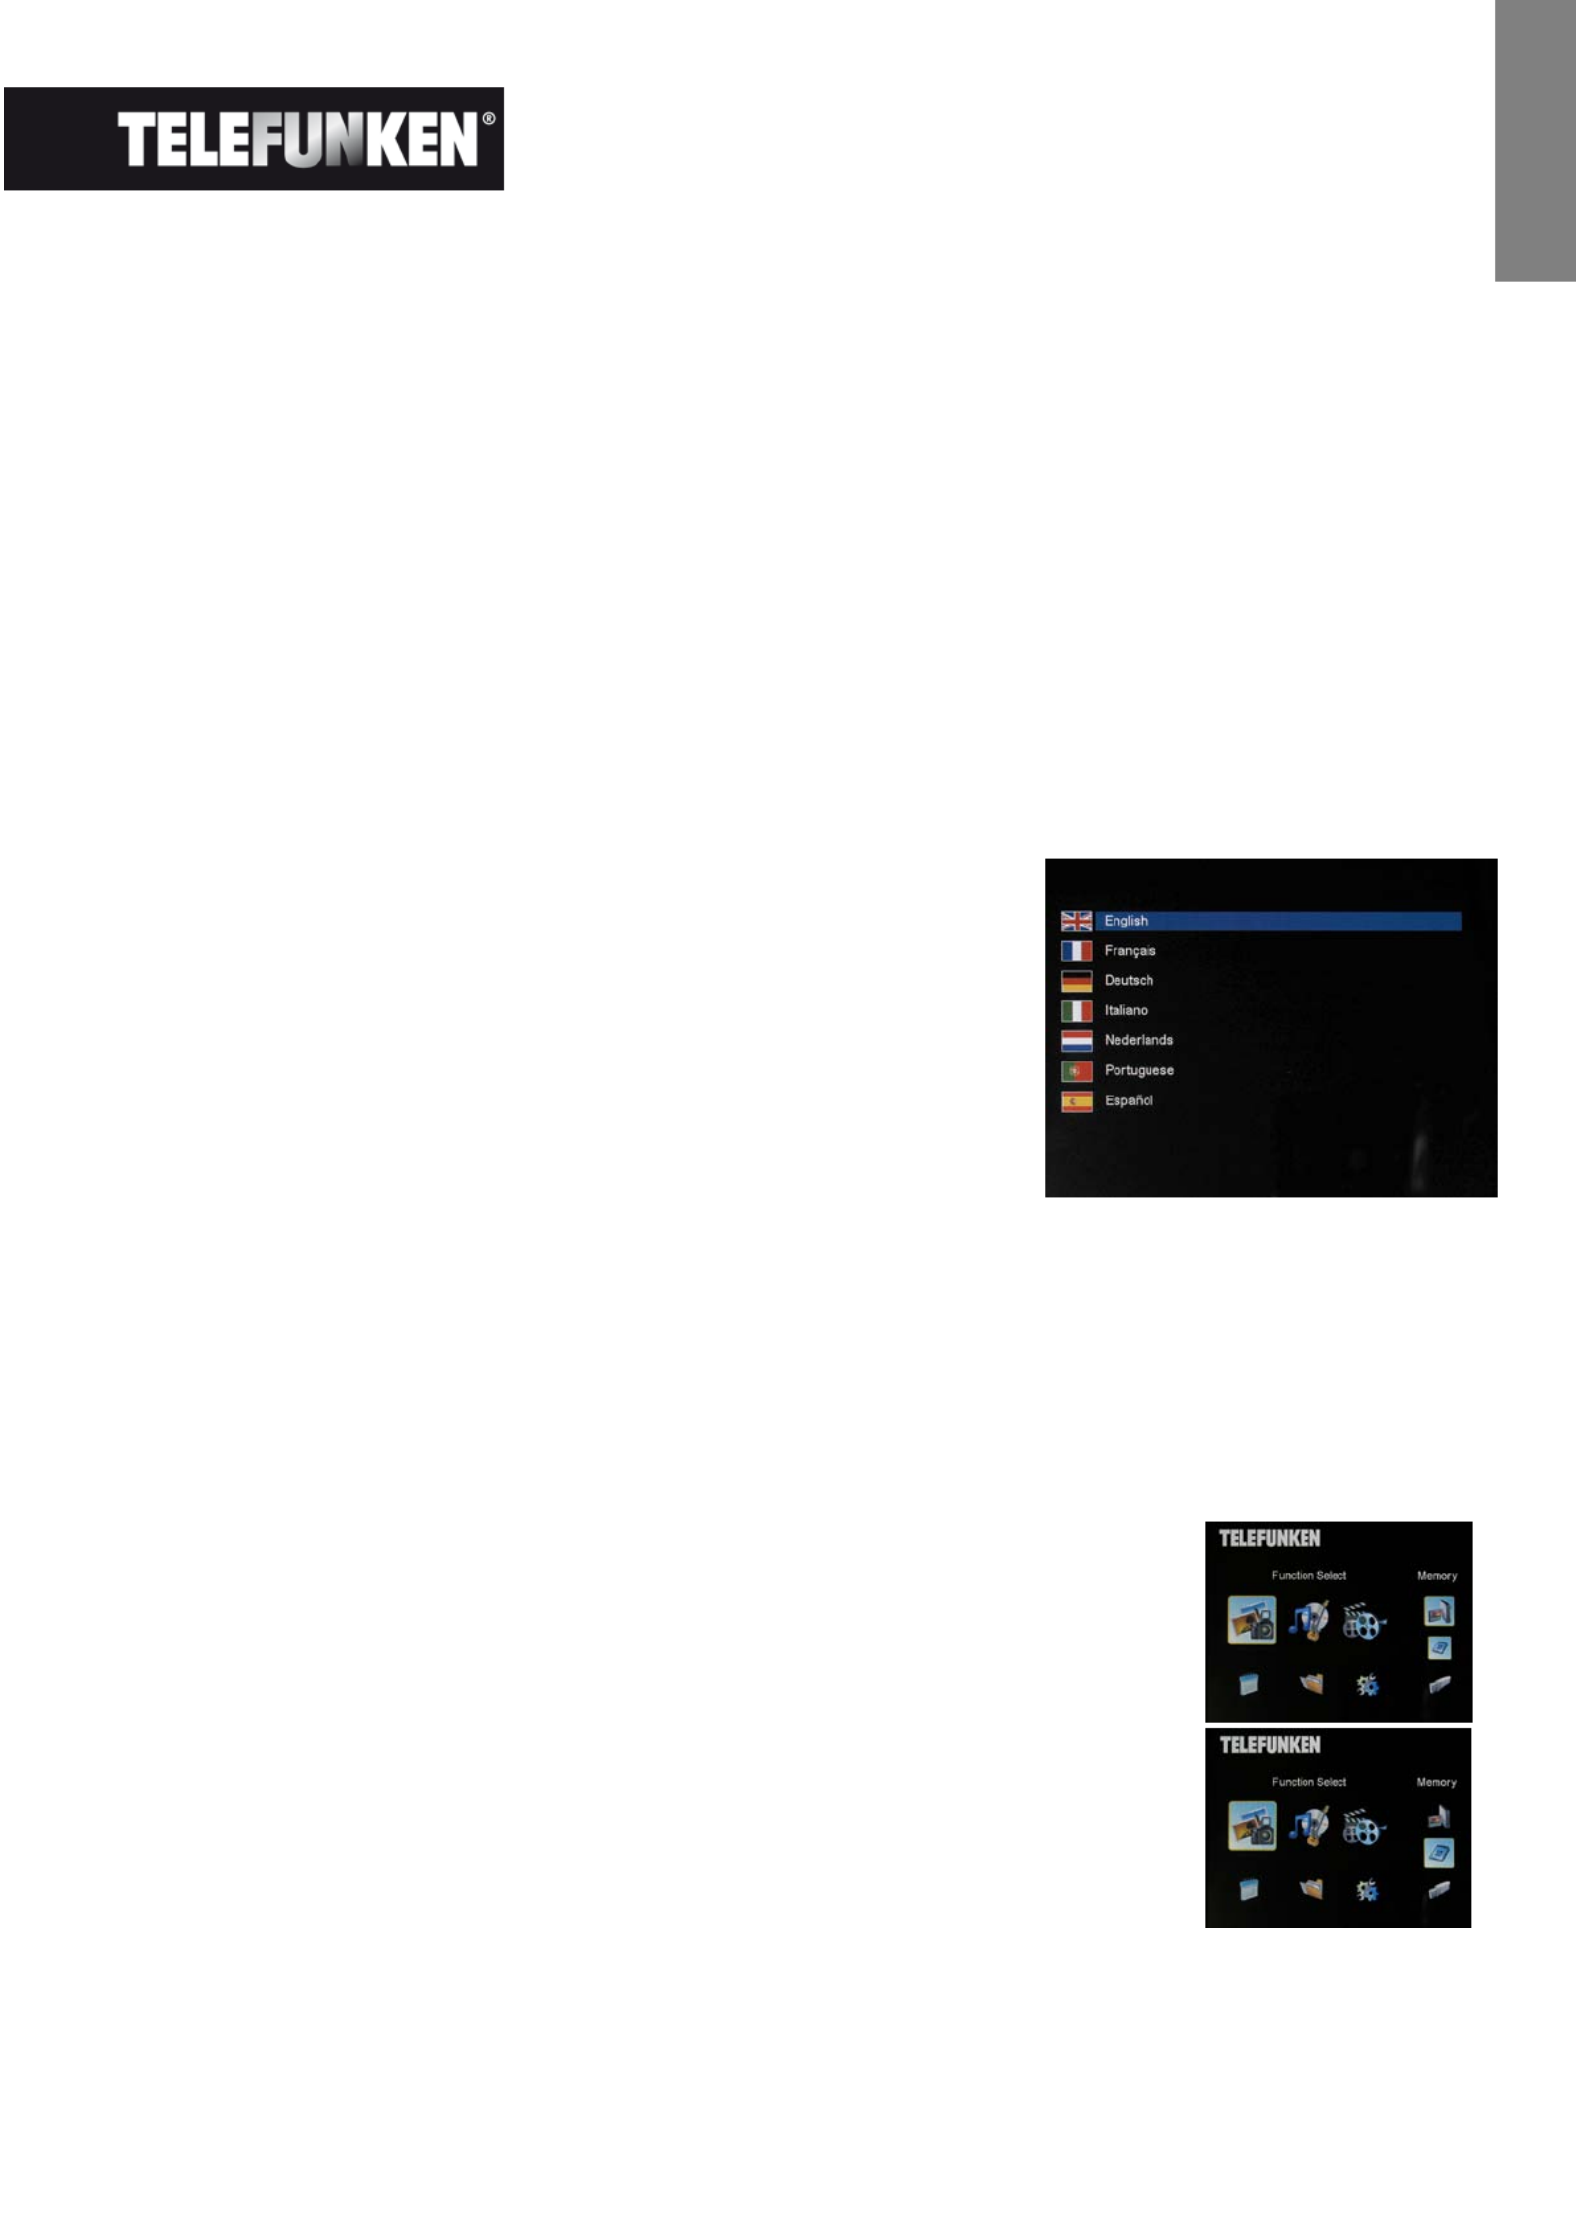
1. Selecting a language
During its first use, the frame will display an initial screen allowing
you to choose the language.
- Select your language using the arrow keys on the remote
control, then press "ENTER".
Once you have selected your language, your frame will begin to
read the photos contained in its internal memory.
2. Reading a memory card or a USB key
If your frame is off:
- Insert your card or USB key in the space provided.
- Switch on your frame: The slideshow will automatically play the contents of your memory card
or USB key.
If your frame is on:
- Press the "Exit" key on your remote as many times as necessary for the
mode selection screen to come up
- Using the “Up /Down” keys on your remote, select the card or key you
want to read (The top icon for internal memory, or the icons for memory
card or USB key)
Press the key on your remote to confirm your choice, then the “Enter”
“Slideshow” key to launch the slideshow.
If your media (memory card, USB key or built in memory) contains music - and if
you want to play a musical slideshow, press the ”Enter” key during the
slideshow. The digital frame will display “Slide with music”.

4
Non contractual document subject to change in case of typographical errors (Mktg0609)
ENGLISH
ENGLISH
ENGLISH
ENGLISHENGLISH
3. Copying photos to the internal memory
There are two methods for copying images from your memory card to the frame's internal memory.
- Copy your photos from the file manager
If you use this method, you can only copy files one at a time, and you will not be able to resize them to
the frame's resolution.
- Press the "Exit" key on your remote as many times as necessary for the mode selection screen
to come up .
- Using the "Left/Right" keys on the remote, select the "Files"
icon and press "Enter".
- Select the photo (or music or video file for versions 7911,
7331, 9331 & 10331) using the "Up/Down" keys on the
remote, and press the key. The screen will "Copy/Del"
display "Copy file? YES/NO". Choose the desired option and
press "Enter". Your file has been copied.
- Copy your photos from the thumbnail mode
Using this method, you can copy all or a selection of photos, with the ability to resize them to the
frame's resolution in order to optimize internal memory capacity.
1. Press the "Exit" key on your remote as many times as necessary for the mode selection screen
to come up.
2. Select the removable medium (memory card or USB key) storing the photos to be copied using
the "Up/Down" . keys on the remote. Press "Enter"
3. Using the "Left/Right" keys, select photo mode and press "Enter". The slideshow will then
launch.
4. Press the "Exit" k ey on the remote to access the thumbnails.
5. Press the "Copy/Del" key. The screen will display "Copy files?" Select "Yes" and press
"Enter".
6. The thumbnails will again be displayed, with a small
white square in the upper right corner of each. Select
the photos to be copied using the "Left/Right -
Up/Down" keys on the remote, pressing "Enter" for
each photo you wish to select. The small white
square then shows a tick mark for each image you select. (If you choose “Copy all”, all the
white squares show a tick mark)

5
Non contractual document subject to change in case of typographical errors (Mktg0609)
ENGLISH
ENGLISH
ENGLISH
ENGLISHENGLISH
7. Press the "Copy/Del" key. Next, select the directory into which you
want to copy your images, then press "Enter"
8. The screen will show a dialog box asking you if you want to resize your
images. (To automatically resize all your photos without passing through
this screen, see p. 9.)
9. Select the desired option using the "Up/Down" keys on the remote and
confirm the choice by selecting "Confirm". Press "Enter". Your photos
are now copied into the internal memory and sized to the frame's
resolution
4. Deleting photos
You can delete photos that are in your frame's internal memory.
- Delete your photos from the file manager
If you use this method, you can only delete one file at a time.
1. Press the "Exit" key on your remote as many times as
necessary for the mode selection screen to come up
2. Using the "Left/Right" keys on the remote, select the "Files"
icon and press "Enter".
3. Select the photo (or music or video file for versions 7911,
7331, 9331, 10331) using the "Up/Down" keys on the remote,
and press the "Copy/Del" key. The screen will display
"Delete file? YES/NO". Choose the desired option and press
"Enter". Your file has been deleted.
- Delete your photos from the thumbnail mode
With this method, you can delete all or a selection of photos in the internal memory.
1. Press the "Exit" key on your remote as many times as necessary for the mode selection screen
to come up.
2. Select the internal memory using the "Up/Down" keys on the remote. Press "Enter".
3. Using the "Left/Right" keys, select the photo mode and press "Enter". The slideshow will then
launch.
4. Press the "Exit" key on the remote to access the
thumbnails.
5. Press the "Copy/Del" key. The screen will display
"Delete?" Select "Yes" and press "Enter".
6. The thumbnails will again be displayed, with a small
white square in the upper right corner of each. Select the photos to be

6
Non contractual document subject to change in case of typographical errors (Mktg0609)
ENGLISH
ENGLISH
ENGLISH
ENGLISHENGLISH
copied using the "Left/Right - Up/Down" keys on the remote, pressing "Enter" for each photo
you wish to select. The small white square then shows a tick mark for each image you select. (If
you choose “Delete all”, all the white squares show a tick mark)
7. Press the "Copy/Del" key, then press "Enter".
8. The screen will display "Delete?"
9. Select the desired option using the "Up/Down" keys on the remote.
Press "Enter". Your photos have now been deleted from the internal
memory
III. Selecting the type of files to play
1. Photos
- Press the "Exit" key twice to display the main screen.
- Using the "Left/Right" arrows on the remote, select the "Photo"
icon.
- Press the "Enter" key: playing will begin.
2. Videos (only on DPF 7911, DPF 7331, DPF 9331, DPF 10331)
- Press the "Exit" key twice to display the main screen.
- Using the "Left/Right" arrows on the remote, select the "Video"
icon.
- Press the "Enter" key: playing will begin.
- Press the "Right" arrow key once to fast forward, then press a
second time to return to play mode.
- Press the "Left" arrow key once to rewind, then press a second time
to return to play mode.
- Press the "Enter" key to pause playback, and press a second time to resume.
- Press the "Vol +" or "Vol -" keys to adjust the sound level.
3. Music (only on DPF 7911, DPF 7331, DPF 9331, DPF 10331)
- Press the "Exit" key twice to display the main screen.
- Using the "Left/Right" arrows on the remote, select the "Music"
icon.
- Press the "Enter" key: playing will begin.
- Press the "Enter" key to pause playback, and press a second time
to resume.
- Press the "Vol +" or "Vol -" keys to adjust the sound level.

7
Non contractual document subject to change in case of typographical errors (Mktg0609)
ENGLISH
ENGLISH
ENGLISH
ENGLISHENGLISH
- You can change the various musical effects (see p. 12) by pressing the "Rotate" key on the
remote.
- 2 You an also change the different playback modes (see p. 1 ) by pressing the "Zoom" key on
your remote.
NORM.: Play once
• : Repeat once
• : Loop
: Random play
IV. Settings
On the main screen, select the "Settings" icon using the
"Left/Right" and "Up/Down" keys on your remote to access the
different settings for your frame.
If you wish, you can also access the settings menu by simply
pressing the "Setup" key on your remote.
When you are in the settings menus, the "Up/Down" keys on the
remote allow you to select the parameter to adjust, and the
"Left/Right" keys allow you to choose the appropriate setting for
the selected parameter.
1. Photo settings
In order to access this menu, select the "Photo settings" option using the "Up/Down" keys on the
remote, then press "Enter". The screen to the right will appear:
You will then be able to change settings using the arrow keys on
the remote:
- Display mode
Select the "Display mode" option onscreen using the
"Up/Down" keys on the remote, then use the "Right/Left" keys
to choose:
. Slideshow: images scroll by one after the other
. Thumbnails: the images display as thumbnails. (Note: When
your frame is in this mode, you can access slideshow or single display by pressing the "Enter" key
once.)
. Single: A single photo displays

8
Non contractual document subject to change in case of typographical errors (Mktg0609)
ENGLISH
ENGLISH
ENGLISH
ENGLISHENGLISH
- Display ratio
Select the "Display ratio" option onscreen using the keys on the remote, then use the "Up/Down"
"Right/Left" keys to choose:
. Fit screen: the photo remains in its original format (a 4:3 photo in a 16:9 frame will leave 2 black
spaces along the sides).
. Crop for full- screen: the photo is centred and cropped accordingly to occupy the entire screen.
. Full-screen: the photo is altered in order to occupy the full screen.
- Duration of slideshow
Select the "Image display time" option onscreen using the "Up/Down" keys on the remote, then use
the "Right/Left" keys to choose:
. 5 s
. 15 s
. 30 s
. 60 s
. 5 min
. 15 min
- Slideshow loop
Select the "Repeat slideshow" option onscreen using the "Up/Down" keys on the remote, then use the
"Right/Left" keys to choose:
. Once: the slideshow is played once.
. Repeat: the slideshow plays in a loop.
- Transition effects
Select the "Transition effects" option onscreen using the keys on the remote, then use the "Up/Down"
"Right/Left" keys to choose from the following effects:
. Random, Snake, Partition, Eraser, Blinds, Random lines, Grid, Cross-fade, Spiral, Close.
- Multiple display
This mode lets you display several images simultaneously (2, 3 or 4 images depending on their
orientation).
Select the "Multiple display" option onscreen using the "Up/Down" keys on the remote, then use the
"Right/Left" keys to choose:
. Off
. On
- Clock
Activating this function lets you display the time in the upper left corner of your frame during the
slideshow.
Select the "Clock" option onscreen using the "Up/Down" keys on the remote, then use the
"Right/Left" keys to choose:
. Off
. On

9
Non contractual document subject to change in case of typographical errors (Mktg0609)
ENGLISH
ENGLISH
ENGLISH
ENGLISHENGLISH
- Image resizing
This option lets you resize your images to the resolution of the frame (480 x 234 for
DPF 7901 and DPF 7911; 800 x 600 for DPF 7321, DPF 7331, DPF 9321, DPF 9331 and DPF 10331).
Resizing optimises internal memory space so you can store over 10,000 images in the internal memory
without losing visual quality.
(For example: a 5-megapixel image occupying 1.5 MB will now only take up approximately 80 K after
resizing.)
Select the "Resizing" option onscreen using the "Up/Down" keys on the remote, then use the
"Right/Left" keys to choose:
. Off
. On
- Automatic cropping
If your images are not in a format proportional to your picture frame, black spaces will appear at the top
and bottom of your 4:3 frame (if your images are 16:9 or 3:2), or along the sides for your 16:9 frame (if
your images are 4:3).
If you have activated resizing, you can activate the automatic cropping function when you copy images
to your frame in order to display your images without distortion or blank spaces.
Select the "Crop while copying" option onscreen using the "Up/Down" keys on the remote, then use
the "Right/Left" keys to choose:
. Off
. On
- Automatic resizing
If image resizing is activated, by default a screen asking if you want to resize your images will appear
when you copy them. Automatic resizing mode will allow the frame to resize all your images without
passing through this selection screen. As a result, all your images will be resized without your
intervention.
Select the "Indicate process while copying" option onscreen using the "Up/Down" keys on the remote,
then use the "Right/Left" keys to choose:
. Off
. On
2. Calendar settings
If you want to display the calendar on your frame, press the "Exit" key on
your remote as many times as necessary to display the mode selection
screen. Use the "Right/Left" keys to select the calendar icon and press
"Enter".

10
Non contractual document subject to change in case of typographical errors (Mktg0609)
ENGLISH
ENGLISH
ENGLISH
ENGLISHENGLISH
When you are in the settings menu, select the line using the "Up/Down"
keys on the remote in order to access this menu and press "Enter".
You can then make adjustments using the remote's arrow keys:
- Calendar display mode
This mode allows you to display:
. A monthly calendar
. A daily calendar
. A clock
In the calendar display modes, slideshow images scroll to the side.
In clock mode, only the time and date are displayed.
Select the "Display mode" option onscreen using the keys on the remote, then use the "Up/Down"
"Right/Left" keys to choose the mode desired.
- Date
Select the "Date" option onscreen using the "Up/Down" keys on the remote, then:
- Use the "Right/Left" keys to set the month
- Press the "Down" key to select day
- Press the "Right/Left" keys to set the day
- Press the "Down" key to select year
- Press the "Right/Left" keys to set the year
To return to the previous parameter, press the key on the remote."Up"
- Time display mode (12- - or 24 hour)
Select the "Clock mode" option onscreen using the keys on the remote, then press the "Up/Down"
"Right/Left" keys to choose 12- - or 24 hr format.
- Time
Select the "Clock time" option onscreen using the keys on the remote, then:"Up/Down"
- Use the "Right/Left" keys to set the hour
- Press the "Down" key to select minutes
- Press the "Right/Left" keys to set the minutes
To return to the previous parameter, press the key on the remote."Up"
- Alarm status
(only on DPF 7911, DPF 7331, DPF 9331, DPF 10331)
This setting lets you activate or disable the alarm.
Select the "Alarm status" option onscreen u keys on the remote, then press the sing the "Up/Down"
"Right/Left" keys to choose "On" or "Off".

11
Non contractual document subject to change in case of typographical errors (Mktg0609)
ENGLISH
ENGLISH
ENGLISH
ENGLISHENGLISH
- Alarm time
(only on DPF 7911, DPF 7331, DPF 9331, DPF 10331)
To set the time for the alarm, select the "Clock time" option onscreen using the "Up/Down" keys on
the remote, then:
- Use the "Right/Left" keys to set the hour
- Press the "Down" key to select minutes
- Press the "Right/Left" keys to set the minutes
To return to the previous parameter, press the key on the remote."Up"
- Alarm frequency
(only on DPF 7911, DPF 7331, DPF 9331, DPF 10331)
Select the "Alarm frequency" option onscreen using the "Up/Down" keys on the remote, then press the
"Right/Left" keys to choose:
. Once
. Everyday
. Monday- Friday
. Weekend
3. Video settings (only on DPF 7911, DPF 7331, DPF 9331, DPF 10331)
In the settings menu, select the "Video settings" line using the "Up/Down"
keys on your remote and press "Enter".
In this menu you can choose:
- Display mode
Select the "Display mode" option onscreen using the "Up/Down" keys on
the remote, then press the "Right/Left" keys to choose:
. Original dimensions: your video will display in its original format
. Full-screen: your video will display in 4:3 for DPF models 7331, 9321 and 10331, or in 16:9 for DPF
models 7901 and 7911
- Playback mode
Select the "Playback mode" option onscreen using the "Up/Down" keys on the remote, then press the
"Right/Left" keys to choose:
. Once: your video will only play once
. Repeat: your video will play in a loop
- Automatic play
Activating automatic play lets you play your video files automatically, as soon as video mode is
selected.

12
Non contractual document subject to change in case of typographical errors (Mktg0609)
ENGLISH
ENGLISH
ENGLISH
ENGLISHENGLISH
Select the "Automatic play" option onscreen using the keys on the remote, then press the "Up/Down"
"Right/Left" keys to choose:
. On
. Off
4. Music settings (only on DPF 7911, DPF 7331, DPF 9331, DPF 10331)
In the settings menu, select the "Music settings" line using the "Up/Down" keys on your remote, and
then press "Enter".
You can set:
- Playback mode
Select the "Playback mode" option onscreen using the "Up/Down" keys on
the remote, then press the "Right/Left" keys to choose:
. Once: each piece will only play once
. Repeat once: each piece will play twice
. Repeat: the pieces will play in a loop
. Random: the pieces will play randomly
- Musical effects
Your TELEFUNKEN frame has an equalizer to adapt the sound to the type of music being listened to.
Select the "Equalizer" option onscreen using the "Up/Down" keys on the remote, then press the
"Right/Left" keys to choose:
. Normal
. Rock
. Pop
. Classical
. Mellow
. Jazz
- Equalizer display during playback
When playing a music file, you can display the equalizer on the screen of your TELEFUNKEN frame.
Select the "Equalizer" option onscreen using the "Up/Down" keys on the remote, then press the
"Right/Left" keys to choose:
. On
. Off
- Automatic play
Activating automatic play lets you play your audio files automatically, as
soon as audio mode is selected.
Select the "Automatic play" option onscreen using the keys on the remote, then press the "Up/Down"
"Right/Left" keys to choose:
. On
. Off

13
Non contractual document subject to change in case of typographical errors (Mktg0609)
ENGLISH
ENGLISH
ENGLISH
ENGLISHENGLISH
5. System settings
This menu allows you to set the operating parameters of your frame.
- Language
You can change the operating language for your frame at any time in this
menu.
Select the "Language" option onscreen using the "Up/Down" keys on the
remote, then press the keys to choose:"Right/Left"
. French
. German
. Italian
. Dutch
. Portuguese
. Spanish
. English
- Brightness
Select the "Brightness" option onscreen using the "Up/Down" keys on the remote, then press the
"Right/Left" keys to adjust the brightness.
- Contrast
Select the "Contrast" option onscreen using the "Up/Down" keys on the remote, then press the
"Right/Left" keys to adjust the contrast.
- Colour saturation
Select the "Saturation" option onscreen using the "Up/Down" keys on the remote, then press the
"Right/Left" keys to adjust the saturation.
- Tint
Select the "Tint" option onscreen using the "Up/Down" keys on the remote, then press the
"Right/Left" keys to adjust the tint.
- Programmed automatic start- up
This setting lets you activate or disable programmed automatic start-up for your TELEFUNKEN frame.
Select the "Start- up" option onscreen using the "Up/Down" keys on the remote, then press the
"Right/Left" keys to choose:
. On
. Off
- Programmed start- up time
Select the "Automatic start-up time" option onscreen using the "Up/Down" keys on the remote, then:
- Press the "Right/Left" keys to set the hour
- Press the "Down" key to select minutes

14
Non contractual document subject to change in case of typographical errors (Mktg0609)
ENGLISH
ENGLISH
ENGLISH
ENGLISHENGLISH
- Press the "Right/Left" keys to set the minutes
Press the key to go back."Up"
- Programmed automatic shutdown
This setting lets you activate or disable programmed shutdown for your TELEFUNKEN frame.
Select the "Shutdown" option onscreen using the "Up/Down" keys on the remote, then press the
"Right/Left" keys to choose:
. On
. Off
- Programmed automatic shutdown time
Select the "Automatic shutdown time" option onscreen using the "Up/Down" keys on the remote, then:
- Press the "Right/Left" keys to set the hour
- Press the "Down" key to select minutes
- Press the "Right/Left" keys to set the minutes
Press the key to go back."Up"
- Frequency of automatic start-up and shutdown
Select the "Shutdown" option onscreen using the "Up/Down" keys on the remote, then press the
"Right/Left" keys to choose:
. Once
. Everyday
. Monday- Friday
. Weekend
- Rebooting your frame
If the frame is handled incorrectly, it may be useful to reset the frame to its default settings. To do so,
select the "Reset" option onscreen using the keys on the remote, then press the "Up/Down" "Enter"
key.
Note: After rebooting, the language selection screen will appear during the following start-up, just as it
did for its first use.
V. Connecting to a computer
It is possible to transfer files into the frame by connecting it to your personal computer. To do so,
connect your frame to the computer with a USB cable (mini-USB port on the frame, and standard
USB port for the computer), then turn on your frame: the frame's screen will show "PC connection..."
Return to normal operation after disconnecting
On your computer, the following dialog box will appear:

15
Non contractual document subject to change in case of typographical errors (Mktg0609)
ENGLISH
ENGLISH
ENGLISH
ENGLISHENGLISH
- Click "Open folder and display files" in order to view the contents of the internal memory.
The following screen will appear:
Open the directory storing the files you want to transfer to the frame, and place them in the desired
folder using "copy/paste" or "drag and drop".
Caution! Photos transferred in this way will not be resized.
- Disconnect the USB cable: your frame will restart automatically.
VI. Safety instructions
Handle the digital photo frame with care, and avoid touching the screen; fingerprints are difficult to
remove.
Always set the digital photo frame on a flat and stable surface to prevent it from falling and being
damaged.
Avoid exposing the digital photo frame to the sun or high temperatures, as these may damage the
frame or reduce its operational life. Do not place it near heat sources like radiators or space heaters. Do
not position the frame facing direct sunlight in order to avoid reflections.
Avoid exposing the digital photo frame to rain, water, or moisture. Do not place it in a sink or basin
where it may come in contact with water.

16
Non contractual document subject to change in case of typographical errors (Mktg0609)
ENGLISH
ENGLISH
ENGLISH
ENGLISHENGLISH
Never place heavy or sharp objects on the frame, the screen, or the frame's power supply.
Make sure not to plug the digital photo frame into an outlet or cord with a power supply that is too high.
This may cause overheating, a fire, or electrical shock.
Be careful of the location of the power cord; it must not be walked on or come in contact with other
objects. Do not place the cord under a rug. Regularly check the condition of the cord to prevent
damage. If the cord is damaged, unplug it and replace it.
Vent
Vent
Vent
VentVentilatio
ilatio
ilatio
ilatioilation
n
n
nn
The openings and spaces for memory cards allow the frame to vent.
To ensure optimal use of the frame and to prevent overheating, these openings must not be covered or
blocked.
Keep the digital frame at a sufficient distance from the wall to ensure it vents.
Do not place the digital photo frame on a bed or sofa so that it does not overheat. Caution!
Never remove the plastic cover on the back of the frame. The digital photo frame has electrical circuits
and you could be hurt if you touch them.
Do not try to repair the digital photo frame by yourself.
VII. Warranty
The warranty does not cover damage caused if you (or any unauthorized person) tried to repair the
frame.
If the frame is emitting smoke, noise, or an unusual smell, immediately turn it off and unplug it. Contact
your store.
If you do not use the digital frame for a while, make sure to unplug the power cord.
The warranty concerns the digital photo frame and does not include the accessories. The following are
considered accessories:
The power supply unit,
The remote control (according to model).
However, these accessories may be ordered from our technical division:
By email: assistance@sopeg.fr
Warranty
Warranty
Warranty
WarrantyWarranty p
p
p
p period
eriod
eriod
erioderiod
This digital frame is under warranty for 12 months. The warranty period begins on the date the frame is
purchased.
The warranty must be proven by presenting the original invoice or receipt on which the date and model
purchased appear.
C
C
C
CCoverage
overage
overage
overageoverage
A defective digital frame must be returned complete to your distributor with an explanation.
If this digital frame presents a defect during the warranty per Sales Service will iod, the authorized After-
repair any defective component or manufacturing defect. The After-Sales Service will unilaterally decide
whether to repair or replace the digital frame, in part or in whole.
The initial purchase date will determine the starting date for the warranty period.
If the digital frame is repaired or exchanged by our After Sales Service, the warranty period is not -
extended.

17
Non contractual document subject to change in case of typographical errors (Mktg0609)
ENGLISH
ENGLISH
ENGLISH
ENGLISHENGLISH
Ex
Ex
Ex
ExExclusions
clusions
clusions
clusionsclusions
Damage or defects caused by the improper use or handling of the digital frame, or by the use of
accessories, which are not original or not recommended in these instructions, are not covered by the
warranty.
The warranty does not cover damage caused by outside elements, like lightning, water, or fire, or any
other damage caused during transport.
No warranty coverage may be claimed if the digital frame's serial number has been modified, removed,
erased, or made illegible.
No warranty coverage may be claimed if the digital frame has been repaired, altered, or modified by the
buyer or any repair personnel not officially qualified and authorized.
The manufacturer does not guarantee the technical properties described in this manual. The hardware
and accessories described in this manual are subject to change without advance notice. For this
reason, the manufacturer reserves the right to change the related documents, components, options,
and characteristics without advance notice.
Compliance with current regulations:
This digital frame complies with current CE marking standards, and is compatible with the RoHS
standard.
Recycling end life electrical equipment and electronics- -of
Used electrical and electronic devices must not be discarded with ordinary household refuse.
The presence of the symbol on the product or its packaging serves as a reminder of this.
Some materials constituting this product may be recycled if you take them to an appropriate recycling
centre. By reusing the components and raw materials of old devices, you contribute significantly to
protecting the environment.
For further information on collection sites for used equipment, you can enquire at your city hall, the
waste treatment department, or the shop where you purchased the product.

18
Non contractual document subject to change in case of typographical errors (Mktg0609)
ENGLISH
ENGLISH
ENGLISH
ENGLISHENGLISH
VIII. Specifications
Characteristic DPF 7901 DPF 7911 DPF 7321 DPF 7331 DPF 9321 DPF 9331 DPF 10331
Dimensions 7 ˝ 7 ˝ 7 ˝ 7 ˝ ˝ ˝ 8.4 8.4 10,4’’
Resolution 480 x 234 480 x 234 800 x 600 800 x 600 800 x 600 800 x 600 800 x 600
Image ratio 16/9 16/9 4/3 4/3 4/3 4/3 4/3
Internal
memory
128 MB 128 MB 2 GB 2 GB 2 GB 2 GB 2 GB
Audio/Video
NO
YES
NO
YES
NO
YES
YES
Compatible
cards
SD/MMC,
MS, XD,
USB keys
SD/MMC,
MS, XD,
USB keys
SD/MMC,
MS, XD,
USB keys
SD/MMC,
MS, XD,
USB keys
SD/MMC,
MS, XD,
USB keys
SD/MMC,
MS, XD,
USB keys
SD/MMC,
MS, XD,
USB keys
Auto resizing YES YES YES YES YES YES YES
Auto rotation YES YES YES YES YES YES YES
Power input 100 240V -
AC 50/60
Hz
100 240V -
AC 50/60
Hz
100 240V -
AC 50/60
Hz
100 240V -
AC 50/60
Hz
100 240V -
AC 50/60
Hz
100 240V -
AC 50/60
Hz
100 240V -
AC 50/60
Hz
Power output 5V DC 2Ah 5V DC 2Ah 5V DC 2Ah 5V DC 2Ah 5V DC 2Ah 5V DC 2Ah 9V DC 2Ah
Dimensions 205 x 135 x
20 mm
205 x 135 x
20 mm
195 x 149 x
20 mm
195 x 149 x
20 mm
225 x 178 x
20 mm
225 x 178 x
20 mm
264 x 210 x
25 mm
Weight 362 g (0.8
lb)
362 g (0.8
lb)
424 g (0.9
lb)
424 g (0.9
lb)
520 g (1.1
lb)
520 g (1.1
lb)
900 g (1.98
lb)
System
compatibility
Windows
XP, Vista,
Mac OS
9.0 and
later
Windows
XP, Vista,
Mac OS
9.0 and
later
Windows
XP, Vista,
Mac OS
9.0 and
later
Windows
XP, Vista,
Mac OS
9.0 and
later
Windows
XP, Vista,
Mac OS
9.0 and
later
Windows
XP, Vista,
Mac OS
9.0 and
later
Windows
XP, Vista,
Mac OS
9.0 and
later

1
Dokument ohne vertraglichen Charakter. Änderungen aufgrund von Druckfehlern bleiben vorbehalten (Mktg0609).
DEUTSCH
DEUTSCH
DEUTSCH
DEUTSCHDEUTSCH
BEDIENUNGSANLEITUNG DIGITALBILDERRAHMEN
TELEFUNKEN-SERIE „STYLE“ (DPF 7901, DPF 7331, DPF 9321, DPF 10331)
I. Auspacken und Installieren Ihres Bilderrahmens ............................... 2
1. Inhalt der Verpackung ....................................................................................................... 2
2. Abbildungen des Bilderrahmens ..................................................................................... 2
3. Installierung 3........................................................................................................................
II. Benutzung Ihres Bilderrahmens ............................................................. 4
1. Sprachauswahl 4..................................................................................................................
2. Lesen einer Speicherkarte oder eines USB-Sticks ...................................................... 4
3. Kopieren von Fotos in den internen Speicher .............................................................. 5
4. Löschen von Fotos ............................................................................................................ 6
III. Auswahl des zu lesenden Dateityps ...................................................... 8
1. Fotos .................................................................................................................................... 8
2. Videos (nur bei DPF 7911, DPF 7331, DPF 9331 und DPF 10331) 8..........................
2. Musik (nur bei DPF 7911, DPF 7331, DPF 9331 und DPF 10331) ............................ 9
IV. Einstellungen ............................................................................................. 9
1. Fotoeinstellung ................................................................................................................. 10
2. Kalendereinstellung ......................................................................................................... 12
3. Videoeinstellungen (nur bei DPF 7911, DPF 7331, DPF 9331, DPF 10331) .......... 14
4. Musikeinstellungen (nur bei DPF 7911, DPF 7331, DPF 9331, DPF 10331) ......... 15
5. lung Systemeinstel ........................................................................................................... 16
V. Verbindung mit einem Computer ......................................................... 19
VI. Sicherheitshinweise ............................................................................... 20
VII. Garantie .................................................................................................... 20
VIII. Technische Merkmale ...................................................................... 22

2
Dokument ohne vertraglichen Charakter. Änderungen aufgrund von Druckfehlern bleiben vorbehalten (Mktg0609).
DEUTSCH
DEUTSCH
DEUTSCH
DEUTSCHDEUTSCH
I. Auspacken und Installieren Ihres Bilderrahmens
Vielen Dank für Ihren Kauf eines digitalen Bilderrahmens der „ Serie“ von TELEFUNKEN. Bevor Sie STYLE-
Ihr Gerät benutzen, lesen Sie bitte die vorliegende Gebrauchsanweisung durch und bewahren Sie sie gut
auf, um später auf sie zurückgreifen zu können.
1. Inhalt der Verpackung
- 1 digitaler Bilderrahmen
- 1 Netzadapter
- 1 Fernbedienung
- 1 Reinigungstuch
2. Abbildungen des Bilderrahmens
Kontrolltasten
An/Aus-Taste
Wandaufhänger
Justierbarer
Ständer
Mini-USB-Anschluss
Anschluss für USB-Sticks
Anschluss für SD/MMC-
Speicherkarten
Anschluss für XD-
Speicherkarten
Anschluss für
Speicherkarten MS, MS Pro,
MS Duo, MS Pro Duo
Anschluss für die
Netzspannung

3
Dokument ohne vertraglichen Charakter. Änderungen aufgrund von Druckfehlern bleiben vorbehalten (Mktg0609).
DEUTSCH
DEUTSCH
DEUTSCH
DEUTSCHDEUTSCH
3. Installierung
- Nehmen Sie Ihren Bilderrahmen und sein Zubehör aus der Verpackung.
- Entfernen Sie die Schutzfolie von der Vorderseite des Bilderrahmens.
- Ziehen Sie den Plastikstreifen zum Schutz der Kontakte der Fernbedienung ab.
- Stellen Sie den Bilderrahmen an der gewünschten Stelle auf, indem Sie den justierbaren Ständer in
Ihre Richtung ziehen (s. Abbildung oben).
- Schließen Sie das Netzkabel an der vorgesehenen Stelle am Bilderrahmen und an einer Steckdose
an.
- Ihr Bilderrahmen schaltet sich automatisch ein.
Einstellungen
Ein/Aus
Lautstärke
Taste „Hoch“
Taste „Rechts“
Taste „Runter“
Stopp
Diashow
Taste „Links“
Kopieren/Löschen
Drehen
Ende
Zoom
Ton aus

4
Dokument ohne vertraglichen Charakter. Änderungen aufgrund von Druckfehlern bleiben vorbehalten (Mktg0609).
DEUTSCH
DEUTSCH
DEUTSCH
DEUTSCHDEUTSCH
II. Benutzung Ihres Bilderrahmens
1. Sprachauswahl
Bei der ersten Benutzung des Bilderrahmens erscheint zunächst ein
Bildschirm für die Auswahl der Benutzersprache.
- Wählen Sie Ihre Sprache mithilfe der Pfeiltasten der
Fernbedienung aus und drücken Sie auf „Enter
„Enter
„Enter
„Enter„Enter“.
“.
“.
“.“.
Sobald Sie Ihre Sprache ausgewählt haben, beginnt der Bilderrahmen,
die im internen Speicher befindlichen Fotos abzuspielen.
2. Lesen einer Speicherkarte oder eines USB-Sticks
Falls I
Falls I
Falls I
Falls IFalls Ihr Bilderrahmen ausg
hr Bilderrahmen ausg
hr Bilderrahmen ausg
hr Bilderrahmen ausghr Bilderrahmen ausgeschaltet i
eschaltet i
eschaltet i
eschaltet ieschaltet ist:
st:
st:
st: st:
- Führen Sie Ihre Speicherkarte oder Ihren USB Stick an der hierfür vorgesehenen Stelle ein.-
- Schalten Sie Ihren Bilderrahmen ein. Die Diashow spielt den Inhalt Ihrer Speicherkarte oder Ihres
USB-Sticks automatisch ab.
Falls I
Falls I
Falls I
Falls IFalls Ihr Bilderrahmen eing
hr Bilderrahmen eing
hr Bilderrahmen eing
hr Bilderrahmen einghr Bilderrahmen eingeschaltet i
eschaltet i
eschaltet i
eschaltet ieschaltet ist:
st:
st:
st:st:
- Drücken Sie so häufig auf die „Exit“
„Exit“
„Exit“
„Exit“„Exit“-Taste Ihrer Fernbedienung, bis die
Modus- Auswahl auf dem Bildschirm angezeigt wird.
- Wählen Sie mithilfe der Tasten „Hoch/Runter“
„Hoch/Runter“
„Hoch/Runter“
„Hoch/Runter“ „Hoch/Runter“ Ihrer Fernbedienung die
Speicherkarte oder den USB-Stick, von der/dem abgespielt werden soll.
(
Internal memory
Internal memory
Internal memory
Internal memoryInternal memory für internen Speicher, SD, XD, MS
SD, XD, MS
SD, XD, MS
SD, XD, MS SD, XD, MS oder USB
USB
USB
USBUSB für einen
USB-Stick)
- Drücken Sie auf die „E
„E
„E
„E„Enter“
nter“
nter“
nter“nter“-Taste Ihrer Fernbedienung, um Ihre Wahl zu
bestätigen, und anschließend auf die Taste „Slide
„Slide
„Slide
„Slide„Slide Show“
Show“
Show“
Show“ Show“, um die Diashow
zu starten
Falls auf Ihre Datenspeicher, USB Schlüssel oder internen Speicher Musik gespeichert ist, und falls Sie
ein musikales Diaporama wünschen, dann drücken Sie bitte die 'Enter' Taste der Abstandsbedienung,
während das Lesen vom Diaporama. Auf Ihr Bildschirm sehen Sie dann 'Musik Auto'

5
Dokument ohne vertraglichen Charakter. Änderungen aufgrund von Druckfehlern bleiben vorbehalten (Mktg0609).
DEUTSCH
DEUTSCH
DEUTSCH
DEUTSCHDEUTSCH
3. Kopieren von Fotos in den internen Speicher
Es gibt zwei Methoden, um die Bilder Ihrer Speicherkarte in den internen Speicher des Bilderrahmens zu
kopieren.
- Kopieren Ihrer Fot
Kopieren Ihrer Fot
Kopieren Ihrer Fot
Kopieren Ihrer FotKopieren Ihrer Fotos über den Datei
os über den Datei
os über den Datei
os über den Dateios über den Dateimanager
manager
manager
managermanager
Falls Sie diese Methode anwenden, können Sie die Dateien nur eine nach der anderen kopieren und haben
nicht die Möglichkeit, sie auf die Auflösung des Bilderrahmens zu skalieren.
1. Drücken Sie so häufig auf die „Exit“
„Exit“
„Exit“
„Exit“„Exit“- -Taste Ihrer Fernbedienung, bis die Modus Auswahl auf dem
Bildschirm angezeigt wird.
2. Wählen Sie mithilfe der Tasten „Rechts/Links“
„Rechts/Links“
„Rechts/Links“
„Rechts/Links“„Rechts/Links“ der
Fernbedienung das Symbol
„Dateie
„Dateie
„Dateie
„Dateie„Dateien“
n“
n“
n“ n“ aus und drücken Sie
auf „Ent
„Ent
„Ent
„Ent„Enter“
er“
er“
er“er“.
3. Wählen Sie das Foto (oder die Musik- oder Videodatei für die
Versionen 7911, 7331, 9331 und 10331) anhand der Tasten
„Hoch/Runter“
„Hoch/Runter“
„Hoch/Runter“
„Hoch/Runter“„Hoch/Runter“ der Fernbedienung aus und drücken Sie auf
die Taste „Copy
„Copy
„Copy
„Copy„Copy/Del“
/Del“
/Del“
/Del“/Del“ „Datei
„Datei
„Datei
„Datei „Datei . Auf dem Bildschirm erscheint
kopie
kopie
kopie
kopiekopieren?
ren?
ren?
ren? ren? –
–
–
––
Ja/Nein“
Ja/Nein“
Ja/Nein“
Ja/Nein“Ja/Nein“. Wählen Sie die gewünschte Option und drücken Sie auf „Enter
„Enter
„Enter
„Enter„Enter“.
“.
“.
“. “. Ihre
Datei wird kopiert.
- Kopieren Ihre
Kopieren Ihre
Kopieren Ihre
Kopieren IhreKopieren Ihrer Fotos über den Miniatur
r Fotos über den Miniatur
r Fotos über den Miniatur
r Fotos über den Miniaturr Fotos über den Miniatur-
-
-
--
Mo
Mo
Mo
MoModus.
dus.
dus.
dus.dus.
Mit dieser Methode können Sie eine Auswahl an Fotos kopieren und haben dabei die Möglichkeit, sie auf
die Auflösung des Bilderrahmens zu skalieren, um die Kapazität des internen Speichers zu optimieren.
1. Drücken Sie so häufig auf die „Exit“
„Exit“
„Exit“
„Exit“„Exit“- -Taste Ihrer Fernbedienung, bis die Modus Auswahl auf dem
Bildschirm angezeigt wird.
2. Wählen Sie anhand der Tasten „Hoch/Runter“
„Hoch/Runter“
„Hoch/Runter“
„Hoch/Runter“„Hoch/Runter“ der Fernbedienung den mobilen Datenträger, auf
dem sich die zu kopierenden Fotos befinden (Speicherkarte oder USB Stick). Drücken Sie auf -
„Ent
„Ent
„Ent
„Ent„Enter“
er“
er“
er“er“.
3. Wählen Sie mithilfe der Tasten „Rechts/Links“
„Rechts/Links“
„Rechts/Links“
„Rechts/Links“„Rechts/Links“ den Fotomodus und drücken Sie auf „Ent
„Ent
„Ent
„Ent„Enter“
er“
er“
er“er“. Die
Diashow startet
4. Drücken Sie auf die „Exit“
„Exit“
„Exit“
„Exit“„Exit“-Taste der Fernbedienung,
um zu den Miniaturbildern zu gelangen.
5. Drücken Sie die Taste „Copy/
„Copy/
„Copy/
„Copy/„Copy/Del“
Del“
Del“
Del“Del“. Auf dem Bildschirm
erscheint „Datei
„Datei
„Datei
„Datei„Dateien kopieren?“
en kopieren?“
en kopieren?“
en kopieren?“en kopieren?“. Wählen Sie „Ja“ und
drücken Sie auf „Enter“
„Enter“
„Enter“
„Enter“„Enter“.

6
Dokument ohne vertraglichen Charakter. Änderungen aufgrund von Druckfehlern bleiben vorbehalten (Mktg0609).
DEUTSCH
DEUTSCH
DEUTSCH
DEUTSCHDEUTSCH
6. Die Miniaturbilder werden erneut angezeigt mit jeweils einem kleinen weißen Kästchen in ihrer
rechten oberen Ecke. Wählen Sie die zu kopierenden Fotos anhand der
Tasten
„Rechts/Links
„Rechts/Links
„Rechts/Links
„Rechts/Links „Rechts/Links Hoch/Runter“
Hoch/Runter“
Hoch/Runter“
Hoch/Runter“Hoch/Runter“
–
–
–
– – der Fernbedienung aus, indem Sie
für jedes ausgewählte Foto auf „Ent
„Ent
„Ent
„Ent„Enter“
er“
er“
er“er“ drücken. Das kleine weiße Kästchen
der ausgewählten Bilder wird dadurch markiert.
7. Drücken Sie die Taste „Copy/
„Copy/
„Copy/
„Copy/„Copy/Del“
Del“
Del“
Del“Del“. Wählen Sie anschließend den Ordner, in
den Sie Ihre Bilder kopieren möchten, und drücken Sie auf „Ent
„Ent
„Ent
„Ent„Enter“
er“
er“
er“er“.
8. Auf dem Bildschirm erscheint eine Dialogbox, die Sie fragt, ob Sie Ihre
Bilder skalieren möchten (Um alle Ihre Fotos automatisch zu skalieren, ohne über diesen
Bildschirm zu gehen, siehe S. 12).
9. Wählen Sie die gewünschte Option anhand der Tasten „Hoch/
„Hoch/
„Hoch/
„Hoch/„Hoch/Runter“
Runter“
Runter“
Runter“Runter“ r de
Fernbedienung aus und „bestäti
„bestäti
„bestäti
„bestäti„bestätigen“
gen“
gen“
gen“gen“ Sie. Drücken Sie auf „Ent
„Ent
„Ent
„Ent„Enter“
er“
er“
er“er“. Ihre
Fotos werden nun in den internen Speicher kopiert und auf die Auflösung
des Bilderrahmens skaliert.
4. Löschen von Fotos
Sie können Fotos löschen, die sich im internen Speicher Ihres Bilderrahmens befinden.
- Löschen Ih
Löschen Ih
Löschen Ih
Löschen IhLöschen Ihrer Fotos über den Dat
rer Fotos über den Dat
rer Fotos über den Dat
rer Fotos über den Datrer Fotos über den Dateimanager.
eimanager.
eimanager.
eimanager. eimanager.
Falls Sie diese Methode anwenden, können Sie die Dateien nur eine nach der anderen löschen.
1. Drücken Sie so häufig auf die „Exit“
„Exit“
„Exit“
„Exit“„Exit“-Taste Ihrer Fernbedienung,
bis die Modus- Auswahl auf dem Bildschirm angezeigt wird.
2. Wählen Sie mithilfe der Tasten „Rechts/Links“
„Rechts/Links“
„Rechts/Links“
„Rechts/Links“„Rechts/Links“ der
Fernbedienung das Symbol „Dateien“ aus und drücken Sie auf
„Ent
„Ent
„Ent
„Ent„Enter“
er“
er“
er“er“.

8
Dokument ohne vertraglichen Charakter. Änderungen aufgrund von Druckfehlern bleiben vorbehalten (Mktg0609).
DEUTSCH
DEUTSCH
DEUTSCH
DEUTSCHDEUTSCH
III. Auswahl des zu lesenden Dateityps
1. Fotos
- Drücken Sie zweimal auf die „Exit“
„Exit“
„Exit“
„Exit“„Exit“-Taste, um den Hauptbildschirm
aufzurufen.
- Wählen Sie mithilfe der Pfeiltasten „Links/Rechts“
„Links/Rechts“
„Links/Rechts“
„Links/Rechts“„Links/Rechts“ der Fernbedienung
das Symbol „Foto“
„Foto“
„Foto“
„Foto“„Foto“.
- Drücken Sie auf die „En
„En
„En
„En„Enter“
ter“
ter“
ter“ter“-Taste: das Abspielen beginnt.
2. Videos (nur bei DPF 7911, DPF 7331, DPF 9331 und DPF 10331)
-
- - Drücken Sie zweimal auf die „Exit“
„Exit“
„Exit“
„Exit“„Exit“ Taste, um den Hauptbildschirm
aufzurufen.
- Wählen Sie mithilfe der Pfeiltasten „Links/Rechts“
„Links/Rechts“
„Links/Rechts“
„Links/Rechts“„Links/Rechts“ der Fernbedienung
das Symbol „Musik“
„Musik“
„Musik“
„Musik“„Musik“.
- - Drücken Sie auf die „Ent
„Ent
„Ent
„Ent„Enter“
er“
er“
er“er“ Taste: das Abspielen beginnt.
- Drücken Sie für den Schnellvorlauf einmal auf den Pfeil „Rechts“
„Rechts“
„Rechts“
„Rechts“„Rechts“ und ein zweites Mal, um zum
Abspielmodus zurückzukehren.
- Drücken Sie für den Schnellrücklauf einmal auf die Taste „Links“
„Links“
„Links“
„Links“„Links“ und ein zweites Mal, um zum
Abspielmodus zurückzukehren.
- Drücken Sie auf „Ent
„Ent
„Ent
„Ent„Enter“
er“
er“
er“er“, um das Abspielen anzuhalten, und ein zweites Mal, um es wieder zu
starten.
- Drücken Sie auf die Tasten „Vol +“
„Vol +“
„Vol +“
„Vol +“„Vol +“ oder „Vol
„Vol
„Vol
„Vol „Vol –
–
–
––“
“
“
““, um die Lautstärke anzupassen.

9
Dokument ohne vertraglichen Charakter. Änderungen aufgrund von Druckfehlern bleiben vorbehalten (Mktg0609).
DEUTSCH
DEUTSCH
DEUTSCH
DEUTSCHDEUTSCH
2. Musik (nur bei DPF 7911, DPF 7331, DPF 9331 und DPF 10331)
- Drücken Sie zweimal auf die „Exit“
„Exit“
„Exit“
„Exit“„Exit“-Taste, um den Hauptbildschirm
aufzurufen.
- Wählen Sie mithilfe der Pfeiltasten „
„
„
„„Links/Rechts“
Links/Rechts“
Links/Rechts“
Links/Rechts“Links/Rechts“ der Fernbedienung
das Symbol „Musik“
„Musik“
„Musik“
„Musik“„Musik“.
- - Drücken Sie auf die „Ent
„Ent
„Ent
„Ent„Enter“
er“
er“
er“er“ Taste: das Abspielen beginnt.
- Drücken Sie auf „Ent
„Ent
„Ent
„Ent„Enter“
er“
er“
er“er“, um das Abspielen anzuhalten, und ein zweites Mal, um es wieder zu
starten.
- Drücken Sie auf die Tasten „Vol +“
„Vol +“
„Vol +“
„Vol +“„Vol +“ oder „Vol
„Vol
„Vol
„Vol „Vol –
–
–
––“
“
“
““, um die Lautstärke anzupassen.
- Sie können die verschiedenen Musikeffekte ändern (siehe S. 1 ), indem Sie auf die Taste 5 „Rotat
„Rotat
„Rotat
„Rotat„Rotate“
e“
e“
e“ e“
der Fernbedienung drücken.
- Durch Drücken auf die Taste „Zoom“
„Zoom“
„Zoom“
„Zoom“ „Zoom“ Ihrer Fernbedienung können Sie auch die verschiedenen
Abspielmodi ändern (siehe S. 11).
NOR: Einmal lesen
• : Einmal wiederholen
• : Endlosmodus
: Zufallsmodus
IV. Einstellungen
Wenn Sie sich auf dem Hauptbildschirm befinden, wählen Sie das
Symbol „Einst.“
„Einst.“
„Einst.“
„Einst.“„Einst.“ anhand der Tasten „Rechts/Links“
„Rechts/Links“
„Rechts/Links“
„Rechts/Links“„Rechts/Links“ und
„Hoch/Runter“
„Hoch/Runter“
„Hoch/Runter“
„Hoch/Runter“„Hoch/Runter“ Ihrer Fernbedienung, um zu den verschiedenen
Einstellungsmöglichkeiten für Ihren Bilderrahmen zu gelangen.
Je nach Wunsch können Sie auch ganz einfach auf die „Set
„Set
„Set
„Set„Setup“
up“
up“
up“up“-
Taste Ihrer Fernbedienung drücken, um zum Einstellungsmenü zu
gelangen.

10
Dokument ohne vertraglichen Charakter. Änderungen aufgrund von Druckfehlern bleiben vorbehalten (Mktg0609).
DEUTSCH
DEUTSCH
DEUTSCH
DEUTSCHDEUTSCH
Wenn Sie sich in den Einstellungsmenüs befinden, ermöglichen die „Hoch/Runter“
„Hoch/Runter“
„Hoch/Runter“
„Hoch/Runter“„Hoch/Runter“-Tasten der
Fernbedienung es Ihnen, die einzustellenden Parameter auszuwählen. Mithilfe der Tasten „Rechts/Links“
„Rechts/Links“
„Rechts/Links“
„Rechts/Links“„Rechts/Links“
können Sie den ausgewählten Parameter dann passend regeln.
1. Fotoeinstellung
Um zu diesem Menü zu gelangen, wählen Sie die entsprechende Zeile mithilfe der Tasten „Hoch/Runter“
„Hoch/Runter“
„Hoch/Runter“
„Hoch/Runter“„Hoch/Runter“
der Fernbedienung und drücken Sie auf „Ent
„Ent
„Ent
„Ent„Enter“
er“
er“
er“er“. Der
nebenstehende Bildschirm erscheint:
Mit den Pfeiltasten der Fernbedienung können Sie Folgendes
einstellen:
- Anzeigemodus
Anzeigemodus
Anzeigemodus
AnzeigemodusAnzeigemodus
Wählen Sie mithilfe der Tasten „Hoch/Runter“
„Hoch/Runter“
„Hoch/Runter“
„Hoch/Runter“„Hoch/Runter“ der Fernbedienung
die Zeile „Anzeigemodus“ und anschließend anhand der Tasten
„Rechts/Links“:
„Rechts/Links“:
„Rechts/Links“:
„Rechts/Links“:„Rechts/Links“:
. Diashow : die Bilder werden ei nes nach dem anderen abgespielt.
. Miniaturbilder: die Fotos werden in Form von Miniaturbildern angezeigt. (Bitte beachten Sie: wenn sich
Ihr Bilderrahmen in diesem Modus befindet, können Sie durch einfaches Drücken der „Ent
„Ent
„Ent
„Ent„Enter“
er“
er“
er“er“-Taste zur
Diashow oder zur Einzelanzeige gelangen.)
. Einzelanzeige: ein einziges Foto wird angezeigt.
- Anzeigeverhält
Anzeigeverhält
Anzeigeverhält
AnzeigeverhältAnzeigeverhältnis
nis
nis
nisnis
Wählen Sie mithilfe der Tasten der Fernbedienung die Zeile „Anzeigeverhältnis“ und
„Hoch/Runter“
„Hoch/Runter“
„Hoch/Runter“
„Hoch/Runter“ „Hoch/Runter“
anschließend anhand der Tasten „Rechts/Links“
„Rechts/Links“
„Rechts/Links“
„Rechts/Links“„Rechts/Links“:
. Bildschirmanpassung: das Foto bleibt in seinem Originalformat (bei einem 4:3- -Foto in einem 16:9 Rahmen
erscheinen zwei schwarze Streifen an den Seiten).
. Zuschnitt auf Vollbildschirm: das Foto wird mittig so zugeschnitten, dass es die gesamte Bildschirmfläche
abdeckt.
. Vollbildschirm: Das Foto wird verzerrt, um die Bildschirmfläche abzudecken.

11
Dokument ohne vertraglichen Charakter. Änderungen aufgrund von Druckfehlern bleiben vorbehalten (Mktg0609).
DEUTSCH
DEUTSCH
DEUTSCH
DEUTSCHDEUTSCH
- Dauer der Diasho
Dauer der Diasho
Dauer der Diasho
Dauer der DiashoDauer der Diashow
w
w
ww
Wählen Sie mithilfe der Tasten „Hoch/Runter“
„Hoch/Runter“
„Hoch/Runter“
„Hoch/Runter“ „Hoch/Runter“ der Fernbedienung die Zeile „Anzeigedauer“ und
anschließend anhand der Tasten „Rechts/Links“
„Rechts/Links“
„Rechts/Links“
„Rechts/Links“„Rechts/Links“:
. 5 Sek.
. 15 Sek.
. 30 Sek.
. 60 Sek.
. 5 Min.
. 15 Min.
- Endlos
Endlos
Endlos
EndlosEndlosmodus fü
modus fü
modus fü
modus fümodus für die Dias
r die Dias
r die Dias
r die Diasr die Diashow
how
how
howhow
Wählen Sie mithilfe der Tasten der Fernbedienung die Zeile „Diashow wiederholen“ und
„Hoch/Runter“
„Hoch/Runter“
„Hoch/Runter“
„Hoch/Runter“ „Hoch/Runter“
anschließend anhand der Tasten „Rechts/Links“
„Rechts/Links“
„Rechts/Links“
„Rechts/Links“„Rechts/Links“:
. Einmal: die Diashow wird nur einmal abgespielt.
. Wiederholen: die Diashow wird im Endlosmodus abgespielt.
- Übergangseffekte
Übergangseffekte
Übergangseffekte
ÜbergangseffekteÜbergangseffekte
Wählen Sie mithilfe der Tasten „Hoch/Runter“
„Hoch/Runter“
„Hoch/Runter“
„Hoch/Runter“ „Hoch/Runter“ der Fernbedienung die Zeile „Übergangseffekte“ und
anschließend anhand der Tasten „Rechts/Links“
„Rechts/Links“
„Rechts/Links“
„Rechts/Links“„Rechts/Links“ einen der folgenden Effekte:
. Zufällig, Schlange, Teilung, Auflösen, Blenden, zufällige Linien, Gitter, Kreuzen, Spirale, Schließen.
- Gleichzei
Gleichzei
Gleichzei
GleichzeiGleichzeitiges
tiges
tiges
tigestiges Anzeigen mehrerer Bilder
Anzeigen mehrerer Bilder
Anzeigen mehrerer Bilder
Anzeigen mehrerer Bilder Anzeigen mehrerer Bilder
Dieser Modus ermöglicht es Ihnen, mehrere Bilder gleichzeitig anzuzeigen (je nach Ausrichtung zwei, drei
oder vier Bilder).
Wählen Sie mithilfe der Tasten „Hoch/Runter“
„Hoch/Runter“
„Hoch/Runter“
„Hoch/Runter“ „Hoch/Runter“ der Fernbedienung die Zeile „Mehrfachanzeige“ und
anschließend anhand der Tasten „Rechts/Links“
„Rechts/Links“
„Rechts/Links“
„Rechts/Links“„Rechts/Links“:
. Ein
. Aus
- Uhr
Uhr
Uhr
UhrUhr
Die Aktivierung dieser Funktion ermöglicht während des Abspielens der Diashow die Anzeige der Uhrzeit in
der linken oberen Ecke des Bilderrahmens.
Wählen Sie mithilfe der Tasten „Hoch/Runter“
„Hoch/Runter“
„Hoch/Runter“
„Hoch/Runter“ „Hoch/Runter“ der Fernbedienung die Zeile „Uhr“ und anschließend anhand
der Tasten „Rechts/Links“
„Rechts/Links“
„Rechts/Links“
„Rechts/Links“„Rechts/Links“:
. Ein
. Aus
- Skalie
Skalie
Skalie
SkalieSkalierung der B
rung der B
rung der B
rung der Brung der Bild
ild
ild
ildilder
er
er
erer
Diese Option ermöglicht es Ihnen, Ihre Bilder auf die Auflösung des Bilderrahmens zu skalieren (480 x 234
für
DPF 7901, DPF 7911 und 800 x 600 für DPF 7321, DPF 7331, DPF 9321, DPF 9331 und DPF 10331).

12
Dokument ohne vertraglichen Charakter. Änderungen aufgrund von Druckfehlern bleiben vorbehalten (Mktg0609).
DEUTSCH
DEUTSCH
DEUTSCH
DEUTSCHDEUTSCH
Die Skalierung optimiert den Platz im internen Speicher, sodass dort mehr als 10.000 Bilder ohne Einbußen
bezüglich ihrer visuellen Qualität gespeichert werden können.
(Beispiel: ein Bild mit 5 Mio. Pixeln, das 1,5 Mo einnimmt, benötigt nach der Skalierung nur noch rund 80
Ko.)
Wählen Sie mithilfe der Tasten der Fernbedienung die Zeile „Skalierung“ und anschließend
„Hoch/Run
„Hoch/Run
„Hoch/Run
„Hoch/Run„Hoch/Runter“
ter“
ter“
ter“ ter“
anhand der Tasten „Rechts/Links“
„Rechts/Links“
„Rechts/Links“
„Rechts/Links“„Rechts/Links“:
. Ein
. Aus
- Automati
Automati
Automati
AutomatiAutomatisches Zuschnei
sches Zuschnei
sches Zuschnei
sches Zuschneisches Zuschneiden
den
den
denden
Wenn das Format Ihrer Bilder nicht proportional zum Bilderrahmen ist, erscheinen oben und unten
schwarze Streifen, falls Ihre Fotos im Format 16:9 oder 3:2 sind, der Fotorahmen aber das Format 4:3 hat,
oder an den Seiten, falls Ihre Fotos im Format 4:3 sind, der Bilderrahmen jedoch das Format 16:9 besitzt.
Wenn die Skalierung bei der Kopie der Bilder auf Ihren Rahmen aktiviert ist, können Sie die automatische
Zuschnittsfunktion aktivieren, die dafür sorgt, dass Ihre Fotos ohne schwarze Streifen und ohne Verzerrung
angezeigt werden.
Wählen Sie mithilfe der Tasten „Hoch/Runter“
„Hoch/Runter“
„Hoch/Runter“
„Hoch/Runter“ „Hoch/Runter“ der Fernbedienung die Zeile „Beim Kopieren zuschneiden“
und anschließend anhand der Tasten „Rechts/Links“
„Rechts/Links“
„Rechts/Links“
„Rechts/Links“„Rechts/Links“:
. Ein
. Aus
- Automati
Automati
Automati
AutomatiAutomatisches Skalieren
sches Skalieren
sches Skalieren
sches Skalierensches Skalieren
Wenn die Skalierung der Bilder aktiviert ist, erscheint beim Kopieren standardmäßig ein Bildschirm, der Sie
fragt, ob Sie Ihre Bilder skalieren wollen. Dank der automatischen Skalierung skaliert der Rahmen alle Ihre
Bilder, ohne diesen Bildschirm anzuzeigen. So werden alle Ihre Bilder ohne Ihr Zutun skaliert.
Wählen Sie mithilfe der Tasten „Hoch/Runter“
„Hoch/Runter“
„Hoch/Runter“
„Hoch/Runter“ „Hoch/Runter“ der Fernbedienung die Zeile „Prozess während des
Kopierens anzeigen“ und anschließend anhand der Tasten „Rechts/Links“
„Rechts/Links“
„Rechts/Links“
„Rechts/Links“„Rechts/Links“:
. Ein
. Aus
2. Kalendereinstellung
Wenn Sie den Kalender auf Ihrem Bilderrahmen angezeigt haben möchten,
drücken Sie so häufig auf die „Exit“-Taste Ihrer Fernbedienung wie
notwendig, um den Bildschirm für die Modus Auswahl aufzurufen. Wählen -
Sie anhand der Tasten das Kalendersymbol und klicken Sie „Rechts/Links“
auf „Enter“.

13
Dokument ohne vertraglichen Charakter. Änderungen aufgrund von Druckfehlern bleiben vorbehalten (Mktg0609).
DEUTSCH
DEUTSCH
DEUTSCH
DEUTSCHDEUTSCH
Wenn Sie sich im Einstellungsmenü befinden, wählen Sie mithilfe der Tasten
„Hoch/Runter“
„Hoch/Runter“
„Hoch/Runter“
„Hoch/Runter“„Hoch/Runter“ der Fernbedienung die entsprechende Zeile, um zu diesem
Menü zu gelangen, und drücken Sie auf „Ent
„Ent
„Ent
„Ent„Enter“
er“
er“
er“er“.
Mit den Pfeiltasten der Fernbedienung können Sie Folgendes einstellen:
- Kalenderanzeigemo
Kalenderanzeigemo
Kalenderanzeigemo
KalenderanzeigemoKalenderanzeigemodus
dus
dus
dus dus
Dieser Modus ermöglicht Ihnen die Anzeige:
. Eines Monatskalenders
. Eines Tageskalenders
. Einer Uhr
Bei den Kalenderanzeigemodi werden die Bilder der Diashow auf der Seite des Rahmens abgespielt.
Beim Uhrmodus werden nur die Uhr und das aktuelle Datum angezeigt.
Wählen Sie mithilfe der Tasten der Fernbedienung die Zeile „Anzeigemodus“ und treffen Sie
„Hoch/Runter“
„Hoch/Runter“
„Hoch/Runter“
„Hoch/Runter“ „Hoch/Runter“
Ihre Wahl anhand der Tasten „Rechts/Links“
„Rechts/Links“
„Rechts/Links“
„Rechts/Links“„Rechts/Links“.
- Datum
Datum
Datum
DatumDatum
Wählen Sie mithilfe der Tasten der Fernbedienung die Zeile „Datum“ und:
„Hoch/Runter“
„Hoch/Runter“
„Hoch/Runter“
„Hoch/Runter“„Hoch/Runter“
- stellen Sie anhand der Tasten „Rechts/Links“
„Rechts/Links“
„Rechts/Links“
„Rechts/Links“„Rechts/Links“ den Monat ein.
- drücken Sie auf die Taste „Runter“
„Runter“
„Runter“
„Runter“„Runter“, um den Tag auszuwählen.
- drücken Sie auf die Tasten „Rechts/Links“
„Rechts/Links“
„Rechts/Links“
„Rechts/Links“„Rechts/Links“, um den Tag einzustellen.
- drücken Sie auf die Taste „Runter“
„Runter“
„Runter“
„Runter“„Runter“, um das Jahr auszuwählen.
- drücken Sie auf die Tasten „Rechts/Links“
„Rechts/Links“
„Rechts/Links“
„Rechts/Links“„Rechts/Links“, um das Jahr einzustellen.
Um zum vorherigen Parameter zurückzukehren, drücken Sie auf die Taste „Hoch“
„Hoch“
„Hoch“
„Hoch“„Hoch“ der Fernbedienung.
- Uhrze
Uhrze
Uhrze
UhrzeUhrzeitanzeige
itanzeige
itanzeige
itanzeigeitanzeigemodus (24 od
modus (24 od
modus (24 od
modus (24 odmodus (24 oder 12 S
er 12 S
er 12 S
er 12 Ser 12 Stunden
tunden
tunden
tundentunden)
)
)
))
Wählen Sie mithilfe der Tasten „Hoch/Runter“
„Hoch/Runter“
„Hoch/Runter“
„Hoch/Runter“ „Hoch/Runter“ der Fernbedienung die Zeile „Uhrzeitmodus“ und anhand
der Tasten „Rechts/Links“
„Rechts/Links“
„Rechts/Links“
„Rechts/Links“„Rechts/Links“ - - - das 12 oder das 24 Stunden Format.
- Uhrze
Uhrze
Uhrze
UhrzeUhrzeit
it
it
itit
Wählen Sie mithilfe der Tasten der Fernbedienung die Zeile „Uhrzeit“ und:
„Hoch/Runter“
„Hoch/Runter“
„Hoch/Runter“
„Hoch/Runter“„Hoch/Runter“
- stellen Sie anhand der Tasten „Rechts/Links“
„Rechts/Links“
„Rechts/Links“
„Rechts/Links“„Rechts/Links“ die Uhrzeit ein.
- drücken Sie auf die Taste „Runter“
„Runter“
„Runter“
„Runter“„Runter“, um die Minuten auszuwählen.
- drücken Sie auf die Tasten „Rechts/Links“
„Rechts/Links“
„Rechts/Links“
„Rechts/Links“„Rechts/Links“, um die Minuten einzustellen.
Um zum vorherigen Parameter zurückzukehren, drücken Sie auf die Taste „Hoch“
„Hoch“
„Hoch“
„Hoch“„Hoch“ der Fernbedienung.
Specyfikacje produktu
| Marka: | Telefunken |
| Kategoria: | Cyfrowe ramki na zdjęcia |
| Model: | DPF 7911 |
Potrzebujesz pomocy?
Jeśli potrzebujesz pomocy z Telefunken DPF 7911, zadaj pytanie poniżej, a inni użytkownicy Ci odpowiedzą
Instrukcje Cyfrowe ramki na zdjęcia Telefunken

7 Sierpnia 2024
7 Sierpnia 2024
Instrukcje Cyfrowe ramki na zdjęcia
- Cyfrowe ramki na zdjęcia Samsung
- Cyfrowe ramki na zdjęcia Philips
- Cyfrowe ramki na zdjęcia Salora
- Cyfrowe ramki na zdjęcia Denver
- Cyfrowe ramki na zdjęcia Hitachi
- Cyfrowe ramki na zdjęcia Clas Ohlson
- Cyfrowe ramki na zdjęcia Sandstrøm
- Cyfrowe ramki na zdjęcia Curtis
- Cyfrowe ramki na zdjęcia Dynex
- Cyfrowe ramki na zdjęcia Audiovox
- Cyfrowe ramki na zdjęcia Naxa
- Cyfrowe ramki na zdjęcia WayteQ
Najnowsze instrukcje dla Cyfrowe ramki na zdjęcia
10 Października 2024
9 Sierpnia 2024
8 Sierpnia 2024
7 Sierpnia 2024

7 Sierpnia 2024
7 Sierpnia 2024
3 Lipca 2024

3 Lipca 2024
2 Lipca 2024
2 Lipca 2024