Instrukcja obsługi Tascam BD-MP1
Tascam
odtwarzacz blu-ray
BD-MP1
Przeczytaj poniżej 📖 instrukcję obsługi w języku polskim dla Tascam BD-MP1 (52 stron) w kategorii odtwarzacz blu-ray. Ta instrukcja była pomocna dla 11 osób i została oceniona przez 2 użytkowników na średnio 4.5 gwiazdek
Strona 1/52
D01372220B
BD-MP1
BLU-RAY DISC PLAYER
OWNER'S MANUAL
2 TASCAM BD-MP1
CAUTION: TO REDUCE THE RISK OF ELECTRIC SHOCK, DO NOT REMOVE COVER (OR BACK). NO
USER-SERVICEABLE PARTS INSIDE. REFER SERVICING TO QUALIFIED SERVICE PERSONNEL.
The lightning flash with arrowhead symbol, within equilateral triangle, is intended to alert the
user to the presence of uninsulated “dangerous voltage” within the product’s enclosure that may
be of sufficient magnitude to constitute a risk of electric shock to persons.
The exclamation point within an equilateral triangle is intended to alert the user to the presence
of important operating and maintenance (servicing) instructions in the literature accompanying
the appliance.
WARNING: TO PREVENT FIRE OR SHOCK HAZARD, DO NOT
EXPOSE THIS APPLIANCE TO RAIN OR MOISTURE.
1. Read these instructions.
2. Keep these instructions.
3. Heed all warnings.
4. Follow all instructions.
5. Do not use this apparatus near water.
6. Clean only with dry cloth.
7. Do not block any ventilation openings. Install in accordance
with the manufacturer’s instructions.
8. Do not install near any heat sources such as radiators, heat
registers, stoves, or other apparatus (including amplifiers)
that produce heat.
9. Do not defeat the safety purpose of the polarized or
grounding-type plug. A polarized plug has two blades with
one wider than the other. A grounding type plug has two
blades and a third grounding prong. The wide blade or the
third prong are provided for your safety. If the provided
plug does not fit into your outlet, consult an electrician for
replacement of the obsolete outlet.
10. Protect the power cord from being walked on or pinched
particularly at plugs, convenience receptacles, and the
point where they exit from the apparatus.
11. Only use attachments/accessories specified by the
manufacturer.
12. Use only with the cart, stand, tripod, bracket, or table
specified by the manufacturer, or sold with the apparatus.
When a cart is used, use caution when moving the cart/
apparatus combination to avoid injury from tip-over.
13. Unplug this apparatus during lightning storms or when
unused for long periods of time.
14. Refer all servicing to qualified service personnel. Servicing
isrequired when the apparatus has been damaged in any
way, such as power-supply cord or plug is damaged, liquid
has been spilled or objects have fallen into the apparatus,
the apparatus has been exposed to rain or moisture, does
not operate normally, or has been dropped.
• The apparatus draws nominal non-operating power from the
AC outlet with its POWER or STANDBY/ON switch not in the
ON position.
• The mains plug is used as the disconnect device, the
disconnect device shall remain readily operable.
• Caution should be taken when using earphones or
headphones with the product because excessive sound
pressure (volume) from earphones or headphones can cause
hearing loss.
• If you are experiencing problems with this product, contact
TEAC for a service referral. Do not use the product until it has
been repaired.
CAUTION
• Do not expose this apparatus to drips or splashes.
• Do not place any objects filled with liquids, such as vases,
on the apparatus.
• Do not install this apparatus in a confined space such as a
book case or similar unit.
• The apparatus should be located close enough to the AC
outlet so that you can easily grasp the power cord plug at
any time.
• If the product uses batteries (including a battery pack
or installed batteries), they should not be exposed to
sunshine, fire or excessive heat.
• CAUTION for products that use replaceable lithium
batteries: there is danger of explosion if a battery is
replaced with an incorrect type of battery. Replace only
with the same or equivalent type.
WARNING
• Products with Class construction are equipped with a !
power supply cord that has a grounding plug. The cord of
such a product must be plugged into an AC outlet that has
a protective grounding connection.
WARNING
• To prevent possible hearing damage, do not listen
at high volume levels for long periods.
WARNING
• This equipment is not suitable for use in locations where
children are likely to be present.
IMPORTANT SAFETY INSTRUCTIONS
TASCAM BD-MP1 3
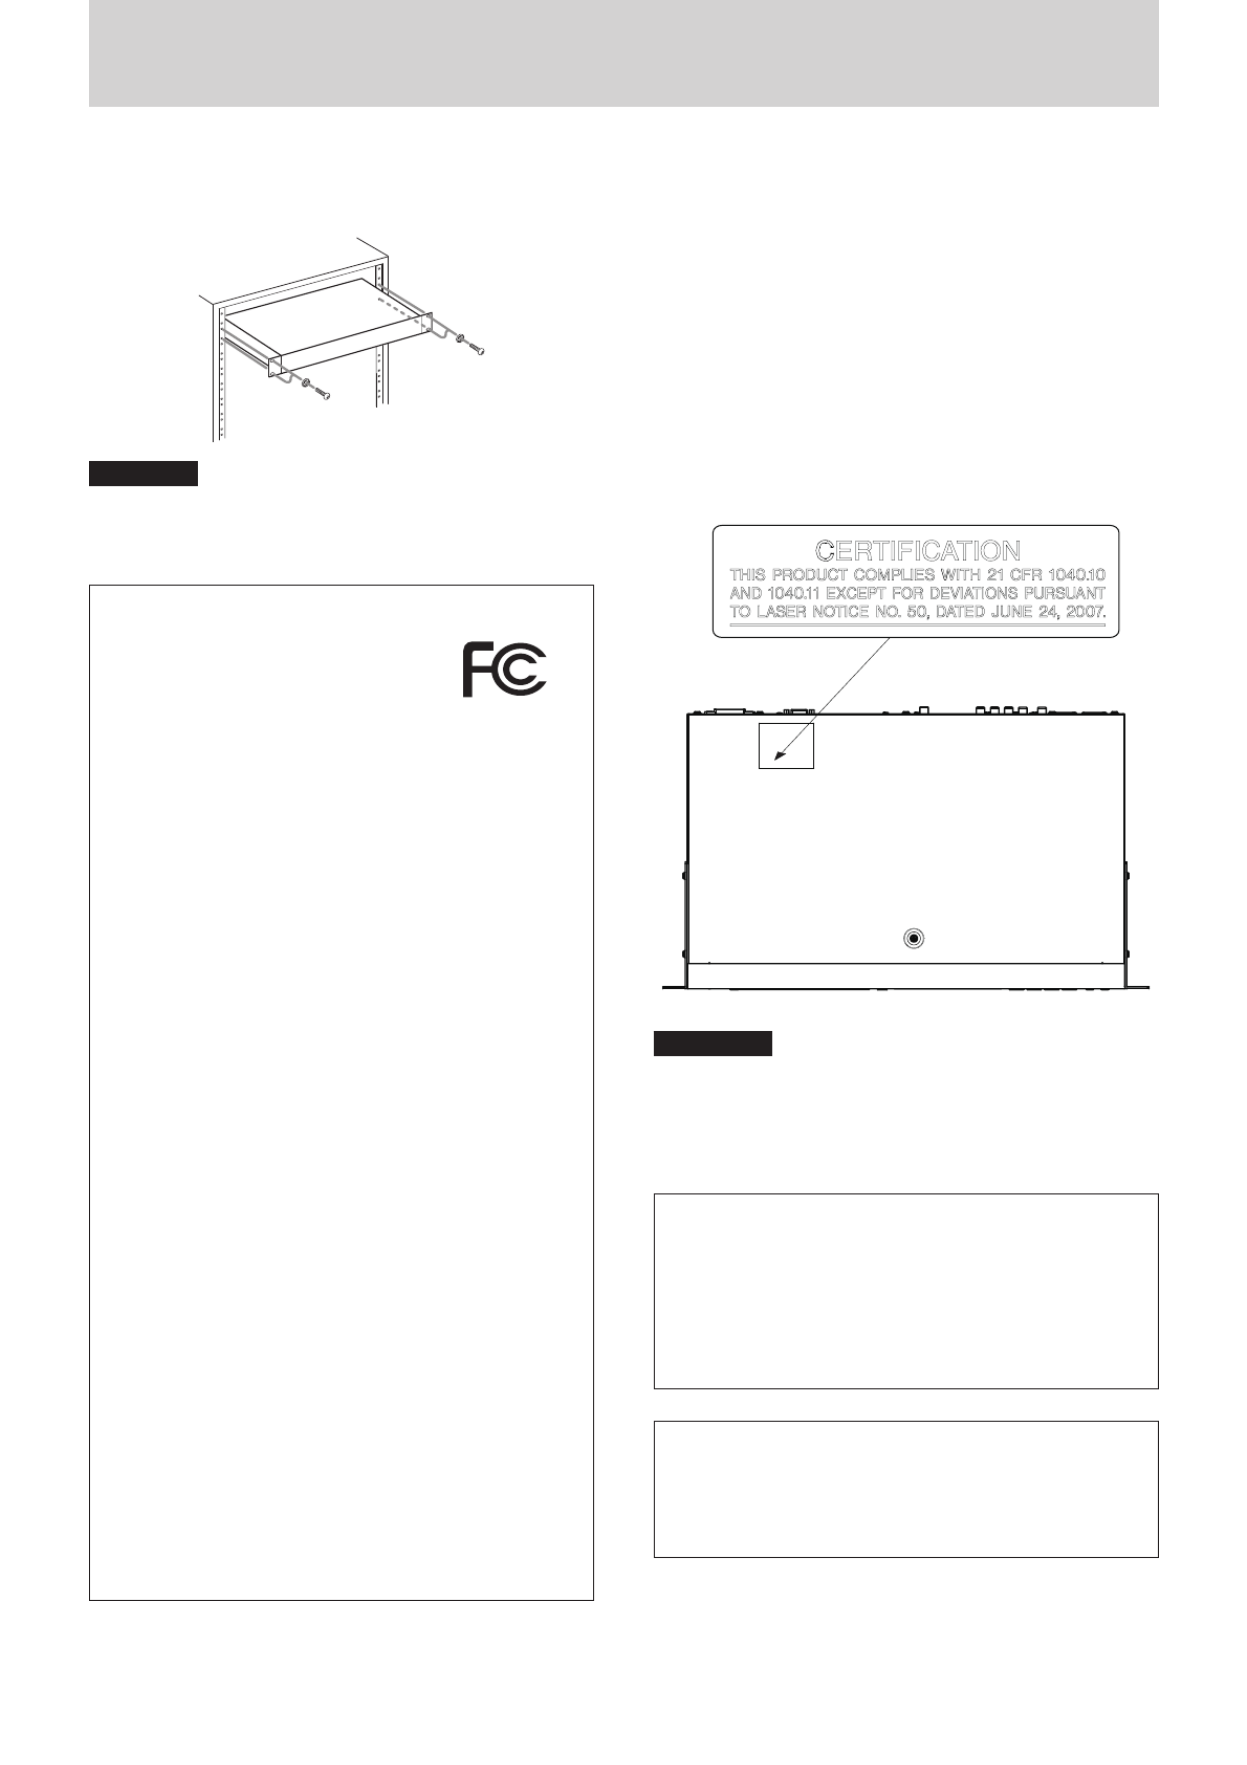
RACK-MOUNTING THE UNIT
Use the supplied rackmount kit to mount the unit in a standard
19-inch rack, as shown below.
ATTENTION
i Leave 1U of space above the unit for ventilation.
i Allow at least 10 cm (4 in) at the rear of the unit for ventilation.
Model for USA
Declaration of Conformity
Model Number: BD-MP1
Trade Name: TASCAM
Responsible party: TEAC AMERICA, INC.
Address: 10410 Pioneer Blvd. Suite #1, Santa Fe Springs,
California 90670, U.S.A.
Telephone number: 1-323-726-0303
This device complies with Part 15 of the FCC Rules. Operation
is subject to the following two conditions: (1) this device may
not cause harmful interference, and (2) this device must accept
any interference received, including interference that may
cause undesired operation.
INFORMATION TO THE USER
This equipment has been tested and found to comply with
the limits for a Class B digital device, pursuant to Part 15 of the
FCC Rules. These limits are designed to provide reasonable
protection against harmful interference in a residential
installation. This equipment generates, uses, and can radiate
radio frequency energy and, if not installed and used in
accordance with the instruction manual, may cause harmful
interference to radio communications. However, there is
no guarantee that interference will not occur in a particular
installation. If this equipment does cause harmful interference
to radio or television reception, which can be determined by
turning the equipment off and on, the user is encouraged to
try to correct the interference by one or more of the following
measures.
a) Reorient or relocate the receiving antenna.
b) Increase the separation between the equipment and
receiver.
c) Connect the equipment into an outlet on a circuit different
from that to which the receiver is connected.
d) Consult the dealer or an experienced radio/TV technician
for help.
CAUTION
Changes or modifications to this equipment not expressly
approved by TEAC CORPORATION for compliance could void
the user’s authority to operate this equipment.
Laser information
This product contains a semiconductor laser system inside the
cabinet and is classified as a “CLASS 1 LASER PRODUCT”.
To prevent being exposed to the laser beam, do not try to open
the enclosure.
Notes on Laser Product
This product has been designed and manufactured according
to FDA regulations “title 21, CFR, chapter 1, subchapter J, based
on the Radiation Control for Health and Safety Act of 1968”,
and is classified as a class 1 laser product. There is no hazardous
invisible laser radiation during operation because invisible laser
radiation emitted inside of this product is completely confined
in the protective housings.
The label required in this regulation is shown at .1
1
For USA
VCAUTION
i DO NOT REMOVE THE PROTECTIVE HOUSING USING A
SCREWDRIVER.
i USE OF CONTROLS OR ADJUSTMENTS OR PERFORMANCE OF
PROCEDURES OTHER THAN THOSE SPECIFIED HEREIN MAY
RESULT IN HAZARDOUS RADIATION EXPOSURE.
Optical pickup
Type: SL6167
Manufacturer: Sony Corporation
Laser output: Less than 100 mW on the objective lens (CD)
Less than 100 mW on the objective lens (DVD)
Wavelength: 770 - 800 nm (CD) typ.
650 - 664 nm (DVD) typ.
Optical pickup
Type: SLD3134VL
Manufacturer: Sony Corporation
Laser output: Less than 700 mW on the objective lens (BD)
Wavelength: 400 - 410 nm (BD) typ.
IMPORTANT SAFETY INSTRUCTIONS

10 TASCAM BD-MP1
About TASCAM customer support
service
TASCAM products are supported and warrantied only in their
country/region of purchase.
To receive support after purchase, on the TASCAM Distributors
list page of the TEAC Global Site ( ), http:// teac-global.com/
search for the local company or representative for the
region where you purchased the product and contact that
organization.
When making inquiries, the address (URL) of the shop or
web shop where it was purchased and the purchase date are
required.
Moreover, the warranty card and proof of purchase might also
be necessary.
SD cards and USB flash drives
This unit can use SD cards and USB flash drives for playback.
A list of SD cards and USB flash drives that have been confirmed
for use with this unit can be found on the TEAC Global Site
( ). Check the page for this product. You http://teac-global.com
can also contact TASCAM customer support service.
Precautions for use
SD cards and USB flash drives are delicate media.
In order to avoid damaging SD cards and USB flash drives,
please take the following precautions when handling them.
pDo not leave them in extremely hot or cold places.
pDo not leave them in extremely humid places.
pDo not let them get wet.
pDo not put things on top of them or twist them.
pDo not hit them.
pDo not remove or insert them during playback, data
transmission or other access.
pWhen transporting them, put them into cases, for example.
Handling discs
pLoad discs with their recorded sides down.
pLoad discs when the disc tray is completely open.
pAlign discs with the tray guide and place them so they are
level.
pDo not touch the recorded (unlabeled) side. Fingerprints, oils
and other substances can cause errors during playback.
pIf fingerprints or dust adhere to the recorded side of a disc,
wipe it gently with a soft dry cloth from the center towards
the outside edge.
pDirt on discs can lower video and sound quality, so clean
them and always store them in a clean state.
pDo not use any record spray, anti-static solutions, benzene,
paint thinner or other chemical agents to clean discs as they
could damage the delicate playing surface. It may cause discs
to become unplayable.
pDo not apply labels or other materials to discs. Do not use
discs that have glue or sticky residue from having had tape,
stickers or other materials applied to their surface. Such discs
could become stuck in the unit or cause it to malfunction.
pNever use commercially-available disc stabilizers. Using
stabilizers with this player could prevent playback or damage
the unit.
pDo not use cracked discs.
pDo not use discs that are irregularly shaped, including discs
shaped like hearts, business cards and octagons because
using such discs could cause the unit to malfunction.
pCopy Control CDs have been sold by several record
companies in an attempt to protect their copyrights. Since
some of these discs do not comply with the CD specifications,
they may not be playable on the unit.
NOTE
If a disc that cannot be played back or a disc that is upside
down is loaded in the unit, “ ” will appear on the NO DISC
display.
ATTENTION
i Only load one disc at a time. Loading two or more discs at the
same time could cause malfunction and damage the discs.
i Do not push the disc tray in when the power is in standby.
Doing so could cause malfunction.

TASCAM BD-MP1 11
Names and functions of parts
Front panel
1 2 3 4 5 6 7 8 9 0
q w
1 button and indicator
Use to turn the unit on and off (put it into standby).
The indicator lights red when the power is off (in standby)
and green when on.
VCAUTION
Before turning the unit on, lower the volumes of connected
equipment to their minimum levels.
Failure to do so could result in a sudden loud noise that could
harm hearing, for example.
ATTENTION
Do not turn the power on/off when the unit is playing any
media or reading data from an SD card or USB flash drive.
Doing so could make the unit stop operating properly and
cause data on the SD card or USB flash drive to be damaged.
2 Disc tray
Press the OPEN/CLOSE [LOCK] button to open the disc
tray and load/remove a disc. To close the disc tray, press the
OPEN/CLOSE [LOCK] button.
3 OPEN/CLOSE [LOCK](-) button
Use to open and close the disc tray usually.
Press while pressing the button to HIDE MENU [SHIFT]
enable the front panel lock function.
Do this again to disable the lock function.
4 Remote control signal receiver
Signals from remote controls are received here. When
operating the remote control, point it toward this receiver.
5 Display
This shows various types of information.
6 HIDE MENU [SHIFT] button
When the HOME screen is open, press this to hide it.
Moreover, this button can be pressed at the same time as
another button to enable the shift mode and use the shift
function of that button (shown as light lettering on a black
background).
7 STOP [ENTER] (HOME) (8) button
When a video file is being played, paused or searched, press
to stop that operation and return to the HOME screen.
When an audio file is being played, paused or searched, press
to stop playback or searching.
When the HOME screen or Default Settings Screen is open,
press at the same time as the button to HIDE MENU [SHIFT]
enable shift mode and use this as the button.ENTER
8 PLAY [j] (y) button/indicator
Press when stopped or in playback standby to start playback.
The indicator lights green during playback and is unlit at all
other times.
When the HOME screen or Default Settings Screen is open,
press at the same time as the button to HIDE MENU [SHIFT]
enable shift mode and use this as the move cursor down (j)
button.
9 PAUSE [k] (9) (TOP MENU) button
Press when playing back to pause playback.
When the HOME screen or Default Settings Screen is open,
press at the same time as the button to HIDE MENU [SHIFT]
enable shift mode and use this as the move cursor up (k)
button.
0 SKIP .// [l]/[;] (m/,) (REPEAT/A-B)
buttons
Press when playing back or paused to skip to the previous or
next chapter or file.
(Playback will start after skipping.)
Press and hold when playing back or paused to search
backward/forward. The search speed changes (among 5
speeds) each time the button is pressed and held.
(To resume playing back or to pause when searching
backward/forward, press the PLAY [ ] ( ) PAUSE [ ] j y or k
( )9 button.
When the HOME screen or Default Settings Screen is open,
press at the same time as the button to HIDE MENU [SHIFT]
enable shift mode and use as the move cursor left/right (l/;)
buttons.
q USB port
Connect/disconnect USB flash drives here.
Audio, video and other files can be played back from a
connected USB flash drive. Moreover, this can be used to load
update files for firmware updates.
w SD card slot
Insert an SD card in this slot.
Audio, video and other files can be played back from a
connected SD card.

12 TASCAM BD-MP1
Button combinations and the unit's behavior
Button combination Button press Behavior
SHIFT -Simultaneous press Changes the LOCK setting.
SHIFT 8Simultaneous press Confirms or selects menu items.
SHIFT ySimultaneous press j (down)
SHIFT 9Simultaneous press k (up)
SHIFT mSimultaneous press l (left)
SHIFT ,Simultaneous press ; (right)
y 8 Simultaneous press Displays the HOME screen.
y 9 Simultaneous press Displays the top menu/title menu of the disc.
ymSimultaneous press Selects repeat modes.
y , Simultaneous press Plays back a defined section between point A and B repeatedly.
Rear panel
e r t y u i o p a
e ANALOG OUT (BALANCED) L/R jacks
These are balanced XLR analog output jacks.
These transmit audio signals to external speakers and
amplifiers, for example. Use XLR cables for connection.
r ANALOG OUT (UNBALANCED) L/R jacks
These are unbalanced RCA analog output jacks.
These transmit audio signals to external speakers and
amplifiers, for example. Use RCA cables for connection.
t 7.1 audio out (unbalanced) jacks
These are 7.1 unbalanced RCA analog output jacks.
These transmit 8 channels of audio signals to a 7.1 surround
system. Use RCA cables for connection.
y DIGITAL OUT (COAXIAL) connector
This is a coaxial digital audio output connector.
This transmits digital audio signals to a television. Use a
coaxial cable (75Ω) for connection.
u HDMI OUT port
Audio/video signals are transmitted from the HDMI port. Use
an HDMI cable for connection.
i USB port
Connect/disconnect USB flash drives here.
Audio, video and other files can be played back from a
connected USB flash drive. Moreover, this can be used to load
update files for firmware updates.
o ETHERNET connector
This is an Ethernet port.
Use to connect this unit to a network and to control it from a
computer.
Moreover, BD-Live contents can also be accessed with an
Internet connection. Use an STP cable that is category 5e or
higher for connection.
p RS-232C connector
This is a 9-pin D-sub RS-232C control input/output connector.
A computer can be used to control this unit by connecting to
it with an RS-232C cable.
a AC IN connector
Connect the included power cord here.
VCAUTION
Always use the included cord to supply power to this unit.
Use of a different one could cause malfunction, fire or electric
shock.

TASCAM BD-MP1 13
Wireless remote control (TASCAM RC-BDMP1)
1
3
4
5
6
7
8
9
q
0
e
y
i
o
2
h
g
l
k
;
x
s
d
f
a
p
c
w j
r
t
u z
1
¤ (STANDBY/ON) button
This has the same function as the button on the main unit.
VCAUTION
Before turning the unit on, lower the volumes of connected
equipment to their minimum levels.
Failure to do so could result in a sudden loud noise that could
harm hearing, for example.
2 Number (0–9) buttons
The number buttons can be used during media playback
to designate and select chapter and audio track numbers
(except when options or submenus are shown on the screen).
(see "Jumping to a specific playback time, scene or track" on
page 30)
3 AUDIO button
Press during video disc playback to show the current audio
settings at the top left of the monitor screen.
Press this button repeatedly to show the audio settings that
can be used and to switch sound sources.
The audio settings shown depend on the settings supported
by the video disc.
For example, stereo, mono, left channel and right channel
can be selected for DVDs, and DTS-HD MA (master audio) or
Dolby Digital can be selected in various languages for Blu-ray
discs.
4 TOP MENU button
Press during playback of a video disc to show the top menu
screen.
Use the l/;/k/j cursor buttons to move in menus, and use
the button to confirm selection.ENTER
5 ON SCREEN button
Press during video disc playback to show an information bar
that can be used to check the current status at the top of the
monitor screen.
6 RETURN button
Press when using the HOME screen to return to the previous
menu. Press repeatedly to return to the top menu.
7 Cursor buttons l/;/k/j
Press when the HOME screen is open to move between
setting items.
Moving in menus is also possible on video file top menu and
title menu screens as well as option menu screens during
playback.
8 7 button
This has the same function as the PLAY [j] (y) button on
the main unit.
9 m/, buttons
Press when playing back or paused to search backward/
forward.
oWhen searching backward/forward in a video file, press
the PAUSE ( )9 button to pause playback. In this state,
press the , button to resume playback, or press the
m button to resume backward searching.
oWhen searching backward/forward in an audio file, press
the PAUSE ( )9 button to pause playback. Press it again to
resume searching backward/forward.
0 8 button
This has the same function as the button on the STOP ( )8
main unit.
q .// buttons
Press when playing back or paused to skip to the previous or
next chapter or file. (Playback will start after skipping.)
oIn video files, this will move to the previous or next
chapter.
oIn audio files, this will move to the previous or next file.
w SETUP button
Press when using the HOME screen, playing back, paused or
searching backward/forward to open the Setup Menu.
Press again to return to the original screen.
e SEARCH button
Press when playing back or paused to designate a specific
playback time within the current medium.
Press this button to open an information bar at top of the
monitor screen. The cursor will appear for 20 seconds in
the time display area (upper right) of the information bar.
Press the button while the cursor appears and use ENTER
the to input any playback time. To move number buttons
among hours, minutes and seconds, use the l/; cursor
buttons while the cursor appears.
r CLEAR button
This clears the value in the field being input.
In the bookmark list, this deletes the selected bookmark.
t MUTE button
This mutes the volume of the main unit. (An icon appears at
the top of the monitor.)
y PIP button
This turns the picture-in-picture function on/off. This function
can only be used with discs that support it.
u AUDIO button (2nd)*
This selects the audio language used with the picture-in-
picture function. This function can only be used with discs
that support it. (Unclear.)
* This does not have the same function as the 3AUDIO
button.

TASCAM BD-MP1 15
HOME screen
Select, play and check media files, set up the unit and conduct
other functions on the HOME screen.
To move between menus, confirm settings and execute items,
use the shift* functions of buttons on the unit or use the cursor
and buttons on the remote control.ENTER
(These explanations will primarily use remote control
operations.)
* To move the cursor and confirm/execute using the unit,
press the button with the desired shift HIDE/MENU [SHIFT]
function (shown below the button with light characters on a
dark background) at the same time.
Disc
This plays the disc loaded in the disc tray of the unit.
To play a disc, while the icon is selected, press the Disc 7 button.
Media
This enables selection of media (items) loaded in the unit.
Basic remote control functions
pTo exit a folder or subfolder, press the l cursor button
repeatedly to return to the starting screen.
pPress the button to return to the HOME screen.HOME
While the icon is selected, press the button to Media ENTER
show the various media loaded in the unit.
NOTE
i Usually the icons are shown in the order that the media were
loaded.
i After the power is turned on, the various icons are shown in
the order that the unit recognized the media. (The images
shown on these pages are examples after the power was
turned on.)
pBDMV icon: Blu-ray disc
The disc loaded in the disc tray is shown as follows.
pDVD Video icon: DVD disc
The disc loaded in the disc tray is shown as follows.
pCDDA icon: Compact disc (CD)
The disc loaded in the disc tray is shown as follows.
Select the or icon and press the button BDMV CDDA ENTER
to start playback of the media.
pSD : icon SD card
pUSB2/3 : * icon USB flash drive
* The USB number is shown in the order that the USB flash
drives were connected.
If an SD card is not loaded, “USB1” will be shown as the first.
Flash drives loaded in the unit are shown as follows.

16 TASCAM BD-MP1
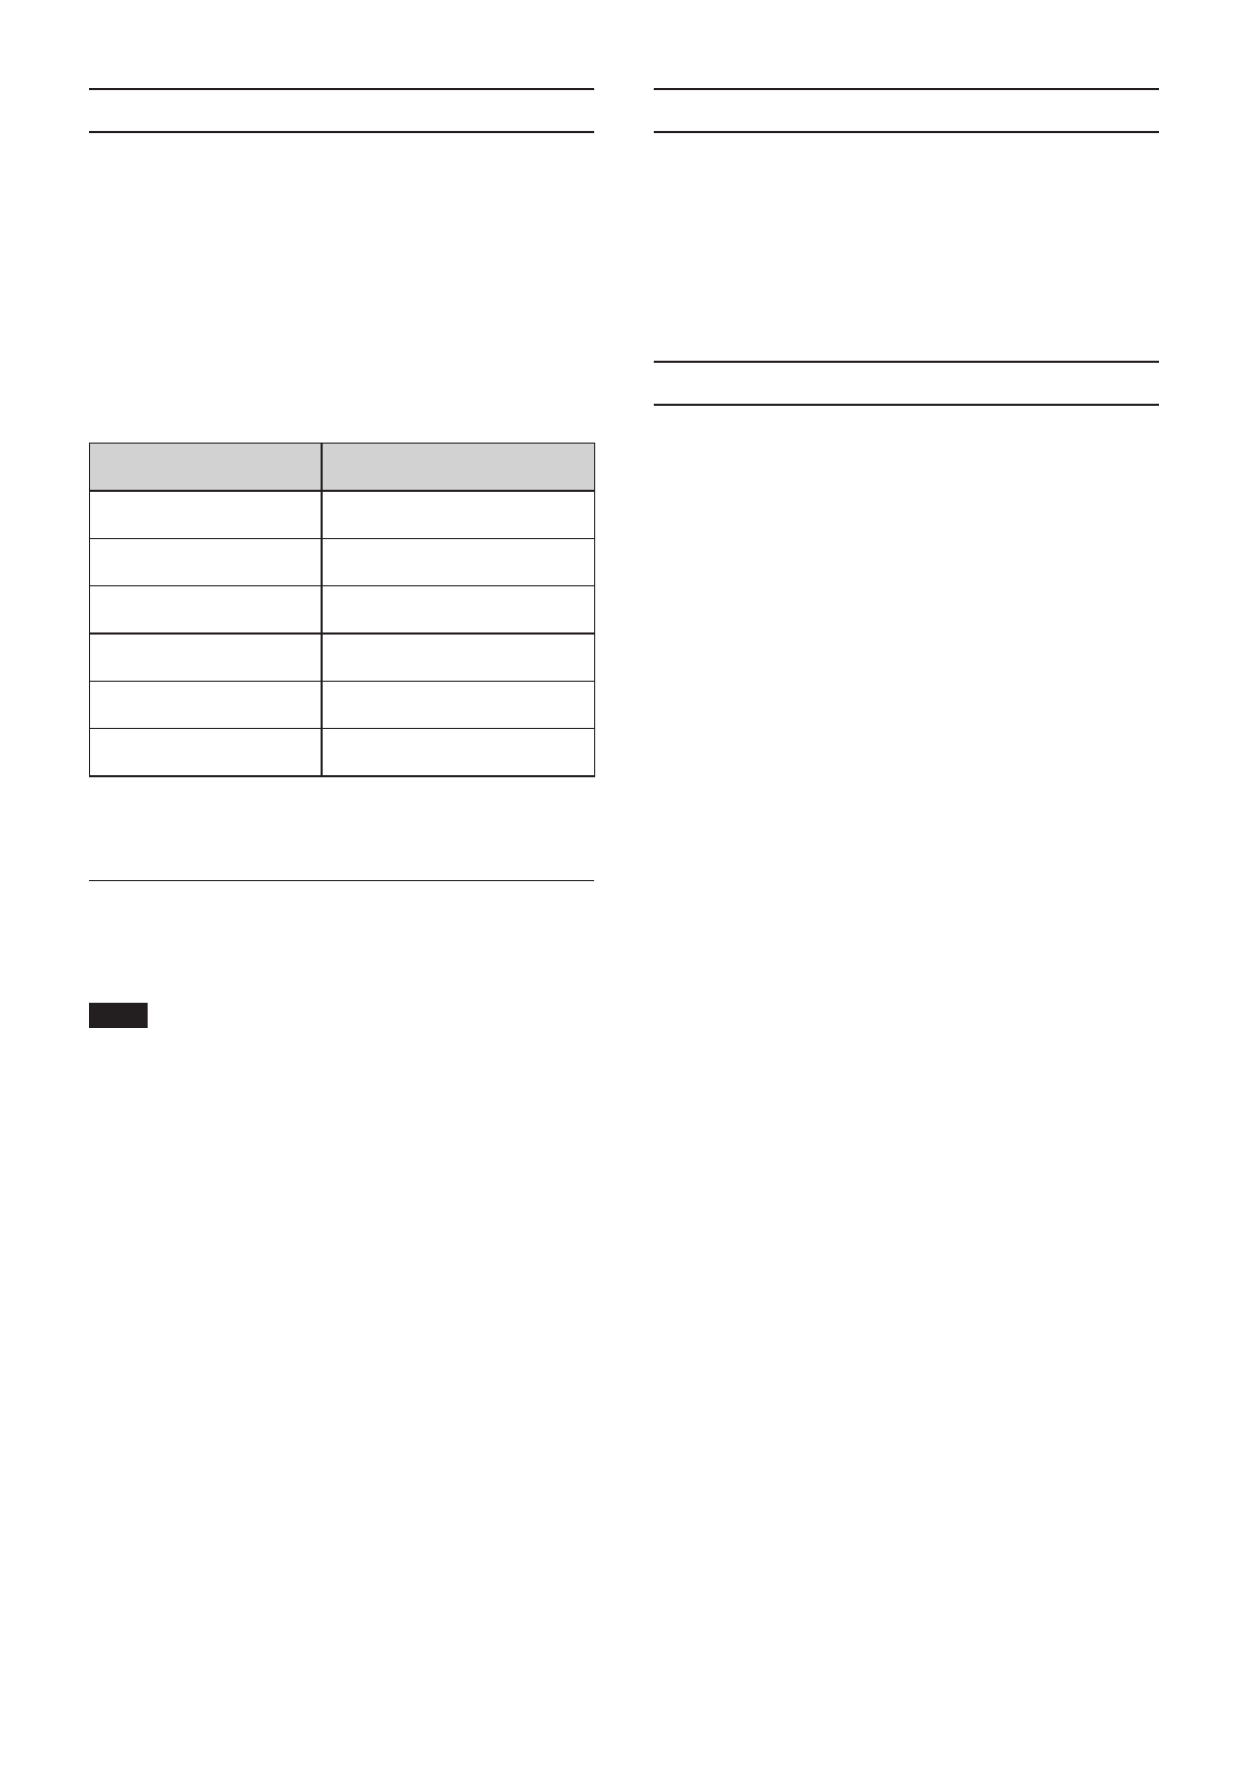
Playing files on SD cards and USB flash
drives
1. Use the j/k cursor buttons to select an SD card or
USB flash drive and press the button to show ENTER
individual folders as below. (The same method is used
to show the content of folders on both SD cards and
USB flash drives.)
…: Top folder
Photo: Photo folder
Music: Audio folder
Video: Video folder
AVCHD: High-quality video folder
2. Use the j/k cursor buttons to select a folder and
press the button to show the files inside the ENTER
folder.
(Example: Music folder open)
3. Use the j/k cursor buttons to select a file and press
the 7 button to start playback.
When a file is selected, the following information
appears on the right side of the monitor.
i Thumbnails of image files
i Various information for audio and video files
When a file is selected, press the ; cursor button to add
a check mark before the file name, selecting it.
i In this state, press the button to play the ENTER
selected files in order. After playback completes, the
screen above will reopen.
i To remove a check mark from a file, select it again and
press the ; cursor button.
pPlaylist icon
By using a playlist, files can be played back in the order
selected from the media (items).
…: Top folder
Photo: Photo folder
Music: Audio folder
Video: Video folder
Adding files to and removing them from
a playlist
Adding files to a playlist
1. Use the j/k cursor buttons to select an SD card or
USB flash drive and press the button to select ENTER
the desired folder.
2. TITLE/Select the file to add to the playlist, and press the
POP UP button to open a pop-up message.

TASCAM BD-MP1 17
3. Use the j/k cursor buttons to select “Add to
playlist” ENTER, and press the button to add the
selected file to the playlist.
i When a file is selected, press the ; cursor button to add
a check mark before the file name, selecting it.
Select a file again and press the ; cursor button to
remove its check mark.
i Add check marks to the necessary files, and press the
TITLE/POP UP button to open a pop-up message.
Use the j/k cursor buttons to select “Add to
playlist” ENTER, and press the button to add the
selected file to the playlist.
i In addition, check marks can be added to all files in
the folder by selecting " ” in the pop-up and Select all
pressing the button in step 2.ENTER
i With check marks added to files, press the TITLE/POP
UP button to open a pop-up message.
Use the j/k cursor buttons to select “Add to
playlist” ENTER, and press the button to add the
selected file to the playlist.
i Select " ” in the pop-up message and press the Clear all
ENTER button to remove check marks from all files.
Exiting the folder will also remove the check marks from
all files.
To do nothing, select “Cancel” ENTER and press the
button, or press the button to return to the RETURN
original screen.
Removing files from a playlist
1. To remove a file from a playlist, select the playlist icon
and open the folder that contains the file.
2. To remove a specific file from the playlist, select it and
press the ; cursor button to add a check mark before
its name.
i At this point, press the button to open TITLE/POP UP
a pop-up message. Then, use the j/k cursor buttons
to select “Remove from playlist” ENTER and press the
button to remove files with check marks from the
playlist.
3. To remove all files from the playlist, press the TITLE/
POP UP button to open a pop-up message. Then, select
“ ” and the press the button to add Select all ENTER
check marks to all files in the folder.
Press the button again to open a pop-up TITLE/POP UP
message. Then, use the j/k cursor buttons to select
“Remove from playlist” ENTER and press the button
to remove files with check marks from the playlist.

18 TASCAM BD-MP1
Settings
On the screens, which include the General Settings, Display Settings, Audio Settings and System Information screens, settings Settings
can be made and information checked, for example.
While the icon is selected, press the button to show icons for the various settings.Settings ENTER
To move between menus, confirm settings and execute items, use the shift* functions of buttons on the unit or use the cursor and
ENTER buttons on the remote control. (These explanations will primarily use remote control operations.)
* To move the cursor and confirm/execute using the unit, press the button with the desired shift function (shown HIDE/MENU [SHIFT]
below the button with light characters on a dark background) at the same time.
Basic remote control functions
pTo exit a folder or subfolder, press the l cursor button repeatedly to return to the starting screen.
pPress the button to return to the HOME screen.HOME
pPress the button even during an operation to return to the previous screen.RETURN
pIn the list of settings below, the underlined setting items are the defaults.
General Settings
System
Function Options Explanation
Screen Saver On/Off
Turn the screen saver on/off.
If “On” is selected, the following functions become enabled when
nothing is playing back or when playback is stopped or paused.
pA screensaver will appear after about 3 minutes without
operation.
pThe unit will automatically turn off after about 10 minutes
without operation.
HDMI CEC On/Off
When an HDMI cable is used to connect a device such as this unit
that supports HDMI CEC to a TV that supports HDMI CEC, this
function allows the remote control to link operation of both of
them.
(When off, only the unit will respond to the remote control.)
Disc Auto Upgrade
On/Off If an upgrade disc is loaded into this unit, upgrading will occur
automatically.
Load Default More… This function restores the various settings stored in the backup
memory of the unit to their factory default values.
Upgrade Disc/USB Storage Use to upgrade the unit firmware.
(Selection of upgrade media is possible.)
Easy Setup More…
The following settings can be made easily using a setup wizard:
pUse the items to make more detailed settings, General Settings
including language, monitor resolution and monitor aspect
ratio.

TASCAM BD-MP1 19
Language
Function Options Explanation
OSD English/Japanese Set the language used for unit function and information screens to
English or Japanese.
Disc menus Various languages/More Set the language used for option menus during playback.
Audio Various languages/More Set the language used to show during playback.
Subtitles Various languages/More/Off Set the language used to show subtitles during playback or turn
subtitles off.
* These functions only work with content that support them.
Playback
Function Options Explanation
Disc Auto Playback On (Repeat On)/On (Repeat Off )/Off
Automatic playback and repeat playback functions can be set.
pWhen the repeat function is used, playback will start
automatically if the disc to be played is loaded in the disc tray
and the power is turned on, as well as if a disc is changed and
the disc tray is closed.
pWith the repeat function, after a disc is played completely,
playback will repeat continuously from the beginning.
i On (Repeat On): Both automatic and repeat playback
functions are enabled.
i On (Repeat Off): The repeat playback function is off, but the
automatic playback function is enabled.
i Off: Both automatic and repeat playback functions are
disabled.
NOTE
oThis function only work with discs that support it.
oWhen the repeat function is enabled, playback will start
automatically when a disc is loaded. For this reason, be
careful during the following operations.
i Making settings on the HOME screen
i Playing files on an SD card/USB flash drive
oAutomatic playback is not supported for SD cards or USB
flash drives.
Closed Captions On/Off
Set whether or not the function to subtitle video disc audio is
enabled.
Angle Icon On/Off Set whether or not an icon is shown when angle operations are
available during video disc playback.
PIP Icon On/Off Set whether or not an icon is shown when picture-in-picture
functions are available during video disc playback.
Secondary Audio Icon On/Off Set whether or not the secondary audio icon is shown or not.
Last Memory On/Off
Set whether or not the unit stores the last playback positions of
discs in its internal memory. When this function is on, playback will
start from the stored position when a disc is played again.
NOTE
i These functions only work with content that support them.
i Pressing the button during playback will not save the HOME
playback position.
i This unit can save positions for five discs maximum. When
the total number of discs would exceed five, the record for
the disc played least recently will be replaced by a record for
the most recent disc.

20 TASCAM BD-MP1
Security
Function Options Explanation
Change Password More…
A password can be set for the unit.
pThe password is a 4-digit number.
* The default password is “0000”.
Parental Control More…
Set the age rating restriction for discs.
A password must be input to change this.
* The default setting is “Off”.
Country Code More… Set the country to use for Parental Control.
A password must be input to change this.
Network
Function Options Explanation
Internet Connection Enable/Disable Enable or disable Internet connection for the unit.
Interface Ethernet/Wireless
Set the method of Internet access for the unit to “ ” or Ethernet
“Wireless”.*
When using "Wireless", after responding "Yes", select from the
following connection methods.
pScan: The unit will search for access points, allowing selection of
a network.
pManual: An SSID can be set manually to connect.
pAuto: Connection is possible using Wi-Fi Protected Setup (WPS)
standards.
Information More…
The following information related to the Internet connection is
shown:
pinterface, address type, IP address, subnet mask, gateway, DNS1
and DNS 2.
( When DHCP is set to “ ”, this information can be input manually 0
using the remote control.)
Connection Test More… This tests the network connection.
IP Setting /ManualAuto
Select how the unit's IP address is set.
pAuto: Automatically acquire the IP address from a DHCP server.
pManual: Manually input the interface, address type, IP address,
subnet mask, gateway, DNS1 and DNS2 numbers.
Wireless Setting More…
Use this to make wireless connection settings.*
pScan: The unit will search for access points, allowing selection of
a network.
pManual: An SSID can be set manually to connect.
pAuto: Connection is possible using Wi-Fi Protected Setup (WPS)
standards.
BD-Live BUDA pBUDA Information
pBUDA Setup
Set the storage location used to save BD-Live contents.
pBUDA Information
oThis shows the amount of open space in the storage location
used to save content.
oPress the button to show the button, and ENTER Fmt buda
press the button again.ENTER
This creates a BUDA folder in the selected storage location.
pBUDA Setup
The storage location used by BUDA can be set to an external
device or the internal storage.
oExternal: A USB flash drive connected to the unit will be
used.**
oOnboard: The internal storage of the device will be used.

TASCAM BD-MP1 21
BD-LIVE Connection Permitted/Partially Permitted/
Prohibited
Select the access level for BD-Live contents on the Internet.
oPermitted: All contents can be accessed.
oPartially Permitted: Specific contents can be accessed.
oProhibited: BD-Live contents will be blocked.
Proxy Settings Disable/Enable
Set whether or not to connect this unit to the Internet through a
proxy server.
oDisable: Do not use a proxy server.
oEnable: A proxy host and proxy port can be set.
* “Wireless” connection can only be used if a USB-wireless LAN adapters has been connected to the unit.
A USB-wireless LAN adapter is not included with this unit. (see "Network connection overview" on page 36)
** If USB flash drives have been connected to both the front and back USB ports, the one first recognized by the unit will be used for
external memory
Do not disconnect the USB flash drive when the BD-Live function is in use. The USB flash drive should use the FAT32 file format.
Display Settings
TV
Function Options Explanation
TV Screen
p16:9 Full
p16:9 Normal
p4:3 Pan & Scan
p4:3 Letterbox
Use to set the display aspect ratio.
Resolution
pAuto
p480I/576I
p480P/576P
p720P
p1080I
p1080P
Use to set the image resolution.
pIf Auto is selected, this unit will detect the optimal resolution for
the monitor or TV. In this case, a message confirming the saving
of the selection will appear. Select " " as necessary.OK
TV System NTSC/PAL/Multi Select the broadcast format* of the device connected to the unit.
Color Space
pRGB
pYCbCr
pYCbCr422
pFull RGB
Select the HDMI output color space.
HDMI Deep Color 30 bits/36 bits/48 bits/Off Select the HDMI output deep color mode.**
HDMI 1080P 24Hz On/Off Turn frame rate conversion on/off for 1080P Blu-ray discs that play
back at 24 Hz.
HDMI 3D /OffAuto
pWhen Auto is selected, the 3D signal will automatically be
output when 3D video is played.
pWhen Off is selected, 3D signals will not be output.
* When in a region that supports both NTSC and PAL, select “Multi”.
** For this function to work properly, the TV or monitor must support HDMI version 1.3 or later.
Video Process
Function Options Explanation
Video Adjustments More…
Adjust the brightness, contrast, hue and saturation output from this
unit to the TV or monitor.
pBrightness Contrast Hue Saturation/ / /
Sharpness High/Normal/Low Set the sharpness to / / for images output from High Normal Low
this unit to the TV or monitor.

22 TASCAM BD-MP1
Closed Captions
Function Options Explanation
CC Attributes /CustomAuto
Auto: Use default attributes for subtitle fonts and
windows, including their size, color and
opacity.
Custom: Enable adjustment of subtitle fonts and
windows, including their size, color and
opacity.
Font color Default/White/Black/Red/Green/Blue/Yellow/Magenta/Cyan The color of subtitle fonts can be adjusted.
Font size Default/Standard/Small/Large The size of subtitle fonts can be adjusted.
Font style
pDefault
pMonospaced with serifs
pProportionally spaced with serifs
pMonospaced without serifs
pProportionally spaced without serifs
The style of subtitle fonts can be adjusted.
Font opacity Solid/Translucent/Transparent
The opacity of subtitle fonts can be adjusted.
pSolid
pTranslucent
pTransparent
Font edge
pDefault
pNone
pRaised
pDepressed Uniform
pLeft drop shadow
pLeft drop shadow
An edge effect can be added to subtitle fonts.
pRaised
pDepressed
pUniform
pLeft drop shadow
pRight drop shadow
Font edge color White/Black/Red/Green/Blue/Yellow/Magenta/Cyan
The edges of subtitle fonts can have a color added.
Background color Default/White/Black/Red/Green/Blue/Yellow/Magenta/Cyan The background color of subtitle fonts can be
changed.
Background opacity Solid/Translucent/Transparent
The opacity of the background of subtitle fonts can
be changed.
pSolid
pTranslucent
pTransparent
Window color Default/White/Black/Red/Green/Blue/Yellow/Magenta/Cyan The color of the subtitle window can be changed.
Window opacity Solid/Translucent/Transparent
The opacity of the subtitle window can be changed.
pSolid
pTranslucent
pTransparent

TASCAM BD-MP1 23
Audio Settings
Audio Output
Function Options Explanation
S/PDIF Bitstream/PCM/Off This selects the digital audio signal format.
HDMI Bitstream/PCM/Off This selects the HDMI audio format.
FS Setting 48 kHz/96 kHz/192 kHz This selects the sampling frequency.*
Volume Control Enable/Disable
Volume up/down operations can be enabled or disabled.
Dolby DRC Off/On/ Set the dynamic range to , or .Auto Off On Auto
* The downsampling frequency used during audio playback for signal processing inside the unit can be set. If an audio signal is played that
has a sampling frequency higher than the selected value, it will be converted to the set sampling frequency.
PCM signals output by HDMI
and S/PDIF connectors will also be downsampled to the set value.
Speaker Settings
Function Options Explanation
Configuration 2.x/3.x/4.x/5.x/6.x/7.x
Select the channel configuration.
p2.x: Lt/Rt*, Stereo
p3.x: LCR
p4.x: LRLsRs
p5.x:
p6.x:
p7.x: C+LR+LsRs+LsrRsr
Test Tone More…
Select to play a test tone from the speakers. **
pSubwoofer selection: None, Single
pSpeakers: C, L, R, SW1, Ls, Rs, Lsr, Rsr
* Lt/Rt is a two-channel downmix output that supports Dolby surround. When played on an ordinary stereo system, the L and R
channel balance could be degraded. If this occurs, select Stereo.
** Trim adjustment overview
Digital full scale (-10dB) is shown as “ ” to make adjustment of surround channel speaker volume differences easier.0
If trim adjustment is unnecessary, use the default setting (+10).
S/PDIF Output Configuration
Function Options Explanation
Configuration
pFL/FR
pSL/SR
pC/SW
pSBL/SBR
pL/R (-10dBF)
The selection items are the same signals that are output from the
analog outputs on the back of the unit.
The selected analog outputs are output from the digital audio
output (COAXIAL) connector.
* The maximum audio level will become -10 dBF only for L/R
System Information
Use to check the revision and the MAC address used by this unit.
oModel: BD-MP1
oMAC: xx-xx-xx-xx-xx-xx
oRevision: xxx.xxx

24 TASCAM BD-MP1
Making connections
This is an example of connections with the unit.
Precautions before making connections
pCarefully read the operation manuals of the devices to be
connected and then connect them correctly.
pBefore making connections, turn this unit and all equipment
to be connected off (standby).
pInstall all connected devices, including this unit, so that they
are powered from the same line. When using a power strip
or similar device, be sure to use one that has high current
capacity (thick cable) in order to minimize fluctuations in
power voltage. Moreover, do not bundle or wrap power
cords.
pConnect cable types correctly. (Be careful not to insert cables
into the wrong connectors or with the wrong orientation.)
ANALOG
IN
(UNBALANCED)
L R
DIGITA IN HDMI INL
ANALOG IN
(BALANCED)
LR
Mixer, recorder, amp, etc. TV, display, etc. Network router, etc.
Computer
USB flash drive
To 7.1 sound system
Mixer, recorder, amp, etc.
Installing rackmount years
The included rackmount ears must first be attached before mounting this unit in a rack.
pRefer to the illustration below when attaching them.
NOTE
i A Phillips screwdriver is necessary for attachment.
i The attachment holes in the included rackmount ears are
elongated, allowing adjustment so that the unit does not
stick out of the rack when attached.

TASCAM BD-MP1 25
Display
BD USB
7
SD
1 2
53
T00 C00 00001
4
1 Type of disc in tray
This shows the type of disc loaded in the tray of the unit.
i Blu-ray disc: , BDMV BDAV
i DVD disc: DVD
i Audio CD: CD
i No disc loaded: NO DISC
2 Connected media
These appear when a USB flash drive or SD card is connected
to the USB port or the SD card slot on the unit.
3 Media operation status
When the unit is playing or paused, an icon appears here.
i During playback: 7
i When paused: 9
4 Title/chapter/track
When the unit is playing or paused, title/chapter/track
information appears here.
i Title/track: T00
i Chapte: C00
5 Various information
oThis shows the position in the media item order shown on
the page of the HOME screen.Media
oSETUP appears when on the Settings page of the
HOME screen.
oVarious information is shown in response to different
operations.
i When a USB flash drive is connected: USB IN
i When a USB flash drive is disconnected: USB OUT
i When the STOP button is pressed: STOP
i When the button is pressed: TITLE/POP UP POP
i When the disc tray is open: OPEN
i When the disc tray is closed: CLOSE
i When a medium is recognized: LOAD
i When playing back: 00:00:00
oOther information shown
i When the title menu of a disc that contains multiple
titles is open: ROOT
i When the title menu of a purchased or rental video disc
is open: TOP
i During a firmware update: UPGRADE
i Volume adjustment: VOL 0
Adjustment range (−41 min. – 0 max.)
Preparing the remote control
Installing batteries
1. Open the cover on the back.
2. Insert two AAA batteries, being certain to use the correct
¥ and ^ orientations.
3. Close the cover.
When to replace batteries
Replace both batteries with new ones if the distance from the
main unit that the remote can be used decreases or if the unit
stops responding to the remote buttons.
Battery precautions
Misuse of batteries could cause them to leak or rupture, for
example. Carefully read and follow the battery caution labels.
(see "CAUTIONS ABOUT BATTERIES" on page 5)
Using the wireless remote control
See "Wireless remote control (TASCAM RC-BDMP1)" on page
13 for the button functions.
When using the remote control, point it toward the receiver on
the unit and use it within the range shown below.
Remote control signal receiver
Remote control operation range
From any angle within 15° of front: 5 m
ATTENTION
i Operation might not be possible if there are obstacles.
i Remove the battery if not using the remote control for a long
time (a month or more).
i It battery fluid should leak, wipe away any fluid inside the
case thoroughly and install a new battery.
i When using other devices that can be controlled by infrared
rays, operation of this remote control could cause those
devices to function improperly.

26 TASCAM BD-MP1
Turning the unit on and off
NOTE
When this unit is connected by a power cord and electricity
is supplied from an outlet, it will automatically start up. (This
will also occur when power is restored after a power outage
or other interruption to the power supply.)
If the STANDBY/ON indicator on the front of the unit lights red,
press the button or the remote control STANDBY/ON button.
HELLO
Startup screen
BD USB
BDMV
Operation screen
After the unit starts and the startup screen is shown, the
operation screen will appear on the display.
Turning the unit off
Press the button or the remote control STANDBY/ON button
to turn the unit off.
ATTENTION
Do not turn the power off or disconnect the power cord
when the unit is operating (including playing back or writing
data to a USB flash drive). Doing so could damage the unit.
Loading and removing discs
Loading discs
Press the OPEN/CLOSE (-) button on the main unit or remote
control.
Open the disc tray and place the disc on it with the label side up.
Press the OPEN/CLOSE ( )- button again to close the disc tray.
After loading a disc, the unit will read its information and show
the media type on the display.
NOTE
i When the disc tray is open, “ ” will appear on the display. OPEN
When the disc tray is open, “CLOSE” will appear on the
display.
i If a disc other than a playable CD is inserted or a disc is
inserted upside down, the unit will automatically eject it.
Ejecting discs
Press the OPEN/CLOSE (-) button on the main unit or remote
control.
After the disc tray opens, pick the disc up by its center and
remove it.
NOTE
The OPEN/CLOSE button functions when the unit is turned
on.
Inserting and removing SD cards
Inserting SD cards
Insert an SD card into the SD card slot on the front of the unit to
enable playback.
TIP
SD cards can be inserted whether or not the unit is on or off.
i Inserted SD cards with the correct orientation.
i The label should be up and the connector should be
inserted toward the back.
Removing SD cards
Turn the unit off or stop operation before removing an SD card.
ATTENTION
Do not remove an SD card when the unit is operating
(playing back an SD card). Doing so could cause proper
dubbing to fail, data to be lost, and sudden loud noises from
monitoring equipment, which might damage the equipment,
harm hearing or cause other trouble.
1. Press the SD card in gently to make it to come forward.
2. Pull the SD card out by hand.
SD card write protection switches
SD cards have write-protection switches that prevent writing
new data to them.
Connecting and disconnecting USB
flash drives
Connecting USB flash drives
Connect a USB flash drive to the USB port on the front or back of
the unit to enable playback.
TIP
You can connect a USB flash drive when the unit is on or off.
Disconnecting USB flash drives
Turn the unit off or stop operation before disconnecting a USB
flash drive.
ATTENTION
Never disconnect a USB flash drive when the unit is operating
(including playing back or writing data to the USB flash
drive). Doing so could cause the loss of data or damage the
unit.
TASCAM BD-MP1 27
Panel lock function
By using the lock functions, opening and closing the disc tray,
and operations using the remote control and main unit buttons
can be locked.
1. HIDE MENU [SHIFT] OPEN/CLOSE [LOCK]Press the and
buttons on the front of the unit at the same time.
The current lock status will appear on the unit display.
2. While pressing and holding the button HIDE MENU [SHIFT]
on the unit, press the OPEN/CLOSE [LOCK] button again.
oPressing these buttons changes the status every time.
oPress the OPEN/CLOSE [LOCK] button while continuing
to press and hold the button until HIDE MENU [SHIFT]
the desired lock function appears.
Unit display indication Lock status
LOCK: T LOCK Disc tray locked
LOCK: P LOCK Main unit buttons locked*
LOCK: R LOCK Remote control locked
LOCK: R+P LOCK Remote control and main unit
buttons locked*
LOCK: R+T LOCK Remote control and disc tray
locked
LOCK: OFF Unlocked
* Even when the main unit buttons are locked, pressing the
HIDE MENU [SHIFT] OPEN/CLOSE [LOCK] and buttons at
the same time still works.
When locked
If operation of the front panel is attempted when the front
panel is locked, “LOCKED” will appear on the display and that
operation will not be executed.
NOTE
i If the disc tray is locked using or LOCK: T LOCK
LOCK: R+T LOCK while the tray is still open, closing
it once will be possible. After that, the disc tray will be locked.
i Turning the power on again will be possible even if the
power is turned off while the unit is locked. The unit will
remain locked after it starts up.
Remote control overview
This unit can be controlled remotely by connecting it to a
computer, either by connecting their ports with an RS-RS-232C
232C cable or by connecting the unit’s to a LAN port ETHERNET
on the computer with a LAN cable.
pFor details about this unit’s communication and command
protocols for ETHERNET and RS-232C, refer to the BD-MP1
download page of the TASCAM website (http://teac-global.
com/).
BD-Live overview
This unit supports BD-Video (BD-ROM Profile 2.0) with BD-Live
functions.
By connecting this unit to the Internet, this function can be
used to enable additional content, including special videos and
subtitles.
pThe various functions that can be used with BD-Live depend
on the disc. Refer to the screen display and explanations of
the disc for details about those functions and operations.
pTo use BD-Live functions, connect this unit to the Internet
and make the necessary settings. See "Network connection
overview" on page 36 for connection procedures, and “See
"Network" on page 20 for setting procedures.
pDepending on the disc, changing the settings described in
“Network” on page 20 might be necessary.
pIf the BD-LIVE Connection setting is “ ” in “Network” Prohibited
on page 20, BD-Live content will not be able to access the
Internet.
pDepending on the network setup being used, network
connection might take some time or might not even be
possible.
pDuring playback of discs that support BD-Live, identification
data for the unit or disc might be transmitted to the content
provider.
To limit Internet connection, change the “Network” on page
20 settings described on page 17.

28 TASCAM BD-MP1
Types of media that can be played
This unit can play the following media formats.
Disc media
pSupported Blu-ray
BD25, BD50, BD-ROM, BD-R, BD-RE
pSupported DVD
DVD-ROM, DVD+R, DVD-R, DVD+RW, DVD-RW
pSupported CD
CD-DA, CD-R, CD-RW
Disc formats
pSupported Blu-ray
BDMV, BDAV
pSupported DVD
DVD-Video, DVD-VR, AVCHD
NOTE
i BD-R/DVD-RW/DVD-R media that have not been finalized
(closed) might not play properly.
i BD-RE version 1.0 (cartridge type) and DVD-RAM media
cannot be played.
i Additional recorded parts cannot be played from BD-RE/
BD-R/DVD-RW/DVD-R media with multi-session (multi-
border) recordings.
i Some BD-Video/DVD-Video media might not operate as
explained in this manual due to the intentions of their
producers. For details, refer to the manuals of such discs.
i Use music CDs that conform to ISO standards.
i Playback is not guaranteed for all discs that conform to the
standards.
Playable file formats (video, audio and
image)
This unit can play the following file formats.
Video formats
p.asf, .mpg, .avi, .3gp, .dat, .mkv, .mov, .m2ts,
.ogm, .tp, .ts, .mp4, .wmv
Audio formats
p.wav, .mp3, .wma, .aac, .flac, .ape
Still image formats
p.jpeg, .gif, .png
NOTE
USB flash drives and SD cards must use FAT16, FAT32 or NTFS
file systems.
Playing media
This section explains basic operations, including playback,
pausing and stopping.
The following explanations assume that necessary connections
have been completed, the unit is on, a disc or other media that
contains video or audio files has been loaded, the current source
has been selected, and " ” or BDMV", " ", " ", "BDAV DVD CD", "USB
" ", for example, appears on the display.SD
Loading discs
Conduct the following operations with the buttons on the front
of the unit or with the remote control.
(These explanations will primarily use remote control
operations.)
1. Press the OPEN/CLOSE ( ) button to open the disc tray.-
2. Load a disc in the disc tray, and press the OPEN/CLOSE ( )-
button again to close it.
While the disc is being read, " " appears on the LOAD
display, followed by one of the items below when reading
completes.
i Blu-ray disc: , BDMV BDAV
i DVD disc: DVD
i Audio CD: CD
Automatic playback overview
pWhen Disc Auto Playback Settings (HOME screen > >
System On (Repeat On) Off) is set to (the default is ), discs
will start playing automatically after they are loaded.
pWhen Disc Auto Playback Off is or playback does not start,
select on the HOME screen, and press the or Disc ENTER 7
button.
NOTE
oWhen the repeat function is enabled, playback will start
automatically when a disc is loaded. For this reason, be
careful during the following operations.
i Making settings on the HOME screen
i Playing files on an SD card/USB flash drive
oAutomatic playback is not supported for SD cards or USB
flash drives.

TASCAM BD-MP1 29
Playing video discs
pIf a disc that has never been played before is loaded, it will
start playing from the beginning.
pIf (HOME screen > > Last Memory Settings System) is set
to On (the default is ), when discs that have been played On
before are loaded, they will resume playing* from the
position where they were last stopped.
* This only works with purchased or rental video discs.
Moreover, the unit can save positions for five discs maximum
with this function. When the total number of discs would
exceed five, the record for the disc played least recently will
be replaced by a record for the most recent disc.
Operating from disc top menus and pop-up
menus
When video discs have menus or pop-up menus, they can be
shown and a variety of operations are possible.
( The contents of menus and pop-up menus depend on the
programming of the discs.)
pTo show the title menu, press the TOP MENU button. If this is
done when playing or paused, playback will stop.
To show the title menu without stopping playback when
playing or paused, press the button.TITLE/POP UP
To move between items in the title menu use the cursor
buttons, and press the button to confirm.ENTER
Pausing playback
To pause playback, press the 9 button.
Press the 9 button again or press the 7 button to resume
playback from the stopped position.
Stopping playback
To stop playback, press the 8 button.
Press the 7 or button to start playback from the ENTER
stopped position.
* This is different from pausing.
oWhatever is shown on the monitor will disappear.
oDuring repeat playback, the repeat mode will clear.
Searching backward/forward
Use the m/, buttons to search backward/forward
Pressing the
m/, button again will change the search
speed up to five levels.
Pressing it again will return to ordinary playback.
When searching backward/forward in a disc, press the 9 button
to pause playback.
Pressing the button again will resume playback.9
Skipping to the previous or next chapter/
track
Press the .// button to skip to the previous/next
chapter/track.
pWhen playing, paused or searching backward/forward, press
the / button to skip to the previous/next chapter/. /
track and resume playback.
pTo return to the beginning of the currently playing chapter/
track, press the . button once.
( However, if the current chapter/track is playing back or
paused within a few seconds of its beginning, this will move
to the previous chapter/track and resume playback.)
Repeating playback of part of a scene or
track
* This repeat playback function is different from the automatic
playback repeat function. The playback position will not be
retained when the unit is turned off.
During media playback, press the button to set a desired A-B
interval (between A and B points) and play it back repeatedly.
(In this explanation, “scene” is used, but it also applies to “tracks”
when using audio files.)
1. Press the A-B button at the point in the scene were repeat
playback will start. The starting point “ ” will appear at the A-
top of the monitor.
2. Next, press the A-B button at the point in the scene were
repeat playback will end. The starting and ending points
“ ” will appear at the top of the monitor, and repeat A-B
playback will continue between these points.
3. During repeat playback, press the A-B button again to end
repeat playback and continue ordinary playback
(Not all video discs support this function.)
Repeating playback of a chapter, title or
track
* This repeat playback function is different from the automatic
playback repeat function. The playback position will not be
retained when the unit is turned off.
Press the REPEAT button to enable repeat playback mode. The
currently playing chapter, title or track will play repeatedly. Press
this button repeatedly to change the repeat playback mode.
Video discs
oDuring chapter repeat playback, playback starts at the
beginning of the current chapter. (The icon appears
at the top of the monitor.)
oDuring title repeat playback, playback starts at the
beginning of the current title. (The icon appears at
the top of the monitor.)
oDuring all repeat playback, playback starts at the
beginning of the video file. (The icon appears at the
top of the monitor.)
CDs and video/audio files
oDuring single repeat playback, playback starts at the
beginning of the current track. (The icon appears at
the top of the monitor.)
oDuring all repeat playback, playback repeats for all tracks
on a CD and for all video/audio files in the same folder.
(The icon appears at the top of the monitor.)

30 TASCAM BD-MP1
Jumping to a specific playback time, scene
or track
(This also applies to “chapters” when using audio discs.)
During disc playback, press the button to show an SEARCH
information bar at the top of the monitor. A cursor will appear in
the time display area.
At this time, press a l/; cursor button to move the selection
between the time and chapter display areas.
NOTE
Only playback times and chapter numbers that exist on
the playing disc can be specified. Values that exceed these
ranges cannot be specified.
Jumping to a specific playback time
1. ENTERIn this state, press the button to select the time
display area, enabling the value to be changed.
2. Use the number buttons to input values.
Use the l/; cursor buttons to move between the hours,
minutes and seconds.
(In the illustration below, values have been entered for
minutes and seconds.)
3. ENTERAfter inputting values, press the button to start
playback from the specified time.
(The chapter display will also change to the chapter at the
specified time.)
Time display
Hours: minutes: seconds
Chapter display
Press the button to close the information bar.ON SCREEN
Jumping to a specific chapter or track
1. Use a l/; cursor button in the time display area to move
the cursor to the chapter display area.
In this state, press the button to show up and down ENTER
triangle icons in the chapter display area, enabling the
value to be changed.
2. Use the number buttons to input values.
3. ENTERAfter inputting values, press the button to start
playback from the specified chapter.
(The time display will also change to the time at the
specified chapter.)
Press the button to close the information bar.ON SCREEN
Playing USB flash drives and SD cards
To play these media, connect them to the USB port* or SD card
slot on the front of the unit.
* Another USB port is on the back of the unit.
While the medium is being read, " " appears on the LOAD
display, followed by one of the items below when reading
completes.
oUSB flash drive: USB
oSD card: SD
1. Media ENTERSelect on the HOME screen and press the
button.
Media icons will appear. Use the j/k cursor buttons to
select an SD/USB icon and press the button.ENTER
2. Opening the selected icon will show the following folders.
…: Top folder
Photo: Photo folder
Music: Audio folder
Video: Video folder
AVCHD: High-quality video folder
3. Select the target folder, and press the button.ENTER
Files inside the folder will be shown.
(Example: Music folder open)

TASCAM BD-MP1 31
4. Use the j/k cursor buttons to select a file and press
the 7 button to start playback.
When a file is selected, the following information
appears on the right side of the monitor.
i Thumbnails of image files
i Various information for audio and video files
Playing USB flash drive/SD cards playlists
To play playlists with these media, connect them to the USB
port* or SD card slot on the front of the unit.
* Another USB port is on the back of the unit.
While the medium is being read, " " appears on the LOAD
display, followed by one of the items below when reading
completes.
oUSB flash drive: USB
oSD card: SD
NOTE
Media files in playlists will be played back in the order that
they were selected.
Adding files to a playlist
1. Media ENTERSelect on the HOME screen and press the
button.
Media icons will appear. Use the j/k cursor buttons to
select an SD/USB icon and press the button.ENTER
2. Opening the selected icon will show the following folders.
…: Top folder
Photo: Photo folder
Music: Audio folder
Video: Video folder
AVCHD: High-quality video folder
NOTE
Playlists can only include image, audio or video files.
A playlist cannot contain different types of files. (For example,
it cannot contain both image and video files.)
3. TITLE/Select the file to add to the playlist, and press the
POP UP button to open a pop-up message.
4. Use the j/k cursor buttons to select "Add to playlist”,
and press the button to add the selected file to the ENTER
playlist.
oWhen a file is selected, press the ; cursor button to add a
check mark before the file name, selecting it.
Select a file again and press the ; cursor button to remove
its check mark.
oAdd check marks to the necessary files, and press the
TITLE/POP UP button to open a pop-up message.
Use the j/k cursor buttons to select "Add to playlist”,
and press the button to add the selected file to the ENTER
playlist.
oIn addition, check marks can be added to all files in the
folder by selecting " ” in the pop-up and pressing Select all
the button in step 3.ENTER

32 TASCAM BD-MP1
oWith check marks added to files, press the TITLE/POP UP
button to open a pop-up message.
Use the j/k cursor buttons to select "Add to playlist”,
and press the button to add the selected file to the ENTER
playlist.
oSelect " ” in the pop-up message and press the Clear all
ENTER button to remove check marks from all files.
Exiting the folder will also remove the check marks from
all files.
To do nothing, select “Cancel” ENTER and press the
button, or press the button to return to the RETURN
original screen.
Playing files in a playlist
1. Media ENTERSelect on the HOME screen and press the
button.
Media icons will appear. Use the j/k cursor buttons to
select the Playlist folder and press the button.ENTER
2. Opening the playlist folder will show the following folders.
…: Top folder
Photo: Photo folder
Music: Audio folder
Video: Video folder
3. ENTERSelect a file for playback, and press the or 7 button
to start playing the playlist
Removing files from a playlist
1. To remove a file from a playlist, select the playlist icon and
open the folder that contains the file.
2. To remove a specific file from the playlist, select it and press
the ; cursor button to add a check mark before its name.
oAt this point, press the button to open TITLE/POP UP
a pop-up message. Then, use the j/k cursor buttons
to select “Remove from playlist” ENTER and press the
button to remove files with check marks from the playlist.
3. To remove all files from the playlist, press the TITLE/POP UP
button to open a pop-up message. Then, select “Select all”
and the press the button to add check marks to all ENTER
files in the folder.
Press the button again to open a pop-up TITLE/POP UP
message. Then, use the j/k cursor buttons to select
“Remove from playlist” ENTER and press the button to
remove files with check marks from the playlist.

TASCAM BD-MP1 33
Using program playback
This unit can play the content (titles/chapters or tracks) of video
and audio discs in specified order.
1. First, press the button. The following Program PROG/RED
page appears on the monitor.
NOTE
Pressing the PROG/RED button again during this operation
will clear the set content, restoring the default state.
DVD Screen
CD Screen
The Program screen shows the type of media that can
have its playback order set (title/chapter or track), the total
number of programmed items (15 maximum) and the names
of the operation buttons (Play/Clear/Stop).
* Remote control button assignments
oPlay: 7 button
oClear: buttonCLEAR
oStop: buttonRETURN
2. On the Program screen, input the content to play in order
from field using the procedures below.1
1. First, in field , press the button. Then use the 1ENTER
j/k cursor buttons to select titles/chapters or tracks.
DVD Screen
oFor video discs, first use the / cursor buttons to select j k
the number* of the title to be played in the title input
field. Then, use the cursor button to move to the chapter ;
input field, and use the / cursor buttons to select the j k
number* of the chapter to be played.
i Use the button to reset the input number to .CLEAR 0
i Press the button to cancel the program and RETURN
close the Program page.
* Only values that exist in the disc content can be selected.
CD Screen
oFor audio discs, use the j/k cursor buttons to select the
number* of the track to be played in the track input field.
i Use the button to reset the input number to .CLEAR 0
i Press the button to cancel the program and RETURN
close the Program page.
* Only values that exist in the disc content can be selected.
2. After inputting all the desired playback items, press the
7 button to start program playback.
NOTE
When the Program page is open, only the following buttons
can be used.
7, , , cursor and number buttonsCLEAR RETURN
Specyfikacje produktu
| Marka: | Tascam |
| Kategoria: | odtwarzacz blu-ray |
| Model: | BD-MP1 |
Potrzebujesz pomocy?
Jeśli potrzebujesz pomocy z Tascam BD-MP1, zadaj pytanie poniżej, a inni użytkownicy Ci odpowiedzą
Instrukcje odtwarzacz blu-ray Tascam

7 Września 2024
29 Sierpnia 2024
Instrukcje odtwarzacz blu-ray
- odtwarzacz blu-ray Sony
- odtwarzacz blu-ray Samsung
- odtwarzacz blu-ray LG
- odtwarzacz blu-ray Sharp
- odtwarzacz blu-ray Pioneer
- odtwarzacz blu-ray Philips
- odtwarzacz blu-ray Onkyo
- odtwarzacz blu-ray Panasonic
- odtwarzacz blu-ray Asus
- odtwarzacz blu-ray Nedis
- odtwarzacz blu-ray Lenco
- odtwarzacz blu-ray Toshiba
- odtwarzacz blu-ray Grundig
- odtwarzacz blu-ray Denon
- odtwarzacz blu-ray Cambridge
- odtwarzacz blu-ray JVC
- odtwarzacz blu-ray Oppo
- odtwarzacz blu-ray Pyle
- odtwarzacz blu-ray Marantz
- odtwarzacz blu-ray NAD
- odtwarzacz blu-ray Harman Kardon
- odtwarzacz blu-ray Verbatim
- odtwarzacz blu-ray McIntosh
- odtwarzacz blu-ray Hitachi
- odtwarzacz blu-ray Laser
- odtwarzacz blu-ray Sherwood
- odtwarzacz blu-ray Vizio
- odtwarzacz blu-ray Peaq
- odtwarzacz blu-ray Dune
Najnowsze instrukcje dla odtwarzacz blu-ray

7 Lutego 2025

2 Lutego 2025
30 Grudnia 2025
30 Grudnia 2025
22 Grudnia 2024
22 Grudnia 2024
22 Grudnia 2024
22 Grudnia 2024
22 Grudnia 2024
8 Października 2024