Instrukcja obsługi Solac CVG9605
Przeczytaj poniżej 📖 instrukcję obsługi w języku polskim dla Solac CVG9605 (62 stron) w kategorii Żelazo. Ta instrukcja była pomocna dla 20 osób i została oceniona przez 2 użytkowników na średnio 4.5 gwiazdek
Strona 1/62

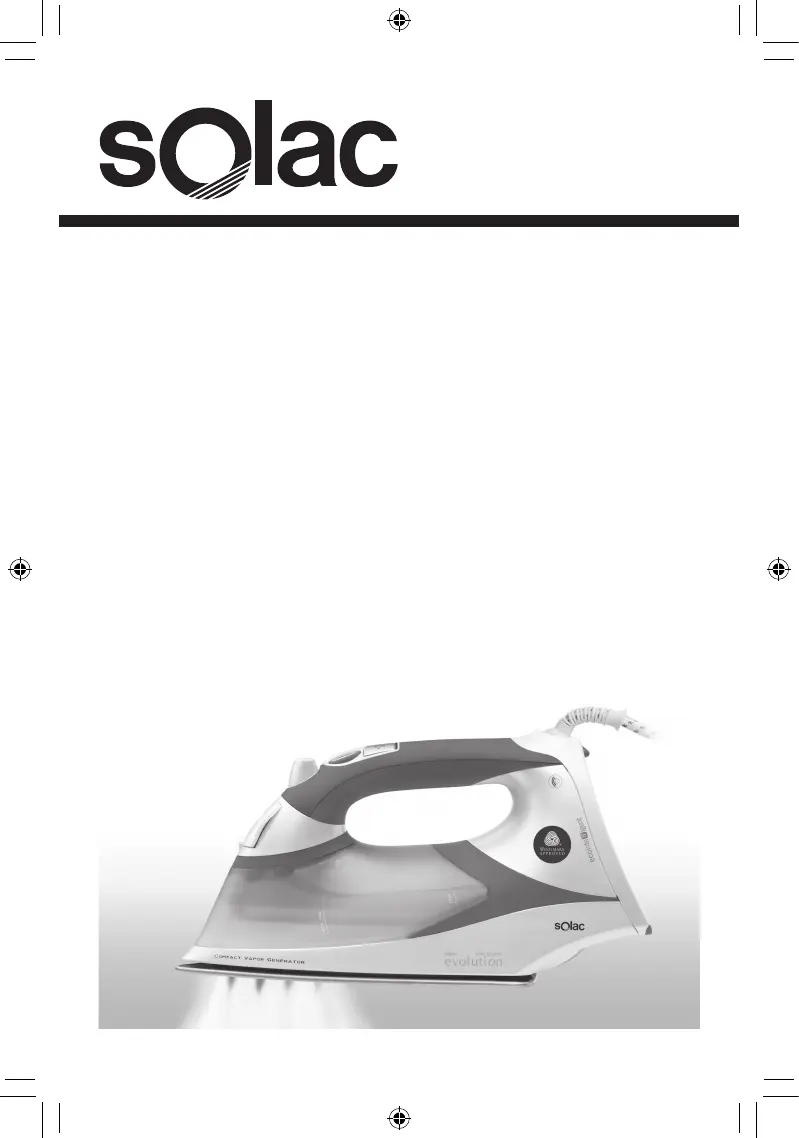
CENTRO DE PLANCHADO COMPACTO INSTRUCCIONES DE USO
COMPACT VAPOR GENERATOR INSTRUCTIONS FOR USE
CENTRALE DE REPASSAGE COMPACTEC MODE D’EMPLOI
KOMPAKT-BÜGEL-STATION GEBRAUCHSANLEITUNG
CENTRO DE PASSAR COMPACTO INSTRUÇÕES DE USO
CENTRO DI STIRATURA COMPATTO ISTRUZIONI PER L’USO
COMPACTE STRIJKINRICHTING GEBRUIKSAANWIJZING
ŽEHLÍCÍ CENTRUM COMPACT NÁVOD K POUZITÍ
ŻELAZKO KOMPAKTOWE INSTRUCJA OBSLUGI
KOMPAKTNÝ ŽEHLIACI STROJ NÁVOD NA POUZITIU
HASZNALATI ÚTMUTATÓ HASNÁLATI UTASÍTÁS
КОМПАКТЕН ГЛАДЕЩ ЦЕНТЪР инструкция за употреба
KOMPAKTNI SUSTAV ZA GLAČANJE UPUTE ZA UPOTREBU
EVOLUTION COMPACT IRONING CENTRE INSTRUCŢIUNI DE UTILIZARE
MOD. CVG 96…
Solac is a registered Trade Mark 10/2008
CVG9601.indd 1 28/10/09 17:40:02

5- 8 • ESPAÑOL
9-12 • ENGLISH
13-17 • FRANÇAIS
17-21 • DEUTSCH
21-25 • PORTUGU SÊ
25-29 • ITALIANO
29-33 • NEDERLANDS
33-37 • ESKYČ
37-41 • POLSKA
41-45 • ESLOVENSKY
45-49 • MAGYAR
49-53 • българск
54-57 • HRVATSKA
58-61 • ROMANA
CVG9601.indd 2 28/10/09 17:40:02

3
10
8
11
31
7
9
5
6
12
Fig. 1
2
4
CVG9601.indd 3 28/10/09 17:40:02

4
Fig. 2
1.
6.
Fig. 3
A
n
t
i
c
a
l
c
-
s
y
s
t
e
m
CVG9601.indd 4 28/10/09 17:40:03

5
• ESPAÑOL
Gracias por haber elegido Evolution de Solac, el único Centro de Planchado Compacto del mundo, con
el que disfrutará de un planchado profesional con las ventajas de una plancha tradicional.
El Centro de Planchado Compacto Evolution ha sido testado y aceptado dentro del
programa Woolmark para el cuidado de prendas de lana en el hogar, y representa
una nueva categoría de licencia Woolmark en el cuidado de prendas de vestir.
Evolution incorpora una tecnología radicalmente nueva que asegura la delicadeza
y eficacia en el planchado gracias a la generación de vapor constante a la tempe-
ratura mínima (punto ) y a la uniformidad de la temperatura de la suela.•
Número de certificado: M0601
ATENCIÓN
• Antes de utilizar su CPC (Centro de Planchado Compacto), retire todas las bolsas de papel o plástico, láminas
plásticas, cartones y pegatinas eventuales que se encuentran dentro o fuera del aparato que sirvieron como
protección de transporte o promoción de venta.
• Lea estas instrucciones antes de poner su aparato en funcionamiento
• No lo conecte sin comprobar que el voltaje del aparato y el de su casa coinciden.
• Verifique que la base del enchufe dispone de una toma de tierra adecuada
• Tenga cuidado de que el cable no toque las partes calientes del aparato.
• Si Vd. plancha con vapor, remítase al apartado “ANTES DE EMPEZAR A PLANCHAR”
• Para llenar su Centro de Planchado Compacto (CPC) o rellenarlo durante el planchado, siga las instrucciones
indicadas en el apartado “ANTES DE EMPEZAR A PLANCHAR”, desconectándolo de la red y usando el vaso
que lo acompaña.
• No se preocupe si el aparato desprende un poco de humo durante el primer uso. Desaparecerá rápida-
mente.
• No proyecte el vapor “vertical” sobre una prenda colgada en el armario o puesta en una persona. El
planchado vertical debe hacerse con la prenda sobre un colgador y aislada de otras prendas, elementos
o personas.
• Mantenga el CPC en posición vertical cuando lo guarde, apoyado sobre la talonera del mismo.
• Se debe utilizar el CPC sobre una superficie de planchado estable.
• Al término del planchado vacíe siempre el agua del depósito. Y si desea vaciarlo durante el plan-
chado, desconecte también previamente el aparato de la red.
• Para desconectar el CPC no tire del cable de alimentación, hágalo de la clavija .
• Si el cable de alimentación está dañado, para evitar peligros, debe de ser sustituido en un S.A.T. (Servicio
de Asistencia Técnica) autorizado por el fabricante, ya que son necesarias herramientas especiales.
• Se debe utilizar el CPC sobre una superficie de planchado estable.
• El CPC no debería ser usado si se ha caído o si tiene alguna rotura o fuga en el depósito del agua. Si observa
alguno de estos problemas lleve el CPC a un S.A.T. autorizado por el fabricante.
• No deje el aparato en funcionamiento sin vigilancia.
• Los niños deberían ser supervisados para asegurar que no juegan con el aparato.
• Este aparato no está destinado para ser utilizado por personas (incluidos niños) cuyas capacidades físicas,
sensoriales o mentales estén reducidas, o carezcan de experiencia o conocimiento, salvo si han tenido
supervisión o instrucciones relativas al uso del aparato por una persona responsable de su seguridad.
¡¡ATENCIÓN!! Cuando desee desprenderse del aparato, NUNCA lo deposite en la basura,
sino que acuda al PUNTO LIMPIO o de recogida de residuos más cercano a su domicilio,
para su posterior tratamiento. De esta manera, está contribuyendo al cuidado del medio
ambiente.
COMPONENTES PRINCIPALES Y ACCESORIOS FIG 1
1.- Tapa del orificio de llenado de agua
2.- Salida de spray
CVG9601.indd 5 28/10/09 17:40:03

7
• Para seleccionar el nivel de vapor deseado, basta con pulsar una vez el interruptor correspondiente (Fig.1
(8) Fig.1 (9) para vapor medio o para vapor máximo). En ambos casos sonará un pitido y se encenderá en
rojo el icono del nivel de vapor seleccionado.
• Para cortar la salida del vapor, presione de nuevo el interruptor de vapor activado (en rojo), sonará un
pitido, se apagará la luz roja, y éste dejará de salir automáticamente.
• ECO-INTELLIGENT: este Centro de Planchado Compacto Solac cuenta con un dispositivo de desco-
nexión de la función de vapor tras 3 segundos sin detección de movimiento. Con ello se consigue
un menor consumo energético así como una mayor autonomía del depósito (menor consumo de
agua).
• La función vapor se conectará de nuevo automáticamente al detectar el más mínimo movimiento del
Centro de Planchado Compacto o bien presionando uno de los pulsadores de salida de vapor.
DESCONEXIÓN AUTOMÁTICA: AUTO - PAUSE
• El Centro de Planchado Compacto posee un sistema de desconexión automática. Transcurridos 3
minutos desde la última vez que se utilizó, éste se desactiva de forma automática. Esto significa
que una vez que actúa el dispositivo, el CPC deja de calentar y comienza a enfriarse. En ese mo-
mento sonará un pitido; posteriormente parpadeará el piloto luminoso de funcionamiento Fig.1
(10), indicando que el aparato se ha desconectado. Para volverlo a activar, basta con moverlo
ligeramente. Sonará un pitido y el CPC volverá a la posición de temperatura y vapor que tenía
antes de la desconexión.
• Téngase en cuenta que el período transcurrido desde la desconexión hasta que se vuelva a activar influirá
en el tiempo que necesite el CPC para volver a recuperar la temperatura seleccionada anteriormente.
RECOMENDACIONES DE PLANCHADO
• Dado que el funcionamiento de este modelo se asemeja a un centro de planchado profesional y debido
a su fuerte caudal de vapor al máx, 40 gr/min, le recomendamos planchar con vapor medio en las posi-
ciones • y •• de temperatura, y vapor máximo para las posiciones ••• y MAX. de temperatura. Asimismo le
recomendamos primero planchar con vapor (el adecuado a la prenda que vaya a planchar) y repasar en
seco para deshumedecer la ropa y obtener los resultados de un planchado profesional.
• Para planchar sin vapor, basta con NO accionar los interruptores de vapor Fig.1 (8 y 9). NO es necesario
vaciar el depósito de agua.
PLANCHADO CON VAPOR
• Este modelo le permite planchar con vapor en la posición 1 de temperatura (•). Dispone de dos caudales
de vapor, med 20gr/m y máx 40gr/m. Para la correcta utilización del caudal remítase al apartado de “Re-
comendaciones de Planchado”.
PLANCHADO VERTICAL
• Mantenga pulsado el interruptor de vapor para obtener vapor durante el planchado en vertical.
Permite eliminar arrugas de prendas delicadas sin necesidad de apoyarlas en la tabla de planchado: cha-
quetas, abrigos, cortinas, prendas de ante, etc...
• Coloque la prenda en un colgador, aislada de otras prendas, personas, ...
• Ponga la ruleta de selección de temperatura en posición (••), (•••) ó (MAX), sitúe el CPC en posición vertical
y accione el pulsador. En el punto (••) obtendrá un vapor más húmedo y blanco que percibirá mejor,
mientras que en el punto (•••) y (MAX) el vapor es más seco y aunque sigue manteniendo el mismo caudal
le será más difícil verlo.
SPRAY
• Con agua en el depósito, puede pulverizar agua sobre la prenda presionando el pulsador Fig. 1 (3).
RELLENADO DE AGUA
• Si durante el planchado el depósito se queda sin agua , se escuchará un pitido indicando que se ha de
rellenar de agua.
CVG9601.indd 7 28/10/09 17:40:03

11
• To select the desired steam level, just press the respective switch once (Fig.1 (8) for medium steam or
Fig.1 (9) for maximum steam). In both cases a whistle will sound and the icon of the selected steam level
will light up in red.
• To shut off steam output, press the steam switch activated (on red) again, a whistle will sound, the red light
will go off, and it will cease to issue automatically.
• ECO-INTELLIGENT: this Solac Compact Ironing System includes a device for disconnecting the
steam function after 3 seconds of not detecting any movement. This ensures lower power
consumption as well as greater autonomy of the tank (lower water consumption).
The steam function switches back on automatically when the slightest movement of the Com-
pact Ironing System is detected or when any of the steam outlet buttons is pressed.
AUTOMATIC SWITCH OFF: AUTO - PAUSE
• The Compact Vapor Generator has an automatic switch-off system. It is switched off automatically
3 minutes after the last time it was used. This means that once the device is actuated, the CVG
ceases to heat and begins to cool down. At this time a whistle will sound; the ON warning light
Fig.1 (10) will remain on the blink, indicating that the appliance has been switched off. To switch
it back on, just move it slightly. A whistle will sound and the CVG will return to the temperature
and steam position that it had before being switched off.
• Remember that the period between being switched off and switched back on again will affect the time
that the CVG may need to regain the temperature selected previously.
IRONING RECOMMENDATIONS
• Since the working of this model is similar to an ironing centre and due to its strong flow of steam at Max,
40 gr/min, we recommend you to iron with medium steam at temperature positions • and ••, and maximum
steam for temperature positions ••• and MAX. We also recommend you to iron first with steam (the level
appropriate to the garment you are going to iron) and go over the clothes dry to remove the moisture
and obtain results comparable with professional pressing.
• Whenever the Compact Vapor Generator is in the vertical position, we recommend you to shut off steam
issue by pressing the steam switch activated once. Fig. 1 (8 or 9).
• To iron without steam, simply do NOT press the steam switches Fig 1 (8-9) It is NOT necessary to drain
the water tank.
STEAM IRONING
• This model enables you to iron with steam at temperature position 1 (•). It has two steam flow rates, med.
20gr/m and max. 40gr/m. For correct use of the flow refer to the section “Ironing Recommendations”.
VERTICAL IRONING
• Keep the steam button pressed to obtain steam during vertical ironing.
• It enables you to remove creases from delicate garments without having to lay them on the
ironing board: jackets, coats, curtains, suede garments, etc.
• Place the garment on a hanger, away from other garments, persons, ...
• Set the temperature selector at position (••), (•••) or (MAX), place the iron in the vertical position and
press the button. At position (••) you will obtain a more humid white steam which will be more apparent,
whereas at setting (•••) and (MAX) the steam is drier and, although the same flow is maintained, it will be
harder for you to see.
SPRAY
• With water in the tank, you may spray water over the garment by pressing the button Fig. 1 (3).
FILLING WITH WATER
• If the water level drops below Min while you are ironing, a whistle will sound indicating that the water
level has to be topped up.
CVG9601.indd 11 28/10/09 17:40:04

14
3. Bouton du vaporisateur.
4. Cuve d’eau.
5. Filtre anticalcaire amovible.
6. Pieds antidérapants.
7. Sélecteur de température.
8. Interrupteur de vapeur 20 g/min
9. Interrupteur de vapeur 40 g/min
10. Voyant lumineux de fonctionnement.
11. Voyant lumineux de température.
12. Récipient.
AVANT DE COMMENCER A REPASSER
• Après avoir débranché votre centrale de repassage compacte du réseau électrique, ouvrez le couvercle de
l’orifice de remplissage Fig 2 (1) en le tournant vers l’arrière (voir flèche).
• Étant donné les niveaux élevés de dureté de l’eau du réseau dans la majorité des régions, Solac recom-
mande l’utilisation systématique d’eau distillée ou déminéralisée pour repasser. Vous maintiendrez ainsi
plus longtemps votre centre de repassage compact dans des conditions optimales. Si pour des raisons
spécifiques, vous ne trouvez pas d’eau distillée, veillez à utiliser de l’eau pauvre en minéraux (eau douce).
• N’utilisez pas d’agents décalcifiants ou de produits anti-calcaires dans le réservoir d’eau. N’utilisez pas non
plus d’eaux parfumées ou dites « de repassage ».
• Ces produits peuvent endommager l’intérieur du système de génération de vapeur.
• Remplissez le réservoir sans dépasser le niveau maximum à l’aide du doseur fourni Fig. 1 (12) et en main-
tenant la centrale de repassage en position verticale, appuyez sur les pieds anti-dérapants du couvercle
arrière Fig 2. Une fois le réservoir rempli, fermez le couvercle.
• Nous vous conseillons de remplir le réservoir jusqu’au niveau maximum indiqué sur celui-ci car ce produit
génère un débit de vapeur important et, dans le cas contraire, vous auriez à remplir le réservoir d’eau
plus souvent.
• Vérifiez si le vêtement que vous allez repasser porte une étiquette indiquant la température de repas-
sage. Nous recommandons de classer les vêtements en fonction de leur température de repassage et
de commencer par les vêtements exigeant un repassage à basse température ( • ).
LAINE, Fibres synthétiques, basse température (•)
SOIE, température intermédiaire (••)
COTON, haute température (•••)
LIN : température maximum (MAX)
• REMARQUE : Si vous repassez des textiles délicats à une température supérieure à celle recommandée, vous
risquez de les abîmer et de provoquer l’adhérence de résidus brûlés à la semelle.
FONCTIONNEMENT
• Branchez la Centrale de Repassage Compacte. Un bip retentira, le voyant lumineux orange de fonctionne-
ment s’allumera et le voyant de température vert clignotera jusqu’à atteindre la température adéquate.
Sélection de la température
• Votre Centrale de Repassage Compacte vous permettra de savoir facilement à quel moment la température
sélectionnée est atteinte et quand le fer est prêt à repasser puisque le voyant de température vert s’allumera
et clignotera jusqu’à obtention de la température sélectionnée.
• La Centrale de Repassage Compacte a 4 positions de température (•, ••, •••, MAX) que vous pourrez sélec-
tionner en tournant le bouton de sélection de température Fig 1 (7).
• Si vous réglez le bouton à la position , votre Centrale de Repassage Compacte s’éteindra.0
CVG9601.indd 14 28/10/09 17:40:04

19
• Wir empfehlen Ihnen, den Wassertank bis zu obersten Markierung zu füllen, da dieses Gerät große Dampf-
mengen erzeugt und Sie auf diese Weise häufiges Nachfüllen vermeiden.
• Überprüfen Sie, ob das Kleidungsstück ein Etikett mit der Angabe einer Bügeltemperatur aufweist.
• Wir empfehlen, die Kleidungsstücke entsprechend der zum Bügeln erforderlichen Temperatur zu sortieren
und mit den Teilen zu beginnen, die die niedrigste Temperatur erfordern ( • ).
WOLLE, KUNSTFASERN, Mindesttemperatur (•)
SEIDE mittlere Temperatur (••)
BAUMWOLLE, hohe Temperatur (•••)
LEINEN, Höchsttemperatur (MAX)
HINWEIS: Das Bügeln empfindlicher Kleidungsstücke mit zu hoher Temperatur schadet dem Gewebe und
verursacht das Anhaften von Verbrennungsrückständen auf der Bügelsohle.
FUNKTIONSWEISE
• Gerät am Netz anschliessen.
• Es ertönt ein Piepton, die Betriebsanzeige (10) leuchtet orange auf.
• Die Temperaturanzeige (11) blinkt in grüner Farbe, bis die geeignete Temperatur erreicht ist.
Temperaturwahl
• Bei Ihrer KBS können Sie leicht feststellen, wann die gewünschte Temperatur erreicht und das Eisen bü-
gelbereit ist, denn die Leuchtanzeige (11) leuchtet grün auf und blinkt, bis die ausgewählte Temperatur
erreicht ist.
• Die Kompakt-Bügel-Station bietet 4 Temperaturstellungen (•, ••, •••, MAX), die Sie durch Drehen der Tempe-
raturwahlscheibe (7) wählen können.
• Steht die Scheibe auf „0“, ist die KBS ausgeschaltet.
Dampfwahl
• Ihre KBS bietet zwei Dampfmengen: 20 g/Min und 40 g/Min.
• Zur Auswahl der gewünschten Dampfmenge braucht nur einmal der entsprechende Schalter gedrückt zu
werden. Schalter wählen Sie für untere Dampfmenge. Schalter für starken Dampf.(8) (9)
• In beiden Fällen ertönt ein Piepton, und das Symbol der gewählten Dampfmenge leuchtet rot auf.
• Um den Dampfaustritt zu unterbrechen, den gedrückten (rot leuchtenden) Schalter erneut drücken; es
ertönt ein Piepton, die rote Lampe erlischt und es tritt kein Dampf mehr aus.
ABSCHALTAUTOMATIK: AUTO-PAUSE
• Ihre KBS verfügt zur zusätzlichen Sicherheit über ein automatisches Abschaltsystem; genannt: Auto-Pause.
• Drei Minuten nach der letzten Benutzung wird die KBS automatisch abgeschaltet. Das bedeutet, dass
sich das Gerät nach Einsetzen der Auto-Pause-Funktion abkühlt.
• Es ertönt ein Piepton; die Betriebsanzeige (10) blinkt und zeigt an, dass das Gerät abgeschaltet
ist.
• Zur erneuten Inbetriebnahme braucht es nur leicht bewegt zu werden. Es ertönt ein Piepton, und die KBS
funktioniert wieder, in der vor dem Ausschalten eingestellten Temperatur- und Dampfstellung. Sollte das
Gerät inzwischen abgekühlt sein, beachten Sie bitte, dass etwas Zeit zum erneuten Aufheizen des Geräts
vergeht.
• ECO-INTELLIGENT: diese Kompaktbügelstation von Solac verfügt über einen Ausschaltmechanismus
für die Dampffunktion nach 3 Sekunden Stillstand. Dies sorgt für geringeren Stromverbrauch und
längere Betriebszeit des Tanks (geringerer Wasserverbrauch).
• Die Dampffunktion schaltet sich automatisch wieder ein, sobald die Kompaktbügelstation eine
Bewegung wahrnimmt oder einer der Schalter für den Dampfausstoß betätigt wird.
CVG9601.indd 19 28/10/09 17:40:05

20
BÜGELEMPFEHLUNGEN
• Da die Betriebsweise der einer Bügelstation ähnlich ist und in der höchsten Stellung eine Dampfmenge von
40 g/Min. erreicht wird, empfehlen wir, mit einer der unteren Dampfmenge in den Temperaturstellungen
(•) und (••) und mit der höchsten Dampfmenge in den Stellungen (•••) und (MAX) zu bügeln.
• Es ist auch zweckmässig, erst mit Dampf (jeweils die für das Kleidungsstück geeignete Menge) und danach
trocken zu bügeln, um so die Feuchtigkeit zu entziehen und professionelle Ergebnisse zu erzielen.
• Wir empfehlen, den Dampfaustritt, durch einmaliges Drücken des betätigten Dampfschalters (8, 9), immer
dann zu unterbrechen, wenn das Bügeleisen in senkrechter Stellung abgestellt wird.
• Soll ohne Dampf gebügelt werden, die Dampfschalter (8, 9) NICHT betätigen. Der Wassertank muss beim
Trockenbügeln nicht entleert werden.
BÜGELN MIT DAMPF
• Dieses Modell ermöglicht es Ihnen, auch in der Temperaturstellung (•) mit Dampf zu bügeln.
• Es stehen zwei Dampfmengen zur Verfügung, die untere mit 20 g/Min. und die obere mit 40 g/Min.
• Für die richtige Verwendung beachten Sie bitte die “Bügelempfehlungen”.
VERTIKALES BÜGELN
• Halten Sie den Dampfschalter gedrückt, um Dampf während des Vertikalbügelns zu erzeugen.
• Falten können von empfindlichen Kleidungsstücken entfernt werden, ohne diese auf ein Bügelbrett zu
legen: Jacken, Mäntel, Gardinen, Wildleder usw.
• Kleidungsstück, entfernt von anderen Kleidungsstücken und Personen, auf einen Bügel hängen.
• Temperaturwahlschalter in Stellung (••), (•••) oder (MAX), die KBS senkrecht halten und Dampfschalter (8
oder 9) betätigen.
• In Stellung (••) ist der Dampf feuchter und weisser, man sieht ihn besser. In den Stellungen (•••) und (MAX)
dagegen ist der Dampf trockener, und obwohl die Menge dieselbe ist, kann man ihn kaum sehen.
SPRAY
• Mit dem im Tank vorhandenen Wasser kann das Kleidungsstück durch Drücken der Taste (3) besprüht
werden.
WASSER AUFFÜLLEN
• Sinkt der Wasserstand während des Bügelns unter „MIN“, ertönt ein Piepton, um darauf hinzuweisen, dass
Wasser nachgefüllt werden muss.
• Wird der Behälter nicht innerhalb von 1 Minute aufgefüllt und der Dampf (8, 9) nicht ausgeschalten, schaltet
die Pumpe automatisch ab, um Beschädigungen zu vermeiden.
• Zum Nachfüllen des Wassers, Netzstecker ziehen und Behälter in senkrechter Stellung mit dem mitgelie-
ferten Becher (12) füllen, wie in Fig. 2 gezeigt.
• Die Markierung „MAX“ bitte beachten.
• Sollte das Wasser vollständig verbraucht sein, hört man ein eigenartiges Geräusch, das von der
Mikropumpe verursacht wird. In diesem Fall sofort den Dampf abstellen (8 oder 9), Netzstecker
ziehen und den Wasserbehälter nachfüllen. Bei wieder betätigen der Dampfschalter (8 oder 9)
arbeitet das Gerät wieder normal.
ANTI-KALK-KASSETTE
• Die KBS ist mit einem neuheitlichen, austauschbaren Anti-Kalk-Kassette (5) ausgestattet.
• Es handelt sich um einen Harzfilter, der die im Wasser enthaltenen Kalkpartikel abfängt und verhindert,
dass sie in die Dampfkammer und in die Dampfkanäle gelangen. Dadurch erhöht sich die Lebensdauer
des Gerätes.
• Soweit gewünscht, ist es bei diesem Modell möglich, die Kassette zu ersetzen, damit die KBS immer einen
optimalen Zustand aufweist.
• Der Austausch der Kassette bedeutet nicht, dass die Ratschläge bezüglich der Wasserhärte im Kapitel „VOR
DEM BÜGELN / TANK FÜLLEN“ nicht beachtet werden müssen.
CVG9601.indd 20 28/10/09 17:40:05

23
• Devido aos elevados níveis de dureza da água da companhia na maioria das zonas, a Solac recomenda
utilizar sempre água destilada ou desmineralizada para engomar. Desta forma, garantirá que o seu Centro
de Engomar Compacto se mantém em condições óptimas durante um maior período de tempo. Se, por
determinadas circunstâncias, não dispuser de água destilada, assegure-se de que utiliza uma água pobre
em minerais (macia).
• Não utilize agentes descalcificantes nem produtos anticalcários no depósito de água. Não utilize também
águas perfumadas ou de engomar.
• Estes produtos podem danificar o interior do sistema de geração de vapor.
• Encha o depósito sem ultrapassar o nível máximo com a ajuda do copo fornecido Fig.1 (12) e
mantenha o CEC na vertical, apoiado sobre os pés antideslizantes da tampa traseira Fig 2. Uma
vez cheio o depósito feche a tampa.
• Verifique se a peça de roupa a engomar tem alguma etiqueta com indicação da temperatura a que deve
ser engomada. Recomendamos que separe as peças de roupa em função da temperatura que requerem
para engomar e comece pelas peças de roupa que se engomem com a temperatura mais baixa ( • ).
Lã, Fibras sintéticas, temperatura mínima (•)
SEDA, temperatura média (••)
ALGODÃO, temperatura alta (•••)
LINHO, temperatura máxima (MÁX)
NOTA: Passar peças delicadas com uma temperatura superior à necessária, prejudica ao tecido e provoca a
aderência de resíduos queimados na base.
FUNCIONAMENTO
• Ligue o Centro de Passar Compacto à rede. Soará um silbo, acender-se-á o piloto luminoso de funcio-
namento em cor laranja, e o piloto de temperatura pisca-pisca em cor verde, até que atinja o nível de
temperatura adequado.
Selecção de temperatura
• Com o seu Centro de Passar Compacto saberá facilmente em quê momento atinge a temperatura seleccio-
nada e está apto para passar, ja que o piloto luminoso de temperatura se acenderá em cor verde e piscará
até que tenha atingido a temperatura seleccionada.
• O CPC tem 4 posições de temperatura (•, ••, •••, MAX) entre as que poderá eleger girando a roleta de
selecção de temperatura Fig 1 (7).
• Situando-se a roleta na posição 0, desligará o seu CPC.
Selecção de vapor:
• O Centro de Passar Compacto tem duas posições de vapor; vapor médio (20 gr/min) e vapor máximo
(40 gr/min).
• Para seleccionar o nível de vapor desejado, é suficiente com pressionar uma vez o interruptor correspon-
dente (Fig.1 (8) Fig.1 (9) para vapor médio ou para vapor máximo). Em ambos os casos soará um silbo e
se acenderá em vermelho o icono do nível de vapor seleccionado.
• Para cortar a saída do vapor, pressione novamente o interruptor de vapor activado (em vermelho), soará
um silbo, apagar-se-á a luz vermelha, e este deixará de sair automaticamente.
• ECO-INTELLIGENT: este Centro de Engomar Compacto Solac possui um dispositivo de desligar da
função de vapor após 3 segundos sem detecção de movimento. Com isso consegue-se um menor
consumo energético bem como uma maior autonomia do depósito (menor consumo de água).
• A função vapor liga-se novamente de forma automática ao detectar o mais pequeno movimento
do Centro de Engomar Compacto ou premindo um dos botões de saída do vapor.
DESLIGAÇÃO AUTOMÁTICA: AUTO - PAUSE
• O Centro de Passar Compacto possui um sistema de desligação automática. Passados 3 minutos da úl-
tima vez que se utilizou, este se desactiva de modo automático. Isto significa que uma vez que actua o
dispositivo, o CPC deixa de aquecer e começa a esfriar-se. Nesse momento soará um silbo; posteriormente
CVG9601.indd 23 28/10/09 17:40:05
Specyfikacje produktu
Marka: | Solac |
Kategoria: | Żelazo |
Model: | CVG9605 |
Potrzebujesz pomocy?
Jeśli potrzebujesz pomocy z Solac CVG9605, zadaj pytanie poniżej, a inni użytkownicy Ci odpowiedzą
Instrukcje Żelazo Solac

29 Września 2024

29 Września 2024

29 Września 2024

29 Września 2024

26 Września 2024

26 Września 2024

26 Września 2024

26 Września 2024

26 Września 2024

26 Września 2024
Instrukcje Żelazo
- Żelazo Electrolux
- Żelazo DeLonghi
- Żelazo AEG
- Żelazo Beko
- Żelazo LG
- Żelazo Gorenje
- Żelazo LERAN
- Żelazo Braun
- Żelazo Russell Hobbs
- Żelazo Tefal
- Żelazo Philips
- Żelazo Livoo
- Żelazo SilverCrest
- Żelazo Bosch
- Żelazo Miele
- Żelazo Easy Home
- Żelazo Hacienda
- Żelazo Brentwood
- Żelazo Severin
- Żelazo Singer
- Żelazo Panasonic
- Żelazo Nedis
- Żelazo Jura
- Żelazo Black & Decker
- Żelazo OK
- Żelazo Adler
- Żelazo Hoover
- Żelazo Tesla
- Żelazo Westinghouse
- Żelazo Quigg
- Żelazo Domo
- Żelazo Conair
- Żelazo Taurus
- Żelazo Orbegozo
- Żelazo Blaupunkt
- Żelazo Vivax
- Żelazo Siemens
- Żelazo Ambiano
- Żelazo Grundig
- Żelazo Haier
- Żelazo Jocel
- Żelazo Hyundai
- Żelazo Rowenta
- Żelazo Mesko
- Żelazo Concept
- Żelazo ECG
- Żelazo Unold
- Żelazo Swann
- Żelazo Hotpoint
- Żelazo Trisa
- Żelazo Zelmer
- Żelazo Wilfa
- Żelazo Hotpoint Ariston
- Żelazo Krups
- Żelazo Bomann
- Żelazo Moulinex
- Żelazo Cleanmaxx
- Żelazo Ursus Trotter
- Żelazo Emerio
- Żelazo Create
- Żelazo H.Koenig
- Żelazo Arzum
- Żelazo Melissa
- Żelazo Beper
- Żelazo Foppapedretti
- Żelazo MPM
- Żelazo Philco
- Żelazo Qilive
- Żelazo Morphy Richards
- Żelazo Zanussi
- Żelazo Fagor
- Żelazo Koenic
- Żelazo Izzy
- Żelazo Klarstein
- Żelazo BEEM
- Żelazo Polti
- Żelazo Cecotec
- Żelazo AFK
- Żelazo Eta
- Żelazo Camry
- Żelazo Lenoxx
- Żelazo Scarlett
- Żelazo Nevir
- Żelazo TriStar
- Żelazo Exquisit
- Żelazo First Austria
- Żelazo Privileg
- Żelazo Arçelik
- Żelazo G3 Ferrari
- Żelazo Sanyo
- Żelazo Hamilton Beach
- Żelazo Clatronic
- Żelazo Telefunken
- Żelazo Calor
- Żelazo SVAN
- Żelazo Ariete
- Żelazo Princess
- Żelazo Innoliving
- Żelazo Sunbeam
- Żelazo Duronic
- Żelazo AEG-Electrolux
- Żelazo Breville
- Żelazo VOX
- Żelazo Shark
- Żelazo Tower
- Żelazo Elta
- Żelazo Orion
- Żelazo Hitachi
- Żelazo Frigidaire
- Żelazo Leifheit
- Żelazo Sencor
- Żelazo Elica
- Żelazo Kalorik
- Żelazo Lervia
- Żelazo Kunft
- Żelazo Robinhood
- Żelazo Grunkel
- Żelazo Becken
- Żelazo Lelit
- Żelazo ProfiCare
- Żelazo Lagrange
- Żelazo Comelec
- Żelazo Vitek
- Żelazo Proline
- Żelazo Flama
- Żelazo OBH Nordica
- Żelazo Rotel
- Żelazo Swan
- Żelazo Alpina
- Żelazo Korona
- Żelazo Saturn
- Żelazo Tomado
- Żelazo Oster
- Żelazo Sinbo
- Żelazo Jata
- Żelazo Profilo
- Żelazo Aigostar
- Żelazo Mellerware
- Żelazo Heinner
- Żelazo Termozeta
- Żelazo Palson
- Żelazo Eldom
- Żelazo Jocca
- Żelazo Defy
- Żelazo GlobalTronics
- Żelazo Sunny
- Żelazo Drew & Cole
- Żelazo Elba
- Żelazo Watshome
- Żelazo Maxwell
- Żelazo Champion
- Żelazo Ufesa
- Żelazo Brabantia
- Żelazo Imetec
- Żelazo Lümme
- Żelazo Johnson
- Żelazo Nova
- Żelazo Koblenz
- Żelazo Proctor Silex
- Żelazo Primo
- Żelazo Konig
- Żelazo Laurastar
- Żelazo Igenix
- Żelazo Essentiel B
- Żelazo Team
- Żelazo Gallet
- Żelazo Zephir
- Żelazo Superior
- Żelazo Turmix
- Żelazo Waves
- Żelazo Coline
- Żelazo Khind
- Żelazo Andis
- Żelazo Weasy
- Żelazo T-fal
- Żelazo Hermes
- Żelazo Di4
- Żelazo Elgento
- Żelazo Zomix
- Żelazo Domena
- Żelazo Eudora
- Żelazo Thomas
- Żelazo High One
- Żelazo LAFE
- Żelazo Inno-Hit
- Żelazo Britania
- Żelazo Vaporella
- Żelazo CHI
- Żelazo Steamfast
- Żelazo Girmi
- Żelazo Kleva
- Żelazo JML
- Żelazo Michelini
- Żelazo Vanguard
- Żelazo DPM
- Żelazo Maxim
- Żelazo Imarflex
- Żelazo Yamazen
Najnowsze instrukcje dla Żelazo

12 Marca 2025

5 Marca 2025

5 Marca 2025

5 Marca 2025

5 Marca 2025

27 Lutego 2025

27 Lutego 2025

27 Lutego 2025

27 Lutego 2025

27 Lutego 2025