Instrukcja obsługi Samsung SL420
Przeczytaj poniżej 📖 instrukcję obsługi w języku polskim dla Samsung SL420 (103 stron) w kategorii kamera. Ta instrukcja była pomocna dla 6 osób i została oceniona przez 2 użytkowników na średnio 4.5 gwiazdek
Strona 1/103

User Manual
SL420
Thank you for buying a Samsung Camera.
This manual will help you learn to capture
images, share or print your photos, and edit
photos with the accompanying software.
Please read this manual thoroughly.

001
Thank you for buying a Samsung Digital Camera.
Prior to using this camera, please read the user manual
thoroughly.
If you require After Sales service, please bring the camera and the
cause of the camera malfunction (such as battery, Memory card
etc.) to the A/S centre.
Please check that the camera is operating properly prior to when
you intend to use it (e.g. for a trip or an important event) to avoid
disappointment. Samsung takes no responsibility for any loss or
damage that may result from camera malfunction.
Keep this manual in a safe place.
If you use a card reader to copy the images on the memory card to
your PC, the images could be damaged. When transferring the
images taken with the camera to your PC, be sure to use the
supplied USB cable to connect the camera to your PC. Please note
that the manufacturer holds no responsibility for loss or damage of
images on the memory card due to the use of a card reader.
The contents and illustrations of this manual are subject to change
without prior notice for upgrading the camera functions.
Ä Microsoft, Windows and Windows logo are registered trademarks
of Microsoft Corporation incorporated in the United States and/or
other countries.
Ä Adobe and Reader are either trademarks or registered
trademarks in the United States and/or other countries.
Ä All brand and product names appearing in this manual are
registered trademarks of their respective companies.
Getting to Know your cameraInstructions
Setting up the applica-
tion software
Use this camera in the following order.
To use this camera with a PC,
install the application software
first. After this has been done, the
stored images in the camera can be
moved to the PC and can be edited
by an image editing program. (p.89)
Take a picture. (p.20)
Insert the supplied USB cable
into the PC’s USB port and the
camera’s USB connection
terminal. (p.91)
Check the camera’s power. If the
power is turned off, preset the
camera button to turn it on.
Open Windows’s EXPLORER
and search for [Removable Disk].
(p.92)
Take a picture
Insert the USB cable
Check the camera's
power
Check [Removable Disk]

002
Warning
WARNING indicates a potentially hazardous situation which, if not
avoided, could result in death or serious injury.
Do not use the ash in close proximity to people or animals. fl
Positioning the ash too close to your subject’s eyes may cause fl
eyesight damage.
For safety reasons keep this product and accessories out of reach
of children or animals to prevent accidents e.g.:
- Swallowing battery or small camera accessories. If an accident
should occur, please consult a doctor immediately.
- There is the possibility of injury from the camera’s moving parts.
Battery and camera may become hot during prolonged use and it
may result in camera malfunction. Should this be the case, allow
the camera to sit idle for a few minutes to allow it time to cool.
Do not leave this camera in places subject to extremely high tem-
peratures, such as a sealed vehicle, direct sunlight or other places
of extremes in temperature. Exposure to extreme
temperatures may adversely affect the camera’s internal
components and could cause a fire.
When in use, do not cover the camera or Charger. This may cause
heat to build up and distort the camera body or cause a fire. Always
use the camera and its accessories in a well-ventilated area.
Danger
DANGER indicates an imminently hazardous situation which, if not
avoided, will result in death or serious injury.
Do not attempt to modify this camera in any way. To do so may
result in re, injury, electric shock or severe damage to you or your fi
camera. internal inspection, maintenance and repairs should only
be carried out by your dealer or Samsung Camera Service centre.
Please do not use this product in close proximity to ammable or fl
explosive gases, as this could increase the risk of explosion.
Should any form of liquid or a foreign object enter the camera, do
not use it. Switch off the camera, and then disconnect the power
source. You must contact your dealer or Samsung Camera Service
centre. Do not continue to use the camera as this may cause a fire
or electric shock.
Do not insert or drop metallic or in ammable foreign objects into fl
the camera through access points e.g. the memory card slot and
battery chamber. This may cause a fire or electric shock.
Do not operate this camera with wet hands. This could pose a risk
of electric shock.

003
Caution
CAUTION indicates a potentially hazardous situation which, if not
avoided, may result in a minor or moderate injury.
Leaking, overheating, or damaged battery could result in re or injury.fi
- Use battery with the correct speci cation for the camera.fi
- Do not short circuit, heat or dispose of battery in fire.
- Do not insert the battery with the polarities reversed.
Remove the battery when not planning to use the camera for a
long period of time. Otherwise the battery may leak corrosive
electrolyte and permanently damage the camera’s components.
Do not fire the ash while it is in contact with hands or objects. Do fl
not touch the ash after using it continuously. It may cause burns.fl
Do not move the camera while it is switched on, if you are using
the AC adapter. After use, always switch off the camera before
unplugging the cable from the wall socket. Then make sure that
any connector cords or cables to other devices are disconnected
before moving the camera. Failure to do so may damage the cords
or cables and cause a fire or electric shock.
Take care not to touch the lens or lens cover to avoid taking an
unclear image and possibly causing camera malfunction.
Avoid obstructing the lens or the ash when you capture an image.fl
When using this camera in low temperatures, you may experience
the following. These are not camera malfunctions and usually
recover at normal temperature.
- It takes longer to turn on the LCD monitor and the colour may
differ from the subject.
- When changing the composition, there may be an after image on
the LCD monitor.
Credit cards may be demagnetized if left near case. Avoid leaving
magnetic strip cards near the case.
Never connect the 20 pin connector to the USB port of a PC. This
carries a high risk of computer malfunction.
Contents
READY
RECORDING
007 System chart
007 Package Contents
007 Sold Separately
008 Identification of features
008 Front & Top
009 Back
010 Bottom
010 5 Function button
011 Self-timer lamp
011 Camera Status Lamp
011 Mode icon
012 Connecting to a Power Source
014 Inserting the memory card
015 Instructions on how to use the memory
card
017 When using the camera for the first time
018 LCD monitor indicator
019 How to use the menu
020 Starting the recording mode
020 Selecting modes
020 How to use the Auto mode
021 How to use the Program mode
021 How to use the DUAL IS mode
022 Using the Photo Help guide mode
023 How to use the Beauty Shot mode
023 How to use the Scene modes

004
SETUP
Contents
025 How to use the Movie clip mode
025 Recording the movie clip without sound
025 Pausing while recording a movie clip
(Successive Recording)
026 How to use the Smart Auto mode
027 Things to Watch Out for When Taking
Pictures
028 Using the camera buttons to set the camera
028 POWER button
028 SHUTTER button
028 ZOOM button
030 Info (DISP) / Up button
030 Macro / Down button
032 Focus lock
032 Flash / Left button
034 Self-timer / Right button
036 MENU button
036 OK button
036 Functions
037 How to Enable Functions Using the MENU
Button
037 Exposure compensation
038 White balance
039 ISO
039 Face Detection
041 Face Tone
041 Face Retouch
042 Image Size
042 Quality / Frame rate
043 ACB
043 Metering
044 Drive mode
044 Auto Focus type
045 Photo Style Selector
046 Image Adjust
046 OIS
047 Voice Memo
047 Voice Recording
048 Recording the movie clip without voice
049 Sound menu
049 Sound
049 Volume
049 Start up sound
049 Shutter sound
049 Beep Sound
050 AF sound
050 Self Portrait
050 Setup menu
050 Display
050 Language
050 Function Description
051 Start up image
051 Display Bright
051 Quick view
051 Display SAVE
052 Settings
052 Formatting a memory

005
PLAY
Contents
052 Initialisation
053 Setting up the Date / Time / Date type
053 Time Zone
053 File name
054 Imprinting the recording date
054 Auto power off
055 Selecting Video out type
056 Auto Focus lamp
056 Setting the USB
057 Starting play mode
057 Playing back a still image
057 Playing back a movie clip
058 Movie clip capture function
058 Playing back a recorded voice
058 Playing back a voice memo
059 LCD monitor Indicator
060 Using the camera buttons to set the
camera
060 Thumbnail / Enlargement button
060 Smart Album
062 Info (DISP) / Up button
062 Play & Pause / OK button
063 Left / Right / Down / MENU button
063 Delete button
064 Setting up the play back function using the
LCD monitor
066 Edit
066 Resize
067 Rotating an image
067 Photo Style Selector
068 Image Adjust
070 View
070 Starting the Multi Slide Show
070 Start the Multi Slide Show
071 Selecting Images
071 Configure Multi Slide show effects
072 Setting play interval
072 Setting Background Music
072 File Options
072 Deleting images
073 Protecting images
073 Voice memo
074 DPOF
076 Copy To Card
077 PictBridge
078 PictBridge : Picture Selection
078 PictBridge : Print Setting
079 PictBridge : Reset
079 Important notes
081 Warning indicator
082 Before contacting a service centre
084 Specifications

006
SOFTWARE
Contents
087 Software Notes
087 System Requirements
088 About the software
089 Setting up the application software
091 Starting PC mode
094 Removing the removable disk
095 Samsung Master
098 Setting up the USB Driver for MAC
098 Using the USB Driver for MAC
099 FAQ

007
System chart
Please check that you have the correct contents before using this product. The contents can vary depending on the sales region. To buy the
optional equipment, contact your nearest Samsung dealer or Samsung service centre. Parts and accessories illustrated below may differ from
exact appearance.
Package Contents
Camera Rechargeable battery
(4302-001221)
AC adapter (AD44-00131A) /
USB cable (AD39-00164A)
AV cable
(AD39-00146A)
Camera strap
(Silver: AD63-02596A/
Black: AD63-02604A)
Software CD (AD46-00241A)
(see p.88)
User manual (AD68-03664A)
,
Product warranty
Sold Separately
SD/SDHC memory card / MMC
(see p.16) Camera case

008
Identification of features
Front & Top
AF sensor /
Self-timer lamp
Lens/ Lens cover
Flash
Shutter button
Speaker Power button
Microphone

009
Back
Identification of features
Camera status lamp
LCD monitor
Play mode button
Fn / Delete button
5 function button
MENU button
USB / AV / DC terminal
Zoom Tele(T) button / Digital zoom
Mode Dial
Zoom Wide(W) button / Thumbnail
Strap eyelet

010
Bottom
Identification of features
5 Function button
Battery holderBattery chamber cover
Memory card slot
Battery chamber
Tripod socket
Information / Up button
Macro / Down button
Self-timer /
Right button
Flash /
Left button
OK / Play & Pause button

011
Self-timer lamp
Icon Status Description
Blinking
- For the first 8 seconds, the lamp blinks at 1 second
intervals.
- For the final 2 seconds, the lamp blinks quickly at
0.25-second intervals.
Blinking For the 2 seconds, the lamp blinks quickly at
0.25-second intervals.
Blinking A picture will be taken after about 10 seconds and 2
seconds later a second picture will be taken.
Blinking After pressing the Shutter button, the image is taken
in accordance with the subject’s movement.
Camera Status Lamp
Status Description
Power on The lamp turns on and off when the camera
is ready to take a picture
After taking a picture
The lamp blinks while saving the image data and
turns off when the camera is ready to take a picture
When flash battery is charging
The lamp blinks
When the USB cable is
inserted to a PC
The lamp lights up
(LCD monitor turns off after initializing the device)
Transmitting Data with a PC
The lamp blinks (LCD monitor turns off)
When the USB cable is
inserted into a printer The lamp is off
When the printer is printing
The lamp is off
When the AF activates
The lamp turns on
(The camera focus on the subject)
The lamp blinks
(The camera doesn’t focus on the subject)
Identification of features
Mode icon
Refer to page 20 for more information about the camera mode setting.
MODE Auto Program DUAL IS Photo Help
Guide
ICON
MODE Beauty Shot Scene Movie
Smart Auto
ICON
MODE
SCENE
Frame Guide
Night Portrait Children
ICON
MODE Landscape Close up Text Sunset
ICON
MODE Dawn Backlight Firework
Beach&Snow
ICON

012
Connecting to a Power Source
SLB-10A rechargeable battery Specication
Model SLB-10A
Type Lithium lon
Capacity 1050mAh
Voltage 3.7V
C
harging time
Approximately 180 Minutes
You should use the rechargeable battery SLB-10A supplied with the
camera. Be sure to charge the battery before using the camera.
Number of images and battery life: Using the SLB-10A
Battery life /
Number of images Conditions
Still image Approx. 160 MIN /
Approx. 320 shots
Using the fully charged battery, Auto
mode, 10M image size, Fine image
quality, Shot to shot interval: 30Sec.
Changing the zoom position between
the Wide and the Tele after every shot.
Using the ash on every second shot.
Using the camera for 5 minutes and
then powering it off for 1 minute.
Movie Approx. 130 MIN
Using the fully charged battery
640x480 image size
30fps frame rate
Ä These gures are measured under Samsung’s standard conditions
and shooting conditions and may vary depending on the user’s
methods.
Important information about battery usage.
When camera is not in use, turn off the power.
Please remove the battery if the camera will not be used
for long periods. Batteries can lose power over time and are
prone to leaking if kept inside the camera.
Low temperatures (below 0°C) can affect the performance of
the battery and you may experience reduced battery life.
Batteries will usually recover at normal temperatures.
During extended use of the camera, the camera body may
become warm. This is perfectly normal.
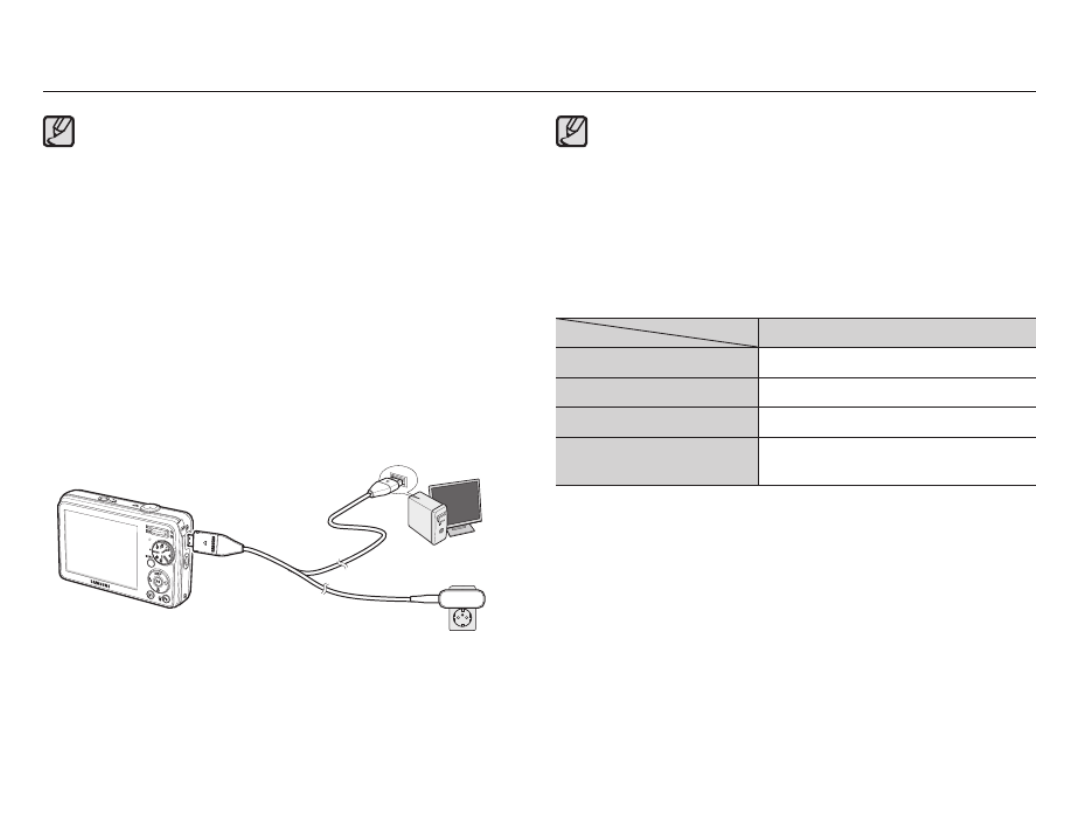
Connecting the AC adapter with the USB cable can be used as an
AC cable, and you can charge the rechargeable battery with the
AC cable.
- Using an AC cable
: Connect the AC adapter to the USB
cable. It can be used as a power
cable.
- Using a USB cable
: Remove the AC adapter.
You can download stored images
to your PC (p.91) or supply the
power to your camera through the
USB cable.
013
Connecting to a Power Source
Important information about USB cable usage.
Use a USB cable with the correct specication.
If the camera is connected to the PC through a USB hub :
connect the camera directly to the PC.
If the camera and other devices are connected to the PC at
the same time : remove other device.
Camera can not be detected using the front side USB port
of computer. In this case, use the back side USB port of
computer.
If the USB port of the PC doesn’t meet the Power output
standard (5V, 500mA), the camera may not be charged.
How to charge the rechargeable battery
Before inserting any cables or AC adapter, check the directions and
do not insert by force. It may cause breakage of cable or camera.
If the charging LED of the AC Charger does not turn on or blink after
inserting the rechargeable battery, please check whether the battery
is inserted correctly.
If you charge the battery with the camera power on, the battery won’t
be fully charged. Turn the camera off while charging the battery.
Charging LED of the AC Adapter
Charging LED
Being Charged Red LED is on
Charging is complete Green LED is on
Charging error Red LED is off or blinking
Being discharged
(Using the AC adapter) Orange coloured LED is on
If you insert the fully discharged battery to charge it, do not turn on
the camera at the same time. The camera may not be turned on
because of the low battery capacity. Charge the battery for more
than 10 minutes before using the camera.
Do not use the ash frequently or take a movie clip with the fully
discharged battery charged for a short time. Even if the charger
is inserted, the camera power may be turned off because the
rechargeable battery is discharged again.

014
Connecting to a Power Source
There are 4 indicators for battery condition that are displayed on
the LCD monitor.
Battery
indicator
Battery
status
The battery is
fully charged
Low battery
capacity
(Prepare to
recharge or use
spare battery)
Low battery
capacity
(Prepare to
recharge or use
spare battery)
Battery empty.
(Recharge or
use spare bat-
tery)
Ä When using the camera and the battery in a place that is excessively cold or hot,
the battery status on the LCD may be different from the actual battery status.
Insert the battery as shown
Inserting the memory card
Insert the memory card as shown.
- Turn off the camera’s power
before inserting the memory card.
- Have the front of the memory
card facing toward the back of
the camera (LCD monitor) and
the card pins toward the front of
the camera (lens).
- Do not insert the memory card
the wrong way round.
Doing so may damage the
memory card slot.
- If the camera does not turn on
after you have inserted battery,
please check whether the
battery (+ / -).
- When the battery chamber
cover is opened, do not force
the battery chamber cover,
this may damage it.

015
Instructions on how to use the memory card
If the memory card is subjected to any of the following, the re-
corded data may become corrupted :
- When the memory card is used incorrectly.
- If the power is switched off or the memory card is removed while
recording, deleting (formatting) or reading.
Samsung cannot be held responsible for lost data.
It is advisable to copy important data onto other media as back-up
e.g. oppy disks, hard disks, CD etc.
If there is insuf cient memory available :
A [Memory Full] message will appear and the camera will not
operate. To optimise the amount of memory in the camera, replace
the memory card or delete unnecessary images stored on the
memory card.
Don't remove the memory card when the camera status lamp is
blinking as this may cause damage to data in the memory card.
Be sure to format the memory card (see p.52) if you are using a
newly purchased memory card for the rst time, if it contains data
that the camera cannot recognise, or if it contains images captured
with a different camera.
Turn off the camera power whenever the memory card is being
inserted or removed.
Repeated use of the memory card will eventually reduce the mem-
ory card’s performance. Should this be the case, you will need to
purchase a new memory card. Wear and tear on the memory card
is not covered by the Samsung warranty.
The memory card is an electronic precision device.
Do not bend, drop or subject the memory card to any heavy
impact.
Do not store the memory card in an environment with strong
electronic or magnetic elds, e.g. near loud speakers or TV receiv-
ers.
Please do not use or store in an environment where there are
extremes in temperature.
Do not allow the memory card to become dirty or to come into con-
tact with any liquid. Should this happen, clean the memory card
with a soft cloth.
Please keep the memory card in its case when not in use.
During and after periods of extended use, you may notice that the
memory card is warm. This is perfectly normal.
Do not use a memory card that is used in another digital camera.
To use the memory card in this camera, format the memory card
using this camera.
Do not use a memory card formatted by another digital camera or
memory card reader.
016
Instructions on how to use the memory card
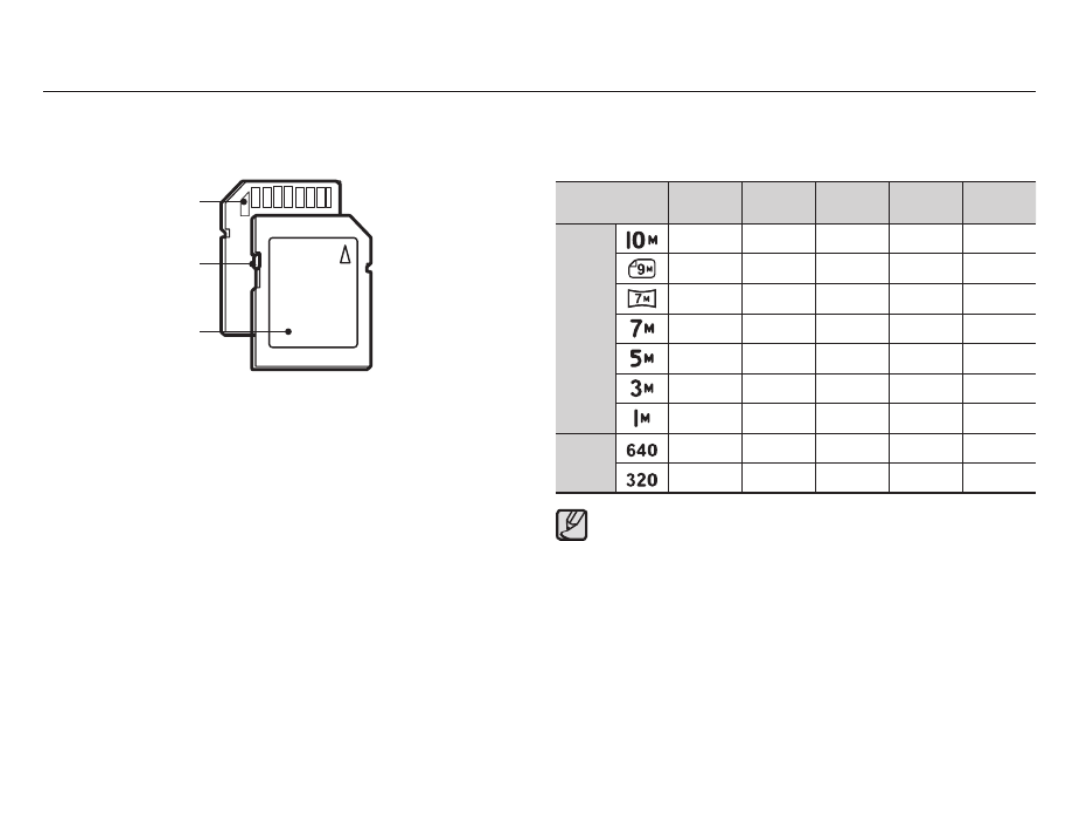
The camera can use SD/SDHC Memory Cards and MMC (Multi
Media Cards).
The SD/SDHC memory card has a write protect switch that
prevents image les from being deleted or formatted. By sliding
the switch to the bottom of the SD/SDHC memory card, the data
will be protected. By sliding the switch to the top of the SD/SDHC
memory card, the data protection will be cancelled.
Slide the switch to the top of the SD/SDHC memory card before
taking a picture.
When using a 1GB SD memory, the speci ed shooting capacity will be
as follows. These gures are approximate as image capacities can be
affected by variables such as subject matter and memory card type.
Recorded image
size
Super
Fine Fine Normal 30 FPS 15 FPS
Still
image
About 182 About 334 About 471 - -
About 199 About 361 About 510 - -
About 252 About 441 About 611 - -
About 252 About 441 About 617 - -
About 334 About 577 About 792 - -
About 494 About 813
About 1065
- -
About 1235 About 1670 About 1872
- -
*Movie
clip
---
About 7'04"
About 13'52"
---
About 26'20" About 49'16"
The zoom button doesn’t function during the movie recording.
The recording times can be changed by the zoom operation.
You can record videos of up to 4GB or 2hours each.
Card pins
Write protect switch
Label
[SD (Secure Digital) memory card]

017
Setting up the date, time and date type
1. Select the [Date&T ime] menu by
pressing the Up/Down button and press
the Right button.
2. Select the desired sub menu by
pressing the Up/Down/Left/Right
button and press the OK button.
Left/Right button : Selects world time/year/ month/ day/hour/
minute/ date type
Up/Down button : Changes the value of each item.
Ä For more information about the World Time, refer to the page 53.
When using the camera for the rst time
Charge the rechargeable battery fully before using the camera for
the rst time.
When the camera is turned on for the rst time, a menu will be
displayed in the LCD monitor to set date, time and language. This
menu will not be displayed again after setting up the date, time
and language. Set up the date, time and language before using
this camera.
Setting up the language
1. Select the [Language] menu by
pressing the Up/Down button and press
the Right button.
2. Select the desired sub menu by
pressing the Up/Down button and press
the OK button. Back Set
Date & Time :09/01/01
Language :English
English
䚐ạ㛨
Français
Deutsch
Español
Italiano
Back Set
Date & Time :09/01/01
Language :English
2009 / 01 / 01 13:00 yyyy/mm/dd
yyyy mm dd

018
The LCD monitor displays information about the shooting
functions and selections.
LCD monitor indicator
No. Description Icons Page
1 Recording mode p.20
2
Optical / Digital Zoom bar /
Digital Zoom rate
p.28
3
Voice Memo
p.47
4
Number of available shots
remaining 00001 p.16
Remaining time 00:00:00 p.16
[Image & Full Status]
No. Description Icons Page
5Memory card icon /
Internal memory icon -
6 Battery p.14
7 Flash p.32
8 Self-timer p.34
9 Macro p.30
10 Photo Style Selector p.45
11
Face Detection · Self Portrait
· Smile Shot · Blink Detection
p.39
12 Face Tone / OIS (Optical
Image Stabilization)
p.41/
46
13
Face Retouch / Image Adjust /
Without Sound
p.41/
46/48
14 Date / Time 2009/01/01 01:00 PM p.53
15 Camera shake Warning p.27
16 Auto Focus Frame p.44
17 Drive mode p.44
18 Metering /
Long Time Shutter
p.43/
24
19 Image Quality /
Frame Rate p.42
20 Image Size p.42
21 ISO p.39
22 White Balance p.38
23
Exposure compensation
p.37

019
How to use the menu
1.
Turn on the camera and press the MENU button. A menu for each camera mode appears.
2. Use the up or down buttons to navigate through the menus.
3. Use the left or right buttons to select a sub menu.
4. Select a submenu and click the OK button to save settings and return to the previous window.
Press the
LEFT or
RIGHT button.
Press the
LEFT or
RIGHT button.
Press the
UP or DOWN
button.
Press the
UP or DOWN
button.
Functions
Sound
Display
Settings
Photo Size
Quality
Focus Area
Photo Style Selector
OIS
Face Detection
Exit Change
Functions
Sound
Display
Settings
Photo Size
Quality
Focus Area
Photo Style Selector
OIS
Face Detection
Exit Change
Voice
Voice
Back Set
Start Sound :Off
Shutter Sound :1
Beep Sound :1
AF Sound :On
Self-Portrait :On
Volume :MediumOff
Low
Medium
High
Start Sound :Off
Shutter Sound :1
Beep Sound :1
AF Sound :On
Self-Portrait :On
Volume :Medium
Exit Back
Functions
Sound
Display
Settings
Start Sound
Shutter Sound
Beep Sound
AF Sound
Self-Portrait
Volume
Exit Change
Functions
Sound
Display
Settings
Function Description
Start Image
Display Brightness
Quick View
Power Save
Language
Exit Change
Functions
Sound
Display
Settings
Start Sound
Shutter Sound
Beep Sound
AF Sound
Self-Portrait
Volume
Exit Change
020
Starting the recording mode
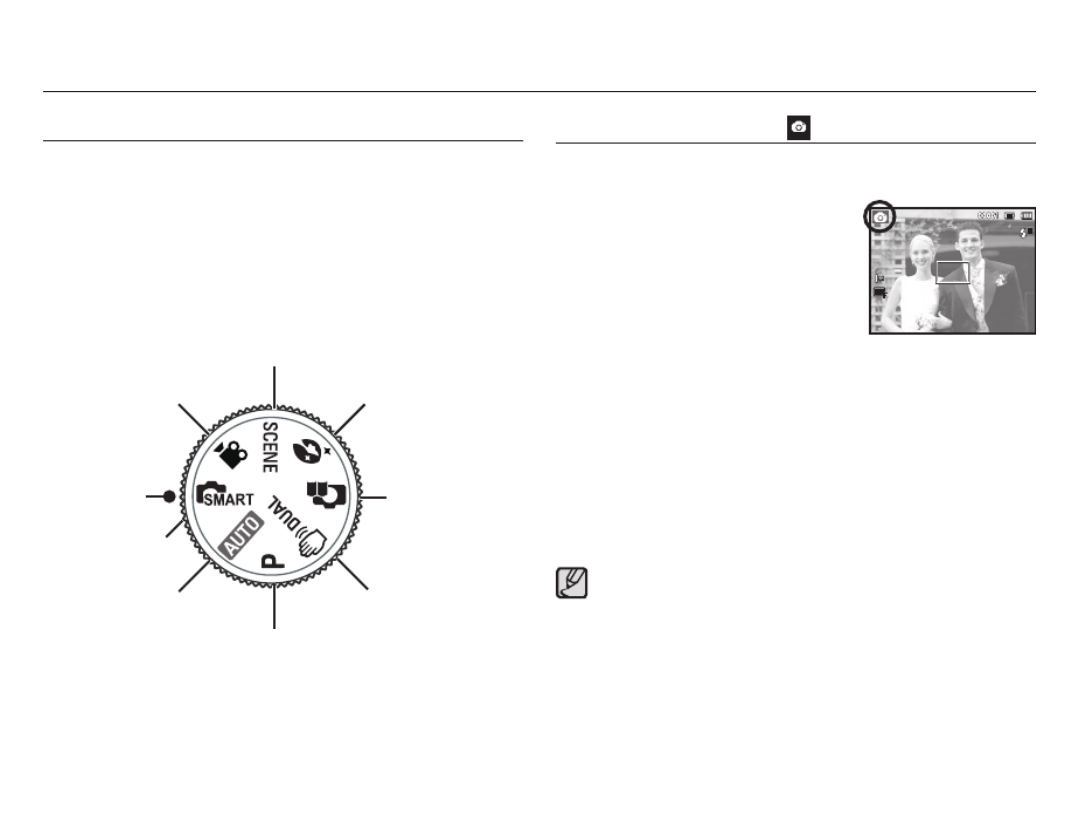
How to use the Auto mode ( )
If the auto focus frame turns to red when you press the shutter
button down half way, it means that the camera cannot focus
on the subject. Should this be the case, the camera is unable to
capture an image clearly.
Avoid obstructing the lens or the ash when you capture an image.
1.
Insert the batteries (p.14). Insert the
batteries taking note of the polarity (+ / -).
2. Insert the memory card (p.14). As
this camera has a 40MB internal
memory, you do not need to insert the
memory card. If the memory card is
not inserted, an image will be stored
in the internal memory. If the memory card is inserted, an image
will be stored on the memory card.
3. Close the battery chamber cover.
4. Press the power button to turn on the camera.
5. Select the Auto mode by using the mode dial.
6. Point the camera towards the subject and compose the image
by using the LCD monitor.
7. Press the shutter button to capture an image.
Select this mode for quick and easy picture taking with minimal user
interaction.
Selecting modes
You can select the shooting modes by using the mode dial on the upper
of your camera.
How to use the mode dial
Select the shooting mode by turning the mode dial to the selection
point.
Scene mode
Beauty Shot mode
Photo help guide
Movie Clip mode
DUAL IS mode
Smart Auto mode
Auto mode
Program mode
Select point

021
Selecting the automatic mode will congure the camera with
optimal settings. You can still manually con gure all functions
except the aperture value and shutter speed.
1. Select the Program mode by using the
Mode dial. (p.20)
2. Press the Menu button to congure
advanced functions.
How to use the Program mode ( )
Starting the recording mode
DUAL IS(Dual Image Stabilization) mode.
This mode will reduce the effect of camera shake and help you get
a well-exposed image in dim conditions.
1. Select the DUAL IS mode by using the
Mode dial. (p.20)
2. Point the camera towards the subject
and compose the image by using the
LCD monitor.
3. Press the Shutter button to capture an
image.
How to use the DUAL IS mode ( )
Things to watch out for using the DUAL IS mode
1. The digital zoom will not operate in the DUAL IS mode.
2. If the lighting condition is brighter than uorescent lighting
conditions, the DUAL IS will not activate.
3. If the lighting condition is darker than in uorescent lighting
conditions, camera shake warning indicator ( Ã ) will display.
For best results only take pictures in situations where the
camera shake warning indicator ( Ã ) is not displayed.
4. If the subject is moving, the captured image may be blurred.
5. As the DUAL IS uses the camera's digital signal processor, it
may take a little longer for the camera to process and save the
images.

022
Starting the recording mode
Using the Photo Help guide mode ( )
Helps the user learn the correct picture taking method and includes
solutions for potential problems that may occur. This also enables
the user to practice the best way to take the pictures.
Available functions of the photo help guide
Function that can be used when focusing is difcult
Functions that can be used when the image is blurred
Function that can be used when lming in the dark
Function that can be used when adjusting the picture brightness
Function that can be used when adjusting the picture colour
[Function that can be used when focusing is difcult]
Pressing the
Left/Right button
Pressing the OK button
Pressing the
Up/Down button
Pressing the
Up button
Pressing the OK buttonPressing the shutter button
Press the shutter button
to practice using this
feature.
Guide list
Photo Help Guide
Features to reduce camera shake
Features to use when adjusting brightness
Features to use when the image is out of focus
Features to use in low light conditions
Features to use when adjusting colours
Photo Help Guide
When the subject is in focus,
press the shutter button
completely to capture the image
or video. If the subject is out of
focus, try half-pressing the shutter
button again.
2/2
Back Practice
Photo Help Guide
To focus on your subject, half-
press the shutter button:
- Green frame: subject is in focus
- Red frame: subject is out of focus
1/2
Back Practice
Photo Help Guide
Guide list
Pressing the
Left/Right button
Pressing the OK button
Features to use when the image is out of focus
To focus on a subject 80 cm or farther
To focus on people’s faces
Half-press the shutter button to focus
To focus on a subject less than 80 cm away
Photo Help Guide
Back ChangeChange

023
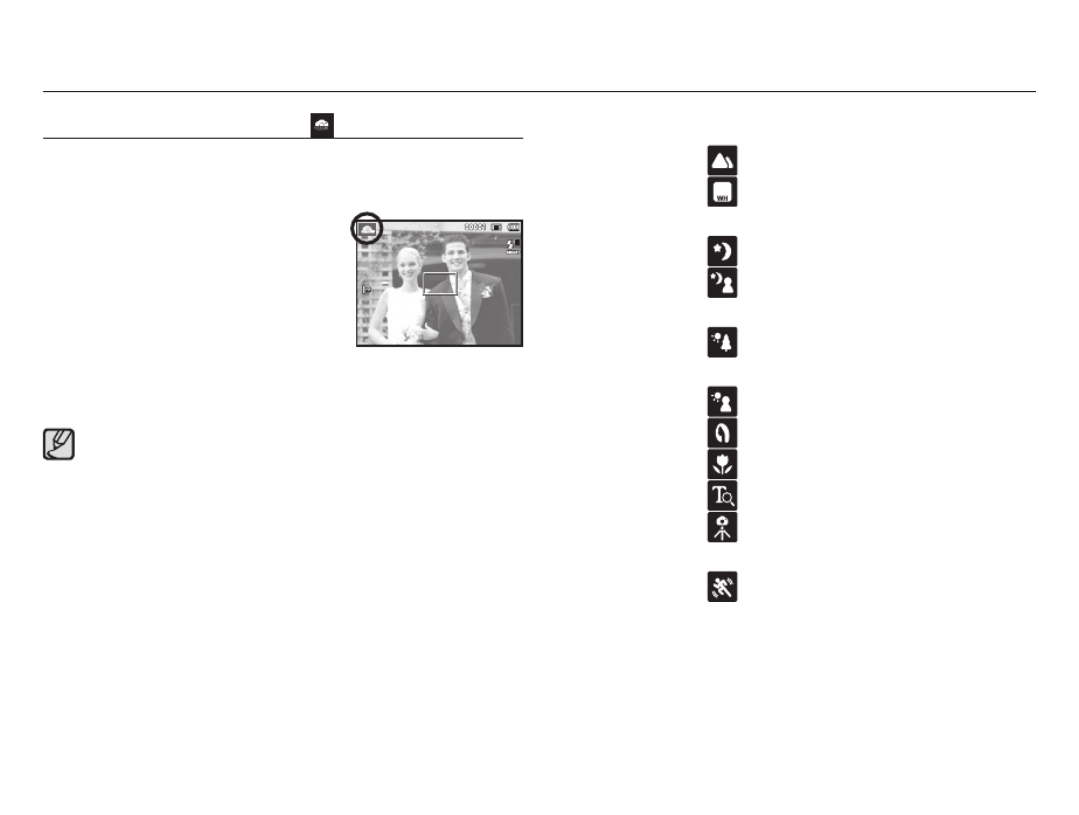
The scene modes are listed below.
[Frame Guide] ( ) : Use this mode when you want someone
else to take a picture for you from the
angle you choose.
[Night] ( ) : Use this for shooting still images at night
or in other dark conditions.
[Portrait] ( ) : To take a picture of a person.
[Children] ( ) : To take a picture of fast moving
objects, for example, children.
[Landscape] ( ) : To take pictures of distant scenery.
[Close Up] ( ) : Close-up shooting for small objects such
as plants and insects.
[Text] ( ) : Use this mode to shoot a document.
[Sunset] ( ) : For taking pictures of sunsets.
[Dawn] ( ) : Daybreak scenes.
[Backlight] ( ) :
Portrait without shadows caused by backlight.
[Firework] ( ) : Firework scenes.
[Beach&Snow] ( ) : For ocean, lake, beach and snowscape
scenes.
Starting the recording mode
Take a photo of portraits by setting options to clear facial
imperfections.
1. Select the Beauty Shot mode by using
the Mode dial. (p.20)
2. Press the Up/Down button in
[Functions] menu to select [Face Tone]
or [Face Retouch].
3. Press the Left/Right button to select a
desired level of [Face Tone] or [Face
Retouch] features. And then press the
OK button.
4. Press the Shutter button to capture
images.
How to use the Beauty Shot mode ( ) Ä To change the Scene mode,
press the MENU button and select
a desired scene menu.
Exit Change
Scene
Functions
Sound
Display
Settings
Night
Portrait
Children
Landscape
Close Up
Frame Guide
Te xt
Use the menu to easily con gure optimal settings for a variety of
shooting situations.
1. Select the Scene mode by using the
Mode dial. (p.20)
2. Press the Left/Right button to select
the desired mode.
3. Point the camera towards the subject
and compose the image by using the
LCD monitor.
4. Press the shutter button to capture an
image.
How to use the Scene modes ( )
This mode is appropriate for shooting with
pre-composed scenes.
Frame Guide

024
Starting the recording mode
How to use the [Frame Guide] mode
Set [Frame Guide] mode when you want someone else to take a
picture for you from the angle you choose.
1. Take a picture from the angle you
choose.
- A guide appears round the sides
of the picture.
2. Then another person can take the
picture by aligning the edge of the
picture to be taken with the guide
framing the sides of the window.
Cancel Frame : OK
Guide
Cancel Frame : OK
Cancel Frame : OK
How to use the [Long Time Shutter]
This camera automatically adjusts the shutter speed and aperture
values to the shooting environment. However, in Night scene mode,
you can set the shutter speed and aperture values to your preference.
Changing the Shutter speed and Aperture value
1. Select the [Night] mode. (p.23)
2. Press the Fn button and Long Time
shutter menu will be displayed.
3. Congure the Long Time shutter value
with the 5 function button.
4. Press the Fn button again. The value
you set will be saved and the mode
will switch to Night scene mode.
3.5
1S
Exit Move
Long Time Shutter
Adjust the shutter speed and aperture value.

025
Starting the recording mode
How to use the Movie clip mode ( )
A movie clip can be recorded for as long as the available recording
time of the memory capacity allows.
1. Select the Movie clip mode by using
the Mode dial. (p.20)
2. Point the camera towards the subject
and compose the image by using the
LCD monitor.
3. Press the shutter button once and mov-
ie clips are recorded for as long as the
available recording time allows. Movie clips will still be recorded
if the shutter button is released. If you wish to stop recording,
press the shutter button again.
Ä Image size and type are listed below.
- Image size : 640x480, 320x240 (Selectable)
- Movie clip le type : AVI (MJPEG)
- Frame Rate : 30 FPS, 15 FPS (Selectable)
You can record the movie clip without sound.
Steps from 1 -3 are the same as those for
MOVIE mode.
4. Press the Menu button.
5. Press the Up / Down button to select the
[Functions] menu and press the Right
button.
Recording the movie clip without sound
6. Select the [Voice] menu by pressing the Up / Down button and
press the OK button.
7. Select the [Off] menu by pressing the Left / Right button.
8. Press the OK bu tton. You can record a movie without sound.
Ä See p.48 for further details.
Using Successive Recording
Steps from 1-2 are the same as those for
MOVIE CLIP mode.
3. Press the shutter button and movie clips
are recorded for as long as the available
recording time. Movie clips
will still be recorded if the shutter button
is released.
4. Press the OK button to pause recording.
5. Press the OK button again to resume the recording.
6. If you wish to stop recording, press the shutter button again.
This camera allows you to temporarily stop during unwanted
scenes, while recording a movie clip. Using this function, you can
record your favourite scenes into a movie clip without having to
create multiple movie clips.
Pausing while recording a movie clip (Successive Recording)
Stop Record
026
Starting the recording mode
The camera automatically chooses the appropriate camera settings
based on a detected type of scene. It will be helpful if you are not
familiar with the camera settings for various scenes.
1. Select Smart Auto mode by using the
Mode dial. (p.20)
2. Point the camera towards the subject
and compose the image by using the
LCD monitor.
3. Press the Shutter button to capture an
image.
How to use the Smart Auto mode( )
Each scene is recognized in the following conditions;
[Landscape] ( ) : When shooting outdoor scenes
[White] ( ) : When shooting in a very bright
environment
[Night] ( ) : When shooting the nighttime scenes
[Night Portrait] ( ) : When shooting people in a dark outdoor
place
[Backlight] ( ) : When shooting a backlit scenery without
a portrait
[Backlight Portrait] ( ) : When shooting a backlit portrait
[Portrait] ( ) : When shooting a portrait
[Macro] ( ) : When shooting close-ups
[Macro Text] ( ) : When shooting texts in a close focus
[Tripod] ( ) : When shooting a subject without any
movement on the tripod
[Action] ( ) : When shooting a subject making frequent
movements
If the camera does not recognize a proper scene mode, the
default settings will be used.
Even if there is a face detected, the camera may not select a
portrait mode depending on the subject’s position or lighting.
The camera may not select the correct scene depending on
shooting environments, such as camera shake, lighting, and
distance to the subject.
The [Night] mode recognizes scenes only when the ash is set
to off. The camera operates the [Tripod] mode after checking the
shooting condition on the tripod for a certain time.
Despite using a tripod, the camera may not select a tripod mode
depending on the subject’s movement.
027
The available memory capacity may vary depending on shooting
conditions and camera settings.
When the Flash Off, Slow synchro mode or DUAL IS mode is
selected in a low lighting condition, the camera shake warning
indicator ( Ã ) may appear on the LCD monitor. In this case,
use a tripod, support the camera on a solid surface or change to
flash shot mode.
Shooting against the light
: It is best to take pictures with the sun in the
background. Taking pictures against the
sun may make the picture come out dark.
To take a picture against the light, please
use the [Backlight] in scene shooting mode
(see page 23), ash (see page 32), fi flll-in
spot metering (see page 43), exposure
compensation (see page 37) or ACB (see
page 43) function.
Avoid obstructing the lens or the flash when you capture an image.
Things to Watch Out for When Taking Pictures
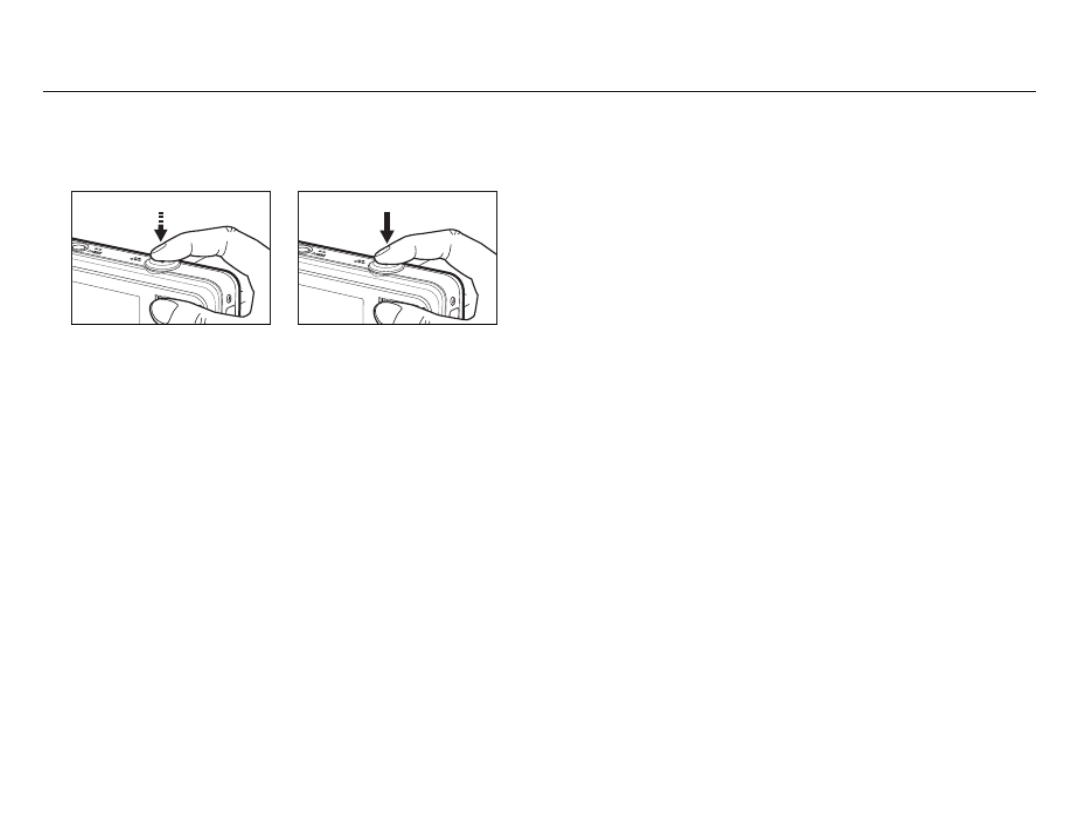
Pressing the shutter button down half way.
Lightly press the shutter button to confirm focus and flash battery
charge. Press the shutter button all way down to take the picture.
Compose the image by using the LCD monitor.
Under certain conditions the auto focus system may not perform
as expected.
- When photographing a subject that has little contrast.
- If the subject is highly reflective or shiny.
- If the subject is moving at high speed.
- When there is strong re ected light, or when the background is fl
very bright.
- When the subject matter has only horizontal lines or the subject
is very narrow (such as a stick or flagpole).
- When the surroundings are dark.
[Lightly press the shutter button] [Press the shutter button]
028
Using the camera buttons to set the camera
ZOOM button
The recording mode function can be set up by using the camera buttons.
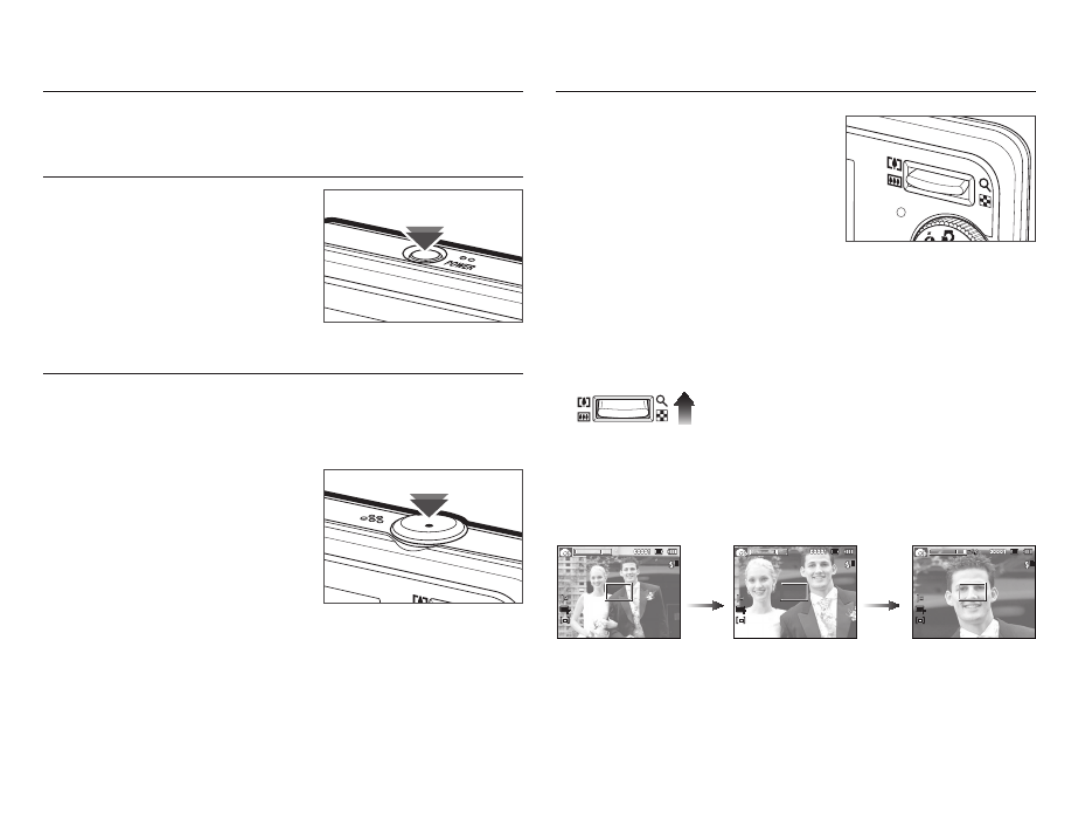
Used for turning the camera’s power
on / off. If there is no operation during
the speci ed time, the camera's power fi
will be turned off automatically to save
battery life. Refer to page 54 for more
information about the auto power off
function.
Used for taking an image or recording voice in the RECORDING
mode.
In MOVIE CLIP mode
Pressing the shutter button down
fully starts the process for record-
ing a movie clip. Press the shutter
button once and the movie clip is
recorded for as long as the available
recording time in the memory allows.
If you wish to stop recording, press
the shutter button again.
In STILL IMAGE mode
Pressing the shutter button down halfway activates the autofocus
and checks the condition of the ash. Pressing the shutter button fl
down fully takes and stores the image. If you select voice memo
recording, the recording will start after the camera has finished
storing the image data.
If the menu is not displayed, this button
works as the OPTICAL ZOOM or
DIGITAL ZOOM button.
This camera has a 5X optical zoom and
a 5X digital zoom function. Using both
will offer a total zoom ratio of 25X.
TELE Zoom
Optical zoom TELE : Pressing the ZOOM T button. This will zoom
into the subject i.e. the subject will appear
nearer.
Digital zoom TELE : When the maximum (5X) optical zoom
is selected, pressing the ZOOM T button
activates the digital zoom software.
Releasing ZOOM T button stops the digital
zooming at the required setting. Once the
maximum digital zoom (5X) is achieved,
pressing the ZOOM T button will have no
effect.
POWER button
SHUTTER button
Pressing
the ZOOM
T button
Pressing
the ZOOM
T button
[WIDE zoom] [TELE zoom] [Digital zoom 5.0X]

029
ZOOM button
WIDE Zoom
Optical zoom WIDE : Pressing the ZOOM W button. This will
zoom out from the subject i.e. the subject
will appear further away. Pressing the
ZOOM W button continuously will set the
camera to its minimum zoom setting i.e.
the subject appears at its furthest from the
camera.
Digital zoom WIDE : When the digital zoom is in operation,
pressing the ZOOM W button will reduce
the digital zooming in steps. Releasing
ZOOM W button stops digital zooming.
Pressing the ZOOM W button will reduce
the digital zoom and then it will continue to
reduce the optical zoom until the minimum
setting is reached.
Digital zoom
Optical zoom
Images taken using the digital zoom may take a little longer for
the camera to process. Allow time for this to take place.
If the Zoom buttons are being pressed during the Movie shots,
the voice will not be recorded.
You may notice a decrease in image quality when using the digital
zoom.
To view a clearer digital zoom image, press the shutter button
halfway at the maximum optical zoom position and press the
zoom T button again.
The digital zoom can’t be activated in the [Face Detection], [DUAL
IS], [Movie], [Smart Auto], [Beauty Shot] and some Scene modes.
Take care not to touch the lens to avoid taking an unclear image
and possibly causing camera malfunction. If the image is dim, turn
the camera power off and on again to modify the lens position.
Take care not to press the lens as this may cause a camera
malfunction.
When the camera is turned on, take care not to touch the camera’s
moving lens parts as this may cause the resulting image to be dim
and unclear.
Take care not to touch the lens when operating the zoom button.
[TELE zoom] [Optical zoom 2X] [WIDE zoom]
Pressing
the ZOOM
W button
Pressing
the ZOOM
W button
[Digital zoom 5.0X] [TELE zoom] [WIDE zoom]
Pressing
the ZOOM
W button
Pressing
the ZOOM
W button
030
Macro ( ) / Down button
While the menu is showing, the
DOWN
button operates as a direction
button.
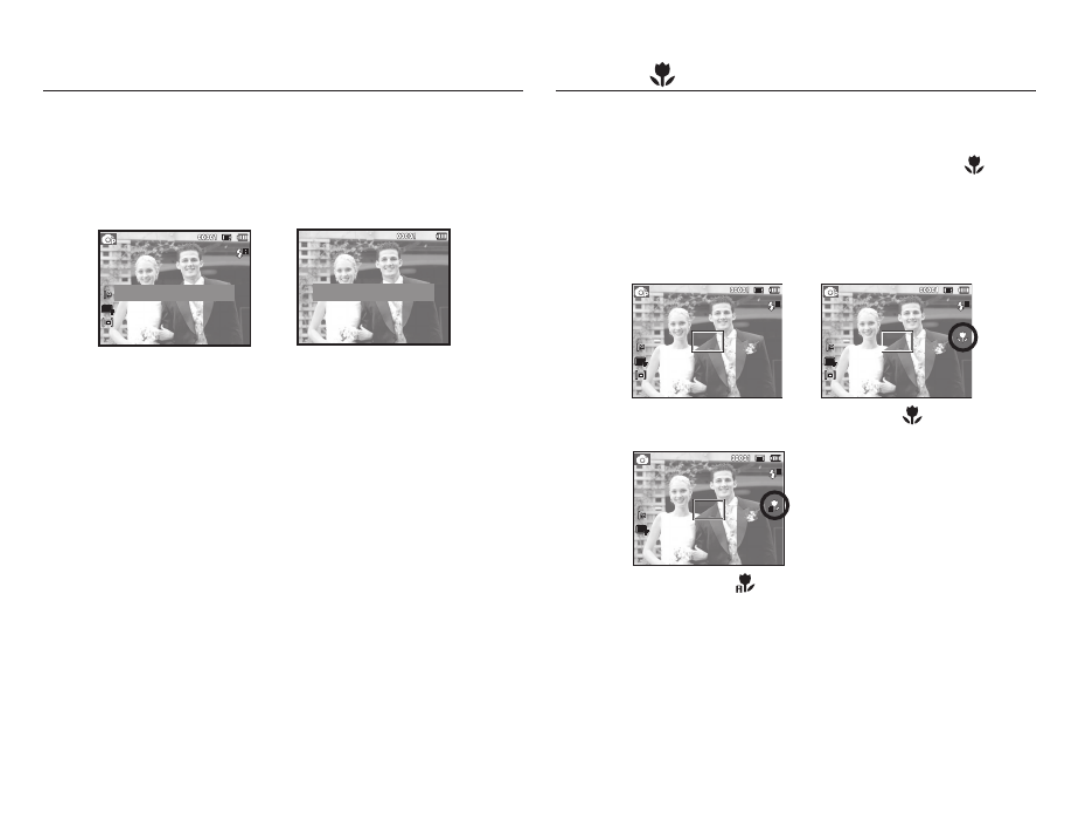
When the menu is not showing, you can use the MACRO ( ) /
DOWN button to take macro pictures.
The focus ranges are shown on the next page.
Press the Macro button until the desired macro mode indicator
appears on the LCD monitor.
[Auto Focus] [Macro ( )]
Info (DISP) / Up button
While the menu is showing, the Up button operates as a direction button.
In the recording modes or playback mode, pressing this button will display
the image information.
[Information screen][Filming screen]
Show all photographic information. Show only basic information.
[Auto Macro ( )]
031
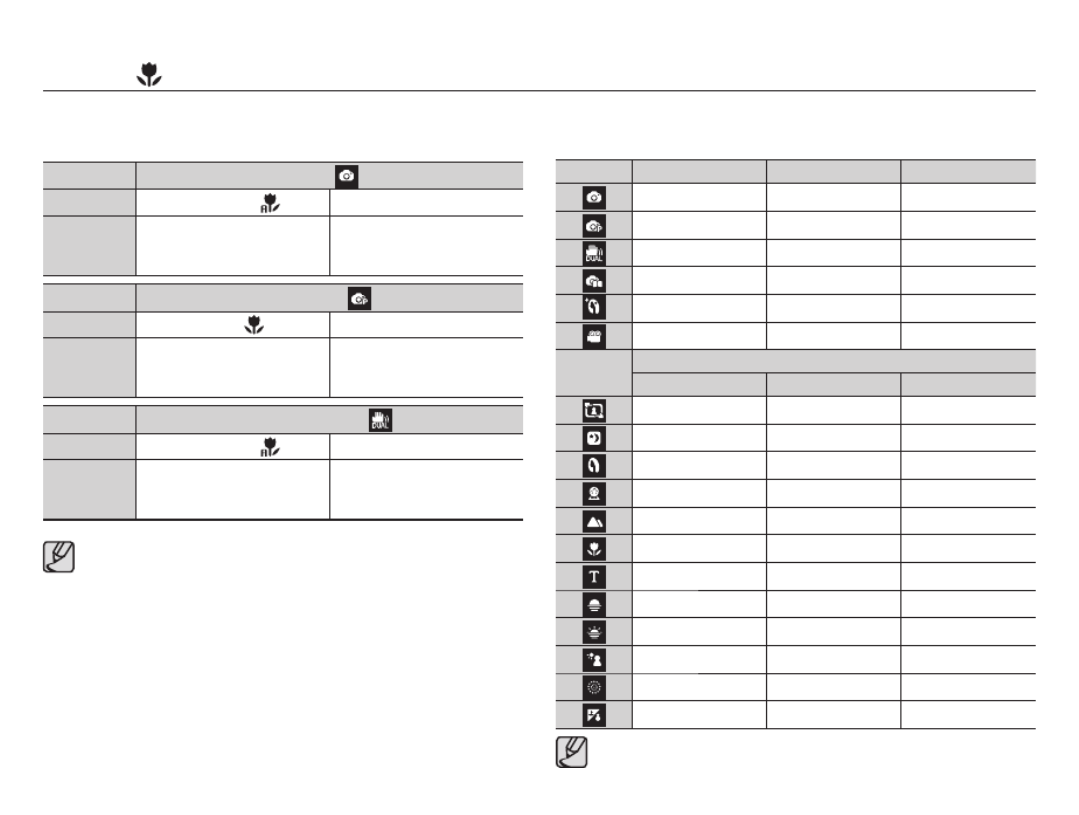
Mode Auto ( )
Focus Type Auto macro ( ) Normal
Focus range W : 10~ Infinity
T : 50 ~ Infinity
W : 80 ~ Infinity
T : 80 ~ Infinity
Mode Program ( )
Focus Type macro ( ) Normal
Focus range W : 10 ~ 80
T : 50 ~ 80
W : 80 ~ Infinity
T : 80 ~ Infinity
Mode DUAL IS Mode ( )
Focus Type Auto macro ( ) Normal
Focus range W : 10 ~ Infinity
T : 50 ~ Infinity
W : 80 ~ Infinity
T : 80 ~ Infinity
Types of focus mode and focus range (W : Wide, T : Tele)
(Unit: cm)
When the macro mode is selected, be particularly careful to avoid
camera shake.
When you take a picture within 40cm (Wide zoom) or 50cm
(Tele zoom) in the Macro mode, select the FLASH OFF mode.
Macro ( ) / Down button
Available focusing method, by recording mode
( o : Selectable, : Infinity focus range)
Mode Auto macro Macro Normal
o o
o o
o o
o o
o
o o
Mode SCENE
Auto macro Macro Normal
o
o
o
o
o
o
o
o
o
o
o
Focus range is automatically selected in [Smart Auto] mode.

032
Focus lock
To focus on a subject not positioned in the centre of the picture, use
the focus lock function.
3. Recompose the picture
and fully depress the
SHUTTER button.
1. The image to be
captured.
2.
Press the SHUTTER
button halfway and
focus on the subject.
Ê Using the Focus Lock
1. Ensure the subject is in the centre of the autofocus frame.
2. Press the SHUTTER button halfway. When the green auto focus
frame lights up, it means the camera is focused on the subject.
Be careful not to press the SHUTTER button all the way down to
avoid taking an unwanted picture.
3. With the SHUTTER button still pressed down only halfway, move
the camera to recompose your picture as desired, and then
press the SHUTTER button completely to take the picture. If you
release your nger from the SHUTTER button, the focus lock
function will be cancelled.
Flash ( ) / Left button
When the menu is displayed on the LCD
monitor, pressing the LEFT button makes
the cursor shift to the left tab.
When the menu is not displayed on the
LCD monitor, the LEFT button operates as
the FLASH ( ) button.
Ê Selecting the ash mode
1. Select a desired Recording mode, except the [Movie] mode and
the [DUAL IS] mode. (p.20)
2. Press the Flash button until the desired ash mode indicator is
displayed on the LCD monitor.
3. A ash mode indicator will be displayed on the LCD monitor.
Use the correct ash to suit the environment.
Ê Flash range (Unit: m)
ISO
Normal Macro Auto macro
WIDE TELE WIDE TELE WIDE TELE
AUTO 0.8~3.6 0.8~2.3 0.2~0.8 0.5~0.8 0.2~3.6 0.5~2.3
[Selecting the Auto ash]

033
If you press the shutter button after selecting the fl fiash, the rst
fl fiash res to check the shooting condition (Flash range and Power
ratio of ash). Do not move the camera until the second fl flash
fires.
Using the ash frequently will reduce the life of the battery.fl
Under normal operating conditions the re-charging time for the
flash is usually within 4 seconds. If the battery is weak, the charg-
ing time will be longer.
In the DUAL IS mode, some Scene modes, and the Movie clip
mode, the ash function will not operate.fl
Take photographs within the flash range.
The image quality is not guaranteed if the subject is too close or
highly reflective.
When taking an image in poorly lit conditions with the flash, there
may be a white speck in the captured image. The speck is caused
by the ash light re ecting off atmospheric dust.fl fl
Flash ( ) / Left button
Flash mode indicator
Icon Flash mode Description
Auto ashflIf the subject or background is dark, the
camera flash will operate automatically.
Auto & Red eye
reduction
If a subject or background is dark, the
camera flash will work automatically and will
reduce the red-eye effect by using the red-
eye reduction function.
Fill in flash
The ash fl fires regardless of the avail-
able light. The intensity of the flash will be
automatically controlled to suit the prevailing
conditions.
Slow synchro
The flash operates with a slow shutter speed
to obtain a balanced correct exposure. In poor
lighting conditions the camera shake warning
indicator ( Ã ) will display on the LCD moni-
tor.
Red-eye reduction
When a shot with "red eye" is detected,
this mode will reduce the red-eye effect
automatically.
Flash off
The fl fiash does not re.
Select this mode when capturing images in
a place or situation where ash photography fl
is prohibited. When you capture an image in
poorly lit conditions, the camera shake warn-
ing indicator ( Ã ) will appear on the LCD
monitor.

035
Selecting the self-timer
1.
Select a Recording mode with the
exception of Voice recording mode.(p.20)
2.
Press the SELF-TIMER / RIGHT ( )
button until the desired mode indicator
displays on the LCD monitor. A 10 second,
2 second, Double self-timer or Motion timer
icon appears on the LCD monitor.
3. When you press the SHUTTER button,
the picture will be taken after the
specified time has elapsed.
Self-timer ( ) / Right button
[Selecting the 10 SEC
self-timer]
Self-timer mode indicator
Icon Mode Description
10SEC
self-timer
Pressing the shutter button will allow an interval of
10 seconds before the image is taken.
2SEC
self-timer
Pressing the shutter button will allow an interval of
2 seconds before the image is taken.
Double
self-timer
A picture will be taken after about 10 seconds and
2 seconds later a second picture will be taken.
When using the flash, the 2-second
self-timer may be delayed for longer than 2 sec-
onds depending on the flash charging time.
Motion
Timer
The camera detects the subject's movement 6
seconds after pressing the Shutter button, and the
picture is taken when the movement is stopped.
The Motion Timer ows are as followings. (Movie Clip mode excluded)fl
Selecting the Motion Timer Pressing the Shutter button
Confirming the composition (Within 6 sec.)
*1
Starting the detec-
tion (Swing your hands fully)
*2
Stopping the detection
(Do not move) Taking an image (after 2 sec.)
*1: The camera detects the subject's movement 6 seconds after pressing the
Shtter button, so confirm the composition within 6 seconds.
*2: Move your body or hands fully.
Motion Timer
Motion Icon & Self-timer lamp
Pressing the Shuter button after
setting the Motion Timer Blink (1 second interval)
Detecting the subject's movement Blink (0.25 second interval)
No movement is detected Turn on and the image is taken
after 2 seconds
In the following cases, the Motion Timer may not operate.
The focus distance is over 3m.
The exposure is too bright or dark
In backlight conditions.
The movement is insignificant
The movement is detected beyond
the center part (50%) of the sensor
where the movement is recognized.
If the camera doesn`t sense any
movement for 30 seconds, or the
camera doesn’t sense stillness after
sensing movement
The detection range of
Motion Timer

036
MENU button
- When you press the MENU button, a menu related to each
camera mode will be displayed on the LCD monitor. Pressing it
again will return the LCD to the initial display.
- A menu option can be displayed when the following are selected :
MOVIE CLIP and STILL IMAGE mode. There is no menu
available when the voice recording function is selected.
- When the menu is displayed on the LCD monitor, this button is
used for shifting the cursor to the sub menu or for con rming data.fi
Use the menu that enables the functions, or the Fn button, to bring up the
menus below:
Mode Menu Available mode Page
(
Functions
)
EV p.37
White Balance p.38
ISO p.39
Face Detection p.39
Face Tone p.41
Face Retouch p.41
Photo Size / Movie Size
p.42
ACB p.43
Quality / Frame Rate p.42
Metering p.43
Drive p.44
Focus Area p.44
Photo Style Selector p.45
Image Adjust p.46
OIS p.46
Voice p.47
Long Time Shutter p.24
Functions ( )
OK button
[Pressing the
OK button]
Functions
Sound
Display
Settings
Photo Size
Quality
Focus Area
Photo Style Selector
OIS
Face Detection
Exit Change
Functions
Sound
Display
Settings
Photo Size
Quality
Focus Area
Photo Style Selector
OIS
Face Detection
Exit Change Exit Back
Photo Size
Quality
Focus Area
Photo Style Selector
OIS
Face Detection
Voice
Voice Voice
[Menu off] [Menu on]
[Pressing the MENU button]

037
Functions ( )
Exposure compensation
This camera automatically adjusts the exposure according to the
ambient lighting conditions.
You can also select the exposure value by using the [EV] menu.
Compensating Exposure
1. Click the Up/Down button from the
Functions menu to select [EV] ( ).
2. Use the LEFT and RIGHT buttons to
set the desired exposure compensation
factor.
3. Press the OK button. The value you
set will be saved and the Exposure Compensation setup mode
will be closed. If you change the exposure value, the exposure
indicator ( ) will be displayed on the Left of the LCD monitor.
Ä A negative exposure compensation value reduces the exposure.
Note that a positive exposure compensation value increases the
exposure and the LCD monitor will appear white or you may not
get good pictures.
EV
Set exposure value to adjust brightness.
Back Move
3. Select a desired menu by pressing the Up / Down button and
then press the OK button.
1. Press the MENU button in an available mode.
2. Press the Up / Down button to select the [Functions] menu and
press the Right/OK button.
How to Enable Functions Using the MENU Button Use the Fn button on the rear of the camera to bring up the menus
that enable frequently used functions faster.
4. Select a desired menu by pressing the Left / Right button and
then press the OK button.
Left / Right
button
White Balance
Adjust the white balance according to the light source.
Back Move
Daylight
Appropriate for outdoor photography on a clear day.
Back Move
Up / Down
button
White Balance
ISO
Face Detection
Photo Size
Quality
EV
ACB
Exit Back
White Balance
ISO
Face Detection
Photo Size
Quality
EV
ACB
Exit Back
Right/OK
button
White Balance
ISO
Face Detection
Photo Size
Quality
EV
ACB
Exit Back
Functions
Sound
Display
Settings
White Balance
ISO
Face Detection
Photo Size
Quality
EV
Exit Change
ACB
038
Functions ( )
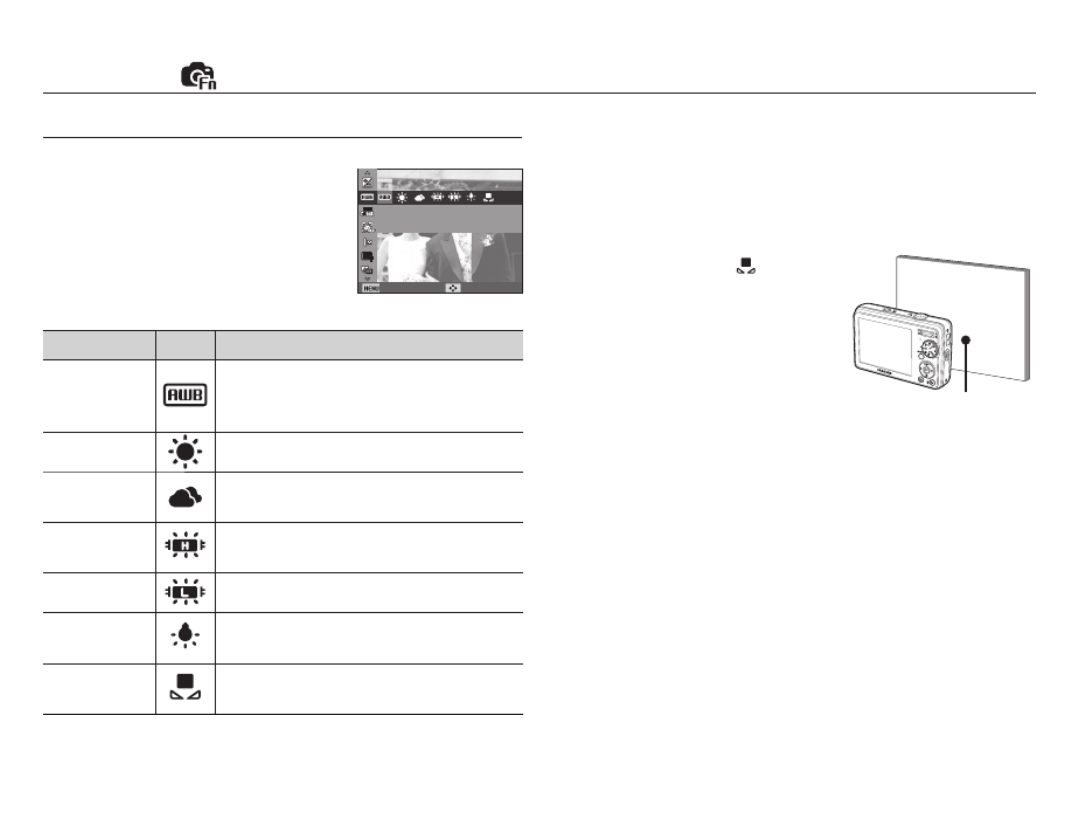
White balance
The white balance control allows you to
adjust the colours to appear more natural.
Mode Icon Description
Auto WB
The camera automatically selects the ap-
propriate white balance settings, depending
on the prevailing lighting conditions.
Daylight For taking images outside.
Cloudy For taking images under a cloudy and over-
cast sky.
Fluorescent_H For shooting under daylight uorescent types fl
of three-way uorescent lighting.fl
Fluorescent_L Shooting under white uorescent lighting.fl
Tungsten For shooting under tungsten (standard light
bulb) lighting.
Custom Set Allows the user to set the white balance ac-
cording to the shooting condition.
Ä Different lighting conditions may cause a colour cast on your images.
Using the Custom White Balance
White balance settings may vary slightly depending on the
shooting environment. You can select the most appropriate
white balance setting for a given shooting environment by setting
up the custom white balance.
1. Select the CUSTOM ( ) menu of
the White Balance and place a sheet
of white paper in front of the camera
so that the LCD monitor shows only
white.
2. OK button : selects previous cus-
tom white balance.
Shutter button : saves new custom white balance.
- The custom white balance value will be applied, starting with the
next picture you take.
- The user con gured white balance will be remain effective until fi
it is overwritten.
White Balance
Adjust the white balance according to the light source.
Back Move
White paper

039
ISO
[Auto] : The camera's sensitivity is
automatically changed by
variables such as lighting value
or subject brightness.
[ISO 80, 100, 200, 400, 800, 1600, 3200] :
You can increase the shutter speed while
the same amount of light is present, by
increasing the ISO sensitivity. However, the
image may be saturated in high luminance.
The higher the ISO value, the higher the camera’s sensitivity to
light and therefore the greater its capacity to take pictures in dark
conditions. However, the noise level in the image will increase as
the ISO value increases, making the image appear coarse.
Ä When [Motion Capture] is set, ISO speed will be set to Auto.
Ä [ISO] is enabled only in [Program] or [Manual] mode.
You can select the ISO sensitivity when taking pictures.The speed or
specific light-sensitivity of a camera is rated by ISO numbers.
Functions ( )
ISO
Adjust the sensitivity of the camera.
Back Move
Face Detection
Adjust face detection settings.
Back Move
Normal
This mode detects the face position of the subject automatically and
then sets the focus and exposure. Select this mode for quick and easy
face picture.
Ä Selectable modes: Auto, Program, DUAL IS, Photo Help Guide,
Beauty Shot, Portrait, Children, Beach & Snow
1. The size and position of the auto
focus frame is set at the face of the
subject automatically.
2. Press the shutter button halfway. The
focus frame turns to green when the
focus is activated.
3. Press the shutter button fully to take
a picture.
Face Detection
If you use face detection options, your
camera can detect a human face. When
focusing on a human face, the brightness
of the face is also adjusted. You can also
capture natural facial expressions by using
self portrait.

040
Functions ( )
This function can detect up to 10 persons.
When the camera recognises many people at the same time,
it will focus on the nearest person.
The Digital zoom is not activated in this mode.
When the camera detects a target face, the white colour
focus frame will be displayed over the target face and the
grey colour focus frame appears over the remaining faces.
Press the shutter button halfway down to focus on the face
and the white focus frame turns green.
Return to previous AF mode if face detection was failure.
In some conditions this function cannot work properly.
- When a person wears dark glasses or some part of the face
is hidden.
- When the person being taken does not look at the camera.
- Camera doesn't detect a face as the brightness is too dark
or too bright.
- The distance between the camera and object are far.
The maximum available Face Detection range is 2.5m (Wide).
The nearer the subject, the faster the camera can recognize
the subject.
In [Beauty Shot], [Portrait], and [Children] mode, the [Face
Detection] function setting is set to its default value.
Self Portrait
When taking pictures of yourself, the area of your face is automatically
detected so that you can take self pictures more easily and quickly.
Ä Selectable modes: Auto, Program, DUAL IS, Photo Help Guide,
Beauty Shot, Portrait,
Beach & Snow
1. For self-filming, set the camera lens
towards the face of the object. It
automatically detects the face of the
object, and emits a guiding sound.
2. Start filming by pressing the shutter
button.
When locating the face in the center of the screen, it repeatedly
emits a faster sound unlike the sounds that are emitted when
the face is not in the center.
The guiding sound can be set using the sound setting
menu. (See p.49)

041
Functions ( )
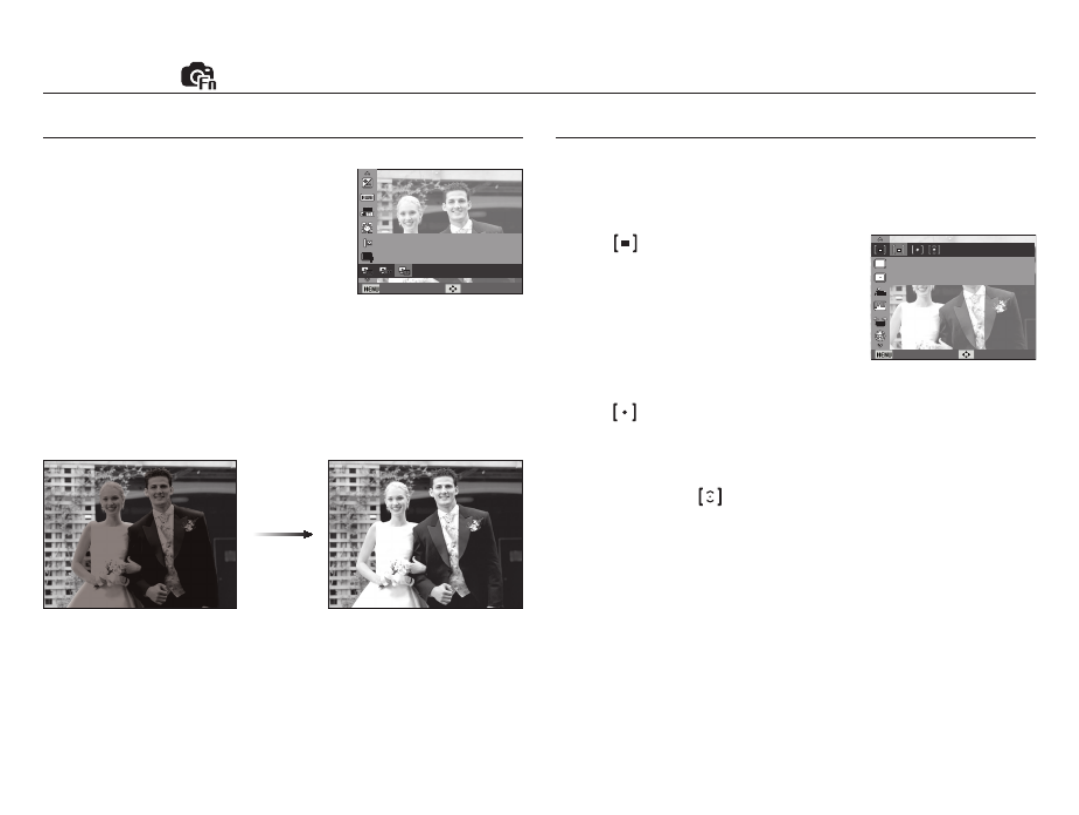
Face Tone
This menu allows you to control the skin tone in images in beauty shot
mode. The higher the level you select, the brighter the skin tone.
1. Select [Face Tone] by pressing the
Up/Down button.
2. Select a desired face tone by pressing
the Left / Right button and then press
the OK button.
3. Press the Shutter button to take an
image.
Face Retouch
This menu allows you to make skin appear clear and beautiful before
recording in beauty shot mode. The higher the level selected, the
more effective the control.
1. Select [Face Retouch] by pressing the
Up/Down button.
2. Select a desired face retouch by
pressing the Left / Right button and
then press the OK button.
3. Press the Shutter button to take an
image.
Face Tone
Set the level of face tone. (brightening the face)
Back Move
Face Retouch
Set the level of face retouching.
Back Move
Smile Shot
The camera automatically takes a picture by
detecting the face of the subject although
you don’t press the shutter button. If you
press the Shutter button, the picture is taken
in the normal way. When taking a picture of
smile shot, showing teethes or keeping the
smiley face of your subject helps detecting
the smile face of the subject.
Blink Detection
If the eyes of the subject are closed when the
shutter button is pressed, the camera takes
2 continuous shots and then the images are
saved. The camera takes only one picture if
the eyes of the subject are open when the
Shutter button is pressed.
Detecting the smiling face or the blinking eyes may not be
available if any of the following situations occurs:
- If the subject is wearing sunglasses.
- When the subject is not facing directly to the camera.
- If the environmental light is too bright or too dark to detect the
face of the subject.
- When the camera is far from the subject. (Orange colored
focusing mark)
- If there is refl ection of the light or the back light that are too
bright.

042
Functions ( )
The higher the resolution, the lower the number of shots
available because high resolution images require more memory.
Image Size
You can select the image size appropriate for your application.
[ STILL IMAGE mode ] [ MOVIE CLIP mode ]
(Unit: pixel)
Still
image
mode
Icon
Size
3648X
2736
3648X
2432
3584X
2016
3072X
2304
2592X
1944
2048X
1536
1024X
768
Movie
clip
mode
Icon
Size 640 x 480 320 x 240
Set the photo size.
Photo Size
Back Move
Movie Size
Set the video size.
Back Move
This file format complies with the DCF (Design rule for Camera
File system).
JPEG (Joint Photographic Experts Group) :
JPEG is the image compression standard developed by the Joint
Photographic Experts Group. This type of compression is most
commonly used for compressing photos and graphics because it
can compress the les effi ficiently.
Quality / Frame rate
You can select the compression ratio appropriate for your application
of the captured images. The higher the compression ratio, the lower
the picture quality.
[ STILL IMAGE mode ] [ MOVIE CLIP mode ]
Mode STILL IMAGE mode MOVIE CLIP mode
Icon
Sub menu Super Fine Fine Normal 30 FPS 15 FPS
File
Format jpeg jpeg jpeg avi avi
Frame Rate
Set the number of frames per second for movies.
Back MoveBack Move
Adjust the image quality.
Quality
043
Functions ( )
Metering
If you cannot obtain suitable exposure conditions, you can change
the metering method to take brighter pictures.
[Multi] ( ) : Exposure will be calculated
based on an average of
the available light in the
image area. However, the
calculation will be biased
towards the centre of the
image area. This is suitable
for general use.
[Spot] ( ) : Only the rectangular area in the centre of the LCD
monitor will be metered for light. This is suitable when
the subject in the centre is exposed correctly, regard-
less of the back lighting.
[Center We ighted] ( )
: Exposure will be calculated based on an average of
the available light in the image area. However, the
calculation will be biased towards the centre of the im-
age area. This is suitable for taking a picture of small
object like a flower or insects.
Ä If the subject is not the centre of the focus area, do not use the
spot metering as this may result in an exposure error. In this
circumstance, it is better to use exposure compensation.
Metering
Set the light metering option.
Back Move
ACB
This function is to adjust the contrast
automatically when taking photos in an en-
vironment with big exposure difference i.e.
backlight or contrast. This function adjusts
the brightness automatically and allows the
subject to be photographed clearly.
Ä The ACB function is available in [Auto], [Program] or [Portrait]
recording mode. ACB function always operates in the [Auto],
[Portrait] recording mode.
Automatically compensate for differences in brightness.
ACB
Back Move
044
Functions ( )
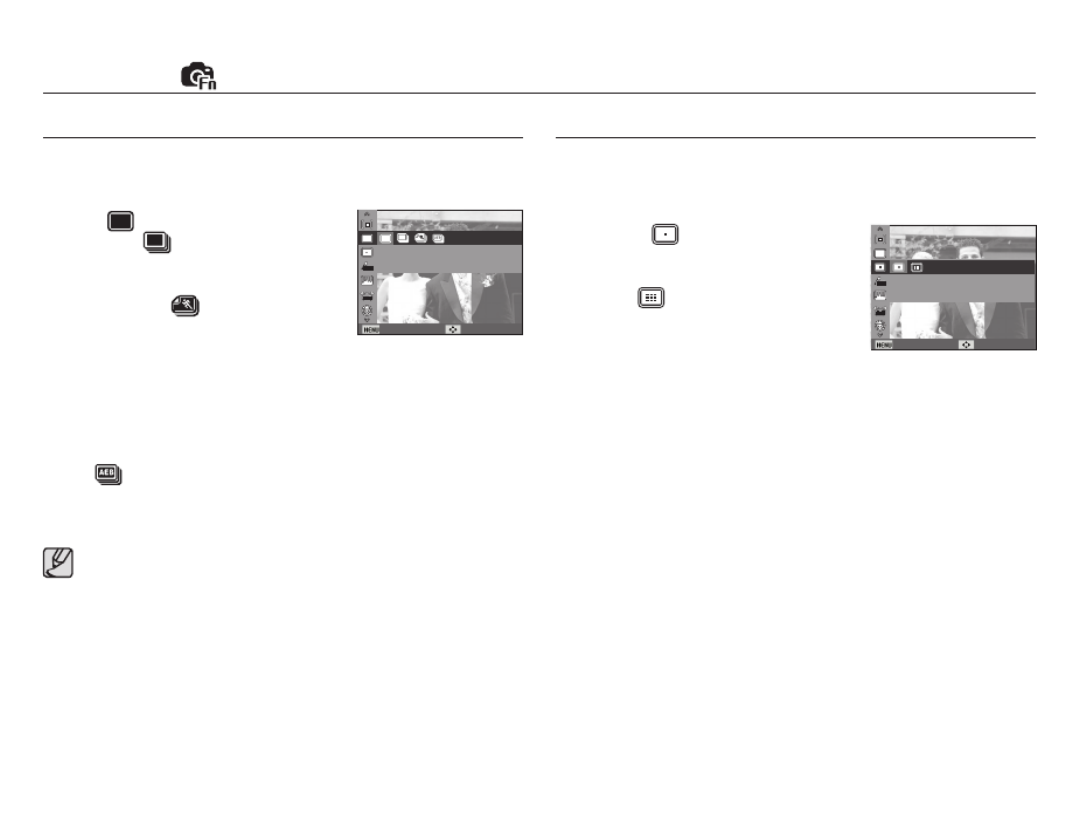
Drive mode
You can select continuous shot, and AEB (Auto Exposure Bracketing).
[Single] ( ) : Take one picture only.
[Continuous] ( ) :
Images will be taken
continuously until the
shutter button is released.
[Motion Capture] ( )
:
This takes 5 shots per
second, when the shut-
ter is pressed and held down. After completing
the continuous shooting, images are saved and
the images play back on the Rear LCD.
The maximum number of shots is 30 and the
image size is xed as 640x480.fi
[AEB] ( ) :
Take three consecutive photos with varying
exposure values. Use this mode if it is hard to
decide exposure of the object.
High resolution and picture quality increases le saving time, fi
which increases stand-by time.
If the [Continuous], [Motion Capture], [AEB] sub menu is selected,
the flash will be off automatically.
If less than 3 pictures are available in the memory, the AEB shoot-
ing is not available.
If less than 30 pictures are available in the memory, the motion
capture is not available.
It is best to use a tripod for the AEB shooting as the time to save
each image le is longer and blurring caused by camera shake fi
may occur.
Auto Focus type
You can select your preferred Focus Area according to the shooting
conditions.
[Center AF] ( ) : The rectangular area in
the center of the LCD
monitor will be focused
[Multi AF] ( ) : This camera selects all
of available AF point
from the 9 AF points.
Ä When the camera focuses on the subject, the auto focus frame
turns to green. When the camera doesn't focus on the subject, the
auto focus frame turns to red.
Drive
Set the shooting type.
Back Move
Focus Area
Set the autofocus method.
Back Move
Specyfikacje produktu
| Marka: | Samsung |
| Kategoria: | kamera |
| Model: | SL420 |
Potrzebujesz pomocy?
Jeśli potrzebujesz pomocy z Samsung SL420, zadaj pytanie poniżej, a inni użytkownicy Ci odpowiedzą
Instrukcje kamera Samsung

9 Października 2024
4 Października 2024
4 Października 2024
3 Października 2024
2 Października 2024
2 Października 2024
2 Października 2024
2 Października 2024
30 Września 2024
30 Września 2024
Instrukcje kamera
- kamera Sony
- kamera Leica
- kamera Logitech
- kamera Xiaomi
- kamera Joy-It
- kamera Braun
- kamera Lenovo
- kamera TP-Link
- kamera Philips
- kamera SilverCrest
- kamera Acer
- kamera Epson
- kamera Hikvision
- kamera EZVIZ
- kamera Panasonic
- kamera Canon
- kamera Mio
- kamera Viewsonic
- kamera Nedis
- kamera Reolink
- kamera Medion
- kamera Lenco
- kamera Fujifilm
- kamera D-Link
- kamera GE
- kamera Ring
- kamera Garmin
- kamera Imou
- kamera Blaupunkt
- kamera IOptron
- kamera Casio
- kamera Sigma
- kamera HP
- kamera Prixton
- kamera SJCAM
- kamera Creative
- kamera Swann
- kamera Nikon
- kamera Ozito
- kamera Kodak
- kamera Cisco
- kamera Scosche
- kamera DJI
- kamera Zenit
- kamera Gembird
- kamera Minox
- kamera Cobra
- kamera JVC
- kamera Trust
- kamera Fimi
- kamera AgfaPhoto
- kamera Vimar
- kamera Dahua Technology
- kamera Kyocera
- kamera Eufy
- kamera Ricoh
- kamera Rollei
- kamera Netgear
- kamera Velleman
- kamera Bolex
- kamera Pyle
- kamera Vtech
- kamera Speco Technologies
- kamera ARRI
- kamera Fluke
- kamera Olympus
- kamera Avaya
- kamera National Geographic
- kamera Maginon
- kamera SPC
- kamera Polaroid
- kamera Konica Minolta
- kamera Sanyo
- kamera Red Digital Cinema
- kamera Oregon Scientific
- kamera Lorex
- kamera Optoma
- kamera Bresser
- kamera Hama
- kamera GoPro
- kamera TomTom
- kamera Denver
- kamera Anker
- kamera Pentax
- kamera Bushnell
- kamera Berger & Schröter
- kamera Marshall Electronics
- kamera Hitachi
- kamera Emerson
- kamera SereneLife
- kamera Vemer
- kamera Azden
- kamera AVerMedia
- kamera RCA
- kamera Genius
- kamera Levenhuk
- kamera BenQ
- kamera Trevi
- kamera Technaxx
- kamera Lexibook
- kamera Hanwha
- kamera Sencor
- kamera Powerfix
- kamera Blackmagic Design
- kamera Foscam
- kamera Lumens
- kamera Daewoo
- kamera Dörr
- kamera Best Buy
- kamera EVE
- kamera POV
- kamera Elmo
- kamera UniView
- kamera Laserliner
- kamera Vivitar
- kamera PTZ Optics
- kamera Agfa
- kamera Argus
- kamera Easypix
- kamera Celestron
- kamera Yashica
- kamera Flir
- kamera Daitsu
- kamera Arlo
- kamera Nest
- kamera Ansco
- kamera Intel
- kamera Mamiya
- kamera Konig
- kamera Fuji
- kamera Minolta
- kamera Zorki
- kamera EverFocus
- kamera RunCam
- kamera SeaLife
- kamera Burris
- kamera Liiv360
- kamera Watec
- kamera Meade
- kamera Contax
- kamera Sinji
- kamera Traveler
- kamera Exakta
- kamera Digital Watchdog
- kamera MuxLab
- kamera AViPAS
- kamera ZeissIkon
- kamera Silvergear
- kamera Spypoint
- kamera HOLGA
- kamera Praktica
- kamera Hasselblad
- kamera Moto Mods (Motorola)
- kamera Fantasea Line
- kamera Kogan
- kamera Getac
- kamera Brinno
- kamera Z CAM
- kamera General
- kamera Ergoguys
- kamera Strex
- kamera General Electric
- kamera Leotec
- kamera Leitz Focomat IIc
- kamera Syrp
- kamera Cosina
- kamera Videology
- kamera InfiRay
- kamera Pelco
- kamera Videotec
- kamera Cambo
- kamera Kobian
- kamera Kyocera Yashica
- kamera Bauhn
- kamera Konica
- kamera Akaso
- kamera Seek Thermal
- kamera Aida
- kamera Ikegami
- kamera Ikelite
- kamera Adeunis
- kamera Hoppstar
- kamera Moultrie
- kamera PatrolEyes
- kamera Camouflage
- kamera HuddleCamHD
- kamera Aplic
- kamera Linhof
- kamera GoXtreme
- kamera KanDao
- kamera Aquapix
- kamera Kraken Sports
- kamera Voigtlander
Najnowsze instrukcje dla kamera

9 Kwietnia 2025

9 Kwietnia 2025

3 Kwietnia 2025
2 Kwietnia 2025
1 Kwietnia 2025
29 Marca 2025
29 Marca 2025
27 Marca 2025
27 Marca 2025
27 Marca 2025