Instrukcja obsługi QNAP TVS-473
Przeczytaj poniżej 📖 instrukcję obsługi w języku polskim dla QNAP TVS-473 (93 stron) w kategorii serwer. Ta instrukcja była pomocna dla 6 osób i została oceniona przez 2 użytkowników na średnio 4.5 gwiazdek
Strona 1/93

QTS 5.0.x
User Guide
Document Version: 8
03/03/2023

Contents
1. Overview
About QTS................................................................................................................................................................. 11
What's New in QTS...................................................................................................................................................11
QTS Initialization...................................................................................................................................................... 13
Initializing QTS Using Pro.................................................................................................................... 13Qnder
Initializing QTS Using the Cloud Installation Website.................................................................................... 16
Initializing QTS Using an HDMI Connection.................................................................................................... 19
NAS Access................................................................................................................................................................21
Accessing the NAS Using a Browser................................................................................................................. 21
Accessing the NAS Using Pro.............................................................................................................. 22Qnder
Accessing the NAS Using Qmanager................................................................................................................22
QTS Navigation.........................................................................................................................................................23
Task Bar................................................................................................................................................................ 23
Main Menu...........................................................................................................................................................31
Desktop................................................................................................................................................................ 32
Qboost..................................................................................................................................................................34
2-step ....................................................................................................................................................36Verication
Enabling 2-step ...............................................................................................................................36Verication
Logging in to QTS Using 2-step .................................................................................................... 37Verication
Disabling 2-step ..............................................................................................................................37Verication
Enforcing 2-step Verication..............................................................................................................................38
Support and Other Resources................................................................................................................................39
2. Getting Started
Storing Data..............................................................................................................................................................40
Accessing Data......................................................................................................................................................... 40
Backing Up Data...................................................................................................................................................... 41
Conguring Privilege Settings................................................................................................................................41
Setting Up Remote Access......................................................................................................................................42
Acquiring Apps and Licenses..................................................................................................................................42
Securing the NAS..................................................................................................................................................... 43
3. System Settings
General Settings.......................................................................................................................................................45
Conguring System Administration Settings.................................................................................................. 45
Conguring Time Settings................................................................................................................................. 47
Conguring Daylight Saving Time.................................................................................................................... 48
Conguring Codepage Settings........................................................................................................................ 48
Conguring Region Settings..............................................................................................................................48
Conguring the Login Screen............................................................................................................................49
Enabling or Disabling Console Management.................................................................................................. 49
Security..................................................................................................................................................................... 49
Conguring the Allow/Deny List....................................................................................................................... 50
Conguring IP Access Protection......................................................................................................................50
Conguring Account Access Protection........................................................................................................... 51
SSL & Private Key..............................................................................................................................51Certicate
Conguring the Password Policy...................................................................................................................... 53
Hardware.................................................................................................................................................................. 54
Conguring General Hardware Settings..........................................................................................................54
Conguring Audio Alert Settings...................................................................................................................... 55
Conguring Smart Fan Settings........................................................................................................................ 56
QTS 5.0.x User Guide
1

RAID....................................................................................................................................................................241
Self-Encrypting Drives (SEDs)...........................................................................................................................251
Expansion Units..................................................................................................................................................... 257
Expansion Unit Actions.....................................................................................................................................258
Expansion Unit Recovery..................................................................................................................................258
QNAP External RAID Devices...........................................................................................................................258
QNAP JBOD Enclosures.....................................................................................................................................272
Qtier.........................................................................................................................................................................273
Qtier .....................................................................................................................................................274Benets
Qtier Requirements.......................................................................................................................................... 275
Qtier Creation....................................................................................................................................................276
Qtier Management........................................................................................................................................... 279
Snapshots............................................................................................................................................................... 282
Snapshot Storage Limitations......................................................................................................................... 282
Snapshot Creation............................................................................................................................................ 282
Snapshot Management....................................................................................................................................284
Snapshot Data Recovery.................................................................................................................................. 286
Snapshot Clone................................................................................................................................................. 289
Snapshot Replica...............................................................................................................................................290
Cache Acceleration................................................................................................................................................ 300
Cache Acceleration Requirements..................................................................................................................300
Creating the SSD Cache....................................................................................................................................301
Expanding the SSD Cache................................................................................................................................ 302
Conguring SSD Cache Settings..................................................................................................................... 303
Cache Missing....................................................................................................................................................304
Removing the SSD Cache - QTS....................................................................................................................... 304
External Storage.................................................................................................................................................... 304
External Storage Device Actions..................................................................................................................... 305
External Storage Partition Actions..................................................................................................................305
Formatting an External Storage Disk or Partition.........................................................................................305
Remote Disk........................................................................................................................................................... 306
Remote Disk Limitations.................................................................................................................................. 307
Adding a Remote Disk...................................................................................................................................... 307
Remote Disk Actions.........................................................................................................................................308
VJBOD (Virtual JBOD)............................................................................................................................................. 309
VJBOD Requirements........................................................................................................................................309
VJBOD Limitations.............................................................................................................................................310
VJBOD Automatic Reconnection......................................................................................................................310
VJBOD Creation..................................................................................................................................................310
VJBOD Management.........................................................................................................................................315
VJBOD Cloud...........................................................................................................................................................317
Installing VJBOD Cloud.....................................................................................................................................318
VJBOD Cloud Volume and LUN Creation........................................................................................................ 318
VJBOD Cloud Management..............................................................................................................................330
Transfer Resources........................................................................................................................................... 333
Event Logs..........................................................................................................................................................334
Licenses..............................................................................................................................................................334
8. iSCSI & Fibre Channel
Storage Limits........................................................................................................................................................ 336
iSCSI Storage Limits..........................................................................................................................................336
Fibre Channel Storage Limits...........................................................................................................................336
iSCSI & Fibre Channel Global Settings.................................................................................................................336
LUNs........................................................................................................................................................................ 336
QTS LUN Types.................................................................................................................................................. 337
Creating a Block-Based LUN............................................................................................................................ 337
Creating a File-Based LUN................................................................................................................................339
QTS 5.0.x User Guide
5

LUN Import/Export........................................................................................................................................... 340
iSCSI.........................................................................................................................................................................343
Getting Started with iSCSI................................................................................................................................343
iSCSI Performance Optimization.....................................................................................................................344
iSCSI Targets...................................................................................................................................................... 344
iSCSI LUN Management................................................................................................................................... 348
iSCSI Access Control List...................................................................................................................................350
iSCSI Target Authorization............................................................................................................................... 352
QNAP Snapshot Agent......................................................................................................................................353
Fibre Channel......................................................................................................................................................... 354
Fibre Channel Ports.......................................................................................................................................... 354
Fibre Channel Storage......................................................................................................................................357
Fibre Channel WWPN Aliases...........................................................................................................................358
9. SSD ToolProling
Installing SSD Tool................................................................................................................................. 362Proling
SSD Over-Provisioning.......................................................................................................................................... 362
SSD Extra Over-Provisioning............................................................................................................................362
Creating an SSD Over-Provisioning Test............................................................................................................. 362
Test Reports............................................................................................................................................................364
Test Report Information...................................................................................................................................364
Test Report Actions...........................................................................................................................................364
Settings................................................................................................................................................................... 364
10. Network & Virtual Switch
About Network & Virtual Switch.......................................................................................................................... 366
Parts of the User Interface................................................................................................................................... 366
Basic Network Adapter ................................................................................................................ 367Conguration
Conguring IPv4 Settings................................................................................................................................ 368
Conguring IPv6 Settings................................................................................................................................ 369
Conguring the System Default Gateway......................................................................................................369
Conguring Static Route Settings...................................................................................................................370
IP Addressing Services Conguration................................................................................................................. 371
Conguring DNS Server Settings....................................................................................................................372
Conguring DHCP Server Settings .................................................................................................................372
Adding DHCP Clients to a DHCP Server..........................................................................................................375
Conguring RADVD Server Settings............................................................................................................... 376
Conguring DDNS Service Settings................................................................................................................ 378
LAN Switching ............................................................................................................................... 378Conguration
Conguring VLAN Settings.............................................................................................................................. 379
Conguring Port Trunking Settings................................................................................................................380
Virtual Switch ................................................................................................................................ 381Conguration
Creating a Virtual Switch in Basic Mode.........................................................................................................381
Creating a Virtual Switch in Advanced Mode.................................................................................................382
Creating a Virtual Switch in Software-dened Switch Mode....................................................................... 385
Network Policies ........................................................................................................................... 385Conguration
Conguring Forward Error Correction (FEC) Settings...................................................................................385
Wireless Network Conguration..........................................................................................................................386
Adding a Wireless Network..............................................................................................................................386
Enabling Wi-Fi....................................................................................................................................................388
Connecting to a Wireless Network .................................................................................................................388
Understanding the Wireless Connection Messages.....................................................................................395
Accessing the Wireless Access Point (AP) Settings........................................................................................396
USB QuickAccess ...........................................................................................................................396Conguration
Enabling USB QuickAccess ..............................................................................................................................397
Conguring the USB QuickAccess IP address .............................................................................................. 397
6

A message appears.conrmation
Warning
Clicking deletes all data on the drive before installing QTS.Initialize
20. InitializeClick .
Important
The initialization may take several minutes to complete. Do not power the device during theo
process.
QTS is initialized.
Initializing QTS Using the Cloud Installation Website
You can initialize QTS on the cloud installation website, which is designed to help you set up QNAP devices.
Warning
Initializing QTS deletes all data on the drives. Back up your data before proceeding.
1. Power on the NAS.
2. Connect the NAS to the internet.
3. Go to the QNAP Cloud Installation website using one of the following methods:
• On your computer, go to the website dedicated to your region:
• Global: https://install.qnap.com
• China: https://install.qnap.com.cn
• Or scan the QR code on the NAS using a mobile device.
The web page lists all the uninitialized QNAP NAS devices on the local network.
4. InitializeFind your NAS from the list and then click .
Tip
If your NAS is connected to the Internet, you can also go to tohttps://install.qnap.com/set
enter the Cloud Key printed on the NAS. This allows you to initialize the NAS even if your NAS
and your computer are not on the same network.
The installation wizard opens in the default web browser
5. Create an account or sign in to myQNAPcloud.
Note
You must return to this page to complete the installation after creating an account.
6. Specify the myQNAPcloud device name for the NAS.
Note
• The myQNAPcloud device name is used when remotely accessing the NAS.
QTS 5.0.x User Guide
Overview 16

• For security purposes, the myQNAPcloud Link remote connection service will be disabled
on your NAS after initialization. You can enable it by connecting to QTS through LAN and
then installing myQNAPcloud Link.
7. NextClick .
The QNAP Warranty Service page opens in the default web browser.
8. Check warrantyClick .
The QNAP Warranty Service window opens in a new web page.
Important
You can check your device warranty policy or purchase an extended warranty plan at QNAP
Warranty Service.
9. Close the warranty page.
The opens in the default web browser.Smart Installation Guide
10. If the screen shows a dierent operating system, click QTS.
Note
• This step is only required if the NAS supports installing more than one operating system
and the default operating system for installation is not QTS.
• If the screen shows QuTS hero, you may need to click Skip rst.
The NAS restarts and the smart installation screen shows QTS as the operating system to install.
11. Start Smart InstallationClick .
12. Specify a version using any of the following methods. rmware
Methods User Actions
Current version Current versionSelect .
Latest available version a. Latest available versionSelect .
b. Check for UpdateClick
The system checks for the latest updatermware
available for your device. If a newer version is
available, the system downloads the updatermware
and restarts the NAS.
Uploaded version a. Uploaded versionSelect .
b. BrowseClick .
The upload window appears.le
c. Select a rmware le.
13. NextClick .
The Enter the NAS name and administrator’s password screen appears.
14. Specify the following information.
• : Specify a name with 1 to 14 characters. The name can contain letters (A to Z, a to z),NAS Name
numbers (0 to 9), and hyphens (-), but cannot end with a hyphen.
QTS 5.0.x User Guide
Overview 17
No. Element Possible User Actions
10 Click the button to view the following menu items:More
• : Opens the window, which displaysWhat's New What's New
information on the new features and enhancements available in the
installed QTS version
• : Displays links to the Quick Start Guide, Virtualization Guide,Help
Help Center, and online tutorials page
• : Opens a list of supported languages and allows you toLanguage
change the language of the operating system
•Desktop Preferences: Opens a list of display modes and allows you
to select the mode based on your device type
• : Opens the Helpdesk windowHelp Request
• : Opens the pageData & Privacy QNAP Privacy Policy
• : Displays the following information:About
• Operating system
• Hardware model
• Operating system version
• Number of installed drives
• Number of empty drive bays
• System volume name
11 Display all system and the Getting Started Guide for systemNotice Board notications
setup.
12 Click the button to display the dashboard.Dashboard
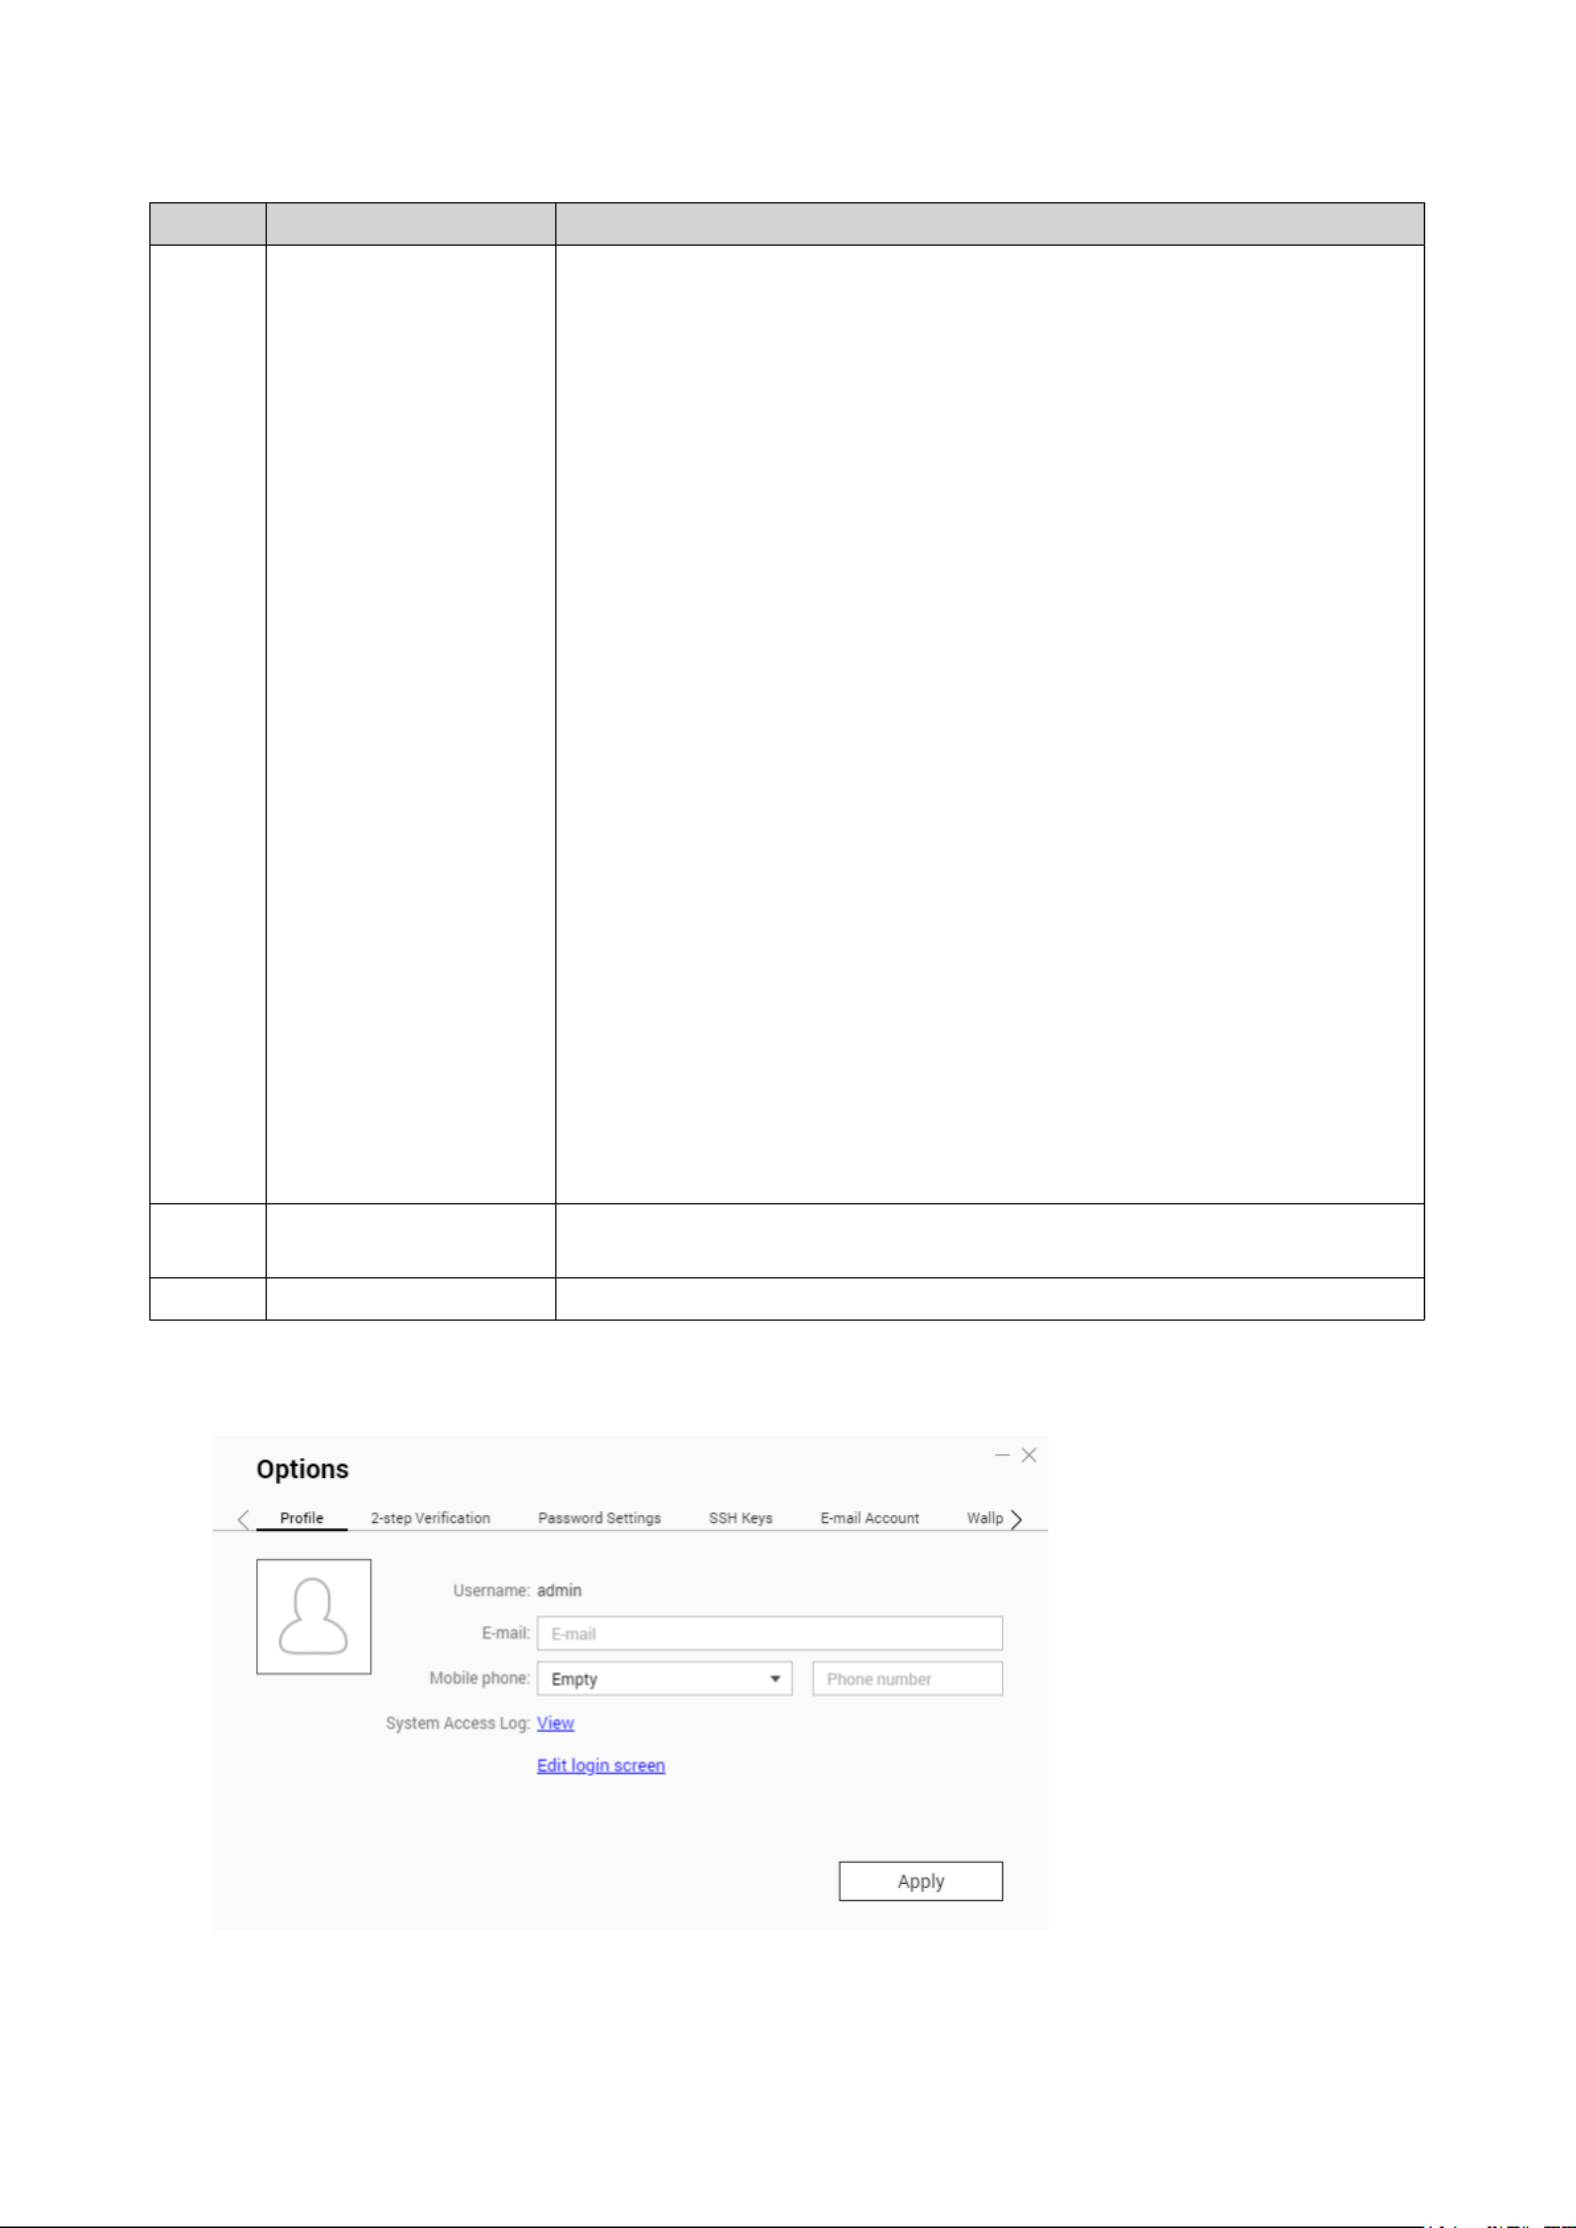
Options
QTS 5.0.x User Guide
Overview 26

No. Section Description Possible User Actions
4 Search Displays apps that meet your search
criteria.
Enter keywords.
Desktop
# Element Description Possible User Actions
1 Wallpaper This is a digital image that is used as a
background for the QTS desktop.
Users can either select from one of the
provided wallpapers or upload an image
Change the wallpaper in the Options
window.
2 Shortcut icons Each icon opens an app or a utility.
When you install an application,
QTS automatically creates a desktop
shortcut. The following are the default
shortcuts:
• Control Panel
• File Station
• Storage & Snapshots
• App Center
• Help Center
• Click an icon to open the application
window.
• Right-click an icon and then select
one of the following:
• : Opens the applicationOpen
window
• : Deletes the icon fromRemove
the desktop
• Click and drag an icon to another
desktop.
3 Desktop This area contains open system utilities
and applications. The desktop consists
of three separate screens.
Click or to move to another desktop.< >
QTS 5.0.x User Guide
Overview 32

# Element Description Possible User Actions
8 This the user about importantNotications noties
system events that may require user
action. If there are multiple notication
groups, notices are arranged according
to the type on a noticenotication
board. You can also view innotications
Notice Board.
For details, see Task Bar.
Tip
When you initialize QTS, the
Getting Started guide will
appear in afternotications
installation.
Click a to open thenotication
corresponding utility or app.
Qboost
Qboost is a system utility that monitors and enables you to manage memory consumption. You can
download the utility from App Center. It provides the following information:
# Section Description User Actions
1 Memory A graphic showing memory usage on the
NAS.
• Blue: Available memory, expressed as
a percentage. Available memory is the
sum of free memory, memory,buer
cache memory, and other reclaimable
memory.
• Green: Free memory, expressed
as a percentage. Free memory is
memory that is currently unused and
unallocated.
Click to clear the memoryOptimize buer
(block level) and cache memory level).(le
Hover the pointer over the memory
widget to see the amount of available
memory and free memory in MB, GB, or
TB.
QTS 5.0.x User Guide
Overview 34
Objective Action
Create a schedule for enabling
and disabling an application or
service.
Warning
Setting a schedule may force an application to stop in
the middle of a task.
1. Click to open the scheduling screen.
2. Enable ScheduleSelect .
The calendar is activated. All days and hours are enabled by
default.
3. Select the hours during which the application or service should be
enabled or disabled.
Hours are with one of the following colors or patterns.lled
• Blue: The application or service is enabled.
• Gray: The application or service is disabled.
• Striped: The NAS is scheduled to sleep or shut down.
4. Optional: If you want to enable the app at a certain time, specify
the number of minutes after the hour when the application is
enabled or disabled.
Example: To enable an application only after half an hour, type 30.
5. Perform one of the following actions.
• Click : Applies the schedule to the selected applicationApply
or service
• Select : Applies the schedule to all applications andAuto-apply
services
Delete a schedule. Click to delete the schedule and disable an application or service.
Remove an application. Click .
This function applies only to applications that are available in App
Center.
2-step Verication
2-step enhances the security of user accounts. When the feature is enabled, users are requiredverication
to specify a six-digit security code in addition to the account credentials during the login process.
To use 2-step you must install an authenticator application on your mobile device. Theverication,
application must implement services using the Time-based One-time Password Algorithmverication
(TOTP). QTS supports Google Authenticator (for Android, iOS, and BlackBerry) and Authenticator (for
Windows Phone).
Enabling 2-step Verication
Important
When enabling 2-step you will be logged out of all applications, browsers, andverication,
devices where you have logged in with your account. You will have to log in again after
completing this setting.
QTS 5.0.x User Guide
Overview 36

1. Install an authenticator application on your mobile device.
QTS supports the following applications:
• Google Authenticator: Android, iOS, and BlackBerry
• Authenticator: Windows Phone
2. Verify that the system times of the NAS and mobile device are synchronized.
Tip
QNAP recommends connecting to an NTP server to ensure that your NAS follows the
Coordinated Universal Time (UTC) standard.
3. In QTS, go to > .Options 2-step Verication
4. Get StartedClick .
The window opens.2-step Verication
5. Open the authenticator application on your mobile phone.
6. Congure the application by scanning the QR code or specifying the security key displayed in the
2-step Verication window.
7. 2-step In the Verication window, click . Next
The screen appears.Conrm verication your 2-step settings
8. Specify the security code generated by the authenticator application.
9. Select an alternative method that will be used whenever your mobile device is inaccessible. verication
Method Steps
Answer a security question. Select one of the options or provide your own security question.
Email a security code. Go to > > a. Control Panel Notication Center Service
Account and Device Pairing Email > .
b. Verify that the SMTP server is correctly congured.
10. FinishClick .
Logging in to QTS Using 2-step Verication
1. Specify your username and password.
2. Specify the security code generated by the authenticator application installed on your mobile device.
Tip
If your mobile device is inaccessible, click . You can choose to answer aVerify another way
security question or receive a security code via email to verify your identity.
3. LoginClick .
Disabling 2-step Verication
We recommend enabling 2-step to ensure your data and device security. However, you canverication
disable 2-step if you or other users are locked out of your accounts.verication
QTS 5.0.x User Guide
Overview 37
3. System Settings
General Settings
Settings Description
System Administration This screen allows you to specify the server name and ports and
congure secure connection settings.
Time Time settings event logs and scheduled tasks. This screenaect
allows you to specify the time zone and format and thecongure
system date and time.
Daylight Saving Time (DST) Daylight saving time (DST) settings apply only to regions that use
DST. This screen allows you to either automatically adjust the
system clock or manually the settings.congure
Codepage This screen allows you to select the language that the NAS uses to
display and directory information.le
Region This screen allows you to select a region for your NAS. System
and application content and services are localized according to the
selected region.
Login Screen This screen allows you to customize the NAS login screen.
Console Management This screen allows you to enable console management.
Conguring System Administration Settings
1. Control Panel System General Settings System AdministrationGo to > > > .
2. Specify the following information.
Field User Action
Server name Specify a name containing up to 14 characters from any of the following
groups:
• Letters: A to Z, a to z
• Numbers: 0 to 9
• Dashes (-)
Important
• The server name must contain one or more letters.
• The server name cannot consist of numbers only.
• The server name cannot start with a dash.
• The host name must contain one or more letters.
• The host name cannot consist of numbers only.
• The host name cannot start with a dash.
System port Specify the port used to access the web interface.
The default port is 8080.
QTS 5.0.x User Guide
System Settings 45

5. ApplyClick .
Conguring Daylight Saving Time
These settings are available for NAS users in regions that use Daylight Saving Time (DST). Users outside
these regions can disregard these settings.
1. Control Panel System General Settings Daylight Saving TimeGo to > > > .
2. Adjust system clock automatically for daylight saving timeSelect .
3. Enable customized daylight saving time tableOptional: Select .
4. Optional: Perform any of the following actions.
Action Steps
Add DST data Click .a. Add Daylight Saving Time Data
The window appears.Add Daylight Saving Time Data
b. Specify a time period and the number of minutes to oset.
c. ApplyClick .
Edit DST data Select a DST schedule from the table.a.
b. Click .
c. Specify a time period and the number of minutes to oset.
d. ApplyClick .
Delete DST data Select a DST schedule from the table.a.
b. DeleteClick .
c. OKClick .
5. Optional: Select a DST schedule from the table.
6. ApplyClick .
Conguring Codepage Settings
All and directories on the NAS use Unicode encoding. If your operating system or FTP client does notles
support Unicode, you must the following settings to properly view and directories on the NAS.congure les
1. Control Panel System General Settings CodepageGo to > > > .
2. Select the language of your operating system.
3. ApplyClick .
Conguring Region Settings
Important
The NAS region settings device connectivity and the functionality, content, andaect
validity of some applications, utilities, licenses, and Ensure that you select thecerticates.
correct region to avoid errors.
QTS 5.0.x User Guide
System Settings 48

OS or Application Description
QTS QTS applications share expansion card resources for transcoding.
• Select Hardware Transcoding to allow QTS software to use
expansion card resources to speed up transcoding tasks. Only one
card can be assigned to hardware transcoding.
• Select to use expansion card resources for video outputOutput
of HD Station or Linux Station. Only one card can be assigned to
output.
Virtualization Station Virtualization Station has exclusive use of all expansion card resources.
Container Station Container Station has exclusive use of all expansion card resources.
4. ApplyClick .
Conguring TPU Settings
You can the priority level and maximum number of Tensor Processing Units (TPU) allocated to ancongure
app.
Important
• The system will not run apps with lower TPU priority levels until the TPU resource is
released from running higher priority apps.
• The maximum number of TPUs you can allocate to an app is 4.
1. Control Panel System Hardware Hardware ResourceGo to > > > .
2. Locate the TPU device from the list.
3. Click on the TPU device.
The window appears.Priority
4. Select an app.
5. Select a TPU priority level.
6. Select the maximum number of TPUs.
7. ApplyClick .
Viewing Single Root I/O Virtualization (SR-IOV) Settings
You can view all Single Root I/O Virtualization (SR-IOV) devices mapped to your virtual machines on the
Control Panel Hardware Hardware Resources > > page. The SR-IOV interface is a hardware specication
that allows a single PCIe device, such as a network adapter, to appear as multiple physical devices to the
hypervisor. Because each device is directly assigned to an instance, it can bypass the hypervisor and virtual
switch layer to achieve low latency and performance matching in nonvirtualized environments. SR-IOV
achieves this through the following types of functions:
• Physical Function (PF): These are PCIe devices that have SR-IOV capabilities. PFs are managed and
congured in the same way as PCIe devices.
• Virtual Function (VF): These are lightweight PCIe functions that only process I/O. Because each VF is
derived from a PF, the device hardware limits the number of VFs a device can have. A VF shares one or
more hardware resources of the device, such as a memory or network port.
QTS 5.0.x User Guide
System Settings 57

6. Optional: Specify application privileges for the user.
a. Edit Application Privilege EditUnder , click .
b. Select application permissions for the user.
Tip
QNAP recommends denying access to applications and network services that the user does not
require. Users without privileges to applications will not see it on their main menu.specic
7. Optional: Set a quota for the user.
Note
This option is only available when quotas are enabled.
a. Quota EditUnder , click .
b. Set the quota.
• : Quota settings do not apply to the user.No Limit
• : Specify a quota for the user.Limit disk space to
• : Group quota settings apply to the user.Use group quotas
Note
Individual quotas may override group quotas. For details, see .Quota Conicts
8. CreateClick .
Creating Multiple Users
1. Control Panel Privilege UsersGo to > > .
2. Create Create Multiple UsersClick > .
The Multiple Users Creation Wizard appears.
3. NextClick .
4. Specify the following information.
Field Description
User Name Prex Specify a username that contains a maximum of 23 ASCII characters
and that does not:
• Contain a space
• Begin with the following characters: - # @
• Contain the following characters: grave accent (`), asterisk (*),
equal sign (=), plus sign (+), square brackets ([ ]), curly brackets
({}), slash (\), vertical bar (|), semicolon (;), colon (:), apostrophe ('),
quotation mark ("), comma (,), less than sign (< ), greater than sign
(>), backslash (/), question mark (?), percent sign (%), dollar sign ($),
and the space character.
This will be included before all usernames.prex
Example: test
QTS 5.0.x User Guide
Privilege Settings 79
Ensure that folder aggregation is enabled before performing the following steps. For
details, see .Folder Aggregation
1. Control Panel Privilege Shared Folders Folder AggregationGo to > > > .
2. Import/Export Folder TreeClick .
The Import/Export Folder Tree window appears.
3. Export Folder Tree ExportUnder , click .
QTS exports the folder tree to your computer as a BIN le.
Tip
You can use this to import folder trees to another NAS running QTS.le
4. FinishClick .
Shared Folder Encryption
Shared folders on the NAS can be encrypted with 256-bit AES encryption to protect data. Encrypted shared
folders can be mounted with normal read/write permissions but can only be accessed using the authorized
password. Encrypting shared folders protects sensitive data from unauthorized access if the drives are
physically stolen.
Encrypting a Shared Folder
Note
• Default shared folders cannot be encrypted.
• The volume or path of an encrypted folder cannot be changed.
• Encrypted folders cannot be accessed through NFS.
1. Control Panel Privilege Shared Folders Shared FolderGo to > > > .
2. Locate a shared folder.
3. Under , click . Action
The window appears.Edit Properties
4. Encrypt this folderSelect .
5. Specify the following information.
Field/Option Description
Input Password Specify a password that contains 8 to 32 characters except the
following: " $ : = \
This does not support multibyte characters.eld
Verify Password The password must match the previously password.specied
QTS 5.0.x User Guide
Privilege Settings 105

The window opens.Mount Network Drives
8. Add mounted folders to "Favorites" in FinderSelect .
9. OKClick .
A message appears.conrmation
10. YesClick .
11. Specify your Mac username and password.
12. OKClick .
QTS 5.0.x User Guide
Privilege Settings 111

Type Description
All users When enabled, the quota is applied to both new and existing users.
Go to > > to enable quotas.Control Panel Privilege Quota
For details, see .Enabling Quotas
Note
Quotas are applied per volume and are not shared across volumes.
Important
Individual quotas may override group quotas.
For details, see .Quota Conicts
Tip
You can export quota settings to a CSV to use as a reference.le
For details, see .Exporting Quota Settings
Enabling Quotas
1. Control Panel Privilege QuotaGo to > > .
2. Enable quota for all usersSelect .
3. Specify the all users quota.
Note
The all users quota must be between 100 MB and 128 TB.
4. ApplyClick .
QTS displays the quota settings for Local Users.
Editing Quota Settings
1. Control Panel Privilege QuotaGo to > > .
2. Select the type of user or group.
•Local Users
•Domain Users
•Local Groups
•Domain Groups
Tip
By default, the screen displays Local Users.Quota
3. Select a user or group.
4. EditClick .
The window appears.Quota
5. Set a quota for the user or group.
• : Quota settings do not apply to the user or group.No Limit
• : Specify a quota for the user or group.Limit disk space to
QTS 5.0.x User Guide
Privilege Settings 113

The NAS Samba service replicates this in the server's This description appearsComment eld.
when connecting to a NAS Samba shared folder using the command line interface.
5. Select the server signature rule for the domain.
Option Description
Auto SMB signing is but not enforced. Clients can choose whether tooered
use SMB signing or not.
Mandatory SMB signing is required.
Disabled SMB signing is disabled for SMB 1. For SMB 2 and above, this option
behaves the same as .Auto
6. JoinClick .
AD Server and Domain Names
After joining the NAS to the AD domain, you can use the following username formats to log in to the NAS
and access shared folders:
• Local users: NASname\NASusername
• AD users: Domain\DomainUsername
The location of AD server and domain names depends on the version of Windows Server.
Windows Server Version Location
2003 Go to in Windows.System Properties
Example: If the computer name is "node1.qnap-test.com", the AD
server name is "node1" and the domain name is "qnap-test.com".
2008 Go to > in Windows.Control Panel System
The AD server name will appear as the computer name, and the
domain name can be found in the domain eld.
2012, 2016
Right-click , and then click .System
The AD server name will appear as the computer name, and the
domain name can be found in the domain eld.
2019 Go to > > in Windows.Control Panel System and Security System
The AD server name will appear as the computer name, and the
domain name can be found in the domain eld.
Enabling Trusted Domain Authentication
A trusted domain is a domain that AD trusts to authenticate users. If you join the NAS to an AD domain, all
users from trusted domains can log in and access shared folders.
Trusted domains are in AD. You can only enable trusted domains on the NAS. By default, thiscongured
feature is disabled in QTS.
1. Control Panel Network & File Services Win/Mac/NFS Microsoft NetworkingGo to > > > .
2. Advanced OptionsClick .
The window appears.Advanced Options
3. Enable trusted domainsSelect .
QTS 5.0.x User Guide
Privilege Settings 117
LDAP Authentication Options
The vary depending on when Microsoft Networking is enabled.LDAP authentication options
Scenario Options
Microsoft Networking is enabled before LDAP
settings are applied.
• : Only local users can access the NASLocal users only
using Microsoft Networking.
• : Only LDAP users can access theLDAP users only
NAS using Microsoft Networking.
Microsoft Networking is enabled after the NAS
is connected to the LDAP server.
• : Only local users can access theStandalone Server
NAS using Microsoft Networking.
• : Only LDAP users canLDAP Domain Authentication
access the NAS using Microsoft Networking.
AD and LDAP Management
The administrator can modify domain user accounts and user groups when the NAS joins an AD domain or
connects to an LDAP server.
Managing AD and LDAP Users
1. Privilege UsersGo to > .
2. Domain UsersSelect .
QTS displays the list of domain users.
3. Locate a user.
4. Perform any of the following tasks.
Task User Action
Edit an account prole a. Under , click .Action
The window appears.Edit Account Prole
b. Edit the user quota.
Note
User quotas must be enabled for this option to appear. For
details, see .Enabling Quotas
Edit shared folder
permissions
a. Under , click .Action
The window appears.Edit Shared Folder Permission
b. Edit the user's permissions for each shared folder.
For details, see .Shared Folder Permissions
QTS 5.0.x User Guide
Privilege Settings 121

Default Domain User Groups
• Allowed RODC Password Replication Group
• Service DCOM AccessCerticate
• Denied RODC Password Replication Group
• Enterprise Read-Only Domain Controllers
• Incoming Forest Trust Builders
• Network OperatorsConguration
• Pre-Windows 2000 Compatible Access
• Read-Only Domain Controllers
• Terminal Server License Servers
• Windows Authorization Access Group
Creating a Domain User Group
1. Control Panel Privilege Domain Controller GroupsGo to > > > .
2. Create a User GroupClick .
The Create a User Group wizard appears.
3. Specify a user group name between 1 and 128 ASCII characters that does not begin with:
• Spaces
• The following characters: - # @
4. NextClick .
5. Optional: Add users to the group.
a. YesSelect .
b. NextClick .
c. Select the users you want to add to the group.
d. NextClick .
6. Review the summary, and then click .Finish
Editing Domain User Groups
1. Control Panel Privilege Domain Controller GroupsGo to > > > .
2. Locate a domain user group.
3. Under , click Action .
The wizard appears.Edit Group Users
4. Select or deselect user groups.
QTS 5.0.x User Guide
Privilege Settings 130
Option User Action
Restore Selected Files a. Select les.
b. Restore Selected FilesClick .
Only selected in the list are restored to their shared folders.les
Exclude List Click .
QTS restores the to its shared folder and adds the to thele le
exclude list.
Servers
Depending on your needs, you can the NAS to host websites, create VPN connections for securecongure
data transmission, and more.
Web Server
You can use the NAS to host websites and establish an interactive website.
Enabling the Web Server
1. Log on to QTS as administrator.
2. Control Panel Applications Web Server Web ServerGo to > > > .
3. Enable Web ServerSelect .
4. Optional: the following settings. Congure
Setting User Action
Port number Specify a port number.
Note
The default port is 80.
Enable HTTP compression Select this option to improve transfer speeds and bandwidth
utilization. This setting is enabled by default.
Warning
Enabling this option may lead to security risks.
QTS 5.0.x User Guide
Services 141

QTS restores the MariaDB database. The screen appears.Finish
Note
It may take a few minutes for the system to restore the database.
8. FinishClick .
QTS enables the MariaDB server.
Migrating a MariaDB 5 Database to MariaDB 10
This feature is only available in the MariaDB 10 app.
1. Log on to QTS as administrator.
2. Install the MariaDB 10 app.
Note
For details, see .Installing an App from App Center
3. Open the MariaDB 10 app.
The window opens.MariaDB Setup Wizard
Note
The MariaDB setup wizard only appears during app initialization. To more advancedcongure
database features and settings, edit the php.ini maintenance For details, see le. Modifying the
php.ini Maintenance File.
4. StartClick .
The screen appears.Database Actions
5. Migrate a MariaDB 5 to a MariaDB 10 databaseSelect .
6. NextClick .
The screen appears.Default Instance Properties
7. Optional: TCP/IP networking.Congure
a. Enable TCP/IP networkingSelect .
Note
This option is enabled by default.
b. Specify the TCP/IP networking port.
Note
The default port is 3307.
8. ApplyClick .
QTS migrates the existing MariaDB 5 database to MariaDB 10. The screen appears.Finish
Note
The data migration may take a few minutes to complete.
9. FinishClick .
QTS enables the MariaDB server.
QTS 5.0.x User Guide
Services 147
a. Specify the maximum log size.
Tip
The log size range is 1 to 100.
b. Select the log destination folder.
c. Enter the log name.le
6. Optional: Enable the email settings. notication
Note
The NAS sends an email to up to 2 email addresses when the severity of the received syslog
message matches the level.specied
a. Enable the email Select notication.
b. Select a severity level.
Level Severity Description
0 The system is unusable.Emerg
1 The system requires immediate attention.Alert
2 The system has critical conditions.Crit
3 The system has error conditions.Err
4Warning The system has warning conditions.
c. RuleClick Congure Notication .
The window opens.Create event rulenotication
Adding a Syslog Server Filter
This task allows the NAS to only receive syslog messages that match a specied lter.
1. Log on to QTS as administrator.
2. Control Panel Applications Syslog Server Filter SettingsGo to > > > .
3. Add a FilterClick .
The window opens.Add a Filter
4. Congure lter. the
a. Select the type. lter
•Facility
•Severity
•Hostname
•Application
•Message
•IP
b. Select a option. lter
QTS 5.0.x User Guide
Services 151

6. File Station
About File Station
File Station is a QTS management application that allows you to access on the NAS. You can quicklyle les
locate and folders, manage access permissions, play media and share data with other users.les les,
System Requirements
Category Detail
Web browser • Microsoft Edge
• Mozilla Firefox 3.6 or later
• Apple Safari 5 or later
• Google Chrome
Java program Java Runtime Environment (JRE) 7 or later
Flash player Adobe Flash Player 9 or later is required for viewing media les.
File Station User Interface
You can perform and folder actions from the toolbar and the left panel.le
Label Item Description
1 Search Search and folders by their name or type.les
Tip
You can select Advanced Search to specify more
criteria.
2 Background Task Open the background tasks of your mount, folder, or le
operations.
3 Network Media
Player
Stream videos, photos, and music to compatible devices on
your network.
4 Refresh Refresh the current page.
5 Smart Filter Filter and folders based on the criteria.les specied
6 More Settings File Station settings, open the Help guide, or viewCongure
application information.
QTS 5.0.x User Guide
File Station 157
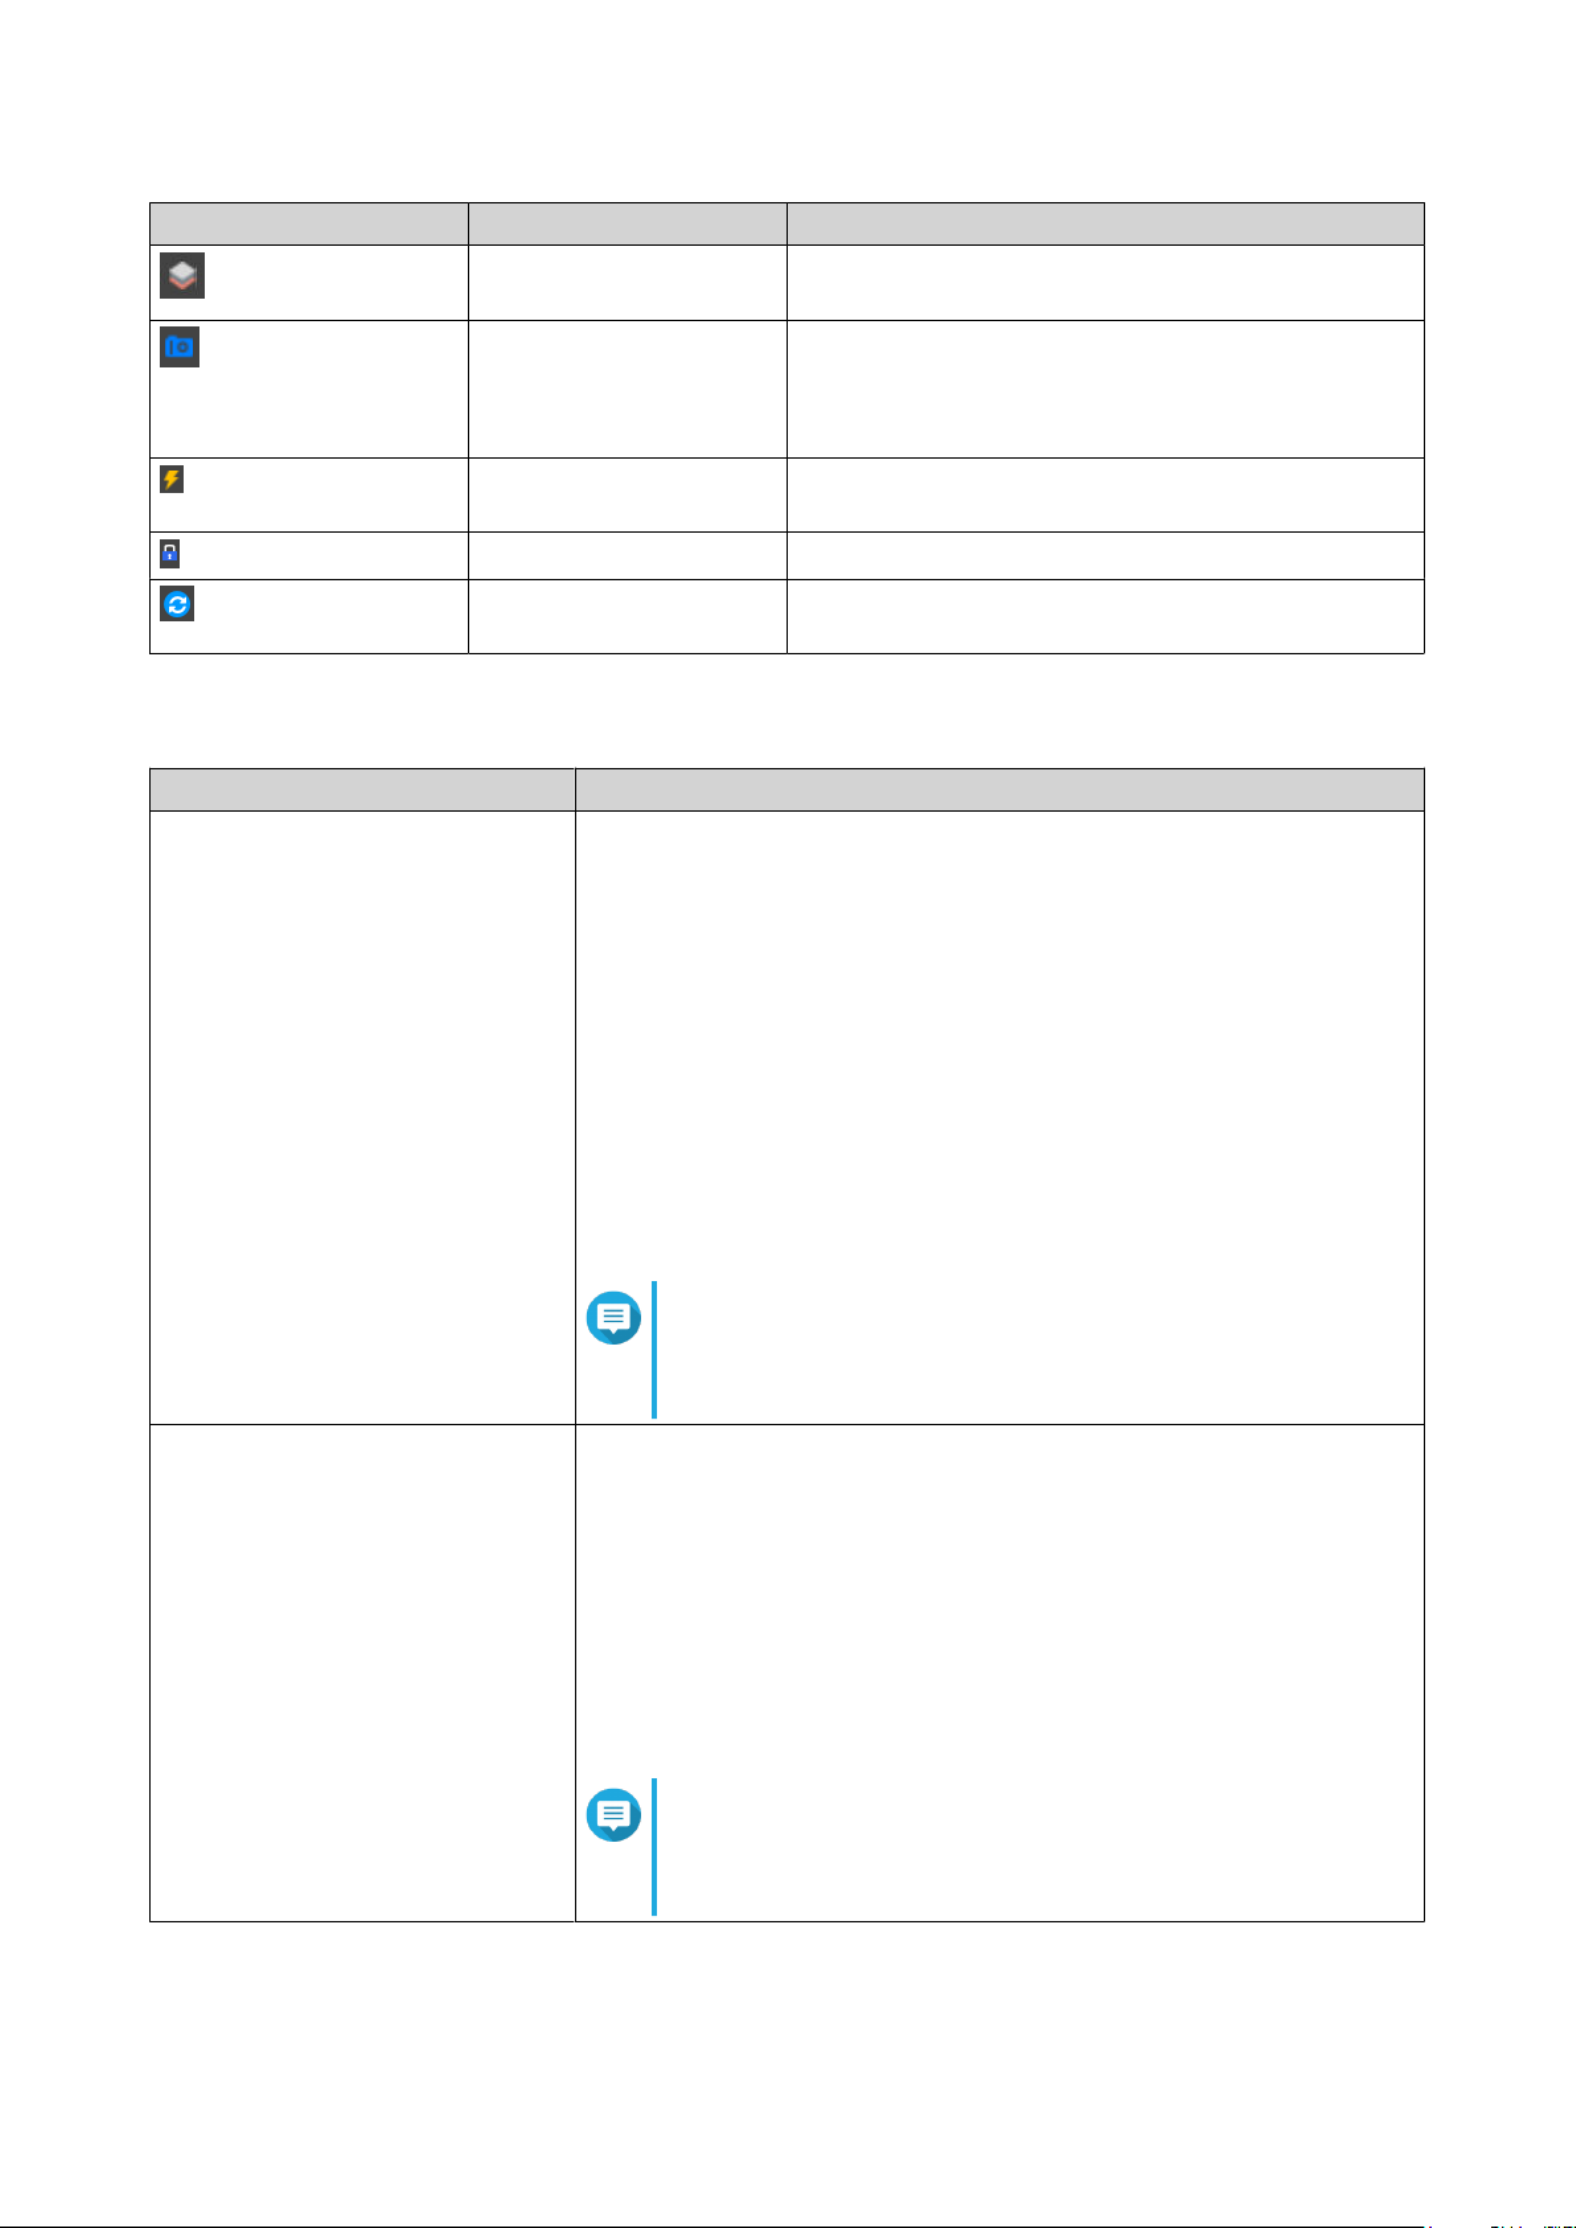
Icon Name Description
On Demand Tiering This icon appears when auto-tiering is enabled on
the volume.
Snapshots This icon appears when snapshots are available for
the volume.
For details, go to the Snapshot section of the QTS
User Guide.
Cache Acceleration This icon appears when acceleration is enabled on
the volume.
Volume Encryption This icon appears when the volume is encrypted.
Volume Synchronization This icon appears when the cloud volume is
synchronizing data.
Supported File Formats
Category File Extension
Image • BMP
• JPG
• JPE
• PNG
• TGA
• GIF
• HEIC
• HEIF
Note
The availability of multimedia formats may varyle
depending on the multimedia services enabled on the
NAS.
Music • MP3
• FLAC
• OGG
• WAV
• AIF
• AIFF
Note
The availability of multimedia formats may varyle
depending on the multimedia services enabled on the
NAS.
QTS 5.0.x User Guide
File Station 161
Method Steps
Using the context menu Locate a or folder in the list and then right-click.a. le
b. DownloadClick .
File Station downloads the items to your computer.
Viewing File or Folder Properties
1. Open File Station.
2. Locate and select one or more and folders.les
3. Perform one of the following methods.
Method Steps
Using the toolbar a.
Click .
b. PropertiesSelect .
Using the context menu Locate a or folder in the list and then right-click.a. le
b. PropertiesSelect .
Tip
If the folder you want to view appears on the left
panel, you can right-click the folder from the left panel
and select .Properties
Depending on your selected items, the window opens and displays the followingProperties
information.
Field Description
Selected items Displays how many items are selected.
Type Displays the folder or type.le
Size Displays the or folder size.le
Tip
If you selected multiple items, click to display the
total size and count.le
Location Displays the or folder location.le
Modied Date Displays the date the or folder was last le modied.
Storage Pool Displays the name of the storage pool on which the folder is stored.
Volume Displays the name of the volume on which the folder is stored.
4. CloseClick .
Modifying File or Folder Permissions
To congure more advanced permission settings for individual users, you need to enable advanced folder
permissions in > > Control Panel Privilege Shared Folders Advanced Permissions > .
QTS 5.0.x User Guide
File Station 165

Field User Action
Send from Select the email delivery method.
• Use NAS to mail the links.
• Use local computer to mail the links.
Sender Select an email account.
To Specify the email address of the recipient.
Tip
You can select a recipient from your contact list if
Qcontactz is installed on the NAS.
Subject Specify the email subject line.
Message Enter a new message or use the default message.
5. More settingsOptional: Click and congure additional settings.
Field User Action
Link Name Enter a name for the link or use the current name of the or folder.le
Note
A link name cannot contain the following characters: /
| \ : ? < > * "
Domain name/IP Select the domain name or IP address.
Tip
The following domains and IP addresses are
supported:
• : Provides a link to the sharedmyQNAPcloud
le or folder using the DDNS address set in
myQNAPcloud.
•WAN: Provides a link to the shared or folder tole
other computers using a network.dierent
• : Provides a link to the shared or folder toLAN le
other computers using the same local network.
• : Provides a SmartURL viaSmartShare
myQNAPcloud Link to the shared or folder.le
• : Provides links to the sharedAll available links
le or folder using all of the available domains and
IPs.
Note
The recipients get direct read access.
Show SSL in URL Use an HTTPS URL.
QTS 5.0.x User Guide
File Station 182

The window opens.Create a User
4. Specify the following information:
Field Description
Username Specify a username that contains 1 to 32 characters from any of
the following groups:
• Letters: A to Z, a to z
• Numbers: 0 to 9
• Special characters: ~ ! @ # $ ^ & ( ) - _ . { }
Password Specify a password that contains 1 to 64 ASCII characters.
Quota Specify the storage capacity available to the user.
Phone number (optional) The information is for your reference and is not used by QTS.
Email (optional) QTS sends a to this email address when the accountnotication
password is about to expire.
Note
• You must congure the related settings in SMTP
Server Change Password and . Otherwise, QTS would
not send to the email address.notications specied
• : Go to > >SMTP Server Control Panel System
Notication > .E-mail
• : Go to Change Password Control Panel System > >
Security Password Policy > .
(Optional) Send a notication
mail to the newly created user
When selected, QTS sends a message that contains the following
information to the email address.specied
• Username and password
• URLs for connecting to the NAS
5. CreateClick .
File Station creates a new user account and allocates the storage space.specied
Locking or Unlocking an Encrypted Shared Folder
After creating an encrypted shared folder, you can lock or unlock this folder to control user access.
1. Open File Station.
2. Locate an encrypted folder on the left panel.
Tip
File Station displays the following icons beside an encrypted shared folder.
Icon Status
The encrypted folder is locked.
The encrypted folder is unlocked.
QTS 5.0.x User Guide
File Station 193

1. Open File Station.
2. Near the top-right corner, click .
A search box appears.
3. Specify a or folder name.le
4. Optional: Select a or folder type.le
a. Click .
A menu list appears.
b. Select one of the following options.
•Any
•Music
•Video
•Photo
•Advanced Search
For more information on Advanced Search, see Using Advanced Search to Search for Files
and Folders.
5. Press .ENTER
Using Advanced Search to Search for Files and Folders
Advanced Search allows you to search for and folders anywhere on the NAS.les
1. Open File Station.
2. Near the top-right corner, click .
A search box appears.
3. Click .
A menu list appears.
4. Advanced SearchSelect .
The screen appears.Advanced Search
5. Specify at least one of the following elds.
Field Description
Name Searches by or folder name.le
Size Searches a or folder greater than or less than a size.le specied
Modied Date Searches before, on, or after a date or a date within a range.specic
Location Searches for and folders in a mount.les specic
Type Searches by a type.le
Owner/Group Searches for and folders in the category.les specied
6. Filter based on the rules aboveOptional: Select specied .
QTS 5.0.x User Guide
File Station 201

Note
This option automatically enables and applies the criteria to all ofSmart File Filter specied
your mounts. For details, see .Using the Smart File Filter to Search for Files and Folders
7. SearchClick .
Using the Smart File Filter to Search for Files and Folders
The allows you to apply a set of search criteria to all of your folders. When you click aSmart File Filter
folder, the feature automatically your and folders by the search criteria.lters les
Note
You can only search folders and under the same folder level with Smart File Filter.les
Basic or advanced search will search all data in the folders and correspondingspecied
subfolders.
1. Open File Station.
2. Near the top-right corner, click .
The screen appears.Smart File Filter
3. Specify at least one of the following elds.
Field Description
Name Searches by or folder name.le
Size Searches a or folder greater than or less than a size.le specied
Modied Date Searches before, on, or after a date or a date within a range.specic
Type Searches by a type.le
Owner/Group Searches for and folders in the category.les specied
4. SearchClick .
File Station turns on the and by the criteria.Smart File Filter lters specied
Other Tasks
This section describes miscellaneous tasks that you can perform on File Station.
Removing Background Tasks
You can remove or stop unnecessary background tasks.
1. Open File Station.
2. Click .
Tip
The Task Upload tab displays every task. The tab only displays upload tasks.
3. Locate a task to remove.
4. Click .
File Station removes the task.
QTS 5.0.x User Guide
File Station 202

Tip
To remove all tasks, click . To remove all completed tasks from the tab, clickDelete All Upload
Remove All Complete Tasks.
Modifying General Settings
1. Open File Station.
2. Click on the top-right corner.
3. SettingsSelect .
The window appears.Options
4. GeneralGo to the tab.
5. Modify the following settings.
Option Description
Show hidden on NASles File Station displays and folders.les
Allow all users to create shared links All users can share data from the NAS using shared
links.
Show Network Recycle Bin(s) File Station displays the folder in all user@Recycle
folders.
Only allow the admin and administrators group
to use "Share to NAS user"
File Station prevents non-administrators from
sharing with other NAS users.les
Only allow the admin and administrators group
to permanently delete les
File Station prevents non-administrators from
permanently deleting les.
Only allow the admin and administrators group
to use transcodeon-the-y
File Station prevents non-administrators from using
on-the-y transcoding.
Track and folder accessle File Station allows users to track or folder accessle
and view information in Access Logs.
6. CloseClick .
Modifying File Transfer Settings
1. Open File Station.
2. Click on the top-right corner.
3. SettingsSelect .
The window appears.Options
4. File TransferGo to the tab.
5. Duplicate File Name PolicyUnder , specify policies for handling duplicate les.
QTS 5.0.x User Guide
File Station 203

For commercial use, you need to sign up for 365. You will be redirected to the 365Oce Oce
interface when opening a with Online.le Oce
8. ApplyClick .
9. CloseClick .
Modifying File Operations Settings
1. Open File Station.
2. Click on the top-right corner.
3. SettingsSelect .
The window appears.Options
4. File OperationsGo to the tab.
5. Always keep SMB attributesOptional: Select le .
Note
Enabling this feature may access speed.aect le
6. ApplyClick .
7. CloseClick .
Modifying Third-party Service Settings
You can convert Apple iWork formats to Microsoft formats using CloudConvert. The convertedle Oce le
les will be stored in the same folder with source les.
You can also see the linked account and its remaining credits.
1. Open File Station.
2. Click on the top-right corner.
3. SettingsSelect .
The window appears.Options
4. Third-party ServiceGo to the tab.
5. Acquire your CloudConvert API key.
Tip
For details, see the tutorial: https://www.qnap.com/go/how-to/faq/article/how-to-get-an-api-
key-from-cloudconvert.
6. Paste your CloudConvert API key.
7. ApplyClick .
QTS 5.0.x User Guide
File Station 206

7. Storage & Snapshots
Storage & Snapshots is a QTS utility that helps you create, manage, and monitor storage on your NAS. With
Storage & Snapshots you can perform the following tasks:
• Create RAID groups, storage pools, and shared folders.
• Monitor storage usage and access speeds.
• Back up data using snapshots.
• Accelerate the performance of your NAS by creating an SSD cache.
• Specify which hosts (computers, servers, other NAS devices) are allowed to access the NAS.
QTS Flexible Volume Architecture
QTS Flexible Volume Architecture
Object Description Details
Disk A physical device that stores and
retrieves data.
QTS restricts which type of disk can be used for SSD
cache and storage space (static volumes and storage
pools). For details, see .Disk Types
RAID group A group of one or more disks
combined into one logical disk.
RAID groups usually contain
disks that are of the same type
and capacity.
Data is distributed across the disks in a RAID group.
Each RAID type a combination ofoers dierent
reliability, performance, and capacity.
For details, see .RAID
Storage pool A pool of storage space
consisting of one or more RAID
groups.
Storage pools can aggregate RAID groups that consist
of disks of types and capacities. Storagedierent
pools enable easier storage space management and
features such as snapshots.
QTS 5.0.x User Guide
Storage & Snapshots 207

Status Description
Safely Detached The disk's storage pool or expansion unit was safely detached from the NAS.
Disk Information
Information Description
Disk Health Status The general health status of the disk
• Good: The disk is healthy.
• Warning: QTS has detected an error. Run a full S.M.A.R.T. test and a disk
scan.
• Error: QTS has detected a critical error. You must replace the disk
immediately.
Manufacturer The manufacturer of the disk
Model The disk model
Disk Capacity The capacity of the disk, in both binary and decimal formats
Note
• Binary format assumes that 1 GB = 1,073,741,824
bytes. This is the true capacity of the disk and is used
by computers and operating systems such as QTS.
• Decimal format assumes that 1 GB = 1,000,000,000
bytes. This format is used by disk manufacturers and
appears in advertising, on the disk's box, and in the
disk's hardware specications.
• Due to in the number of bytes perdierences
gigabyte, a disk's binary capacity will be slightly
lower than its decimal capacity. For example, a disk
advertised as 500 GB (decimal) has a true capacity of
456 GB (binary).
Bus Type The interface that the disk uses
Supported Bus Types The disk types the drive bay supports. For example, an internal M.2 SSD slot
might support SATA and NVMe SSDs.
Status The hardware status of the disk
Current Speed The speed at which the disk is connected to the enclosure
Maximum Speed The maximum transfer speed supported by the drive bay or slot that the
disk is installed in
Temperature The current temperature of the disk
Disk temperature is retrieved from the disk's using S.M.A.R.T.rmware
Disk Access History (I/O) • Good: QTS has not detected any I/O errors on the disk.
• Error: QTS has detected one or more I/O errors on the disk.
Disk SMART Information Important
If any of the S.M.A.R.T. attribute values reach the threshold
set by the disk manufacturer or a predened threshold
determined by QTS, this will change to .eld Warning
QTS 5.0.x User Guide
Storage & Snapshots 213

Information Description
Estimated Life Remaining The remaining life of the disk, as calculated by the disk's Whenrmware.
the value reaches 0, you should replace the disk.
This information is only available for solid-state drives (SSDs).
Disk Actions
Action Description
Disk Info Displays disk details, including the disk manufacturer, model, serial
number, disk capacity, bus type, rmware version, ATA version, and ATA
standard.
Disk Health Displays disk S.M.A.R.T. information.
For details, see .Disk Health Information
Scan for Bad Blocks Scan the disk for bad blocks.
Tip
Run this scan if the disk's status changes to orWarning
Error. If QTS does not detect any bad blocks, the status
changes back to .Ready
To view the number of bad blocks, see > .Disk Health Summary
Locate Prompt the drive LEDs to blink so that you can locate the drive in a NAS or
expansion unit.
Detach Remove the disk from its RAID group. The group must be of type: RAID 1,
RAID 5, RAID 6, RAID 10.
Replace & Detach Replace the disk with a spare disk. After all data on the selected disk is
copied to the spare disk, the selected disk is safely detached from the RAID
group and the system.
Set as Enclosure Spare Assign the disk as a global hot spare for all RAID groups within the same
enclosure (NAS or expansion unit).
For details, see Conguring an Enclosure Spare Disk.
Disable Spare Unassign the disk as a global hot spare.
New Volume Create a new volume.
For details, see Volume Creation.
Secure Erase Permanently erase all data on a disk.
For details, see Securely Erasing a Disk.
RAID Group Select a RAID group to view its RAID type, capacity, and member disks.
Disk Health Information
Tab Description Actions
Summary Displays an overview of S.M.A.R.T.
disk information and the results
from the most recent disk scan and
S.M.A.R.T. test.
-
QTS 5.0.x User Guide
Storage & Snapshots 214

Tab Description Actions
Settings Disk settings can be applied
individually, or to multiple disks at
once.
Congure the following settings:
•Enable temperature alarm: QTS displays
a warning when the disk temperature is
equal to or above the threshold.specied
•S.M.A.R.T. Test schedule: Schedule
periodic rapid and complete S.M.A.R.T. disk
tests. The results are displayed on the
Summary screen.
•IronWolf Health Management: Schedule
a daily IHM test for the disk. The results
are saved in the selected shared folder,
and are displayed on the IronWolf Health
Management screen.
Tip
You can apply these settings to the
current disk, all disks, or to disks
with the same type as the current
disk (HDD or SSD).
Advanced Displays advanced settings. the following settings:Congure
• :Native Command Queuing (NCQ)
Enhances the read and write performance
of the disk.
Note
• This setting is only available for
SATA disks.
• To disable this setting, contact
QNAP support.
• To prevent the disk from
becoming undetectable, this
setting is automatically
disabled and cannot be
enabled if the system detects
NCQ timeout errors.
Disk Performance Tests
QTS can test the sequential and random read speeds of your disks.
Important
• The results provided by these tests are to the NAS being tested.specic
• For accurate results, do not use any resource-intensive applications while the tests are
running.
QTS 5.0.x User Guide
Storage & Snapshots 216

Tip
QNAP recommends replacing legacy volumes with newer volumes. To replace a legacy
volume, back up all data, create a new thick, thin, or static volume, and then restore the
data to the new volume.
The System Volume
The system volume is a regular static or thick volume that QTS uses to store system data such as logs,
metadata, and thumbnails. By default, applications are installed to the system volume. If no system volume
exists, either because the NAS has recently been initialized or the system volume was deleted, QTS will
assign the next static or thick volume that you create as the system volume.
Important
QNAP recommends creating a system volume of at least 10 GB. This is to prevent errors
caused by system volume spaceinsucient
Volume Conguration
Volumes divide the NAS storage space into separate areas. You can create one large volume or multiple
smaller volumes. Each volume can contain one or more shared folders, which are used to store and share
les.
QTS 5.0.x User Guide
Storage & Snapshots 220

Deleting a Volume
Note
• To delete a VJBOD Cloud volume, use the VJBOD Cloud app.
• To delete a HybridMount volume, use the HybridMount app.
1. Storage & Snapshots Storage Storage/SnapshotsGo to > > .
2. Select a volume.
Warning
All data on the selected volume will be deleted.
3. ManageClick .
The window opens.Volume Management
4. Action RemoveSelect > .
The Volume Removal Wizard window opens.
5. ApplyClick .
Conguring a Volume Space Alert
1. Storage & Snapshots Storage Storage/SnapshotsGo to > > .
2. Select a volume.
3. ManageClick .
The window opens.Volume Management
4. Actions Set ThresholdClick , and then select .
The window opens.Alert Threshold
5. Enable space alerts.
6. Specify an alert threshold.
QTS issues a warning when the percentage of used space is greater than or equal to thenotication
specied threshold.
7. ApplyClick .
Volume File System Check
A system check scans for and automatically repairs errors in the system of a thick, thin, or staticle le
volume. QTS will prompt you to start a system check if it detects system errors on one or morele le
volumes. You can also run a system check manually or schedule a one-time check.le
Running a File System Check Manually
Warning
• A volume is unmounted and becomes inaccessible while its system is beingle
checked.
• This process might take a long time, depending on the size of the volume.
QTS 5.0.x User Guide
Storage & Snapshots 229

Expanding a Single Static Volume by Adding a New RAID Group
The storage capacity of a static volume can be expanded by creating a new RAID group and then adding it to
the volume. This operation can be performed while the volume is online and accessible to users. QTS writes
data linearly to storage pools containing multiple RAID groups. This means that QTS writes data to a RAID
group until the group is full before writing data to the next RAID group.
Warning
• If a static volume contains multiple RAID groups and one RAID group fails, all data on
the volume will be lost. Ensure that you have a complete data backup plan.
• To expand a RAID 50 or RAID 60 pool, you must create a new RAID 50 or 60 group with
the same number of disks and sub-groups as the original pool. It is not possible to add
additional sub-groups.
1. Storage & Snapshots Storage Storage/SnapshotsGo to > > .
2. Select a static volume.
3. ManageClick .
The window opens.Volume Management
4. Action ExpandSelect > .
The Expanding Static Volume Wizard window opens.
5. Create and add a new RAID groupSelect .
6. NextClick .
7. Enclosure UnitOptional: Select an expansion unit from the list.
Important
If the expansion unit is disconnected from the NAS, the storage pool becomes inaccessible until
it is reconnected.
8. Select one or more disks.
Warning
All data on the selected disks will be deleted.
9. Select a RAID type.
QTS displays all available RAID types and automatically selects the most optimized RAID type.
Important
• If the storage pool contains a RAID 1, RAID 5, RAID 6 or RAID 10 group, the new RAID group
must also have one of the mentioned RAID types.
• For RAID 50 or RAID 60, you cannot select a RAID type.dierent
10. Optional: Select the disk that will be used as a hot spare for this RAID group.
For details, see Conguring a RAID Group Hot Spare.
11. NextClick .
12. Optional: SSD over-provisioning. Congure
QTS 5.0.x User Guide
Storage & Snapshots 233

12. Optional: the alert threshold. Congure
QTS issues a warning when the percentage of used pool space is equal to or above thenotication
specied threshold.
13. Optional: pool guaranteed snapshot space. Congure
Pool guaranteed snapshot space is storage pool space that is reserved for storing snapshots. Enabling
this feature ensures that QTS always has space to store new snapshots.sucient
14. Specify the encryption password.
The encryption password must consist of 8 to 32 characters from any of the following groups:
• Letters: A to Z, a to z
• Numbers: 0 to 9
• Special characters: Any except for space ( )
Warning
Remember this password. If you forget the password, the pool will become inaccessible and all
data will be unrecoverable.
15. Optional: Save the encryption key to the local NAS.
Saving the encryption key enables QTS to automatically unlock and mount the SED pool when the NAS
starts up. If the encryption key is not saved, you must specify the encryption password every time the
NAS restarts.
Warning
Enabling this setting can result in unauthorized data access if unauthorized personnel are able
to physically access the NAS.
16. NextClick .
17. CreateClick .
A message appears.conrmation
18. OKClick .
QTS creates the storage pool and then displays the information on the screen.Storage/Snapshots
Creating a SED Secure Static Volume
To create a regular static volume, see Creating a Static Volume.
1. Storage & Snapshots Storage Storage/SnapshotsGo to > > .
2. Perform one of the following actions.
NAS State Action
No volumes or storage pools Click .New Volume
One or more volumes or storage pools Click > Create New Volume .
The Volume Creation Wizard window opens.
3. Static volumeSelect .
4. NextClick .
5. Enclosure UnitOptional: Select an expansion unit from the list.
QTS 5.0.x User Guide
Storage & Snapshots 253

• Special characters: Hyphen (-), underscore (_)
13. Congure the SED settings.
a. Specify the encryption password.
The password must contain 8 to 32 characters, with any combination of letters, numbers, and
special characters. Spaces are not allowed.
Warning
Remember this password. If you forget the password, the pool will become inaccessible and all
data will be unrecoverable.
b. Verify the encryption password.
c. Optional: Save the encryption key to the local NAS.
Saving the encryption key enables QTS to automatically unlock and mount the SED volume when
the NAS starts up. If the encryption key is not saved, you must specify the encryption password
every time the NAS restarts.
Warning
Enabling this setting can result in unauthorized data access if unauthorized personnel are able
to physically access the NAS.
14. Optional: SSD over-provisioning. Congure
Over-provisioning reserves a percentage of SSD storage space on each disk in the RAID group to
improve write performance and extend the disk's lifespan. You can decrease the amount of space
reserved for over-provisioning after QTS has created the RAID group.
Tip
To determine the optimal amount of over-provisioning for your SSDs, download and run SSD
Proling Tool from App Center.
15. Optional: advanced settings. Congure
Setting Description User Actions
Alert threshold QTS issues a warning when thenotication
percentage of used volume space is equal to
or above the threshold.specied
Specify a value.
Accelerate
performance with
SSD cache
QTS adds data from this volume to the SSD
cache to improve read or write performance.
-
Create a shared
folder on the volume
QTS automatically creates the shared folder
when the volume is ready. Only the user
account that creates the shared folder will
have read/write access to the folder.
• Specify a folder name.
• Select Create this folder as a
snapshot shared folder.
A snapshot shared folder enables
faster snapshot creation and
restoration.
Bytes per inode The number of bytes per inode determines
the maximum volume size and the number
of and folders that the volume can store.les
Increasing the number of bytes per inode
results in a larger maximum volume size,
but a lower maximum number of andles
folders.
Select a value.
QTS 5.0.x User Guide
Storage & Snapshots 255
Tip
Expansion units used to be known as JBODs.
Expansion Unit Actions
Go to > Storage & Snapshots Storage Disks/VJBOD > and select an expansion unit to perform one of the
following actions.
Action Description
Enclosure Info View full hardware details of the expansion unit, including the model,
serial number, rmware version, BUS type, CPU temperature, system
temperature, power status, and fan speeds.
Action Locate > Prompt the expansion unit chassis LEDs to blink, so that you can locate
the device in a server room or rack.
Action Safely Detach > Stop all activity and safely unmount the enclosure from the host NAS.
Action Update Firmware > Update the expansion unit's rmware.
Action Rename Enclosure > Rename the selected expansion unit.
RAID Group View details about each RAID group on the expansion unit, including
its RAID type, capacity, and member disks.
Expansion Unit Recovery
If an expansion unit is accidentally disconnected from the NAS, for example by an unscheduled shutdown or
disconnected cable, then the following changes to storage state will occur:
• The status of all storage pools on the expansion unit will change to .Error
• The status of all RAID groups on the expansion unit will change to .Not Active
If you encounter this situation, reconnect the expansion unit to the NAS and QTS will automatically guide
you through the recovery process.
You can also perform recovery manually. Go to > Storage & Snapshots Storage Disks/VJBOD > , select an
expansion unit, and then click to perform one of the following actions.Recover
Action Description
Reinitialize enclosure ID Reset all expansion unit IDs, and then give each unit a new ID number
starting from 1 based on the order that they are physically connected.
Tip
Use this action if the expansion unit IDs appear out of
sequential order in the enclosure list.
Attach and Recover Storage Pool Scan all free disks on the NAS and all connected expansion units for
existing volumes, LUNs, and storage pools.
Tip
Perform this action after moving disks between NAS
devices.
QNAP External RAID Devices
QTS 5.0.x User Guide
Storage & Snapshots 258

• The RAID group you created is automatically selected and the RAID type is set to .Single
11. NextClick .
12. Congure the alert threshold.
QTS issues a warning when the percentage of used pool space is equal to or above thenotication
specied threshold.
13. Congure pool guaranteed snapshot space.
Pool guaranteed snapshot space is storage pool space that is reserved for storing snapshots. Enabling
this feature ensures that QTS always has space to store new snapshots.sucient
14. NextClick .
15. CreateClick .
A message appears.conrmation
16. OKClick .
QTS creates the storage pool and then displays the information on the screen.Storage/Snapshots
Creating a Storage Pool on a Drive Adapter
1. Set the drive adapter to the RAID mode that you want using the device's hardware Mode switch.
2. Install the drive adapter in the NAS.
For details, see the drive adapter's hardware user guide.
3. Storage & Snapshots Storage Storage/SnapshotsGo to > > .
4. Perform one of the following actions.
• Click .New Storage Pool
• Click , and then select Create New Storage Pool.
The Create Storage Pool Wizard window opens.
5. NextClick .
6. Enclosure Unit NAS HostUnder , select .
7. In the list of disks, select the drive adapter.
8. RAID Type SingleUnder , select .
9. NextClick .
10. Optional: SSD over-provisioning. Congure
Over-provisioning reserves a percentage of SSD storage space on each disk in the RAID group to
improve write performance and extend the disk's lifespan. You can decrease the amount of space
reserved for over-provisioning after QTS has created the RAID group.
Tip
To determine the optimal amount of over-provisioning for your SSDs, download and run SSD
Proling Tool from App Center.
11. Optional: the alert threshold. Congure
QTS issues a warning when the percentage of used pool space is equal to or above thenotication
specied threshold.
QTS 5.0.x User Guide
Storage & Snapshots 261

Action Description
Congure external storage
partitions
Opens > Storage & Snapshots Storage External Storage > .
For more information, see Conguring a RAID Enclosure as an External
Storage Device.
Create NAS storage space Opens > Storage & Snapshots Storage Storage/Snapshots > .
For more information, see Creating a Storage Pool on a RAID
Enclosure.
Edit access permissions Opens the window to edit accessEdit Shared Folder Permissions
permissions for this device.
QNAP JBOD Enclosures
About QNAP JBOD Enclosures
QNAP JBOD enclosures are a series of expansion units designed to increase the storage capacity of your
NAS, computer, or server. JBOD enclosures a wide range of storage applications. You can manageoer
drives independently or group them together in a software RAID using a host NAS, computer,conguration
or server. QNAP JBOD enclosures with USB 3.2 Gen 2 Type-C or SFF interface ports to ensure quick andoers
ecient data transfer between the JBOD enclosure and the host device.
QNAP JBOD Enclosure Types
Enclosure Type Description Supported
Platforms
Example Models
Single-controller SAS
JBOD enclosure
A JBOD enclosure that uses SFF
interface ports to connect to a NAS
or server. These enclosures can only
connect to a host device with an
installed PCIe SAS storage expansion
card.
Server:
• Windows
• Linux
NAS:
• QTS
• QuTS hero
TL‑R1220Sep‑RP,
TL‑R1620Sep‑RP
Dual-controller SAS
JBOD enclosure
A JBOD enclosure with dual controllers
that uses SFF interface ports to connect
to a NAS or server. These enclosures
can only connect to a host device with
available Mini-SAS ports or an installed
PCIe SAS storage expansion card.
Server:
• Windows
• Linux
NAS:
• QES
TL‑R1620Sdc
SATA JBOD enclosure A JBOD enclosure that uses SFF
interface ports to connect to a NAS
or computer. These enclosures can
only connect to a host device with an
installed QNAP QXP host bus adapter.
Computer:
• Windows
• Linux
NAS:
• QTS
• QuTS hero
• TL‑D400S,
TL‑D800S,
TL‑D1600S
• TL‑R400S,
TL‑R1200S‑RP
QTS 5.0.x User Guide
Storage & Snapshots 272
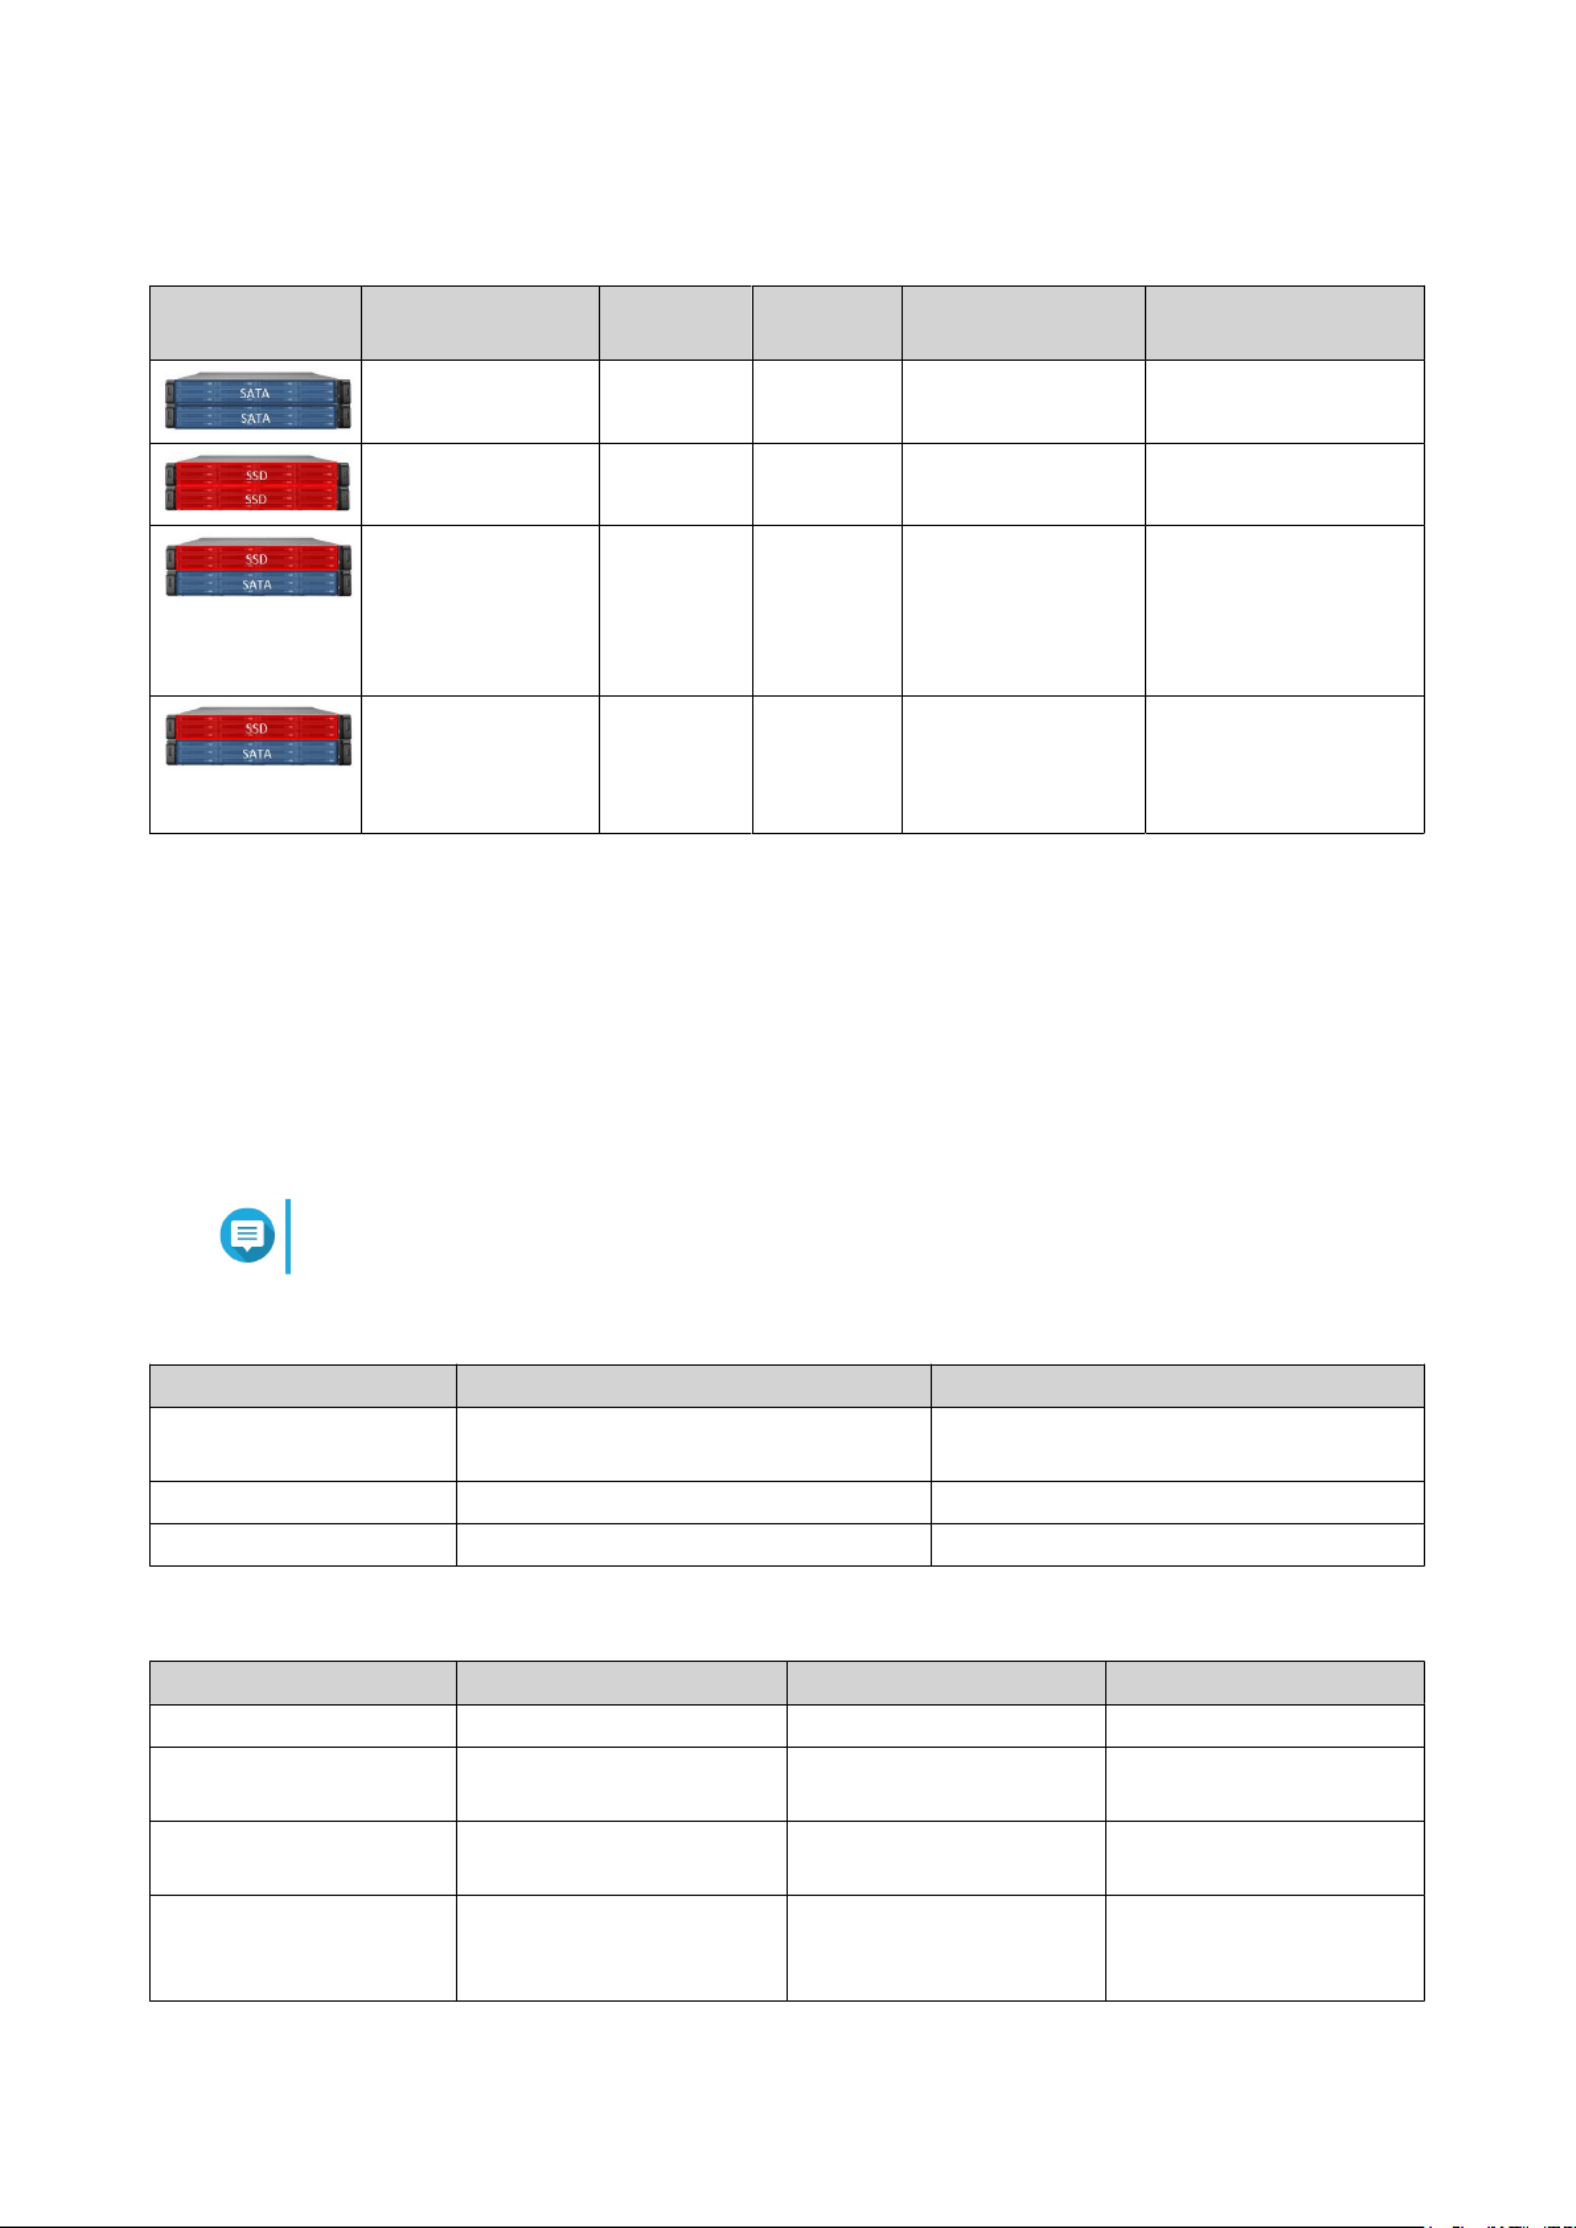
Qtier Benets
NAS
Conguration
Cost Storage
Capacity
Read/Write
Performance
Management Eort
All HDDs Low High Low Low
All SSDs Very high Low High Low
SSDs and
HDDs manually
separated into two
or more storage
pools
Moderate Medium High for SSD pool,
low for HDD pool
High (admin must
manually move data
between pools)
Qtier with SSDs
and HDDs in
one Qtier-enabled
storage pool
Moderate Medium High for frequently
accessed data
Low (QTS
automatically moves
data between disks)
Qtier 2.0 IO Aware
Qtier 2.0 IO Aware is a feature available in QTS version 4.3.3 or later. With IO Aware, QTS reserves 25% of
the SSD tier capacity in a Qtier storage pool for faster access performance. If data in the capacity or high
speed tiers experiences a high number of read or write requests, QTS immediately moves it to reserved
SSD space instead of waiting to move it using auto-tiering. This improves random I/O performance, oering
performance similar to having an SSD cache.
Qtier and SSD Cache Comparison
Note
Qtier can be used at the same time as SSD cache.
There are three main conguration conguring options when a NAS with a mixture of HDDs and SSDs.
Conguration SSD Usage HDD Usage
Qtier Storage Pool Qtier Storage Pool (combined with
HDDs)
Qtier Storage Pool (combined with SSDs)
SSD Cache SSD cache HDD-only storage pool
All-SSD Storage Pool SSD-only storage pool HDD-only storage pool
Qtier, SSD Cache, and All-SSD Storage Pool Comparison
Qtier Storage Pool SSD Cache All-SSD Storage Pool
Total storage space High (SSDs + HDDs) Moderate (HDDs only) Low (SSDs only)le
Maximum SSD capacity No limit Up to 4 TB depending on
installed memory
No limit
SSD expansion Expand as needed Limited by available
memory
Expand as needed
Applicable storage Thick volumes, thin
volumes and block-based
LUNs in the pool
All volumes and LUNs on
the NAS
Volumes and LUNs
created on the SSDs
QTS 5.0.x User Guide
Storage & Snapshots 274

• You can restore and folders from a snapshots in File Station by enabling les Enable
File Station Snapshot Directory for administrators.
For details, see .Snapshot Global Settings
1. Storage & Snapshots Storage Storage/SnapshotsGo to > > .
2. Select a thick or thin volume.
The volume must contain at least one snapshot.
3. Snapshot Snapshot ManagerClick , and then select .
The window opens.Snapshot Manager
4. Select a snapshot.
5. Select the and folders to be restored.les
6. Perform one of the following actions.
Action Description
Select > Restore Restore Files Restore the or folders to their original storage location. If theles
les or folders still exists on the NAS, then they will be overwritten
with the older versions.
Warning
All changes made after the snapshot was taken will
be deleted.
Select > Restore Restore Files to Choose one of the following restoration options.
• Restore the or folders to a les dierent location on the NAS.
• Restore the or folders to remote mounted storage space.les
• Restore a single shared folder as a new shared folder.
In the menu bar, click
Download the and folders to your computer in a ZIP les le.
QTS restores the and folders then displays a message.les conrmation
Reverting a Volume
Reverting restores a volume or LUN to the state at which the snapshot was taken. Restoring data using
snapshot revert is faster than restoring individual and folders.signicantly les
1. Storage & Snapshots Storage Storage/SnapshotsGo to > > .
2. Select a thick or thin volume.
Important
The volume must have at least one snapshot.
3. Snapshot Snapshot ManagerClick , and then select .
The window opens.Snapshot Manager
4. Select a snapshot.
5. Revert Volume SnapshotClick .
QTS 5.0.x User Guide
Storage & Snapshots 287

The window opens.Snapshot Manager
4. Select snapshot locationUnder , select a remote NAS.
5. Select a snapshot.
6. CloneClick .
The window opens.Clone Snapshot
7. Specify a volume alias.
8. Select a storage pool.
9. Enable encryption during transferSelect .
QTS encrypts the snapshot before sending it for additional security.
10. OKClick .
QTS clones the volume and shared folders, and then displays a message.conrmation
Cloning a Block-Based LUN from a Remote Snapshot
1. Storage & Snapshots Storage Storage/SnapshotsGo to > > .
2. Select a block-based LUN.
Important
The LUN must have at least one snapshot.
3. Snapshot Snapshot ManagerClick , and then select .
The window opens.Snapshot Manager
4. Select snapshot locationUnder , select a remote NAS.
5. Select a snapshot.
6. CloneClick .
The window opens.Clone Snapshot
7. Specify a LUN name.
8. Select a storage pool.
9. Optional: Select an iSCSI target.
QTS will map the LUN copy to the target.
10. Enable encryption during transferSelect .
QTS encrypts the snapshot before sending it for additional security.
11. OKClick .
QTS clones the LUN and then displays a message.conrmation
Data Recovery on a Destination NAS
Snapshot Vault
After setting a NAS as the destination for a Snapshot Replica job, the replicated snapshots are stored in
Storage & Snapshots Snapshot Backup Snapshot Vault > > . Each replica job has its own separate vault.
QTS 5.0.x User Guide
Storage & Snapshots 298

Cloning a Block-Based LUN from a Snapshot Vault
Important
The time required to create the LUN depends on the amount of data stored on the LUN
and the connection speed between the two NAS devices.
1. Storage & Snapshots Snapshot Backup Snapshot VaultGo to > > .
2. Select a storage pool.
3. On a vault, click .
The Snapshot Vault window opens.
4. Select a snapshot.
5. CloneClick .
The window opens.Clone Snapshot
6. Specify a LUN name.
7. Optional: Select an iSCSI target.
QTS will map the LUN copy to the target.
8. OKClick .
QTS clones the LUN and then displays a message.conrmation
Cache Acceleration
Cache Acceleration enables you to create an SSD cache to improve the read and write performance of the
NAS.
Cache Acceleration Requirements
• The NAS model must support Cache Acceleration.
For information about NAS and drive bay compatibility, see .https://www.qnap.com/solution/ssd-cache
• The NAS must have one or more free SSDs installed in a compatible drive bay.
• The NAS must have a suitable amount of installed memory.
The amount of memory required depends on the size of the SSD cache.
SSD Cache Size Required Memory
QTS 4.5.x (and earlier) QTS 5.0.0 (and later)
512 GB 1 GB -≧
1 TB 4 GB 2 GB≧ ≧
2 TB 8 GB -≧
4 TB 16 GB 4 GB≧ ≧
8 TB - 8 GB (ARM CPU)≧
16 TB - 8 GB (x86 CPU)≧
Note
ARM-based NAS running QTS 4.5.x (or earlier) are limited to an SSD cache size of 1 TB.
QTS 5.0.x User Guide
Storage & Snapshots 300

Changing the sector size to 4 KB increases LUN performance for applications and disk types.specic
Important
VMware does not currently support a 4 KB sector size.
15. Allocate stored space.
Stored space is space used to store a copy of the LUN's data locally on the NAS.
a. Select a storage pool.
b. Specify the capacity of the stored space.
Limit Amount Notes
Minimum stored space capacity 1.25x the LUN's capacity Additional space is needed to
store metadata.
Maximum stored space capacity 2x the LUN's capacity -
16. NextClick .
17. Do not map it to a target for nowOptional: Deselect .
If deselected, the wizard appears after QTS has creating the LUN.Edit LUN Mapping nished
18. FinishReview the summary information, and then click .
The VJBOD Cloud LUN appears in the Cloud Storage VJBOD Cloud Overview table at > .
Reattaching an Existing VJBOD Cloud Volume
Note
• QTS uses shared folders instead of volumes. For this reason, after creating a VJBOD
Cloud volume QTS automatically creates a shared folder with the same name which is
stored on the volume. You can then write data to the shared folder.
• When transferring a VJBOD Cloud volume from QuTS hero to QTS, ensure that all les
are in subfolders. Files in the shared folder that are not in a subfolder will not be
visible in QTS.
1. VJBOD CloudOpen the app.
2. Create VJBOD Cloud Volume/LUNClick .
The Create VJBOD Cloud Volume/LUN window opens.
3. Cloud VolumeClick .
The Create VJBOD Cloud Volume screen appears.
4. Select a cloud service.
5. Congure the selected cloud service.
Depending on the selected cloud storage provider, you may need to log in, authenticate, or congure
settings through a third-party interface.
For details, see .Connecting to a VJBOD Cloud Service
6. Use system proxy settingsOptional: Select .
When enabled, connects to the cloud storage space using the system proxy serverVJBOD Cloud
setting, at congured Control Panel Network & File Services Network Access Proxy > > > .
7. SearchClick .
QTS 5.0.x User Guide
Storage & Snapshots 322

3. Cloud LUNClick .
The Create VJBOD Cloud LUN screen appears.
4. Select a cloud service.
5. Congure the selected cloud service.
Depending on the selected cloud storage provider, you may need to log in, authenticate, or congure
settings through a third-party interface.
For details, see .Connecting to a VJBOD Cloud Service
6. Use system proxy settingsOptional: Select .
When enabled, connects to the cloud storage space using the system proxy serverVJBOD Cloud
setting, at congured Control Panel Network & File Services Network Access Proxy > > > .
7. SearchClick .
8. Select a cloud space.
This may be a bucket, container, account name, or something else depending on the cloud service
provider.
Note
If you do not have permission to browse the list of cloud spaces, then you need to enter the
name of the cloud space manually.
9. Performance testOptional: Click .
QTS tests the read and write speeds of the cloud space, and then displays the results with a warning if
speeds are too low.
10. NextClick .
11. Attach an existing cloud LUNSelect .
12. Select an existing LUN.
13. Allocate stored space.
Stored space is space used to store a copy of the LUN's data locally on the NAS.
a. Select a storage pool.
b. Specify the capacity of the stored space.
Limit Amount Notes
Minimum stored space capacity 1.25x the LUN's capacity Additional space is needed to
store metadata.
Maximum stored space capacity 2x the LUN's capacity -
14. NextClick .
15. Optional: Forcibly disconnect the LUN from its current NAS.
If a volume is connected to another NAS, then the LUN's status will be and Occupied Current NAS will
display an IP address other than .Localhost
Warning
Forcibly disconnecting a LUN deletes the LUN's data from the other NAS, and then recreates
the LUN locally from its last restore point. Any changes to data made since the last restore
point will be lost.
a. Specify the admin password of the other NAS.
QTS 5.0.x User Guide
Storage & Snapshots 324

Cloud Service Steps
Microsoft Azure Select .1. Azure
2. Specify the storage account.
3. Specify the access key.
4. Optional:
Select .Enable secure connection (SSL)
5. Optional:
Select Validate SSL certicate.
Backblaze Select .1. Backblaze
2. Specify the key ID.
3. Specify the application key.
4. Optional:
Select Validate SSL certicate.
Catalyst Select .1. Catalyst
2. Specify the user ID.
3. Specify the password.
4. Specify the project name.
5. Optional:
Select Validate SSL certicate.
Cynny Space Select .1. Cynny Space
2. Specify the access key.
3. Specify the secret key.
4. Optional:
Select .Enable secure connection (SSL)
5. Optional:
Select Validate SSL certicate.
DigitalOcean Select .1. Digital Ocean
2. Specify the access key.
3. Specify the secret key.
4. Optional:
Select .Enable secure connection (SSL)
5. Select a region.
QTS 5.0.x User Guide
Storage & Snapshots 326

The minimum number is one. The maximum number is determined by your NAS hardware.
Important
Total transfer resources must be greater than current reserved transfer resources.
3. ApplyClick .
Conguring Transfer Resources for a Volume or LUN
1. VJBOD Cloud Transfer ResourcesGo to > .
2. Cloud Volume/LUN ResourcesUnder , locate a VJBOD Cloud volume or LUN.
3. Congure any of the following settings.
Setting Description
Reserved The number of transfer resources reserved for this volume or LUN.
Limit The maximum number of transfer resources this volume or LUN can use.
Note
To set this value, must be set to .Limitation Rule Limit
Limitation Rule Select one of the following rules:
• Limit: The maximum number of transfer resources this volume or LUN
can use is restricted. It can only use the number under .specied Limit
• No Limit: The maximum number of transfer resources this volume or
LUN can use is unrestricted. It can use all of its reserved resources and
all shared transfer resources.
4. ApplyClick .
Event Logs
Event logs, error messages, and warnings related to VJBOD Cloud are displayed in > VJBOD Cloud Event
Logs . You can view logs by severity level, search logs using keywords, and congure notication settings.
Licenses
You can go to > to view how many VJBOD Cloud licenses are registered to the localVJBOD Cloud Licenses
NAS, and how many of those licenses are currently being used. You can also purchase additional VJBOD
Cloud licenses.
VJBOD Cloud Licensing Overview
VJBOD Cloud requires a license for each connection to a unique cloud space. A cloud space may be called a
bucket, container, account name, or something else depending on the cloud service provider. For example,
the following VJBOD Cloud volumes and LUNs require three licenses:
•Amazon S3
→
Bucket1
→
Volume1
•Amazon S3
→
Bucket2
→
Volume2
•Azure
→
Space1
→
LUN1
QTS 5.0.x User Guide
Storage & Snapshots 334

Each unique cloud space can contain an unlimited number of VJBOD Cloud volumes and LUNs. For example,
the following VJBOD Cloud volumes and LUNs require only one license:
•Amazon S3
→
Bucket1
→
Volume1
•Amazon S3
→
Bucket1
→
Volume2
•Amazon S3
→
Bucket1
→
LUN1
If a license expires, all VJBOD Cloud volumes and LUNs created from the cloud space attached to the license
become read-only until the license is renewed.
VJBOD Cloud includes one free license.
Purchasing VJBOD Cloud Licenses
1. VJBOD Cloud LicensesGo to > .
2. Purchase LicenseClick .
The window opens.License Center
3. Software StoreClick .
4. VJBOD Cloud BuyLocate , and then click .
5. Follow the onscreen instructions to purchase and activate the VJBOD Cloud licenses.
QTS 5.0.x User Guide
Storage & Snapshots 335

• Special characters: Underscore (_)
6. NextClick .
7. Select the destination folder.
Option Description Required Information
Linux Share (NFS) NFS share on an external server • IP address or host name
• NFS folder or path
Windows Share
(CIFS/SMB)
CIFS/SMB share on an external server • IP address or host name
• Username
• Password
• CIFS/SMB folder or path
Local Host Local NAS shared folder or connected
external storage device
• NAS shared folder or external device
• Sub-folder
8. NextClick .
9. Optional: Specify a LUN image name.
• The name must consist of 1 to 64 characters from any of the following groups:
• Letters: A to Z, a to z
• Numbers: 0 to 9
• Special characters: Underscore (_), hyphen (-), space ( )
• The name cannot begin or end with a space.
10. Use CompressionOptional: Select to compress the image le.
When enabled, the image will be smaller but exporting will take longer and will use more processorle
resources.
11. Select when the job will run.
Option Description
Now Run the job immediately after the job has been created. After this rst
run, the job will only run when manually started.
• Hourly
• Daily
• Weekly
• Monthly
Run the job periodically according to the schedule.specied
12. NextClick .
13. ApplyClick .
QTS creates the job. The job then starts running if was selected as the scheduling option.Now
QTS 5.0.x User Guide
iSCSI & Fibre Channel 341

4. Install an iSCSI initiator application or driver on the host.
The host is the service, computer, or NAS device that will access the LUN.
5. Connect the iSCSI initiator to the iSCSI target on the NAS.
Warning
To prevent data corruption, multiple iSCSI initiators should not connect to the same LUN
simultaneously.
The LUNs mapped to the iSCSI target appear as disks on the host.
6. In the host OS, format the disks.
iSCSI Performance Optimization
You can optimize the performance of iSCSI by following one or more of these guidelines:
• Use thick provisioning (instant allocation). Thick provisioning gives slightly better read and write
performance than thin provisioning.
• Create multiple LUNs, one for each processor thread on the NAS. For example, if the NAS has four
processor threads, then you should create four or more LUNs.
Tip
Go to > > > > to view theControl Panel System System Status System Information CPU
number of processor threads.
• Use separate LUNs for applications. For example, when creating two virtual machines whichdierent
intensively read and write data, you should create one LUN for each VM to distribute the load.
• You can use iSER (iSCSI Extensions for RDMA) for faster data transfers between QNAP NAS devices
and VMware ESXi servers. Enabling iSER requires a compatible network card and switch. For a list of
compatible network devices, see https://www.qnap.com/solution/iser.
iSCSI Targets
iSCSI targets allow iSCSI initiators from other devices on the network to access mapped LUNs on the NAS.
You can create multiple iSCSI targets and also map multiple LUNs to a single iSCSI target.
Creating an iSCSI Target
1. iSCSI & Fibre Channel iSCSI StorageGo to > .
2. Create New iSCSI TargetClick , and then select .
The iSCSI Target Creation Wizard window opens.
3. NextClick .
4. Specify a target name.
QTS appends the name to the iSCSI name (IQN). IQNs are unique names used tospecied qualied
identify targets and initiators.
• Valid characters: 0 to 9, a to z, A to Z
• Length: 1 to 16 characters
5. Optional: Specify a target alias.
An alias enables you to identify the target more easily on the initiator.
QTS 5.0.x User Guide
iSCSI & Fibre Channel 344
iSCSI Target Actions
You can perform various actions on iSCSI targets by going to iSCSI & Fibre Channel iSCSI Storage > . Select
a target and then click to select the desired action.Action
Action Description
Disable Disable an active target and disconnect all connected iSCSI initiators.
Enable Enable a disabled target.
Modify Edit the target's settings.
For details, see the following topics:
•Editing iSCSI Target Settings
•iSCSI Target Authorization
View Connections View the IP addresses and IQN information of all iSCSI initiators
connected to this target.
Delete Disconnect all connected iSCSI initiators and delete the target. Any
LUNs mapped to the target will be unmapped and then added to the
unmapped LUN list.
iSCSI Target Status
You can view iSCSI target statuses by going to iSCSI & Fibre Channel iSCSI Storage > .
Status Description
Ready The target is accepting connections but no initiators are currently
connected.
Connected An initiator is connected to the target.
Oine The target is not accepting connections.
iSCSI LUN Management
Mapping a LUN to an iSCSI Target
1. iSCSI & Fibre Channel iSCSI StorageGo to > .
2. Select a LUN.
Tip
Double-click an iSCSI target to view all of its mapped LUNs.
3. Optional: If the LUN is already mapped to a target, disable the LUN.
a. Action DisableClick , and then select .
A message appears.conrmation
b. OKClick .
QTS disables the LUN.
4. Action Edit LUN MappingClick , and then select .
The window opens.Edit LUN Mapping
5. Map to iSCSI targetSelect .
QTS 5.0.x User Guide
iSCSI & Fibre Channel 348
For example, if a test is created with a test range of 0-20% and a test interval of 5%, SSD Tool willProling
test SSD write performance in 5 phases, with over-provisioning set to 0%, 5%, 10%, 15%, and 20%. If the
random write performance of the disk is very low during any phase, SSD Proling Tool will end the phase
early and move to the next one.
1. SSD Tool ReviewGo to Proling > .
2. + Create TestClick .
The Create SSD Test wizard opens.
3. NextClick .
4. Enclosure UnitOptional: Select an expansion unit from the list.
Important
• You cannot select disks from multiple expansion units.
5. Select one or more disks.
Selecting a single SSD determines the optimum amount of over-provisioning for all SSDs of the same
model and capacity. Selecting multiple SSDs determines the optimum amount of over-provisioning for
that combination of disks and RAID type. Testing multiple disks gives more accurate results,specic
but takes longer than testing a single disk.signicantly
Warning
All data on the selected disks will be deleted.
6. Select a RAID type.
7. NextClick .
8. Optional: the test settings. Congure
Setting Description
Test data size SSD Tool writes the amount of test data to the SSDProling specied
during each test phase. Decreasing the test data size decreases test
time but gives less accurate results.
Over-provisioning test range Specify the minimum and maximum amount of over-provisioning to
test.
Test interval Specify the over-provisioning increments to test.
End a test phase early if consistent
performance is too low
SSD Tool will end a test phase after 5 minutes of testing ifProling
the random write speeds during the phase are lower than a system-
dened threshold.
Tip
Enabling this avoids wasting time testing disks when
the amount of over-provisioning is producingspecied
no measurable benets.
9. Review the estimated time required.
For multiple SSDs, the test may take more than 24 hours.
Tip
If the estimated test time is too long, reduce the test range, test interval or the test data size.
10. NextClick .
QTS 5.0.x User Guide
SSD Tool Proling 363

Conguring IPv4 Settings
1. Control Panel Network & Virtual SwitchGo to > .
The window opens.Network & Virtual Switch
2. Network InterfacesGo to > .
3.
Identify the adapter that you want to then click > . congure, Congure
The window opens.Congure
4. Congure the IPv4 settings.
Setting Description
Obtain IP address settings
automatically via DHCP
If the network supports DHCP, the adapter automatically obtains the IP
address and network settings.
Use static IP address Manually assign a static IP address. You must specify the following
information:
• Fixed IP address
• Subnet mask
• Default gateway
Jumbo frames Jumbo frames are Ethernet frames that are larger than 1500 bytes.
They are designed to enhance Ethernet networking throughput, and
to reduce CPU usage when transferring large QTS supports theles.
following MTU sizes:
• 1500 bytes (default)
• 4074 bytes
• 7418 bytes
• 9000 bytes
Important
• All connected network devices must enable Jumbo
Frames and use the same MTU size.
• Only certain NAS models support Jumbo Frames.
• Using jumbo frames requires a network speed of
1000 Mbps or faster.
Network Speed Select the network transfer rate allowed by the network environment.
Tip
Selecting will automatically detectAuto-negotiation
and set the transfer rate.
Important
The Network Speed is automatically set to eld Auto-
negotiation and hidden when 10GbE &conguring
40GbE adapters.
QTS 5.0.x User Guide
Network & Virtual Switch 368
Specyfikacje produktu
| Marka: | QNAP |
| Kategoria: | serwer |
| Model: | TVS-473 |
| Kolor produktu: | Złoto |
| Wbudowany wyłącznik: | Tak |
| Wbudowany wyświetlacz: | Tak |
| Typ wyświetlacza: | LCD |
| Częstotliwość wejściowa AC: | 50 - 60 Hz |
| Napięcie wejściowe AC: | 100-240 V |
| Wysokość produktu: | 188.2 mm |
| Szerokość produktu: | 199.3 mm |
| Głębokość produktu: | 279.6 mm |
| Waga produktu: | 4900 g |
| Obsługiwane systemy operacyjne Windows: | Windows 10 Enterprise, Windows 7 Enterprise, Windows 8 Enterprise |
| Obsługiwane systemy operacyjne Mac: | Tak |
| Wielkość pamięci flash: | 512 MB |
| Prędkość transferu danych przez Ethernet LAN: | 10,100,1000 Mbit/s |
| Ilość portów Ethernet LAN (RJ-45): | 4 |
| Zakres temperatur (eksploatacja): | 0 - 40 °C |
| Zakres wilgotności względnej: | 5 - 95 % |
| Zarządzanie przez stronę www: | Tak |
| Taktowanie procesora: | 2.1 GHz |
| Typ procesora: | Wbudowane procesory AMD SoC z serii R. |
| Model procesora: | RX-421BD |
| Wi-Fi: | Nie |
| Przewody: | AC, LAN (RJ-45) |
| Przewodowa sieć LAN: | Tak |
| Obsługiwany systemy operacyjne Linux: | Tak |
| Szyfrowanie / bezpieczeństwo: | 256-bit AES, AES, FIPS 140-2, HTTPS, SSH, SSL/TLS |
| Diody LED: | HDD, LAN, Power, Status, USB |
| Instrukcja szybkiej instalacji: | Tak |
| Funkcja kopii zapasowej: | Tak |
| Cechy kopii zapasowej: | Cloud, iSCSI LUN |
| Model: | NAS |
| Klasa urządzenia: | Small i Medium Business |
| Zainstalowane urządzenie pamięci masowej: | Nie |
| Całkowita pojemność zainstalowanej pamięci: | 0 TB |
| Ilość obsługiwanych rozmiarów dysków pamięci: | 6 |
| Rodzaje zainstalowanych dysków: | Nie |
| Obsługiwane rodzaje dysków: | HDD & SSD |
| Interfejs napędów pamięci masowej: | M.2, Serial ATA III |
| Pojemność dysku: | - GB |
| Rozmiary napędów pamięci masowej: | 2.5/3.5 " |
| Usługa RAID: | Tak |
| Liczba rdzeni procesora: | 4 |
| Typ pamięci wewnętrznej: | DDR4 |
| Pamięć wewnętrzna: | 64 GB |
| Klient DHCP: | Tak |
| Ilość portów USB 3.2 Gen 1 (3.1 Gen 1) Typu-A: | 4 |
| Obudowa: | Tower |
| Rodzaj chłodzenia: | Aktywne |
| Liczba wentylatorów: | 1 went. |
| Zainstalowany system operacyjny: | QNAP Turbo System |
| Lokalizacja zasilania: | Wbudowany |
| Moc zasilacza: | 240 W |
| Ilość jednostek zasilania: | 1 |
| Prąd wyjściowy: | 3.5 A |
| Poziomy raid: | 0, 1,5+HS, 5,6, 10, JBOD |
| Ilość portów HDMI: | 2 |
| Zasilanie: | Tak |
| Funkcja Wake-On-LAN: | Tak |
| Brzęczyk: | Tak |
| Kensington Lock: | Tak |
| Typ gniazda zamka kabla: | Kensington |
| Przycisk reset: | Tak |
| Obsługiwane systemy operacyjne serwera: | Windows Server 2003, Windows Server 2003 R2, Windows Server 2008, Windows Server 2008 R2, Windows Server 2012, Windows Server 2012 R2 |
| Obsługiwane protokoły sieciowe: | CIFS/SMB, SMB2.1, SMB3.0, AFP (v3.3), NFS(v3), FTP, FTPS, SFTP, TFTP, HTTP(S), Telnet, SSH, iSCSI, SNMP, SMTP, SMSC |
| Serwer DHCP: | Tak |
| Lista kontrolna dostępu (ACL): | Tak |
| Zgodny z Jumbo Frames: | Tak |
| Obsługiwane systemy plików: | FAT32, HFS+, NTFS, ext3, ext4 |
| Gniazda pamięci: | 4 |
| Obsługiwane przeglądarki: | Microsoft Internet Explorer 10+, Mozilla Firefox 8+, Apple Safari 4+, Google Chrome |
| Wersja systemu operacyjnego: | 4.3 |
| Średnica czaszy wentylatora: | 120 mm |
| Agregator połączenia: | Tak |
| Zatoka hot-swap: | Tak |
| Obsługa iSCSI: | Tak |
| Wbudowany serwer mediów UPnP™ AV: | Tak |
| Wbudowany serwer iTunes: | Tak |
| Wsparcie wielojęzyczne: | Tak |
| Maksymalna pamięć operacyjna RAM: | 64 GB |
| Obsługa S.M.A.R.T.: | Tak |
| Wbudowany serwer FTP: | Tak |
| Elementy gorącej rezerwy: | Tak |
| Uwierzytelnianie hasła: | Tak |
| Folder udostępniający: | CIFS/SMB |
| Zarządzanie prawem dostępu do folderu udostępniającego: | Tak |
| Rejestr systemowy: | Tak |
| Liczba śrub: | 12 |
| Skanowanie dysku: | Tak |
Potrzebujesz pomocy?
Jeśli potrzebujesz pomocy z QNAP TVS-473, zadaj pytanie poniżej, a inni użytkownicy Ci odpowiedzą
Instrukcje serwer QNAP

13 Października 2024
12 Października 2024
29 Września 2024
20 Września 2024
16 Września 2024
14 Września 2024
13 Września 2024
12 Września 2024
11 Września 2024
5 Września 2024
Instrukcje serwer
- serwer Sony
- serwer Supermicro
- serwer Lenovo
- serwer Gigabyte
- serwer Acer
- serwer Technics
- serwer Hikvision
- serwer Fujitsu
- serwer Conceptronic
- serwer StarTech.com
- serwer Asus
- serwer Medion
- serwer TRENDnet
- serwer MSI
- serwer Toshiba
- serwer D-Link
- serwer ATen
- serwer APC
- serwer HP
- serwer Tripp Lite
- serwer Cisco
- serwer Moxa
- serwer Synology
- serwer Lindy
- serwer ZyXEL
- serwer Dell
- serwer Linksys
- serwer Digitus
- serwer Vimar
- serwer Netgear
- serwer Black Box
- serwer ELAC
- serwer Intellinet
- serwer HGST
- serwer Revox
- serwer Naim
- serwer SEH
- serwer Planet
- serwer NEC
- serwer LevelOne
- serwer Digi
- serwer Axis
- serwer Asrock
- serwer Abus
- serwer Rocstor
- serwer Western Digital
- serwer Smart-AVI
- serwer Promise Technology
- serwer Chenbro Micom
- serwer Allnet
- serwer Veritas
- serwer IStarUSA
- serwer Silverstone
- serwer Ernitec
- serwer AVerMedia
- serwer Atlona
- serwer Gefen
- serwer Hanwha
- serwer Quantum
- serwer Blackmagic Design
- serwer Kathrein
- serwer Eaton
- serwer Monacor
- serwer Sonnet
- serwer In Win
- serwer Teo
- serwer Megasat
- serwer Areca
- serwer Kramer
- serwer KanexPro
- serwer Raritan
- serwer AMX
- serwer C2G
- serwer Acti
- serwer Sitecom
- serwer Maxdata
- serwer Matrox
- serwer Flir
- serwer Buffalo
- serwer GeoVision
- serwer LaCie
- serwer Valcom
- serwer Asustor
- serwer Intel
- serwer Fantec
- serwer Freecom
- serwer Seagate
- serwer Iomega
- serwer Luxman
- serwer Ibm
- serwer Provision ISR
- serwer TAIDEN
- serwer SIIG
- serwer Advantech
- serwer Extron
- serwer Avocent
- serwer Teradek
- serwer Silex
- serwer Sun
- serwer MvixUSA
- serwer Dual Bay
- serwer Raidsonic
- serwer EMC
- serwer Infortrend
- serwer Opengear
- serwer G-Technology
- serwer EXSYS
- serwer Middle Atlantic
- serwer Mr. Signal
- serwer Atlantis Land
- serwer Lantronix
- serwer NETSCOUT
- serwer Mobotix
- serwer Origin Storage
Najnowsze instrukcje dla serwer

9 Kwietnia 2025
2 Kwietnia 2025

2 Kwietnia 2025
2 Kwietnia 2025
28 Marca 2025
28 Marca 2025
28 Marca 2025

10 Marca 2025
10 Marca 2025
10 Marca 2025