Instrukcja obsługi Pioneer NS-DV77
Pioneer
Zestaw kina domowego
NS-DV77
Przeczytaj poniżej 📖 instrukcję obsługi w języku polskim dla Pioneer NS-DV77 (104 stron) w kategorii Zestaw kina domowego. Ta instrukcja była pomocna dla 6 osób i została oceniona przez 2 użytkowników na średnio 4.5 gwiazdek
Strona 1/104

XV-DV77
XV-DV88
DVD/CD TUNER
LECTEUR DVD/CD AVEC TUNER
S-DV77SW
S-DV88SW
POWERED SUBWOOFER
SUBWOOFER ALIMENTÉ
S-DV77ST
S-DV88ST
SATELLITE SPEAKER
ENCEINTE SATELLITE
Operating Instructions
Mode d’emploi

2
En
RISK OF ELECTRIC SHOCK
DO NOT OPEN
CAUTION
These labels can be found on the DVD/CD tuner rear panel
(US model)/bottom panel (European model), and on the
powered subwoofer rear panel.
When using this product, follow the instructions written on the
underside of the unit, which concern the XV-DV77/XV-DV88.
Thank you for buying this PIONEER product.
Please read through these operating instructions so you will know
how to operate your model properly. After you have finished reading
the instructions, put them away in a safe place for future reference.
[For European model]
CAUTION
This product contains a laser diode of higher class than 1.
To ensure continued safety, do not remove any covers or
attempt to gain access to the inside of the product.
Refer all servicing to qualified personnel.
The following caution label appear on your player.
Location: On the bottom panel of XV-DV77/DV88
Inside the bonnet of XV-DV77/DV88
CLASS 1
LASER PRODUCT
CAUTION :
VORSICHT :
ADVARSEL :
VARNING :
VARO! :
VISIBLE AND INVISIBLE LASER RADIATION WHEN OPEN. AVOID EXPOSURE TO BEAM.
SICHTBARE UND UNSICHTBARE LASERSTRAHLUNG, WENNABDECKUNG GEÖFFNET
NICHT DEM STRAHL AUSSETZEN!
SYNLIG OG USYNLIG LASERSTRÅLING VED ÅBNING UNDGÅ UDSÆTTELSE FOR
STRÀLING.
SYNLIG OCH OSYNLIG LASERSTRÅLNING NÄR DENNA DEL ÄR ÖPPNAD BETRAKTA
EJ STRÅLEN.
AVATTAESSA ALTISTUT NÄKYVÄ JA NÄKYMÄTTÖMÄLLE LASERSATEIL YLLE. ÄLÄ
KATSO SÄTEESEN.
VRW1872
CUIDADO :
RADIACIÓN LÁSER VISIBLE E INVISIBLE AL ESTAR ABIERTO. EVITAR EXPOSICIÓN AL
RAYO.
[For European model]

3
En
English
Operating Environment H045 En
Operating environment temperature and humidity:
+5 C F °– +35°C (+41°– +95°F); less than 85%RH (cooling
vents not blocked)
Do not install in the following locations
•Location exposed to direct sunlight or strong artificial
light
•Location exposed to high humidity, or poorly ventilated
location
[For European model]
[For U.S. model]
4
En
[For U.S. model]
IMPORTANT NOTICE H006AEn
The serial number for this equipment is located in the
bottom plate. Please write this serial number on your
enclosed warranty card and keep it in a secure area.
This is for your security.
Selecting fine audio equipment such as the unit you’ve just
purchased is only the start of your musical enjoyment. Now it’s
time to consider how you can maximize the fun and excitement
your equipment offers. This manufacturer and the Electronic
Industries Association’s Consumer Electronics Group want you
to get the most out of your equipment by playing it at a safe level.
One that lets the sound come through loud and clear without
annoying blaring or distortion-and, most importantly, without
affecting your sensitive hearing.
Sound can be deceiving. Over time your hearing “comfort
level” adapts to higher volumes of sound. So what sounds
“normal” can actually be loud and harmful to your hearing.
Guard against this by setting your equipment at a safe level
BEFORE your hearing adapts.
To establish a safe level:
• Start your volume control at a low setting.
• Slowly increase the sound until you can hear it comfortably
and clearly, and without distortion.
Once you have established a comfortable sound level:
• Set the dial and leave it there.
Taking a minute to do this now will help to prevent hearing
damage or loss in the future. After all, we want you listening for
a lifetime.
E S T 1 92 4
EIA
E
L
E
C
T
R
O
N
I
C
I
N
D
U
S
T
R
I
E
S
•
A
S
S
O
C
I
A
T
I
O
N
•
We
Want You
LISTENING
For A Lifetime
We Want You Listening For A Lifetime
Used wisely, your new sound equipment will provide a
lifetime of fun and enjoyment. Since hearing damage from
loud noise is often undetectable until it is too late, this
manufacturer and the Electronic Industries Association’s
Consumer Electronics Group recommend you avoid prolonged
exposure to excessive noise. This list of sound levels is included
for your protection.
Decibel
Level Example
30 Quiet library, soft whispers
40 Living room, refrigerator, bedroom away from traffic
50 Light traffic, normal conversation, quiet office
60 Air conditioner at 20 feet, sewing machine
70 Vacuum cleaner, hair dryer, noisy restaurant
80 Average city traffic, garbage disposals, alarm clock
at two feet.
THE FOLLOWING NOISES CAN BE DANGEROUS
UNDER CONSTANT EXPOSURE
90 Subway, motorcycle, truck traffic, lawn mower
100 Garbage truck, chain saw, pneumatic drill
120 Rock band concert in front of speakers, thunderclap
140 Gunshot blast, jet plane
180 Rocket launching pad
Information courtesy of the Deafness Research Foundation.
E S T 1 92 4
EIA
E
L
E
C
T
R
O
N
I
C
I
N
D
U
S
T
R
I
E
S
•
A
S
S
O
C
I
A
T
I
O
N
•
We
Want You
LISTENING
For A Lifetime

5
Fr
English Fran aisç
Conditions de Fonctionnement H045 Fr
Tempéraure et humidité ambiante lors du fonctionnement:
+5 C F rieur °– +35°C (+41°– +95°F); infé à 85%RH (events
d a s)’ ération non obstrué
Ne pas installer dans les lieux suivants
• é à è èLieux expos s la lumi re direct du soleil ou lumi re
artificielle forte
• é à é éLieux expos s une forte humidit ou lieux peu ventil s
ATTENTION
Ce produit renferme une diode laser d une catà ’ égorie
sup rieure curité à 1. Pour garantir une sé é constante, ne pas
retirer les couvercles ni essayer d rieur de’ é à ’ éacc der l int
l’appareil.
Pour toute r paration, s un personnel qualifié ’ àadresser é.
La note suivante se trouve sur votre lecteur.
Localisation : Sur le panneau inf rieur du XV-DV77/DV88é
Sous le couvercle du XV-DV77/DV88
CLASS 1
LASER PRODUCT
Nous vous remercions pour cet achat d’un produit Pioneer.
Nous vous demandons de lire soigneusement ce mode d’emploi;
vous serez ainsi à même de faire fonctionner l’appareil
correctement. Après avoir bien lu le mode d’emploi, le ranger
dans un endroit sûr pour pouvoir s’y référer ultérieurement.
Vous pouvez trouver ces étiquettes sur le panneau arrière du lecteur DVD/CD
avec tuner (modèle nord-américain)/panneau inférieur (modèle européen),
et sur le panneau arrière du subwoofer alimenté.
ATTENTION
DANGER D'ELECTROCUTION
NE PAS OUVRIR
CAUTION :
VORSICHT :
ADVARSEL :
VARNING :
VARO! :
VISIBLE AND INVISIBLE LASER RADIATION WHEN OPEN. AVOID EXPOSURE TO BEAM.
SICHTBARE UND UNSICHTBARE LASERSTRAHLUNG, WENNABDECKUNG GEÖFFNET
NICHT DEM STRAHL AUSSETZEN!
SYNLIG OG USYNLIG LASERSTR LING VED BNING UNDG UDS TTELSE FOR Å Å Å Æ
STR LING.À
SYNLIG OCH OSYNLIG LASERSTR LNING N R DENNA DEL PPNAD BETRAKTA Å Ä ÄR Ö
EJ STRÅLEN.
AVATTAESSA ALTISTUT NÄKYV KYMÄ Ä JA N Ä Ö Ä Ä ÄTT M LLE LASERSATEIL YLLE. L
KATSO SÄTEESEN.
VRW1872
CUIDADO :
RADIACIÓN LÁSER VISIBLE E INVISIBLE AL ESTAR ABIERTO. EVITAR EXPOSICIÓN AL
RAYO.

6
En/Fr
Installation Precautions
•Install components so that there are no obstructions above
or either side of them, or by ventilation holes. Also install 5
cm away from the wall as shown in the figures. Compo-
nents feature ventilation holes on the bottom so do not
install on thick pile carpets or other surfaces that may
block them.
•Use a vacuum cleaner periodically to clean the port of the
subwoofer to keep it free of dust.
Powered subwoofer unit (S-DV77SW/DV88SW)
Enceinte active d’extrêmes graves (S-DV77SW/
DV88SW)
Précautions d’installation
• è ’Installez les appareils de mani re qu un espace libre soit
m nag té é au-dessus et sur chacun de leurs cô és, et que les
ou a gagïes d’ ération soient dé ées. Veillez ce que 5 cm, auà
moins, s parent l appareil d un mur ou d une paroi,é ’ ’ ’
comme le montre les illustrations.
Des ou es d ration sont galement plac es sur leï ’ éaé é
panneau de fond; ne posez donc pas les appareils sur une
moquette ou une surface similaire qui pourrait les
obstruer.
• éUtilisez un aspirateur p riodiquement pour nettoyer la
porte du haut-parleur d me grave pour qu il n y ait’ êextr ’ ’
pas de poussière.
Rear: 5 cm (2 in.) or more
Arrière: au moins 5 cm
5 cm (2 in.) or
more
Au moins 5 cm
5 cm (2 in.) or
more
Au moins 5 cm
WARNING: Slot and openings in the cabinet are
provided for ventilation and to ensure reliable
operation of the product and to protect it from
overheating, to prevent fire hazard, the openings
should never be blocked and covered with items, such
as newspapers, table-cloths, curtains, etc. Also do not
put the apparatus on the thick carpet, bed, sofa, or
fabric having a thick pile. H040 En
POWER-CORD CAUTION
Handle the power cord by the plug. Do not pull out the plug by tugging the
cord and never touch the power cord when your hands are wet as this could
cause a short circuit or electric shock. Do not place the unit, a piece of
furniture, etc., on the power cord, or pinch the cord. Never make a knot in
the cord or tie it with other cords. The power cords should be routed such
that they are not likely to be stepped on. A damaged power cord can cause a
fire or give you an electrical shock. Check the power cord once in a while.
When you find it damaged, ask your nearest PIONEER authorized service
center or your dealer for a replacement.
NOTE IMPORTANTE SUR LE CABLE
D’ALIMENTATION
Tenir le c ble d alimentation par la fiche. Ne pas d brancher la prise enâ ’ é
tirant sur le c ble et ne pas toucher le c ble avec les mains mouill es. Celaâ â é
risque de provoquer un court-circuit ou un choc lectrique. Ne pas poseré
l’appareil ou un meuble sur le câble. Ne pas pincer le câble. Ne pas faire de
noeud avec le c ble ou lâ ’attacher à ’ â â ’ d autres c bles. Les c bles d alimentation
doivent on tre crasêtre posés de faç à ne pas ê é és. Un câble abî ém peut
provoquer un risque d incendie ou un choc lectrique. V rifier le c’ é é âble
d’alimentation de temps en temps. Contacter le service après-vente PIONEER
le plus proche ou le revendeur pour un remplacement.
ATTENTION: Les vents et les ouvertures dans laé
structure sont pr vus pour la ventilation et pouré
assurer le bon fonctionnement du produit et pour la
protéger des risques de surchauffe, et des risques
d’incendie, les ouvertures ne doivent jamais etre
bloquées ni couvertes par des matériaux tels que
journaux, nappes, rideaux, etc. De meme, ne pas
positionner l’appareil sur un tapis pais, lit, canap oué é
tout meuble poss dant un rembourrage pais. é é H040 Fr
PLAY/PAUSE
ST ANDBY/ON
6OPEN/C LOSE
ST OP
0
7
1
R
DVD/CD TUNER (XV-DV77/DV88)
LECTEUR DVD/CD AVEC TUNER (XV-DV77/
DV88)
5 cm (2 in.) or more
Au moins 5 cm
5 cm (2 in.) or
more
Au moins 5 cm
Rear: 5 cm (2 in.) or more
Arrière: au moins 5 cm
15 cm (6 in.) or more
Au moins 15 cm

7
En/Fr
English Français
Table de matières
1 Préparatifs
Caractéristiques ......................................................... 10
Utilisation de ce manuel ............................................ 10
Suggestions pour l’installation.................................. 11
Comment éviter les problèmes de condensation .. 11
Déplacer l’appareil .................................................. 11
Disques compatibles avec cet appareil .................... 12
Régions des DVD vidéo ........................................... 12
2 Commandes et affichages
Panneau avant ............................................................ 14
Afficheur ..................................................................... 14
Télécommande ........................................................... 16
3 Configuration
Introduction ............................................................... 17
Allumage et réglage de l’horloge .............................. 17
Comment changer le format de l’affichage
de l’horloge ............................................................. 18
Configuration du son surround .................................19
Réglage de la distance des enceintes ..................... 19
Comment équilibrer le son surround ..................... 21
Réglage du système du téléviseur ............................ 22
Utilisation du Setup Navigator ................................ 23
Configuration de la télécommande pour
commander votre téléviseur ..................................... 25
Utilisation de cette télécommande avec votre
téléviseur ................................................................. 26
4 Mise en service
Lecture de DVD, de CD et de Video CD .................. 28
Commandes de base de lecture ............................ 29
Comment naviguer sur les menus des
disques DVD ........................................................... 30
Comment naviguer sur les menus PBC de
Video CD ..................................................................31
Pour écouter la radio ................................................ 32
Comment améliorer le son FM stéréo ................... 33
Mémorisation de station préréglées ..................... 33
Pour écouter des stations préréglées .................... 34
Pour nommer des stations préréglées .................... 35
Affichages du système du tuner ................................36
Lecture d’autres composants raccordés ...................36
Réduction du niveau d’entrée auxiliaire ................ 37
5 Utilisation des modes de son et des effets
Utilisation du menu Sound ....................................... 38
Utilisation de modes de son ..................................... 39
Lecture de sources Dolby/DTS ............................. 39
Lecture d’autres sources stéréo avec des
effets DSP ................................................................41
6 Lecture de disques
Introduction .............................................................. 42
Comment trouver ce que vous souhaitez sur
un disque ................................................................... 42
Comment changer les angles de caméra ................. 43
Comment changer les sous-titres ............................ 43
Contents
1 Before You Start
Features ...................................................................... 10
Using this manual....................................................... 10
Hints on installation .................................................. 11
Avoiding problems with condensation ................... 11
Moving the system ................................................... 11
Discs compatible with this system ............................ 12
DVD Video regions .................................................. 12
2 Controls and Displays
Front panel .................................................................13
Display ........................................................................ 13
Remote control .......................................................... 15
3 Setting Up
Introduction ............................................................... 17
Switching on and setting the clock ........................... 17
Changing the clock display format ......................... 18
Setting up for surround sound .................................. 19
Setting the speaker distances ................................. 19
Balancing the surround sound................................ 21
Setting the TV System .............................................. 22
Using the setup navigator ........................................ 23
Setting up the remote to control your TV ............... 25
Using this remote with your TV ............................. 26
4 Getting Started
Playing DVDs, CDs and Video CDs .......................... 28
Basic playback controls.......................................... 29
Navigating DVD disc menus ................................... 30
Navigating Video CD PBC menus ...........................31
Listening to the radio ............................................... 32
Improving FM stereo sound ................................... 33
Saving station presets ............................................ 33
Listening to station presets ................................... 34
Naming station presets ........................................... 35
Tuner system displays ............................................... 36
Playing other connected components ..................... 36
Reducing the auxiliary input level .......................... 37
5 Using Sound modes and Effects
Using the Sound menu ..............................................38
Using sound modes .................................................. 39
Playing Dolby/DTS sources ................................... 39
Playing other stereo sources with DSP effects ......41
6 Playing Discs
Introduction .............................................................. 42
Finding what you want on a disc .............................. 42
Switching camera angles ........................................... 43
Switching subtitles .................................................... 43
Switching audio language ......................................... 43
Switching audio channels ......................................... 44
Making a program list ............................................... 44
Using random play .................................................... 46
Using repeat play ...................................................... 47

8
En/Fr
Bookmarking a place in a disc .................................. 48
Memorizing disc settings .......................................... 48
Displaying disc information ...................................... 49
Displays when playing ............................................ 50
Displays when stopped .......................................... 52
DVD and CD system displays ................................... 52
Displays when playing ............................................ 52
Displays when stopped .......................................... 52
7 Using RDS
Using RDS ..................................................................53
RDS Program types ................................................ 54
Displaying RDS information .................................. 55
Searching for a program type ................................ 56
8 Playing MP3s
Playing MP3s ..............................................................57
Searching for folders and tracks .............................. 58
Using random play .................................................... 58
Using repeat play ...................................................... 59
Displaying MP3 information .................................... 59
Using the MP3 Navigator ......................................... 60
Making a program list of MP3 tracks ........................61
MP3 compatibility information ................................ 62
9 Using the Timer
Using the wake up timer ........................................... 63
Activating/deactivating the wake up timer ........... 64
Checking the timer settings ................................... 65
Using the sleep timer................................................ 65
10 Advanced Sound Setup
Dynamic Range Control ........................................... 67
LFE Attenuator .......................................................... 67
Dual-mono setting .................................................... 68
Adjusting channel volume levels............................... 69
11 DVD Setup Menu
Using the DVD Setup menu...................................... 70
Audio settings ............................................................71
Dolby Digital Out ................................................... 71
96kHz PCM Out ..................................................... 71
Video settings ............................................................ 72
TV Screen................................................................ 72
S-Video Out ............................................................ 72
Screen Saver ........................................................... 73
Background............................................................. 73
Video Adjust ........................................................... 73
Still Picture ..............................................................76
On Screen Display ...................................................76
Angle Indicator ....................................................... 77
Language settings ..................................................... 77
OSD language ......................................................... 77
Audio Language ...................................................... 77
Subtitle Language....................................................78
Auto Language........................................................ 79
DVD Language ........................................................ 80
Subtitle Display .......................................................81
Subtitle Off ..............................................................81
Comment changer la langue audio .......................... 44
Comment changer les canaux audio ........................ 44
Comment faire une liste de programmes................. 46
Utilisation de la lecture aléatoire............................. 47
Utilisation de la lecture répétée............................... 47
“ Looping ” (répétition sans fin) d’une partie
d’un disque ............................................................. 47
Indexation d’un emplacement d’un disque ............. 48
Mémorisation des réglages d’un disque .................. 48
Affichage de l’information du disque....................... 49
Affichages pendant la lecture ................................ 50
Affichages à l’arrêt ................................................. 52
Affichages des systèmes DVD et CD ........................ 52
Affichages pendant la lecture ................................ 52
Affichages à l’arrêt ................................................. 52
7 Utilisation du RDS
Utilisation du RDS .....................................................53
Types de programmes RDS .................................... 54
Affichage de l’information RDS ............................. 55
Recherche d’un type de programme ..................... 56
8 Lecture de MP3
Lecture de MP3 ..........................................................57
Recherche de répertoires et de pistes ..................... 58
Utilisation de la lecture aléatoire............................. 58
Utilisation de la lecture répétée............................... 59
Affichage de l’information de MP3 .......................... 59
Utilisation du MP3 Navigator................................... 60
Comment faire une liste de programmes de
pistes MP3 ..................................................................61
Information sur la compatibilité du format MP3 .... 62
9 Utilisation de la minuterie
Utilisation de la minuterie de réveil ......................... 63
Activation/désactivation de la minuterie de
réveil ........................................................................ 64
Comment vérifier les réglages de la minuterie ...... 65
Utilisation de la minuterie de sommeil .................... 65
10 Configuration avancée du son
Commande gamme dynamique ................................ 67
Atténuateur LFE......................................................... 67
Réglage dual-mono ................................................... 68
Réglage des niveaux de volume du canal ................. 69
11 Menu Setup (de configuration) du DVD
Utilisation du menu Setup du DVD .......................... 70
Réglages audio .......................................................... 71
Dolby Digital Out (Sortie Dolby Digital).............. 71
96kHz PCM Out (Sortie PCM 96kHz)...................71
Réglages vidéo .......................................................... 72
TV Screen (Écran du téléviseur) ............................ 72
S-Video Out (Sortie S-Video)................................ 72
Screen Saver (Économiseur d’écran) .................... 73
Background Color (Couleur de fond) ................... 73
Video Adjust (Ajustement vidéo) .......................... 73
Still Picture (Image figée) .......................................76
On Screen Display (Affichage à l’écran) ................76

9
En/Fr
English Fran aisç
General settings ........................................................ 82
Setup Menu Mode .................................................. 82
Parental Lock .......................................................... 82
Registering a new password ................................... 83
Changing your password .........................................83
Setting/changing the Parental Lock level .............. 84
Setting/changing the Country Code ..................... 84
Country code list.................................................... 85
12 Connecting Up
For instructions on connecting up the speakers and the
powered subwoofer, see the separate instruction sheet, Setting
Up the System.
Connecting the optional MD deck .......................... 86
Connecting the optional CD recorder..................... 86
Connecting other components .................................87
Connecting external antennas .................................. 89
External AM antenna .............................................. 89
External FM antenna .............................................. 89
13 Additional Information
Child lock .................................................................. 90
Beep mode ................................................................ 90
Tuner frequency step ................................................ 90
Dimming the display ..................................................91
Taking care of your system ........................................91
Disc lens cleaner ......................................................91
Taking care of your discs.........................................91
Storing discs ........................................................... 92
Discs to avoid ......................................................... 92
Glossary ..................................................................... 93
Language code list .................................................... 94
Screen sizes and disc formats .................................. 95
Troubleshooting ........................................................ 96
Amplifier fault finding ............................................ 96
Optional component fault finding......................... 96
DVD fault finding .................................................... 96
Troubleshooting tips ...............................................97
Resetting the system ................................................. 98
Specifications ...........................................................101
Demo display .......................................................... 104
Angle Indicator (Indicateur d’angle) ..................... 77
Réglages de la langue ............................................... 77
OSD language (Langue OSD) ................................ 77
Audio Language (Langue audio) ............................ 77
Subtitle Language (Langue des sous-titres) ..........78
Auto Language (Langue automatique) .................. 79
DVD Language (Langue du DVD) .......................... 80
Subtitle Display (Affichage des sous-titres) ..........81
Subtitle Off (Sous-titres désactivés)...................... 81
Réglages généraux .................................................... 82
Setup Menu Mode (Mode menu de
configuration) ......................................................... 82
Parental Lock (Verrouillage parental).................... 82
Comment consigner un nouveau mot de passe .....83
Comment changer le niveau de verrouillage
parental ................................................................... 83
Comment régler/changer le niveau de verrouillage
parental ................................................................... 84
Comment régler/changer le code du pays............ 84
Liste des codes de pays .......................................... 85
12 Raccordements
Pour obtenir des informations sur le raccordement des
enceintes et du subwoofer alimenté, consultez la feuille
d’instructions sur la “ Configuration de la chaîne ” qui se
trouve à part.
Raccordement de la platine MD optionnelle .......... 86
Raccordement de l’enregistreur CD optionnel ....... 86
Raccordement d’autres composants ........................87
Raccordement d’antennes externes ......................... 89
Antenne AM externe .............................................. 89
Antenne FM externe ............................................... 89
13 Information complémentaire
Restriction pour les enfants ..................................... 90
Mode bip ................................................................... 90
Le pas de la fréquence du tuner ............................... 90
Comment obscurcir l’afficheur ..................................91
Comment prendre soin de votre chaîne ...................91
Produits nettoyants pour lentille de disque ...........91
Comment prendre soin de vos disques ..................91
Rangement des disques ......................................... 92
Disques à éviter ...................................................... 92
Glossaire .................................................................... 93
Liste des codes de langues ....................................... 94
Tailles d’écran et formats de disque ........................ 95
Guide de dépannage ................................................. 96
Pour trouver une anomalie au niveau de
l’amplificateur ......................................................... 96
Pour trouver une anomalie au niveau d’un
composant optionnel ............................................. 96
Pour trouver une anomalie au niveau du
lecteur DVD ............................................................ 96
Astuces du guide de dépannage ............................ 99
Réinitialisation de l’appareil ................................... 100
Spécifications ...........................................................101
Affichage de démonstration ................................... 104

10
En/Fr
Before You Start Préparatifs
1
Using this manual
This manual is for the XV-DV77/DV88 DVD Surround
System (XV-DV88 DVD Surround System in Europe only). It
is divided into several sections: information for before you
start using the system (chapters 1 2); getting started using–
the system (chapters 3 4); more advanced features–
(chapters 5 10); system settings and preferences (chapter–
11); connecting up the system and using this system with
external components (chapter 12). Chapter 13 provides
additional information, including a glossary of terms used
in this manual, and a troubleshooting section.
Features
÷Superlative audio performance with Dolby
Digital* and DTS** software
The XV-DV77/DV88 delivers breathtaking sound quality
with Dolby Digital and DTS discs, and is also compatible
with 96kHz/24-bit PCM sources.
÷Super Fine Focus Digital Filter
technology
This high-quality digital video filter gives you great picture
quality with DVD discs. The filter is effective all the way up
the video frequency range, and also reduces noise outside
the video frequency range.
•This product incorporates copyright protection
technology that is protected by method claims of
certain U. S. patents and other intellectual property
rights owned by Macrovision Corporation and other
rights owners. Use of this copyright protection
technology must be authorized by Macrovision
Corporation, and is intended for home and other
limited viewing uses only unless otherwise authorized
by Macrovision Corporation. Reverse engineering or
disassembly is prohibited.
* Manufactured under license from Dolby Laboratories.
“ ” “ ”Dolby , Pro Logic and the double-D symbol are
trademarks of Dolby Laboratories. Confidential
unpublished works. © 1992-1997 Dolby Laborato-
ries. All rights reserved.
** “ ” “ ”DTS and DTS Digital Surround are trademarks
of Digital Theater Systems, Inc. Manufactured under
license from Digital Theater Systems, Inc.
Utilisation de ce manuel
Ce manuel est consacr la cha ne XV-DV77/DV88é à î
Surround (cha ne XV-DV88 DVD Surround uniquement enî
Europe). Il est divis en plusieurs sections : informationé
pour les pr paratifs (chapitres 1 2) ; mise en service eté –
utilisation de la cha ne (chapitres 3 4) ; caractî – éristiques
avancées supplémentaires (chapitres 5–10) ; réglages et
paramètres de la chaîne (chapitre 11) ; raccordement et
utilisation de la cha ne sur d autres composants externesî ’
(chapitre 12). Le chapitre 13 fournit des informations
compl mentaires, y compris un glossaire de termes utilis sé é
dans ce manuel, et une section guide de dépannage.
Caractéristiques
÷Performance audio supérieure avec Dolby
Digital* et logiciel DTS**
Le XV-DV77/DV88 fournit une extraordinaire qualit sonoreé
avec les disques Dolby Digital et DTS et est galementé
compatible avec les sources PCM de 96kHz/24 bits.
÷Technologie du filtre numérique de haute
définition
Ce filtre vid o num rique de haute qualit vous offre uneé é é
excellente qualit image avec les disques DVD. Le filtreé ’ d
est effectif dans toute la gamme de fr quence vid o, eté é
r duit galement les parasites en dehors de la gamme deé é
fr o.équence vidé
• èCe produit int gre une technologie de protection des
droits d auteur elle-m me prot e par certains’ ê é ég
brevets nord-am ricains et d autres droits sur laé ’
propri t té é intellectuelle qui appartiennent à la socié é
Macrovision Corporation et autres dà ’ d étenteurs.
L’illustration de cette technologie de protection des
droits d auteur doit tre autoris e par ladite soci’ ê é é ét
Macrovision Corporation et est exclusivement
destin e autresé à une exploitation à domicile et à d’
usages limit s, sauf autre autorisation. La rechercheé
technique par inversion ou le d sassemblage esté
interdit.
* Fabriqu sous licence de Dolby Laboratories.é
“ ” “ ” Dolby , Pro Logic et le symbole double D sont
des marques de commerce de Dolby Laboratories.
Oeuvres confidentielles non publi es. © 1992-1997é
Dolby Laboratories. Tous droits ré éserv s.
** “ ” “ ” DTS et DTS Digital Surround sont des
marques commerciales de Digital Theater System,
Inc. Fabriqu sous licence de Digital Theateré
Systems, Inc.

11
En/Fr
Before You Start Préparatifs 1
English Fran aisç
Hints on installation
We want you to enjoy using this unit for years to come, so
please bear in mind the following points when choosing a
suitable location for it:
Do...
✓Use in a well-ventilated room.
✓Place on a solid, flat, level surface, such as a table, shelf or
stereo rack.
Don’t...
✗Use in a place exposed to high temperatures or humidity,
including near radiators and other heat-generating
appliances.
✗Place on a window sill or other place where the system will
be exposed to direct sunlight.
✗Use in an excessively dusty or damp environment.
✗Place directly on top of an amplifier, or other component
in your stereo system that becomes hot in use.
✗Use near a television or monitor as you may experience
interference—especially if the television uses an indoor
antenna.
✗Use in a kitchen or other room where the system may be
exposed to smoke or steam.
✗Use on a thick rug or carpet, or cover with cloth this may—
prevent proper cooling of the unit.
✗Place on an unstable surface, or one that is not large
enough to support all four of the unit’s feet.
Avoiding problems with
condensation
Condensation may form inside the system if it is brought into
a warm room from outside, or if the temperature of the room
rises quickly. Although the condensation won’t damage the
system, it may temporarily impair its performance. For this
reason you should leave it to adjust to the warmer tempera-
ture for about an hour before switching on and using.
Moving the system
If you need to move the system, first switch it off and unplug
from the wall outlet. Never lift or move the unit during
playback—discs rotate at a high speed and may be damaged.
Suggestions pour l’installation
Nous souhaitons que vous puissiez profiter de cet appareil
pendant les ann venir, veuillez donc garder en mé àes émoire
les points suivants au moment de choisir un endroit
convenable pour son installation :
A faire...
✓Utilisez-le dans une piè é éce bien a r e.
✓Placez-le sur une surface solide, plate, nivelé ’e, telle qu une
table, une re ou é ètag é è î é étag re pour cha ne st r o.
A ne pas faire...
✗Ne l’ é àutilisez pas dans un endroit expos de hautes
temp humiditératures ou à de l’ é, y compris près de
radiateurs et d autres appareils g rateurs de chaleur.’ é én
✗Ne le placez pas sur le rebord d’ êune fen tre ou autre
endroit expos directement aux rayons du soleil.é
✗Ne l’utilisez pas dans un environnement excessivement
poussiéreux ou humide.
✗Ne le placez pas directement au-dessus de l’amplificateur,
ou d un autre composant de votre cha ne st o qui se’ î é ér
r chauffe l utilisation.é à ’
✗Ne l’ è ’ é é ’utilisez pas pr s d un t l viseur ou d un moniteur
puisque vous pouvez expérimenter des interférences.
Sp lécialement si le té éviseur emploie une antenne
int rieure.é
✗Ne l’ è ùutilisez pas dans une cuisine ou autre pi ce o
l appareil peut tre expos de la fum e ou de la vapeur.’ ê é à é
✗N’utilisez pas de couverture, ni de tapis épais, ou un linge
pour le recouvrir. Ceci peut emp cher le refroidissementê
correct de l’appareil.
✗Ne le placez pas sur une surface instable, ou pas assez
grande pour supporter les quatre pieds de l appareil.’
Comment éviter les problèmes de
condensation
De la condensation peut se former rieur du lecteur sià ’ é l int
celui-ci est d plac de l ext rieur une pi ce chaude, ou si laé é ’ é à è
temp lérature de la pièce s’é ève rapidement. Quoique la
condensation n endommagera pas le lecteur, elle peut’
diminuer temporairement son fonctionnement normal. Dans
ce cas vous devriez le laisser tel quel pendant environ une
heure afin qu il s la plus chaude temp rature avant’ ’ àadapte é
de l allumer et de l utiliser.’ ’
Déplacer l’appareil
Si vous avez besoin de d placer l appareil, teignez-le d abordé ’ é ’
et d branchez-le de la prise. Ne soulevez ni d placez jamaisé é
l’appareil pendant la lecture. Les disques tournent à une
haute vitesse et ils pourraient s’endommager.

12
En/Fr
Before You Start Préparatifs
1
Discs compatible with this system
Any disc that displays one of the following logos should play
in this system. Other formats, including DVD-RAM, DVD-
ROM, DVD-Audio, SACD Photo CD and CD-ROM (except those
containing MP3 files) will not play.
DVD Video compatibility:
•Logo:
•Single-sided or double-sided discs
•Single layer or dual layer discs
•Dolby Digital, DTS, MPEG or Linear PCM digital audio
•MPEG-2 digital video
DVD discs are generally divided into one or more . Titlestitles
may be further subdivided into chapters.
Audio CD and MP3 compatibility:
•Logos:
• ” ”12cm or 8cm (5 or 3 ) discs
•Linear PCM digital audio or MP3 (MPEG-1 Audio Layer 3)
•CD, CD-R* and CD-RW* formats
CDs are divided into tracks.
* This system can play CD-R and CD-RW discs recorded with
audio. However, depending on the condition of the player and
the disc, you may find that not all discs will play successfully.
(For example, if the disc is scratched or dirty, or if the player’s
pickup lens is dirty.) Note that this unit cannot record onto
recordable discs.
Video CD compatibility:
•Logo:
• ” ”12cm or 8cm (5 or 3 ) discs
•MPEG-1 digital audio
•MPEG-1 digital video
Video CDs are divided into tracks.
DVD Video regions
21
ALL
All DVD Video discs carry a region mark on the case
somewhere that indicates which region(s) of the world the
disc is compatible with. Your DVD system also has a region
mark, which you can find on the rear panel. Discs from
incompatible regions will not play in this system. Discs
marked ALL will play in any player.
Disques compatibles avec cet appareil
Cet appareil devrait pouvoir lire les disques portant les logos
suivants. D autres formats, y compris les DVD-RAM, DVD-’
ROM, DVD Audio, SACD Photo CD et les CD-ROM (à
l’exception de ceux contenant des fichiers MP3) ne seront pas
lus.
Compatibilité des DVD vidéo :
•Logo :
• àDisques face simple ou double face
• àDisques couche simple ou double couche
• éDolby Digital, DTS, MPEG ou audio num rique Linear
PCM
• é éVid o num rique MPEG-2
En g ral, les disques sont divis s en un ou plusieurs . Aé énétitres
leur tour les titres sont sous-divis s en échapitres.
Compatibilité des CD audio et MP3 :
•Logos :
•Disques de 12cm ou 8cm
• éAudio num rique Linear PCM ou MP3 (MPEG-1 Audio
Layer 3)
•Formats CD, CD-R* et CD-RW*
Les disques sont divis s en épistes.
* Cet appareil peut lire des disques CD-R et CD-RW enregistrés
avec audio. Mais d pendant de la condition du lecteur et dué
disque, il se peut que la lecture de tous les disques ne soit pas
satisfaisante. (Par exemple, si le disque est ray ou sale, ou sié
la lentille du capteur du lecteur est sale.) Remarquez que cette
unité ne peut pas enregistrer sur des disques enregistrables.
Compatibilité des Video CD :
•Logos :
•Disques de 12cm ou 8cm
• éAudio num rique MPEG-1
• é éVid o num rique MPEG-1
Les disques sont divisés .pistes
Régions des DVD vidéo
21
ALL
Tous les disques DVD vid o portent une marque de la ré égion
sur l tui pour indiquer avec quelles r gions du monde le’é é
disque est compatible. Votre cha ne DVD a galement uneî é
marque que vous pouvez trouver sur le panneau arri re. Lesè
disques provenant de r gions incompatibles ne seront pas lusé
sur cet appareil. Les disques marqu s avec seront lus suréALL
qu’importe quel lecteur.

13
En
Controls and Displays 2
English Français
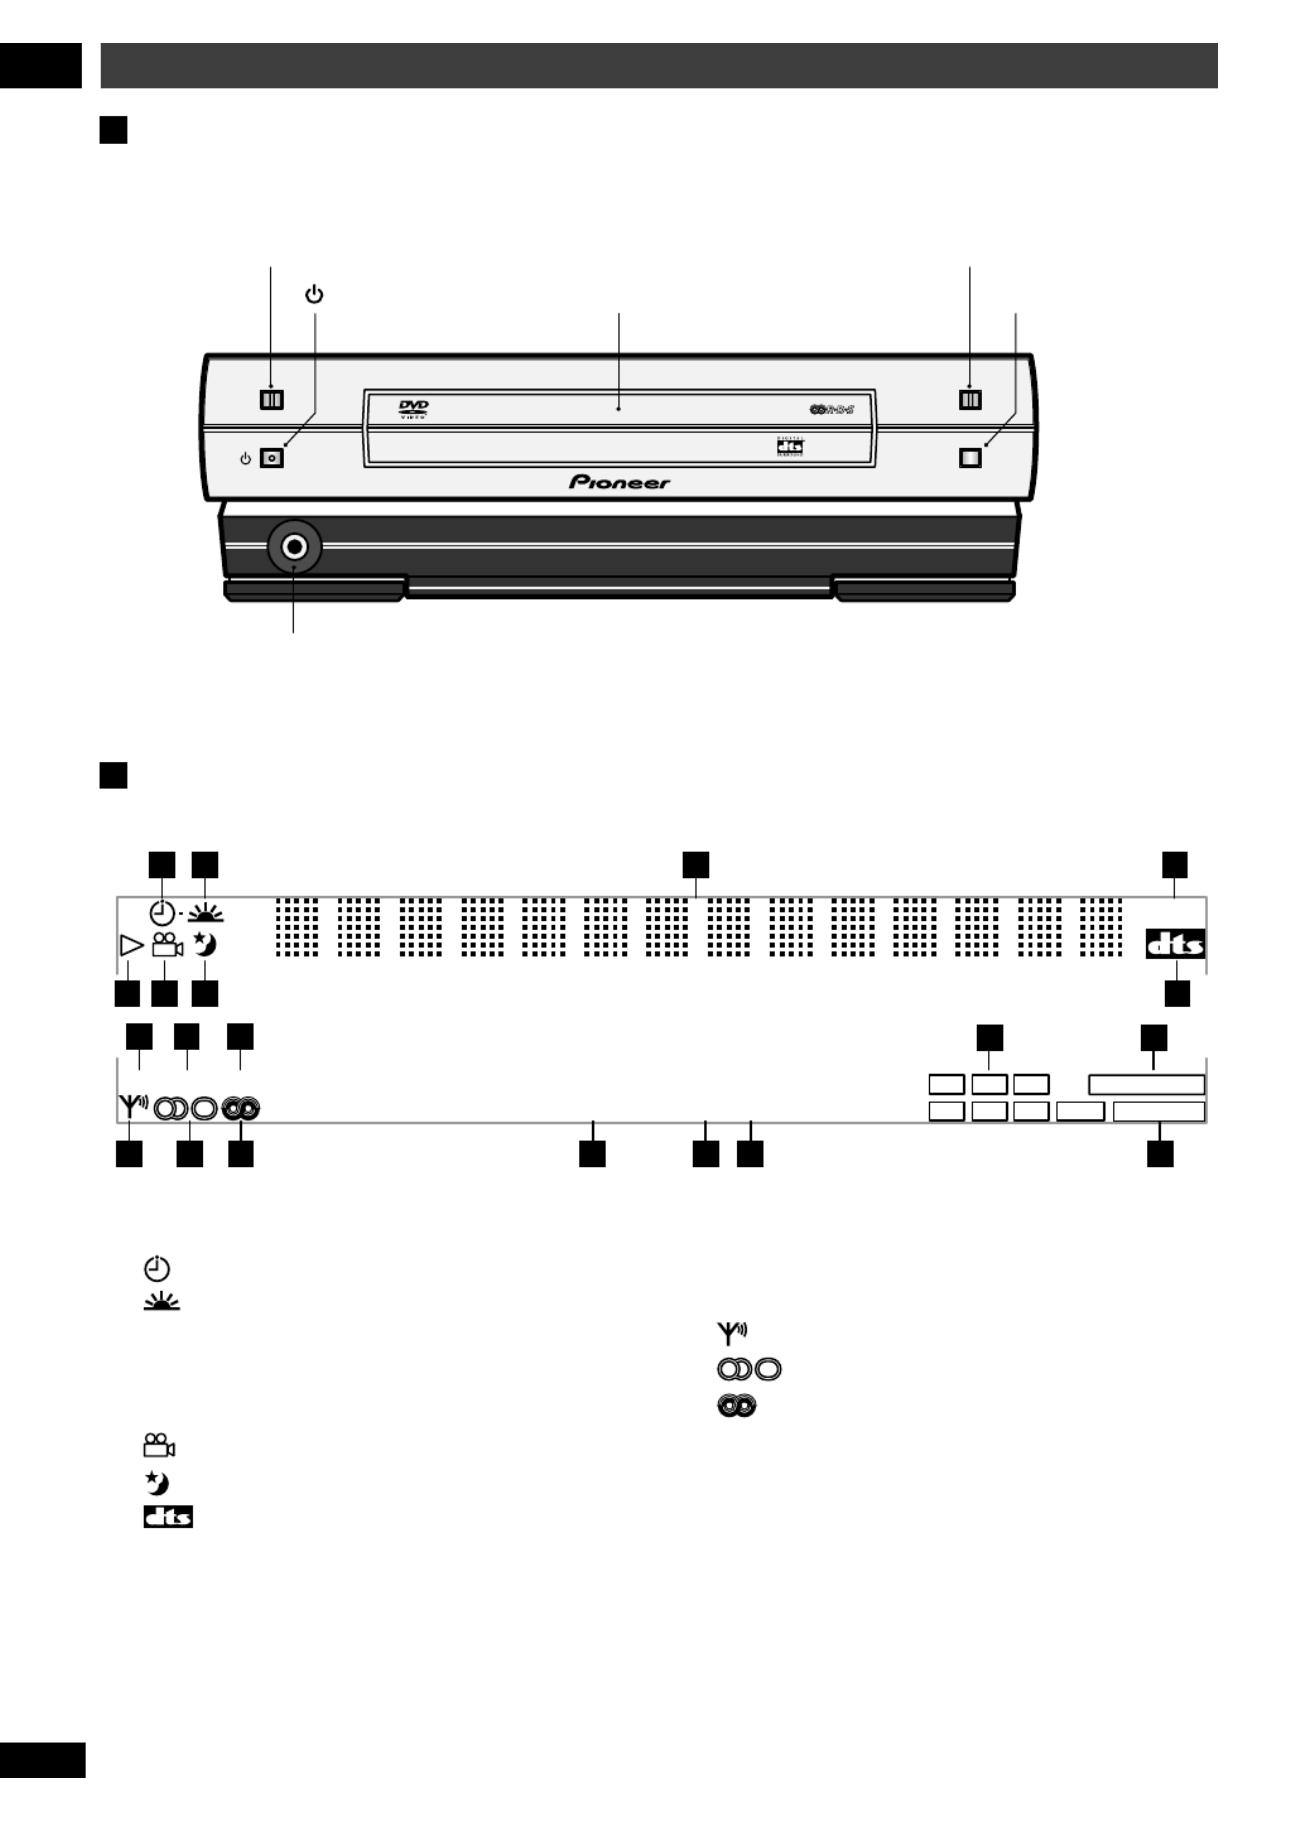
Front panel
PLAY/PAUSE
STANDBY/ON
6OPEN/CLOSE
STOP
0
7
1
R
6 PLAY/PAUSE ( touch sensor)
STANDBY/ON
Head
p
hone
j
ack
Disc tray
0 OPEN/CLOSE (touch sensor)
7 STOP
Display
1 Timer – pages 63–66
2 Wake up timer page 63
3Character display
4- DSP - – page 41
5# Lights when a disc is playing
6 Multi-angle scene – page 43
7 Sleep timer – page 66
8 Lights when playing a DVD with DTS sound
9COND. Condition memory – page 49
10 LAST Last memory – page 48
11 96kHz Lights when playing a disc with 96kHz audio
12 Active channel indicators
COND.LAST 96KHz
RPT 1 PGM RDM–
PRO LOGIC
2
DIGITAL
2
-DSP-
Ls Rs
CL
S
R
LFE
1 2
5
9 10 11 12 13
20191817161514
6 7
3 4
8
13 2PRO LOGIC Lights when playing a Dolby Pro Logic
source
14 Indicates strength of broadcast signal
15 Auto stereo/mono mode – page 33
16 RDS (Europan model only) – pages 53–56
17 RPT, RPT-1 Repeat play mode – pages 47, 59
18 PGM Program play – pages 44, 61
19 RDM Random play – pages 46, 58
20 2DOLBY DIGITAL Lights when playing a Dolby Digital
source
(Illustration shows European model)
14
Fr
Commandes et affichages
2
Panneau avant
Afficheur
COND.LAST 96KHz
RPT 1 PGM RDM–
PRO LOGIC
2
DIGITAL
2
-DSP-
Ls Rs
CL
S
R
LFE
1 2
5
9 10 11 12 13
20191817161514
6 7
3 4
8
1 Minuterie – pages 63-66
2 Minuterie de r page 63é –veil
3Affichage de caractère
4- DSP - – page 41
5# S’ à ’allume la lecture d un disque
6 Scè à –ne angles multiples page 43
7 Minuterie de sommeil – page 66
8 S’ à ’allume la lecture d un DVD avec son DTS
9COND. Mémoire en condition – page 49
10 LAST Derni morisationère mé – page 48
11 96kHz S allume ’ à la lecture d’un disque avec audio
96kHz
12 Indicateurs du canal actif
13 2PRO LOGIC S allume ’ à la lecture d’une source avec
Dolby Pro Logic
14 Indique l du signal de l’ éintensit ’émission
15 Mode st page 33é é –r o/mono automatique
16 RDS (Uniquement pour le mod le europè é –en) page
53-56
17 RPT, RPT-1 Mode lecture r pages 47, 59é é é –p t e
18 PGM Lecture programm pages 44, 61é –e
19 RDM Lecture al pages 46, 58é –atoire
20 2DOLBY DIGITAL S allume ’ à la lecture d’une source
avec Dolby Digital
PLAY/PAUSE
STANDBY/ON
6OPEN/CLOSE
STOP
0
7
1
R
6 PLAY/PAUSE (touche sensible)
STANDBY/ON
Prise
p
our écouteurs
Plateau à disques
0 OPEN/CLOSE (touche sensible)
7 STOP
(L’illustration montre le modèle européen)

15
En
Controls and Displays 2
English Fran aisç
STANDBY
/ON
LAST
TEST
TONE
SYSTEM
VOLCD TUNER
SEARCH
REPEAT A–B
DIMMER
MENU
ENTER
TOP MENU
SOUND
MUTE CH LEVEL
SURROUND
DSP
AUDIO SUBTITLE ANGLE DVD DISP
POWER CH VOL
TV
INPUT
SHIFT CLOCK/
TIMER
RETURN
SYSTEM
FOLDER/GROUPe E STEP/SLOW
SETUP
DISP
NEXT+
CHARACTER
MENU
–PREV
DVD
SYSTEM
PROGRAM
RANDOM
CLR
+
–
V1/V2/V3
CONDITION
ME MORY
VIDEO
1 2 3
4 5 6
>10
7 8 9
5
∞
3
6 7
1 ¡ 4 ¢
2
10/0
+
–
+
–
DVD
DIRECT PLAY 3
FM/AM
MD TAPE
21 3 4
65 7
98 10 11
1312 14 15
1716 18 19
3029 31 32
3433 35 36
3837 39 40
4241 43 44
4645 47 48
49 50
20 21
22
26
2423 25
27 28
1 STANDBY/ON page 17
2 DVD/CD (DIRECT PLAY 3) page 28
3 TUNER FM/AM (DIRECT PLAY )3 page 32
4 SYSTEM VOL +/–
5 VIDEO V1/V2/V3 page 36
6 MD (DIRECT PLAY 3)
7 TAPE (DIRECT PLAY 3)
8 1 | CONDITION page 49
9 2 | LAST page 48
10 3 | SEARCH page 42, 58
11 CLR | TEST TONE page 21
12 4 | REPEAT pages 47, 59
13 5 | A–B page 47
14 6 | RANDOM pages 46, 58
15 >10 Use to select numbers over 10
Remote control
16 7 | DIMMER page 91
17 8 | PROGRAM pages 44, 61
18 9
19 10/0 Use as 10 or 0
20 MENU | TOP MENU page 30
21 DVD SETUP | SYSTEM SETUP pages 19, 70
22 5 Cursor up
23 2 Cursor left
24 ENTER
25 3 Cursor right
26 ∞ Cursor down
27 SOUND page 38
28 RETURN pages 30–31
29 6 pages 28–29, 57
30 7 pages 29, 57
31 SYSTEM MENU
32 SYSTEM DISP | CHARACTER pages 35, 36, 52
33 1 | e STEP/SLOW pages 29–30
34 ¡ | E STEP/SLOW pages 29 30–
35 4 | –PREV | FOLDER/GROUP pages 29 30, 58–
36 ¢ | +PREV | FOLDER/GROUP pages 29 30, 58–
37 MUTE Press to mute/restore the sound
38 CH LEVEL page 69
39 SURROUND page 39
40 DSP page 41
41 AUDIO page 43
42 SUBTITLE page 43
43 ANGLE page 43
44 DVD DISP pages 49–50, 59
45 POWER page 26
46 CH+/– page 26
47 VOL+/– page 26
48 INPUT page 26
49 SHIFT Press to access alternative button functions
50 CLOCK/TIMER pages 17, 63–65

16
Fr
Commandes et affichages
2
STANDBY
/ON
LAST
TEST
TONE
SYSTEM
VOLCD TUNER
SEARCH
REPEAT A–B
DIMMER
MENU
ENTER
TOP MENU
SOUND
MUTE CH LEVEL
SURROUND
DSP
AUDIO SUBTITLE ANGLE DVD DISP
POWER CH VOL
TV INPUT
SHIFT CLOCK/
TIMER
RETURN
SYSTEM
FOLDER/GROUPe E STEP/SLOW
SETUP
DISP
NEXT+
CHARACTER
MENU
–PREV
DVD
SYSTEM
PROGRAM
RANDOM
CLR
+
–
V1/V2/V3
CONDITION
MEMORY
VIDEO
1 2 3
4 5 6
>10
7 8 9
5
∞
3
6 7
1 ¡ 4 ¢
2
10/0
+
–
+
–
DVD
DIRECT PLAY 3
FM/AM
MD TAPE
21 3 4
65 7
98 10 11
1312 14 15
1716 18 19
3029 31 32
3433 35 36
3837 39 40
4241 43 44
4645 47 48
49 50
20 21
22
26
2423 25
27 28
1 STANDBY/ON page 17
2 DVD/CD (DIRECT PLAY 3) page 28
3 TUNER FM/AM (DIRECT PLAY )3 page 32
4 SYSTEM VOL +/–
5 VIDEO V1/V2/V3 page 36
6 MD (DIRECT PLAY 3)
7 TAPE (DIRECT PLAY 3)
8 1 | CONDITION page 49
9 2 | LAST page 48
10 3 | SEARCH page 42, 58
11 CLR | TEST TONE page 21
12 4 | REPEAT pages 47, 59
13 5 | A–B page 47
14 6 | RANDOM pages 46, 58
15 >10 S’ é é é àutilise pour s lectionner des num ros sup rieurs 10
16 7 | DIMMER page 91
17 8 | PROGRAM pages 44, 62
18 9
19 10/0 S’utilise comme 10 ou 0
20 MENU | TOP MENU page 30
21 DVD SETUP | SYSTEM SETUP pages 19, 70
22 5 Curseur vers le haut
23 2 Curseur vers la gauche
24 ENTER
25 3 Curseur vers la droite
26 ∞ Curseur vers le bas
27 SOUND page 38
28 RETURN pages 30–31
29 6 pages 28–29, 57
30 7 pages 29, 57
31 SYSTEM MENU
32 SYSTEM DISP | CHARACTER pages 35, 36, 52
33 1 | e STEP/SLOW pages 29–30
34 ¡ | E STEP/SLOW pages 29 30–
35 4 | –PREV | FOLDER/GROUP pages 29 30, 58–
36 ¢ | +PREV | FOLDER/GROUP pages 29–30, 58
37 MUTE Appuyez pour couper/rétablir le son
38 CH LEVEL page 69
39 SURROUND page 39
40 DSP page 41
41 AUDIO page 43
42 SUBTITLE page 43
43 ANGLE page 43
44 DVD DISP pages 49–52, 59
45 POWER page 26
46 CH+/– page 26
47 VOL+/– page 26
48 INPUT page 26
49 SHIFT Appuyez pour accéder aux fonctions alternatives d
la touche
50 CLOCK/TIMER pages 17, 63–65
Télécommande

17
En/Fr
3Setting Up Configuration
English Français
Introduction
Before starting, make sure that your
system is installed and set up according
to the guide, andSetting up the system
plugged into a power outlet.
This chapter covers switching on and
setting the clock, using the Setup
Navigator to set some basic preferences,
using all the basic controls for playing
discs, using the tuner and playing
external sources.
Switching on and setting
the clock
This system has a built in clock, which
needs to be set to be able to use the
timer features.
1 Press STANDBY/ON to
switch on.
2 Press CLOCK/TIMER then
use the 2 or 3 buttons to
select CLOCK ADJUST.
CLOCK ADJUST
3 Press ENTER.
You should see a time displayed, with
the hour part blinking.
9:OO am
STANDBY
/ON
ENTER
32
SYSTEM
MENU
CLOCK/
TIMER
5
∞
Introduction
Avant de commencer, vérifiez que votre
chaîne est installée et configurée en
fonction du guide Configuration de la
chaîne et branchée à une prise
d’alimentation.
Ce chapitre décrit comment allumer et
faire le réglage de l’horloge, comment
utiliser le Setup Navigator (navigateur
de configuration) pour régler quelques
paramètres de base, comment utiliser
toutes les commandes de base pour la
lecture de disques, comment utiliser le
tuner et comment lire des sources
externes.
Allumage et réglage de
l’horloge
Cette chaîne a une horloge intégrée qui
doit être réglée pour pouvoir utiliser les
fonctions de la minuterie.
1 Appuyez sur STANDBY/ON
pour allumer.
2 Appuyez sur CLOCK/TIMER
puis utilisez les touches 2 ou
3 pour sélectionner CLOCK
ADJUST.
CLOCK ADJUST
3 Appuyez sur ENTER.
Vous devriez voir s’afficher une date,
avec la partie correspondante à l’année
qui clignote.
9:OO am

18
En/Fr
Setting Up3 Configuration
4 Use the and buttons to set the hour,5 ∞
then press ENTER.
• The default clock display format is 12-hour.
5 Use the and buttons to set the5 ∞
minute, then press ENTER.
The display blinks for 2 seconds to indicate that the
time has been set.
Press SYSTEM DISP anytime to see the clock when the
system is on or in standby.
Changing the clock display format
You can choose to display the clock and timer settings
in 12-hour (default setting) or 24-hour format.
1 If the system is on, press STANDBY/ON
to put it into standby.
2 Press SYSTEM MENU and select HOUR
FORMAT.
• Use the 2 3 and buttons to change the currently
displayed option. Press ENTER to select.
3 Select 12-HOUR or 24-HOUR format.
• Use the 5 ∞ and buttons to change the currently
displayed option. Press ENTER to select.
The system returns to standby after pressing ENTER.
4 Utilisez les touches 5 et ∞ pour régler
l’heure puis appuyez sur ENTER.
• ’ éLe format de 12 heures est l affichage par d faut d
l’horloge.
5 Utilisez les touches 5 et ∞ pour régler les
minutes puis appuyez sur ENTER.
L’affichage clignote pendant 2 secondes pour indique
que l heure a ’ é é é ét gl e.
Astuce
Appuyez sur SYSTEM DISP à n’importe quel moment
pour voir l horloge quand la cha ne est allum e ou en’ î é
attente.
Comment changer le format de
l’affichage de l’horloge
Vous pouvez choisir d afficher l horloge et les r’ ’ églag
de la minuterie dans le format de 12 heures (réglage
par d faut) ou dans le format de 24 heures.é
1 Si la chaîne est allumée, appuyez sur
STANDBY/ON pour la mettre en
attente.
2 Appuyez sur SYSTEM MENU et
sélectionnez HOUR FORMAT.
• ’Utilisez les touches 2 3 et pour changer l option
actuellement affichée. Appuyez sur ENTER pour
sélectionner.
3 Sélectionnez le format 12-HOUR ou
24-HOUR.
• ’Utilisez les touches 5 ∞ et pour changer l option
actuellement affichée. Appuyez sur ENTER pour
sélectionner.
La cha ne se remet en attente apr s avoir pressî è é ENTER.

19
En/Fr
3Setting Up Configuration
English Fran aisç
Setting up for surround
sound
You can use this system right out of the
box for surround sound with just the
default settings. However, for really
great surround sound, we recommend
that you spend a few minutes making
some settings that match this system to
your listening room. These include
setting the distances from your
listening position to your speakers, and
balancing the speaker volumes. Unless
you change the layout of your speakers
or main listening position, you only
need to make these settings once.
Setting the speaker
distances
1 Press SYSTEM SETUP.
• To access this function, hold down
SHIFT SYSTEM SETUP, then press .
2 Press 2 or 3 until you see
FRONT in the display.
FRONT SP 3.Om
3 Use the and 5 ∞ buttons to
set the distance from your
main listening position to the
front left/right speakers.
Ideally, your listening position should
be equidistant from the two front
speakers.
The default setting is 3m. You can
adjust the range from 0.3m to 9.0m in
steps of 0.3m.
TEST
TONE
SYSTEM
VOL
+
–
ENTER
DVD
5
∞
32
SURROUND
SHIFT
SETUP
SYSTEM
Configuration du son
surround
Vous pouvez utiliser cette cha ne telleî
quelle, sortie de son emballage pour
obtenir un son surround simplement
avec les r glages par d faut. Toutefois,é é
pour obtenir un son surround
vraiment excellent nous vous
recommandons de passer quelques
minutes à faire quelques réglages pour
adapter la cha votre salleî àne
d’écoute. Ceci inclut les réglages de la
distance entre votre position d coute et’é
vos enceintes, ainsi que la balance des
volumes d enceinte. A moins que vous’
changiez la disposition de vos
enceintes ou la principale position
d coute, il n cessaire de faire ces’é ’est né
réglages qu’une seule fois.
Réglage de la distance des
enceintes
1 Appuyez sur SYSTEM SETUP.
• é àPour acc der cette fonction,
maintenez enfoncé SHIFT puis
appuyez sur SYSTEM SETUP .
2 Appuyez sur jusqu’à2 ou 3
ce que vous voyiez FRONT
dans l’afficheur.
FRONT SP 3.Om
3 Utilisez pour régler la5 et ∞
distance entre votre
principale position d’écoute
et les enceintes avant droite/
gauche.
La position id ale d coute devrait é ’é être
équidistante aux deux enceintes avant.
Le r faut est 3m. Vouséglage par dé
pouvez r gler la port e entre 0,3m eté é
9,0m par pas de 0,3m.

20
En/Fr
Setting Up3 Configuration
4 Press to move on to the CENTER3
speaker setting.
CENTER SP 3.Om
5 Use the and buttons to set the5 ∞
distance from your main listening posi-
tion to the center speaker.
The default setting is 3m. You can adjust the range
from 0.3m to 9.0m in steps of 0.3m.
6 Press 3 to move on to the SURROUND
speakers setting.
SURR. SP 3.Om
7 Use the and buttons to set the5 ∞
distance from your main listening posi-
tion to the surround speakers.
Ideally, your listening position should be equidistant
from the surround speakers.
The default setting is 3m. You can adjust the range
from 0.3m to 9.0m in steps of 0.3m.
8 Press ENTER to make the last setting and
exit.
• The setting mode is automatically exited if no
operation is performed within 20 seconds.
• There are several other settings that you can make
from the System Setup menu to further enhance the
surround sound. See chapter 10 for more on this.
• The speaker distance settings have no effect when the
surround mode is set to VIRTUAL SURR 1 VIRTUAL . or
SURR 2. . See chapter 5 for more on surround modes.
4 Appuyez sur 3 pour aller jusqu’au
réglage d’enceinte CENTER.
CENTER SP 3.Om
5 Utilisez les touches 5 et ∞ pour régler la
distance entre votre principale position
d’écoute et l’enceinte centrale.
Le r glage par d faut est 3m. Vous pouvez r gler laé é é
portée entre 0,3m et 9,0m par pas de 0,3m.
6 Appuyez sur 3 pour aller jusqu’au
réglage d’enceinte SURROUND.
SURR. SP 3.Om
7 Utilisez les touchs 5 et ∞ pour régler la
distance entre votre principale position
d’écoute et les enceintes surround.
La position id ale d coute devrait tre quidistante aé ’é ê é
enceintes surround.
Le r glage par d faut est 3m. Vous pouvez r gler laé é é
portée entre 0,3m et 9,0m par pas de 0,3m.
8 Appuyez sur ENTER pour faire le dernier
réglage et quitter ce mode.
• é éLe mode r glage est automatiquement quitt si
aucune op ration n est ex e dans les 20 secondesé ’ é écut
Remarque
• éIl y a plusieurs autres r glages que vous pouvez
effectuer à partir du menu System Setup (configurati
du syst me) pour mieux adapter votre son surround.è
Voir chapitre 10 pour plus de détails.
• éLe r glage de la distance des enceintes est sans eff
quand le mode surround est ré é àgl
VIRTUAL SURR 1 .
ou VIRTUAL SURR 2 . . Voir chapitre 5 pour plus de
détails sur les modes surround.

21
En/Fr
3Setting Up Configuration
English Fran aisç
Balancing the surround sound
You can further improve surround sound performance
by balancing the levels from the subwoofer, center and
surround speakers relative to the front left/right
speakers. To help you judge the sound level of each
speaker a test tone is played through each speaker in
turn (make sure that there are no headphones
connected). Adjust the levels until they all sound equal.
The levels you set here will apply to all surround modes.
However, you can set levels independently for each DSP
mode (see page 69 for more on this).
It may not be possible to accurately adjust the
subwoofer level using this method. You may prefer to
leave it on its default setting and adjust it to your liking
later when playing surround-sound sources.
1 Press SURROUND.
STANDARD
The surround mode can be set to anything except
SURROUND OFF or AUTO (No test tone is output if
the surround mode is set to either of these settings.)
2 Set the volume to a moderate level.
3 Press TEST TONE (SHIFT and CLR) to
start the test tone then adjust the master
volume to a suitable level.
The test tone plays through each speaker in turn:
• Front left
• Center
• Front right
• Surround right
• Surround left
• Subwoofer
Comment équilibrer le son surround
Vous pouvez am liorer la performance du son surrouné
en quilibrant les niveaux des enceintes subwoofer,é
centrale et surround relatives aux enceintes avant
droite/gauche. Pour vous aider juger du niveau duà
son de chaque enceinte, un test de tonalité est lu à
travers chacune d entre elles tour de r le (v’ à ô érifiez
qu aucun ’ écouteurs ne sont raccordés). Ajustez les
niveaux jusqu ils soient tous ’à ce qu’ égaux.
Les niveaux que vous r glez ici seront applicables toé à
les modes surround. Cependant, vous pouvez r gler deé
niveaux ind pendamment de chaque mode DSP (voiré
page 69 pour plus de détails).
Remarque
Il se peut que vous ne puissiez pas ajuster correctemen
le niveau du subwoofer en utilisant cette m thode. Voé
pouvez le laisser au r glage par d faut et l ajuster seloé é ’
votre pr la lecture de sources sonoresé é àf rence
surround.
1 Appuyez sur SURROUND.
STANDARD
Vous pouvez faire tous les r glages du mode surroundé
l’exception de SURROUND OFF ou AUTO. (Aucun
test de tonalit est fourni si le mode surround est ré ’ n ég
à ’ ’ é l un ou l autre de ces r glages.)
2 Réglez le voume à un niveau modéré.
3 Appuyez sur TEST TONE (SHIFT et CLR)
pour démarrer le test de tonalité puis
ajustez le volume principal à un niveau
approprié.
Le test de tonalit lit travers chaque enceinte tour dé à à
r le :ô
• Avant gauche
• Centrale
• Avant droite
• Surround droite
• Surround gauche
• êSubwoofer (extr me-grave)

22
En/Fr
Setting Up3 Configuration
4 Use the 5 and ∞ buttons to adjust the
level of a speaker as the test tone plays.
Lch OdB
Lch + 3dB
For best results, sit in your main listening position when
doing this. You can adjust each speaker in the range of
+/-10dB.
5 When you're done, press TEST TONE to
turn off the test tone.
Setting the TV System
(Except US model)
The default setting of this player is AUTO, and unless
you notice that the picture is distorted when playing
some discs, you should leave it set to AUTO.
If you experience picture distortion with some discs, set
the TV system to match your country or region.
When set to , PAL encoded DVD discs are outputNTSC
as is.
1 Make sure that the system is in standby.
2 Press SYSTEM MENU.
3 Press 2 or 3 repeatedly until you see
VIDEO SELECT appear in the display.
4 Press ENTER.
5 Use to select the video system.5 or ∞
Switch between AUTO, PAL and NTSC.
6 Press ENTER.
4 Utilisez les touches 5 et ∞ pour ajuster le
niveau d’une enceinte pendant la lecture
du test de tonalité.
Lch OdB
Lch + 3dB
Pour obtenir de meilleurs r sultats, asseyez-vous voé à
principale position d coute au m me moment. Vous’é ê
pouvez ajuster chaque enceinte dans la portée de
+/-10dB.
5 Après quoi, appuyez sur TEST TONE pour
éteindre le test de tonalité.
Réglage du système du téléviseur
(Sauf le modèle nord-américain)
Le r glage par d faut de ce lecteur est é é AUTO, et moinsà
que vous remarquiez que l image est d la’ é é àform e
lecture de certains disques, vous devriez le laisser au
r glage é AUTO.
Si vous constatez une d formation de l image avecé ’
certains disques, r glez le syst me du t viseur pouré è é él
qu gion.’il corresponde à votre pays ou votre ré
Remarque
Au r , les disques DVD cod s PAL sonté àglage NTSC é
fournis tels quels.
1 Vérifiez que le système est en attente.
2 Appuyez sur SYSTEM MENU.
3 Appuyez à plusieur reprises sur 2 ou 3
jusqu’à ce que vous voyiez apparaître
VIDEO SELECT sur l’affichage.
4 Appuyez sur ENTER.
5 Utilisez pour sélectionner le5 ou ∞
système vidéo.
Commutez entre AUTO, PA L et NTSC.
6 Appuyez sur ENTER.

23
En/Fr
3Setting Up Configuration
English Fran aisç
Using the setup navigator
Before playing any discs, we strongly
recommend using the Setup Navigator.
This makes some basic DVD system
settings for you.
1 Press STANDBY/ON to
switch on.
Also turn on your TV and make sure
that it is set to the correct video input.
• If a disc already loaded starts
playing, press 7 to stop it.
2 Press DVD SETUP.
The Setup Navigator on-screen display
(OSD) appears:
GeneralV2 LanguageAudio Video1
SETUP
ExitMove
ENTER
Select
Setup Navigator
Setup Navigator
Auto Start Off
Start
Setup using the Setup Navigator
Navigate all of the following OSDs
using these controls:
5 ∞, – cursor up/down
ENTER – select the highlighted
menu option
2 – go back to the previous question
The control possibilities for the current
OSD are shown at the bottom of each
screen.
STANDBY
/ON
ENTER
SETUP DVD
5
∞
2
7
Utilisation du Setup
Navigator
Avant de lire tous les disques, nous
recommandons fortement l’utilisation
du Setup Navigator. Celui-ci fait
certains r glages de base de la cha neé î
DVD.
1 Appuyez sur STANDBY/ON
pour allumer.
Allumez légalement votre té éviseur et
v gl oérifiez qu’il est ré é à la sortie vidé
correcte.
• ’ é àSi la lecture d un disque d j
chargé commence, appuyez sur 7
pour l’ êarr ter.
2 Appuyez sur DVD SETUP.
L’ à ’éaffichage l cran (OSD) du Setup
Navigator appara t :î
GeneralV2 LanguageAudio Video1
SETUP
ExitMove
ENTER
Select
Setup Navigator
Setup Navigator
Auto Start Off
Start
Setup using the Setup Navigator
Naviguez sur tous les OSD suivants en
utilisant ces commandes :
5 ∞, – curseur en haut/en bas
ENTER – é ’ s lectionne l option en
surbrillance du menu
2 rieure– retourne à la question anté
Les possibilit s de commande pouré
l’OSD actuel sont montrées sur la
partie inf rieure de lé ’écran.

24
En/Fr
Setting Up3 Configuration
3 Select ‘Start’.
•Press ENTER to select the highlighted option.
• ’If you decide you don t want to use the Setup
Navigator, select Auto Start Off here instead.
4 Choose an OSD menu language.
SETUP ExitMove ENTER Select
Setup Navigator
Select the On Screen Language
OSD Language
Espa olñ
fran aisç
English
Language
Deutsch
Italiano
GeneralV2 LanguageAudio Video1
•The language options shown in the on-screen
display illustrations on the following pages may not
correspond to those available in your country or region.
5 Select the type of TV you have.
SETUP ExitMove ENTER Select
Setup Navigator
Widescreen TV
16:9 aspect ratio
TV Type
Standard (4:3)
Widescreen (16:9)
TV Connection
General
V2 Language
Audio Video1
• ’See in the glossary on page 93 if youAspect ratio re
unsure of the difference between widescreen and
standard TVs.
6 Confirm all the settings.
SETUP ExitMove ENTER Select
Setup Navigator
Changes are saved
Exit Setup Navigator
Start Again
Delete Changes
Save Changes
GeneralV2 LanguageAudio Video1
Congratulations, you ve set up your system!’
If you want to use the Setup Navigator again at any
time, it is available from the General menu. Also,
each individual setting can be changed using the
appropriate menu option chapter 10 explains all—
menu options in detail.
3 Sélectionnez “ Start ”.
•Appuyez sur ENTER pour sé ’lectionner l option en
surbrillance.
• éSi vous d cidez que vous ne souhaitez pas utiliser le
Setup Navigator, s lectionnez éAuto Start Off laà
place.
4 Choisissez une langue pour le menu OSD.
SETUP ExitMove ENTER Select
Setup Navigator
Select the On Screen Language
OSD Language
Espa olñ
fran aisç
English
Language
Deutsch
Italiano
GeneralV2 LanguageAudio Video1
Remarque
• éLes options de langue montr es dans les illustrations
de l cran sur les pages suivantes peuvent’ à ’éaffichage l
ne pas correspondre celles disponibles dans votre paysà
ou votre r gion.é
5 Sélectionnez le type de téléviseur dont
vous disposez.
SETUP ExitMove ENTER Select
Setup Navigator
Widescreen TV
16:9 aspect ratio
TV Type
Standard (4:3)
Widescreen (16:9)
TV Connection
GeneralV2 LanguageAudio Video1
•Voir dans le glossaire de la page 93 siAspect ratio
vous n tes pas s r de la diff rence entre un t’ê û é é é àl viseur
é é écran large et un t l viseur standard.
6 Confirmez tous les réglages.
SETUP ExitMove ENTER Select
Setup Navigator
Changes are saved
Exit Setup Navigator
Start Again
Delete Changes
Save Changes
GeneralV2 LanguageAudio Video1
F glélicitations, vous avez ré é votre chaîne !
Si vous souhaitez utiliser de nouveau le Setup Navigator
à ’ n importe quel moment, il est disponible depuis le
menu General (Gé é én ral). Aussi, chaque r glage
individuel peut tre modifi en utilisant lê é ’option
correcte du menu. Le chapitre 10 explique toutes les
options du menu en détails.

25
En/Fr
3Setting Up Configuration
English Français
Setting up the remote to
control your TV
You can set up the supplied remote to
control your TV.
1 Switch on your TV.
2 Find the name of the manu-
facturer of your TV in the
table on the following pages.
European model: See the code list
on the following page.
US model: See the code list on page
27.
Next to each manufacturer is one or
more three-digit codes. These tell the
remote what kind of TV you have.
• If the name of the manufacturer of
your TV does not appear in the table,
you won’t be able to set up this remote
to control your TV.
3 Point the remote at your TV,
hold down the CLR button,
then enter the three digit
code for your TV.
The remote transmits an on/off signal
to the TV. If you’ve entered the correct
code, your TV should switch off.
If your TV doesn’t turn off, repeat the
procedure using the next code in the
list until your TV switches off.
CLR
1 2 3
4 5 6
7 8 9 10/0
POWER CH VOL
TV
INPUT
+
–
+
–
Configuration de la
télécommande pour
commander votre
téléviseur
Vous pouvez configurer la
télécommande fournie pour com-
mander votre téléviseur.
1 Allumez votre téléviseur.
2 Cherchez le nom du
fabricant de votre téléviseur
dans le tableau de la page
suivante.
Modèle européen : voir la liste
des codes à la page suivante.
Modèle nord-américain : voir
la liste des codes à la page 27.
A côté de chaque fabricant il y a un ou
plusieurs codes à trois chiffres. Ceci
indique à la télécommande de quel
type de téléviseur il s’agit.
• Si le nom du fabricant de votre
téléviseur n’apparaît pas dans le
tableau, vous ne pourrez pas
configurer cette télécommande pour
commander votre téléviseur.
3 Pointez la télécommande
vers votre téléviseur,
maintenez enfoncée la
touche CLR puis saisissez le
code à trois chiffres
correspondant à votre
téléviseur.
La télécommande transmet un signal
d’activation/désactivation au téléviseur.
Si vous avez saisi le code correct, votre
téléviseur devrait s’éteindre.
Si votre téléviseur ne s’éteint pas,
répétez la procédure en utilisant le
code suivant de la liste jusqu’à ce que
votre téléviseur s’éteigne.

27
En/Fr
3Setting Up Configuration
Manufacturer Code(s)
Fabricant Code(s)
ADMIRAL 112 124 126
AIWA 138 142 143
AKAI 104
AOC 105
BELL&HOWEL 124 126 178
BROKSONIC 104 105 180 144
CENTURION 105
CIS HOTEL 199
CORONAD 164
CRAIG 109 110 108
CROSLEY 115
CURTIS MAT 104 107 110
DAEWOO 106 104 135 196
EMERSON 109 108 110 104 120 133 134 180
FISHER 111
FUJITSU 139 156 157 160
FUNAI 136 137 140 141 155 146 147
GE 112 101 104 132
GOLDSTAR 104 105 165
HITACHI 113 104 183
INTEQ 126 127
JC PENNY 104 112
JVC 114 158 159 167 184
KTV 104 110 166
LXI 112 104 115 111 107 105
MAGNASONIC 178
MAGNAVOX 115 105 104 116 129 168
MARANTZ 117
MEMOREX 178
MGA 104 105
Manufacturer Code(s)
Fabricant Code(s)
MITSUBISHI 117 104 105 124 172
MTC 101 103
NATIONAL 100 101 102 151
NEC 104 105
ORION 128
PANASONIC 100 101 102 151 193
PHILCO 115 104
PHILIPS 115
PIONEER 118 101 107
PORTLAND 104
PRISM 101
PROSCAN 112 104 121 119 122 185
QUASAR 101 103
RADIOSHACK 112 105 117 110
RCA 112 104 121 119 122 130 131 161
162 163 132 169 186
SAMSUNG 123 105 104 170
SANYO 111 149 152 153 154 197
SCOTT 110 105
SEARS 107 112 104 115 111 105
SHARP 124 120 150 187
SIGNATURE 124 126
SONY 125 192 188
SYLVANIA 115 105 104
SYMPHONIC 110 171
TECHNICS 100
TOSHIBA 107 124 189
VIDTECH 113 104 105
WARDS 104 120 105
ZENITH 126 127 190 144
(US code list) (Liste des codes nord-américains)

28
En/Fr
Getting Started4 Mise en service
Playing DVDs, CDs and
Video CDs
The basic controls for playing discs are
covered here. Further functions are
detailed in the next chapter.
1 Press STANDBY/ON
(remote or front panel) to
turn on the system.
2 Press DVD/CD.
3 Touch the OPEN/CLOSE 0
sensor (front panel only) to
open the disc tray.
4 Load a disc.
Load a disc with the label side facing
up, using the disc tray guide to align
the disc (if you’re loading a double-
sided DVD disc, load it with the side you
want to play face down).
5 Press 6 to start playback
of the disc just loaded.
On the front panel, touch the 6
touch-sensor to start playback.
• If you’re playing a DVD or Video CD,
a menu may appear. See pages 30–31
for how to navigate these.
STANDBY
/ON CD
1 2 3
4 5 6
>10
7 8 9 10/0
DVD
DIRECT PLAY 3
e E STEP/SLOW
6 7
1 ¡ 4 ¢
MENU
ENTER
TOP MENU
RETURN
5
∞
32
SHIFT
Lecture de DVD, de CD et
de Video CD
Les commandes de base pour la lecture
de disques sont décrites ici. Des
fonctions plus complètes sont détaillées
dans le chapitre suivant.
1 Appuyez sur STANDBY/ON
(télécommande ou panneau
avant) pour allumer la
chaîne.
2 Appuyez sur DVD/CD.
3 Appuyez sur la touche sen-
sible OPEN/CLOSE 0
(uniquement panneau avant)
pour ouvrir le plateau à
disques.
4 Chargez un disque.
Chargez un disque avec l’étiquette
dirigée vers le haut, en utilisant le
cercle interne du plateau à disques pour
aligner le disque (si vous chargez un
disque DVD à face double, chargez-le
avec la face à lire vers le bas).
5 Appuyez sur 6 pour
démarrer la lecture du disque
que vous venez de charger.
Sur le panneau avant, appuyez sur la
touche sensible pour démarrer la6
lecture.
• Si vous lisez un DVD ou un
Video CD, un menu peut apparaître.
Voir pags 30–31 pour comment
naviguer dessus.

29
En/Fr
4Getting Started Mise en service
English Français
Basic playback controls
Button What it does
6Starts playback or pauses a disc that’s
playing (press again to restart playback).
DVD and Video CD only: Resumes playback
of a stopped disc.
7Stops playback. DVD and Video CD only:
Display shows
RESUME
(press 6 to start
playback again from the last place stopped).
11. Press & hold for fast reverse scanning.
Release to resume normal playback.
2. Press once to start reverse scanning.
Press again to increase the scan speed. (CD
and Video CD have two scan speeds; DVD
has three.) Press 6 to resume normal
playback.
¡1. Press & hold for fast forward scanning.
Release to resume normal playback.
2. Press once to start forward scanning.
Press again to increase the scan speed. (CD
and Video CD have two scan speeds; DVD
has three.) Press 6 to resume normal
playback.
4Skips to the start of the current track or
chapter, then to previous tracks/chapters.
¢Skips to the next track or chapter.
Numbers If the disc is stopped, playback starts from
the selected track or title number. If the disc
is playing, playback jumps to the start of the
selected track or chapter number.
>10 Selects tracks/titles/chapters 11 and over.
(For example, for 24, press >10 2 4 , , .)
Commandes de base de lecture
Touche Fonction
6Démarre la lecture ou met en pause un
disque en cours de lecture (appuyez de
nouveau pour reprendre la lecture).
Uniquement DVD et Video CD : Reprend la
lecture d’un disque arrêté.
7Arrête la lecture. Uniquement DVD et Video
CD : l’afficheur montre
RESUME
(appuyez sur
6 pour démarrer de nouveau la lecture à
partir de l’emplacement du dernier arrêt).
11. Appuyez et maintenez enfoncé pour un
scannage recul rapide. Relâchez pour
reprendre la lecture normale.
2. Appuyez une fois pour démarrer le
scannage recul. Appuyez de nouveau pour
augmenter la vitesse de scannage. (Les CD
et les Video CD ont deux vitesses de
scannage ; les DVD en ont trois.) Appuyez
sur 6 pour reprendre la lecture normale.
¡1. Appuyez et maintenez enfoncé pour un
scannage avance rapide. Relâchez pour
reprendre la lecture normale.
2. Appuyez une fois pour démarrer le
scannage avance. Appuyez de nouveau pour
augmenter la vitesse de scannage. (Les CD
et les Video CD ont deux vitesses de
scannage ; les DVD en ont trois.) Appuyez
sur 6 pour reprendre la lecture normale.
4Saute au début de la piste ou du chapitre
actuel, puis aux pistes/chapitres antérieurs.
¢Saute à la piste ou au chapitre suivant.
Numéros Si le disque est arrêté, la lecture démarre à
partir du numéro de la piste ou du titre
sélectionné. Si le disque est en lecture,
celle-ci saute au début du numéro de la
piste ou du chapitre sélectionné.
>10 Sélectionne des pistes/titres/chapitres 11 et
supérieurs. (Par exemple, pour 24, appuyez
sur >10, 2 4, .)
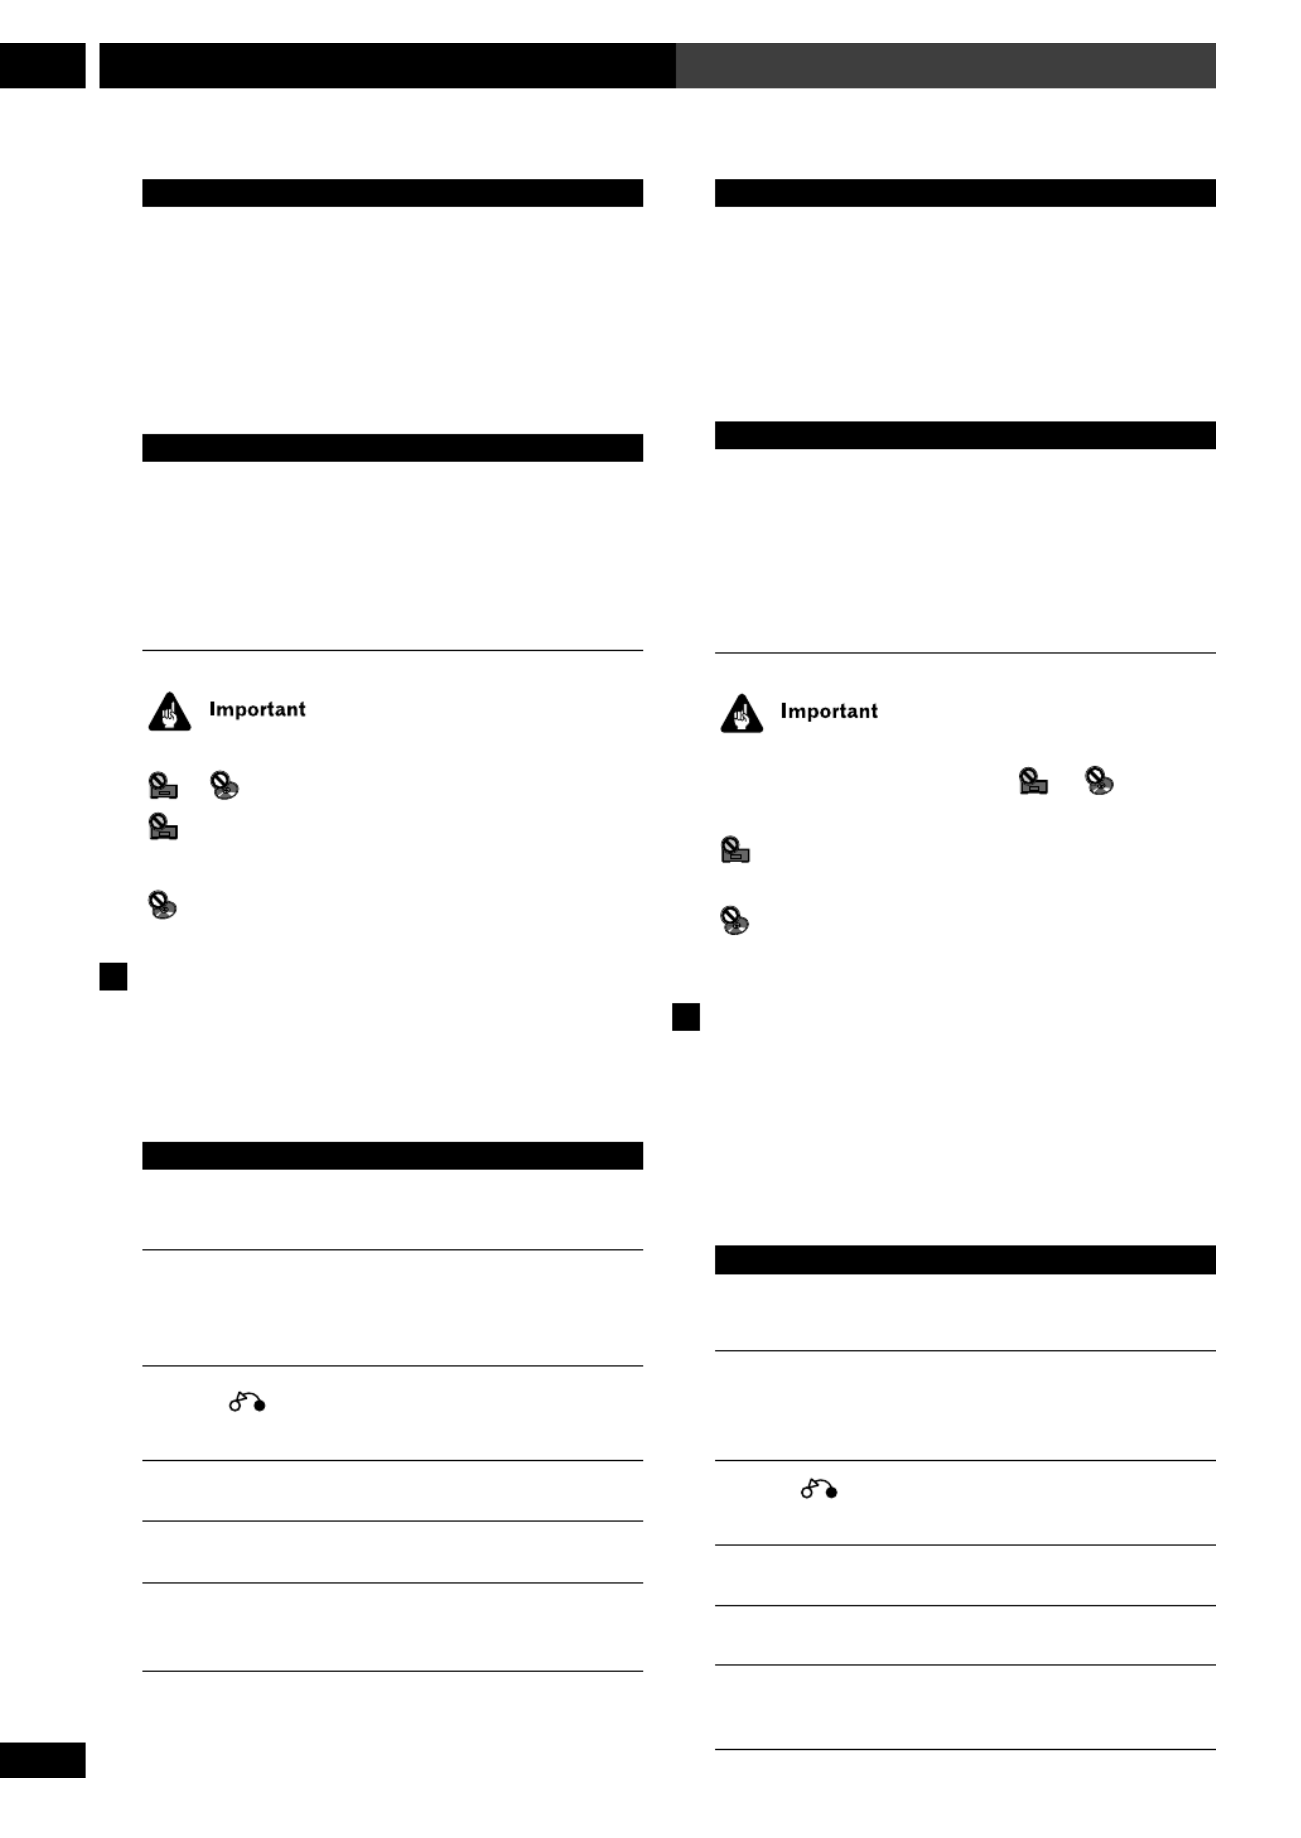
30
En/Fr
Getting Started4 Mise en service
DVD and Video CD only:
E (SHIFT ) ¡1. Press to start slow-motion forward
scanning. Press again to change the
scanning speed (
1
/ 16 =
1
/ 8=
1
/ 4=
1
/ ).2
2. When playing, press once to pause;
advance a single frame with each subse-
quent press.
DVD only:
e (SHIFT ) 11. Press to start slow-motion reverse
scanning. Press again to switch between
SLOW 1 SLOW 2 and scanning speed.
2. When playing, press once to pause;
reverse a single frame with each subsequent
press.
While using the DVD playback controls, you may see the
or mark displayed on-screen.
means that the operation is not allowed by the
system.
means that the operation is not allowed by the disc.
Navigating DVD disc menus
Many DVD discs contain menus. Sometimes these are
displayed automatically when you start playback; others
only appear when you press MENU MENU or TOP .
Button What it does
TOP MENU Displays the ‘top menu’ of a DVD disc—
this varies with the disc.
MENU Displays a DVD disc menu—this varies with
the disc and may be the same as the ‘top
menu’.
RETURN Returns to the previously displayed menu
screen.
5 ∞ 2 3 Moves the cursor around the screen
ENTER Selects the current menu option
Numbers Selects a numbered menu option (some
discs only)
Uniquement DVD et Video CD :
E (SHIFT ) ¡1. Appuyez pour démarrer le scannage
avance ralenti. Appuyez de nouveau pour
changer la vitesse de scannage (
1
/ 16 =
1
/8
=
1
/ 4=
1
/ ).2
2. A la lecture, appuyez une fois pour
mettre en pause; avancez d’une seule image
avec chaque pression consécutive.
Uniquement DVD :
e (SHIFT ) 11. Appuyez pour démarrer le scannage recul
en ralenti. Appuyez de nouveau pour
commuter entre la vitesse de scannage
SLOW 1 et SLOW 2.
2. A la lecture, appuyez une fois pour
mettre en pause; reculez d’une seule image
avec chaque pression consécutive.
Pendant l utilisation des commandes de lecture pour le’
DVD, vous pouvez voir la marque ou affiché àe
l cran.’é
signifie que l ration n est pas autoris e par la’ éop ’ é
cha ne.î
signifie que l ration n est pas autoris e par le’ éop ’ é
disque.
Comment naviguer sur les menus des
disques DVD
Beaucoup de disques DVD contiennent des menus.
Parfois ils sont automatiquement affich s quand vousé
démarrez la lecture ; d’autres ils n’apparaissent que si
vous appuyez sur MENU MENU ou TOP .
Touche Fonction
TOP MENU Affiche le “ menu supérieur” d’un disque
DVD. Ceci varie avec le disque.
MENU Affiche un menu de disque. Ceci varie avec
le disque et peut être le même que le
“ menu supérieur ”.
RETURN Retourne à l’écran du menu affiché
précédemment.
5 ∞ 2 3 Déplace le curseur autour de l’écran.
ENTER Sélectionne l’option du menu actuel.
Numéros Sélectionne une option numérotée du menu
(uniquement certains disques).

31
En/Fr
4Getting Started Mise en service
English Fran aisç
Navigating Video CD PBC menus
Some Video CDs have menus from which you can
choose what you want to watch. These are called PBC
(Playback control) menus.
You can play a PBC Video CD without having to
navigate the PBC menu by starting playback using a
number button to select a track, rather than the 6
button.
Button What it does
RETURN Displays the PBC menu.
Numbers Selects a numbered menu option.
4Displays the previous menu page (if there is
one).
¢Displays the next menu page (if there is
one).
6Press to select an item from a PBC menu.
Comment naviguer sur les menus PBC
de Video CD
Certains Video CD disposent de menus partir desqueà
vous pouvez choisir ce que vous souhaitez voir. On les
appelle menus PBC (Playback control Commande de–
lecture).
Vous pouvez lire un Video CD avec PBC sans devoir
naviguer sur le menu PBC en d marrant la lecture é à
l rot’aide d’une touche numé ée pour sélectionner une
piste, au lieu de la touche 6.
Touche Fonction
RETURN Affiche le menu PBC.
Numéros Sélectionne une option numérotée du
menu.
4Affiche la page précédente du menu (s’il y
en a une).
¢Affiche la page suivante du menu (s’il y en a
une).
6Appuyez pour sélectionner un item du menu
PBC.

32
En/Fr
Getting Started4 Mise en service
Listening to the radio
The following steps show you how to
tune in to FM and AM radio broadcasts
using the automatic, manual and
high-speed tuning functions. Once you
are tuned to a station you can
memorize the frequency for recall
later see on— Saving station presets
the following page for how to do this.
1 Press TUNER FM/AM to
select the tuner.
Press repeatedly to switch between FM
and AM bands.
FM 87.5OMHz
AM 531kHz
2 Tune to a station.
There are three ways to do this:
• Automatic tuning
To search for stations in the currently
selected band, press and hold either the
1 ¡ or button for about a
second. The system will start searching
for the next station, stopping when it
has found one. Repeat this step to
search for other stations.
• Manual tuning
To change the frequency one step at a
time, press the 1 or ¡ buttons.
• High-speed tuning
Press and hold the or button1 ¡
for high speed tuning, releasing the
button once you reach the frequency
you want.
• ’It s also possible to use the 5 and
∞ buttons for tuning.
TUNER
CLR
DIRECT PLAY 3
FM/AM
ENTER
5
∞
32
SYSTEM
DISP
CHARACTER
MENU
1 ¡
Station naming buttons
Pour écouter la radio
Les op rations suivantes vous indiquenté
comment accorder des missions deé
radio FM et AM en utilisant les
fonctions d accord automatique,’
d’accord manuel et d’accord haute
vitesse. Une fois qu une station est’
accordée vous pouvez mémoriser la
fréquence pour la rappeler plus tard.
Voir Mémorisation de station
préréglées à la page suivante pour les
détails.
1 Appuyez sur TUNER FM/AM
pour sélectionner le tuner.
Appuyez plusieurs fois pour passer
parmi les bandes FM et AM.
FM 87.5OMHz
AM 531kHz
2 Accordez une station.
Il y a trois mani res de faire :è
• Accord automatique
Pour rechercher des stations dans la
bande actuellement sé électionn e,
appuyez et maintenez enfonc e soit laé
touche 1 soit ¡ pendant environ
un seconde. L’ àappareil se mettra
rechercher la station suivante,
s arr’ êtant quand il en a trouvée une.
R pé étez cette opération pour rechercher
d’autres stations.
• Accord manuel
Pour changer de fr quence un pas é à la
fois, appuyez sur les touches 1 ou
¡.
• Accord haute vitesse
Appuyez et maintenez enfonc e laé
touche 1 ou ¡ pour accorder à
haute vitesse, en rel chant la toucheâ
une fois que vous avez atteint la
fr e.équence souhaité
• é ’Il est galement possible d utiliser
les touches et pour accorder.5 ∞
Touches pour nommer des
stations
GHI JKL
PQRS TUV WXYZ
MNO
ABC DEF
1 2 3
4 5 6
7 8 9 10/0
< > ! "
# $ % & '
() * + , – .
/:; < = > ?
@ _ \
espace
space

33
En/Fr
4Getting Started Mise en service
English Fran aisç
Improving FM stereo sound
If you re listening to a stereo FM broadcast, but find that’
there is a lot of noise because of a weak signal, try
switching to mono.
1 Press SYSTEM MENU and select TUNER
MENU.
TUNER MENU
•Change menu options using the 2 3 and buttons.
Press ENTER to select the currently displayed option.
2 Select FM AUTO/MONO from the tuner
menu.
FM AUTO/MONO
•Change menu options using the 2 3 and buttons.
Press ENTER to select the currently displayed option.
3 Select FM AUTO or FM MONO.
•Change menu options using the 5 ∞ and buttons.
Press ENTER to select the currently displayed option.
When listening in mono, the indicator lights in the
display.
Saving station presets
If you often listen to a particular radio station, it's
convenient to have the receiver store the frequency for
easy recall whenever you want to listen to that station.
This saves the effort of manually tuning in each time.
This system can save up to 30 station presets. When
saving FM frequencies, the receiver also saves the mono
setting (see above).
1 Tune to a station you want to memorize.
See Listening to the radio on the previous page for
more on how to do this.
Comment améliorer le son FM stéréo
Si vous coutez une mission FM st r o, mais vousé é é é
trouvez qu il y a trop de parasites cause du signal qui’ à
est faible, essayez de passer en mono.
1 Appuyez sur SYSTEM MENU et
sélectionnez TUNER MENU.
TUNER MENU
•Changez les options du menu en utilisant les touches
2 3 et . Appuyez sur ENTER pour s lectionner lé ’option
actuellement affichée.
2 Sélectionnez FM AUTO/MONO sur le
menu du tuner.
FM AUTO/MONO
•Changez les options du menu en utilisant les touches
2 3 et . Appuyez sur ENTER pour s lectionner lé ’option
actuellement affichée.
3 Sélectionnez FM AUTO ou FM AUTO.
•Changez les options du menu en utilisant les touches
5 ∞ et . Appuyez sur ENTER pour sé ’lectionner l option
actuellement affichée.
À ’é ’ l coute en mono, l indicateur [ ] s allume sur’
l’affichage.
Mémorisation de station préréglées
Si vous coutez souvent une station de radio ené
particulier, il est commode de m moriser la fré équence
pour la rappeler plus facilement chaque fois que vousà
souhaitez viteécouter cette station. Ceci vous é
d’accorder manuellement à chaque fois. Cet appareil
peut m moriser jusqu 30 stations pr es. Ené ’à é é ér gl
m moriseémorisant des fréquences FM, le récepteur mé
é également le r glage mono (voir ci-dessus).
1 Accordez une station que vous souhaitez
mémoriser.
Voir Pour écouter la radio à la page antérieure pour les
détails.

34
En/Fr
Getting Started4 Mise en service
2 Press SYSTEM MENU and select TUNER
MENU.
TUNER MENU
•Change menu options using the 2 3 and buttons.
Press ENTER to select the currently displayed option.
3 Select STA. MEMORY from the tuner
menu.
STA. MEMORY
•Change menu options using the 2 3 and buttons.
Press ENTER to select the currently displayed option.
4 Press or 5 ∞ to select a station preset
number.
ST 1 FM 87.5O
ST 3 FM 87.5O
5 Press ENTER to save the station preset.
Repeat these steps to save up to 30 station presets.
Listening to station presets
Having saved up to 30 station presets (see above), you
can be listening to a station with a couple of button
presses.
1 Press TUNER FM/AM to switch to the
tuner.
2 Use the or the buttons4 / ¢ 2 / 3
to select the station preset you want to
listen to.
Alternatively, use the number buttons (use the >10
button for numbers over 10).
•If the system is left disconnected from the AC power
outlet for a lengthy period, the station presets will be lost
and will have to be reprogrammed.
2 Appuyez sur SYSTEM MENU et
sélectionnez TUNER MENU.
TUNER MENU
•Changez les options du menu en utilisant les touches
2 3 et . Appuyez sur ENTER pour s lectionner lé ’option
actuellement affichée.
3 Sélectionnez STA. MEMORY sur le menu
du tuner.
STA. MEMORY
•Changez les options du menu en utilisant les touches
2 3 et . Appuyez sur ENTER pour s lectionner lé ’option
actuellement affichée.
4 Appuyez sur ou pour sélectionner un5 ∞
numéro de station préréglée.
ST 1 FM 87.5O
ST 3 FM 87.5O
5 Appuyez sur ENTER pour mémoriser la
station préréglée.
R pé étez cette opération pour mémoriser jusqu’à 30
stations pré é ér gl es.
Pour écouter des stations préréglées
En ayant m s jusqu 30 stations pr es (voiré émoris ’à é é ér gl
ci-dessus), vous pouvez couter une station en appuyanté
sur deux touches.
1 Appuyez sur TUNER FM/AM pour passer
au tuner.
2 Utilisez les touches ou 4 / ¢ 2 / 3
pour sélectionner la station préréglée que
vous souhaitez écouter.
Alternativement, utilisez les touches numé érot es
(utilisez la touche >10 pour des numé é àros sup rieurs
10).
• ’ é éSi vous laissez l appareil d branch de la prise
d’alimentation secteur pendant une longue période de
temps, vous perdrez les stations pr es et vous devrezé é ér gl
les programmer de nouveau.

36
En/Fr
Getting Started4 Mise en service
Tuner system displays
• Press SYSTEM DISP to change the infor-
mation shown in the display.
FM 87.5OMHz
R T
P S
PTY
PTY SEARCH
7:36 am
Frequency
Radio Text
Program Service
name
Program Type
Program Type
search
Time
RDS model in FM band onl
y
(RDS displays are available on European model only)
Playing other connected
components
You may have connected various other components to
your system using the analog or digital auxiliary inputs.
1 Press VIDEO V1/V2/V3 to select an
auxiliary input.
2 For inputs V1 and V2* only: Press SYSTEM
MENU and select INPUT SEL.
• Change menu options using the 2 3 and buttons.
Press ENTER to select the currently displayed option.
* European model only
3 Use the or button to select an5 ∞
auxiliary input.
•AUX ANALOG
•AUX DIGITAL
4 Press ENTER.
Affichages du système du tuner
• Appuyez sur SYSTEM DISP pour changer
l’information montrée sur l’affichage.
FM 87.5OMHz
R T
P S
PTY
PTY SEARCH
7:36 am
Fréquence
Texte radio
Nom du service
de programme
Type de programme
Recherche du type
de programme
Heure
Modèle du RDS uni
q
uement sur la bande FM
(Les affichages de RDS sont uniquement disponibles
sur le modèle européen)
Lecture d’autres composants
raccordés
Il se peut que vous ayiez plusieurs autres composants
raccord s esé à votre appareil à l’aide des entré
analogiques ou num riques auxiliaires.é
1 Appuyez sur VIDEO V1/V2/V3 pour
sélectionner une entrée auxiliaire.
2 Uniquement pour les entrées V1 et V2* :
appuyez sur SYSTEM MENU et
sélectionnez INPUT SEL.
• Changez les options du menu en utilisant les touch
2 3 et . Apppuyez sur ENTER pour s lectionneré
l e.’option actuellement affiché
* Mod le europ en seulementè é
3 Utilisez les touches 5 ou pour∞
sélectionner une entrée auxiliaire.
•AUX ANALOG
•AUX DIGITAL
4 Appuyez sur ENTER.

37
En/Fr
4Getting Started Mise en service
English Fran aisç
STANDBY
/ON
V1/V2/V3
VIDEO
DIRECT PLAY 3
MD TAPE
ENTER 32
SYSTEM
MENU
5
∞
• For detailed instructions on using
the optional MD or tape deck, see the
included operating instructions.
• For more on controlling your TV
using this remote control, see page 26.
Reducing the auxiliary
input level
If a component you connected to an
analog input causes the sound to
distort, the input level is probably too
high. You can reduce it by turning on
the video input attenuator.
1 Switch the system into
standby.
2 Press SYSTEM MENU and
select VIDEO ATT.
• Change menu options using the 2
and 3 buttons. Press ENTER to select
the currently displayed option.
3 Use the 2 or 3 button to
select VIDEO 1, 2 or 3 ATT,
then press ENTER.
4 Select ATT ON or ATT OFF
as required.
• Change menu options using the 5
and ∞ buttons. Press ENTER to select
the currently displayed option.
Remarque
• é éPour les instructions d taill es
d’utilisation de la platine MD ou la
platine cassette en option, voir le mode
d’emploi qui est inclus.
• Pour en savoir plus sur la
commande de votre t viseur ené él
utilisant la t commande, voir pageé él
26.
Réduction du niveau
d’entrée auxiliaire
Si un composant raccord aux entré ées
analogiques provoque une déformation
du son, le niveau d e est’ éentr
probablement trop . Vous pouvez leé élev
r attéduire en activant l’ énuateur de
l entr o.’ ée vidé
1 Mettez l’appareil en attente.
2 Appuyez sur SYSTEM MENU
et sélectionnez VIDEO ATT.
• Changez les options du menu en
utilisant les touches . Appuyez2 et 3
sur ENTER pour s lectionner lé ’option
actuellement affichée.
3 Utilisez la touche 2 ou 3
pour sélectionner VIDEO 1, 2
ou 3 ATT, puis appuyez sur
ENTER.
4 Sélectionnez ATT ON ou ATT
OFF selon le cas.
• Changez les options du menu en
utilisant les touches . Appuyez5 et ∞
sur ENTER pour s lectionner lé ’option
actuellement affichée.

38
En/Fr
Using Sound Modes and Effects
5
Utilisation des modes de son et des effets
Using the Sound menu
This menu gives you access to various amplifier sound
settings:
The bass and treble settings have no effect when using
the DSP modes, or when the Surround mode is set to
anything other than STANDARD SURROUND or
OFF.
1 Press SOUND.
2 Use the 2 or 3 buttons to select an
option from the Sound menu.
•
BASS O
Adjusts the level of bass.
•
TREBLE O
Adjusts the amount of treble.
•
EFFECT 7O
Adjusts the amount of Advanced Theater or DSP effect
(not available on all effects).
•
P.BASS ON
Switches extra bass boost on or off.
•
MIDNIGHT ON
Switches the low-level listening mode on or off.
3 Use the 5 and ∞ buttons to adjust the
currently selected option.
You can see the current setting in the display.
4 Press ENTER to set the level and exit the
Sound menu.
• If you don’t press ENTER, the Sound menu is exited
anyway after about 5 seconds.
Utilisation du menu
Sound
Ce menu vous offre l’accès à plusieurs réglages
d’amplification sonore :
Remarque
Les réglages des graves et des aigus sont sans effet à
l’utilisation des modes DSP, ou quand le réglage du
mode surround est autre que STANDARD ou SUR-
ROUND OFF .
1 Appuyez sur SOUND.
2 Utilisez les touches pour2 ou 3
sélectionner un option sur le menu
Sound.
•
BASS O
Règle le niveau des graves.
•
TREBLE O
Règle la quantité d’aigus.
•
EFFECT 7O
Règle la quantité de l’effet Advanced Theater ou DSP
(n’est pas disponible sur tous les effets).
•
P.BASS ON
Active ou désactive l’amplification supplémentaire d
graves.
•
MIDNIGHT ON
Active ou désactive le mode d’écoute à bas niveau.
3 Utilisez les touches pour régler5 et ∞
l’option actuellement sélectionnée.
Vous pouvez voir le réglage actuel sur l’affichage.
4 Appuyez sur ENTER pour régler le niveau
et quitter le menu Sound.
• Si vous n’appuyez pas sur ENTER, le menu Sound
est quitté de toute manière au bout de 5 secondes
environ.

39
En/Fr
5
Using Sound Modes and Effects
Utilisation des modes de son et des effets
English Français
Using sound modes
This system offers several ways to enjoy surround sound
and stereo sources. When playing Dolby Digital, Dolby
Surround, Dolby Pro-Logic or DTS sources, we recom-
mend using the surround mode to ensure proper
surround sound. From the surround mode you can
choose one of the Advanced Theater effects to add room-
type effects to the source.
If you want to add room-type effects to stereo sources, we
recommend using the DSP effects. Like the Advanced
Theater effects, these add ambience to the source to
simulate different spaces, such as a concert hall or a
club.
Playing Dolby/DTS sources
Switch on the surround mode when you play a Dolby
Surround, Dolby Digital or DTS source. Use the
Advanced Theater effects to add room effects to the
surround sound.
The surround mode cannot be used with 96kHz/24-bit
sources, or in combination with DSP effects.
1 Press SURROUND repeatedly to select a
surround mode.
The display shows the current surround mode.
•
AUTO
For digital sources, decoding is automatically selected
according to the source: Dolby Digital, DTS, Dolby Pro
Logic, 2-channel stereo, etc. No extra effects are added to
the source. Analog sources are played in the same way as
the Surround Off setting.
Utilisation de modes de son
Cet appareil vous offre plusieurs mani res de profiter dè
sources sonores surround et st o. A la lecture deé ér
sources Dolby Digital, Dolby Surround, Dolby Pro Lo
ou DTS, nous vous recommandons l'utilisation du
mode surround pour garantir un son surround plus
approprié. A paritr du mode surround vous pouvez
choisir un des effets Advance Theater pour ajouter des
effets spatiaux la source.à
Si vous souhaitez ajouter des effets spatiaux aux sourc
st ré éo, nous vous recommandons l’utilisation des effet
DSP. Ainsi que les effets Advanced Theater, ceux-là
ajoutent de l la source pour simuler des’ àambiance
espaces diff rents, tels qué ’une salle de concert ou un
club.
Lecture de sources Dolby/DTS
Activez le mode surround pendant la lecture d’une
source Dolby Surround, Dolby Digital ou DTS. Utilise
les effets Advanced Theater pour ajouter des effets
spatiaux au son surround.
Remarque
Le mode surround ne peut pas s utiliser avec des sourc’
de 96kHz/24 bits, ou en combinaison avec des effets D
1 Appuyez plusieurs fois sur SURROUND
pour sélectionner un mode surround.
L’affichage montre le mode surround actuel.
•
AUTO
Pour les sources num riques, le d codage esté é
automatiquement s en fonction de la source é électionn
Dolby Digital, DTS, Dolby Pro Logic, 2 canaux stà ér
etc. Aucun effet suppl est ajout la sourcémentaire n’ é à
Les sources analogiques sont lues de la m me maniê ère
qu glage ’avec le ré Surround Off.

40
En/Fr
Using Sound Modes and Effects
5
Utilisation des modes de son et des effets
•
STANDARD
As AUTO, except that 2-channel (analog or digital)
sources are processed using Dolby Pro Logic for
surround-sound effects.
•
MUSICAL
Concert hall sound.
•
DRAMA
Classic, mid-size movie theater sound.
•
ACTION
Large, modern movie theater sound.
•
VIRTUAL SURR.1
Virtual surround sound from just the main front stereo
speakers and the subwoofer. Use this mode if you can't
use the surround speakers.
•
VIRTUAL SURR.2
Virtual surround sound if you have connected the
surround speakers, but are using them in front of your
listening position.
•
REAR WIDE
Widens the rear channel soundstage.
•
SURROUND OFF
All sources are played through only the front left and
right speakers, and the subwoofer. No effects are added.
2 If necessary, adjust the effect level.
• Select EFFECT from the Sound menu and adjust
using the buttons. Press 5 and ∞ ENTER to set the
level.
EFFECT 7O
You can adjust the effect level in the range of 10 to 90 in
steps of 10.
•
STANDARD
Comme AUTO, sauf que les sources 2 canauxà
(analogiques ou num riques) sont trait es en utilisanté é
Dolby Pro Logic pour les effets de son surround.
•
MUSICAL
Son salle de concert.
•
DRAMA
Son classique de salle de th tre de taille moyenne.éâ
•
ACTION
Son ample de salle de th tre moderne.éâ
•
VIRTUAL SURR.1
Son surround virtuel provenant simplement des
enceintes avant st o et du subwoofer. Utilisez ce mé ér
si vous ne puvez pas utiliser les enceintes surround.
•
VIRTUAL SURR.2
Son surround virtuel si vous avez raccord les enceiné
surround, mais en les utilisant en face de votre positio
d’écoute.
•
REAR WIDE
Amplifie le degr sonore du canal arri re.é è
•
SURROUND OFF
Toutes les sources sont uniquement lues travers lesà
enceintes avant droite et gauche, et le subwoofer. Auc
effet n est ajout’ é.
2 Le cas échéant, réglez le niveau de l’effet.
• éS lectionnez EFFECT sur le menu Sound et faites“ ”
le r glage en utilisant les touches . Appuyez sué 5 et ∞
ENTER pour régler le niveau.
EFFECT 7O
Vous pouvez r gler le niveau de l effet dans une porté ’
de 10 90 par pas de 10.à

41
En/Fr
5
Using Sound Modes and Effects
Utilisation des modes de son et des effets
English Fran aisç
Playing other stereo sources with DSP
effects
You can add room effects to audio CDs and other stereo
sources using the DSP modes. Different effects work
better with different kinds of music, so don’t be afraid to
experiment a little.
• The DSP effects cannot be used with 96kHz/24-bit
sources, or in combination with a surround mode.
• When playing stereo sources with DSP effects
switched off, there is no sound from the surround and
center speakers.
1 Press DSP repeatedly to select a sound
mode.
The display shows the current DSP mode.
•
HALL1
Large, wood-paneled concert hall sound.
•
HALL2
Large, stone-walled concert hall sound.
•
JAZZ
Live jazz club sound.
•
DANCE
Nightclub sound.
•
THEATER1
Classic, mid-size movie theater sound.
•
THEATER2
Large, modern movie theater sound.
•
SIMUL.STEREO
Virtual stereo for mono sources.
2 If necessary, adjust the effect level.
• Select EFFECT from the Sound menu and adjust
using the buttons. Press 5 and ∞ ENTER to set the
level.
EFFECT 7O
You can adjust the effect level in the range of 10 to 90 in
steps of 10.
Lecture d’autres sources stéréo avec
des effets DSP
Vous pouvez ajouter des effets spatiaux aux CD audio
autres sources st o en utilisant les modes DSP.é ér
Différents effets fonctionnent mieux avec différents ty
de musique, n ayez donc aucune crainte d en faire un’ ’
peu l’ éexp rience.
Remarque
• ’Les effets DSP ne peuvent pas s utiliser avec des
sources de 96kHz/24 bits, ou en combinaison avec un
mode surround.
• é éA la lecture de sources st r o avec les effets DSP
d sactivé és, il n’y a pas de son provenant des enceintes
surround et centrale.
1 Appuyez plusieurs fois sur DSP pour
sélectionner un mode de son.
L’affichage montre le mode DSP actuel.
•
HALL1
Son ample, de salle de concert avec panneaux en bois.
•
HALL2
Son ample, de salle de concert avec murs en pierre.
•
JAZZ
Son de direct de club de jazz.
•
DANCE
Son de bo te de nuit.î
•
THEATER1
Son classique, de salle de th tre de taille moyenne.éâ
•
THEATER2
Son ample, de salle de th tre moderne.éâ
•
SIMUL.STEREO
Son st o virtuel pour sources mono.é ér
2 Le cas échéant, réglez le niveau de l’effet.
• éS lectionnez EFFECT sur le menu Sound et faites“ ”
le r glage en utilisant les touches . Appuyez suré 5 et ∞
ENTER pour régler le niveau.
EFFECT 7O
Vous pouvez r gler le niveau de l effet dans une porté ’ é
de 10 90 par pas de 10.à

42
En/Fr
Playing Discs6 Lecture de disques
Introduction
• Most of the functions covered in this chapter apply to
DVD discs, Video CDs and CDs, although the exact
operation of some varies slightly with the kind of disc
loaded.
• When playing DVD discs, if the or icon
appears on-screen when you try and use a particular
function, either the player or the disc doesn’t allow the
use of that function.
• When playing Video CDs, some of the functions are
not available in PBC mode. If you want to use them,
start the disc playing using a number button to select a
track.
Finding what you want on a disc
You can directly access any point on a disc using one of
the search modes. Use these search modes while a disc is
playing, or when it’s stopped—playback immediately
starts from the point specified.
1 Press SEARCH to choose between:
• Title search (DVD only)
• Chapter/Track search
• Time search (DVD and Video CD only)
• Folder search (MP3 only)
• Off
2 Enter the title/chapter/track number or
time (minutes & seconds).
For example, for title 4, press 4.
For chapter/track 12, press 1 , 2.
For 45 minutes into the disc,
press , , , .4 5 0 0
3 Press 6 to start/restart playback.
Introduction
• La plupart des fonctions décrites dans ce chapitre
font référence aux disques DVD, Video CD et CD, bi
que l’opération exacte de certains varie un peu avec l
type de disque chargé.
• A la lecture de disques DVD, si l’icône ou
apparaît à l’écran quand vous essayez d’utiliser une
fonction en particulier, soit le lecteur soit le disque ne
permet pas l’utilisation de cette fonction.
• A la lecture de Video CD, certaines fonctions ne so
pas valables dans le mode PBC. Si vous voulez les
utiliser, démarrez la lecture du disque en utilisant une
touche numérotée pour sélectionner une piste.
Comment trouver ce que vous
souhaitez sur un disque
Vous pouvez accéder directement à n’importe quel
emplacement sur le disque en utilisant un des modes
recherche. Utilisez ces modes de recherche pendant l
lecture d’un disque, ou pendant son arrêt. La lecture
démarre immédiatement à partir de l’emplacement
spécifié.
1 Appuyez sur SEARCH pour choisir parmi :
• Title search (Recherche de titre) (DVD seulement)
• Chapter/Track search (Recherche de chapitre/piste)
• Time search (Recherche de temps) (DVD et CD vi
seulement)
• Folder search (MP3 seulement)
• Off (désactivé)
2 Saisissez le numéro de titre/chapitre/
piste ou la durée (minutes et secondes).
Par exemple, pour le titre 4, appuyez sur 4.
Pour le chapitre/la piste 12, appuyez sur 1 2, .
Pour 45 minutes du disque, appuyez sur 4 5 0 0, , , .
3 Appuyez sur 6 pour démarrer/
redémarrer la lecture.

43
En/Fr
6Playing Discs Lecture de disques
English Français
Switching camera angles
Some DVD discs feature scenes shot from two or more
angles—check the disc box for details: it should be
marked with a icon if it contains multi-angle
scenes.
• To switch the camera angle, press ANGLE.
If the disc was paused, playback starts again with the
new angle.
• To hide the TV angle indicator, choose Angle
Indicator > Off from the Video 2 menu (see page
77).
Switching subtitles
Many DVD discs have subtitles in one or more lan-
guages the disc box will usually tell you which—
subtitle languages are available. You can switch subtitle
language anytime during playback.
• To display/switch the subtitle language,
press SUBTITLE repeatedly.
• To switch off subtitles, press SUBTITLE
then CLR.
• To set subtitle preferences, see page 78.
Switching audio language
When playing a DVD disc recorded with dialog in two or
more languages, you can switch audio language
anytime during playback.
• To display/switch the audio language,
press AUDIO repeatedly.
• To set audio language preferences, see page 77.
Comment changer les angles de
caméra
Certains disques DVD pr sentent des sc nes enregistré è é
sous deux ou plusieurs angles. V rifiez l tui pour lesé ’é
d tails : un ic ne é ô devrait tre marqu s il contientê é ’
des sc angles multiples.è ànes
• Pour changer l’angle de caméra, appuyez
sur ANGLE.
Si le disque tait en pause, la lecture d marre deé é
nouveau avec le nouvel angle.
• ’ ’ é éPour cacher l indicateur d angle du t l viseur,
choisissez Angle Indicator > Off à partir du menu
Video 2 (voir page 77).
Comment changer les sous-titres
Beaucoup de disques DVD ont des sous-titres dans un
ou plusieurs langues. En g ral l tui vous indiqueraé én ’é
les langues disponibles. Vous pouvez changer la langu
du sous-titre n importe quand pendant la lecture.’
• Pour afficher/changer la langue des sous-
titres, appuyez plusieurs fois sur SUB-
TITLE.
• Pour désactiver les sous-titres, appuyez
sur SUBTITLE puis sur CLR.
• é èPour r gler les param tres des sous-titres, voir la
page 78.
Comment changer la langue audio
A la lecture d un disque DVD enregistr avec des’ é
dialogues dans deux langues ou plus, vous pouvez
changer la langue audio n importe quand pendant la’
lecture.
• Pour montrer/changer la langue audio,
appuyez plusieurs fois sur AUDIO.
• é èPour r gler les param tres des langues audio, voir la
page 77.

44
En/Fr
Playing Discs6 Lecture de disques
Switching audio channels
For karaoke or similar format CDs and Video CDs, it’s
possible to select stereo, left channel only, or right
channel only.
• To change the playback channel, press
AUDIO.
Press repeatedly to switch between:
•L CH – Left channel only
•R CH – Right channel only
•STEREO
Making a program list
Making a program list means telling the player which
titles/chapters/tracks you want played, and the order to
play them in. You make a program list via an on-screen
display, using the cursor buttons to navigate and the
number buttons to enter titles/chapters/tracks.
1 Press PROGRAM.
2 Use the or button to select ‘Program2 3
Chapter’ or ‘Program Title’.
3 Move the cursor down ( ) to the program∞
list window.
If you selected Program Chapter, move the cursor
up ( ) and enter a title number (all the programmed5
chapters will come from this title).
Comment changer les canaux audio
Pour les karaok s ou des CD eté
Video CD avec un format similaire, il est possible de
sélectionner, uniquement le canal de gauche ou
uniquement le canal de droite.
• Pour changer le canal de lecture, appuyez
sur AUDIO.
Appuyez plusieurs fois pour passer parmi :
•L CH – Uniquement le canal de gauche
•R CH – Uniquement le canal de droite
•STEREO
Comment faire une liste de
programmes
Faire une liste de programme signifie indiquer au
lecteur quels titres/chapitres ou quelles pistes, et dans
quel ordre vous souhaitez leur lecture. Vous pouvez f
une liste de programmes via un affichage cran, eà ’é l
utilisant les touches du curseur pour naviguer et les
touches num es pour saisir des titres/chapitres/é érot
pistes.
1 Appuyez sur PROGRAM.
2 Utilisez les touches pour2 ou 3
sélectionner “ Program Chapter ” ou “
Program
Title ”.
3 Faites descendre le curseur ( ) jusqu’à la∞
fenêtre de la liste de programmes.
Si vous avez sé électionn Program Chapter, faites
monter le curseur ( ) et saisissez un num ro de titre5 é
(tous les chapitres programm s proviendront de ceé
titre).

45
En/Fr
6Playing Discs Lecture de disques
English Fran aisç
4 Enter the title/chapter numbers for your
program list.
For titles/chapters 1 10, use the corresponding number–
buttons. For 11 and over, use the
>10
button (
>10
, , 2 4
for 24, etc.)
• A program list can contain up to 24 steps.
5 If you want to save the program list, move
the cursor down (∞) to ‘Program
Memory’ and set it to ‘On’.
If you do this, the program list is automatically recalled
when you next load the disc.
• You can save program lists for up to 24 discs.
6 Press ENTER or 6 to start playback
immediately, or PROGRAM to exit if you
want to start playback later.
During program play, you may occasionally see the start
of a chapter that was not programmed when the chapter
number changes. This is not a malfunction.
For Video CDs that feature PBC, make sure that the disc
is stopped before you start.
1 Press PROGRAM.
2 Enter the track numbers for your program
list.
For tracks 1 10, use the corresponding number buttons.–
For 11 and over, use the
>10
button (
>10
, , 2 4 for 24,
etc.)
• A program list can contain up to 24 steps.
4 Saisissez les numéros de titre/chapitre
correspondants à votre liste de
programmes.
Pour les titres/chapitres de 1 10, utilisez les touchesà
num rot es correspondantes. Pour le num ro 11 eté é é
supérieurs, utilisez la touche
>10
(
>10
, , 2 4 pour 24,
etc.).
• ’àUne liste de programmes peut contenir jusqu 24
sections.
5 Si vous souhaitez mémoriser la liste de
programmes, faites descendre le curseur
( ) jusqu’à “ Program Memory ” et∞
réglez-le à “ On ”.
En faisant cela, la liste de programmes sera
automatiquement rappel e au prochain chargement dué
disque.
• Vous pouvez m moriser des listes de programmesé
pour un maximum de 24 disques.
6 Appuyez sur ENTER ou pour6
démarrer immédiatement la lecture, ou
sur PROGRAM pour quitter le mode si
vous souhaitez démarrer la lecture plus
tard.
Remarque
Pendant la lecture programm e, vous pouvez voiré
occasionnellement le d but d un chapitre qui n a pas é ’ ’ é
programmé quand le numéro du chapitre change. Il ne
s’agit pas un mauvais fonctionnement.
Pour des Video CD avec PBC, v rifiez que le disque eé
arr t marrer.ê é avant de le faire dé
1 Appuyez sur PROGRAM.
2 Saisissez les numéros de piste
correspondants à votre liste de
programmes.
Pour les pistes 1 10, utilisez les touches numà é érot es
correspondantes. Pour le num ro 11 et supé érieurs,
utilisez la touche
>10
(
>10
, , 2 4 pour 24, etc.).
• ’àUne liste de programmes peut contenir jusqu 24
sections.
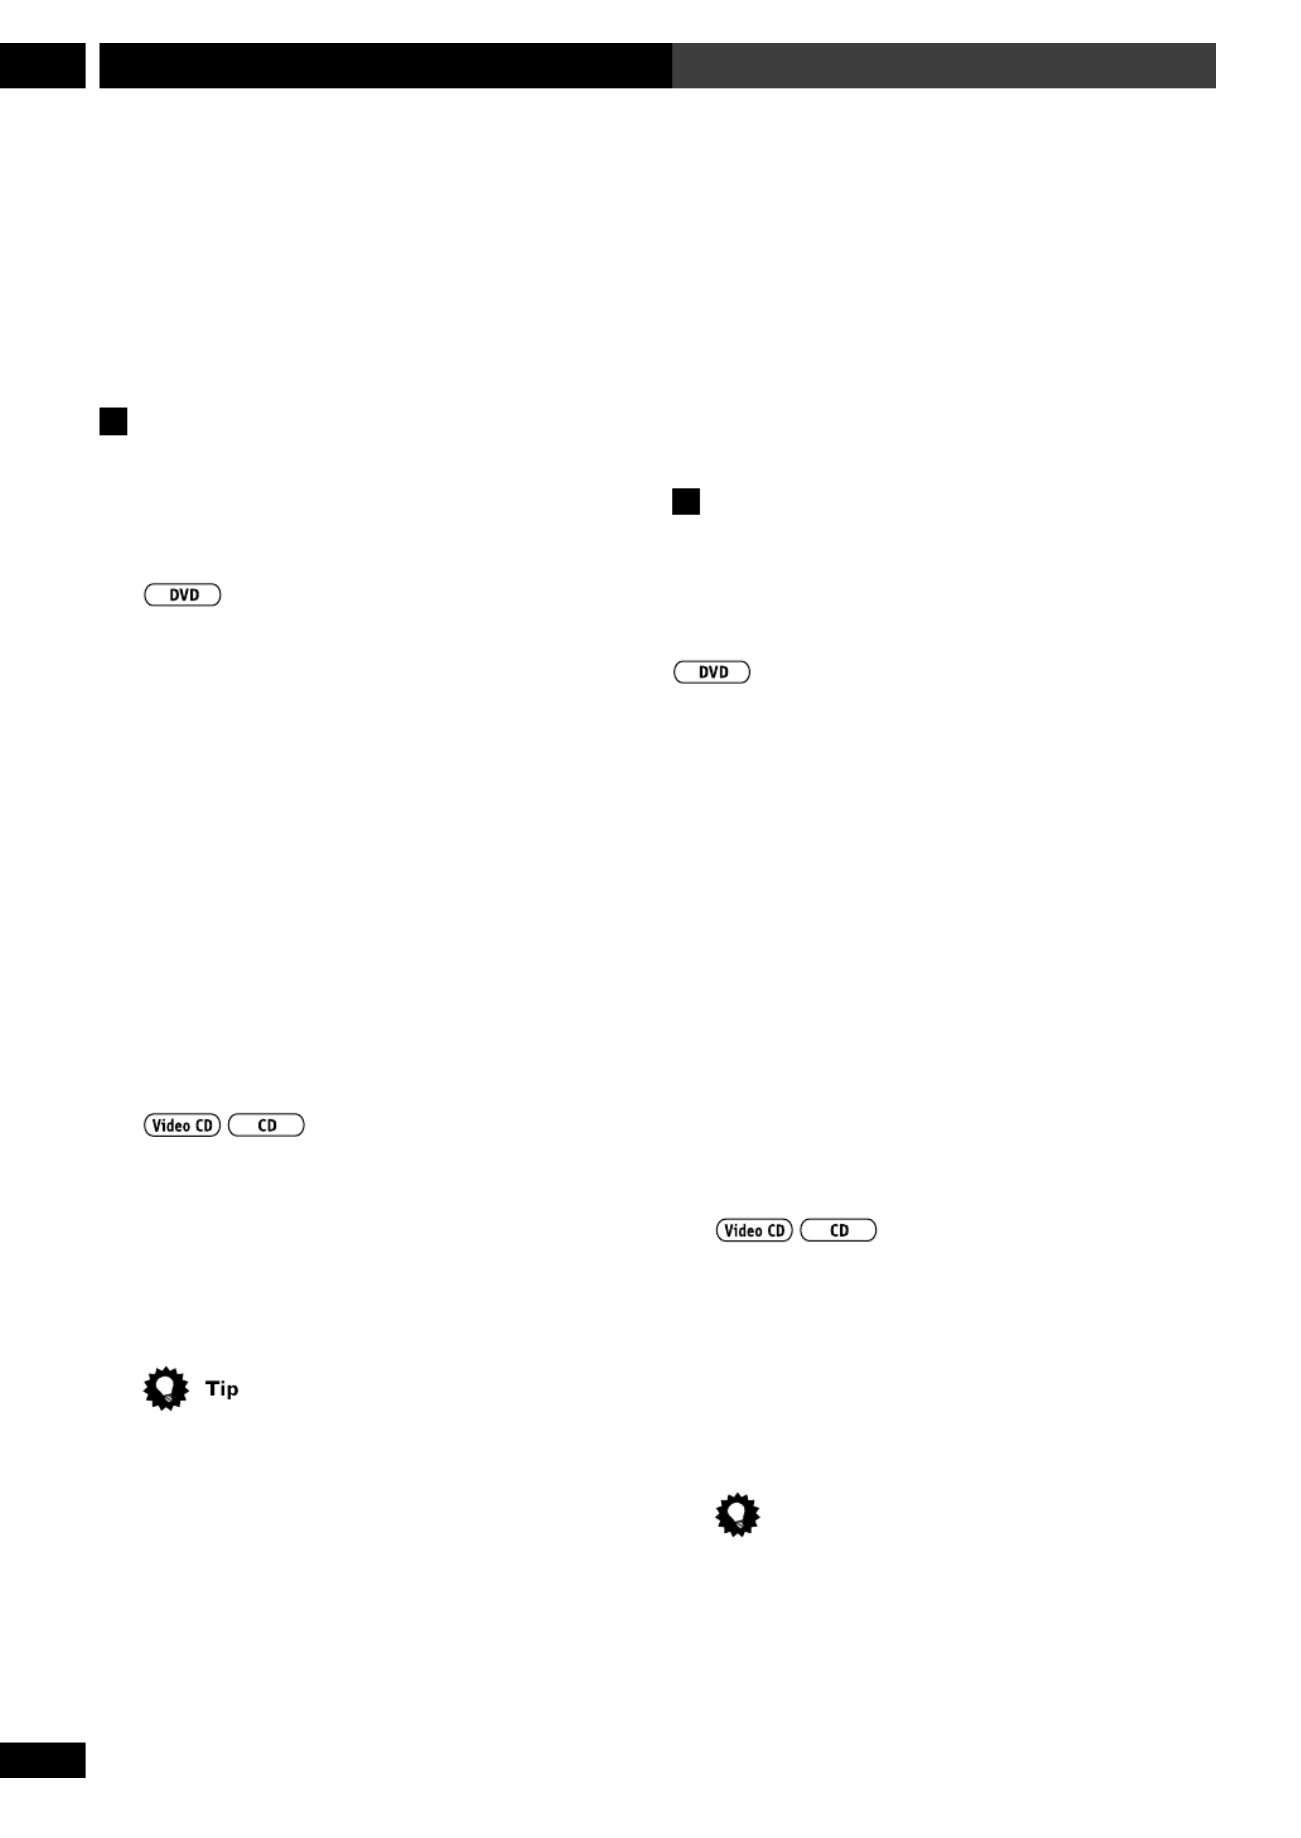
46
En/Fr
Playing Discs6 Lecture de disques
3 Press ENTER or 6 to start playback
immediately, or PROGRAM to exit if you
want to start playback later.
•You can't start playback later with a PBC Video CD;
press ENTER or 6 to start.
Using random play
Use the random play function to play titles/chapters (on
a DVD) or tracks (on a CD or Video CD) in a random
order.
1 Press RANDOM repeatedly to select a
random play mode.
The mode is displayed on-screen and in the front panel
display:
•Random Chapter (from within the current
title)
•Random Title
2 Press ENTER or to start random play.6
•To stop the disc and cancel random playback, press
7.
•To cancel random playback without stopping
playback, press CLR. The rest of the disc plays out.
1 Press RANDOM to start random play.
•To stop the disc and cancel random playback, press
7.
•To cancel random playback without stopping
playback, press CLR. The rest of the disc plays out.
During random play, the and buttons4 ¢
function a little differently to normal: returns to4
the beginning of the current track/chapter. You can't go
back further than this. selects another track/¢
chapter at random from those remaining.
3 Appuyez sur ENTER ou pour démarrer6
immédiatement la lecture, ou sur PRO-
GRAM pour quitter le mode si vous
souhaitez démarrer la lecture plus tard.
•Vous ne pouvez pas d marrer la lecture plus tard avecé
un Video CD avec PBC ; appuyez sur ENTER ou 6
pour démarrer.
Utilisation de la lecture aléatoire
Utilisez la fonction lecture al atoire pour lire des titres/é
chapitres (sur un DVD) ou des pistes (sur un CD ou un
Video CD) dans un ordre al atoire.é
1 Appuyez plusieurs fois sur RANDOM pour
sélectionner un mode de lecture aléatoire.
Le mode est affich cran et dans l afficheur dué à ’é l ’
panneau avant :
•Random Chapter (Lecture al atoire deé
chapitres) ( partir du titre actuel)à
•Random Title (Lecture aléatoire de titres)
2 Appuyez sur ENTER ou pour6
démarrer la lecture aléatoire.
• ê éPour arr ter le disque et annuler la lecture al atoire,
appuyez sur 7.
• é êPour annuler la lecture al atoire sans arr ter la
lecture, appuyez sur CLR. Le reste du disque sera lu.
1 Appuyez sur RANDOM pour démarrer la
lecture aléatoire.
• ê éPour arr ter le disque et annuler la lecture al atoire,
appuyez sur 7.
• é êPour annuler la lecture al atoire sans arr ter la
lecture, appuyez sur CLR. Le reste du disque sera lu.
Astuce
Pendant la lecture al atoire, le fonctionnement desé
touches et est un peu diff rent du4 ¢ é
fonctionnement normal : retourne au d but de la4é
piste/du chapitre actuel. Vous ne pouvez pas retourner
au del de l . s lectionne la lecture al atoireà à ¢é é
d’une autre piste ou d’un autre chapitre à partir de
celles ou de ceux qui restent.

47
En/Fr
6Playing Discs Lecture de disques
English Fran aisç
Using repeat play
You can set the player to repeat individual tracks on CDs
or Video-CDs, chapters or titles on DVD discs, or the
whole disc. It's also possible to loop a section of a disc.
You can use the repeat together with the programming
mode to repeat the tracks/chapters in the program list
(see page 44 for how to make a program list).
1 Press REPEAT during playback to select a
repeat mode.
Each press switches the repeat mode:
•Chapter Repeat
•Title Repeat
•Repeat Off
•Track Repeat
• Repeat All
•Repeat off
2 To resume normal playback, press CLR.
You can use repeat play with program play . During
program play, press REPEAT.
Looping a section of a disc
1 Press A-B once at the start of the section
you want to repeat, then again at the end.
Playback immediately jumps back to the start point and
plays the loop round and round.
•On a DVD disc, the start and end points of the loop
must be in the same title.
2 To resume normal playback, press CLR.
•You can also repeat a section of a disc just once by
pressing 6 to mark the end point (instead of A B-).
Utilisation de la lecture répétée
Vous pouvez r gler le lecture pour r ter des pistesé é ép
individuelles de CD ou de Video CD, des chapitres ou des
titres sur des disques DVD, ou tout un disque. Il est
é é également possible de r p ter en continu (loop) une
partie d un disque.’
Vous pouvez utiliser le mode de r tition avec le modeé ép
de programmation pour r p ter les pistes/chapitres de laé é
liste de programmes (voir la page 44 pour comment
faire une liste de programmes).
1 Appuyez sur REPEAT pendant la lecture
pour sélectionner un mode de répétition.
Chaque pression change le mode de r tition dansé ép
l ordre suivant :’
•Chapter Repeat (Ré ép tition de chapitres)
•Title Repeat (Ré ép tition de titres)
•Repeat Off (Ré é é ép tition d sactiv e)
•Track Repeat (Ré ép tition de pistes)
• Repeat All (R p tition de toutes les pistes)é é
•Repeat Off (Ré é é ép tition d sactiv e)
2 Pour reprendre la lecture normale,
appuyez sur CLR.
Astuce
Vous pouvez utiliser la lecture r e avec la lectureé é ép t
programmée. Pendant la lecture programmée, appuyez
sur REPEAT.
“ Looping ” (répétition sans fin) d’une
partie d’un disque
1 Appuyez une fois sur A-B au démarrage
de la partie que vous souhaitez répéter,
puis de nouveau à la fin.
La lecture saute imm diatement avant le point du dé ébut
et lit en continu la partie r p ter.à é é
• éSur un disque DVD, il faut que le d but et la fin de la
partie pà ré éter en continu (“ loop ”) fassent partie du
m me titre.ê
2 Pour reprendre la lecture normale,
appuyez sur CLR.
•Vous pouvez galement r ter une partie dé é ép’un
disque en appuyant simplement une fois sur 6 pour
indexer le point final (au lieu de A B-).

48
En/Fr
Playing Discs6 Lecture de disques
Bookmarking a place in a disc
If you watch only part of a DVD disc with the intention
of picking up later where you left off, you can bookmark
the place then resume playback at a later date without
having to manually search for the right place.
You can use this feature for up to five discs (after that
the oldest bookmark is deleted to make space for a new
one).
• At the point from which you want to
resume playback next time, press LAST.
Press 7 if you want to stop playback here.
• To resume playback, load the disc and
press LAST.
If the disc starts auto playback, stop it first.
•To clear the bookmark for the disc loaded, press
LAST LAST ‘then CLR while _MEMORY’ is displayed
on-screen.
•Bookmarking also works with Video CDs, but for one
disc only, and you must leave the disc in the player—
opening the disc tray erases the memory. Last Memory
may not work reliably with some PBC Video CDs.
Memorizing disc settings
If you have a particular set of preferences for a disc, you
can memorize them using the Condition Memory
function. Once memorized, your settings will be recalled
automatically whenever you load that disc. The player
can store settings for 15 discs; after this, memorizing
another replaces the oldest one stored.
Indexation d’un emplacement d’un
disque
Si vous ne regardez qu une partie du disque DVD dans’
l’intention de le reprendre plus tard à ’ l endroit o vousù
l’avez laiss , vous pouvez indexer lé ’endroit puis reprendre la
lecture un autre jour sans devoir rechercher manuellement
le bon endroit.
Vous pouvez utiliser cette caract ristique pour un maximumé
de cinq disques (apr s quoi lè ’ancienne indexation est effacée
pour laisser de la place la nouvelle).à
• Au point où vous souhaitez reprendre la
lecture la prochaine fois, appuyez sur LAST.
Appuyez sur si vous souhaitez arr ter ici la lecture.7ê
• Pour reprendre la lecture, chargez le
disque et appuyez sur LAST.
Si le disque d marre automatiquement la lecture,é
arr abord.êtez-la d’
• ’ éPour supprimer l indexation du disque charg ,
appuyez sur LAST CLR LAST puis sur tandis que “ _
MEMORY” est affiché à ’ée l cran.
Remarque
•L’ éindexation fonctionne galement avec des Video CD,
mais pour un seul disque, et vous devez laisser le disque
dans le lecteur. L’ àouverture du plateau disques efface la
mémoire. Il se peut que Last Memory “ ” ne fonctionne pas
fidèlement avec certains Video CD avec PBC.
Mémorisation des réglages d’un
disque
Si vous avez des pr rences de r glage pour un disque,é éfé
vous pouvez les m moriser en utilisant la fonctioné
“ ” é é é Condition Memory . Une fois m moris s, vos r glages
seront automatiquement rappel s toutes les fois queé
vous chargerez un disque. Le lecteur peut m moriser desé
réglages pour 15 disques ; après quoi, une autre
mémorisation remplacera la plus ancienne.

49
En/Fr
6Playing Discs Lecture de disques
English Fran aisç
The settings memorized are:
•OSD Position (page 76)
•Subtitle Language (page 78)
•Audio Language (page 77)
•Angle Indicator (page 77)
•Parental Lock level (page 82)
• To memorize settings for the current disc,
press CONDITION during playback.
• To recall memorized settings, just load the
disc.
The display shows COND MEMORY_ and ‘Condi-
tion Memory’ appears on-screen.
•To clear memorized settings, load the disc and press
CLR while
‘Condition Memory’ is displayed on-screen.
Displaying disc information
Various track, chapter and title information, as well as
the video transmission rate for DVD discs, can be
displayed on-screen while a disc is playing, or while it’s
stopped.
You can find detailed explanations of all the displays on
the following pages (depending on the disc, you may not
see all the screens shown).
• To show/switch the information dis-
played, press DVD DISP.
•When a disc is playing, the information appears at
the top of the screen. Keep pressing DVD DISP to
change the displayed information.
•When a disc is stopped, all title/chapter, or track
information for the disc loaded appears on-screen. Press
DVD DISP again to exit the screen.
Les r glages m s sont :é é émoris
•OSD Position (Position OSD) (page 76)
•Subtitle Language (Langue des sous-titres)
(page 78)
•Audio Language (Langue audio) (page 77)
•Angle Indicator (Indicateur d’angle) (page 77)
•Parental Lock level (Niveau de verrouillage
parental) (page 82)
• Pour mémoriser des réglages pour le
disque actuel, appuyez sur CONDITION
pendant la lecture.
• Pour rappeler des réglages mémorisés,
chargez simplement le disque.
L’affichage montre COND MEMORY_ et
“ Condition Memory ” apparaî à ’ét l cran.
• é é éPour supprimer des r glages m moris s, chargez le
disque et appuyez sur CLR tandis que
“ Condition Memory ” est affich l cran.é à ’é
Affichage de l’information du disque
Différentes informations sur la piste, le chapitre et le
titre, ainsi que le rapport de transmission vid o pour lesé
disques DVD, peuvent s’ à ’éafficher l cran pendant la
lecture d un disque ou pendant son arr’ êt.
Vous pouvez trouver des explications d es de tousé étaill
les affichages dans les pages suivantes (selon le disque,
il est possible que tous les crans ne soient pas montr s).é é
• Pour montrer/changer l’information
affichée, appuyez sur DVD DISP.
• ’ ’ îA la lecture d un disque, l information appara t sur
la partie sup rieure de l cran. Maintenez press é ’é é DVD
DISP pour changer l information affich’ ée.
• ’ ê ’ ’A l arr t d un disque, toute l information sur un
titre/chapitre ou sur une piste du disque charg apparaé ît
à ’é l cran. Appuyez de nouveau sur DVD DISP pour
quitter l’écran.

50
En/Fr
Playing Discs6 Lecture de disques
Displays when playing
Play
Title
3–29 49.58
101.04–51.06 /
Play
Chapter
3–32 54.53
1.510.21 /
Play
Chapter
3–32 54.53
1.51–1.30 /
Play
Tr. Rate:
3–32 54.53
6.3
«
«
«
«
current title/chapter number elapsed time of current title
current title/chapter number elapsed time of current title
remaining time of current title remaining total time of
current title
elapsed time of current chapter total time of current
chapter
current title/chapter number elapsed time of current title
remaining time of current chapter total time of current
chapter
current title/chapter number elapsed time of current title
transmission rate level meter transmission rate level
Dis
p
la
y
off
• To display the time remaining on a DVD disc, press
and hold DVD DISP.
The display shows the disc time remaining for as long as
you hold the button. Release the button to revert to the
previous display.
Affichages pendant la lecture
• éPour afficher la dur e restante sur un disque DVD,
appuyez et maintenez enfoncé DVD DISP.
L’ éaffichage montre la dur e restante du disque aussi
longtemps que vous maintenez enfonc e la touche.é
Rel rieur.âchez-la pour retourner à l’affichage anté
Play
Title
3 29 49.58–
101.04–51.06 /
Play
Chapter
3 32 54.53–
1.510.21 /
Play
Chapter
3 32 54.53–
1.51–1.30 /
Play
Tr. Rate:
3 32 54.53–
6.3
«
«
«
«
Numéro du titre/chapitre actuel Temps écoulé du titre actuel
Numéro du titre/chapitre actuel Temps écoulé du titre actuel
Durée restante du titre actuel Durée totale restante du
titre actuel
Temps écoulé du chapitre actuel Durée totale du chapitre
actuel
Numéro du titre/chapitre actuel Temps écoulé du titre actuel
Durée restante du chapitre actuel Durée totale du chapitre
actuel
Numéro du titre/chapitre actuel Temps écoulé du titre actuel
Mesure du niveau de rapport
de transmission
Niveau de rapport de transmission
Afficha
g
e désactivé

51
En/Fr
6Playing Discs Lecture de disques
English Fran aisç
Play
Track
3 1.13
3.32–3.29/
Play
All
1/10 1.13
66.32–66.20 /
«
«
current track number elapsed time of current track
elapsed time of current trackcurrent track number
remaining time of current track total time of
current track
CD's remaining time CD's total time
Display off
Play
All
3/12 10.53
70.19–59.26 /
Play
Track
3 10.53
5.233.56/
Play
Track
3 10.53
5.23-1.27/
«
«
«
current track number/
total number of tracks Video CD's total elapsed time
current track number Video CD's total elapsed time
Video CD's remaining time Video CD's total time
elapsed time of current track total time of current tracks
current track number Video CD's total elapsed time
remaining time of current track total time of current tracks
Display off
Play
All
3/12 10.53
70.19–59.26 /
Play
Track
3 10.53
5.233.56/
Play
Track
3 10.53
5.23–1.27/
«
«
«
Numéro de la piste actuelle/
nombre total de pistes Temps total écoulé du Video CD
Numéro de la piste actuelle Temps total écoulé du Video CD
Durée restante du Video CD Durée totale du Video CD
Temps écoulé de la piste actuelle Durée totale des pistes actuelles
Numéro de la piste actuelle Temps total écoulé du Video CD
Durée restante de la piste actuelle Durée totale des pistes actuelles
Affichage désactivé
Play
Track
3 1.13
3.32–3.29/
Play
All
1/10 1.13
66.32–66.20 /
«
«
Numéro de la piste actuelle Temps écoulé de la piste actuelle
Temps écoulé de la piste actuelleNuméro de la piste actuelle
Durée restante de la piste actuelle
Durée restante du CD Durée totale du CD
Affichage désactivé
Durée totale des pistes actuelles
When playing a Video CD using PBC, the above displays
do not appear (except for a PLAY indicator).
Remarque
A la lecture d un Video CD en utilisant le mode’
PBC, les affichages ant rieurs n apparaissent pas (é ’ à
l’exception d’un indicateur PLAY).
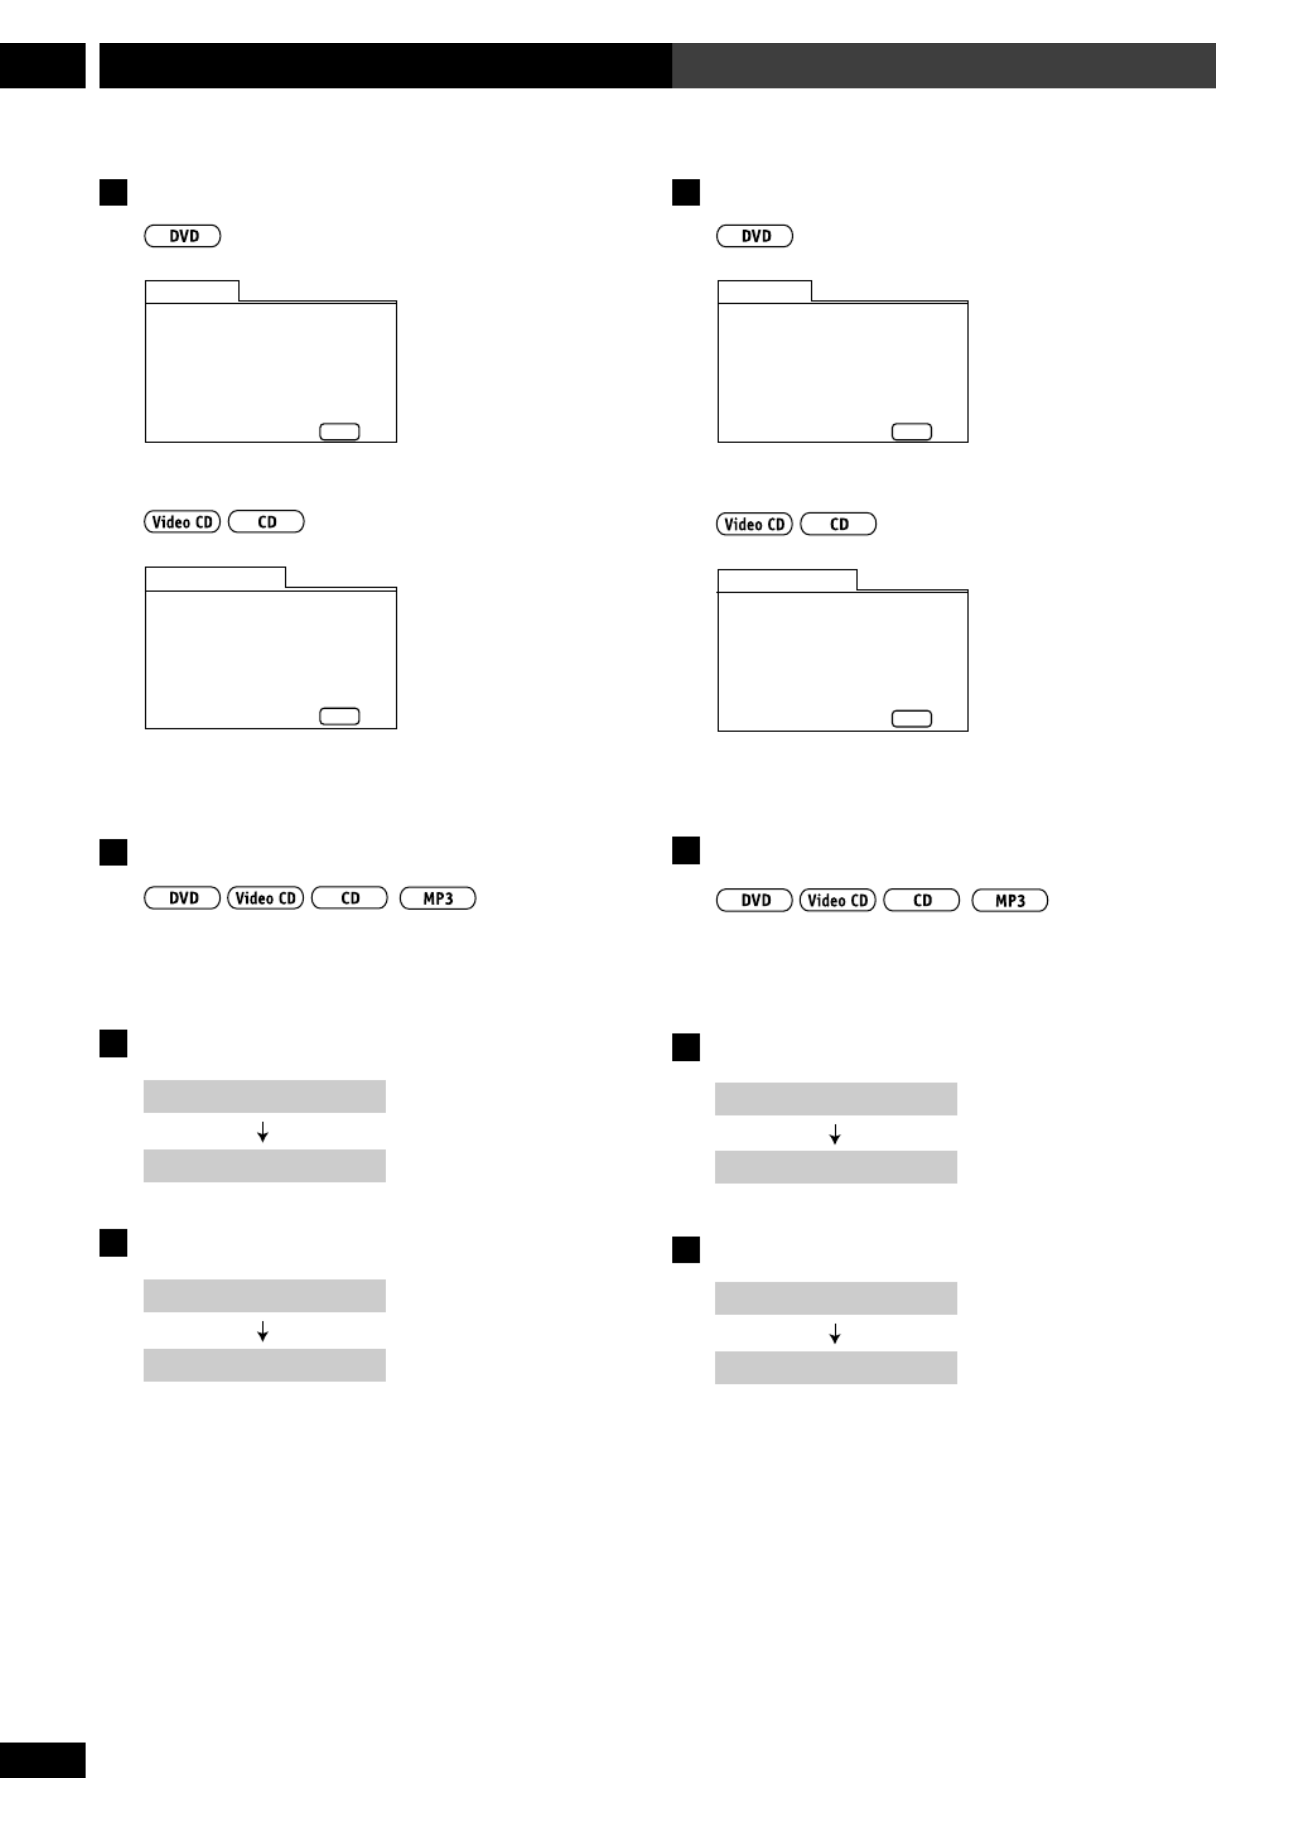
52
En/Fr
Playing Discs6 Lecture de disques
Displays when stopped
Information: DVD
Title Chapter Title Chapter
DISPLAY
Exit
01
02
03
04
06
07
08
09
05
1~ 1
1~ 1
1~ 1
1~ 1
1~ 1
1~ 1
1~ 1
1~ 4
1~ 1
1/1
DVD-Video
CD/Video CD
Information: Compact Disc
Total Time
Track Time
DISPLAY
Exit
6.30
3.32
2.58
01
02
1/1
DVD and CD system displays
• Press SYSTEM DISP to change the infor-
mation shown in the display.
Displays when playing
CD 1 O:24
4:12 am Time
Elapsed track time
Displays when stopped
CD
4:12 am
CD mode
Time
Affichages à l’arrêt
Information: DVD
Title Chapter Title Chapter
DISPLAY
Exit
01
02
03
04
06
07
08
09
05
1~ 1
1~ 1
1~ 1
1~ 1
1~ 1
1~ 1
1~ 1
1~ 4
1~ 1
1/1
DVD-Video
CD/Video CD
Information: Compact Disc
Total Time
Track Time
DISPLAY
Exit
6.30
3.32
2.58
01
02
1/1
Affichages des systèmes DVD et CD
• Appuyez sur SYSTEM DISP pour changer
l’information indiquée sur l’affichage.
Affichages pendant la lecture
CD 1 O:24
4:12 am
Heure
Temps écoulé de lecture
Affichages à l’arrêt
CD
4:12 am
Mode CD
Heure

53
En/Fr
7Using RDS Utilisation du RDS
English Français
Using RDS
(European model only)
Radio Data System, or RDS as it’s usually known, is a
system used by FM radio stations to provide listeners
with various information—the name of the station and
what kind of show they’re broadcasting, for example.
RDS allows you to search through stations automati-
cally using this information. It shows up as text on the
display, and you can switch between the type of
information shown. Although you don’t get RDS
information from all FM radio stations, you do with
most.
This unit lets you display three different kinds of RDS
information: Radio Text, Program Service Name, and
Program Type.
Radio Text (RT) is a message sent by the radio station.
It can be anything the broadcaster chooses—a talk
radio station might give out its telephone number as RT,
for example.
Program Service Name (PS) is the name of the radio
station.
Program Type (PTY) indicates the kind of program
currently being broadcast.
Utilisation du RDS
(Uniquement pour le modèle européen)
Le système de données de radio (Radio Data System), ou
plus habituellement connu par RDS, est un système
utilisé par les stations de radio FM pour offrir aux
auditeurs différentes informations. Le nom de la station
et le type de programme qu’ils sont en train d’émettre,
par exemple. Le RDS vous permet de rechercher
automatiquement parmi les stations en utilisant cette
information. Cela fait apparaître un texte sur
l’affichage, et vous pouvez permuter entre le type
d’informations montrées. Même si vous n’obtenez pas
les informations RDS depuis toutes les stations de radio
FM, ce sera le cas pour la plupart d’entre elles.
Cette unité vous permet d’afficher trois différents types
d’information RDS : le texte radio (Radio Text), le nom
du service de programme (Program Service Name), et le
type de programme (Program Type).
Le texte radio (RT) est un message émis par la station
de radio. Il peut s’agir de n’importe quel texte choisi par
le radiodiffuseur. Une station de radio d’échange avec
les auditeurs peut donner par exemple comme RT son
numéro de téléphone.
Le nom du service de programme (PS) est le nom de la
station de radio.
Le type de programme (PTY) indique le genre de
programme actuellement émis.

54
En/Fr
Using RDS7 Utilisation du RDS
RDS Program types
NEWS News
AFFAIRS Current affairs
INFO General information
SPORT Sports
EDUCATE Educational material
DRAMA Radio drama
CULTURE Arts and culture
SCIENCE Science and technology
VARIED Usually talk-based material, such as
quiz shows or interviews.
POP M Pop music
ROCK MRock music
M O R M. . . "Middle of the road" music
LIGHT M 'Light' classical music
CLASSICS 'Serious' classical music
OTHER MOther music not fitting any of the
above categories
WEATHER Weather reports
FINANCE Finance and business
CHILDREN Children’s' entertainment
SOCIAL A Social affairs
RELIGION Religious programming
PHONE IN Phone in talk show
TRAVEL Holiday-type travel rather than traffic
announcements, etc.
LEISURE Leisure interests and hobbies
JAZZ Jazz music
COUNTRY Country music
NATION M Popular music in a language other
than English
OLDIES Popular music from the '50s
FOLK MFolk music
DOCUMENT Documentaries
In addition, there are two program types, ALARM and
TEST, used for exceptional emergency announcements.
The tuner will switch automatically to that station if it
picks up either of these RDS signals.
Types de programmes RDS
NEWS Actualités
AFFAIRS Affaires courantes
INFO Information gé én rale
SPORT Sports
EDUCATE Mat riel ducatifé é
DRAMA Drame Radio
CULTURE Arts et culture
SCIENCE Science et technologie
VARIED Matériel habituel basé sur un débat, tel
que concours ou interviews
POP M Musique pop
ROCK MMusique rock
M O R M. . . Musique contemporaine
LIGHT M Musique classique “ é è ” l g re
CLASSICS Musique classique “ é ” s rieuse
OTHER MAutre musique non comprise dans les
cat rieureségories anté
WEATHER M té éorologie
FINANCE Finances et Commerce
CHILDREN Divertissement pour enfants
SOCIAL A Affaires sociales
RELIGION Programmation religieuse
PHONE IN É é é émission-t l phone de d bat
TRAVEL Annonces voyages de vacances plutôt
que circulation routi re, etc.è
LEISURE Passe-temps et loisirs
JAZZ Musique jazz
COUNTRY Musique country
NATION M Musique populaire dans une langue
autre que l’anglais
OLDIES Musique poulaire des ann es 50é
FOLK MMusique folk
DOCUMENT Documentaires
En suppl ment, il y a deux types de programme,é
ALARM TEST et , utilis s pour des nouvellesé
exceptionnelles ayant un caract re urgent. La radioè
permutera automatiquement sur cette station si elle
reçoit l’un de ces signaux RDS.

55
En/Fr
7Using RDS Utilisation du RDS
English Fran aisç
Displaying RDS information
When the tuner is receiving on the FM band, the RDS
displays become available.
1 Press SYSTEM DISP repeatedly to select
an RDS display.
Choose between:
•RT – Radio Text
•PS – Program Service name
•PTY – Program Type
2 Stop on the one you want and after a few
seconds the RDS information will appear.
NEWS
•The RDS indicator will light in the RDS mode.
•If no RDS signal can be received, NO DATA is
displayed.
•Radio Text data longer than 14 characters scrolls
across the display. If there is noise during the RT scroll
display, some characters may be temporarily displayed
incorrectly.
•If there is no Program Type data being broadcast, the
display reverts to Program Service name.
Affichage de l’information RDS
Quand le tuner est en r ception sur la bande FM, lesé
affichages du RDS deviennent disponibles.
1 Appuyez plusieurs fois sur SYSTEM DISP
pour sélectionner un affichage du RDS.
Choisissez parmi :
•RT – Texte radio
•PS – Nom du service de programme
•PTY – Type de programme
2 Arrêtez-vous sur celui que vous voulez et
après quelques secondes l’information
RDS apparaîtra.
NEWS
Remarque
•L’ ’indicateur RDS s allumera en mode RDS.
• ’ çSi aucun signal RDS n est re u, NO DATA
s’affichera.
• é ’Les donn es du texte radio d une longueur
sup rieure affichage.é à 14 caractères défilent le long de l’
S’il y a des parasites pendant que l’affichage du RT
défile, certains caractères peuvent temporairement
s’afficher incorrectement.
• é ’Si aucune donn e du type de programme n est
é ’mise, l affichage retourne au nom du service de
programme.

56
En/Fr
Using RDS7 Utilisation du RDS
Searching for a program type
You can search for a station that is broadcasting any
program type from the list on page 54.
1 Select FM with the TUNER FM/AM but-
ton.
2 Press SYSTEM DISP repeatedly until PTY
SEARCH appears in the display.
PTY SEARCH
3 Use the and 4 ¢ buttons to choose a
program type, then press SYSTEM DISP.
AFFAIRS
You can search for any of the program types listed on
page 54.
After pressing SYSTEM DISP , the system starts
searching through the station presets for a match. When
it finds one, the search stops and the station plays for 5
seconds.
The display shows the preset station number, the
frequency, then the program type.
4 If you want to keep listening to the sta-
tion, press SYSTEM DISP within the 5
seconds.
If you don't press SYSTEM DISP , searching resumes.
Recherche d’un type de programme
Vous pouvez rechercher une station qui émette
n’importe quel type de programme de la liste de la page
54.
1 Sélectionnez FM avec la touche TUNER
FM/AM.
2 Appuyez plusieurs fois sur SYSTEM DISP
jusqu’à ce que PTY SEARCH apparaisse
sur l’affichage.
PTY SEARCH
3 Utilisez les touches 4 et ¢ pour
choisir un type de programme, puis
appuyez sur SYSTEM DISP.
AFFAIRS
Vous pouvez rechercher n importe quel type de’
programme de la liste de la page 54.
Apr s la pression de èSYSTEM DISP , l appareil d marre’ é
la recherche d une correspondance travers les stations’ à
pr r gl il en trouve une, la recherche s arr teé é ées. Lorsqu’ ’ ê
et la station est re ue pendant 5 secondes.ç
L’ é é é éaffichage montre le num ro de la station pr r gl e, la
fréquence, puis le type de programme.
4 Si vous souhaitez écouter la station,
appuyez sur SYSTEM DISP dans les 5
secondes.
Si vous n appuyez pas sur ’SYSTEM DISP , la recherche
reprend.

57
En/Fr
8Playing MP3s Lecture de MP3
English Français
Playing MP3s
This system can play MP3 files on a CD-ROM disc. MP3
is a popular audio format on computers and the
Internet. Even with file sizes one-tenth the size of CD
audio, the sound quality remains reasonable.
1 Load the MP3 disc into the player.
• It may take upwards of 20 seconds for the system to
read the contents of the disc.
2 Press 6 to start playing the first MP3
track on the disc.
It may take a few seconds for the system to locate the
track on the disc, depending on the complexity of the
file structure.
After the selected track has played out, the next track
recorded on the disc starts playing.
• Press 6 while a track is playing to pause. Press
again to restart playback.
• Press / to skip to the previous/next track4 ¢
on the disc.
• Press and hold to scan backward/1 / ¡
forward.
• Press to stop playback. Except in program or7
random play, the system remembers the current folder
as long as the disc remains in the player. Press to6
restart playback from the first track of that folder.
Lecture de MP3
Cet appareil peut lire des fichiers MP3 d’un disque CD-
ROM. Le MP3 est un format audio populaire sur les
ordinateurs et sur Internet. Même avec des fichiers d’un
dixième de la taille d’un CD audio, le son demeure
d’une qualité raisonnable.
1 Chargez le disque MP3 dans le lecteur.
• L’ap les contenus du disque.
2 Appuyez sur pour démarrer la lecture6
de la première piste MP3 du disque.
L’appareil peut prendre quelques secondes à localiser la
piste sur le disque, selon la complexité de la structure
du répertoire.
Après la lecture de la piste sélectionnée, la lecture de la
piste suivante enregistrée sur le disque démarre.
• Appuyez sur à la lecture d’une piste pour6
mettre en pause. Appuyez de nouveau pour reprendre la
lecture.
• Appuyez sur / pour sauter à la piste4 ¢
précédente/suivante du disque.
• Appuyez et maintenez enfoncé 1 / ¡ pour
scanner vers l’arrière ou vers l’avant.
• Appuyez sur pour arrêter la lecture. Sauf en7
lecture programmée ou aléatoire, l’appareil retient
l’actuel répertoire aussi longtemps que le disque reste
dans le lecteur. Appuyez sur pour redémarrer la6
lecture à partir de la première piste de ce répertoire.

58
En/Fr
Playing MP3s8 Lecture de MP3
Searching for folders and tracks
1 Use the FOLDER/GROUP (SHIFT and
4 ¢/ ) buttons to select a folder.
The folder number is shown in the display.
2 Use the number buttons or the /4 ¢
buttons to select a track within the
current folder.
For numbers 1-9, press the corresponding number
button. For numbers 10-99, press
>10
, then enter the
number. For numbers 100 and over, press
>10
twice,
then enter the number.
For example, for track 46, press
>10
, , .4 6
For track 120, press
>10
,
>10
, , , 1 2
10/0
.
Playback jumps to the selected folder or track.
3 Press 6 to start playback of the se-
lected track.
Using random play
•Files can be mono or stereo. Use the random play
feature to play tracks on a disc in a random order.
Playback stops when all the tracks have played.
1 Press RANDOM (SHIFT and 6) to start
random play.
2 To cancel random play, press 7.
Random play is also canceled if the disc tray is opened,
you press PROGRAM, or you use the number buttons to
jump to another track.
Recherche de répertoires et de
pistes
1 Utilisez les touches FOLDER/GROUP
(SHIFT et / ) pour sélectionner un4 ¢
répertoire.
Le num ro du r pertoire sé é ’affiche.
2 Utilisez les touches numérotées ou les
touches /4 ¢ pour selectionner une
piste dans l’actuel répertoire.
Pour les num ros de 1 9, appuyez sur la toucheé à
num roté ée correspondante. Pour les numéros de 10 à
99, appuyez sur
>10
, puis saisissez le num ro. Pour lesé
numéros 100 et supérieurs, appuyez deux fois sur
>10
,
puis saisissez le numéro.
Par exemple, pour la piste 46, appuyez sur
>10
, , .4 6
Pour la piste 120, appuyez sur
>10
,
>10
, , , 1 2
10/0
.
La lecture saute jusqu au r pertoire ou la piste’ é
sélectionné(e).
3 Appuyez sur pour démarrer la lecture6
de la piste sélectionnée.
Utilisation de la lecture aléatoire
• é ê é éLes r pertoires peuvent tre mono ou st r o. Utilisez
la fonction de lecture al atoire pour lire les pistes dé ’un
disque dans un ordre al atoire. La lecture sé ’ êarr te
quand toutes les pistes sont lues.
1 Appuyez sur RANDOM (SHIFT et 6) pour
démarrer la lecture aléatoire.
2 Pour annuler la lecture aléatoire, appuyez
sur 7.
La lecture al atoire s annule galement si le plateau é ’ é à
disques est ouvert, si vous appuyez sur PROGRAM, ou
si vous utilisez les touches num es pour sauteré érot
jusqu’à une autre piste.

59
En/Fr
8Playing MP3s Lecture de MP3
English Fran aisç
Using repeat play
Use the repeat play feature to repeat the current track, or
all the tracks on the disc.
1 During playback, press REPEAT to select
a repeat play mode.
Each press changes the repeat play mode:
•Repeat track (the RPT 1- indicator lights)
•Repeat folder (the RPT indicator lights)
•Repeat disc (the RPT indicator lights)
•Repeat off
If you stop playback or open the disc tray, repeat play is
also canceled.
Displaying MP3 information
• Press DVD DISP repeatedly during play-
back to display various MP3 information
on-screen.
There are four information screens:
PLAY 16/2O O:O5
Track ONLY_YOU
•Track name (also shows track number and
elapsed playback time)
PLAY 2/1O O:O5
Folder ELVIS
•Folder name (also shows folder number and
elapsed playback time)
PLAY 2–16 O:O5
Track -2:25/ 2:3O
•Track remain / total time (also shows
folder number and elapsed playback time)
PLAY 2–16 O:O5
Tr. Rate: 128kbps
• Encoding bit-rate (also shows folder
number and elapsed playback time)
• Press DVD/DISP when the disc is stopped
to display disc information.
Exit
Folder
001
002
003
004
005
Folder
001
002
003
004
005
Track
1 ~ 10
1 ~ 13
1 ~ 5
1 ~ 4
1 ~ 8
Track
1 ~ 9
1 ~ 11
1 ~ 3
1 ~ 22
1 ~ 15
1/2
Information: MP3
MP3
DISPLAY
Utilisation de la lecture répétée
Utilisez la fonction de lecture r e pour r ter laé é ép t é ép
piste actuelle ou toutes les pistes du disque.
1
Pendant la lecture, appuyez sur REPEAT pour
sélectionner un mode de lecture répétée.
Chaque pression change le mode de lecture r e dané é ép t
l ordre suivant :’
• é é ’ ’R p tition d une piste (l indicateur
RPT
-
1
s’allume)
• éR pétition d’un r pertoire (lé ’indicateur
RPT
s’allume)
• é é ’ ’ ’R p tition d un disque (l indicateur RPT s allume)
• é é é éR p tition d sactiv e
Si vous arr tez la lecture ou vous ouvrez le plateau ê à
disques, la lecture r e sé é ép t ’ éannule galement.
Affichage de l’information de MP3
• Appuyez plusieurs fois sur DVD DISP
pendant la lecture pour afficher à l’écran
plusieurs informations de MP3.
Il y a trois crans d information :é ’
PLAY 16/2O O:O5
Track ONLY_YOU
•Le nom de la piste (montre également le
num couléro de la piste et le temps é é de lecture)
PLAY 2/1O O:O5
Folder ELVIS
•Le nom du répertoire (montre également le
num couléro du répertoire et le temps é é de lecture)
PLAY 2–16 O:O5
Track -2:25/ 2:3O
•Durée restante/totale de la piste (montre
é é é é également le num ro du r pertoire et le temps coul de
lecture)
PLAY 2–16 O:O5
Tr. Rate: 128kbps
• Rapport de bits d’encodage
(montre
é également le num ro du r pertoire et le temps é écoulé de lecture
•
Appuyez sur DVD/DISP quand le disque est
arrêté pour afficher l’information du disque.
Exit
Folder
001
002
003
004
005
Folder
001
002
003
004
005
Track
1 ~ 10
1 ~ 13
1 ~ 5
1 ~ 4
1 ~ 8
Track
1 ~ 9
1 ~ 11
1 ~ 3
1 ~ 22
1 ~ 15
1/2
Information: MP3
MP3
DISPLAY

60
En/Fr
Playing MP3s8 Lecture de MP3
Using the MP3 Navigator
Use the MP3 Navigator to make searching for the
track(s) you want to play easier. You can also use it to
add or clear tracks from the program list.
1 Load a CD-ROM containing MP3 tracks.
2 Press MENU to enter the MP3 Navigator
screen.
MP3 Navigator
ExitPlay
Folder
Current : 1-13
Track
1.TRACK1~1
2.TRACK2~2
3.TRACK3~3
4.TRACK4~4
1.FOLDER~1
2.FOLDER~2
3.FOLDER~3
4.FOLDER~4
5.FOLDER~5
6.FOLDER~6
MENUENTER
MP3 Navigator
ExitPlay
Folder
Current : 1-13
Track
1.TRACK1~1
2.TRACK2~2
3.TRACK3~3
4.TRACK4~4
1.FOLDER~1
2.FOLDER~2
3.FOLDER~3
4.FOLDER~4
5.FOLDER~5
6.FOLDER~6
MENUENTER
Del PGM
CLEAR
1~41~10
The left side of the screen shows a list of folders
containing MP3 tracks. On the right side is a list of MP3
tracks from the first folder in the list.
Navigate using the following controls:
Cursor buttons – Select folders and tracks from
the current screen.
ENTER – Play the currently selected folder or track.
MP3 tracks that are unplayable on this player are
automatically skipped and the display shows
‘UNPLAYABLE MP3 FORMAT ’.
MENU – Exit the MP3 Navigator.
PROGRAM – Add the currently selected track to the
program list. (Tracks in the program list are marked
✔P)
CLR – Clear the currently selected track from the
program list.
Total number of tracks
Total number of folders
Utilisation du MP3 Navigator
Utilisez le MP3 Navigator pour rechercher plus
facilement la/les piste/s que vous souhaitez lire. Vou
pouvez également l’utiliser pour ajouter ou supprime
des pistes de la liste de programmes.
1 Chargez un CD-ROM contenant des pistes
MP3.
2 Appuyez sur MENU pour saisir l’écran du
MP3 Navigator.
MP3 Navigator
ExitPlay
Folder
Current : 1-13
Track
1.TRACK1~1
2.TRACK2~2
3.TRACK3~3
4.TRACK4~4
1.FOLDER~1
2.FOLDER~2
3.FOLDER~3
4.FOLDER~4
5.FOLDER~5
6.FOLDER~6
MENUENTER
MP3 Navigator
ExitPlay
Folder
Current : 1-13
Track
1.TRACK1~1
2.TRACK2~2
3.TRACK3~3
4.TRACK4~4
1.FOLDER~1
2.FOLDER~2
3.FOLDER~3
4.FOLDER~4
5.FOLDER~5
6.FOLDER~6
MENUENTER
Del PGM
CLEAR
1~41~10
Le c gauche de l cran montre une liste de rô ét ’é éperto
contenant des pistes MP3. Le c droit correspond ô ét à
une liste de pistes MP3 provenant du premier réperto
de la liste.
Naviguez en utilisant les commandes suivantes :
Touches du curseur – Sélectionnent des
répertoires et des pistes de l’écran actuel.
ENTER – Lit le répertoire ou la piste actuellement
s lectionné é(e). Les pistes MP3 qui ne sont pas lisible
sur ce lecteur sont automatiquement sautées et
l afficheur montre ’ ‘UNPLAYABLE MP3 FORMAT ’.
TMENU – Quitte le MP3 Navigator.
PROGRAM – Ajoute la piste actuellement
s lectionn e é é à la liste de programmes. (Les pistes de
liste de programmes sont marqu es avec é ✔P.)
CLR – Supprime de la liste de programmes la piste
actuellement sé électionn e.
Nombre total de pistes
Nombre total de répertoires

61
En/Fr
8Playing MP3s Lecture de MP3
English Fran aisç
Making a program list of MP3 tracks
1 Load a CD-ROM containing MP3 files.
2 Press PROGRAM to enter the Program
MP3 screen.
MP3 Program
PROGRAM
Exit
ENTER
PlayMove
Folder:001~025
——:—— ——:—— ——:—— ——:——
——:—— ——:—— ——:—— ——:——
——:—— ——:—— ——:—— ——:——
——:—— ——:—— ——:—— ——:——
——:—— ——:—— ——:—— ——:——
– – – – – : – – – – –
From this screen you can enter folder and track
numbers directly to build up a program list.
3 Use the number buttons to enter a folder
number.
See page 58 (step 2) for how to use the number buttons.
The number of folders on the disc is displayed in the
top-left of the screen.
Once you ve entered a valid folder number, the title of’
the folder appears.
4 Use the number buttons to enter a track
number.
MP3 Program
PROGRAM
Exit
ENTER
PlayMove
Track:001~032
002: : : :—— —— —— —— —— —— ——
—— —— —— —— —— —— —— ——: : : :
—— —— —— —— —— —— —— ——: : : :
—— —— —— —— —— —— —— ——: : : :
—— —— —— —— —— —— —— ——: : : :
MUSIC : – – – – –
• See page 58 (step 2) for how to enter track numbers.
The number of tracks in the current folder is displayed
in the top-left of the screen.
Once you ve entered a valid track number, the name of’
the track appears.
Navigate using the following controls:
Cursor buttons – Navigate the program list.
CLR – Clear the currently selected item in the
program list.
ENTER (or ) 6 – Start playing the program list.
PROGRAM – Exit the Program MP3 screen.
Comment faire une liste de
programmes de pistes MP3
1 Chargez un CD-ROM contenant des
fichiers MP3.
2 Appuyez sur PROGRAM pour saisir
l’écran MP3 Program.
MP3 Program
PROGRAM
Exit
ENTER
PlayMove
Folder:001~025
—— —— —— —— —— —— —— ——: : : :
—— —— —— —— —— —— —— ——: : : :
—— —— —— —— —— —— —— ——: : : :
—— —— —— —— —— —— —— ——: : : :
—— —— —— —— —— —— —— ——: : : :
– – – – – – – – – – :
A partir de cet cran vous pouvez saisir directement deé
numéros de répertoire et de piste pour créer une liste d
programmes.
3 Utilisez les touches numérotées pour
saisir le numéro d’un répertoire.
Voir la page 58 (op ration 2) pour savoir commenté
utiliser les touches numé érot es.
Le nombre de r pertoires sur le disque est affich ené é
haut cran.à gauche de l’é
Une fois que vous avez saisi un num ro de ré épertoire
valide, le titre du r pertoire apparaé ît.
4 Utilisez les touches numérotées pour
saisir un numéro de piste.
MP3 Program
PROGRAM
Exit
ENTER
PlayMove
Track:001~032
002 : : : :—— —— —— —— —— —— ——
—— —— —— —— —— —— —— ——: : : :
—— —— —— —— —— —— —— ——: : : :
—— —— —— —— —— —— —— ——: : : :
—— —— —— —— —— —— —— ——: : : :
MUSIC : – – – – –
• Voir page 58 (op ration 2) pour savoir commenté
saisir des num ros de pistes.é
Le nombre de pistes du r pertoire actuel est affich ené é
haut cran.à gauche de l’é
Une fois que vous avez saisi un num ro de piste validé
le nom de la piste apparaît.
Naviguez en utilisant les commandes suivantes :

62
En/Fr
Playing MP3s8 Lecture de MP3
MP3 compatibility information
• Mono or stereo MPEG-1 Audio Layer 3 format
compatible.
• The CD-ROM must be ISO 9660 compatible.
• ’MP3 tracks on mixed CD audio/MP3 discs can t be
played. Only the audio section is playable.
• This system is not compatible with multi-session
discs. If you try an play a multi-session disc, only the
first session will be played.
• This system can recognize a maximum of 250
folders and 250 tracks. Discs containing more than 250
folders or tracks will not play.
• Only the first 8 characters of folder and track names
(excluding the extension) are displayed.“ ”.mp3
• This system only plays tracks that are named with
the file extension “ ”.mp3 .
• This system plays MP3 tracks according to the order
in which they were recorded.
• Audio encoded at 128Kbps should sound close to
regular audio CD quality. Although this system will play
lower bit-rate MP3 tracks, the sound quality becomes
noticeably worse at lower bit-rates.
• MP3 tracks that are unplayable on this system are
automatically skipped.
Information sur la compatibilité du
format MP3
• àCompatible avec le format audio MPEG-1 3
couches st o ou mono.é ér
• êLe CD-ROM doit tre compatible avec ISO 9660.
• Les pistes MP3 sur des disques mixtes CD audio/M
ne peuvent pas tre lues. Seule la partie audio est lisiê
• ’Cet appareil n est pas compatible avec des disques
multi-session. Si vous essayez de lire un disque mult
session, seule la premi re session sera lue.è
• îCet appareil peut reconna tre un maximum de 250
répertoires et de 250 pistes. Des disques contenant pl
de 250 r pertoires ou pistes ne seront pas lus.é
• èSeuls les 8 premiers caract res des noms de
répertoire et de piste (l’extension “ .mp3 ” exclue) so
affich s.é
• éCet appareil lit uniquement des pistes nomm es av
l .’extension de fichier “ .mp3 ”
• ’Cet appareil lit des pistes MP3 en fonction de l ord
d’enregistrement.
• L’ é àaudio encod 128Kbps devrait avoir une qualit
sonore proche celle d un CD audio normal. Bien quà ’
cet appareil pourra lire des pistes MP3 avec un taux p
bas de bits, la qualit sonore devient assez mauvaise é
des taux de bits inférieurs.
• Les pistes MP3 illisibles sur cet appareil sont
automatiquement sautées.
Touches du curseur Pour naviguer sur la liste–
de programmes.
CLR – ’ Supprime de la liste de programmes l item
actuellement sé électionn .
ENTER (ou ) D marre la lecture de la liste de6 – é
programmes.
PROGRAM – ’é Quitte l cran MP3 Program.

63
En/Fr
9Using the Timer Utilisation de la minuterie
English Français
Using the wake up timer
You can use the timer as an alarm clock to wake up to
the sound of a disc loaded, the radio, or the optional
tape or MD deck. If you have an external component
operated by a separate timer, you can also set the source
function to that.
Once the timer is active, it will switch the system on
everyday at the set time.
Unlike an ordinary alarm clock, you need to set a system
switch off time as well as a switch on time.
You can only use the timer features if the clock is set.
1 Select the source that you want to wake
up to.
For a disc, press DVD/CD; for the radio press TUNER
FM AM/. For another component, press the correspond-
ing button.
2 Prepare the source.
Load a disc, tape, or MD, or tune to a radio station.
3 Press CLOCK/TIMER and select WAKE-
UP.
WAKE-UP
• Press 2 or 3 to change the displayed option. Press
ENTER to
select it.
4 Select TIMER EDIT.
TIMER EDIT
• Change menu options using the buttons.2 and 3
Press ENTER to select the currently displayed option.
5 Set the switch on time.
ON 9:3O am
Use 5 and ∞ to set the hour then press ENTER. Set the
minute in the same way, pressing ENTER to finish.
Utilisation de la minuterie de réveil
Vous pouvez utiliser la minuterie comme un réveil pou
vous réveiller au son d’un disque chargé, de la radio, o
de la platine cassette ou MD optionnelle. Si vous
disposez d’un composant externe opéré par une
minuterie séparée, vous pouvez également régler la
source à cette fonction.
Une fois que la minuterie est active, celle-ci allumera
l’appareil tous les jours à l’heure réglée.
Contrairement à un réveil courant, il fait régler une
heure de désactivation de l’appareil ainsi qu’une heure
d’allumage.
Vous pouvez utiliser les caractéristiques de la minuteri
uniquement si l’horloge est réglée.
1 Sélectionnez la source que vous souhaitez
pour vous réveiller.
Pour un disque, appuyez sur
DVD
/
CD ; pour la radio
appuyez sur TUNER FM AM / . Pour un autre
composant, appuyez sur la touche correspondante.
2 Préparez la source.
Chargez un disque, une cassette ou un MD, ou accorde
une station de radio.
3 Appuyez sur CLOCK/TIMER et
sélectionnez WAKE-UP.
WAKE-UP
• Appuyez sur pour changer l’option2 ou 3
affichée. Appuyez sur ENTER pour la sélectionner.
4 Sélectionnez TIMER EDIT.
TIMER EDIT
• Changez les options du menu en utilisant les touche
2 3 et . Appuyez sur ENTER pour sélectionner l’option
actuellement affichée.
5 Réglez l’heure d’allumage.
ON 9:3O am
Utilisez 5 et ∞ pour les heures puis appuyez sur
ENTER. Réglez les minutes de la même manière, en
appuyant sur ENTER pour finir.

64
En/Fr
Using the Timer9 Utilisation de la minuterie
6 Set the switch off time.
OFF 1O:3O am
Set in the same way as the switch on time, pressing
ENTER to finish.
7 Check the settings you just made.
The display shows the timer settings:
ON 9:3O am
TIMER CHECK
OFF 1O:3O am
DVD/CD
VOLUME 12
CHECK END
8 Switch the system into standby.
The timer will not work if the system is left on!
The standby light on the front panel lights green to
indicate that the timer has been set.
Activating/deactivating the wake up
timer
To activate the wake up timer, set the timer to . ToON
deactivate it, set the timer to OFF.
1 Press CLOCK/TIMER and select WAKE-
UP.
WAKE-UP
• Press 2 or 3 to change the displayed option. Press
ENTER to select an option.
2 Select TIMER ON or TIMER OFF.
• Change menu options using the 2 3 and buttons.
Press ENTER to select the currently displayed option.
6 Réglez l’heure de désactivation.
OFF 1O:3O am
R allumagéglez-la de la même manière que l’heure d’
en appuyant sur ENTER pour finir.
7 Vérifiez les réglages que vous venez de
faire.
L’ éaffichage montre les r glages de la minuterie :
ON 9:3O am
TIMER CHECK
OFF 1O:3O am
DVD/CD
VOLUME 12
CHECK END
8 Mettez l’appareil en attente.
La minuterie ne fonctionnera pas si l appareil reste’
allumé !
Le t moin de mise en attente sur le panneau avanté
s t’allume en vert pour indiquer que la minuterie a é é
réglée.
Activation/désactivation de la
minuterie de réveil
Pour activer la minuterie de r veil, r glez la minuterié é
ON. Pour la d sactiver, ré é àglez-la .OFF
1 Appuyez sur CLOCK/TIMER et
sélectionnez WAKE-UP.
• ’Appuyez sur 2 3 ou pour changer l option
affichée. Appuyez sur ENTER pour s lectionner uneé
option.
2 Sélectionnez TIMER ON ou TIMER OFF.
• Changez les options du menu en utilisant les touch
2 3 et . Appuyez sur ENTER pour s lectionner lé ’option
actuellement affichée.

65
En/Fr
9Using the Timer Utilisation de la minuterie
English Fran aisç
Checking the timer settings
If you ve set the wake-up timer, you can check the’
settings while the system is in standby.
1 With the system in standby, press CLOCK/
TIMER.
The display shows the timer settings:
ON 9:3O am
TIMER CHECK
OFF 1O:3O am
DVD/CD
VOLUME 12
CHECK END
Using the sleep timer
The sleep timer switches the system into standby after a
specified amount of time so that you can fall asleep
without worrying about the stereo being left on all night.
If you've also set the wake up timer this is important
since the wake up timer will only work if the system is in
standby.
1 Press CLOCK/TIMER and select SLEEP
TIMER.
SLEEP TIMER
• Press 2 or 3 to change the displayed option. Press
ENTER to select an option.
Comment vérifier les réglages de la
minuterie
Si vous r glez la minuterie de r veil, vous pouvez vé é éri
les r glages alors que l appareil est en attente.é ’
1 Avec l’appareil en attente, appuyez sur
CLOCK/TIMER.
L’ éafficheur montre les r glages de la minuterie :
ON 9:3O am
TIMER CHECK
OFF 1O:3O am
DVD/CD
VOLUME 12
CHECK END
Utilisation de la minuterie de
sommeil
La minuterie de sommeil met la cha ne en modeî
d attente apr s une heure sp cifi e afin que vous vous’ è é é
endormiez sans vous pr occuper si la cha ne est rest eé î é
allum e toute la nuit. Si vous avez galement r gl laé é é é
minuterie de r veil ceci est important puisque laé
minuterie de r veil ne fonctionnera que si la cha ne esté î
en mode d’attente.
1 Appuyez sur CLOCK/TIMER et
sélectionnez SLEEP TIMER.
SLEEP TIMER
• ’Appuyez sur 2 3 or pour changer l option
affichée. Appuyez sur ENTER pour s lectionner uneé
option.

66
En/Fr
Using the Timer9 Utilisation de la minuterie
2 Use the or button to select a sleep5 ∞
timer setting.
•
SLEEP AUTO
Switch off after the CD, MD or tape has played out *
•
SLEEP 9O
Switch off after 90 minutes
•
SLEEP 6O
Switch off after 60 minutes
•
SLEEP 3O
Switch off after 30 minutes
•
SLEEP OFF
Cancels the sleep timer
The sleep timer indicator () lights when the sleep
timer is active.
* Not available when playing a DVD, or a Video CD in
PBC mode, or if you're playing a CD, Video CD or MP3
disc in repeat mode. If you set a disc playing in repeat
mode after setting the sleep timer to SLEEP AUTO , it
automatically switches to the 90 minute setting.
• To cancel the sleep timer, switch the system into
standby, or select SLEEP OFF (as described above).
• If you switch to a different source when
SLEEP
AUTO is set, the system will automatically go into
standby a minute later.
2 Utilisez la touche pour5 ou ∞
sélectionner un réglage de minuterie de
sommeil.
•
SLEEP AUTO
S teindre apr s la lecture du CD, du MD ou de la’é è
cassette *
•
SLEEP 9O
S’éteindre au bout de 90 minutes
•
SLEEP 6O
S’éteindre au bout de 60 minutes
•
SLEEP 3O
S’éteindre au bout de 30 minutes
•
SLEEP OFF
Annule la minuterie de sommeil
L’indicateur de la minuterie de sommeil () s’allume
à ’ l activation de la minuterie de sommeil.
* N est pas disponible la lecture d un DVD ou d un’ à ’ ’
Video CD en mode PBC, ou si vous lisez un CD, un V
CD ou un disque MP3 en mode de r p tition. Si vousé é
r glez la lecture d un CD dans le mode de r p titioné ’ é é
apr ès le réglage de la minuterie de sommeil à
SLEEP
AUTO, celui-ci passera automatiquement au r glage dé
90 minutes.
• é éUne fois la minuterie de sommeil r gl e, vous pouv
vérifier l’heure laissée en appuyant une fois sur SLEEP.
• Pour annuler la minuterie de sommeil, passez la
cha lectionnez îne au mode d’attente, ou sé SLEEP OFF
(comme d crit ci-dessus).é
• à éSi vous passez une source diff rente quand
SLEEP
AUTO est ré é ’gl , l appareil se mettra automatiquement
en mode d attente une minute plus tard.’

67
En/Fr
10Advanced Sound Setup Configuration avancée du son
English Français
Commande gamme dynamique
La gamme dynamique d’une source est la différence qu’
a entre les sons les plus tranquilles et les plus bruyants. L
gamme dynamique des bandes-son en Dolby Digital peu
être très vaste. Ceci les rend plus excitantes, mais cela ve
aussi dire que lorsque vous baissez le volume vous pouve
perdre facilement des dialogues calmes. Activez la
commande gamme dynamique pour uniformiser le
volume de la bande-son.
1 Appuyez sur SYSTEM SETUP.
• Accédez à cette fonction ensemble avec la touche SHIFT.
2 Appuyez sur la touche 2 ou 3 jusqu’à ce
que vous voyiez D. RANGE dans l’afficheur.
3 Utilisez les touches 5 et ∞ pour
sélectionner un réglage pour la gamme
dynamique.
• D.R.C. OFF Réglage par défaut (sans changement
de dynamique)
• D.R.C. LOW La gamme dynamique est réduite
d’une petite quantité.
• D.R.C. MEDIUM Réglage moyen
• D.R.C. HIGH La gamme dynamique est réduite
d’une grande quantité (bon pour écouter à un très bas
volume).
4 Appuyez sur ENTER pour faire le réglage.
Dynamic Range Control
The dynamic range of a source is the difference between
the quietest and the loudest sounds. The dynamic range
of Dolby Digital soundtracks can be very great. This
makes them exciting, but it also means that when you
turn the volume down you can easily lose quiet dialog.
Switch on Dynamic Range Control to even out the
soundtrack volume.
1 Press SYSTEM SETUP.
• Access this function together with the SHIFT button.
2 Press the or button until you see2 3
D.R.C. in the display.
3 Use the and 5 ∞ buttons to select a
dynamic range setting.
• D.R.C. OFF Default setting (no change to the
dynamics)
• D.R.C. LOW Dynamic range is reduced by a
small amount.
• D.R.C. MEDIUM Mid setting
• D.R.C. HIGH Dynamic range is reduced by a
large amount (good for listening at very low volume).
4 Press ENTER to make the setting.
Atténuateur LFE
Utilisez l’atténuateur LFE (Low Frequency Effects –
Effets de basses fréquences) pour réduire le niveau du
subwoofer s’il est déformé.
1 Appuyez sur SYSTEM SETUP.
• Accédez à cette fonction avec la touche SHIFT.
2 Appuyez sur la touche 2 ou 3 jusqu’à ce
que vous voyiez LFE ATT sur l’affichage.
3 Utilisez les touches 5 et ∞ pour
sélectionner un réglage d’atténuation.
• LFE ATT 0 Réglage par défaut (pas
d’atténuation)
• LFE ATT 10 Le canal de LFE est atténué (réduit)
de 10dB
• ATT OFF Le canal de LFE est désactivé
4 Appuyez sur ENTER pour faire le réglage.
LFE Attenuator
Use the LFE (Low Frequency Effects) attenuator to
reduce the subwoofer level if it is distorting.
1 Press SYSTEM SETUP.
• Access this function together with the SHIFT button.
2 Press the or button until you see LFE2 3
ATT in the display.
3 Use the and 5 ∞ buttons to select a
dynamic range setting.
• LFE ATT 0 Default setting (no attenuation)
• LFE ATT 10 The LFE channel is attenuated
(reduced) by 10dB.
• ATT OFF The LFE channel is switched off.
4 Press ENTER to make the setting.

68
En/Fr
Advanced Sound Settings10 Configuration avancée du son
Dual-mono setting
The dual-mono setting applies only to Dolby Digital
discs that feature dual-mono material see the disc—
box for details.
Dual-mono discs are recorded with two independent
channels that may be played together or separately
depending on the situation. For example, a guitar
tuition disc might have the guitar recorded on one
channel and all the other instruments on the other. Use
the dual-mono setting to play just the guitar part on its
own; just the backing, or everything together (through
separate speakers, or mixed).
1 Press SYSTEM SETUP.
• Access this function together with the SHIFT button.
2 Press the or button until you see2 3
one of the displays shown below.
3 Use the and buttons to change the5 ∞
dual-mono setting.
•
L-ch1 R-ch2
default setting (the left channel is played through the
left speaker; the right through the right)
•
ch1
The left channel is played through the center speaker
(or through the left and right speakers if Surround
Off is selected); the right channel is muted.
•
ch2
The right channel is played through the center speaker
(or through the left and right speakers if Surround
Off is selected); the left channel is muted.
•
MIX
The left and right channels are mixed together and
played through the center speaker (or through both left
and right speakers if Surround Off is selected).
4 Press ENTER to make the setting.
Réglage dual-mono
Le r glage dual-mono s applique seulement auxé ’
disques en Dolby Digital qui offrent un mat riel dualé
mono. Voir l tui du disque pour plus de d tails.’é é
Les disques dual-mono sont enregistr s avec deuxé
canaux ind pendants qui peuvent tre lus ensemble oé ê
s paré ément selon la situation. Par exemple, sur un
disque de cours de guitare, la guitare doit treê
enregistrée sur un canal et les autres instruments sur
d’autres. Utilisez le réglage dual-mono pour ne pouv
lire que la partie correspondante la guitare ; que leà
fond, ou tout ensemble ( travers des enceintes sà épar
ou mé élang es).
1 Appuyez sur SYSTEM SETUP.
• é àAcc dez cette fonction ensemble avec la touche
SHIFT.
2 Appuyez sur la touche ou jusqu’à ce2 3
que vous voyiez un des affichages montrés
ci-dessous.
3 Utilisez les touches 5 et ∞ pour changer
le réglage dual-mono.
•
L-ch1 R-ch2
Réglage par défaut (le canal de gauche est lu à traver
l enceinte gauche ; celui de droite travers celle de’ à
droite).
•
ch1
Le canal de gauche est lu travers l enceinte centraleà ’
(ou à travers les enceintes droite et gauche si Sur-
round Off est s lectionn ) ; le canal de droite esté é
coupé.
•
ch2
Le canal de droite est lu travers l enceinte centrale à ’
à travers les enceintes droite et gauche si Surround
Off est sé é électionn ) ; le canal de gauche est coup .
•
MIX
Les canaux de droite et de gauche sont m s et sé élang
lus travers l enceinte centrale (ou traves des deuxà ’ à
enceintes droite et gauche si Surround Off est
sélectionné).
4 Appuyez sur ENTER pour faire le réglage.

69
En/Fr
10Advanced Sound Setup Configuration avancée du son
English Fran aisç
Adjusting channel volume levels
Depending on your room and where you re sitting, you’
may want to adjust the relative volumes of one or more
speakers for a more balanced sound. You can do this in
any mode, including the surround, DSP, and stereo
modes.
• Each DSP effect has its own set of channel level
settings.
• The channel levels you set for the surround mode
apply to all Advanced Theater effects.
• The headphone level is not affected by the channel
level settings.
1 Press CH LEVEL.
Adjustments to the channel volume levels will affect only
the current sound mode.
2 Use the and buttons to select a2 3
channel to adjust.
Lch OdB
The display shows the channel and its current setting.
• Remember that not all channels are available in all
sound modes.
3 Use the 5 and ∞ buttons to adjust the
volume of the current channel.
Lch OdB
Lch + 3dB
For best results, sit in your main listening position when
doing this. You can adjust each speaker in the range of
+/-10dB.
4 When you're done, press ENTER.
• ’If you don t press ENTER, channel level setting is
exited anyway after about 20 seconds.
Réglage des niveaux de volume du
canal
Selon la pi ce et l endroit o vous vous asseyez, il seè ’ ù
peut que vous souhaitiez r gler le volume d une oué ’
plusieurs enceintes pour obtenir un son plus é équilibr .
Vous pouvez le faire dans le mode quel qu il soit, y’
compris les modes surround, DSP et sté ér o.
Remarque
• Chaque effet DSP dispose de son propre groupe de
réglages du niveau du canal.
• é éLes niveaux du canal que vous avez r gl s pour le
mode surround s tous les effets Advanced’ àappliquent
Theater.
• éLes r glages du niveau du canal sont sans effet sur l
niveau des écouteurs.
1 Appuyez sur CH LEVEL.
Les r glages des niveaux de volume du canal affecteroé
uniquement le mode de son actuel.
2 Utilisez les touches 2 3 et pour
sélectionner un canal à régler.
Lch OdB
L’ éaffichage montre le canal et son r glage actuel.
• Rappelez-vous que les canaux ne sont pas tous
disponibles dans tous les modes.
3 Utilisez les touches pour régler le5 et ∞
volume du canal actuel.
Lch OdB
Lch + 3dB
Pour obtenir de meilleurs r sultats, faites le ré églage
depuis votre principale position d coute. Vous pouvez’é
régler chaque enceinte dans la gamme de +/-10dB.
4 Après quoi, appuyez sur ENTER.
• ’Si vous n appuyez pas sur la touche ENTER, le
r glage du niveau de canal est quitt de toute mani reé é è
au bout de 20 secondes environ.

70
En/Fr
DVD Setup Menu11
Menu Setup (de configuration) du DVD
Using the DVD Setup menu
The DVD Setup menu gives you access to all the system’s
DVD settings. Press DVD SETUP to display/leave the
menu and the cursor ( ) and 25∞3 ENTER buttons
on the remote to navigate and select options. In some
screens you can press RETURN to leave the screen
without making any changes. The controls for each
menu are shown at the bottom of the screen.
If an option is grayed out it means that it cannot be
changed at the current time. This is usually because a
disc is playing. Stop the disc, then change the setting.
The current setting for any option is marked with a
colored box. The color of the box indicates what kind of
disc the setting is applicable to: blue for DVD only; green
for any type of disc.
• The language options shown in the on-screen display
illustrations on the following pages may not correspond
to those available in your country or region.
Utilisation du menu Setup du DVD
Le menu Setup du DVD vous donne accès à tous les
réglages de la chaîne DVD. Appuyez sur
DVD SETUP
pour afficher/quitter le menu et les touches du curseu
(25∞3) et ENTER sur la télécommande pour
naviguer et sélectionner des options. Pour certains
écrans vous pouvez appuyez sur RETURN pour laisser
l’écran sans faire aucun changement. Les commande
correspondantes à chaque menu sont montrées sur la
partie inférieure de l’écran.
Si une option est en dehors du gris cela signifie qu’el
ne peut pas être changée à ce moment-là. Ceci est
normal car il y a un disque en cours de lecture. Arrête
le disque, puis changez le réglage.
Le réglage actuel pour toute option est marqué par un
case de couleur. La couleur de la case indique à quel
type de disque le réglage est applicable : en bleu
uniquement pour les DVD ; en vert pour tout type de
disque.
Remarque
• Les options de langue montrées sur les illustrations
de l’affichage à l’écran dans les pages suivantes peuv
ne pas correspondre à celles disponibles dans votre p
ou votre région.
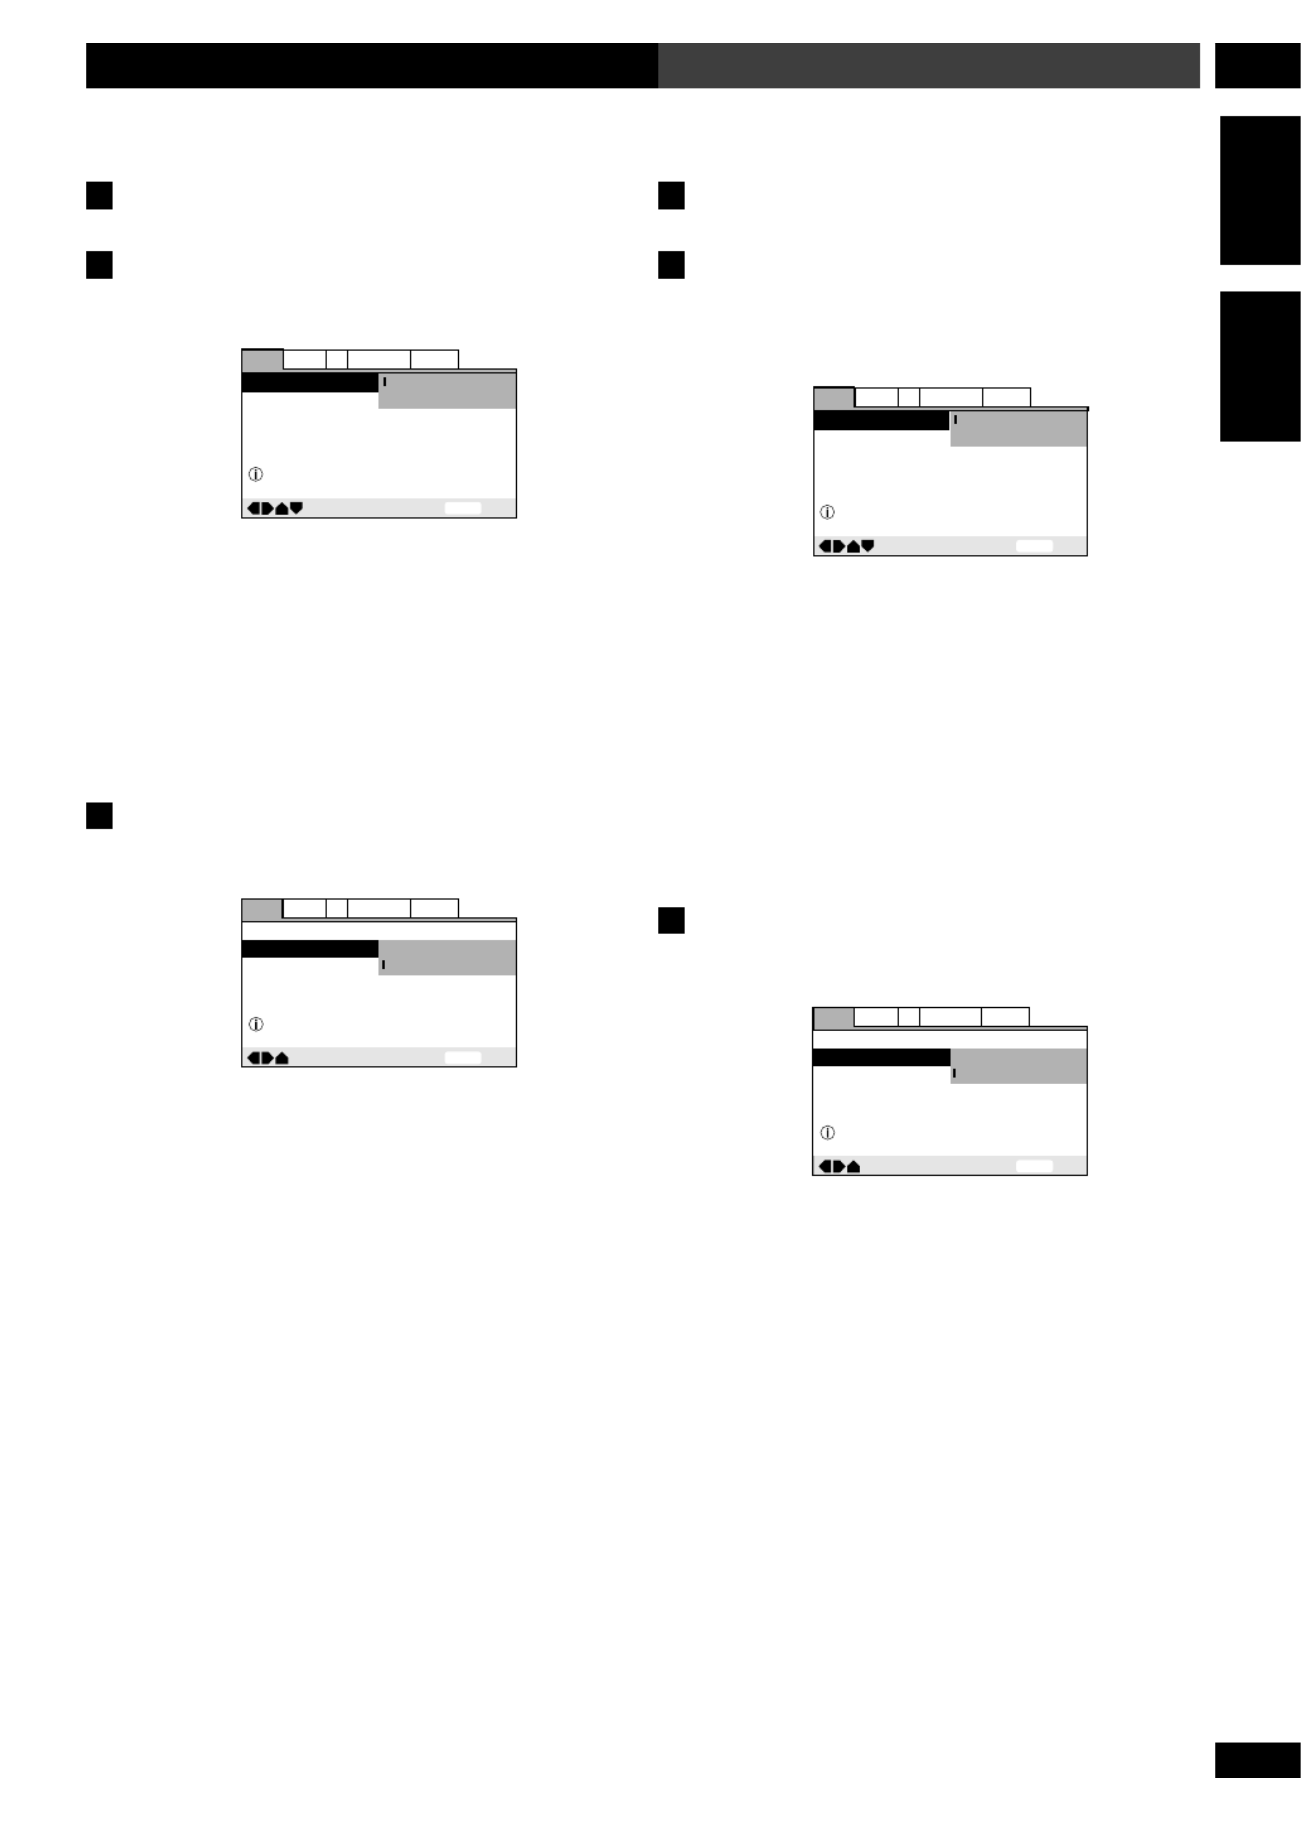
71
En/Fr
11DVD Setup Menu
Menu Setup (de configuration) du DVD
English Français
Audio settings
Dolby Digital Out
• Default: Dolby Digital
—
—
SETUP Exit
Move
Dolby Digital Out
96kHz PCM Out
Dolby Digital
Dolby Digital PCM3
Changes Dolby Digital output mode
General
V2 Language
Audio Video1
You only need to make this setting if you connected
this system to another component (AV amplifier, etc.)
using the optical digital out.
If your AV amplifier (or other connected component) is
Dolby Digital compatible, set to Dolby Digital,
otherwise set to Dolby Digital 3 PCM.
96kHz PCM Out
• Default: 96kHz
—
—
SETUP
ExitMove
Dolby Digital Out
96kHz PCM Out
Dolby Digital
96kHz 48kHz3
96kHz
Changes 96kHz output mode
GeneralV2 LanguageAudio Video1
You only need to make this setting if you connected
this system to another component (MD recorder, etc.)
using the digital out.
If your AV amplifier (or other connected component) is
96kHz audio compatible, set to , otherwise set96kHz
to 96kHz 3 48kHz.
Réglages audio
Dolby Digital Out (Sortie Dolby
Digital)
• Par défaut : Dolby Digital
—
—
SETUP ExitMove
Dolby Digital Out
96kHz PCM Out
Dolby Digital
Dolby Digital PCM3
Changes Dolby Digital output mode
GeneralV2 LanguageAudio Video1
Vous avez besoin de faire ce réglage uniquement si
vous avez raccordé à cet appareil un autre
composant (amplificateur AV, etc.) en utilisant la
sortie numérique optique.
Si votre amplificateur AV (ou autre composant raccord
est compatible avec Dolby Digital, faites le réglage à
Dolby Digital, autrement réglez à Dolby Digital
3 PCM.
96kHz PCM Out (Sortie PCM 96kHz)
• Par défaut : 96kHz
—
—
SETUP
ExitMove
Dolby Digital Out
96kHz PCM Out
Dolby Digital
96kHz 48kHz3
96kHz
Changes 96kHz output mode
GeneralV2 LanguageAudio Video1
Vous avez besoin de faire ce réglage uniquement si
vous avez raccordé à cet appareil un autre
composant (enregistreur MD, etc.) en utilisant la
sortie numérique.
Si votre amplificateur AV (ou autre composant raccord
est audio compatible avec 96kHz, faites le réglage à
96kHz 96kHz , autrement réglez à 3 48kHz.

72
En/Fr
DVD Setup Menu11
Menu Setup (de configuration) du DVD
Video settings
TV Screen
• Set in Setup Navigator (Default: 16:9 (Wide))
—
SETUP ExitMove
TV Screen 4:3 (Letter Box)
4:3 (Pan & Scan)
16:9 (Wide)
Select your display preference
GeneralV2 LanguageAudio Video1
If you have a widescreen TV, select the 16:9 (Wide)
setting—widescreen DVD software is then shown using
the full screen area. When playing software recorded in
conventional (4:3) format, the settings on your TV will
determine how the material is presented—see the
manual that came with your TV for details on what
options are available.
If you have a conventional TV, choose either 4:3
(Letter Box) 4:3 (Pan & Scan)or . In Letter
Box mode, widescreen software is shown with black bars
at the top and bottom of the screen. Pan & Scan chops
the sides off widescreen material to make it fit the 4:3
screen (so even though the picture looks larger on the
screen, you’re actually seeing less of the movie). See
page 95 for more information.
S-Video Out
• Default setting: S2
You only need to make this setting if you connected
this player to your TV using an S-Video cord.
If you find that the picture is stretched or distorted on
the default setting, try changing it to S2 S1.
—
Audio1 Video1 Language General
A2 V2
ExitMove
TV Screen
S-Video Out
Screen Saver
16:9(Wide
)
S1
S2
SETUP
Réglages vidéo
TV Screen (Ecran du téléviseur)
• Réglé au Setup Navigator (Par défaut : 16:9
(Wide))
—
SETUP
ExitMove
TV Screen 4:3 (Letter Box)
4:3 (Pan & Scan)
16:9 (Wide)
Select your display preference
GeneralV2 LanguageAudio Video1
Si vous avez un téléviseur à grand écran, sélectionnez
réglage 16:9 (Wide). Le logiciel du DVD grand écran
est alors montré en prenant tout l’espace de l’écran. A
lecture d’un logiciel enregistré sous un format
conventionnel (4:3), les réglages sur votre téléviseur
détermineront la façon dont est présenté le matériel. V
le manuel qui accompagne votre téléviseur pour les
détails sur les options qui sont disponibles.
Si vous avez un téléviseur conventionnel, choisissez
4:3 (Letter Box) 4:3 (Pan & Scan)ou . Dans
le mode Letter Box (boîte aux lettres), le logiciel gran
écran est montré avec des franges noires en haut et en
bas de l’écran. Pan & Scan (panoramique et scannage
réduit les côtés du matériel pour l’adapter à l’écran 4
(bien que l’image semble plus large sur l’écran, vous
êtes en train de voir moins de quantité du film). Voir
page 95 pour obtenir plus d’information.
S-Video Out (Sortie S-Video)
• Réglage par défaut : S2
Il faut faire ce r glage uniquement si vous avezé
raccord lé ce lecteur à votre té éviseur en utilisant un
cordon S-Video.
Si vous trouvez que l’image est tassée ou déformée a
réglage par défaut , essayez de le changer à .S2 S1
—
Audio1 Video1 Language GeneralA2 V2
ExitMove
TV Screen
S-Video Out
Screen Saver
16:9(Wide
)
S1
S2
SETUP

74
En/Fr
DVD Setup Menu11
Menu Setup (de configuration) du DVD
Selecting a preset
1 Select ‘Start’.
2 Select ‘Video Memory Select’.
3 Select a preset.
• Standard – Default setting; no effect added
• Cinema – High contrast picture
• Animation – Picture with rich color
• Memory 1, 2, 3 – User presets (see below for
more on these)
You can highlight a preset while a disc is playing (before
you press ENTER to select it) to see the effect on the
picture immediately. Note that depending on the disc
and your TV/monitor, the effect of these settings may not
be clear.
Creating your own setting (1)
1 Select ‘Start’.
2 Select ‘Video Setup’
Video Memory Select
Video Setup
3 Use the and buttons to select a5 ∞
picture quality parameter, then use the 2
and buttons to adjust that parameter.3
DISPLAY
ENTER
Fine Focus On Off
Move Select Check
• Fine Focus – Switch on to reveal greater detail
(higher resolution) in the picture.
• Contrast – Adjusts the contrast of the elements in
the picture.
Sélection d’un préréglage
1 Sélectionnez “ Start ”.
2 Sélectionnez “ Video Memory Select ”.
3 Sélectionnez un préréglage.
• Standard – Réglage par défaut ; aucun effet
supplémentaire.
• Cinema – Image avec un contraste élevé.
• Animation – Image avec des couleurs vives.
• Memory 1, 2, 3 – Réglages à programmer par
l’utilisateur (voir ci-dessous pour obtenir des détails
supplémentaires)
Vous pouvez souligner un préréglage pendant la lectu
d’un disque (avant d’appuyer sur ENTER pour le
sélectionner) pour voir l’effet immédiat sur l’image.
Remarquez que l’effet de ces réglages peut ne pas êtr
clair selon le disque et votre téléviseur/moniteur.
Comment créer votre propre configura-
tion (1)
1 Sélectionnez “ Start ”.
2 Sélectionnez “ Video Setup ”.
Video Memory Select
Video Setup
3 Utilisez les touches 5 et ∞ pour
sélectionner un paramètre pour la qualité
d’image, puis utilisez les touches 2 et 3
pour régler ce paramètre.
DISPLAY
ENTER
Fine Focus On Off
Move Select Check
• Fine Focus (Haute definition)– Activez-le pour
découvrir une image beaucoup plus détaillée (plus
haute definition).
• Contrast (Contraste)– Règle le contraste des
objets dans l’image.

75
En/Fr
11DVD Setup Menu
Menu Setup (de configuration) du DVD
English Fran aisç
• Sharpness – Adjusts the sharpness of the mid-
frequency (less detailed) elements in the picture. (This
setting is only effective when Fine Focus is .)On
• Chroma Level – Adjusts how saturated colours
appear.
• Hue – Adjusts the overall colour balance between
red and green.
4 Press ENTER to make the changes you’ve
made effective.
Creating your own setting (2)
1 Select ‘Start’.
2 Select ‘Video Setup’
Video Memory Select
Video Setup
3 Press DVD DISP.
4 Use the and buttons to select a5 ∞
picture quality parameter, then use the 2
and 3 buttons to adjust that parameter.
Memory
Fine Focus
Contrast
Sharpness
Chroma Level
Hue
On Off
soft fine
min max
min max
green red
Off 1 2 3
• The parameters you can adjust are the same as
above.
• To save your changes in one of the user presets,
highlight , Memory 1 2 or 3 and press ENTER.
• Sharpness (Netteté)– Règle la netteté des objets
de fréquence moyenne (moins détaillés) de l’image. (C
réglage est uniquement effectif quand Fine Focus est
On.)
• Chroma Level (Niveau chromatique)– Règle les
couleurs qui apparaissent saturées.
• Hue (Nuance)– Règle l’ensemble de l’équilibre de
la couleur entre le rouge et le vert.
4 Appuyez sur ENTER pour rendre effectifs
vos changements.
Comment créer votre propre configura-
tion (2)
1 Sélectionnez “ Start ”.
2 Sélectionnez “ Video Setup ”.
Video Memory Select
Video Setup
3 Appuyez sur DVD DISP.
4 Utilisez les touches 5 et ∞ pour
sélectionner un paramètre pour la qualité
d’image, puis utilisez les touches 2 et 3
pour régler ce paramètre.
Memory
Fine Focus
Contrast
Sharpness
Chroma Level
Hue
On Off
soft fine
min max
min max
green red
Off 1 2 3
• Les paramètres que vous pouvez régler sont les
mêmes que les antérieurs.
• Pour mémoriser vos changements dans l’un des
réglages à programmer par l’utilisateur, soulignez
Memory 1 2 3, ou et appuyez sur ENTER.

76
En/Fr
DVD Setup Menu11
Menu Setup (de configuration) du DVD
Still Picture
• Default setting: Auto
—
—
—
—
SETUP
ExitMove
Background Color
Video Adjust
Still Picture
On Screen Display
Angle Indicator
Pioneer Logo
Field
Frame
Auto
General
V1 Language
Audio Video2
The player uses one of two processes when displaying a
still frame from a DVD disc. The default Auto setting lets
the system decide which to use.
Field – produces a stable, generally shake-free image.
Frame – produces a sharper image, but more prone to
shake than field stills.
On Screen Display
• Default setting: Position – Normal
—
—
— —
—
SETUP Exit
Move
Background Color
Video Adjust
Still Picture
On Screen Display
Angle Indicator
Pioneer Logo
Auto
Position Wide—
Position Normal—
Off
GeneralV1 LanguageAudio Video2
When watching DVD discs recorded in 4:3 format
(‘regular’ TV size) on a widescreen TV, it can be difficult
to see the operation displays (Play Stop, , Resume,
etc.) at the top of the screen. If you find them hard to
read, select Position – Wide.
If you prefer not to have the operation displays shown
on-screen, change the setting to Off.
Still Picture (Image figée)
• Réglage par défaut : Auto
—
—
—
—
SETUP
ExitMove
Background Color
Video Adjust
Still Picture
On Screen Display
Angle Indicator
Pioneer Logo
Field
Frame
Auto
GeneralV1 LanguageAudio Video2
Le lecteur utilise un des deux procédés quand il affic
une image figée d’un disque DVD. Le réglage par dé
Auto laisse l’appareil décider lequel utiliser.
Field – fournit une image stable, en général sans
vacillement.
Frame – fournit une image plus nette, mais plus
enclin à vaciller que les champs figés.
On Screen Display (Affichage à
l’écran)
• Réglage par défaut : Position – Normal
—
—
— —
—
SETUP
Exit
Move
Background Color
Video Adjust
Still Picture
On Screen Display
Angle Indicator
Pioneer Logo
Auto
Position Wide—
Position Normal—
Off
GeneralV1 LanguageAudio Video2
Si vous visionnez des disques DVD enregistrés sous
format 4 :3 (format de téléviseur “ régulier ”) sur un
téléviseur à grand écran, il se peut que les affichages
d’opération (Play Stop, , Resume, etc.) soient
difficiles à voir sur la partie supérieure de l’écran. Si
vous les trouver difficiles à lire, sélectionnez Position
– Wide.
Si vous préférez que les opérations ne soient pas
affichées à l’écran, changez le réglage à Off.

77
En/Fr
11DVD Setup Menu
Menu Setup (de configuration) du DVD
English Fran aisç
Language settings
OSD language
• Set in Setup Navigator (default: English)
—
—
—
—
SETUP
ExitMove
OSD Language
Audio Language
Subtitle Language
Auto Language
English
fran aisç
Deutsch
Italiano
Espa olñ
Select the On Screen Language
GeneralV2 LanguageAudio Video1
Choose the language you want the OSDs in.
Audio Language
• Default Setting: English
—
—
—
—
SETUP
ExitMove
OSD Language
Audio Language
Subtitle Language
Auto Language
English
French
German
Italian
Spanish
Other
Setup audio language
GeneralV2 LanguageAudio Video1
Angle Indicator
• Default setting: On
—
—
—
—
SETUP
ExitMove
Background Color
Video Adjust
Still Picture
On Screen Display
Angle Indicator
Pioneer Logo
Auto
Position - Normal
On
Off
GeneralV1 LanguageAudio Video2
If you prefer not to see the camera icon on-screen
during multi-angle scenes on DVD discs, change the
Angle Indicator setting to Off.
Angle Indicator (Indicateur d’angle)
• Réglage par défaut : On
—
—
—
—
SETUP
ExitMove
Background Color
Video Adjust
Still Picture
On Screen Display
Angle Indicator
Pioneer Logo
Auto
Position - Normal
On
Off
GeneralV1 LanguageAudio Video2
Si vous préférez ne pas voir l’icône de caméra à l’écran
pendant des scènes à angles multiples sur des disques
DVD, changez le réglage “ Angle Indicator ” à Off
(désactivé).
Réglages de la langue
OSD language (Langue OSD)
• Réglé au Setup Navigator (par défaut : )English
—
—
—
—
SETUP
ExitMove
OSD Language
Audio Language
Subtitle Language
Auto Language
English
fran aisç
Deutsch
Italiano
Espa olñ
Select the On Screen Language
GeneralV2 LanguageAudio Video1
Choisissez la langue pour les OSD.
Audio Language (Langue audio)
• Réglage par défaut : English
—
—
—
—
SETUP
ExitMove
OSD Language
Audio Language
Subtitle Language
Auto Language
English
French
German
Italian
Spanish
Other
Setup audio language
GeneralV2 LanguageAudio Video1
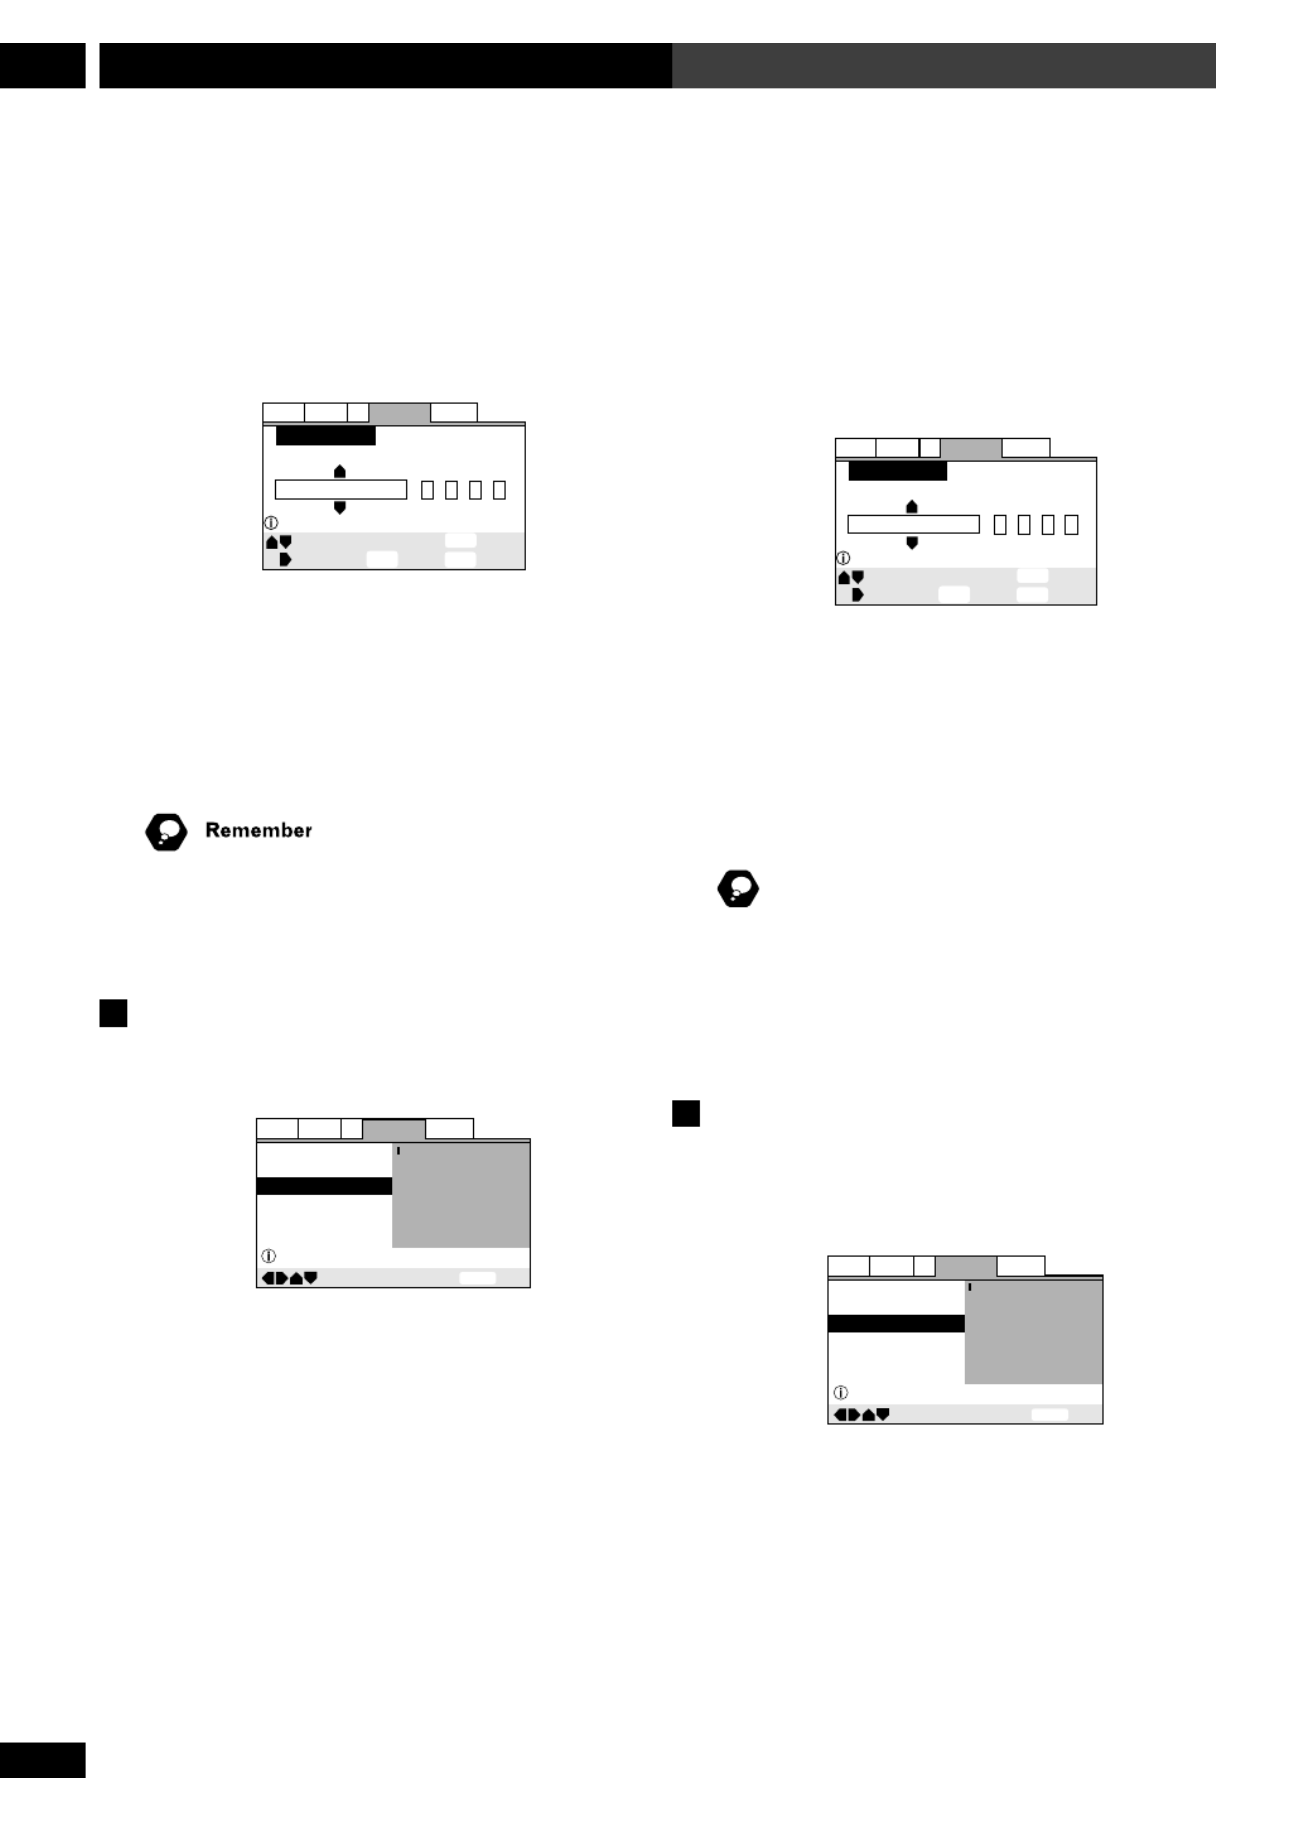
78
En/Fr
DVD Setup Menu11
Menu Setup (de configuration) du DVD
This setting is your preferred audio language for DVD
discs. If the language you specify here is recorded on a
disc, the system automatically plays the disc in that
language (although this depends on the Auto Lan-
guage setting—see Auto Language on page 79).
Setup audio language
+/–
Audio Language
SETUP
Move
Exit
ENTER
Select
Return
ja: Japanese
List of Languages Code (0~2)
1 0 0 1
RETURN
GeneralV2 LanguageAudio Video1
The DVD format recognizes 136 different languages.
Choose Other if you want to specify a language other
than those listed, then follow the on-screen display to
select a language. You may also want to refer to the
Language code list on page 94.
You can switch between the languages recorded on a
DVD disc any time during playback using the AUDIO
button. (This does not affect this setting.)
Subtitle Language
• Default Setting: English
—
—
—
—
SETUP
ExitMove
OSD Language
Audio Language
Subtitle Language
Auto Language
English
French
German
Italian
Spanish
Other
Setup disc's subtitle language
General
V2 Language
Audio Video1
This setting is your preferred subtitle language for DVD
discs. If the language you specify here is recorded on a
disc, the system automatically plays the disc with those
subtitles (although this depends on the Auto Language
setting—see Auto Language on page 79).
Ce réglage correspond à votre langue audio préférée
pour les disques DVD. Si la langue que vous spécifiez ici
est enregistrée sur un disque, la chaîne lira
automatiquement le disque dans cette langue (quoique
cela dépend du réglage Auto Language . Voir Auto
Language page 79).
Setup audio language
+/–
Audio Language
SETUP
Move
Exit
ENTER
Select
Return
ja: Japanese
List of Languages Code (0~2)
1 0 0 1
RETURN
GeneralV2 LanguageAudio Video1
Le format du DVD reconnaît 136 langues différentes.
Choisissez Other (autres) si vous souhaitez spécifiez
une langue autre que celles de la liste, puis suivez
l’affichage à l’écran pour sélectionner une langue. Il se
peut que vous souhaitiez également consulter la Liste
des codes de langues à la page 94.
Rappel
Vous pouvez choisir parmi les langues enregistrées sur
un disque DVD n’importe quand pendant la lecture en
utilisant la touche AUDIO. (Ceci est sans effet sur ce
réglage.)
Subtitle Language (Langue des sous-
titres)
• Réglage par défaut : English
—
—
—
—
SETUP ExitMove
OSD Language
Audio Language
Subtitle Language
Auto Language
English
French
German
Italian
Spanish
Other
Setup disc's subtitle language
GeneralV2 LanguageAudio Video1
Ce réglage correspond à votre langue préférée pour les
sous-titres de disques DVD. Si la langue que vous
spécifiez ici est enregistrée sur un disque, la chaîne lira
automatiquement le disque avec ces sous-titres
(quoique cela dépend du réglage ). VoirAuto Language
Auto Language page 79).

79
En/Fr
11DVD Setup Menu
Menu Setup (de configuration) du DVD
English Fran aisç
Setup audio language
+/–
Subtitle Language
SETUP
Move
Exit
ENTER
Select
Return
ja: Japanese
List of Languages Code (0~2)
1 0 0 1
RETURN
GeneralV2 LanguageAudio Video1
The DVD format recognizes 136 different languages.
Choose Other if you want to specify a language other
than those listed, then follow the on-screen display to
select a language. You may also want to refer to the
Language code list on page 94.
You can change or switch off the subtitles on a DVD disc
any time during playback using the SUBTITLE button.
(This does not affect this setting.)
Auto Language
• Default Setting: On
—
—
—
—
SETUP
ExitMove
OSD Language
Audio Language
Subtitle Language
Auto Language
English
English
English
On
Off
Play dialog, etc. in original language
Subtitle ON with foreign audio
GeneralV2 LanguageAudio Video1
When set to , the system always selects the defaultOn
audio language on a DVD disc (French dialog for a
French movie, for example), and displays subtitles in
your preferred subtitle language only if that is set to
something different. In other words, movies in your
native language won’t have any subtitles, while foreign
language movies will be shown with subtitles.
Set to to have the system play discs strictlyOff
according to your Audio Language and Subtitle
Language settings.
For Auto Language to work, the Audio Language and
Subtitle Language settings must be the same—see
pages 77–78.
Setup audio language
+/–
Subtitle Language
SETUP
Move
Exit
ENTER
Select
Return
ja: Japanese
List of Languages Code (0~2)
1 0 0 1
RETURN
GeneralV2 LanguageAudio Video1
Le format du DVD reconnaît 136 langues différentes.
Choisissez Other si vous souhaitez spécifiez une
langue autre que celles de la liste, puis suivez l’affichage
à l’écran pour sélectionner une langue. Il se peut que
vous souhaitiez également consulter la Liste des codes
de langues à la page 94.
Rappel
Vous pouvez changer ou désactiver les sous-titres sur un
disque DVD n’importe quand pendant la lecture en
utilisant la touche SUBTITLE. (Ceci est sans effet sur ce
réglage.)
Auto Language (Langue automatique)
• Réglage par défaut : On (activé)
—
—
—
—
SETUP
ExitMove
OSD Language
Audio Language
Subtitle Language
Auto Language
English
English
English
On
Off
Play dialog, etc. in original language
Subtitle ON with foreign audio
GeneralV2 LanguageAudio Video1
Si le réglage est , la chaîne sélectionne toujours laOn
langue audio par défaut sur un disque DVD (dialogues
en français pour un film français, par exemple), et
affiche les sous-titres dans votre langue préférée
seulement si le réglage est différent. Dans d’autres mots,
les films qui sont dans votre langue maternelle n’auront
pas de sous-titres, tandis que les films étrangers seront
montrés avec des sous-titres.
Réglez à pour que la chaîne lise des disquesOff
strictement en fonction de vos réglages Audio Lan-
guage et Subtitle Language.
Pour que Auto Language fonctionne, les réglages de
Audio Language Subtitle Language et doivent être les
mêmes. Voir les pages 77 et 78.
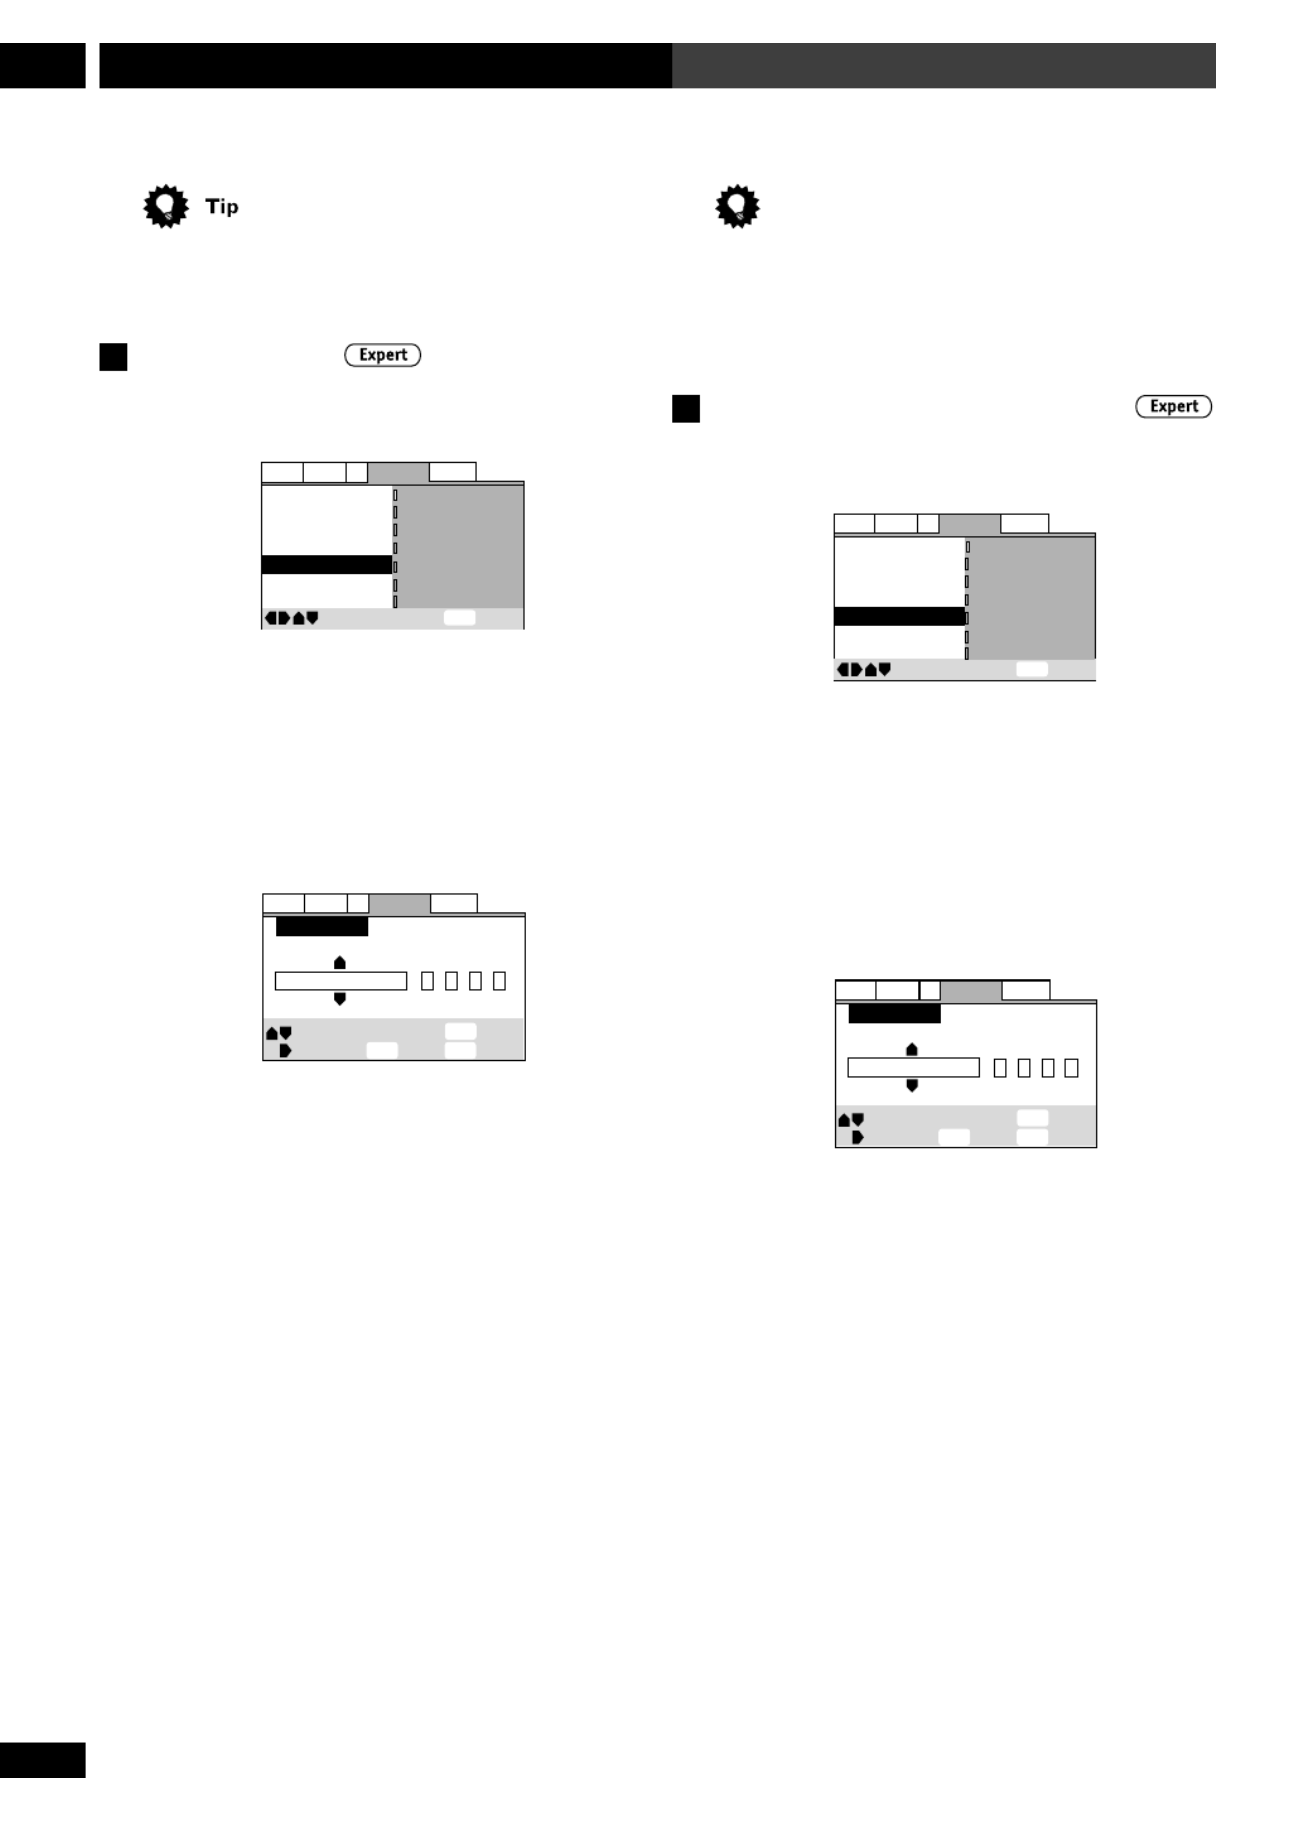
80
En/Fr
DVD Setup Menu11
Menu Setup (de configuration) du DVD
You can still switch audio and subtitle languages on
playback using the AUDIO SUBTITLE and buttons.
DVD Language
• Default Setting: w/Subtitle Language
GeneralV2 LanguageAudio Video1
OSD Language – English
Audio Language – English
Subtitle Language Japanese
DVD Language
English
Subtitle Off
- Selected Subtitle
Auto Language
- On
Subtitle Display
- On
Move
Exit
SETUP
w/ Subtitle Language
English
French
German
Italian
Spanish
Other
Some multilingual discs have disc menus in several
languages. This setting specifies in which language the
disc menus should appear. Leave on the default setting
for menus to appear in the same language as your
Subtitle Language—see page 78.
GeneralV2 LanguageAudio Video1
+/–
DVD Language
SETUP
Move
Exit
ENTER
Select
Return
ja: Japanese
List of Languages Code (0~2)
1 0 0 1
RETURN
The DVD format recognizes 136 different languages.
Choose Other if you want to specify a language other
than those listed, then follow the on-screen display to
select a language. You may also want to refer to the
Language code list on page 94.
Astuce
Vous pouvez encore changer la langue audio et celle des
sous-titres lors de la lecture en utilisant les touches
AUDIO SUBTITLE et .
DVD Language (Langue du DVD)
• Réglage par défaut : w/Subtitle Language
General
V2 Language
Audio Video1
OSD Language – English
Audio Language English–
Subtitle Language Japanese
DVD Language
English
Subtitle Off
- Selected Subtitle
Auto Language
- On
Subtitle Display
- On
Move
Exit
SETUP
w/ Subtitle Language
English
French
German
Italian
Spanish
Other
Certains disques à langues multiples ont des menus de
disque dans plusieurs langues. Ces réglages spécifient la
langue dans laquelle les menus de disque doivent
apparaître. Laissez le réglage par défaut pour que les
menus apparaissent dans la même langue que pour
Subtitle Language. Voir la page 78.
GeneralV2 LanguageAudio Video1
+/–
DVD Language
SETUP
Move
Exit
ENTER
Select
Return
ja: Japanese
List of Languages Code (0~2)
1 0 0 1
RETURN
Le format du DVD reconnaît 136 langues différentes.
Choisissez Other si vous souhaitez spécifiez une
langue autre que celles de la liste, puis suivez l’affichage
à l’écran pour sélectionner une langue. Il se peut que
vous souhaitiez également consulter la Liste des codes
de langues à la page 94.

81
En/Fr
11DVD Setup Menu
Menu Setup (de configuration) du DVD
English Fran aisç
Subtitle Display
• Default Setting: On
GeneralV2 LanguageAudio Video1
OSD Language – English
Audio Language – English
Subtitle Language – English
DVD Language -
English
Subtitle Off -
Selected Subtitle
Auto Language –
On
Subtitle Display
On
Move
Exit
Off
Assist Subtitle
On
SETUP
Set to , the player displays subtitles according to theOn
Subtitle Language Auto Language and settings above.
Set to to switch subtitles off altogether (althoughOff
see Subtitle Off on this page for special cases). Set to
Assist Subtitle to have the player display the extra
assistive subtitles recorded on to some DVD discs.
Subtitle Off
• Default Setting: Selected Subtitle
GeneralV2 LanguageAudio Video1
OSD Language – English
Audio Language English–
Subtitle Language English–
DVD Language –
English
Subtitle Off
Selected Subtitle
Auto Language
– On
Subtitle Display
- On
Move
Exit
With Audio
Selected Subtitle
SETUP
Some discs display subtitles even if the Subtitle Display
setting (this page) is set to off. In this case, you can
either have the subtitles displayed in the same language
as your preferred audio language (With Audio), or
in your preferred subtitle language (Selected
Subtitle). If the Audio Language and Subtitle
Language settings are the same then both of these
choices will give the same result.
Subtitle Display (Affichage des sous-
titres)
• Réglage par défaut : (activé)On
GeneralV2 LanguageAudio Video1
OSD Language – English
Audio Language – English
Subtitle Language – English
DVD Language -
English
Subtitle Off -
Selected Subtitle
Auto Language –
On
Subtitle Display
On
Move
Exit
Off
Assist Subtitle
On
SETUP
Réglé à , le lecteur affiche les sous-titres en fonctioOn
des réglages de Subtitle Language et Auto Language à
la page antérieure. Réglez à pour désactiverOff
complètement les sous-titres (cependant voir Subtitle
Off sur cette page). Réglez à Assist Subtitle pour
que le lecteur affiche les sous-titres supplémentaires
d’assistance enregistrés sur certains disques DVD.
Subtitle Off (Sous-titres désactivés)
• Réglage par défaut : Selected Subtitle
GeneralV2 LanguageAudio Video1
OSD Language – English
Audio Language English–
Subtitle Language English–
DVD Language –
English
Subtitle Off
Selected Subtitle
Auto Language
– On
Subtitle Display
- On
Move
Exit
With Audio
Selected Subtitle
SETUP
Certains disques affichent des sous-titres même si le
réglage Subtitle Display (cette page) est désactivé
(Off). Dans ce cas, vous pouvez soit avoir les sous-titr
affichés dans la même langue que votre langue audio
préférée (With Audio), soit dans votre langue
préférée pour les sous-titres (Selected Subtitle). Si
les réglages sonAudio Language et Subtitle Language
les mêmes alors les deux choix donneront le même
résultat.

82
En/Fr
DVD Setup Menu11
Menu Setup (de configuration) du DVD
General settings
Setup Menu Mode
• Default setting: Basic
—
—
—
SETUP
ExitMove
Setup Menu Mode
Setup Navigator
Parental Lock
Expert
Basic
Off (us)
Change menu mode
General
V2 Language
Audio Video1
The Basic setup menu gives you access to the more
commonly used settings. It also features an information
bar which tells you more about what the currently
highlighted option means.
Set to for access to all settings.Expert
Parental Lock
• Default level: Off
• Default password: none
• Default country code: 2119 us
Parental Lock
Setup Menu Mode
– Basic
Move
Exit
Password
Level
Country Code
SETUP
Setup viewing restrictions
Setup Navigator
GeneralV2 LanguageAudio Video1
Some DVD Video discs feature a Parental Lock level. If
your player is set to a lower level than the disc, it will
require you to enter a password before the disc will play.
This gives you some control about what your children
watch on your DVD player.
Some discs also support the Country Code feature. The
player does not play certain scenes on these discs,
depending on the country code you set.
Réglages généraux
Setup Menu Mode (Mode menu de
configuration)
• Réglage par défaut : Basic
—
—
—
SETUP
Exit
Move
Setup Menu Mode
Setup Navigator
Parental Lock
Expert
Basic
Off (us)
Change menu mode
GeneralV2 LanguageAudio Video1
Le menu de configuration vous donne accès auxBasic
réglages le plus souvent utilisés. Il présente également
une barre d’information qui vous informe sur la
signification de l’option actuellement en surbrillance.
Réglez à pour accéder à tous les réglages.Expert
Parental Lock (Verrouillage parental)
• Niveau par défaut : Off
• Mot de passe par défaut : (aucun)none
• Code du pays par défaut : 2119 us
Parental Lock
Setup Menu Mode
– Basic
Move
Exit
Password
Level
Country Code
SETUP
Setup viewing restrictions
Setup Navigator
GeneralV2 LanguageAudio Video1
Certains disques DVD disposent d’un niveau de
verrouillage parental. Si votre lecteur est réglé à un un
niveau inférieur à celui du disque, il vous faudra saisir
un mot de passe avant de lire le disque. Ceci vous offre
un certain contrôle sur ce que vos enfants regardent sur
votre lecteur DVD.
Certains disques supportent également comme
caractéristique le code du pays. Le lecteur ne lira pas
certaines scènes de certains disques, selon le code du
pays que vous avez réglé.

83
En/Fr
11DVD Setup Menu
Menu Setup (de configuration) du DVD
English Fran aisç
Before you can set the Parental Lock level or the
Country Code you must register a password. As the
password owner, you can change the Parental Lock level
or Country Code whenever you like. You can also
change the password.
Not all discs that you may consider inappropriate for
your children are rated. Unrated discs will always play
without requiring the password first.
Registering a new password
You must register a password before you can change the
Parental Lock level or enter a Country Code.
1 Select ‘Password’.
2 Use the number buttons to enter a 4-
digit password.
It’s also possible to use the cursor buttons to set the
password (up and down to set the number; left and right
to change the cursor position).
3 Press ENTER to register the password.
If you forget your password, you can reset the system
then register a new one. See page 98 for how to reset the
player.
Changing your password
To change your password, confirm your existing
password then enter a new one.
1 Select ‘Password Change’.
2 Use the number buttons to enter your
existing password.
• The numbers appear as asterisks as you enter them.
• It’s also possible to use the cursor buttons to set the
password (up and down to set the number; left and right
to change the cursor position).
3 Press ENTER.
4 Enter a new password.
5 Press ENTER.
Avant de pouvoir régler le niveau de verrouillage
parental ou le code du pays il faut consigner un mot de
passe. En temps que possesseur du mot de passe, vous
pouvez changer le niveau de verrouillage parental ou le
code du pays à votre gré. Vous pouvez également
changer le mot de passe.
Remarque
Tous les disques que vous considérez inappropiés pour
les enfants ne sont pas classifiés comme tels. Les disques
non classifiés pourront être toujours lus sans demander
d’abord le mot de passe.
Comment consigner un nouveau mot
de passe
Vous devez consigner un mot de passe avant de pouvoir
changer le niveau de verrouillage parental ou de saisir
un code de pays.
1 Sélectionnez “ Password ”.
2 Utilisez les touches numérotées pour
saisir un mot de passe à 4 chiffres.
Il est également possible d’utiliser les touches du
curseur pour régler le mot de passe (vers le haut et vers
le bas pour régler le numéro ; vers la gauche et vers la
droite pour changer la position du curseur).
3 Appuyez sur ENTER pour consigner le
mot de passe.
Si vous oubliez votre mot de passe, vous pouvez réinitialiser
l’appareil puis en consigner un nouveau. Voir page 100
pour savoir comment réinitialiser le lecteur.
Comment changer le niveau de
verrouillage parental
Pour changer votre mot de passe, confirmez le mot de
passe actuel puis saisissez-en un nouveau.
1 Sélectionnez “ Password Change ”.
2 Utilisez les touches numérotées pour
saisir votre mot de passe actuel.
• Les numéros apparaissent comme de astérisques au
et à mesure que vous les saisissez.
• Il est également possible d’utiliser les touches du
curseur pour régler le mot de passe (vers le haut et vers
le bas pour régler le numéro ; vers la gauche et vers la
droite pour changer la position du curseur).
3 Appuyez sur ENTER.
4 Saisissez un nouveau mot de passe.
5 Appuyez sur ENTER.

84
En/Fr
DVD Setup Menu11
Menu Setup (de configuration) du DVD
Setting/changing the Parental Lock
level
1 Select ‘Level’.
2 Use number buttons to enter your pass-
word, then press ENTER.
3 Select a new level.
Move leftward to lock more levels (more discs will
require the password); rightward to unlock levels. You
can’t lock level 1.
4 Press ENTER to set the new level.
Use the Condition Memory feature (page 48) to save the
Parental Lock level for individual discs.
Setting/changing the Country Code
You may also want to refer to the Country code list on
page 85.
1 Select ‘Country Code’.
2 Use number buttons to enter your pass-
word, then press ENTER.
3 Select a country code.
You can select the country code by letter or number.
List of Codes Code (0~2)
us
Setup Country Code
LanguageV2 General
Audio Video1
Exit
Return
Move Select
+/–
Country Code
2 1 1 9
SETUP
RETURN
ENTER
4 Press ENTER to set the new Country
Code.
Comment régler/changer le niveau de
verrouillage parental
1 Sélectionnez “ Level ”.
2 Utilisez les touches numérotées pour
saisir votre mot de passe, puis appuyez
sur ENTER.
3 Sélectionnez un nouveau niveau.
Déplacez-vous vers la gauche pour verrouiller plus de
niveaux (beaucoup de disques auront besoin d’un mot
de passe) ; vers la droite pour déverrouiller les niveaux.
Vous ne pouvez pas verrouiller le niveau 1.
4 Appuyez sur ENTER pour régler le
nouveau niveau.
Astuce
Utilisez la caractéristique Condition Memory (page 48)
pour mémoriser le niveau de verrouillage parental
correspondant à des disques individuels.
Comment régler/changer le code du
pays
Vous pouvez également consulter la liste des codes de
pays à la page 85.
1 Sélectionnez “ Country Code ”.
2 Utilisez les touches numérotées pour
saisir votre mot de passe, puis appuyez
sur ENTER.
3 Sélectionnez un code de pays.
Vous pouvez sélectionner le code de pays par des lettres
ou par des chiffres.
List of Codes Code (0~2)
us
Setup Country Code
LanguageV2 General
Audio Video1
Exit
Return
Move Select
+/–
Country Code
2 1 1 9
SETUP
RETURN
ENTER
4 Appuyez sur ENTER pour régler le
nouveau code de pays.

85
En/Fr
11DVD Setup Menu
Menu Setup (de configuration) du DVD
English Fran aisç
Country code list
Country Input code Country code
ARGENTINA
AUSTRALIA
AUSTRIA
BELGIUM
BRAZIL
CANADA
CHILE
CHINA
DENMARK
FINLAND
FRANCE
GERMANY
HONG KONG
INDIA
INDONESIA
ITALY
JAPAN
KOREA, REPUBLIC OF
MALAYSIA
MEXICO
NETHERLANDS
NEW ZEALAND
NORWAY
PAKISTAN
PHILIPPINES
PORTUGAL
RUSSIAN FEDERATION
SINGAPORE
SPAIN
SWEDEN
SWITZERLAND
TAIWAN, PROVINCE
OF CHINA
THAILAND
UNITED KINGDOM
UNITED STATES OF
AMERICA
0118
0121
012 0
0205
0218
0301
0312
0314
0411
0609
0618
0405
0811
0914
0904
0920
1016
1118
1325
1324
1412
1426
1415
1611
1608
1620
1821
1907
0519
1905
0308
2023
2008
0702
2119
ar
au
at
be
br
ca
cl
cn
dk
fi
fr
de
hk
in
id
it
jp
kr
my
mx
nl
nz
no
pk
ph
pt
ru
sg
es
se
ch
tw
th
gb
us
Liste des codes de pays
Pays Code d’entrée Code du pays
ARGENTINE
AUSTRALIE
AUTRICHE
BELGIQUE
BRÉSIL
CANADA
CHILI
CHINE
DANEMARK
FINLANDE
FRANCE
ALLEMAGNE
HONG KONG
INDE
INDONÉSIE
ITALIE
JAPON
RÉPUBLIQUE DE LA
CORÉE
MALAISIE
MEXIQUE
PAYS-BAS
NOUVELLE ZÉLANDE
NORVÈGE
PAKISTAN
PHILIPPINES
PORTUGAL
FÉDÉRATION RUSSE
SINGAPOUR
ESPAGNE
SUÈDE
SUISSE
TAIWAN, PROVINCE DE
LA CHINE
THAILANDE
ROYAUME-UNI
ÉTATS-UNIS
D’AMÉRIQUE
0118
0121
012 0
0205
0218
0301
0312
0314
0411
0609
0618
0405
0811
0914
0904
0920
1016
1118
1325
1324
1412
1426
1415
1611
1608
1620
1821
1907
0519
1905
0308
2023
2008
0702
2119
ar
au
at
be
br
ca
cl
cn
dk
fi
fr
de
hk
in
id
it
jp
kr
my
mx
nl
nz
no
pk
ph
pt
ru
sg
es
se
ch
tw
th
gb
us

86
En/Fr
Connecting Up12 Raccordements
Before making or changing any rear panel connections,
make sure that all the components are switched off and
unplugged from the power supply.
Connecting the optional MD deck
(European model only)
See the manual supplied with the MD recorder (model
MJ-L11) for connection details.
Connecting the optional CD
recorder
(European model only)
You can connect this system to the optional PDR-L77 CD
Recorder. See the manual that comes with the CD
recorder for detailed operating instructions.
1 Connect the VIDEO 3 jacks of this system
to the ANALOG OUT jacks of the CD
recorder.
Use one set of stereo audio cables supplied with the CD
recorder.
2 Connect the SYSTEM CABLE jack of this
system to the ANALOG IN jacks of the
adapter box supplied with the CD
recorder.
3 Connect the jack marked FROM MODEL
PDR-L77 on this system to the jack
marked TO XC-L77 on the CD recorder
using the supplied mini-plug control
cable.
4 Connect the OPTICAL OUT jack of this
system to the OPTICAL IN jack of the CD
recorder using the supplied optical cable.
Avant de faire ou de modifier tout raccordement au
panneau arrière, vérifiez que tous les composants son
éteints et débranchés de l’alimentation.
Raccordement de la platine MD
optionnelle
(Uniquement pour le modèle européen)
Consultez le mode d’emploi fourni avec l’enregistreu
MD (modèle MJ-L11) pour les détails sur le
raccordement.
Raccordement de l’enregistreur CD
optionnel
(Uniquement pour le modèle européen)
Vous pouvez raccorder cet appareil à l’enregistreur C
PDR-L77 optionnel. Voir le manuel qui accompagne
l’enregistreur CD pour les détails d’instructions
d’opération.
1 Raccordez les prises VIDEO 3 de cet
appareil aux prises ANALOG OUT de
l’enregistreur CD.
Utilisez un jeu de câbles audio stéréo fourni avec
l’enregistreur CD.
2 Raccordez la prise SYSTEM CABLE de cet
appareil aux prises ANALOG IN de la
boîte de prise multiple fournie avec
l’enregistreur CD.
3 Raccordez la prise de cet appareil qui
porte la marque FROM MODEL PDR-L77
à la prise de l’enregistreur CD qui porte la
marque TO XC-L77 en utilisant le câble
de commande à mini-fiche fourni.
4 Raccordez la prise OPTICAL OUT de cet
appareil à la prise OPTICAL IN de
l’enregistreur CD en utilisant le câble
optique fourni.

87
En/Fr
12Connecting Up Raccordements
English Français
Connecting other components
1 Use a stereo audio cable to connect the
analog outputs of an external component
to the AUDIO IN jacks of this unit.
This will allow you to play the component through this
system.
CO
AX IN O PT.IN
O PT.O UT
USE O NLY
W
IT
H
PDR-L 7
7
AM LOOP
ANTENNA
FM
UNBAL
75Ω
FROMMODEL
PDR-L77 OR CT-L11
OR
MJ-L1
USE ON LY
W
ITH A A
X71 07
VID
EO
1
SY
ST E
M
AUDIO IN
A
NTE N
NA
A
RL
H
VIDEO
2
VIDEO
3
USE ONLY WITH
S-DV77SW OR
S-DV88SW
S-VIDEO
OUT
VIDEO
OUT
USE ONLY WITH
S-D
V77SW OR
S-DV88SW
B
(Illustration shows European model)
2 Use a digital coaxial cable to connect the
coaxial digital output of an external
component the DIGITAL IN COAX jack of
this system.
This will allow you to play a digital audio component
fitted with a coaxial digital output (MD player, etc.)
through this system.
CO
AX IN O PT
.IN
O PT.O UT
US
E O NL
Y
W
IT
H
PDR-L 77
AM LOOP
ANTENNA
FM
UNBAL
75 Ω
F
ROMMODE L
PD R-L77 O
R C T-L 11
OR
MJ
-L1
US
E O NL Y
WIT
H AA X7
107
VIDEO
1
SY
STEM
AUDIO IN
ANTENNA
A
RL
H
V
IDEO
2
VIDEO
3
USE O
NLY W ITH
S-DV77SW
O R
S-D V88SW
S-VIDEO
OU
T
VIDEO
OUT
U
SE
O NLY WITH
S-D
V7
7SW O R
S-D
V88SW
B
(Illustration shows European model)
3 European model only: Use a digital
optical cable to connect the optical
digital output of an external component
to the OPTICAL IN jack of this system.
This will allow you to play a digital audio component
fitted with an optical digital output (MD player, etc.)
through this system.
Raccordement d’autres composants
1 Utilisez un câble audio stéréo pour
raccorder les sorties analogiques d’un
composant externe aux prises AUDIO IN
de cette unité.
Ceci vous permettra de lire le composant travers cetà
appareil.
COAX IN OPT.IN OPT.OUT
USE ONLY
WITH
PDR-L77
AM
L OOP
ANT
ENNA
F
M
UNB AL
75 Ω
FROMMOD EL
PDR-L77 O R CT-L11
OR
MJ-L1
USE ONLY
WITH AAX7107
VIDEO
1
SYSTEM
AUDIO IN
A
NTENNA
A
RL
H
VIDEO
2
VIDEO
3
USE O N
LY W ITH
S-D V7 7S W O R
S-D V8 8
SW
S- V
ID E
O
OU
T
V
ID E
O
OUT
US E O NL Y WITH
S
-DV 77 SW O R
S-DV 88 SW
B
(L’illustration montre le modèle européen)
2 Utilisez un câble coaxial numérique pour
raccorder la sortie numérique coaxiale
d’un composant externe à la prise COAX
IN de cet appareil.
Ceci vous permettra de lire un composant audio muni
d une sortie num rique coaxiale (lecteur MD, etc.) ’ é à
travers cet appareil.
CO
AX IN O
PT.IN
O
PT.O
UT
USE O NLY
W
IT
H
PDR-L 77
AM LOOP
ANTENNA
FM
UNBAL
75Ω
FR O
MMO
DE L
PD R
-L7
7 O
R C T-L 11
OR
MJ-L
1
USE
ONL
Y
W
IT
H
AAX71 07
VID
EO
1
SYSTEM
AUD
IO IN
ANTENNA
A
RL
H
V
ID
EO
2
VID
EO
3
USE ON LY WITH
S-D V77SW OR
S-DV88SW
S-VIDEO
O
UT
VID EO
OUT
USE
O N
LY W IT H
S-D
V77
SW O R
S-D
V88SW
B
(L’illustration montre le modèle européen)
3 Utilisez un câble optique numérique pour
raccorder la sortie numérique optique
d’un composant externe à la prise OPT.
IN de cet appareil.
Ceci vous permettra de lire un composant audio
num rique muni d une sortie num rique optiqueé ’ é
(lecteur MD, etc.) travers cet appareil.à

89
En/Fr
12Connecting Up Raccordements
English Fran aisç
(US model)
(European model)
Connecting external antennas
External AM antenna
Use 5 6 meters (15 18 ft.) of vinyl-insulated wire and– –
set up either indoors ( ) or outdoors ( ). Leave theB A
supplied AM loop antenna connected.
External FM antenna
US model: Use 75Ω coaxial cable to hook up an
external FM antenna ( ).C
European model: Use 75Ω coaxial cable with a
PAL connector to hook up an external FM antenna (C).
AM LOOP
ANTENNA
FM
UNBAL
75 Ω
H
B
A
C
AM LOOP
ANTENNA
FM
UNBAL
75 Ω
H
B
A
C
Raccordement d’antennes externes
Antenne AM externe
Utilisez 5 tres de fil en vinyl et installez-le soit à 6 mè
l int ext e’ érieur (A) soit à l’ érieur (B). Laissez raccordé
l’antenne cadre AM fournie.
Antenne FM externe
Modèle nord-américain : Utilisez du câble coaxial 75Ω
pour raccorder une antenne FM externe (C).
Modèle européen : Utilisez du câble coaxial 75Ω avec
un connecteur PAL pour raccorder une antenne FM
ext ).érieure (C
(Modèle nord-américain)
(Modèle européen)

90
En/Fr
Additional Information13 Information complémentaire
Child lock
When set to on, the remote control functions normally,
but all front panel controls are inoperative.
1 Switch the system into standby.
2 Press SYSTEM MENU and select CHILD
LOCK.
• Change menu options using the buttons.2 and 3
Press
ENTER to select the currently displayed option.
3 Use the or button to select LOCK5 ∞
ON or LOCK OFF as required, then press
ENTER.
The system returns to standby.
Beep mode
When set to on, the system beeps when you touch 6
or 0 OPEN CLOSE/ on the front panel.
1 Switch the system into standby.
2 Press SYSTEM MENU and select BEEP
MODE.
• Change menu options using the buttons.2 and 3
Press
ENTER to select the currently displayed option.
3 Use the 5 or ∞ button to select BEEP
ON or BEEP OFF as required.
The system returns to standby.
Tuner frequency step
(Not applicable to European model)
As its default setting, the tuner jumps in steps of 10kHz
when tuning in AM stations. If you find that this is
unsuitable in your area (if you can’t tune into stations
successfully), you can change the tuning interval to
9kHz for AM.
1 Switch the system into standby.
2 Press SYSTEM MENU and select TUNER
F.STEP.
• Change menu options using the buttons.2 and 3
Press
ENTER to select the currently displayed option.
Restriction pour les enfants
Quand la fonction est activée, la télécommande
fonctionne normalement, mais toutes les commandes
du panneau avant sont inopérables.
1 Mettez l’appareil en attente.
2 Appuyez sur SYSTEM MENU et
sélectionnez CHILD LOCK.
• Changez les options du menu en utilisant les
touches 2 et 3. Appuyez sur ENTER pour sélectionner
l’option actuellement affichée.
3 Utilisez la touche pour5 ou ∞
sélectionner LOCK ON ou LOCK OFF
selon le cas.
L’appareil se remet en attente.
Mode bip
Quand il est activé, l’appareil fait bip quand vous
touchez 6 ou 0 OPEN CLOSE/ sur le panneau
avant.
1 Mettez l’appareil en attente.
2 Appuyez sur SYSTEM MENU et
sélectionnez BEEP MODE.
• Changez les options du menu en utilisant les
touches 2 et 3. Appuyez sur ENTER pour sélectionner
l’option actuellement affichée.
3 Utilisez la touche pour5 ou ∞
sélectionner BEEP ON ou BEEP OFF selon
le cas.
L’appareil se remet en attente.
Le pas de la fréquence du tuner
(Non applicable au modèle européen)
Comme son réglage par défaut, le tuner saute par pas
10kHz lors de l’accord de stations AM. Si vous trouv
qu’il n’est pas approprié à votre région (si vous ne
parvenez pas accorder des stations), vous vous chang
l’intervalle d’accord à 9kHz pour la bande AM.
1 Mettez l’appareil en attente.
2 Appuyez sur SYSTEM MENU et
sélectionnez TUNER F.STEP.
• Changez les options du menu en utilisant les
touches 2 et 3. Appuyez sur ENTER pour sélectionner
l’option actuellement affichée.

91
En/Fr
13Additional Information Information complémentaire
English Français
3 Use the or button to select AM 9k/5 ∞
FM 50k or AM 10k/FM100k as required.
The system returns to standby.
Dimming the display
• Press DIMMER to change the brightness
of the display.
There are 5 levels of brightness.
Taking care of your system
To clean this unit, wipe with a soft, dry cloth. For
stubborn dirt, wet a soft cloth with a mild detergent
solution made by diluting one part detergent to 5 or 6
parts water, wring well, then wipe off the dirt. Use a dry
cloth to wipe the surface dry. Do not use volatile liquids
such as benzene and thinner which may damage the
surfaces.
Disc lens cleaner
The disc pickup lens should not become dirty in normal
use, but if for some reason it should malfunction due to
dirt or dust, consult your nearest Pioneer authorized
service center. Although lens cleaners for CD players are
commercially available, we do not recommend using
them since some may damage the lens.
Taking care of your discs
When holding discs, take care not to leave fingerprints,
dirt or scratches on the disc surface. Hold the disc by its
edge or by the center hole and edge. Damaged or dirty
discs can affect playback performance. Take care also
not to scratch the label side of the disc. Although not as
fragile as the recorded side, scratches can still result in a
disc becoming unusable.
3 Utilisez la touche pour5 or ∞
sélectionner AM 9k/FM 50k ou AM 10k/
FM100k selon le cas.
L’appareil se remet en attente.
Comment obscurcir l’afficheur
• Appuyez sur DIMMER pour changer
l’éclairage de l’afficheur.
Il y a 5 niveaux d’éclairage.
Comment prendre soin de votre
chaîne
Pour nettoyer cette unit , essuyez-le avec un chiffoné
doux et humect . Pour la salet r sistante, mouillez uné é é
chiffon doux avec une solution d tergente douce ené
diluant une part de d tergent pour 5 ou 6 parts dé ’eau,
essorez bien et essuyez la salet . Utilisez un chiffon seé
pour essuyer la surface. N utilisez pas de liquides tels’
que la benzine et un diluant qui pourraient
endommager les surfaces.
Produits nettoyants pour lentille de
disque
Lors de l utilisation normale de l , la lentille du’ ’ éunit
capteur du lecteur CD ne devrait pas se salir, mais si u
mauvais fonctionnement se produit suite la saletà é ou
la poussi re, consultez votre service Pioneer autoris lè é
plus proche. Bien que des produits nettoyants pour
lentille CD soient disponibles dans le commerce, nous
déconseillons leur utilisation car certains produits
pourraient endommager la lentille.
Comment prendre soin de vos disques
En manipulant les disques, prenez soin de ne pas laisse
de traces de doigts, de ne pas salir ou de rayer la surfac
du disque. Saisissez le disque par le bord ou par l’orifi
central et le bord. Des disques endommag s ou salesé
risquent d affecter l ex cution de la lecture. Prenez soi’ ’ é
é ô é ’également de ne pas rayer le c t de l tiquette du
disque. Quoique pas si fragile que le c t enregistr , uô é é
disque avec des rayures peut devenir inutilisable.

92
En/Fr
Additional Information13 Information complémentaire
Should a disc become marked with fingerprints, dust,
etc., clean using a soft, dry cloth, wiping the disc lightly
from the center to the outside edge as shown on the next
page. If necessary, use a cloth soaked in alcohol, or a
commercially available CD or DVD cleaning kit to clean
a disc more thoroughly. Never use benzine, thinner or
other cleaning agents, including products designed for
cleaning vinyl records.
• Wipe lightly from the center of the disc using straight
strokes.
• ’Don t wipe the disc surface using circular strokes.
Storing discs
Although CDs and DVDs are more durable than vinyl
records, you should still take care to handle and store
discs correctly. When you re not using a disc, return it to’
its case and store upright. Avoid leaving discs in
excessively cold, humid, or hot environments (including
under direct sunlight).
Don t glue paper or put stickers on discs, or write on’
them using a pencil, ball-point pen or other sharp-
tipped writing instrument.
Discs to avoid
Discs spin at high speed during playback. If you can see
that a disc is cracked, chipped, warped, or otherwise
damaged, don t risk using it you could end up’ —
damaging the system.
This system is designed for use with conventional, fully
circular discs only. Use of shaped discs is not recom-
mended. Pioneer disclaims all liability arising in
connection with the use of shaped CDs and DVDs.
Au cas où un disque a des traces de doigts, de la
poussi re, etc. nettoyez-le en utilisant un chiffon douè
humect , en essuyant le disque du centre vers laé
p riph é érie comme indiqué à la page suivante. Si
nécessaire, utilisez un chiffon imbibé d’alcool, ou un
de nettoyage de CD disponible dans le commerce pou
que le nettoyage du disque soit plus complet. N’utilis
jamais de benzine, de diluant ou autres agents
nettoyants, y compris les produits con us pour leç
nettoyage disques en vinyl.
• é è àEssuyez l g rement partir du centre du disque en
faisant des lignes droites.
• ’N essuyez pas la surface du disque en faisant des
cercles.
Rangement des disques
Bien que les CD et les DVD soient plus durables que
disques en vinyl, vous devriez tout de m me prendre ê
de les manipuler et de les ranger correctement. Si vou
n’utilisez pas un disque, remettez-le dans son étui et
rangez-le tout droit. vitez de laisser les disques dansÉ
endroits trop froids, trop humides ou trop chauds (y
compris au soleil).
Ne collez aucun papier ou tiquette sur les disques, oé
n’écrivez pas dessus avec un crayon, un stylo à bille
autre instrument d criture pointu.’é
Disques à éviter
Pendant la lecture les disques tournent grande vitesà
dans le lecteur. Si vous remarquez qu un disque est f’ ê
é é é é ébr ch , voil , ou autrement endommag , ne prenez p
le risque de l utiliser. Vous pourriez finir par’
endommager la chaîne.
Cette cha ne est con ue pour l utilisation de disquesî ç ’
conventionnels, uniquement compl tement circulaireè
Il est d conseill d utiliser des disques ayant une formé é ’
irr gulié ère. Pioneer décline toute responsabilité
surgissant en rapport avec l utilisation de CD et de D’
ayant une forme irr guli re.é è

93
En/Fr
13Additional Information Information complémentaire
English Fran aisç
Glossary
Aspect ratio
The width of a TV screen relative to its height. Conven-
tional TVs are 4:3 (in other words, the screen is almost
square); widescreen models are 16:9 (the screen is
almost twice as wide as it is high).
Chapter
Just as a book is split up into several chapters, a title on
a DVD disc is usually divided into chapters. See also
Title.
Dolby Digital
A surround sound system developed by Dolby Laborato-
ries containing up to six channels of digital audio (front
left and right, surround left and right, center and low-
frequency channels). See also DTS.
DTS
A surround sound system developed by Digital Theater
Systems as an alternative to Dolby Digital. DTS discs
contain up to eight channels of digital audio. See also
Dolby Digital.
MPEG video
The video format used for Video CDs and DVDs. Video CD
uses the older MPEG-1 standard, while DVD uses the
newer and much better quality MPEG-2 standard.
PBC (PlayBack Control) (Video CD only)
A system of navigating a Video CD through on-screen
menus recorded onto the disc. Especially good for discs
that you would normally not watch from beginning to
end all at once karaoke discs, for example.—
Regions (DVD only)
These associate discs and players with particular areas of
the world. This unit will only play discs that have
compatible region codes. You can find the region code of
your unit by looking on the rear panel. Some discs are
compatible with more than one region (or all regions).
Title (DVD only)
A collection of chapters on a DVD disc. See also Chapter.
Glossaire
Aspect ratio (Rapport de format)
Largeur d cran de t viseur par rapport sa’ éun é él à
hauteur. Les t viseurs conventionnels mesurent 4:3é él
(dans d autres termes, l cran est presque carr ), les’ ’é é
modèles grand-écran mesurent 16:9 (la largeur de
l’écran représente presque deux fois sa hauteur).
Chapter (Chapitre)
Tel qu un livre est divis en plusieurs chapitres, un titr’ é
de disque DVD est habituellement divis en chapitres.é
Voir galement .é Title
Dolby Digital
Syst veloppème de son surround dé é par Dolby Labora
ries comprenant jusqu six canaux d audio num’à ’ érique
(canaux gauche et droite frontaux, canaux surround
gauche et droite, canal central et canal de basses
fréquences). Voir également .DTS
DTS
Syst veloppème de son surround dé é par Digital Theate
Systems comme alternative au Dolby Digital. Les disq
DTS comprennent jusqu huit canaux d’à ’audio
numérique. Voir également Dolby Digital.
MPEG video (MPEG vidéo)
Format vid o utilis pour les Video CD et les DVD. Lé é
Video CD utilise le format standard MPEG-1 le plus
ancien, tandis que le DVD utilise le format MPEG-2 p
actuel et de meilleure qualité.
PBC (PlayBack Control) (Commande de
lecture) (seulement Video CD)
Système de navigation sur Video CD travers les menà
à ’é é è l cran enregistr s sur le disque. Particuli rement bo
pour les disques que vous ne regardez pas
habituellement depuis le d but jusqu la fin en uneé ’à
seule fois les disques karaok , par exemple.— é
Regions (régions) (seulement DVD)
Pour associer les disques et les lecteurs ayant une zone
géographique particulière. Cette chaîne ne lira que des
disques ayant des codes de r gion compatibles. Vousé
pouvez trouver le code de r gion de votre unit ené é
regardant sur le panneau arri re. Certains disques sontè
compatibles avec plus d une r gion (ou avec toutes les’ é
régions).
Title (titre) (seulement DVD)
Collection de chapitres sur un disque DVD. Voir
également Chapter.

94
En/Fr
Additional Information13 Information complémentaire
Japanese/japonais ( ja ) 1001
English/anglais ( en ) 0514
French ( fr) 0618
German ( de ) 0405
Italian ( it ) 0920
Spanish ( es ) 0519
Dutch ( nl ) 1412
Russian ( ru ) 1821
Chinese ( zh ) 2608
Korean ( ko ) 1115
Greek ( el ) 0512
Afar ( aa ) 0101
Abkhazian ( ab ) 0102
Afrikaans ( af ) 0106
Amharic ( am ) 0113
Arabic ( ar ) 0118
Assamese ( as ) 0119
Aymara ( ay ) 0125
Azerbaijani ( az ) 0126
Bashkir ( ba ) 0201
Byelorussian ( be ) 0205
Bulgarian ( bg ) 0207
Bihari ( bh ) 0208
Bislama ( bi ) 0209
Bengali ( bn ) 0214
Tibetan ( bo ) 0215
Breton ( br ) 0218
Catalan ( ca ) 0301
Corsican ( co ) 0315
Czech ( cs ) 0319
Welsh ( cy ) 0325
Danish ( da ) 0401
Bhutani ( dz ) 0426
Esperanto ( eo ) 0515
Estonian ( et ) 0520
Basque ( eu ) 0521
Persian ( fa ) 0601
Finnish ( fi ) 0609
Fiji ( fj ) 0610
Faroese ( fo ) 0615
Frisian ( fy ) 0625
Irish ( ga ) 0701
Scots-Gaelic ( gd ) 0704
Galician ( gl ) 0712
Guarani ( gn ) 0714
Gujarati ( gu ) 0721
Hausa ( ha ) 0801
Hindi ( hi ) 0809
Croatian (hr ) 0818
Hungarian ( hu ) 0821
Armenian ( hy ) 0825
Interlingua ( ia ) 0901
Interlingue ( ie ) 0905
Inupiak ( ik ) 0911
Indonesian ( in ) 0914
Icelandic ( is ) 0919
Hebrew ( iw ) 0923
Yiddish ( ji ) 1009
Javanese ( jw ) 1023
Georgian ( ka ) 1101
Kazakh ( kk ) 1111
Greenlandic ( kl ) 1112
Cambodian ( km ) 1113
Kannada ( kn ) 1114
Kashmiri ( ks ) 1119
Kurdish ( ku ) 1121
Kirghiz ( ky ) 1125
Latin ( la ) 1201
Lingala (ln ) 1214
Laothian ( lo ) 1215
Lithuanian ( lt ) 1220
Latvian ( lv ) 1222
Malagasy ( mg ) 1307
Maori ( mi ) 1309
Macedonian ( mk ) 1311
Malayalam ( ml ) 1312
Mongolian ( mn ) 1314
Moldavian ( mo ) 1315
Marathi ( mr ) 1318
Malay ( ms ) 1319
Maltese ( mt ) 1320
Burmese ( my ) 1325
Nauru ( na ) 1401
Nepali ( ne ) 1405
Norwegian ( no ) 1415
Occitan ( oc ) 1503
Oromo ( om ) 1513
Oriya ( or ) 1518
Panjabi ( pa ) 1601
Polish ( pl ) 1612
Pashto, Pushto ( ps ) 1619
Portuguese ( pt ) 1620
Quechua ( qu ) 1721
Rhaeto-Romanc
e ( rm ) 1813
Kirundi ( rn ) 1814
Romanian ( ro ) 1815
Kinyarwanda ( rw ) 1823
Sanskrit ( sa ) 1901
Sindhi ( sd ) 1904
Sangho ( sg ) 1907
Serbo-Croatian ( sh ) 1908
Singhalese ( si ) 1909
Slovak ( sk ) 1911
Slovenian ( sl ) 1912
Samoan ( sm ) 1913
Shona ( sn ) 1914
Somali ( so ) 1915
Albanian ( sq ) 1917
Serbian ( sr ) 1918
Siswati ( ss ) 1919
Sesotho ( st ) 1920
Sundanese ( su ) 1921
Swedish ( sv ) 1922
Swahili ( sw ) 1923
Tamil ( ta ) 2001
Telugu ( te ) 2005
Tajik ( tg ) 2007
Thai ( th ) 2008
Tigrinya ( ti ) 2009
Turkmen ( tk ) 2011
Tagalog ( tl ) 2012
Setswana ( tn ) 2014
Tonga ( to ) 2015
Turkish ( tr ) 2018
Tsonga ( ts ) 2019
Tatar ( tt ) 2020
Twi ( tw ) 2023
Ukrainian ( uk ) 2111
Urdu ( ur ) 2118
Uzbek ( uz ) 2126
Vietnamese ( vi ) 2209
Volapük ( vo ) 2215
Wolof ( wo ) 2315
Xhosa ( xh ) 2408
Yoruba ( yo ) 2515
Zulu ( zu ) 2621
Language/Langue Code Language/Langue Code Language/Langue Code
Language code list Liste des codes de langues

96
En/Fr
Additional Information13 Information complémentaire
Troubleshooting
Incorrect operation is often mistaken for trouble or
malfunction. If you think that there is something wrong
with this component, check the points below. Sometimes
the trouble may lie in another component. Inspect the
other components and electrical appliances being used.
If the trouble cannot be rectified after checking the
items below, ask your nearest Pioneer authorized service
center or your dealer to carry out repair work.
Amplifier fault finding
If there is an internal fault in the amplifier, the power is
automatically shut off without the display showing the
usual “Goodbye” message. The standby indicator
blinks and none of the controls work, including the
power button.
Please contact your nearest Pioneer Service Center.
Optional component fault finding
If there is an internal fault in an optional component,
the power is automatically shut off without the display
showing the usual “Goodbye” message and the
timer indicator blinks. The DVD/CD Tuner switches on
and operates normally, but when the optional
component is switched on the message
OPTION
ERROR appears in the display.
Please contact your nearest Pioneer Service Center.
DVD fault finding
If there is an internal fault in the DVD player, the display
shows
DVD 3.3 ERROR then the power is automati-
cally shut off. If, when you switch the unit back on,
everything works normally then you can continue to use
it. If the error persists, please contact your nearest
Pioneer Service Center.
Guide de dépannage
Vous pouvez confondre une utilisation incorrecte ave
un mauvais fonctionnement. Si vous pensez qu il y a’
problème avec ce composant, vérifiez les points ci-
dessous. Parfois le probl me peut se trouver dans uné
autre composant. V rifiez les autres composants eté
appareils électriques utilisés. Si vous ne pouvez pas
rectifier le probl me m me apr s avoir v les poiè ê è é érifi
ci-dessous, consultez le service Pioneer autoris le plé
pr parations.ès de chez vous pour faire les ré
Pour trouver une anomalie au niveau
de l’amplificateur
S il y a une anomalie interne au niveau de’
l’amplificateur, l appareil s teint automatiquement’ ’é
sans afficher l habituel message ’ “ Goodbye ”.
L’indicateur de veille clignote et aucune des comman
ne fonctionnent, y compris la touche de mise en
marche.
Veuillez contacter le service apr s-vente Pionner le pè
proche.
Pour trouver une anomalie au niveau
d’un composant optionnel
S un’il y a une anomalie interne au niveau d’
composant optionnel, l appareil s’ ’éteint
automatiquement sans afficher l habituel message’
“ Goodbye ” ’ et l indicateur de la minuterie clignote.
Le lecteur DVD/CD avec tuner s active et fonctionne’
normalement, mais en allumant le composant
optionnel le message
OPTION ERROR appara t surî
l’affichage.
Veuillez contacter le service apr s-vente Pionner le pè
proche.
Pour trouver une anomalie au niveau
du lecteur DVD
S il y a une anomalie interne au niveau du lecteur DV’
l’affichage indique
DVD 3.3 ERROR puis l’appareil
s appareil,’éteint automatiquement. Si, en rallumant l’
tout fonctionne normalement vous pouvez donc
continuer à l’utiliser. Si l erreur persiste, veuillez’
contacter votre service apr s-vente Pioneer le plusè
proche.

97
En
13Additional Information
English Fran aisç
Problem
CDs, DVDs and Video CDs
The disc is ejected automati-
cally after loading.
Playback is not possible.
mark appears on screen.
mark appears on screen.
When making changes in the
Setup OSD menus, is
displayed.
Picture playback stops and
the operation buttons cannot
be used.
New settings made in the
Setup screen menus while a
disc is playing are ineffective.
Settings are canceled.
No picture/No color.
Screen is stretched or aspect
does not change.
Picture disturbance during
playback or screen is dark.
Noticeable difference in DVD
and CD volume.
Remedy
• Check that the disc is clean and undamaged (page 92).
• Make sure that the disc is seated properly in the disc guide.
• Check that the disc has a compatible region number (page 12).
• There may be condensation inside the unit. Allow time for condensation to evaporate.
Avoid using the player near an air-conditioning unit.
• Check that the disc is loaded correctly (label side face up).
• The operation is prohibited by the system.
• The selected function does not operate for that disc.
• There is a CD or Video CD loaded and the setting that was changed applies only to
DVD discs. The settings will take effect next time a DVD is loaded.
• Switch the power off once, then on again using the front panel standby/on switch.
• Some settings can be changed while a disc is playing, but are not effective until the
disc is stopped then restarted. This is not a malfunction. Note that making settings in the
Setup screen menus may cancel the resume function.
• If the power was cut due to power failure or by unplugging the power cord, settings
will be canceled.
• Check that the video connections are correct and that plugs are inserted fully.
• Check that the TV/monitor settings are correct.
• Make sure that the TV Screen option in the Setup menu matches the TV/monitor
you're using.
• This player is compatible with Macro-Vision System copy guard. Some discs include a
copy prevention signal, and when this type of disc is played back, stripes etc., may appear
on some sections of the picture depending on the TV. This is not a malfunction.
• Problems with some discs may result in the screen becoming black for a brief instant
or shaking slightly when certain functions are executed.
• Due to copy protection, connection of this system through a VCR or an AV selector
may prevent recording or cause picture problems. This is not a malfunction.
• DVDs and CDs use different recording methods. This is not a malfunction.
Troubleshooting tips

98
En
Additional Information13
Problem
Tuner
Noisy radio reception
Auto tuning does not pick up
some stations.
MP3 playback
The disc containing the MP3
tracks won’t play.
The message UNPLAYABLE
MP3 FORMAT appears when
you try to start playback.
Some tracks seem to be
missing from the disc.
General
The remote control doesn't
seem to work.
No audio, or audio is dis-
torted.
Remedy
• Check that the frequency is correct.
• Check that the antennas are connected properly. For FM, make sure that the antenna
is fully extended and positioned to give the best reception.
For AM, make sure that the loop antenna is pointing in the best direction.
• If the radio signal is weak, an outdoor antenna will usually give better results than the
supplied indoor types.
• Other electrical equipment, such as TVs, fluorescent lamps and motors can cause
interference. Try switching off or moving the equipment, or moving the antenna(s).
• The tuning interval may be incorrect for your country or region. Try switching the
tuning interval (page 90).
• Auto tuning will only detect radio stations with a good signal. For more sensitive
tuning, connect an outdoor antenna.
• If the disc is a recordable CD, make sure that the disc is finalized.
• Check that the disc is ISO 9660 compatible.
• Check that the track(s) are in the MPEG1 Audio Layer 3 format.
• Check that the sampling rate of the track(s) are 44.1 or 48kHz.
• If a track name does not end in “.mp3” or “.MP3”, this system will not recognize it as
an MP3 track.
• This system only recognizes the first 250 folders and tracks on a disc. If there are
more folders/tracks than this, you will not be able to play them.
• This system is not compatible with multi-session discs. If the disc is multi-session, you
will only be able to play tracks recorded onto the first session.
• Make sure that you’re using the remote within its operating range and that there are
no obstacles between the remote and the sensor on the main unit.
• Check that the batteries are not exhausted.
• Check that the correct function is selected (DVD/CD, etc.), the volume turned up.
• Check that the MUTE function is not on and that the disc is not paused.
• Check that the disc is clean and undamaged (page 92)
• Check that all rear panel connections are correct.
• If you find dirty or oxidized plugs/terminals, clean them.
Static electricity or other external influences may cause
malfunctioning of this unit. In this case, unplug the
power cord and then plug back in. This will usually reset
the unit for proper operation. If this does not correct the
problem, please consult your nearest Pioneer service
center.
Resetting the system
Resetting the system returns all menu, picture and
password settings to their factory defaults.
1 Switch the system into standby using the
front panel standby/on switch.
2 Hold down the front panel button and7
switch back on.
All DVD and audio settings are cleared.
Specyfikacje produktu
| Marka: | Pioneer |
| Kategoria: | Zestaw kina domowego |
| Model: | NS-DV77 |
Potrzebujesz pomocy?
Jeśli potrzebujesz pomocy z Pioneer NS-DV77, zadaj pytanie poniżej, a inni użytkownicy Ci odpowiedzą
Instrukcje Zestaw kina domowego Pioneer

15 Września 2024
8 Września 2024
5 Września 2024
4 Września 2024
3 Września 2024
3 Września 2024
31 Sierpnia 2024
30 Sierpnia 2024
30 Sierpnia 2024
26 Sierpnia 2024
Instrukcje Zestaw kina domowego
- Zestaw kina domowego Sony
- Zestaw kina domowego Yamaha
- Zestaw kina domowego Samsung
- Zestaw kina domowego AEG
- Zestaw kina domowego Leica
- Zestaw kina domowego LG
- Zestaw kina domowego Sharp
- Zestaw kina domowego Philips
- Zestaw kina domowego Technics
- Zestaw kina domowego JBL
- Zestaw kina domowego Onkyo
- Zestaw kina domowego KEF
- Zestaw kina domowego Bose
- Zestaw kina domowego Panasonic
- Zestaw kina domowego Klipsch
- Zestaw kina domowego Medion
- Zestaw kina domowego Lenco
- Zestaw kina domowego Adler
- Zestaw kina domowego Majestic
- Zestaw kina domowego ILive
- Zestaw kina domowego Grundig
- Zestaw kina domowego Hyundai
- Zestaw kina domowego Creative
- Zestaw kina domowego Denon
- Zestaw kina domowego Edifier
- Zestaw kina domowego Kenwood
- Zestaw kina domowego Polk
- Zestaw kina domowego Dynaudio
- Zestaw kina domowego JVC
- Zestaw kina domowego Dell
- Zestaw kina domowego Jamo
- Zestaw kina domowego Funai
- Zestaw kina domowego Schneider
- Zestaw kina domowego Thomson
- Zestaw kina domowego Wharfedale
- Zestaw kina domowego Magnat
- Zestaw kina domowego Pyle
- Zestaw kina domowego Marantz
- Zestaw kina domowego Bowers & Wilkins
- Zestaw kina domowego Nevir
- Zestaw kina domowego NAD
- Zestaw kina domowego Harman Kardon
- Zestaw kina domowego AKAI
- Zestaw kina domowego Sanyo
- Zestaw kina domowego Teufel
- Zestaw kina domowego Dali
- Zestaw kina domowego Focal
- Zestaw kina domowego SVS
- Zestaw kina domowego RCA
- Zestaw kina domowego GPX
- Zestaw kina domowego Definitive Technology
- Zestaw kina domowego Canton
- Zestaw kina domowego Daewoo
- Zestaw kina domowego Anthem
- Zestaw kina domowego Sylvania
- Zestaw kina domowego Coby
- Zestaw kina domowego Naxa
- Zestaw kina domowego Sherwood
- Zestaw kina domowego Konig
- Zestaw kina domowego Boston Acoustics
- Zestaw kina domowego Pure Acoustics
- Zestaw kina domowego Integra
- Zestaw kina domowego Wolfgang
- Zestaw kina domowego Iluv
- Zestaw kina domowego OSD Audio
- Zestaw kina domowego Eltax
- Zestaw kina domowego Mitsai
- Zestaw kina domowego Magnavox
- Zestaw kina domowego Fluance
- Zestaw kina domowego Audiocore
- Zestaw kina domowego Amphion
- Zestaw kina domowego BBK
- Zestaw kina domowego Meridian
- Zestaw kina domowego SLS
- Zestaw kina domowego Phase Technology
Najnowsze instrukcje dla Zestaw kina domowego

28 Marca 2025

4 Marca 2025
4 Marca 2025
4 Marca 2025
4 Marca 2025
4 Marca 2025
4 Marca 2025

24 Lutego 2025

21 Lutego 2025

18 Lutego 2025