Instrukcja obsługi Magellan MiVue 420
Magellan
kamera wideo
MiVue 420
Przeczytaj poniżej 📖 instrukcję obsługi w języku polskim dla Magellan MiVue 420 (105 stron) w kategorii kamera wideo. Ta instrukcja była pomocna dla 11 osób i została oceniona przez 2 użytkowników na średnio 4.5 gwiazdek
Strona 1/105

Magellan MiVue 420/480D
User Manual
Rear camera only
included with MiVue 480D.

ii
Safety.
This Magellan device is a dashboard camera and recording device designed to assist you in recording videos,
taking photos, and managing the content stored on the device.
Please check with your state or local law enforcement for applicable regulations regarding mounting to the
windshield. Go to the Magellan store at for alternate mounting solutions.magellanGPS.com
The driver should enter data or program the Magellan receiver only when the vehicle is stopped. Only a vehicle
passenger should enter data or
program the device while the vehicle is moving. It is your responsibility to comply with all traffic laws.
Every attempt is made to ensure that the database is accurate. However, roadways, points of interest (POIs), and
business and service locations may change over time.
Keep the receiver safe from extreme temperature conditions. For example, do not leave it exposed to direct
sunlight for an extended period of time. The maximum operating temperature is 140°F (60°C).
Take care when mounting the device in your vehicle, whether using the windshield mount or other mount or
accessories, that it does not obstruct the driver’s view of the road, interfere with the operation of the vehicle’s
safety devices such as air bags, or present a hazard to occupants of the vehicle should the receiver be dislodged
while driving.
You assume the risks associated with damage to your vehicle or vehicle occupants as the result of your choices
in mounting the receiver.
The battery is rechargeable and should not be removed. In the event it should need to be replaced, please
contact Magellan Technical Support at or 800-707-8871.support.magellanGPS.com
Magellan Take-Back Program
Magellan’s Take-Back Program provides a way for
customers to recycle certain Magellan equipment. As
part of this program, all Magellan GPS models will be
accepted.
Visit for more information.magellanGPS.com/Support

iii
In some jurisdictions, audio recordings require the consent of all parties before you begin recording. It is your
responsibility to know and comply with applicable audio recording consent laws in your jurisdiction.
In some jurisdictions, it could be considered an invasion of privacy rights to take or publicly display photographs
or videos of people or their vehicles using this product. It is your responsibility to know and comply with
applicable laws and rights to privacy in your jurisdiction.
Before using the suction cup mount on your windshield, check the state and local laws and ordinances where
you drive. Some state laws prohibit or restrict drivers from using suction mounts on their windshields while
operating motor vehicles.
IT IS THE USER’S RESPONSIBILITY TO MOUNT AND OPERATE THE DEVICE IN COMPLIANCE WITH ALL
APPLICABLE LAWS AND ORDINANCES.
FCC RF Radiation Exposure Statement
1. This Transmitter must not be co-located or operating in conjunction with any other antenna or
transmitter.
2. This equipment complies with FCC RF radiation exposure limits set forth for an uncontrolled
environment. This equipment should be installed and operated with a minimum distance of 20
centimeters between the radiator and your body.
Wi-Fi 5G Band 1 is for indoor use only.

1
Table Of Contents.
Getting To Know Your Dashcam................................................................................2
Setting Up Your Dashcam.........................................................................................4
Operating Your Dashcam.........................................................................................9
Using Safety Camera Alerts...................................................................................15
Changing System Settings.....................................................................................17
Using MiVue Manager.............................................................................................21
Taking Care of Your Dashcam.................................................................................24
Warranty................................................................................................................27
2
Getting To Know Your Dashcam.
Note: The screenshots and other presentations in this manual may differ from
your actual product.
1 Power button
2 Device mount socket
3 Mini-USB connector
4 System indicator
5 Event button
6 LCD screen
7 Microphone
8 Memory card slot
9 Camera lens
10
Speaker
11
Parking indicator
12
Function keys
13
Mounting pad
14
Camera lens
15
Fixing bolt
16
Micro-USB connector
1
2
3
4
5
6
7
8
9
10
11
12
13
14
16
15
1
2
3
4
5
6
7
8
9
10
11
12
13
14
15
16

3
Power button
Press and hold for 2 seconds to manually turn
the recorder on and off.
When the recorder is turned on, press to switch
the LCD screen on and off.
Event button
Press to manually start an event recording.
LED indicators
System indicator
Glows in green when the recorder is charging. During charging, the LED flashes
in green and amber alternately while the recording is in progress.
Parking indicator
Flashes in red when Parking recording is in progress.
4
Setting Up Your Dashcam.
Using your dashcam in a vehicle.
Note:
Place your dashcam near the rear-view mirror.
Never place the dashcam where your field of vision is blocked while driving.
If your vehicle's windshield is tinted with a reflective coating, it may impact
the GPS reception. In this case, mount your device in a “clear area.”
The system automatically calibrates the dashcam's G sensor during start-up.
To avoid malfunction, turn the device on AFTER mounting it in your vehicle.
First, park your vehicle on level ground.
1. Mount the recorder.

5
2. Mount the rear camera.
Before sticking the mounting pad, clean the windscreen with rubbing alcohol.
Note: If tape adhesion does not perform well, replace the tape with a new one.
3. Adjust the lens angle.
Make sure that the camera view is level with the ground and the horizon is
slightly below the middle of the camera screen.
Recorder Rear camera

6
4. Connect the cables.
Route the cables through the top ceiling and the A-pillar so that it does not
interfere with driving. Make sure that the cable installation does not interfere
with the vehicle's airbags or other safety features.
Car charger
Dashcam Rear camera cable
Rear camera
Y-cable
Note:
If you only use the dashcam (without connecting the rear camera) in your
vehicle, connect the car charger to the dashcam and then plug it to the
Vehicle Power Outlet (VPA).
The installation illustrations are for your reference only. The placement
of the devices and cables may vary depending on the vehicle model. If you
encounter any problems during installation, contact a skilled installer (such
as the service personnel of the vehicle) for assistance.

7
Inserting a memory card.
You must insert a memory card (not supplied in all models) before you can start
recording. Your dashcam supports memory cards with up to 128GB capacity.
1. Hold the card by the edges and gently insert it into the slot with the label facing
the rear side of the recorder.
2. To remove a card gently push the top edge of the card inwards to release it and
pull it out of the slot.
Note:
DO NOT apply pressure to the centre of the memory card.
You are advised to use a Class 10 memory card with at least 8GB capacity.
MiTAC does not guarantee the product’s compatibility with memory cards
from all manufacturers.
Before recording, format the memory card to avoid malfunction caused by
files not created by the dashcam.
Turn your dashcam off before removing the memory card.

8
Connecting to your computer.
Connect your dashcam to your computer to access data on the memory card. To
connect the recorder to the computer via the USB cable (not supplied):

9
Operating Your Dashcam.
Turning the recorder on.
Complete installation according to the instructions in the Setting Up Your Dashcam
section. Once the vehicle engine is started the recorder automatically turns on.
Restarting the recorder.
You may need to perform a hardware reset if your dashcam appears to be “frozen”
or unresponsive. To restart the dashcam, press and hold the button until the Power
system is shut down; press the Power button again to turn the recorder on.
Note: If the system does not shut down by keeping the Power button pressed,
force it to shut down by inserting a a straightened paperclip into the Shutdown
button on the top of the device.
Shutdown button
10
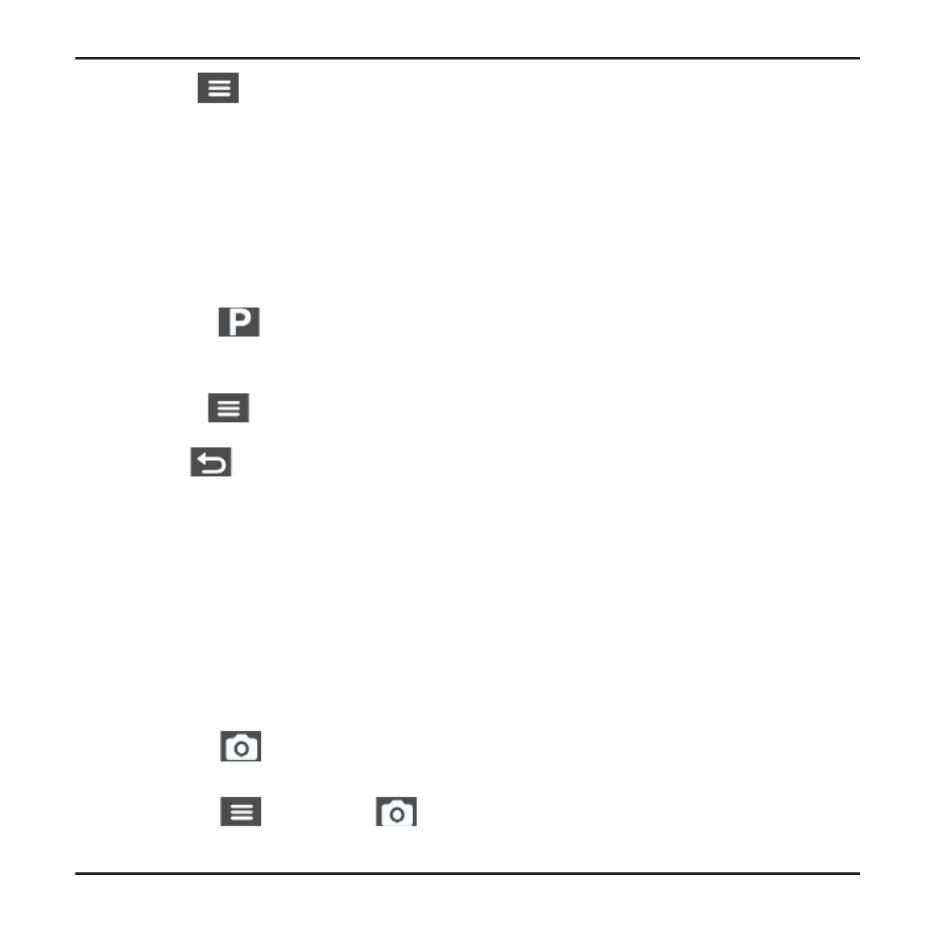
Function keys
The device provides four function keys to control the corresponding icons displayed
on the LCD screen. The key’s function may vary on different screens.
Example 1. Recording screen
Takes a photo.
Enters Parking mode.
Adds a custom safety (speed) camera.
Opens the Menu screen.
Example 2. Menu screen
Moves to the next option.
Acts as the ENTER button.
Moves to the previous option.
Acts as the BACK button.
System icons
Various System icons on the title bar at the top of the screen provide the status
information of your device. The icons displayed will vary depending on your device
model and state.
1 Recording indicator
2 Time display
3 Recording with sound is disabled
4 GPS signal
5 Battery power
6 Your current speed
6
1 2 4 53
1
2
3
4
5
6
1
2
3
4
5
6

11
Switching screens (MiVue 280D).
Once you connect the rear camera and start recording, the screen displays the
PIP (picture-in-picture) mode. You can switch the front and rear camera images by
pressing .
Note: The video files recorded by the front and rear cameras will be saved
separately in the corresponding folders of the memory card.
Setting the date and time.
To make sure that the date and time of your recordings are correct, check the
settings before you begin recording.
1. Press to access the Menu.Settings
2. Select and press System > Date / Time .
3. Select or :Use GPS time Manual
When you select , the system sets date and time according to Use GPS time
the GPS location.
When you select , the system displays date and time setting screen.Manual
Use / to adjust the value of the selected field > press and repeat
the step until all fields have been changed. When completed, press .

12
Recording in driving mode.
Continuous recording
By default, the system will automatically begin with Continuous recording a few
seconds after start up. The recording may be divided into several video clips;
recording will not stop between video clips.
When Continuous recording is in progress, you can manually stop recording by
pressing .
Press to return to the recording screen; the system will start Continuous
recording automatically.
Continuous recordings are saved to the category for file playback.Video
Event recording
By default, if an event happens such as high speed driving, an aggressive turn, or an
accidental crash, the G sensor* prompts your dashcam to start recording the event.
* You can change the sensitivity level (6 levels, from ) of the G sensor by selecting Low to High > Video
Recording > G-Sensor Sensitivity.
If you want to manually start an event recording while continuous recording is in
progress press the Event button on the device.
The event recordings can be found in the “Event” category for file playback.
Recording in Parking mode.
Your dashcam supports Parking recording. Depending upon how long the car is
parked, you may need an additional power source (e.g. an uninterruptible power
cable) to record video during Parking mode.
The Parking mode function is disabled by default. You have to enable the function
by selecting .> Parking Mode > Detection > On
Before enabling Parking mode, please check your device memory allocation. Go

13
to > System > Storage Allocation to allocate storage for Parking recording.
Changing the allocation will erase the memory card, so save any videos or photos
to your computer first.
When Parking mode detection is enabled, the system will enter Parking mode
when you:
- disconnect the device's power (e.g. the vehicle engine is stopped or the power
cable is disconnected) or when the car stops moving for about 5 minutes*; or
- press to manually start Parking mode while Continuous recording is in
progress.
* The feature is triggered by the G sensor of the device. You can change the configuration by selecting
> Parking Mode > Auto Entry.
To stop Parking mode and resume Continuous recording, press .
If movements were detected and recorded during Parking mode, you will be
asked to playback the video when you stop Parking mode.
Parking recordings are saved to the category for file playback.Parking
Camera mode.
Your dashcam allows you to take photos.
- If a recording is in progress, press to take a photo*.
- Press > Camera > .
* This function is not available when the rear camera is connected.
Photos are saved to the category for file playback.Photo

14
Playback mode.
To select a video or photo for playback:
1. Press .> File Playback
2. Select the desired type: , , and .Video Event Parking Photo
3. Press / to select a file from the list > press to start playback.
4. During playback, you can:
While playing videos, press / to play the previous/next video.
While viewing photos, press / to display the previous/next photo.
Press to return to the list.
Press to display the pop-up menu to select:
- : Starts or pauses the playback.Play/Pause
- : The "D" icon displayed on the thumbnail on the playlist Play rear video
means that the video comes with a corresponding rear video (MiVue 480D
only). While playing the front video, you can use this option to switch to the
rear video.
- Move to Event: Moves the file to the category.Event
- : Deletes the file.Delete
Note: When you are moving or deleting the front video, the corresponding rear
video will be processed at the same time.
15
Using Safety Camera Alerts.
Note: The safety camera function is not available in all areas.
You can receive alerts to warn you about the locations of safety (speed) cameras, which will
enable you to monitor your speed through these areas.
When a safety camera appears and is positioned in the detectable direction,
you will receive alerts. The screen will display the visual alert* and you will also
receive audio warnings ( , Beep Voice Mute, or ).
* The displayed icon may vary depending on the type of the safety camera:
fixed camera red light camera
mobile camera average speed camera
traffic light camera traffic violation camera
When the alert sound setting is set to :Beep
- When your car approaches a safety camera, you will receive a normal beep
alert.
- When your car approaches a safety camera at a speed over the set threshold,
you will receive a persistent beep alert until your car speed drops lower than
the appropriate speed limit.
- When your car passes through a safety camera, you will be notified by a
different beep alert.
You can change the settings about how you want to receive the safety camera
alerts. Refer to the section for information.Changing System Settings

16
Adding a safety camera.
Note: You can add a custom safety camera only when a GPS fix is established.
Your dashcam allows you to add up to 100 custom safety cameras to the safety
camera database.
To configure a custom safety camera:
1. To add a custom safety camera in the current location, press on the
recording screen.
2. The next time you pass that location, your dashcam will alert you.
3. To view the information of the added safety camera, select > SafetyCam >
Custom SafetyCam > select the safety camera you want to check.
4. Press to remove the custom safety camera from the recorder.
Updating safety camera data.
Magellan does not warrant that all types and locations of safety camera data are
available as cameras may be removed, relocated, or new cameras installed.
Magellan may offer you updates of safety camera data.
Visit for available downloads and updates.support.magellangps.com
17
Changing System Settings.
To customize the system settings, press .
Note: Depending on your MiVue model, certain settings may not be available.
File Playback
Plays the recorded videos and photos.
Camera
Press to enter Camera mode.
Sound Recording
Sets if you want to include sounds in the recordings. The default setting is .On
Driving Safety
The recorder provides advanced driving safety functions to make your driving
safer.
-
Calibration: After the Lane Departure Warning System (LDWS) function is
enabled, follow the steps to calibrate the system:
1. Drive the vehicle in the middle of the lane.
2. Ask a passenger to select the option and then follow the on-screen
instructions to complete calibration.
Calibrate the system constantly in order to be alerted properly.
- LDWS: The default setting is . You can enable this function by selecting Off
Beep Voice or . Once enabled, the system will alert you when it detects that the
car speed is over 35 mph and the car has strayed from its intended lane.
- Headlight Reminder: Off The default setting is . Once enabled, the system will
remind you to turn the lights on when you are driving after dark.
- Driver Fatigue Alert: Off The default setting is . Once enabled, the system will

18
remind you to take a break after long-distance driving ( , or 2 hours 3 hours 4
hours).
- Eco Drive Indicator: The default setting is Off. Once enabled, the system will
display the Eco drive indicator on the screen. The colour of the indicator will
change (red, yellow or green) depending on your driving status to remind you to
drive more efficiently.
SafetyCam
Sets how you want to be notified of safety cameras. The available settings
include:
- Alert Sound: The options are , Beep Voice Mute and .
- Alert Distance: The options are , and .Short Medium Long
- Alert Method: The options are and Smart Alert Standard Alert.
- Threshold: Sets the speed value for the recorder to start offering alerts.
- Cruise Speed Alert: Sets the limit for cruise speed. When you drive at a cruise
speed over the set value you will receive alerts by the recorder.
- Custom SafetyCam: Lists all user-added safety cameras which are sorted by
created time.
Parking Mode
Allows you to change the settings of Parking mode. The available settings
include:
- Detection: When enabled the recorder will automatically start recording when
it detects movements or if an event happens in Parking mode.
- Detection Method: The options are , Only G-sensor Only Motion Both and
Motion & G-sensor.
- Auto Entry: Medium High Manual Sets the mode (Low, , or ) for the system to
enter Parking mode automatically.
- Motion Detection: The options are , and .Low Medium High

19
- G-Sensor Sensitivity: Sets the sensitivity level ( , or ) of the Low Medium High
G sensor that allows automatic triggering of the parking recording when the
recorder is in Parking mode.
- LED Indicator: The options are and .On Off
Video Recording
Changes the settings of recording, including:
- Video Clip Length: Sets the length of each video clip for a continuous recording
( , or ).1 min 3 min 5 min
- EV: Sets the proper exposure level ( ~ ) to adjust the brightness of the -1 +1
image. The default setting is .0
- G-Sensor Sensitivity: Sets the sensitivity level (6 levels, from ) Low to High
of the G sensor that allows automatic triggering of the event recording while
continuous recording is in progress.
- Stamps: Coordinates G-Sensor Sets the information ( or ) that will be displayed
on the recorded video.
System
Allows you to change the system settings of the device.
- Satellites: Displays the status of GPS/GLONASS signal reception.
- Date/Time: Sets the system date and time. For more information see the
"Setting the date and time" section.
- System Sound: Enables or disables system notification sounds.
- Volume: Adjusts the volume level.
- LCD Standby: Selects to keep the LCD on; or sets the timer for the Always On
LCD to turn off automatically ( , or ) after recording starts. 10 sec 1 min 3 min
Selecting will turn off the LCD (in specified time) but still display the Standby
time and speed information.
- Language: Sets the language.
- Distance Unit: Sets the preferred distance unit.
- Storage Allocation: The system provides 3 default memory configurations

20
to store the videos (including continuous recordings, event recordings and
parking recordings) and photos. Select the proper configuration based on your
usage.
- Restore to Defaults: Restores system settings to factory defaults.
- Version: Displays the software information.
Format
Formats a memory card. (All data will be erased.)

21
Using MiVue Manager.
MiVue Manager™ allows you to view the videos recorded on your dashcam.
Note: Not all features are available for every model.
Installing MiVue Manager.
Download MiVue Manager from and follow the on-screen support.magellangps.com
prompts to install it. Make sure to download the correct software version (Windows
or Mac) according to your computer's operating system.
Playing the recording files.
1. Remove the memory card from the recorder and access the card on the computer
via a card reader. Copy the recording files to your computer for backup and
playback.
You may also leave the memory card inserted in the MiVue device and connect
the device to your computer via a USB cable.
2. Start MiVue Manager on the computer.
By default MiVue Manager shows the calendar and the file list on the right.
When a recording file exists you will see the date marked with “ .” Click that
date to display the files that were recorded on that date.
You can choose the file type to display: / / .Event Normal Parking
To display all files in the current folder, click . To return to the calendar All
view, click .Calendar
3. Double-click a file on the file list to start playback.
4. The playback controls are described as follows:
22
5. During playback, you can check more driving information from the dashboard
panel and the G sensor chart that are displayed below the video playback screen.
On the dashboard panel, click to display the map screen*.
G sensor chart displays data in 3-axis waveform about the car’s shift forward/
backward (X), to the right/left (Y) and upward/downward (Z).
* The map screen may not display when the computer is not connected to the Internet or when your MiVue
model does not support the GPS function.
6. The tool bar allows you to do the following:
1
2
3
4
5
6
7
1
2
3
4
5
6
7
Skip to next/previous file.
Start/pause playback.
Change playback speed.
Mute/unmute volume.
Adjust volume level.
Play full-screen video.
Display playback
progress. Click along the
bar or drag the slider
to move directly to that
point in the video.
1
2
3
4
5
6
7

23
*Settings menu:
- : Sets the display language of MiVue Manager. Change Language
- : Sets the colour scheme of MiVue Manager.Change Skin
- : Checks if there is any new version of MiVue Manager. Internet access is required for this Check for Update
feature.
- : Displays the version and copyright information of MiVue Manager.About
1
2
3
4
5
6
7
Select folder that stores files.
Preview/print current image.
Save files to your computer.
Capture/save video image
to your computer.
Open Settings menu.*
Export and save GPS info as
KML format to your computer.
Upload files to
Facebook and
YouTube.

24
Taking Care Of Your Dashcam.
Caring for your device.
Taking good care of your device will ensure trouble-free operation and reduce the
risk of damage.
Keep your device away from excessive moisture and extreme temperatures.
Avoid exposing your device to direct sunlight or strong ultraviolet light for
extended periods of time.
Do not place anything on top of your device or drop objects on your device.
Do not drop your device or subject it to severe shock.
Do not subject your device to sudden and severe temperature changes. This could
cause moisture condensation inside the unit, which could damage your device. In
the event of moisture condensation, allow the device to dry out completely before
use.
The screen surface can easily be scratched. Avoid touching it with sharp objects.
Non-adhesive generic screen protectors designed specifically for use on portable
devices with LCD panels may be used to help protect the screen from minor
scratches.
Never clean your device with it powered on. Use a soft, lint-free cloth to wipe the
screen and the exterior of your device.
Do not use paper towels to clean the screen.
Never attempt to disassemble, repair or make any modifications to your device.
Disassembling, modifying or any attempt to repair could cause damage to your
device, may inflict bodily harm or damage to property and will void any warranty.
Do not store or carry flammable liquids, gases or explosive materials in the same
compartment as your device, its parts or accessories.
To discourage theft do not leave the device and accessories in plain view in an
unattended vehicle.

25
Overheating may damage the device.
Precautions and notices.
For your own safety do not operate the controls of the product while driving.
A window mount is needed when using the recorder in a car. Make sure that you
place the recorder in an appropriate place, so as not to obstruct the driver’s view
or deployment of airbags.
Make sure that no object is blocking the camera lens and no reflective material is
placed near the lens. Please keep the lens clean.
If the car’s windscreen is tinted with a coating it may impact the recording quality.
Safety precautions.
About charging.
Use only the charger supplied with your device. Use of another type of charger
may result in malfunction and/or danger.
This product is intended to be supplied by a LISTED Power Unit marked with
“LPS”, “Limited Power Source” and output rated + 5 V dc / 1.0 A.
About the charger.
Do not use the charger in a high moisture environment. Never touch the charger
when your hands or feet are wet.
Allow adequate ventilation around the charger when using it to operate the
device or charge the battery. Do not cover the charger with paper or other objects
that will reduce cooling. Do not use the charger while it is inside a carrying case.
Connect the charger to a proper power source. The voltage requirements are
found on the product case and/or packaging.
Do not use the charger if the cord becomes damaged.
Do not attempt to service the unit. There are no serviceable parts inside. Replace
the unit if it is damaged or exposed to excess moisture.

26
About the battery.
CAUTION! This unit contains a non-replaceable internal Lithium Ion battery. The
battery can burst or explode, releasing hazardous chemicals. To reduce the risk of
fire or burns do not disassemble, crush, puncture or dispose of in fire or water.
Use a specified battery in the equipment.
Important instructions (for service personnel only)
Caution! Risk of explosion if battery is replaced by an incorrect type. Dispose
of used batteries according to the instructions.
Replace only with the same or equivalent type recommended by the
manufacturer.
The battery must be recycled or disposed of properly.
Use the battery only in the specified equipment.
About GPS.
GPS is operated by the United States government, which is solely responsible for
the performance of GPS. Any change to the GPS system can affect the accuracy
of all GPS equipment.
GPS satellite signals cannot pass through solid materials (except glass). When
you are inside a tunnel or building, GPS positioning is not available. Signal
reception can be affected by situations such as bad weather or dense overhead
obstacles (e.g. trees, tunnels, viaducts and tall buildings).
The GPS positioning data is for reference only.

27
Warranty.
Magellan Limited Warranty
All Magellan global positioning system (GPS) receivers are navigation aids, and are not intended to replace other
methods of navigation. The purchaser is advised to perform careful position charting and use good judgment.
READ THE USER GUIDE CAREFULLY BEFORE USING THE PRODUCT.
1. MAGELLAN WARRANTY
(a) MiTAC Digital Corp. (“Magellan”) warrants its GPS receivers and hardware accessories to be free from
defects in material and workmanship and will conform to its published specications for the product for a period
of one year from the date of original purchase. THIS WARRANTY APPLIES ONLY TO THE ORIGINAL CONSUMER
PURCHASER OF THIS PRODUCT.
(b) In the event of a defect, Magellan will, at its discretion, repair or replace the hardware product with a product
of like kind or quality, which may be new or reconditioned, with no charge to the purchaser for parts or labor.
Magellan’s limit of liability under the limited warranty shall be the actual cash value of the product at the time
the purchaser returns the product to Magellan for repair less a reasonable amount for usage, as determined by
Magellan in its sole discretion. The repaired or replaced product will be warranted for 90 days from the date of
return shipment, or for the balance of the original warranty, whichever is longer.
(c) Magellan warrants that software products or software included in hardware products will be free from
defects in the media for a period of 30 days from the date of shipment and will substantially conform to the then
current user documentation provided with the software (including updates thereto). Magellan’s sole obligation
shall be the correction or replacement of the media or the software so that it will substantially conform to the
then- current user documentation. Magellan does not warrant the software will meet purchaser’s requirements
or that its operation will be uninterrupted, error-free or virus-free. The purchaser assumes the entire risk of
using the software.
2. PURCHASER’S REMEDY
PURCHASER’S EXCLUSIVE REMEDY UNDER THIS WRITTEN WARRANTY OR ANY IMPLIED WARRANTY SHALL
BE LIMITED TO THE REPAIR OR REPLACEMENT, AT MAGELLAN’S OPTION, OF ANY DEFECTIVE PART OF THE
RECEIVER OR ACCESSORIES WHICH ARE COVERED BY THIS WARRANTY. REPAIRS UNDER THIS WARRANTY
SHALL ONLY BE MADE AT AN AUTHORIZED MAGELLAN SERVICE CENTER. ANY REPAIRS BY A SERVICE
CENTER NOT AUTHORIZED BY MAGELLAN WILL VOID THIS WARRANTY.

28
3. PURCHASER’S DUTIES
For repair or replacement on a Magellan product the purchaser must obtain a Return Materials Authorization
(RMA) number from Magellan Technical Support or by submitting a repair request through our website at www.
magellanGPS.com, prior to shipping. The purchaser must return the product postpaid with a copy of the original
sales receipt, purchaser’s return address and the RMA number clearly printed on the outside of the package to
the Authorized Magellan Service Center address provided by Magellan with the RMA number. Magellan reserves
the right to refuse to provide service free-of-charge if the sales receipt is not provided or if the information
contained in it is incomplete or illegible or if the serial number has been altered or removed. Magellan will
not be responsible for any losses or damage to the product incurred while the product is in transit or is being
shipped for repair. Insurance is recommended. Magellan recommends the use of a trackable shipping method
such as UPS or FedEx when returning a product for service.
4. LIMITATION OF IMPLIED WARRANTIES
Except as set forth in item 1 above, all other expressed or implied warranties, including those of tness for any
particular purpose or merchantability, are hereby disclaimed AND IF APPLICABLE, IMPLIED WARRANTIES UN-
DER ARTICLE 35 OF THE UNITED NATIONS CONVENTION ON CONTRACTS FOR THE INTERNATIONAL SALE OF
GOODS. Some national, state, or local laws do not allow limitations on implied warranty on how long an implied
warranty lasts, so the above limitation may not apply to you.
5. EXCLUSIONS
The following are excluded from the warranty coverage:
(a) periodic maintenance and repair or replacement of parts due to normal wear and tear;
(b) batteries;
(c) nishes;
(d) installations or defects resulting from installation;
(e) any damage caused by (i) shipping, misuse, abuse, negligence, tampering, moisture, liquids, proximity or
exposure to heat, or improper use; (ii) disasters such as re, ood, wind, and lightning; (iii) unauthorized attach-
ments or modication;

29
(g) any product, components or parts not manufactured by Magellan,
(h) that the receiver will be free from any claim for infringement of any patent, trademark, copyright or other
proprietary right, including trade secrets
(i) any damage due to accident, resulting from inaccurate satellite transmissions. Inaccurate transmissions can
occur due to changes in the position, health or geometry of a satellite or modications to the receiver that may
be required due to any change in the GPS.
(Note: Magellan GPS receivers use GPS or GPS+GLONASS to obtain position, velocity and time information.
GPS is operated by the U.S. Government and GLONASS is the Global Navigation Satellite System of the Russian
Federation, which are solely responsible for the accuracy and maintenance of their systems. Certain conditions
can cause inaccuracies which could require modications to the receiver. Examples of such conditions include
but are not limited to changes in the GPS or GLONASS transmission.).
The opening, dismantling or repairing of this product by anyone other than an authorized Magellan Service
Center will void this warranty.
6. EXCLUSION OF INCIDENTAL OR CONSEQUENTIAL DAMAGES
(a) MAGELLAN SHALL NOT BE LIABLE TO PURCHASER
(b) OR ANY OTHER PERSON FOR ANY INDIRECT, INCIDENTAL OR CONSEQUENTIAL DAMAGES WHATSOEVER,
INCLUDING BUT NOT LIMITED TO LOST PROFITS, DAMAGES ARISING FROM A DELAY OR LOSS OF USE, OR OUT
OF THE BREACH OF THIS WARRANTY OR ANY IMPLIED WARRANTY EVEN IF CAUSED BY THE NEGLIGENCE OR
ANOTHER FAULT OF MAGELLAN OR OUT OF THE NEGLIGENT USAGE OF THE PRODUCT. IN NO EVENT WILL
MAGELLAN BE HELD RESPONSIBLE FOR SUCH DAMAGES, EVEN IF MAGELLAN HAS BEEN ADVISED OF THE
POSSIBILITY OF SUCH DAMAGES.
(c) Some national, state, or local laws do not allow the exclusion or limitation of incidental or consequential
damages, so the above limitation or exclusion may not apply to you.

30
7. COMPLETE AGREEMENT
(a) This written warranty is the complete, nal and exclusive agreement between Magellan and the purchaser
with respect to the quality of performance of the goods and any and all warranties and representations.
THIS WARRANTY SETS FORTH ALL OF MAGELLAN’S RESPONSIBILITIES REGARDING THIS PRODUCT. THIS
WARRANTY GIVES YOU SPECIFIC RIGHTS. YOU MAY HAVE OTHER RIGHTS WHICH VARY FROM LOCALITY TO
LOCALITY AND CERTAIN LIMITATIONS CONTAINED IN THIS WARRANTY MAY NOT APPLY TO YOU.
(b) If any part of this limited warranty is held to be invalid or unenforceable, the remainder of the limited
warranty shall nonetheless remain in full force and effect.
This limited warranty is governed by the laws of the State of California, without reference to its conict of law
provisions or the U.N. Convention on Contracts for the International Sale of Goods, and shall benet Magellan,
its successors and assigns. This warranty does not affect the consumer’s statutory rights under applicable laws
in force in their locality, nor the customer’s rights against the dealer arising from their sales/purchase contract.
For further information concerning this limited warranty, please visit Magellan’s website at magellangps.com
or contact:
MiTAC Digital Corp. 279 E Arrow Hwy, San Dimas, CA 91773, USA
USA & Canada: 800-707-9971
Mexico: 866-310-7223

31
Need Technical Support?
If you need technical support for your Magellan product, go to
support.magellangps.com for answers to most questions.
If you can’t nd a solution there, contact Magellan Technical Support by
e-mail at or call 800-707-9971.support.us@cs.magellangps.com
Connect with us
@MagellanGPS
MiTAC Digital Corporation
279 E Arrow Hwy, San Dimas, CA 91773 USA
www.magellanGPS.com
112-0103-001
© 2016 MiTAC Digital Corporation. The Magellan logo and Magellan are registered trademarks
of MiTAC International Corporation, and OneTouch is a trademark of MiTAC International
Corporation and are used under license by MiTAC Digital Corporation. All rights reserved.
All other trademarks and registered trademarks are property of their respective owners.

Magellan MiVue
420/480D
Guía del Usario

33
Seguridad.
Este dispositivo de Magellan es un dispositivo de cámara y de grabación para el tablero de instrumentos,
diseñado para ayudarle a grabar vídeos, tomar fotografías y gestionar los contenidos almacenados en el
dispositivo.
Por favor verique la normativa estatal o local aplicable sobre montaje en el parabrisas. Ingrese a la tienda de
Magellan en para soluciones alternativas de montaje.magellanGPS.com
El conductor debe introducir datos o programar el receptor Magellan solo cuando el vehículo está detenido.
Solo un pasajero del vehículo debe introducir datos o
programar el dispositivo mientras el vehículo esté en
movimiento.Es su responsabilidad cumplir con todas las leyes de tránsito.
Se han tomado todas las precauciones posibles para asegurar que la base de datos sea exacta. Sin embargo,
las carreteras, los puntos de interés (PI) y las ubicaciones de los negocios y servicios pueden cambiar con el
tiempo.
Mantenga el receptor protegido ante condiciones de temperaturas extremas. Por ejemplo, no lo deje expuesto
de manera directa a la luz solar durante un periodo largo de tiempo. La temperatura máxima de funcionamiento
es de 140°F (60°C).
Al realizar el montaje del receptor en su vehículo, p36-ya sea usando el montaje en el parabrisas o cualquier otro
montaje o accesorios, tenga cuidado de no obstruir el campo de visión de la carretera del conductor, interferir con el
funcionamiento de los dispositivos de seguridad del vehículo como las bolsas de aire, o representar un riesgo para los
ocupantes del vehículo en caso que el receptor caiga durante la conducción.
Usted asume los riesgos asociados con los daños a su vehículo o a los ocupantes del vehículo como
consecuencia de su elección de las opciones para el montaje del receptor.
La batería es recargable y no se debe retirar. En el caso de que deba ser reemplazada, por favor póngase en
contacto con el Soporte técnico de Magellan en support.magellanGPS.com o al 800-707-8871.
Programa de reciclaje de Magellan
El Programa de reciclaje de Magellan brinda a los consumidores una
manera de reciclar algunos equipos de Magellan. Como parte de este
programa se aceptarán todos los modelos GPS de Magellan.
Visite para mayor información.magellanGPS.com/Support

34
En algunas jurisdicciones, las grabaciones de audio requieren el consentimiento de todas las partes, antes de
empezar a grabar. Es su responsabilidad conocer y cumplir con las leyes de consentimiento de grabación de
audio aplicables en su jurisdicción.
En algunas jurisdicciones, se podría considerar una invasión de los derechos de privacidad tomar o
mostrar públicamente fotografías o vídeos de personas o de sus vehículos utilizando este producto. Es su
responsabilidad conocer y cumplir con las leyes y los derechos de privacidad aplicables en su jurisdicción.
Antes de utilizar el soporte de ventosa en el parabrisas, verique las leyes y ordenanzas estatales y locales de
donde conduce. Algunas leyes estatales prohíben o restringen el uso de bases de succión en los parabrisas
durante la conducción de un vehículo.
ES RESPONSABILIDAD DEL USUARIO MONTAR Y OPERAR EL DISPOSITIVO DE CONFORMIDAD CON LAS LEYES
Y ORDENANZAS VIGENTES.
Declaración de exposición a la radiación de radio frecuencia (RF) de la Comisión Federal de Comunicaciones
(FCC, por sus siglas en inglés)
1. Este transmisor no se debe colocar ni funcionar conjuntamente con otra antena o transmisor.
2. Este equipo cumple con los límites de exposición a la radiación RF de la FCC establecidos para un
entorno no controlado. Este equipo se debe instalar y operar a una distancia mínima de 20 centímetros
entre el radiador y su cuerpo.
La Banda 1 de Wi-Fi 5G solo es para uso en interiores.
Tested To Comply With
FCC Standards
FOR HOME OR OFFICE USE
Magellan MiVue
240/320/420/480D

35
Configuración de su cámara de tablero.
Inicio rápido con su cámara de tablero...................................................................36
Configuración de su cámara de tablero..................................................................38
Uso de la cámara de tablero...................................................................................43
Uso de las alertas de cámaras de seguridad..........................................................49
Cambio de la configuración del sistema.................................................................51
Uso del MiVue Manager..........................................................................................55
Cuidado de la cámara de tablero............................................................................58
Garantía.................................................................................................................61

36
Inicio rápido con su cámara de tablero.
Nota: Las imágenes del producto y las capturas de pantalla de esta guía pueden
variar de alguna forma de las de su producto.
1 Botón de encendido/apagado
2 Toma de montaje del dispositivo
3 Mini conector USB
4 Indicador de sistema
5 Botón evento
6 Pantalla LCD
7 Micrófono
8 Ranura para tarjetas SD
9 Lentes de la cámara
10
Parlante
11
Indicador Estacionamiento
12
Teclas de función
13
Almohadilla de montaje
14
Lentes de la cámara
15
Perno de Sujeción
16
Micro conector USB
1
2
3
4
5
6
7
8
9
10
11
12
13
14
16
15
1
2
3
4
5
6
7
8
9
10
11
12
13
14
15
16

37
Botón de encendido/apagado
Mantenga presionado durante 2 segundos
para encender y apagar la grabadora de forma
manual.
Cuando se haya activado la grabadora, presione
para encender y apagar la pantalla LCD.
Botón de evento
Presione para iniciar manualmente la grabación de eventos.
Indicadores LED
Indicador de sistema
Se enciende de color verde cuando la grabadora se está cargando.
Durante la carga, el indicador LED parpadea de forma alternada color verde y
ámbar durante la grabación.
Indicador de estacionamiento
Parpadea de color rojo durante la grabación de estacionamiento.

38
Configuración de su cámara de tablero.
Uso de su cámara de tablero en un vehículo.
Nota:
Coloque la cámara de tablero cerca del espejo retrovisor para obtener
grabaciones de la más alta calidad.
Respete las leyes y regulaciones locales en lo que respecta a la instalación
de la cámara de tablero y la grabación de videos con la grabación de DVR de
la cámara de tablero.
Si el parabrisas del vehículo tiene un tinte con revestimiento refractario,
esto podría impactar en la recepción del GPS. En este caso, coloque el
dispositivo cerca de un "área de buena visibilidad".
El sistema calibra de forma automática el sensor G del dispositivo durante
el arranque. Para evitar un funcionamiento incorrecto del sensor G,
encienda siempre el dispositivo DESPUÉS de colocarlo en el vehículo.
Estacione su vehículo en un terreno nivelado. Luego, coloque su grabadora en el
vehículo.
1. Instale la grabadora.

39
2. Monte la cámara trasera.
Antes de montar la base, limpiese el parabrisas con alcohol isopropílicol.
Nota: Si la cinta no funciona, vuelva a colocar la cinta con la nueva cinta.
3. Ajuste el ángulo de la lente.
Asegúrese de que la vista de la cámara quede nivelada con el piso y que el
horizonte esté levemente por debajo de la parte media de la pantalla de la
cámara.
Grabadora Grabadora
trasera

40
4. Conecte los cables.
Coloque los cables a lo largo del techo y el pilar A de forma tal que no interfieran
con la conducción. Asegúrese de que el cable no interfiera con los airbags del
vehículo ni con otras características de seguridad.
Cargador de
vehículo
Grabadora
Grabadora trasera
Cable Y
Nota:
Las ilustraciones de la instalación sirven solo de referencia. La
colocación del dispositivo y los cables podría variar en función del
modelo del vehículo. Si encuentra algún problema durante la instalación,
comuníquese con un profesional (como el personal de servicio del
vehículo) para obtener asistencia.
Cable de grabadora trasera
41
Inserción de una tarjeta de memoria.
Inserte una tarjeta de memoria (se incluye con ciertos modelos) antes de realizar la
grabación.
1. Sujete la tarjeta desde los bordes e insértela suavemente en la ranura con la
etiqueta mirando hacia la parte posterior de la cámara de tablero.
2. Extraiga la tarjeta presionando suavemente el borde superior de la tarjeta hacia
afuera para liberarla y extraerla.
Note:
NO aplique presión en el centro de la tarjeta de memoria.
Utilice una tarjeta de memoria Clase 10 con al menos 8 GB de capacidad y
hasta 128 GB.
La cámara de tablero podría no ser compatible con todas las marcas de
tarjetas de memoria.
Antes de realizar la grabación, formatee la tarjeta de memoria para evitar
averías causadas por los archivos no creados por la grabadora.
Apague el dispositivo antes de extraer la tarjeta de memoria.

42
Conexión con la computadora.
Conecte la cámara de tablero a la computadora a través del cable USB para acceder
a los datos de la tarjeta de memoria:
43
Uso de la cámara de tablero.
Encendido de la grabadora.
Complete la instalación de acuerdo con la sección Uso de la cámara de tablero en
un vehículo. La cámara de tablero se enciende automáticamente una vez que se
arranca el motor del vehículo.
Reinicio de la grabadora.
Es posible que necesite realizar un restablecimiento de hardware cuando la cámara
de tablero deje de responder o parezca no responder:
1. Mantenga presionado el botón Power hasta que la cámara de tablero se
apague.
2. Presione el botón Power para encender la cámara de tablero.
Nota: Si la cámara de tablero no se apaga al presionar el botón Encendido/
apagado, fuerce el apagado insertando un clip para hojas enderezado o un objeto
similar en el botón Apagar ubicado en la parte superior del dispositivo.
Botón apagar

44
Teclas de función.
El dispositivo incluye 4 teclas de función para controlar los iconos correspondientes que aparecen
en la pantalla LCD. La función de las teclas podría variar según las diferentes pantallas.
Pantalla de grabación
Toma un fotografía.
Ingresa al modo Estacionamiento.
Agrega una cámara de seguridad (velocidad) personalizada.
Abre la pantalla Menú.
Pantalla de menú
Se mueve a la siguiente opción.
Funciona como botón INTRO.
Se mueve a la opción anterior.
Funciona como botón ATRÁS.
Los íconos del sistema.
Los íconos del sistema en la parte superior de la pantalla proporcionan la
información de estado del dispositivo. Los iconos visualizados varían en función del
modelo de la cámara de tablero y el estado.
1 Indicador de grabación
2 Indicador de tiempo
3 Grabación con sonido desactivado (por defecto)
4 Señal de GPS
5 Energía de la batería
6 Velocidad actual
6
1 2 4 53
1
2
3
4
5
6
1
2
3
4
5
6

45
Cambiar de pantalla.
Una vez que conecte la grabadora trasera y empezar la grabación, la pantalla
muestra el modo (imagen en imagen) PIP. Puede cambiar las imágenes delantera y
trasera de la cámara pulsando .
Nota: Los archivos de vídeo grabados por las cámaras delantera y trasera se
guardarán por separado en las carpetas correspondientes de la tarjeta de memoria.
Configuración de fecha y hora.
Para asegurarse de que la fecha y hora de las grabaciones sean correctas.
1. Presione .
2. Seleccione System > Date / Time > presione .
3. Seleccione o :Use GPS time Manual
Use GPS time: permite establecer la fecha y hora de acuerdo con la ubicación
actual del GPS.
Manual: muestra la pantalla de configuración de fecha y hora.
Utilice / para ajustar el valor del campo seleccionado > presione
y repita el paso hasta que se hayan cambiado todos los campos. Presione
al completar.

46
Grabación en el modo de conducción.
Grabación continua
La cámara de tablero comienza de forma automática la grabación continua unos
segundos después del arranque. La grabación podría estar dividida en varios clips
de video, pero la grabación no se detendrá entre los clips de video.
Presione para detener manualmente la grabación cuando esté en progreso
la grabación continua.
Presione para regresar a la pantalla de grabación y reanudar la grabación
continua.
Las grabaciones continuas se guardan para la Reproducción del archivo en la
categoría Video.
Grabación de eventos
Si ocurre un evento, como un impacto repentino, conducción a alta velocidad, un
giro agresivo o un accidente, el sensor G indica a la cámara de tablero que grabe un
evento.
* Seleccione > Video Recording G-Sensor Sensitivity > para cambiar la sensibilidad del sensor para las
grabaciones de eventos (6 niveles de a ).Low High
Presione el botón Evento en la cámara de tablero para iniciar manualmente la
grabación de un evento mientras está en progreso la grabación continua.
Las grabaciones de eventos se guardarán para la Reproducción del archivo en la
categoría .Event
Grabación en el modo Estacionamiento.
La cámara de tablero es compatible con la grabación en el modo Estacionamiento.
En función de qué cantidad de tiempo esté estacionado su vehículo, es posible que
necesite una fuente de alimentación adicional (por ejemplo, un cable de cable de
alimentación ininterrumpible) para grabar videos en el modo Estacionamiento.
47
Diríjase a > System > Storage Allocation para asignar espacio para la
grabación de estacionamiento. El cambio de la asignación elimina la tarjeta de
memoria, por lo tanto, guarde en primer lugar cualquier video o fotografía en la
computadora.
Cuando se active el modo Estacionamiento, la cámara de tablero ingresa en el
modo Estacionamiento cuando:
- desconecta el dispositivo deteniendo el vehículo, retirando el cable de
alimentación o deteniendo el vehículo durante 5 minutos, o
- presiona durante la grabación continua para activar el modo
Estacionamiento.
* Esta función se activa a través del sensor G de la cámara de tablero. Puede cambiar la configuración
seleccionando .> Parking Mode > Auto Entry
Presione para detener el modo Estacionamiento y reanudar la grabación
continua.
Si se detectan movimientos y se graba durante el modo Estacionamiento,
se le preguntará si desea reproducir el video cuando se desactive el modo
Estacionamiento.
Las grabaciones del modo Estacionamiento se guardarán para la Reproducción
del archivo en la categoría Parking.
Modo Cámara.
La cámara de tablero le permite tomar una fotografía.
- Presione para tomar una fotografía mientras la grabación se encuentra
en progreso (no disponible cuando se conecta la cámara posterior)*.
- Presione > Camera > .
* Esta función no está disponible cuando se conecta la cámara trasera.

48
Modo Reproducción.
Para seleccionar un video o fotografía para su reproducción:
1. Presione .> File Playback
2. Seleccione , , Video Event Parking Photo o .
3. Presione / para seleccionar un archivo de la lista > presione para
iniciar la reproducción.
4. Durante la reproducción, puede:
Presione / para reproducir el video anterior/siguiente (durante la
reproducción de videos).
Presione / para mostrar la fotografía anterior/siguiente (durante la
visualización de fotografías).
Presione para regresar a la lista.
Press para mostrar un menú emergente y seleccionar:
- : comienza o pausa la reproducción.Play/Pause
- : The "D" icon displayed on the thumbnail on the playlist Play rear video
means that the video comes with a corresponding rear video. While playing
the front video, you can use this option to switch to the rear video.
- Move to Event: mueve el archivo a la categoría Event.
- : elimina el archivo.Delete
Nota: Si se desplaza o eliminar el vídeo frontal, la video cámara trasera
correspondiente será procesado a la vez.

49
Uso de las alertas de cámaras de seguridad.
Nota: La función Cámaras de seguridad no está disponible en todos los países.
Puede recibir alertas para advertirle sobre las ubicaciones de las cámaras de seguridad
(velocidad), de forma que pueda controlar su velocidad al pasar por estas zonas.
Recibirá alertas cuando aparezca una cámara de seguridad y esté colocada en
una dirección detectable. La pantalla mostrará la alerta virtual* y proporcionará
advertencias de audio (pitido, voz o silencio).
* El icono visualizado varía en función del tipo de cámara de seguridad:
cámara fija cámara de semáforo en rojo
cámara móvil cámara de velocidad promedio
cámara de semáforo cámara de infracción de tránsito
Cuando la configuración de sonido de alerta se establezca en Pitido:
- Cuando su vehículo se aproxime a una cámara de seguridad, escuchará un
pitido normal.
- Cuando su vehículo se aproxime a una cámara de seguridad a una velocidad
superior al límite establecido, escuchará un pitido constante hasta que la
velocidad esté por debajo del límite de velocidad.
- Cuando un vehículo pase por una cámara de seguridad, escuchará un pitido
diferente.
Consulte la sección Configuración del sistema para obtener más información
sobre cómo cambiar la configuración de alertas de cámaras de seguridad.

50
Cómo agregar una cámara de seguridad.
Nota: Solo puede agregar una cámara de seguridad personalizada cuando se
establezca una posición fija de GPS.
La cámara de tablero le permite personalizar la base de datos de cámaras de
seguridad. Puede agregar hasta 100 cámaras de seguridad personalizadas en la
cámara de tablero.
Para configurar una cámara de seguridad personalizada:
1. Presione en la pantalla de grabación para agregar una cámara
personalizada en su ubicación. Escuchará alertas desde la cámara de tablero
cuando pase por esta ubicación.
2. Para ver información sobre las cámaras de seguridad agregadas, presione >
SafetyCam > Custom SafetyCam > SafetyCam > Custom SafetyCam > seleccione
la cámara de seguridad que desea comprobar.
3. Presione para eliminar la cámara de seguridad personalizada de la cámara
de tablero.
Cómo actualizar los datos de cámaras de seguridad.
El GPS de Magellan no garantiza que estén disponibles todos los tipos y ubicaciones
de los datos de cámaras de seguridad, puesto que las cámaras pueden quitarse,
reubicarse o instalarse nuevas cámaras.
Ocasionalmente, el GPS de Magellan podría ofrecerle actualizaciones de los datos
de cámaras de seguridad. Visite support.magellangps.com para descargas.

51
Cambio de la configuración del sistema.
Presione para personalizar la configuración de la cámara de tablero.
Nota: Algunas opciones de configuración podrían no estar disponibles en
determinados modelos de MiVue.
File Playback: Se reproducen los videos y fotografías grabados.
Camera: Presione para ingresar en el modo Cámara.
Sound Recording: Permite establecer la opción de grabación de sonidos en On o
Off.
Driving Safety: Permite establecer funciones avanzadas de seguridad en la
conducción para que sea más segura.
-
Calibración: permite activar el Sistema de advertencia de salida de carril y
calibrar el sistema:
1. Conduzca el vehículo por la mitad del carril.
2. Solicite a un pasajero que seleccione la opción y siga lasCalibration
instrucciones en pantalla.
Calibre el sistema de forma constante para obtener alertas precisas.
- LDWS: la configuración predeterminada es Off. Active esta función
seleccionando Beep o Voice. Una vez que esté activada esta función, la cámara
de tablero le advierte cuando detecta que la velocidad del vehículo es superior
a 60 km/h y el vehículo se ha desviado de su carril original.
- Recordatorio de faros: la configuración predeterminada es Off. Una vez que
esté activada esta función, la cámara de tablero le advierte que encienda los
faros cuando anochece.
- Alerta de fatiga del conductor: la configuración predeterminada es Off. Una
vez que esté activada esta función, la cámara de tablero le advierte que se
tome un descanso después de conducir durante una cantidad de tiempo
especificada (2 Hours, 3 Hours o 4 Hours).

52
- Indicador de conducción económica: la configuración predeterminada es
Off. Una vez que esté activada esta función, la cámara de tablero muestra el
indicador de conducción económica en la pantalla. El color del indicador cambia
entre rojo, amarillo o verde en función de su conducción para recordarle que
conduzca de forma eficiente.
SafetyCam
Permite definir cómo desea recibir notificaciones sobre las cámaras de
seguridad:
- Sonido de alerta: Beep, Voice Mute o .
- Distancia de alerta: Short, Medium Long o .
- Método de alerta: Smart Alert Standard Alert y .
- Límite: permite establecer un valor de velocidad para el que la cámara de
seguridad comenzará a enviar alertas.
- Alerta de velocidad crucero: permite establecer el límite para la velocidad
crucero. La cámara de tablero le advierte cuando conduce a una velocidad
crucero superior al valor establecido.
- Cámara de seguridad personalizada: muestra todas las cámaras de
seguridad agregadas (ordenadas por fecha de creación).
Parking Mode
Permite cambiar la configuración del modo Estacionamiento:
- Detección: cuando se activa esta función, la cámara de tablero inicia
automáticamente la grabación cuando detecta movimiento o si ocurre un
evento en el modo Estacionamiento.
- Método de detección: Only G-sensor, Only Motion Both Motion & G-sensor. o
- Ingreso automático: permite establecer el modo ( oLow, Medium, High
Manual) para que la cámara de tablero ingrese automáticamente en el modo
Estacionamiento.
- Detección de movimiento: permite establecer el nivel de sensibilidad (Low,
Medium, High).

53
- Sensibilidad del sensor G: permite establecer el nivel de sensibilidad del
sensor G ( , , ) para permitir la activación automática de las Low Medium High
grabaciones del modo Estacionamiento cuando la cámara de tablero se
encuentra activada en este modo.
- Indicador LED: permite configurar el indicador LED para las grabaciones del
modo Estacionamiento ( u ).On Off
Video Recording
Permite cambiar la configuración de la grabación, incluidas las siguientes:
- Longitud del clip de video: permite establecer la longitud de cada clip de video
para la grabación continua ( , o ).1 min 3 min 5 min
- EV: permite establecer el nivel de exposición adecuado (-1 ~ +1) para ajustar
el brillo de la imagen (la configuración predeterminada es 0).
- Sensibilidad del sensor G: permite establecer la sensibilidad del sensor G (6
niveles, de a ) para permitir la activación automática de la grabación Low High
de eventos cuando la grabación continua se encuentra en progreso.
- Marcas: permite establecer Coordinates G-Sensor o para que aparezcan en
los videos grabados.
System
Permite cambiar la configuración del sistema de la cámara de tablero.
- Satélites: muestra el estado de la recepción de señal de GPS/GLONASS.
- Fecha/hora: permite establecer la fecha y hora del sistema. Consulte la
sección Configuración de fecha y hora para obtener más información.
- Sonido del sistema: permite activar o desactivar los sonidos de notificaciones
del sistema.
- Volumen: permite ajustar el nivel de volumen.
- Espera de pantalla LCD: permite seleccionar Always On para mantener
encendida la pantalla LCD o establecer el tiempo para la pantalla LCD se
apague de forma automática (10 sec, 1 min o 3 min) después de que se inicia
la grabación. Al seleccionar Standby, se apaga la pantalla LCD (en el tiempo
especificado), pero se continúa mostrando la información de hora y velocidad.

54
- Idioma: permite establecer las preferencias de idioma.
- Unidad de distancia: permite establecer las preferencias de unidad de
distancia.
- Asignación de almacenamiento: La cámara de tablero posee 3
configuraciones de memoria predeterminadas para el almacenamiento de
videos (grabaciones continuas, grabaciones de eventos y grabaciones de
estacionamiento) y fotografías. Seleccione la configuración adecuada de
acuerdo a su uso.
- Restaurar a los valores predeterminados: permite restaurar la configuración
del sistema a los valores predeterminados de fábrica.
- Versión: muestra la información del software.
Format
Permite formatear una tarjeta de memoria y eliminar todos los datos.

55
Uso del MiVue Manager.
El video grabado, GPS y los datos de incidentes se guardan automáticamente para
verlos más fácilmente y compartirlos usando MiVue Manager o la aplicación MiVue.
Nota: No se encuentran todas las características disponibles en todos los modelos.
Instalación de MiVue Manager.
Descargue MiVue Manager para Windows o Mac desde support.magellangps.com y
siga las instrucciones en pantalla para realizar la instalación.
Reproducción de los archivos de grabaciones.
1. Extraiga la tarjeta de memoria de la cámara de tablero.
Acceda a la tarjeta desde la computadora a través de un lector de tarjetas. Se
le recomienda copiar los archivos de grabaciones a la computadora para su
respaldo y reproducción. También puede conectar la cámara de tablero a la
computadora a través del cable USB mientras la tarjeta SD está insertada en la
cámara para examinar, reproducir y guardar los archivos
2. Ejecutar MiVue Manager en su computadora.
De forma predeterminada, MiVue Manager muestra el calendario y la lista de
archivos a la derecha.
Cuando exista un archivo de grabación, podrá observar la fecha marcada con
“ .” Haga clic en esa fecha para visualizar los archivos grabados en dicha fecha.
Seleccione el tipo de archivo que desea visualizar: Evento / Normal / Estacionamiento.
Haga clic en All para mostrar todos los archivos de la carpeta actual. Haga
clic en Calendar para regresar a la vista de calendario.
3. Haga doble clic en un archivo en la lista de archivos para iniciar la reproducción.
4. A continuación, se describen los controles de reproducción:
Specyfikacje produktu
| Marka: | Magellan |
| Kategoria: | kamera wideo |
| Model: | MiVue 420 |
Potrzebujesz pomocy?
Jeśli potrzebujesz pomocy z Magellan MiVue 420, zadaj pytanie poniżej, a inni użytkownicy Ci odpowiedzą
Instrukcje kamera wideo Magellan

22 Września 2024
20 Września 2024
18 Września 2024
18 Września 2024
17 Września 2024
17 Września 2024
17 Września 2024
Instrukcje kamera wideo
- kamera wideo Sony
- kamera wideo Samsung
- kamera wideo Leica
- kamera wideo Logitech
- kamera wideo Xiaomi
- kamera wideo Sharp
- kamera wideo Braun
- kamera wideo Voltcraft
- kamera wideo Milwaukee
- kamera wideo Philips
- kamera wideo SilverCrest
- kamera wideo Xblitz
- kamera wideo Panasonic
- kamera wideo Canon
- kamera wideo Mio
- kamera wideo Viewsonic
- kamera wideo Nedis
- kamera wideo Medion
- kamera wideo OK
- kamera wideo Lenco
- kamera wideo Fujifilm
- kamera wideo Toshiba
- kamera wideo Hazet
- kamera wideo Garmin
- kamera wideo Salora
- kamera wideo Evolveo
- kamera wideo HP
- kamera wideo Soundmaster
- kamera wideo Hyundai
- kamera wideo SJCAM
- kamera wideo Creative
- kamera wideo Swann
- kamera wideo Nikon
- kamera wideo Kodak
- kamera wideo Cisco
- kamera wideo SBS
- kamera wideo Kenwood
- kamera wideo DJI
- kamera wideo Gembird
- kamera wideo Minox
- kamera wideo Cobra
- kamera wideo JVC
- kamera wideo Trust
- kamera wideo Linksys
- kamera wideo Thinkware
- kamera wideo AgfaPhoto
- kamera wideo Vimar
- kamera wideo Ricoh
- kamera wideo Renkforce
- kamera wideo Rollei
- kamera wideo Marshall
- kamera wideo Trotec
- kamera wideo Uniden
- kamera wideo DataVideo
- kamera wideo Pyle
- kamera wideo Zoom
- kamera wideo Midland
- kamera wideo Speco Technologies
- kamera wideo Samson
- kamera wideo ARRI
- kamera wideo Olympus
- kamera wideo Navitel
- kamera wideo GoClever
- kamera wideo ION
- kamera wideo Maginon
- kamera wideo Intenso
- kamera wideo Polaroid
- kamera wideo Prestigio
- kamera wideo Konica Minolta
- kamera wideo Sanyo
- kamera wideo Oregon Scientific
- kamera wideo Bresser
- kamera wideo Jay-Tech
- kamera wideo Hama
- kamera wideo GoPro
- kamera wideo Insignia
- kamera wideo Extech
- kamera wideo TomTom
- kamera wideo Denver
- kamera wideo Bushnell
- kamera wideo Berger & Schröter
- kamera wideo Hitachi
- kamera wideo Tracer
- kamera wideo RCA
- kamera wideo Klein Tools
- kamera wideo Genius
- kamera wideo BenQ
- kamera wideo Trevi
- kamera wideo Lexibook
- kamera wideo Overmax
- kamera wideo Sencor
- kamera wideo Insta360
- kamera wideo EasyMaxx
- kamera wideo Blackmagic Design
- kamera wideo DOD
- kamera wideo Steinberg
- kamera wideo Best Buy
- kamera wideo Lamax
- kamera wideo Transcend
- kamera wideo Elmo
- kamera wideo Vitek
- kamera wideo Laserliner
- kamera wideo Vivitar
- kamera wideo Quintezz
- kamera wideo Aiptek
- kamera wideo AEE
- kamera wideo Airis
- kamera wideo ATN
- kamera wideo Activeon
- kamera wideo Energy Sistem
- kamera wideo Easypix
- kamera wideo Nilox
- kamera wideo Flir
- kamera wideo Coby
- kamera wideo Envivo
- kamera wideo TacTic
- kamera wideo Macally
- kamera wideo Bauer
- kamera wideo Naxa
- kamera wideo Mamiya
- kamera wideo Ricatech
- kamera wideo Konig
- kamera wideo Tronje
- kamera wideo Mpman
- kamera wideo Nikkei
- kamera wideo T'nB
- kamera wideo Ematic
- kamera wideo Minolta
- kamera wideo Zagg
- kamera wideo Veho
- kamera wideo Dnt
- kamera wideo Zorki
- kamera wideo Contour
- kamera wideo Iget
- kamera wideo RunCam
- kamera wideo Drift
- kamera wideo SeaLife
- kamera wideo Sakar
- kamera wideo Jobo
- kamera wideo Dragon Touch
- kamera wideo Mediacom
- kamera wideo Kreator
- kamera wideo Contax
- kamera wideo EE
- kamera wideo Traveler
- kamera wideo Contour Design
- kamera wideo Kaiser Baas
- kamera wideo Bluetech
- kamera wideo Braun Phototechnik
- kamera wideo Spypoint
- kamera wideo Kitvision
- kamera wideo Praktica
- kamera wideo MMTC
- kamera wideo Flip
- kamera wideo Kogan
- kamera wideo BlackVue
- kamera wideo Brinno
- kamera wideo DXG
- kamera wideo Storex
- kamera wideo MD 80
- kamera wideo Vupoint Solutions
- kamera wideo Leotec
- kamera wideo Skytronic
- kamera wideo Whistler
- kamera wideo Curve
- kamera wideo PCE Instruments
- kamera wideo CamOne
- kamera wideo Mobius
- kamera wideo ISAW
- kamera wideo Beaulieu
- kamera wideo Revier Manager
- kamera wideo Kobian
- kamera wideo FHD 1080P
- kamera wideo RSC
- kamera wideo Stealth Cam
- kamera wideo Aqua-Vu
- kamera wideo Hamlet
- kamera wideo Qoltec
- kamera wideo Replay
- kamera wideo Akaso
- kamera wideo Hamilton Buhl
- kamera wideo Aida
- kamera wideo Rexing
- kamera wideo IOPLEE
- kamera wideo Moultrie
- kamera wideo Microtek
- kamera wideo Teslong
- kamera wideo Izzo
Najnowsze instrukcje dla kamera wideo
30 Marca 2025
30 Marca 2025
30 Marca 2025
30 Marca 2025
28 Marca 2025
28 Marca 2025
28 Marca 2025
27 Marca 2025
14 Marca 2025
12 Marca 2025