Instrukcja obsługi Conceptronic DDE02B
Przeczytaj poniżej 📖 instrukcję obsługi w języku polskim dla Conceptronic DDE02B (15 stron) w kategorii Kołyska/stacja dokująca. Ta instrukcja była pomocna dla 18 osób i została oceniona przez 2 użytkowników na średnio 4.5 gwiazdek
Strona 1/15

Multi Language Quick Guide
Dual Bay Hard Drive Docking
Station USB 3.0
DDE02B
V1.0
English
Conceptronic DDE02B
Installation & usage
Connect the hard disk docking station to your computer
Turn on your computer.
Connect the included power adapter to the DC connector at the backside of the
hard disk docking station and to a free wall outlet.
Connect the included USB 3.0 cable to the USB connector at the backside of
the hard disk docking station and to a free USB 3.0 port on your computer.
Note: You can also connect the hard disk docking station to a USB 2.0 or USB
1.1 port, but the speed will be limited to the speed of the USB controller of your
computer.
Insert a SATA hard disk in the hard disk docking station.
Turn on the hard disk docking station with the power switch at the backside.
The computer will automatically recognize and install the hard disk docking
station. No driver installation is required.
Safe remove the hard disk docking station from your computer
The hard disk docking station must be removed safely in your operating system
before you turn it off and remove the hard disk, in order to prevent data loss.
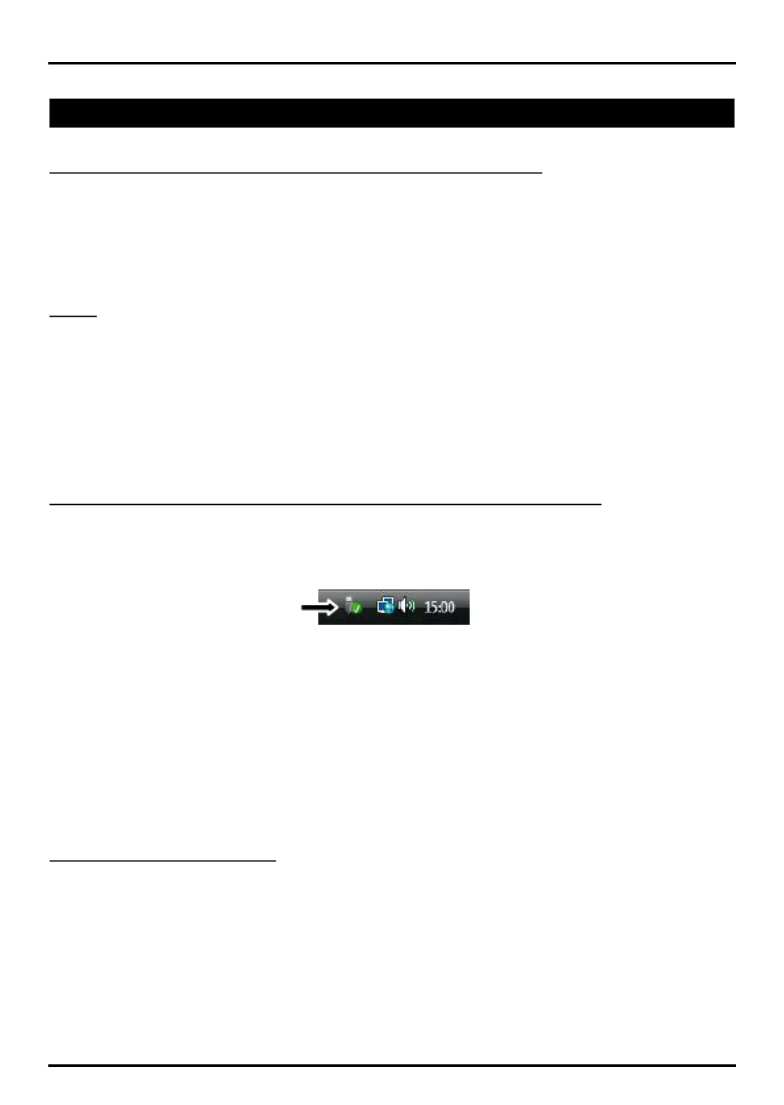
Double click the on “Safely Remove Hardware” icon your system tray. in
The “Safely Remove Hardware” window will shown. be
Click on the connected hard disk docking station (often listed as “USB Mass
Storage Device”) and click the “Stop” button.
Confirm the disconnection by clicking “OK”.
The hard disk docking station is now safely removed from your computer. You can
now turn off the hard disk docking station and remove the hard disk.
Duplicator (CLONE) Mode
The Duplicator Mode only works when the docking station is NOT connected to a PC
via the USB cable.
HDD A (Source): disk with the data you want to duplicate (clone).
HDD B (Destination): in which you want to store the data of the source disk.

Note: The capacity of the destination disk should be equal or larger than the source
disk. Make sure that those hard disks have no bad sectors. Bad sectors will cause
unpredictable problems.
Put the source disk into the , then, put the destination disk into the HDD A bay HDD
B bay. Please make sure that those hard drives are correctly and firmly connected
to those SATA connectors of the docking station.
Connect the power adapter to the docking station and power outlet.
Press the power button to power up the docking station.
Wait at least 10 seconds till the docking station is prepared.
Note: If you have important data on the hard disk, please back up the data before
beginning the Clone operation.
Keep pressing the Clone button for 3 seconds to begin duplication.
During the Clone process, those LED indicators will flash to show the percentage of
the progress:
Begin Clone process: 4 LEDs flash one by one.
Green LED stays solid: 25%
Red LED stays solid: 50%
Yellow LED stays solid: 75%
Orange LED stays solid: 100%
When the green, red, yellow & orange LEDs all stay solid, the process of the Clone
had been finished.
Note: Those hard drives may become hot during the Clone process.
Specyfikacje produktu
| Marka: | Conceptronic |
| Kategoria: | Kołyska/stacja dokująca |
| Model: | DDE02B |
Potrzebujesz pomocy?
Jeśli potrzebujesz pomocy z Conceptronic DDE02B, zadaj pytanie poniżej, a inni użytkownicy Ci odpowiedzą
Instrukcje Kołyska/stacja dokująca Conceptronic

31 Grudnia 2025
31 Grudnia 2025
9 Października 2024
9 Października 2024
2 Października 2024
2 Października 2024
2 Października 2024
2 Października 2024
2 Października 2024
2 Października 2024
Instrukcje Kołyska/stacja dokująca
- Kołyska/stacja dokująca Sony
- Kołyska/stacja dokująca Yamaha
- Kołyska/stacja dokująca Samsung
- Kołyska/stacja dokująca Sven
- Kołyska/stacja dokująca LG
- Kołyska/stacja dokująca Logitech
- Kołyska/stacja dokująca Sharp
- Kołyska/stacja dokująca Pioneer
- Kołyska/stacja dokująca Lenovo
- Kołyska/stacja dokująca Philips
- Kołyska/stacja dokująca Livoo
- Kołyska/stacja dokująca Xblitz
- Kołyska/stacja dokująca JBL
- Kołyska/stacja dokująca Onkyo
- Kołyska/stacja dokująca LC-Power
- Kołyska/stacja dokująca Nokia
- Kołyska/stacja dokująca Scott
- Kołyska/stacja dokująca KEF
- Kołyska/stacja dokująca Bose
- Kołyska/stacja dokująca Infiniton
- Kołyska/stacja dokująca Panasonic
- Kołyska/stacja dokująca StarTech.com
- Kołyska/stacja dokująca Klipsch
- Kołyska/stacja dokująca Muse
- Kołyska/stacja dokująca Crestron
- Kołyska/stacja dokująca Bestway
- Kołyska/stacja dokująca Behringer
- Kołyska/stacja dokująca Asus
- Kołyska/stacja dokująca Nedis
- Kołyska/stacja dokująca Tangent
- Kołyska/stacja dokująca Boss
- Kołyska/stacja dokująca Lenco
- Kołyska/stacja dokująca Majestic
- Kołyska/stacja dokująca Niceboy
- Kołyska/stacja dokująca ILive
- Kołyska/stacja dokująca Blaupunkt
- Kołyska/stacja dokująca ATen
- Kołyska/stacja dokująca Salora
- Kołyska/stacja dokująca Teac
- Kołyska/stacja dokująca Speed-Link
- Kołyska/stacja dokująca Dual
- Kołyska/stacja dokująca Grundig
- Kołyska/stacja dokująca HP
- Kołyska/stacja dokująca DAP-Audio
- Kołyska/stacja dokująca Creative
- Kołyska/stacja dokująca Manhattan
- Kołyska/stacja dokująca Tripp Lite
- Kołyska/stacja dokująca ECG
- Kołyska/stacja dokująca Denon
- Kołyska/stacja dokująca Akasa
- Kołyska/stacja dokująca Block
- Kołyska/stacja dokująca SBS
- Kołyska/stacja dokująca Cambridge
- Kołyska/stacja dokująca Edifier
- Kołyska/stacja dokująca Kenwood
- Kołyska/stacja dokująca Scosche
- Kołyska/stacja dokująca Icy Box
- Kołyska/stacja dokująca Polk
- Kołyska/stacja dokująca Natec
- Kołyska/stacja dokująca Gembird
- Kołyska/stacja dokująca Lindy
- Kołyska/stacja dokująca Zebra
- Kołyska/stacja dokująca Bang & Olufsen
- Kołyska/stacja dokująca Deltaco
- Kołyska/stacja dokująca Trust
- Kołyska/stacja dokująca V7
- Kołyska/stacja dokująca LogiLink
- Kołyska/stacja dokująca Dell
- Kołyska/stacja dokująca Jamo
- Kołyska/stacja dokująca Digitus
- Kołyska/stacja dokująca Alesis
- Kołyska/stacja dokująca TechniSat
- Kołyska/stacja dokująca Vimar
- Kołyska/stacja dokująca Renkforce
- Kołyska/stacja dokująca Pure
- Kołyska/stacja dokująca Netgear
- Kołyska/stacja dokująca Thomson
- Kołyska/stacja dokująca Fresh 'n Rebel
- Kołyska/stacja dokująca Magnat
- Kołyska/stacja dokująca DreamGEAR
- Kołyska/stacja dokująca Pyle
- Kołyska/stacja dokująca Iogear
- Kołyska/stacja dokująca Datalogic
- Kołyska/stacja dokująca NGS
- Kołyska/stacja dokująca Marantz
- Kołyska/stacja dokująca Monster
- Kołyska/stacja dokująca Jabra
- Kołyska/stacja dokująca Bowers & Wilkins
- Kołyska/stacja dokująca Samson
- Kołyska/stacja dokująca Monitor Audio
- Kołyska/stacja dokująca Audio Pro
- Kołyska/stacja dokująca I-TEC
- Kołyska/stacja dokująca Nevir
- Kołyska/stacja dokująca Ewent
- Kołyska/stacja dokująca Ibiza Sound
- Kołyska/stacja dokująca CLUB3D
- Kołyska/stacja dokująca Edimax
- Kołyska/stacja dokująca Peavey
- Kołyska/stacja dokująca ION
- Kołyska/stacja dokująca TooQ
- Kołyska/stacja dokująca Harman Kardon
- Kołyska/stacja dokująca SPC
- Kołyska/stacja dokująca Sonoro
- Kołyska/stacja dokująca Parrot
- Kołyska/stacja dokująca Antec
- Kołyska/stacja dokująca Aiwa
- Kołyska/stacja dokująca AKAI
- Kołyska/stacja dokująca JLab
- Kołyska/stacja dokująca Axis
- Kołyska/stacja dokująca Telefunken
- Kołyska/stacja dokująca Vogel's
- Kołyska/stacja dokująca Aluratek
- Kołyska/stacja dokująca Rocstor
- Kołyska/stacja dokująca Hama
- Kołyska/stacja dokująca Mackie
- Kołyska/stacja dokująca Marmitek
- Kołyska/stacja dokująca Verbatim
- Kołyska/stacja dokująca Axagon
- Kołyska/stacja dokująca Lotronic
- Kołyska/stacja dokująca Schwaiger
- Kołyska/stacja dokująca Sharkoon
- Kołyska/stacja dokująca Gabor
- Kołyska/stacja dokująca Jane
- Kołyska/stacja dokująca Vakoss
- Kołyska/stacja dokująca Denver
- Kołyska/stacja dokująca Anker
- Kołyska/stacja dokująca InLine
- Kołyska/stacja dokująca Rapoo
- Kołyska/stacja dokująca Tracer
- Kołyska/stacja dokująca Boompods
- Kołyska/stacja dokująca OWC
- Kołyska/stacja dokująca Media-Tech
- Kołyska/stacja dokująca Gemini
- Kołyska/stacja dokująca BenQ
- Kołyska/stacja dokująca Trevi
- Kołyska/stacja dokująca Technaxx
- Kołyska/stacja dokująca Klip Xtreme
- Kołyska/stacja dokująca Lexibook
- Kołyska/stacja dokująca GPX
- Kołyska/stacja dokująca Soundcore
- Kołyska/stacja dokująca Sencor
- Kołyska/stacja dokująca Alecto
- Kołyska/stacja dokująca Canton
- Kołyska/stacja dokująca Electro-Voice
- Kołyska/stacja dokująca Laser
- Kołyska/stacja dokująca Roberts
- Kołyska/stacja dokująca Sonnet
- Kołyska/stacja dokująca Best Buy
- Kołyska/stacja dokująca Havis
- Kołyska/stacja dokująca JAYS
- Kołyska/stacja dokująca Socket Mobile
- Kołyska/stacja dokująca Elgato
- Kołyska/stacja dokująca Adj
- Kołyska/stacja dokująca Lamax
- Kołyska/stacja dokująca Terratec
- Kołyska/stacja dokująca Enermax
- Kołyska/stacja dokująca Arctic Cooling
- Kołyska/stacja dokująca Sogo
- Kołyska/stacja dokująca Fenton
- Kołyska/stacja dokująca Xcellon
- Kołyska/stacja dokująca Aiptek
- Kołyska/stacja dokująca Altec Lansing
- Kołyska/stacja dokująca BeeWi
- Kołyska/stacja dokująca GPO
- Kołyska/stacja dokująca Caliber
- Kołyska/stacja dokująca Targus
- Kołyska/stacja dokująca Sitecom
- Kołyska/stacja dokująca Energy Sistem
- Kołyska/stacja dokująca Telestar
- Kołyska/stacja dokująca Boynq
- Kołyska/stacja dokująca Aukey
- Kołyska/stacja dokująca Lava
- Kołyska/stacja dokująca Sonos
- Kołyska/stacja dokująca Kensington
- Kołyska/stacja dokująca Brigmton
- Kołyska/stacja dokująca Sunstech
- Kołyska/stacja dokująca DeLock
- Kołyska/stacja dokująca Techly
- Kołyska/stacja dokująca BlueBuilt
- Kołyska/stacja dokująca Connect IT
- Kołyska/stacja dokująca Steren
- Kołyska/stacja dokująca KitSound
- Kołyska/stacja dokująca Audiosonic
- Kołyska/stacja dokująca Sandberg
- Kołyska/stacja dokująca Seg
- Kołyska/stacja dokująca Bigben Interactive
- Kołyska/stacja dokująca Jam
- Kołyska/stacja dokująca Audiovox
- Kołyska/stacja dokująca Bunn
- Kołyska/stacja dokująca Bigben
- Kołyska/stacja dokująca IDance
- Kołyska/stacja dokująca Simplecom
- Kołyska/stacja dokująca Naxa
- Kołyska/stacja dokująca Fantec
- Kołyska/stacja dokująca Konig
- Kołyska/stacja dokująca Boston Acoustics
- Kołyska/stacja dokująca Sweex
- Kołyska/stacja dokująca Ices
- Kołyska/stacja dokująca Pure Acoustics
- Kołyska/stacja dokująca Peaq
- Kołyska/stacja dokująca T'nB
- Kołyska/stacja dokująca Ematic
- Kołyska/stacja dokująca Zagg
- Kołyska/stacja dokująca Leitz
- Kołyska/stacja dokująca Roadstar
- Kołyska/stacja dokująca Gira
- Kołyska/stacja dokująca Difrnce
- Kołyska/stacja dokująca BlueAnt
- Kołyska/stacja dokująca Vorago
- Kołyska/stacja dokująca Gear4
- Kołyska/stacja dokująca Manu
- Kołyska/stacja dokująca Celly
- Kołyska/stacja dokująca LandingZone
- Kołyska/stacja dokująca Parat
- Kołyska/stacja dokująca Wentronic
- Kołyska/stacja dokująca Urban Revolt
- Kołyska/stacja dokująca IHome
- Kołyska/stacja dokująca Stereoboomm
- Kołyska/stacja dokująca Brydge
- Kołyska/stacja dokująca Tivoli Audio
- Kołyska/stacja dokująca Iluv
- Kołyska/stacja dokująca Monoprice
- Kołyska/stacja dokująca Avanca
- Kołyska/stacja dokująca Havit
- Kołyska/stacja dokująca Voxicon
- Kołyska/stacja dokująca Vantec
- Kołyska/stacja dokująca MIPRO
- Kołyska/stacja dokująca Raikko
- Kołyska/stacja dokująca Clint
- Kołyska/stacja dokująca Xoro
- Kołyska/stacja dokująca I.Sound
- Kołyska/stacja dokująca Billow
- Kołyska/stacja dokująca Icy Dock
- Kołyska/stacja dokująca Maxell
- Kołyska/stacja dokująca WowWee
- Kołyska/stacja dokująca Zalman
- Kołyska/stacja dokująca HMDX
- Kołyska/stacja dokująca Soundfreaq
- Kołyska/stacja dokująca Inter-Tech
- Kołyska/stacja dokująca SIIG
- Kołyska/stacja dokująca CRU
- Kołyska/stacja dokująca Kreafunk
- Kołyska/stacja dokująca Gamber-Johnson
- Kołyska/stacja dokująca Music Angel
- Kołyska/stacja dokująca HyperJuice
- Kołyska/stacja dokująca Braven
- Kołyska/stacja dokująca Laney
- Kołyska/stacja dokująca Esselte
- Kołyska/stacja dokująca Auray
- Kołyska/stacja dokująca Logic3
- Kołyska/stacja dokująca Kogan
- Kołyska/stacja dokująca Novus
- Kołyska/stacja dokująca Cabstone
- Kołyska/stacja dokująca Promate
- Kołyska/stacja dokująca Ministry Of Sound
- Kołyska/stacja dokująca Divacore
- Kołyska/stacja dokująca Merlin
- Kołyska/stacja dokująca Goal Zero
- Kołyska/stacja dokująca X-Zero
- Kołyska/stacja dokująca Alogic
- Kołyska/stacja dokująca Magnavox
- Kołyska/stacja dokująca Highpoint
- Kołyska/stacja dokująca Perfect Choice
- Kołyska/stacja dokująca White Shark
- Kołyska/stacja dokująca Wavemaster
- Kołyska/stacja dokująca XXODD
- Kołyska/stacja dokująca X-MINI
- Kołyska/stacja dokująca Proclip
- Kołyska/stacja dokująca Hamlet
- Kołyska/stacja dokująca Microlab
- Kołyska/stacja dokująca Dolphin
- Kołyska/stacja dokująca Raidsonic
- Kołyska/stacja dokująca Approx
- Kołyska/stacja dokująca Voxx
- Kołyska/stacja dokująca SACK It
- Kołyska/stacja dokująca Acme Made
- Kołyska/stacja dokująca AmpliVox
- Kołyska/stacja dokująca Urban Factory
- Kołyska/stacja dokująca VisionTek
- Kołyska/stacja dokująca EXSYS
- Kołyska/stacja dokująca J5 Create
- Kołyska/stacja dokująca Ryght
- Kołyska/stacja dokująca ICreation
- Kołyska/stacja dokująca IOPLEE
- Kołyska/stacja dokująca Divoom
- Kołyska/stacja dokująca FoneStar
- Kołyska/stacja dokująca SMK-Link
- Kołyska/stacja dokująca Cyber Acoustics
Najnowsze instrukcje dla Kołyska/stacja dokująca
31 Marca 2025
26 Marca 2025
12 Marca 2025
12 Marca 2025
10 Marca 2025
27 Lutego 2025
27 Lutego 2025
11 Lutego 2025
7 Lutego 2025
7 Lutego 2025