Instrukcja obsługi Canon Super G3 - LASER-CLASS-3170-Series
Canon
Komunikacja sieciowa
Super G3 - LASER-CLASS-3170-Series
Przeczytaj poniżej 📖 instrukcję obsługi w języku polskim dla Canon Super G3 - LASER-CLASS-3170-Series (474 stron) w kategorii Komunikacja sieciowa. Ta instrukcja była pomocna dla 10 osób i została oceniona przez 2 użytkowników na średnio 4.5 gwiazdek
Strona 1/474

HT1-2169-000-V.1.1 032001NF0.4 © CANON INC. 2001 PRINTED IN JAPAN
120V
CANON INC.
30-2, Shimomaruko 3-chome, Ohta-ku, Tokyo 146-8501, Japan
CANON U.S.A., INC.
One Canon Plaza, Lake Success, NY 11042, U.S.A.
CANON CANADA INC.
6390 Dixie Road Mississauga, Ontario L5T 1P7, Canada
CANON EUROPA N.V.
Bovenkerkerweg 59-61 P.O. Box 2262, 1180 EG Amstelveen, The Netherlands
CANON FRANCE S.A.
17, quai du President Paul Doumer, 92414 Courbevoie, Cedex, France
CANON (U.K.) LTD.
Woodhatch, Reigate, Surrey, RH2 8BF, United Kingdom
CANON DEUTSCHLAND GmbH
P.O. Box 100364, Europark Fichtenhain A10 47807 Krefeld, Germany
CANON LATIN AMERICA, INC.
6505 Blue Lagoon Drive Suite 325 Miami, Florida 33126, U.S.A.
CANON AUSTRALIA PTY. LTD.
1 Thomas Holt Drive, North Ryde, Sydney, N.S.W. 2113, Australia
CANON SINGAPORE PTE. LTD.
79 Anson Road #09-01/06, Singapore 079906
CANON HONG KONG CO., LTD.
9/F., The Hong Kong Club Building, 3A Chater Road, Central, Hong Kong
This publication uses 50% recycled paper.

Preface i
LASER CLASS 3170 Series.
CFYA/YAH/YAN 120v US V1.0
FACSIMILE USER’S GUIDE

ii Preface
LASER CLASS 3170 Series.
CFYA/YAH/YAN 120v US V1.0
Trademarks
Canon and LASER CLASS are registered trademarks and RAPID Fusing
System is a trademark of Canon, Inc.
Copyright
Copyright © 2001 by Canon, Inc. All rights reserved. No part of this
publication may be reproduced, transmitted, transcribed, stored in a
retrieval system, or translated into any language or computer language
in any form or by any means, electronic, mechanical, magnetic, optical,
chemical, manual, or otherwise, without the prior written permission of
Canon, Inc.
As an ENERGY STAR Partner, Canon has determined
that the Canon LASER CLASS® 3170 and 3175 meet
the Energy Star guidelines for energy efficiency.
Super G3 is a phrase used to describe the new
generation of fax machines that use ITU-T V.34
standard 33.6Kbps* modems. Super G3 High Speed
Fax machines allow transmission time of
approximately 3 seconds* per page which results in
reduced telephone line charges.
* Approximately 3 seconds per page fax transmission
time based on CCITT/ITU-T No.1 Chart, (JBIG,
Standard Mode) at 33.6Kbps modem speed. The
Public Switched Telephone Network (PSTN) currently
supports 28.8Kbps modem speeds or lower,
depending on telephone line conditions.

Preface iii
LASER CLASS 3170 Series.
CFYA/YAH/YAN 120v US V1.0
Users in the U.S.A.
PRE-INSTALLATION REQUIREMENTS FOR CANON
FACSIMILE EQUIPMENT
A. Location
Supply a suitable table, cabinet, or desk. See Appendix A for the
unit’s dimensions and weight.
B. Order Information
1. Only a single telephone line (touch-tone or rotary) is to be used.
2. Order an RJ11-C modular wall jack (USOC code), which should
be installed by the phone company. If the RJ11-C wall jack is not
present, telephone/fax operation is not possible.
3. Order a normal business line from your telephone company’s
business representative. The line should be a regular voice grade
line or the equivalent. Use one line per unit.
DDD (Direct Distance Dial) line
-if not-
IDDD (International Direct Distance Dial) line if you communi-
cate overseas
Canon recommends an individual line following industry standards, e.g.
the 2500 (Touch Tone) or 500 (Rotary/Pulse Dial) telephones. A dedi-
cated extension off a PBX unit without “Call Waiting” can be used with
your facsimile unit. Key telephone systems are not recommended
because they send non- standard signals to individual telephones for
ringing and special codes, which may cause a fax error.
C. Power Requirements
The facsimile unit should be connected to a standard 120 volt AC, three-
wire grounded outlet only. Do not connect this unit to an outlet or
power line shared with other appliances that cause electrical noise.
Air conditioners, electric typewriters, copiers, and machines of this sort
generate electrical noise which often interferes with communications
equipment and the sending and receiving of documents.

Preface ix
LASER CLASS 3170 Series.
CFYA/YAH/YAN 120v US V1.0
WARNING FOR THE ETHERNET BOARD EB-52 FX (IN-
STALLED)
This equipment has been tested and found to comply with the limits for
a Class A digital device, pursuant to Part 15 of the FCC Rules. These
limits are designed to provide reasonable protection against harmful
interference when equipment is operated in a commercial environment.
This equipment generates, uses and can radiate radio frequency energy
and, if not installed and used in accordance with the instructions, may
cause harmful interference to radio communications. Operation of this
equipment in a residential area is likely to cause harmful interference in
which case the user will be required to correct the interference at his own
expense.
*Use of shielded cable is required to comply with Class A limits in
Subpart B of Part 15 of FCC Rules.
Do not make any changes or modifications to the equipment unless
otherwise specified in the manual. If such changes or modifications
should be made, you could be required to stop operation of the
equipment.

xPreface
LASER CLASS 3170 Series.
CFYA/YAH/YAN 120v US V1.0
Users in Canada
PRE-INSTALLATION REQUIREMENTS FOR CANON
FACSIMILE EQUIPMENT
A. Location
Supply a suitable table, cabinet, or desk. See Appendix A: Specifica-
tions for details about unit's weight and dimensions.
B. Order Information
1. Provide only a single line or touch-tone or rotary telephone set
terminated with a standard 4-pin modular phone plug. (Touch-
tone is recommended if available in your area.)
2. Order an RJ11-C modular wall jack (USOC code), which should
be installed by the phone company. If the RJ11-C wall jack is not
present, telephone/fax operation is not possible.
3. Order a normal business line from your telephone company’s
business representative. The line should be a regular voice grade
line or the equivalent. Use one line per unit.
DDD (Direct Distance Dial) line
-if not-
IDDD (International Direct Distance dial) line if you communi-
cate overseas
Canon recommends an individual line following industry standards
such as the 2500 (touch tone) or 500 (rotary/pulse dial) telephones. A
dedicated extension off a PBX without Camp On signals is also permitted
with a fax unit. Key telephone systems are not recommended because
they send non-standard signals to individual telephones for ringing, or
send special codes which may cause a fax error.
C. Power Requirements
The power outlet should be a three-prong grounded receptacle (single
or duplex). It should be independent from copiers, heaters, air condi-
tioners or any electrical equipment that is thermostatically controlled.
The rated value is 120 volts and 15 amperes. The RJ11-C modular jack
should be relatively close to the power outlet to facilitate installation.

Preface xi
LASER CLASS 3170 Series.
CFYA/YAH/YAN 120v US V1.0
NOTICE
The Industry Canada label identifies certified equipment. This certifica-
tion means that the equipment meets certain telecommunications
networks protective, operational and safety requirements. The Depart-
ment does not guarantee the equipment will operate to the user’s
satisfaction.
Before installing this equipment, users should ensure that it is permitted
to be connected to the facilities of the local telecommunications company.
The equipment must also be installed using an acceptable method of
connection. In some cases, the company’s inside wiring associated with
a single-line individual service may be extended by means of a certified
connector assembly (telephone extension cord). The customer should be
aware that compliance with the above conditions may not prevent
deterioration of service in some situations.
The Ringer Equivalence Number (REN) assigned to each terminal device
provides an indication of the maximum number of terminal allowed to
be connected to a telephone interface. The termination on an interface
may consist of any combination of devices subject only to the require-
ment that the sum of the Ringer Equivalence Number of all the devices
does not exceed 5.
The REN of this equipment is 0.3.
Even if the dual-line option is installed, the REN is applicable to each
port.
Repairs to certified equipment should be made by an authorized Cana-
dian maintenance facility designated by the supplier. Any repairs or
alterations made by the user to this equipment, or equipment malfunc-
tions, may give the telecommunications company cause to request the
user to disconnect the equipment.
Users should ensure for their own protection that the electrical ground
connections of the power utility, telephone lines and internal metallic
water pipe system, if present, are connected together. This precaution
may be particularly important in rural areas.

xii Preface
LASER CLASS 3170 Series.
CFYA/YAH/YAN 120v US V1.0
CAUTION
Users should not attempt to make such connections themselves, but
should contact the appropriate electric inspection authority, or electri-
cian, as appropriate.
This Class B digital apparatus meets all requirements of the Canadian
Interference-Causing Equipment Regulations.
Cet appareil numérique de la classe B respecte toutes les exigences du
Règlement sur le matériel brouilleur du Canada.
WARNING FOR THE ETHERNET BOARD EB-52 FX (IN-
STALLED)
This Class A digital apparatus meets all requirements of the Canadian
Interference-Causing Equipment Regulations.
Cet appareil numérique de la classe A respecte toutes les exigences du
Règlement sur le matériel brouilleur du Canada.

Preface xiii
LASER CLASS 3170 Series.
CFYA/YAH/YAN 120v US V1.0
IMPORTANT SAFETY INFORMATION
1. Read these safety instructions and refer to them later if you have any
questions.
2. Follow all warnings and instructions marked on the LASER CLASS®
3170 Series.
3. Place the LASER CLASS® 3170 Series on a level surface. To avoid
serious damage from falling, never place the LASER CLASS® 3170
Series on an unstable cart, stand, or table.
4. Do not use the LASER CLASS® 3170 Series near water.
5. Slots and openings on the cabinet and on the back or bottom are
provided for ventilation. To ensure reliable operation of the LASER
CLASS® 3170 Series and to protect it from overheating, never block
or cover these openings. Do not block the openings by placing the
unit on a bed, sofa, rug, or other similar surface, or near a radiator or
heat register. Do not place the LASER CLASS® 3170 Series in a closet
or built-in installation unless proper ventilation is provided.
6. Operate the LASER CLASS® 3170 Series only from the type of power
source indicated on the unit’s label. If you are not sure of the type of
power available, consult your dealer or local power company.
7. The LASER CLASS® 3170 Series is equipped with a 3-prong, ground-
ing-type plug provided with a third (grounding) pin. This plug will
only fit into a grounding-type outlet. This is a safety feature. If you
are unable to insert the plug into your outlet, contact an electrician to
replace your outlet. Do not defeat the safety purpose of the ground-
ing-type plug by breaking off the third prong or using a 3-to-2
adapter.
8. Do not allow anything to rest on the power cord, and do not locate
the LASER CLASS® 3170 Series where the cord will be walked on.

xiv Preface
LASER CLASS 3170 Series.
CFYA/YAH/YAN 120v US V1.0
9. If you use an extension cord with the LASER CLASS® 3170 Series,
make sure that the total of the ampere ratings on the products
plugged into the extension cord does not exceed the extension cord
ampere rating. Also, make sure that the total ampere rating of all
products plugged into the wall outlet does not exceed the current
amperage of the circuit breaker.
10. Do not push objects of any kind into the slots or openings on the
cabinet as they may touch dangerous voltage points or short out
parts, which could result in a risk of fire or electric shock.
11.To avoid spillage in or around the LASER CLASS® 3170 Series do not
eat or drink around the fax. If you spill liquid or if any substance
falls into the unit, immediately unplug the LASER CLASS® 3170
Series and call your Authorized Canon Dealer immediately.
12. Unplug the LASER CLASS® 3170 Series from the wall outlet before
cleaning.
13. Except as explained elsewhere in this manual, do not attempt to
service the LASER CLASS® 3170 Series yourself. Opening and
removing interior covers may expose you to dangerous voltage
points or other risks. Refer all servicing to your local Authorized
Canon Service Dealer.

Preface xv
LASER CLASS 3170 Series.
CFYA/YAH/YAN 120v US V1.0
14. Unplug this product from the wall outlet and refer servicing to
qualified service personnel under the following conditions:
❏When the power cord or plug is damaged or frayed.
❏If liquid has been spilled into the unit.
❏If the LASER CLASS® 3170 Series has been exposed to rain or
water.
❏If the LASER CLASS® 3170 Series does not operate normally
when you have followed the instructions in the User’s Guide.
Adjust only those controls that are covered by the operating
instructions in the User’s Guide. Improper adjustment of other
controls may result in damage and may require extensive work by
a qualified technician to restore the product to normal operation.
❏If the LASER CLASS® 3170 Series has been dropped or the
cabinet has been damaged.
❏If the LASER CLASS® 3170 Series exhibits a distinct change in
performance, indicating a need for service.
You must register your fax number, your name or company name, and
the date-and time in the LASER CLASS® 3170 Series before you use it.
This is required by the FCC rules governing the use of fax equipment.
(➞3-12)
THE OPTIONAL HANDSET EMITS LOW LEVEL
ELECTROMAGNETIC WAVES. IF YOU USE A CARDIAC
PACEMAKER AND FEEL ABNORMALITIES, PLEASE MOVE AWAY
FROM THIS PRODUCT AND CONSULT YOUR DOCTOR.

xvi Preface
LASER CLASS 3170 Series.
CFYA/YAH/YAN 120v US V1.0
Laser Safety
This fax complies with 21 CFR Chapter 1 Subchapter J as a Class 1 laser
product under the U.S. Department of Health and Human Services
(DHHS) Radiation Performance Standard according to the Radiation
Control for Health and Safety Act of 1968. This means that the fax does
not produce hazardous radiation.
Since radiation emitted inside the fax is completely confined within
protective housings and external covers, the laser beam cannot escape
from the machine during any phase of user operation.
CDRH Regulations
The Center for Devices and Radiological Health (CDRH) of the U.S. Food
and Drug Administration implemented regulations for laser products on
August 2, 1976. These regulations apply to laser products manufactured
from August 1, 1976. Compliance is mandatory for products marketed in
the United States.
USE OF CONTROLS, ADJUSTMENTS, OR PERFORMANCE OF
PROCEDURES OTHER THAN THOSE SPECIFIED IN THIS USER’S
GUIDE MAY RESULT IN HAZARDOUS RADIATION EXPOSURE.
The label is attached to the laser scanner unit inside the fax and is not in
a user access area.

Contents xvii
LASER CLASS 3170 Series.
CFYA/YAH/YAN 120v US V1.0
Contents
Chapter 1 Welcome ! ....................................................................................................... 1-1
Main Features .......................................................................................... 1-2
Options ..................................................................................................... 1-5
Customer Support .................................................................................. 1-6
Chapter 2 Setting Up ...................................................................................................... 2-1
How to Use This Guide ......................................................................... 2-3
Where to Set Up the Fax ........................................................................ 2-4
Space Around the Fax ............................................................................ 2-6
Power Requirements .............................................................................. 2-7
General Precautions ............................................................................... 2-8
Moving the Fax Unit ............................................................................ 2-10
Unpacking: Have You Got Everything? .............................................2-11
For the LASER CLASS® 3170 Series ......................................... 2-13
For the LASER CLASS® 3175 Only .......................................... 2-14
For the LASER CLASS® 3170MS Only ..................................... 2-14
Options Available ........................................................................ 2-16
Supply........................................................................................... 2-16
Parts of the Fax...................................................................................... 2-17
Front View ........................................................................................ 2-17
Rear View .......................................................................................... 2-18
Handset (option) .............................................................................. 2-18
Removing the Shipping Material ....................................................... 2-19
Removing the Shipping Tapes ....................................................... 2-19
Removing the Packing Materials Inside the Fax Unit ................ 2-19
Removing the Packing Materials from Paper Cassette 1 ........... 2-21
Removing the Protective Plastic Sheet ......................................... 2-22
Assembling the Fax .............................................................................. 2-23
Installing the Toner Cartridge ........................................................ 2-23
Attaching the Document Output Tray and
the Upper Output Tray ................................................................... 2-26
Attaching the Document Feeder Tray........................................... 2-27
Installing Paper Cassette 2
(For the LASER CLASS® 3175 Only) ............................................. 2-28
Loading Paper in Paper Cassettes 1 and 2 ................................... 2-31
Connecting the Handset (option) .................................................. 2-38
Connecting the Telephone Line ..................................................... 2-39
Connecting an Extension Phone .................................................... 2-40
Turning on the Power ..................................................................... 2-41
Using the MP Tray ................................................................................ 2-43

xviii Contents
LASER CLASS 3170 Series.
CFYA/YAH/YAN 120v US V1.0
Loading the MP Tray ....................................................................... 2-43
Turning on and off USE MP TRAY and
Setting the Paper Size in the USE MP TRAY Menu .................... 2-48
Selecting Paper Delivery ..................................................................... 2-50
Setting Face-down Paper Delivery for Upper and
Lower Output Trays ........................................................................ 2-50
Using the Face-up Tray ................................................................... 2-53
Using the Optional Dual-Line ............................................................ 2-54
Connecting Two Telephone Lines ................................................. 2-54
How the Two Telephone Lines Operate ....................................... 2-56
Registering the Telephone Numbers for the Lines ..................... 2-57
Chapter 3 Getting Started .............................................................................................. 3-1
Operation Buttons (One-touch panels closed) ................................... 3-2
Operation Buttons (One-touch panels open) ..................................... 3-4
Using the Menus and Buttons .............................................................. 3-5
General Guidelines for Registering Information .......................... 3-5
Using the Menus ................................................................................ 3-5
To Open a Menu and Select an Item .......................................... 3-6
To Return to the Previous Level.................................................. 3-6
To Return to Standby Immediately ............................................ 3-6
Entering Names for Registration ..................................................... 3-7
To Correct a Mistake ..................................................................... 3-8
Menu Button Summary Table .......................................................... 3-9
Checking and Setting the Telephone Line ........................................ 3-10
Registering Required Sender Information ........................................ 3-12
What is Sender Information? ......................................................... 3-12
Registering the Sender Information (TX TERMINAL ID) .............. 3-13
Registering Sender Names .................................................................. 3-18
Registering a Sender Name ............................................................ 3-18
Changing or Erasing a Sender Name ........................................... 3-20
Using the Energy Saver Mode
(For the LASER CLASS® 3170/3175 Only) ....................................... 3-21
Turning the Energy Saver Feature ON ......................................... 3-21
Returning to the Full Power Mode ............................................... 3-23
Chapter 4 Setting Up and Using Speed Dialing ....................................................... 4-1
Read This before Entering Telephone Numbers ................................ 4-2
Entering Pauses for Dialing ............................................................. 4-2
Adjusting the Length of a Pause ..................................................... 4-3
What is Speed Dialing? .......................................................................... 4-5
One-touch Speed Dialing ............................................................. 4-5
Coded Speed Dialing.................................................................... 4-5
Group Dialing................................................................................ 4-5
Setting Up One-touch Speed Dialing .................................................. 4-6
Setting Up Coded Speed Dialing ....................................................... 4-15

Contents xix
LASER CLASS 3170 Series.
CFYA/YAH/YAN 120v US V1.0
Setting Up Group Dialing ................................................................... 4-24
Using Speed Dialing ............................................................................ 4-29
Using One-touch Speed Dialing .................................................... 4-29
Using Coded Speed Dialing ........................................................... 4-31
Using Group Dialing ....................................................................... 4-33
Using Directory Dialing ...................................................................... 4-35
Chapter 5 Using the Fax as a Copier ............................................................................ 5-1
Preparing the Document ....................................................................... 5-2
Setting a Document on the Fax ............................................................. 5-3
Performing the Document Settings...................................................... 5-4
Making Copies ........................................................................................ 5-6
Chapter 6 Sending Documents ..................................................................................... 6-1
Setting a Document for Sending .......................................................... 6-2
Preparing the Document .................................................................. 6-2
Setting the Document on the Fax .................................................... 6-3
Adjusting the Scanning Settings ...................................................... 6-4
Selecting a Sender Name ....................................................................... 6-6
Using Regular Dialing ........................................................................... 6-7
Canceling Sending a Document ........................................................... 6-8
To Cancel Sending on a Single-Line ........................................... 6-8
To Cancel Sending on a Dual-Line ............................................. 6-9
Dialing Long Distance with Regular Dialing ................................... 6-10
Overview of Sending Methods ........................................................... 6-12
Memory Sending ............................................................................. 6-12
Direct Sending .................................................................................. 6-15
Manual Sending ............................................................................... 6-17
Re-dialing When the Line is Busy ...................................................... 6-19
What is Automatic Redialing? ....................................................... 6-19
Setting Up Redialing ....................................................................... 6-20
Auto Redial Setup Summary .................................................... 6-21
Sequential Broadcasting to More Than One Location..................... 6-22
Sending Documents at a Preset Time ................................................ 6-24
Sending a Document with a Subaddress/Password ....................... 6-27
Subaddress/Password Sending with Speed Dialing ................. 6-27
Subaddress/Password Sending with the Operation
Panel Buttons.................................................................................... 6-28
Chapter 7 Receiving Documents .................................................................................. 7-1
Receiving Documents Automatically .................................................. 7-2

xx Contents
LASER CLASS 3170 Series.
CFYA/YAH/YAN 120v US V1.0
Setting the Automatic Receive Mode .............................................. 7-2
Messages Displayed When Receiving a Document...................... 7-2
Turning on and Adjusting the Auto Switch Time ......................... 7-5
Receiving Documents Manually with the Optional Handset .......... 7-7
Receiving a Document Manually at the Fax .................................. 7-7
Receiving a Document Manually with
an Extension Telephone .................................................................... 7-8
Changing the Remote Receive ID.................................................... 7-9
Canceling Receiving a Document .......................................................7-11
To Cancel Receiving on a Single-Line .......................................7-11
To Cancel Receiving on a Dual-Line ........................................ 7-12
Transferring Documents ...................................................................... 7-13
Before You Set Up Document Transfer ......................................... 7-13
Setting Up the Fax for Document Transfer .................................. 7-14
Turning the Transfer Mode ON and OFF ..................................... 7-17
Turning Transfer Mode ON ....................................................... 7-17
Turning Transfer Mode OFF ...................................................... 7-18
Changing the Transfer Settings...................................................... 7-18
Canceling the Transfer Settings ..................................................... 7-20
Chapter 8 Using the Memory Features........................................................................ 8-1
When the Fax Displays RECEIVED IN MEMORY ............................ 8-2
Displaying the Transaction History ..................................................... 8-3
Printing a Memory List.......................................................................... 8-5
Printing a Document in the Memory................................................... 8-6
Sending a Document in Memory to a Different Destination ........... 8-7
Erasing a Document from the Memory............................................... 8-9
Deleting a Document with the Delete File Button ........................ 8-9
Deleting a Document with the Memory Reference Button ....... 8-10
Setting Up and Using a Memory Box .................................................8-11
Before You Create Memory Boxes ................................................. 8-12
When You Create a Memory Box .................................................. 8-12
Access Settings ............................................................................ 8-13
Main Settings ............................................................................... 8-13
Feature Settings ........................................................................... 8-14
Creating a Memory Box .................................................................. 8-14
Changing the Memory Box Settings ............................................. 8-22
Canceling a Memory Box ............................................................... 8-23
Sending a Document Stored in the Memory Box........................ 8-24
Printing a Document Received in a Memory Box....................... 8-25
What Happens to Memory after a Power Failure............................ 8-27
How Your Registered Data Is Protected ....................................... 8-27
About the Backup Battery .............................................................. 8-27
Chapter 9 Using a Relay Network................................................................................ 9-1

Contents xxi
LASER CLASS 3170 Series.
CFYA/YAH/YAN 120v US V1.0
What is Relay Broadcasting?................................................................. 9-2
Setting Up and Using a Standard Relay Unit ..................................... 9-3
Setting Your Fax as a Relay Unit ..................................................... 9-4
Changing the Relay Broadcast Settings .......................................... 9-7
Deleting the Relay Group ................................................................. 9-9
Sending a Document to a Relay Unit for Relay Broadcasting ....... 9-10
Sending a Document to a Relay Unit with Speed Dialing......... 9-12
Sending with the Relay Broadcast Button .................................... 9-12
Chapter 10 Using Confidential Mailboxes ................................................................. 10-1
Setting Up and Using the Standard Mailbox Features.................... 10-2
Creating a Mailbox .......................................................................... 10-2
Changing Mailbox Settings ............................................................ 10-6
Canceling a Mailbox ........................................................................ 10-7
Receiving a Confidential Document ............................................. 10-8
Sending a Confidential Document ................................................... 10-10
Sending a Confidential Document with Speed Dialing ........... 10-10
Sending a Confidential Document with
the Confidential Mailbox Button ..................................................10-11
Chapter 11 Setting Up and Using Polling ...................................................................11-1
What is Polling? .....................................................................................11-2
Before You Use Polling Receiving ..................................................11-2
Polling Other Fax Machines to Receive a Document .......................11-3
Polling to Receive at a Preset Time ................................................ 11-5
Changing the Preset Polling Settings...........................................11-12
Canceling Preset Polling ................................................................ 11-13
Setting Up Polling Sending ................................................................11-15
Before You Can Be Polled to Send ................................................11-15
Setting Up a Polling Box ................................................................11-15
Scanning a Document into the Memory for Polling Sending .. 11-20
Changing the Polling Box Setup ...................................................11-21
Canceling a Polling Box .................................................................11-23
Chapter 12 Other Special Features ............................................................................... 12-1
Using the Telephone............................................................................. 12-2
Tone Dialing on a Pulse Line .............................................................. 12-3
Setting and Using the Program Button ............................................. 12-5
Setting Up and Using the Optional Stamp Feature ......................... 12-8
Setting Up the Stamp Feature ........................................................ 12-8
Turning the Stamp Feature ON/OFF ......................................... 12-10
How the Fax Operates with Default Settings ................................. 12-12
Chapter 13 Restricting Use of the Fax ......................................................................... 13-1

xxii Contents
LASER CLASS 3170 Series.
CFYA/YAH/YAN 120v US V1.0
Setting and Using the System Settings Password............................ 13-2
Setting the System Settings Password .......................................... 13-2
Changing or Canceling the System Settings Password.............. 13-4
Restricting Fax Operation ................................................................... 13-6
Setting Operation Restrictions ....................................................... 13-6
Operating the Fax with Restrictions ON .....................................13-11
Sending a Document with Restrictions ON ...........................13-11
Making a Copy with Restrictions ON.................................... 13-12
Printing a Report with Restrictions ON ................................ 13-13
Using the Telephone with Restrictions ON........................... 13-13
Turning Restrictions OFF and ON .............................................. 13-14
Receiving Documents from Registered Senders Only .................. 13-16
Using Memory Lock........................................................................... 13-17
Setting a Time and Password for Memory Lock ....................... 13-17
Turning the Memory Lock ON .................................................... 13-20
Turning the Memory Lock OFF and Printing Documents ...... 13-20
Setting Up and Using PIN Codes..................................................... 13-21
Setting a PIN Code ........................................................................ 13-21
Dialing with a PIN Code after the Number ............................... 13-24
Dialing with a PIN Code before the Number ............................ 13-25
Setting PIN Code Access for Speed Dialing .............................. 13-26
Using Speed Dialing with PIN Code Access ............................. 13-27
Forced PIN Code Access ............................................................... 13-28
Chapter 14 Printing Reports and Lists ........................................................................ 14-1
Printing the Speed Dialing Lists......................................................... 14-2
Printing the User Data List.................................................................. 14-5
Printing the List of Sender Names ..................................................... 14-6
Reports ................................................................................................... 14-8
Printing the Activity Management Report................................... 14-9
Setting and Using Activity Reports ..............................................14-11
Memory Lists ...................................................................................... 14-17
Chapter 15 Maintenance & Frequently Asked Questions....................................... 15-1
Removing Document Feed Jams ........................................................ 15-2
Removing Printer Feed Jams .............................................................. 15-4
Locating a Paper Jam ...................................................................... 15-5
1. Face-up tray area ..................................................................... 15-6
2. Output trays area .................................................................... 15-6
3. Imaging area ............................................................................ 15-8
4. MP tray area ............................................................................15-11
5. Paper Cassette 1 area ............................................................ 15-12
6. Paper Cassette 2 area ............................................................ 15-13
Storing Recording Paper ................................................................... 15-15

Contents xxiii
LASER CLASS 3170 Series.
CFYA/YAH/YAN 120v US V1.0
Recommended Paper .................................................................... 15-15
Storing the Paper Supply .............................................................. 15-16
Changing the Toner Cartridge .......................................................... 15-17
Storing Toner Cartridges ................................................................... 15-22
Handling Cartridges ..................................................................... 15-22
Storing Cartridges ......................................................................... 15-23
Disposing of Used Toner Cartridges ........................................... 15-23
Periodic Cleaning ............................................................................... 15-24
Cleaning the Fax Unit ................................................................... 15-24
Cleaning the Transfer Guide Area ............................................... 15-25
Cleaning the Scanning Area ......................................................... 15-27
Refilling the Stamp Ink Compartment (option) ............................. 15-33
Error Code Table (listed by number) ............................................... 15-35
List of LCD Display Messages (Alphabetic List) ........................... 15-38
Questions and Answers ..................................................................... 15-42
Documents Are Not Being Sent Correctly. ................................. 15-42
Documents Are Not Being Received Correctly. ........................ 15-45
Documents Are Not Being Copied.............................................. 15-46
Having Other Problems. ............................................................... 15-46
Recording the User Reminder Sheets .............................................. 15-48
Chapter 16 Summary of Important Settings .............................................................. 16-1
Opening the Data Registration Menu ............................................... 16-2
Summary of User Data Settings ......................................................... 16-3
User Settings.......................................................................................... 16-4
Report Settings ...................................................................................... 16-7
TX (Send) Settings .............................................................................. 16-10
RX (Receive) Settings ......................................................................... 16-13
Fax’s Printer Set .................................................................................. 16-16
File Settings ......................................................................................... 16-20
System Settings ................................................................................... 16-27
Dual Line Options .............................................................................. 16-32
Relationship between BATCH TX, QUICK ON-LINE TX, and
Timer Settings ..................................................................................... 16-34
Appendix A Specifications ............................................................................................... A-1
General .................................................................................................... A-1
Operation ................................................................................................ A-3
Dial Features .......................................................................................... A-3
Networking Features ............................................................................ A-4
Copier Features ...................................................................................... A-4
Telephone Features ................................................................................ A-5
Power ...................................................................................................... A-5
Operating Environment........................................................................ A-5
Weight ..................................................................................................... A-5

xxiv Contents
LASER CLASS 3170 Series.
CFYA/YAH/YAN 120v US V1.0
Dimensions ............................................................................................. A-6
Appendix B Documents You Can Scan ........................................................................... B-1
Document Media to Avoid ............................................................... B-1
Specifications for Paper Documents You Can Scan ...................... B-1
Document Thickness ......................................................................... B-1
Document Size ................................................................................... B-2
Scanning Area on the Document ..................................................... B-2
Printing Area ...................................................................................... B-3
Glossary ................................................................................................................................. G-1
Index ......................................................................................................................................... I-1

Chapter 1 Welcome ! 1-1
Welcome !
LASER CLASS 3170 Series.
CFYA/YAH/YAN 120v US V1.0
Chapter 1
Welcome !
Thank you for purchasing the new Canon LASER CLASS® 3170 Series.
This new facsimile unit with its features and options, and greater flexibil-
ity enabled by full support of ITU-T subaddress/password sending and
receiving, will help you expand your work capacity and efficiency.
This Facsimile User’s Guide shows you how to get the most out of your
new facsimile unit. Whether you are sending a quick memo to the home
office on the other side of town or automatically receiving from a branch
overseas or across the country, this book shows you how to do it all
quickly and easily.
Take a few minutes to browse through this User’s Guide so you know
what it contains. You do not have to read it all at once from cover to
cover.
We have done our best to give you an accurate, easy-to-use User’s Guide,
but if you still have some questions about how to use your facsimile unit,
feel free to contact your local authorized Canon dealer sales or service
representatives. They will be glad to answer your questions.
Model LASER CLASS® 3170 is used for illustration purposes in this
manual. When there is any difference among three models, it is clearly
indicated in the text, e.g., “LASER CLASS® 3170MS only.”

1-2 Welcome ! Chapter 1
LASER CLASS 3170 Series.
CFYA/YAH/YAN 120v US V1.0
Main Features
Improved speed
Your fax unit is equipped with the ITU-T standard
V.34 mode which enables transmission speeds up to
33,600 bps, more than double the rate of older G3 fax
models.
Ultra High Quality (UHQ) image
Canon’s ultra-high quality image processing produces
excellent reproductions in documents you send and
copy.
Full support of ITU-T subaddresses and passwords
You can employ ITU-T subaddresses and passwords
to communicate not only with other Canon faxes, but
fax machines of other manufacturers as well.
Laser beam printer
Quiet, clean laser technology guarantees quality
reproduction.
Large paper capacity
A large paper capacity means less time spent loading
paper in the paper cassettes. The MP (Multi-Purpose)
tray holds a stack of up to 100 sheets. Paper Cassette 1
holds 500 sheets, for a total of 600 sheets. Paper
Cassette 2, available as an option for the LASER
CLASS® 3170/3170MS and standard for the LASER
CLASS® 3175, holds another 500 sheets for a total of
1100 sheets. All cassettes and the MP tray can be
adjusted to fit a variety of standard paper sizes, and
are easy to access and re-fill.
Quality Images !
ITU-T
ITU-T
Subaddresses
Passwords
Cut sheets OK !
You don’t need
special recording
paper !
100 sheets
500 sheets
SEND

Chapter 1 Welcome ! 1-3
Welcome !
LASER CLASS 3170 Series.
CFYA/YAH/YAN 120v US V1.0
Automatic dialing
Includes One-touch and Coded Speed Dialing,
Directory Dialing, as well as Group dialing which
allows you to send the same document to several
destinations at the touch of a button.
Variety of send and receive features
Includes multiple broadcasting, polling, relay sending
and receiving, and confidential mailbox sending and
receiving.
ECM send and receive
ECM (error correction mode) reduces errors during
sending and receiving on noisy or poor quality
telephone lines.
Receiving in memory when you run out of paper or
toner
If you run out of paper or toner while you are
receiving a document, the fax unit continues to
receive by putting the remainder of the document in
the fax memory so you can print it out after you refill
the paper cassette or replace the toner cartridge. A
memory backup function also safeguards the contents
of the memory for approximately 12 hours after a
power failure.
Delayed sending
Scan a document into the memory and set for sending
at a later time so you can take advantage of holiday or
late night telephone rates.
Dual access
Even while you are sending or receiving a document,
you can continue to use the fax to register information
with the fax or record documents into the memory.
One-touch Dial
Coded Speed Dial
72
128
Relay sending
Confidential sending
Sequential broadcasting
Polling
Incoming
document
Receiving
in memory
Memory
Automatic sending
Receiving
Recording
documents
into memory
Sending
1-4 Welcome ! Chapter 1
LASER CLASS 3170 Series.
CFYA/YAH/YAN 120v US V1.0
Quick-on-line TX
Before the fax is finished scanning a long document, it
will start dialing and sending the pages that are
already scanned. By the time the last page is scanned,
the document transmission is well under way.
Easy to use
A larger display and operation panel with larger
buttons makes the fax easier to use.
Economical and quiet
Canon’s RAPID Fusing System™ realizes quiet opera-
tion while you save money. If the fax machine remains
idle for a specified length of time, the fax machine
automatically shuts itself down and enters the low
energy sleep mode, and will remain in this low energy
mode until the fax machine receives a document
transmission or until you press the Energy Saver button.
Better security with PIN Codes
For PBXs (private branch exchanges) that require PIN
(Personal Identification Number) codes to acquire an
outside line, you can now turn on the PIN code
feature with a user software switch included with the
user data settings. For better security, the PIN codes
are not displayed on the LCD display during dialing
(only a “C” appears), and they do not appear in
printed activity reports.
Expanded transaction features
You can create up to 50 private memory boxes and set
them up to receive documents. If the other party’s fax
can use ITU-T subaddresses and passwords, you can
set up and use memory boxes even if the other party’s
fax unit is not a Canon fax.
Sending starts
immediately
PBX
PIN code
70 Private memory boxes50 Private memory boxes

Chapter 1 Welcome ! 1-5
Welcome !
LASER CLASS 3170 Series.
CFYA/YAH/YAN 120v US V1.0
JBIG, Improved image data compression
JBIG is a new ITU-T standard image data compression
method. JBIG's compression method allows data to be
compressed more efficiently* than MMR, a conven-
tional compression method. JBIG is especially effec-
tive when transmitting halftone image documents.
Because the smaller data size requires less transmis-
sion time, JBIG saves you time and money.
*Actual compression ratio may vary with image.
Super G3 is a phrase used to describe the new
generation of fax machines that use ITU-T V.34
standard 33.6Kbps** modems. Super G3 High Speed
Fax machines allow transmission time of
approximately 3 seconds** per page which results in
reduced telephone line charges.
** Approximately 3 seconds per page fax transmission
time based on CCITT/ITU-T No.1 Chart, (JBIG,
Standard Mode) at 33.6Kbps modem speed. The
Public Switched Telephone Network (PSTN) currently
supports 28.8Kbps modem speeds or lower,
depending on telephone line conditions.
Options
For details about purchasing these options, contact your local authorized
Canon dealer.
Simultaneous sending/receiving
on dual telephone line connection
LINE 1
LINE 1
Dual-line Upgrade Kit II
After installation of the optional Dual-line Upgrade
Kit II, you can connect two telephone lines to the fax
unit. Either line can be used independently or simul-
taneously for separate transactions. For details contact
your local authorized Canon dealer.
Fax Memory
4MB memory module is available to expand the fax memory capacity of
the LASER CLASS® 3170 Series. For details, see Appendix A-2.
JBIG

1-6 Welcome ! Chapter 1
LASER CLASS 3170 Series.
CFYA/YAH/YAN 120v US V1.0
Printer Board I
This option enables your LASER CLASS® 3170/3175 to operate as a
printer. Printer Board I is a standard feature for LASER CLASS® 3170MS.
Document Distribution System*
This option enables your LASER CLASS® 3170 Series to operate as a
shared fax and network scanner in your network environment.
However, please note that this option and the Dual-line Upgrade Kit II
cannot be installed on the same fax unit.
Printer Options
The Canon Envelope Feeder, the Duplex Unit, the Canon Adobe®
PostScript® 3TM Module I and the Ethernet Board EB-52 FX are available
as printer options for the LASER CLASS® 3170MS, and for the LASER
CLASS® 3170/3175 with Printer Board I installed. Also, 4MB, 8MB, and
16 MB RAM DIMM modules are available to expand the printer memory
capacity for the LASER CLASS® 3170 Series. For details on these options,
refer to the Printer User’s Guide.
Customer Support
Your Canon LASER CLASS® 3170 Series is designed with the latest
technology to provide trouble-free operation. The warranty card pro-
vided with this facsimile machine describes Canon’s limited warranty
for its products. Be sure to read this warranty information.
If you encounter a problem, try to solve it by referring to the information
in Chapter 15 Maintenance & Frequently Asked Questions. If you cannot
solve the problem, or if you think your Canon LASER CLASS® 3170
Series needs servicing, contact your local authorized Canon dealer.

Setting Up
Chapter 2 Setting Up 2-1
LASER CLASS 3170 Series.
CFYA/YAH/YAN 120v US V1.0
Chapter 2
Setting Up
This chapter shows you how to set up the fax unit.
Even if your fax unit has been set up for you, take a few minutes to
glance through this chapter to become familiar with how to use this
User’s Guide. You may also want to check the fax installation to confirm
that it has been done correctly.
❏How to Use This Guide............................................................................ 2-3
❏Where to Set Up the Fax .......................................................................... 2-4
❏Space Around the Fax .............................................................................. 2-6
❏Power Requirements ................................................................................ 2-7
❏General Precautions.................................................................................. 2-8
❏Moving the Fax Unit............................................................................... 2-10
❏Unpacking: Have You Got Everything? ............................................... 2-11
❏Parts of the Fax ........................................................................................ 2-17
•Front View .......................................................................................... 2-17
•Rear View ........................................................................................... 2-18
•Handset (option) ............................................................................... 2-18
❏Removing the Shipping Material ......................................................... 2-19
•Removing the Shipping Tapes ......................................................... 2-19
•Removing the Packing Materials Inside the Fax Unit.................. 2-19
•Removing the Packing Materials from Paper Cassette 1............. 2-21
•Removing the Protective Plastic Sheet ........................................... 2-22
❏Assembling the Fax ................................................................................ 2-23
•Installing the Toner Cartridge ......................................................... 2-23
•Attaching the Document Output Tray and
the Upper Output Tray ..................................................................... 2-26
•Attaching the Document Feeder Tray ............................................ 2-27
•Installing Paper Cassette 2
(For the LASER CLASS® 3175 Only)............................................... 2-28
•Loading Paper in Paper Cassettes 1 and 2 ..................................... 2-31
•Connecting the Handset (option).................................................... 2-38
•Connecting the Telephone Line ....................................................... 2-39
•Connecting an Extension Phone ..................................................... 2-40
•Turning on the Power ....................................................................... 2-41

2-2 Setting Up Chapter 2
LASER CLASS 3170 Series.
CFYA/YAH/YAN 120v US V1.0
❏Using the MP Tray .................................................................................. 2-43
• Loading the MP Tray ........................................................................ 2-43
•Turning on and off USE MP TRAY and
Setting the Paper Size in the USE MP TRAY Menu ...................... 2-48
❏Selecting Paper Delivery ........................................................................ 2-50
•Setting Face-down Paper Delivery for Upper and
Lower Output Trays .......................................................................... 2-50
•Using the Face-up Tray ..................................................................... 2-53
❏Using the Optional Dual-Line ............................................................... 2-54
•Connecting Two Telephone Lines ................................................... 2-54
•How the Two Telephone Lines Operate ......................................... 2-56
•Registering the Telephone Numbers for the Lines ....................... 2-57
Setting Up
Chapter 2 Setting Up 2-3
LASER CLASS 3170 Series.
CFYA/YAH/YAN 120v US V1.0
How to Use This Guide
Before you use this guide, read this list of symbols, terms, and abbrevia-
tions, and make sure you know what they mean. A complete glossary of
terms is included at the end of this User’s Guide.
(➞2-12) A number preceded by an arrow and enclosed in
parentheses references a page number in this User’s
Guide which contains more information about the
topic of the previous sentence.
default A factory setting that remains in effect unless you
change it.
document A document is the original sheet(s) of paper you send,
receive, or copy on the facsimile.
menu A menu is a list of options or features from which
you select an item to set up or change. A menu has a
number and title which appear in the two-line dis-
play.
search buttons The search buttons ( ) change the LCD display.
Press to display the next item or choice in a menu,
or press to display the previous item or choice.
transaction number When you send or receive a document, your fax au-
tomatically assigns the document a unique transac-
tion number. A transaction number is a four-digit
decimal number that will help you keep track of
documents you send and receive.
TX/RX NO. On the LCD display, TX/RX NO. is the abbreviation
used for transaction number.
RX Denotes receiving.
TX Denotes transmitting or sending.
A note describes helpful hints, restrictions, or how to avoid difficulties.

2-4 Setting Up Chapter 2
LASER CLASS 3170 Series.
CFYA/YAH/YAN 120v US V1.0
CAUTIONS SHOW YOU HOW TO AVOID CONDITIONS OR
INCORRECT OPERATIONS THAT COULD CAUSE DAMAGE TO
YOUR HARDWARE OR SOFTWARE OR CAUSE PERSONAL IN-
JURY.
This icon denotes feeding a document.
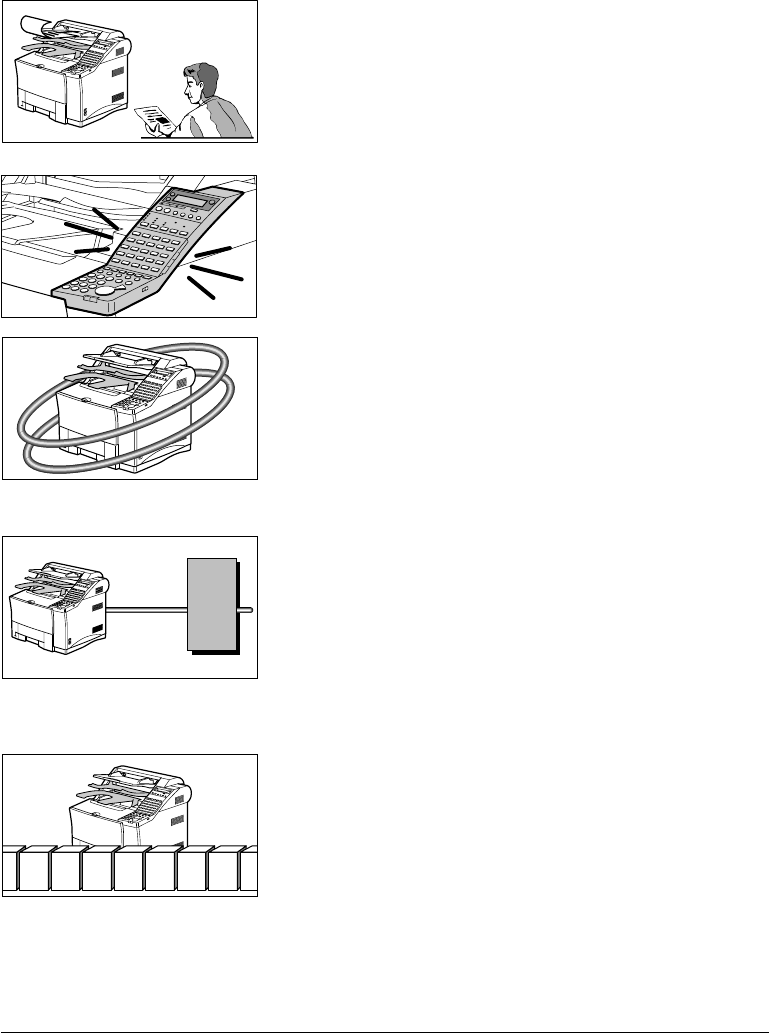
Where to Set Up the Fax
❏Avoid direct sunlight. If you have to place the fax near a
window, install heavy curtains or blinds to protect the fax
from direct sunlight.
❏Choose a flat, stable surface free of vibration.
❏Avoid a location subject to extreme temperature fluctua-
tion. Use in a location within a temperature range of 50°F
to 90.5°F (10°C to 32.5°C).
❏Do not set up the fax near a television, radio, or heavy
equipment like copy machines, air conditioners, comput-
ers, or large printers that can generate strong electromag-
netic fields. Large equipment can generate electronic noise
that can interfere with the operation of the fax.
50°F90.5°F

Setting Up
Chapter 2 Setting Up 2-5
LASER CLASS 3170 Series.
CFYA/YAH/YAN 120v US V1.0
❏Choose a location that is clean and free from dust and
moisture.
❏Do not use or store the fax outdoors.
❏Place the fax unit near a telephone line. You must have an
RJ11-C wall jack installed. If you need assistance, contact
your authorized Canon dealer or service representative,
or your local telephone company.
❏To avoid damage to the fax unit from overheating, do not
block the exhaust vent. Install the fax unit approximately
4 in. (10 cm) away from walls or other equipment.
LINE

2-6 Setting Up Chapter 2
LASER CLASS 3170 Series.
CFYA/YAH/YAN 120v US V1.0
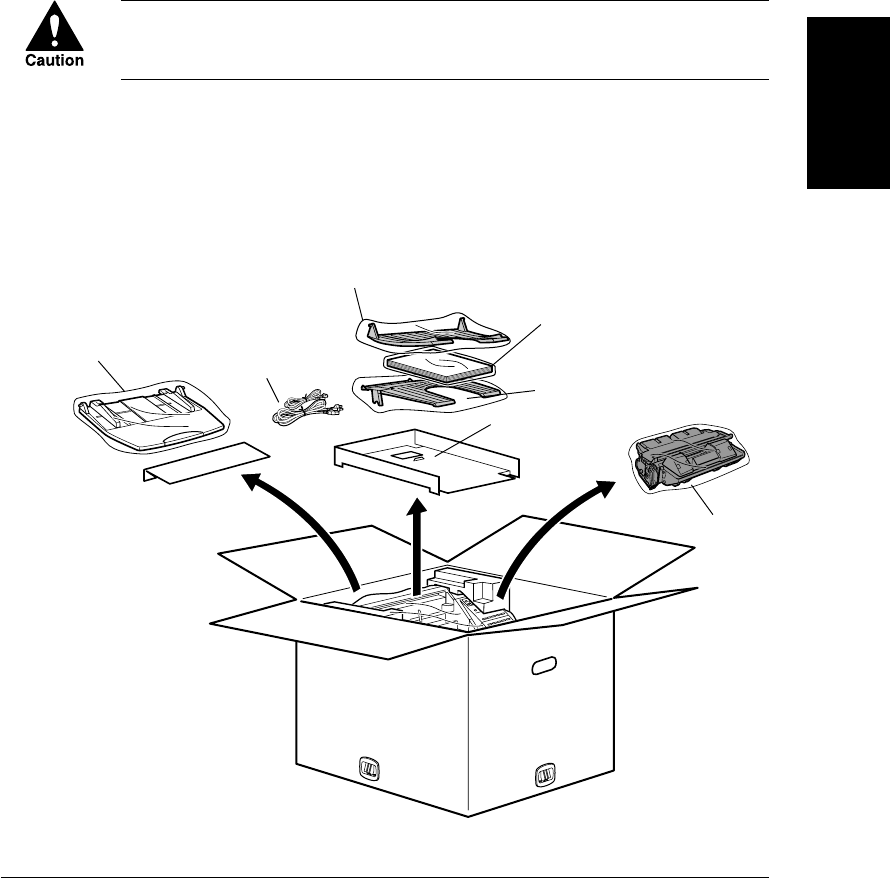
Space Around the Fax
To ensure proper ventilation and easy operation, set up the fax in an area
that meets the minimum requirements for clearance as illustrated below.
TO AVOID DAMAGE TO THE FAX UNIT FROM OVERHEATING,
DO NOT BLOCK THE EXHAUST VENT. INSTALL THE FAX UNIT
APPROXIMATELY 4 IN. (10CM) AWAY FROM WALLS OR OTHER
EQUIPMENT.
HANDSET (option)
32.6” (828 mm)
28.1” (713 mm)
20” (508 mm)
22.5” (571 mm)
19.8” (501 mm)
23.3” (588 mm)
18.5” (467 mm)
PAPER CASSETTE 2
(Standard with the
LASER CLASS®
3175, optional for the
LASER CLASS®
3170/3170MS.)

Setting Up
Chapter 2 Setting Up 2-7
LASER CLASS 3170 Series.
CFYA/YAH/YAN 120v US V1.0
Power Requirements
❏Place the fax near a standard 120 V AC power outlet. This
fax unit is intended for domestic use. Do not attempt to
use it outside the country where you purchased it.
❏Do not plug the power cord into an extension cord
connector or power strip shared with other plugs.
❏Do not plug the fax into a power outlet shared with an air
conditioner, personal computer, electric typewriter, copier,
or other equipment that generates electrical noise.
❏Check the plug frequently and make sure that it is firmly
plugged into the socket.
❏Do not plug the power cord into an uninterruptable
power supply (UPS).

2-8 Setting Up Chapter 2
LASER CLASS 3170 Series.
CFYA/YAH/YAN 120v US V1.0
General Precautions
❏TO AVOID SERIOUS INJURY, NEVER DISASSEMBLE
THE FAX. EXPOSED POWER POINTS INSIDE THE
FAX CAN CAUSE ELECTRICAL SHOCK IF YOU
TOUCH THEM.
❏After you unplug the fax unit, always wait at least 5
seconds before you plug it in again. Always unplug before
you move the fax.
❏During electrical storms, disconnect the plug from the
power outlet. The fax can hold documents in the memory
for up to 12 hours.
❏Before you attach or remove the plug from the power
outlet, make sure your hands are dry.
❏Do not stack boxes or furniture around the power outlet.
Keep the area open so you can reach the outlet quickly. If
you notice anything unusual (smoke, strange odors,
noises) around the fax, turn the fax off immediately and
unplug it. Call for service.

Setting Up
Chapter 2 Setting Up 2-9
LASER CLASS 3170 Series.
CFYA/YAH/YAN 120v US V1.0
❏Before you transport the fax, remove the cartridge. To
protect the cartridge from bright light, cover it with its
original protective bag or a cloth.
❏Keep liquids, cleaners, and other solvents away from the
fax unit. Keep metal pins, paper clips, staples and other
objects away from the fax. If something falls into the fax
unit, remove the plug from the power outlet, and call for
service.
❏Do not set the fax unit, other equipment, or furniture on
the power cord. Never knot the power cord or wrap it
around another object.
❏To avoid paper jams, never unplug the power cord, open
the printer cover or remove a paper cassette during
printing.
OFF

2-10 Setting Up Chapter 2
LASER CLASS 3170 Series.
CFYA/YAH/YAN 120v US V1.0
Moving the Fax Unit
The fax unit is heavy. Be sure to follow these general guidelines when
lifting the fax to move it or to install Paper Cassette 2, etc.
❏Moving the fax unit requires two people.
❏When you lift the fax, hold it by the handles on the right
and left sides. Never try to lift the fax by gripping paper
cassettes by the front and back sides.
❏Grip firmly the handles by the parts close to the back of
the fax unit as shown in the figure below, because the fax
unit is heavier at the back.
❏When you lift the fax, be sure not to tilt it forward because
the paper cassette may slide out of the fax unit.
❏Be sure to remove Paper Cassette 2, if installed, before
moving the fax and lift them separately.
Setting Up
Chapter 2 Setting Up 2-11
LASER CLASS 3170 Series.
CFYA/YAH/YAN 120v US 1.0
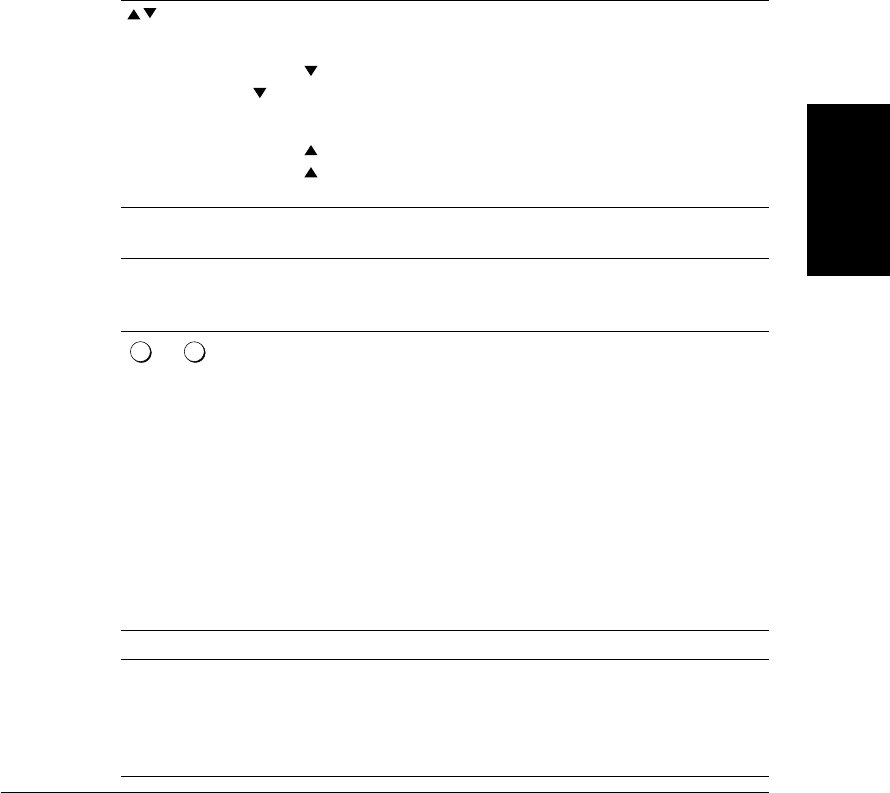
Unpacking: Have You Got Everything?
As you unpack the fax, save the carton and packing material in case you
want to move or ship the fax unit in the future. Ask someone to help you
remove all items from the box.
LIFTING THE FAX UNIT REQUIRES TWO PEOPLE. TO REMOVE
THE FAX UNIT FROM THE CARTON BOX, FOLLOW THE
GENERAL GUIDELINES AND ILLUSTRATION ON PAGE 2-10.
1. Remove the adhesive tapes on the top of the carton box.
2. Take out the document feeder tray, the accessory tray with the
document output tray, documentation, the upper output tray,
power cord and telephone line, and the FX6 Toner Cartridge in its
protective bag.
TELEPHONE LINE
POWER CORD
DOCUMENT
FEEDER TRAY
DOCUMENT
OUTPUT TRAY
DOCUMENTATION
DESTINATION LABELS
TRAY LABELS
CD-ROM (LASER CLASS® 3170MS only)
UPPER OUTPUT TRAY
FX6 TONER
CARTRIDGE
ACCESSORY TRAY
(cardboard)

2-12 Setting Up Chapter 2
LASER CLASS 3170 Series.
CFYA/YAH/YAN 120v US V1.0
3. Remove the four stoppers on the side of the box by squeezing the
center grip.
4. Lift and remove the upper carton. Remove the four styrene foam
blocks positioned on top of the fax unit. Then lift the fax unit by
gripping the handles on the right and left sides. (➞2-10)
FAX UNIT

Setting Up
Chapter 2 Setting Up 2-13
LASER CLASS 3170 Series.
CFYA/YAH/YAN 120v US 1.0
5. Take out Paper Cassette 2 from its carton box.
Paper Cassette 2 is optional for the LASER CLASS® 3170/3170MS.
For the LASER CLASS® 3170 Series
Check each item against this list as you remove it from the box.
❏1 Fax machine
❏1 Document feeder tray
❏1 Document output tray
❏1 Upper output tray
❏1 Paper Cassette 1 (letter-, legal-, A4-size, 500-sheet capacity)
❏1 Power cord
❏1 Telephone line
❏2 Sheets of destination labels
❏1 Sheet of tray labels
❏1 Facsimile User’s Guide
❏1 Warranty registration
❏1 Limited warranty note
❏1 Installation completion card
❏1 FX6 Toner Cartridge

2-14 Setting Up Chapter 2
LASER CLASS 3170 Series.
CFYA/YAH/YAN 120v US V1.0
For the LASER CLASS® 3175 Only
❏1 Paper Cassette 2 (letter-, legal-, A4-, executive-, B5-size, 500-sheet
capacity)
For the LASER CLASS® 3170MS Only
❏1 Printer User’s Guide
❏1 CD-ROM (Printer driver)
❏1 Sheet of End User Licence Agreement (PCL Board)
LASER CLASS® 3170/3170MS
LASER CLASS® 3175
Paper Cassette 2 is a standard feature for
the LASER CLASS® 3175 and optional for
the LASER CLASS® 3170/3170MS.
Paper Cassette 2
Chapter 3 Getting Started 3-9
Getting Started
LASER CLASS 3170 Series.
CFYA/YAH/YAN 120v US V1.0
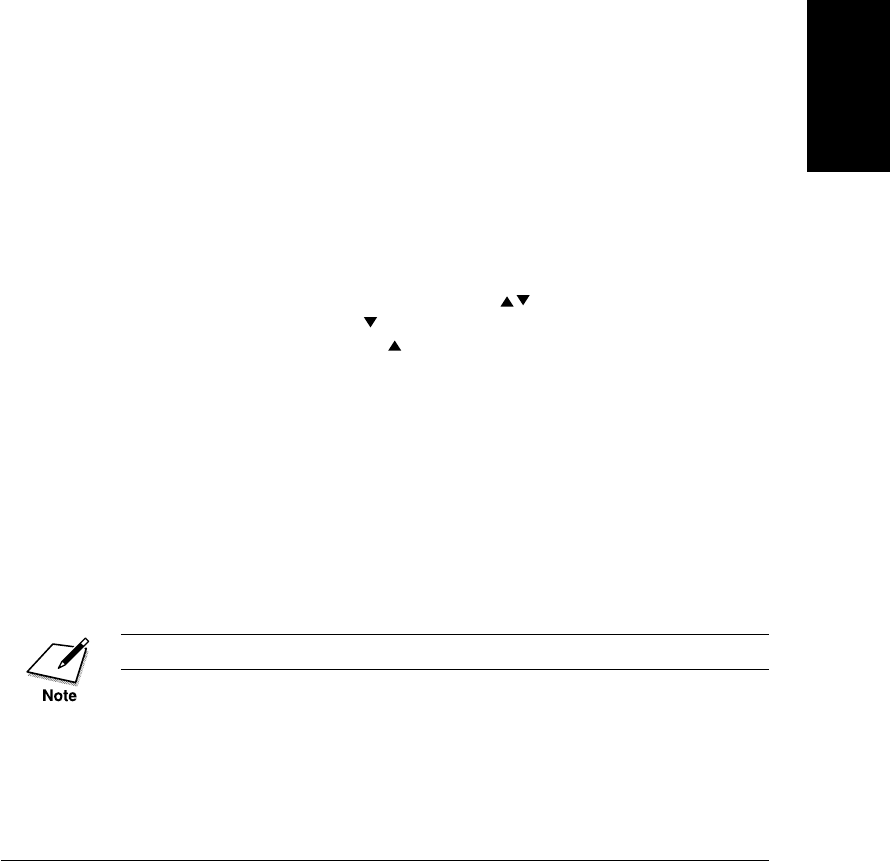
Menu Button Summary Table
When you come to a step where you must enter a number or name for
data registration—in this section or in any part of this Facsimile User’s
Guide—refer to the table below.
To see some of the buttons described below, you may have to open all
three of the One-touch Speed Dialing panels.
Buttons for registering information
The search buttons display the next or previous menu
item.
Press to display the next item of the menu. If you press
when the last item is displayed, the display rotates to
the first item on the menu.
Press to display the previous item of the menu. If you
press when the first item is displayed, the display
rotates to the last item on the menu.
Set Press Set to select the current item and display the next
level of the menu.
*Switches the entry modes.
:A Text entry mode. You can enter letters.
:1 Number entry mode. You can enter numbers.
2
ABC
to
9
WXY
More than one letter is assigned to a button. Press * to enter
the text entry mode then press the button for the letter you
want to enter. If the letter you want to enter is not displayed
first, keep pressing the button until it appears. If the next
letter is under another button, just press that button to enter
the first letter of the group and then keep pressing the
button until the letter you want appears.
-if not-
If the next letter is under the same button, press e to
move the cursor right one space then press the button
again to enter the first letter of the group. Keep pressing
the button until the letter you want appears.
f eThe cursor buttons move the cursor left or right.
#Press # to enter a symbol. You can enter symbols in the
text or number entry mode. Keep pressing # until the
symbol you want is displayed. You can enter these
symbols:
- . * # ! " , ; : ^ `_ = / | ' ? $ @ % & + ( ) [ ] { } < >

3-10 Getting Started Chapter 3
LASER CLASS 3170 Series.
CFYA/YAH/YAN 120v US V1.0
Buttons for registering information (cont'd)
Space Enters a space between letters or numbers. You may enter
spaces in telephone numbers—they do not affect dialing.
Pressing Space also deletes the character at the cursor
position.
Delete Deletes the number from the right digit.
Clear Clears the entire entry if you want to erase it and start
again.
Stop After you are finished making settings or registering
information, press Stop to return to the standby mode.
Checking and Setting the Telephone Line
If you are not sure what type of telephone line you have, check with your
local telephone company. To operate the fax you must know if the fax is
connected to a tone or rotary pulse line. The fax can be set to operate
with either type of telephone line. The fax unit is set to operate through a
tone line without making adjustments.
Use this procedure to switch the fax setup between tone and pulse
dialing.
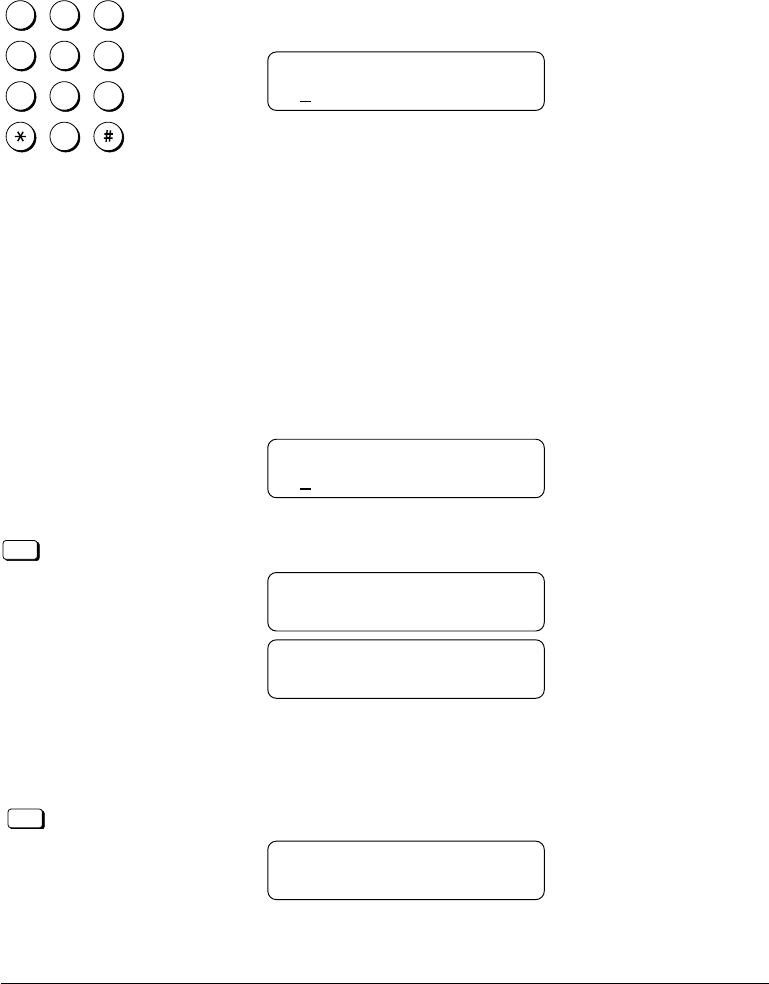
1. Open all three of the One-touch Speed Dialing panels. Then press
Data Registration.
REGISTRATION
1.DATA REGISTRATION
Data
Registration
Set
2. Press Set.
DATA REGISTRATION
1.USER SETTINGS
Set
3. Press Set again.
USER SETTINGS
1.DATE & TIME

Chapter 3 Getting Started 3-11
Getting Started
LASER CLASS 3170 Series.
CFYA/YAH/YAN 120v US V1.0
4. Press the search buttons until you see the display below.
USER SETTINGS
10.TEL LINE TYPE
Set
5. Press Set.
TEL LINE TYPE
TOUCH TONE
6. Display and check the current line setting. Use the search buttons
to alternate the settings.
TEL LINE TYPE
TOUCH TONE
TEL LINE TYPE
ROTARY PULSE
Set
7. Display the setting you need, then press Set.
Stop
8. Press Stop to return to standby.

Chapter 3 Getting Started 3-13
Getting Started
LASER CLASS 3170 Series.
CFYA/YAH/YAN 120v US V1.0
For documents that you receive, you can turn on the RX FOOTER feature
which displays the date, time received, transaction number, and page
number in the lower right corner of the document.(➞16-15)
12/31/1999 FRI 03:57 [TX/RX NO 5015] 001
Registering the Sender Information
(TX TERMINAL ID)
Follow this procedure to set the current date and time, register the
number of your own fax unit, and register your name or company name.
1. Open the USER SETTINGS menu.
Open all three of the One-touch Speed Dialing panels. Then press
Data Registration.
REGISTRATION
1.DATA REGISTRATION
Data
Registration
Set
Press Set.
DATA REGISTRATION
1.USER SETTINGS
Set
Press Set.
USER SETTINGS
1.DATE & TIME
Set
2. Open the DATE & TIME menu. Press Set.
DATE & TIME
12/31/99 11:30
3-14 Getting Started Chapter 3
LASER CLASS 3170 Series.
CFYA/YAH/YAN 120v US V1.0
3. Register the date and time.
1
4
7
2
5
8
0
3
6
9
ABC
GHI
PRS
JKL
TUV
OPER
MNO
WXY
DEF
Tone
SYMBOLS
Use the buttons on the numeric keypad to enter the month, day,
and year.
DATE & TIME
01/02/00 11:30
Use the buttons on the numeric keypad to enter the current time.
❏Use the 24-hour format to enter the time (e.g. 1:00 p.m. as
13:00).
❏To set the year to 2000 or later, enter 00, 01, 02, ..., etc.
❏Just enter the new number over the old number.
❏You can also use the cursor buttons to move the cursor
without changing a number entry.
❏To restore the previous entry, press Clear.
DATE & TIME
01/02/00 08:45
Set
Press Set.
DATE & TIME
DATA ENTRY OK
USER SETTINGS
2.UNIT TELEPHONE #
4. Enter the unit telephone number. The unit telephone number is
the telephone number for your own fax.
Set
Press Set.
UNIT TELEPHONE #
TEL =

Chapter 3 Getting Started 3-15
Getting Started
LASER CLASS 3170 Series.
CFYA/YAH/YAN 120v US V1.0
1
4
7
2
5
8
0
3
6
9
ABC
GHI
PRS
JKL
TUV
OPER
MNO
WXY
DEF
Tone
SYMBOLS
Use these buttons on the numeric keypad to enter your own fax
number.
Data entry buttons
0-9 Enters a number.
Space Enters a space (spaces are optional).
Delete Deletes the rightmost digit of the number you are
entering so you can enter a new digit.
Clear Clears the entire entry if you want to start again.
+Enters a plus sign (+).
You can register a number of up to 20 digits.
UNIT TELEPHONE #
TEL = 123 4567
Set
Press Set.
UNIT TELEPHONE #
DATA ENTRY OK
5. Enter the unit name.
USER SETTINGS
3.UNIT NAME
Set
Press Set.
UNIT NAME :A
_
1
4
7
2
5
8
0
3
6
9
ABC
GHI
PRS
JKL
TUV
OPER
MNO
WXY
DEF
Tone
SYMBOLS
Use the buttons on the numeric keypad to enter a name of up to
24 characters.
You can enter letters in upper or lower case and enter numbers. In
the upper right corner of the display you will see the letter A. This
means you are in the text entry mode. Press the asterisk (*) button
on the numeric keypad to switch the entry mode.
Display Press keypad buttons to enter:
:A Text
:1 Number

3-16 Getting Started Chapter 3
LASER CLASS 3170 Series.
CFYA/YAH/YAN 120v US V1.0
Above each button on the numeric keypad, there is a group of
letters. These are the letters you can enter with the button below.
Each button contains the upper and lower case letters for its group of
letters. (For example: ABCabc)
Press the button of the letter you want to enter. If the letter you
want is not displayed first, keep pressing the button until the
letter you want appears.
If you go past the letter you want, just keep pressing the button until you
see it again.
To enter a space:
Space
Press Space to enter a space.
To enter a number:
Press * to enter the number entry mode (:1).
1
4
7
2
5
8
0
3
6
9
ABC
GHI
PRS
JKL
TUV
OPER
MNO
WXY
DEF
Tone
SYMBOLS
Press the appropriate button on the numeric keypad to enter a
number.
To enter a symbol:
These standard symbols are available for entry:
- . * # ! " , ; : ^ `_ = / | ' ? $ @ % & + ( ) [ ] { } < >
Press # until you see the symbol you want.

Chapter 3 Getting Started 3-17
Getting Started
LASER CLASS 3170 Series.
CFYA/YAH/YAN 120v US V1.0
To delete:
C
Clear
If you make a mistake and want to delete the entire entry so you
can start again, press Clear.
To make a correction:
Press the left or right cursor button to move the cursor under the
letter or number you want to change.
1
4
7
2
5
8
0
3
6
9
ABC
GHI
PRS
JKL
TUV
OPER
MNO
WXY
DEF
Tone
SYMBOLS
Press a button to enter a letter or number.
UNIT NAME :A
CANON DIV. #20
Set
When you are finished entering the unit name, press Set.
UNIT NAME :A
DATA ENTRY OK
This completes registering all of the required sender information
for your fax.
Stop
6. Press Stop to return to standby.

3-18 Getting Started Chapter 3
LASER CLASS 3170 Series.
CFYA/YAH/YAN 120v US V1.0
Registering Sender Names
Registering alternative sender names is optional but you may want to
register sender names if many people are using the fax. If each user
registers his or her personal name as a sender name, they can enter their
sender name to replace the UNIT NAME printed at the top of documents
they send. (➞3-12)
To enter the sender name, press TTI Selector when you scan the document
for sending. (➞6-6)
Registering a Sender Name
Follow this procedure to register sender names.
1. Open the USER SETTINGS menu. (➞3-13)
2. Press the search buttons until you see the display below.
USER SETTINGS
4.SENDER’S NAME
Set
3. Press Set.
SENDER’S NAME
01 :
4. Press the search buttons to display the number where you want to
register your name.
-if not-
Use the buttons on the numeric keypad to enter the number.
❏Up to 19 numbers are available. One number can accept a
single name entry.
❏If a name is already registered, you will see that name to the
right of the number.

Chapter 3 Getting Started 3-19
Getting Started
LASER CLASS 3170 Series.
CFYA/YAH/YAN 120v US V1.0
❏Keep pressing the search buttons until you see a number with
no entry.
SENDER’S NAME
05 :
Set
5. Press Set.
SENDER’S NAME :A
05 : _
1
4
7
2
5
8
0
3
6
9
ABC
GHI
PRS
JKL
TUV
OPER
MNO
WXY
DEF
Tone
SYMBOLS
6. Use the buttons on the numeric keypad to enter a name of up to
24 characters. (➞3-7)
SENDER’S NAME :A
05 : K.SMITH
Set
7. When you are finished entering the name, press Set.
SENDER’S NAME :A
DATA ENTRY OK
SENDER’S NAME
06 :
Repeat the procedure to enter another name, or press Stop to
return to standby.

3-20 Getting Started Chapter 3
LASER CLASS 3170 Series.
CFYA/YAH/YAN 120v US V1.0
Changing or Erasing a Sender Name
1. Repeat steps 1 to 3 of the procedure you used to register the
sender name. (➞3-18)
2. Press the search buttons to display the name you want to edit or
delete.
SENDER’S NAME
10 : J. SMITH
Set
3. Press Set.
SENDER’S NAME :A
10 : J.SMITH
1
4
7
2
5
8
0
3
6
9
ABC
GHI
PRS
JKL
TUV
OPER
MNO
WXY
DEF
Tone
SYMBOLS
4. To change the sender name, use the buttons on the numeric
keypad. (➞3-7)
-if not-
To delete the sender name, press Clear.
Set
5. When you are finished making changes, press Set.
Stop
6. Press Stop to return to standby.

Chapter 3 Getting Started 3-21
Getting Started
LASER CLASS 3170 Series.
CFYA/YAH/YAN 120v US V1.0
Using the Energy Saver Mode (For the
LASER CLASS® 3170/3175 Only)
You can set the fax machine to enter a low-energy sleep mode after it
remains idle for a specified length of time. This ensures that the fax
machine consumes less power when it is not being used.
If you install either the optional Dual-line Upgrade Kit or the PCL6
Printer Board, this function will not work.
Turning the Energy Saver Feature ON
1. Open all three of the One-touch Speed Dialing panels. Then press
Data Registration.
Data
Registration
REGISTRATION
1.DATA REGISTRATION
Set
2. Press Set.
DATA REGISTRATION
1.USER SETTINGS
3. Press the search buttons until you see the display below.
DATA REGISTRATION
7.SYSTEM SETTINGS
Set
4. Press Set.
SYSTEM SETTINGS
1.PASSWORD
5. Press the search buttons until you see the display below.
SYSTEM SETTINGS
10.ENERGY SAVER

3-22 Getting Started Chapter 3
LASER CLASS 3170 Series.
CFYA/YAH/YAN 120v US V1.0
Set
6. Press Set.
ENERGY SAVER
OFF
7. Press a search button to display ON.
ENERGY SAVER
ON
Set
8. Press Set.
ENERGY SVR TIME
03MIN.
1
4
7
2
5
8
0
3
6
9
ABC
GHI
PRS
JKL
TUV
OPER
MNO
WXY
DEF
Tone
SYMBOLS
9. Use the buttons on the numeric keypad to enter a number for the
time (minutes) you want the fax machine to remain idle before it
automatically enters the low-energy sleep mode. You can set a
time from 03 to 30 minutes.
ENERGY SVR TIME
30MIN.
Set
10. Press Set.
SYSTEM SETTINGS
11.PHONE NO. CHECK
Stop
11. Press Stop to return to standby.
After the fax machine enters the energy saver mode, only the
energy saver indicator on the operation panel remains on and the
LCD display shows:
ENERGY SAVER

Chapter 3 Getting Started 3-23
Getting Started
LASER CLASS 3170 Series.
CFYA/YAH/YAN 120v US V1.0
Returning to the Full Power Mode
The display tells you the fax has entered the energy saver mode with this
message:
ENERGY SAVER
Energy
Saver
The indicator under the energy saver button to the right of the LCD
display will also light red.
To restore the full power mode, press the Energy Saver button. While the
fax machine is powering up, PLEASE WAIT is displayed for a few
moments.
PLEASE WAIT
'
While the fax unit is powering up, you can perform any operation.
The following actions will automatically restore the full power mode:
❏Receiving a document.
❏Printing an Activity Management report pre-set for printing.
❏Answering a call.
You can awaken the fax from the low-energy sleep mode by:
❏Pressing the Energy Saver button.
❏Setting a document on the fax for sending or copying.
3-24 Getting Started Chapter 3
LASER CLASS 3170 Series.
CFYA/YAH/YAN 120v US V1.0
The fax does not enter the energy saver mode in the following cases:
❏When documents are stored in the memory.
❏When a paper or document jam has occurred, when the paper
cassettes have run out of paper, or when the toner cartridge has run
out of toner.
❏When a document has been fed into the automatic document feeder
(ADF).
❏When you install either the optional Dual-line Upgrade Kit or PCL6
Printer Board.
You cannot press the Energy Saver button to put the fax in the energy
saver mode. The fax enters the energy saver mode only after the speci-
fied time has elapsed.

Chapter 4 Setting Up and Using Speed Dialing 4-1
Setting Up and
Using Speed
Dialing
LASER CLASS 3170 Series.
CFYA/YAH/YAN 120v US V1.0
Chapter 4
Setting Up and Using Speed Dialing
This chapter introduces some basic dialing features then shows you how
to set up the speed dialing buttons.
Speed dialing includes One-touch Speed Dialing, Coded Speed Dialing,
and Group Dialing. Directory dialing, also described in this chapter,
allows you to locate a number for dialing by searching names and
numbers registered on the fax for speed dialing.
After you set up your speed dialing buttons, we recommend that you
occasionally print a list of all telephone numbers registered in the fax and
store it for reference. (➞14-2)
❏Read This before Entering Telephone Numbers .................................. 4-2
•Entering Pauses for Dialing ............................................................... 4-2
•Adjusting the Length of a Pause ....................................................... 4-3
❏What is Speed Dialing? ............................................................................ 4-5
❏Setting Up One-touch Speed Dialing ..................................................... 4-6
❏Setting Up Coded Speed Dialing .......................................................... 4-15
❏Setting Up Group Dialing ...................................................................... 4-24
❏Using Speed Dialing ............................................................................... 4-29
•Using One-touch Speed Dialing...................................................... 4-29
•Using Coded Speed Dialing ............................................................ 4-31
•Using Group Dialing ........................................................................ 4-33
❏Using Directory Dialing ......................................................................... 4-35

4-2 Setting Up and Using Speed Dialing Chapter 4
LASER CLASS 3170 Series.
CFYA/YAH/YAN 120v US V1.0
Read This before Entering Telephone Numbers
Read this section before you register numbers for speed dialing, espe-
cially if your site has special dialing requirements like dialing through a
PBX.
Entering Pauses for Dialing
If your fax is connected to a switchboard or PBX (private branch ex-
change), you may have to dial a number to connect to an outside line. The
outside number must also be registered with the fax number. The switch-
ing system may also require that you insert a pause after the outside
number. For further assistance, contact your local authorized Canon dealer
sales or service representative or your local telephone company.
Follow this procedure to enter a pause during regular dialing or when
registering a number for a speed dialing button.
1
4
7
2
5
8
0
3
6
9
ABC
GHI
PRS
JKL
TUV
OPER
MNO
WXY
DEF
Tone
SYMBOLS
1. When you come to a step that asks you to enter a number for
dialing, use the buttons on the numeric keypad to enter the
number.
TELEPHONE NUMBER
TEL = 03_
Pause
P
2. To enter a pause between two numbers, press Pause. After you
enter the next number, the “P” changes to a small “p”.
TELEPHONE NUMBER
TEL = 03P_
Pause
P
Set
3. To enter a pause at the end of a number, press Pause then press
Set. The pause at the end of a number appears as an upper case
“P”.
TELEPHONE NUMBER
TEL = 03p123 4567P

Chapter 4 Setting Up and Using Speed Dialing 4-3
Setting Up and
Using Speed
Dialing
LASER CLASS 3170 Series.
CFYA/YAH/YAN 120v US V1.0
Keep in mind these important points about pauses:
❏A pause entered within a number (p) is 2 seconds long.
❏You can add consecutive pauses (pp) with the Pause button.
Each additional pause adds 2 seconds to the pause time.
❏You can change the length of a pause entered within a
number.(➞ below)
❏A pause at the end of a number (P) is 10 seconds long.
❏You may have to insert one or more pauses at the end of a
number to dial an overseas number.
❏You cannot insert a pause when you dial using the numeric
keypad after pressing Hook or after picking up the handset.
Adjusting the Length of a Pause
Follow this procedure to adjust the length of a pause entered within a
number.
This procedure is effective only for adjusting the length pauses entered
within telephone numbers. The 10-second pause entered at the end of a
number cannot be adjusted.
1. Open the TX SETTINGS menu.
Open all three of the One-touch Speed Dialing panels. Then press
Data Registration.
Data
Registration
REGISTRATION
1.DATA REGISTRATION
Set
2. Press Set.
DATA REGISTRATION
1.USER SETTINGS

4-4 Setting Up and Using Speed Dialing Chapter 4
LASER CLASS 3170 Series.
CFYA/YAH/YAN 120v US V1.0
Press the search buttons until you see the display below.
DATA REGISTRATION
3.TX SETTINGS
3.
Set
Press Set.
TX SETTINGS
1.ECM TX
Press the search buttons until you see the display below.
TX SETTINGS
2.MID PAUSE SET
4.
Set
Press Set.
MID PAUSE SET
02SEC
1
4
7
2
5
8
0
3
6
9
ABC
GHI
PRS
JKL
TUV
OPER
MNO
WXY
DEF
Tone
SYMBOLS
Set
5. Use the buttons on the numeric keypad to enter a new time. You
can enter a number from 01 to 15 seconds. Then press Set.
Stop
6. Press Stop to return to standby.

Chapter 4 Setting Up and Using Speed Dialing 4-5
Setting Up and
Using Speed
Dialing
LASER CLASS 3170 Series.
CFYA/YAH/YAN 120v US V1.0
What is Speed Dialing?
Speed dialing allows you streamline and customize dialing procedures
by registering a telephone number and other important settings so you
can start a document transmission while pressing only a few buttons.
The three methods of speed dialing include:
One-touch Speed Dialing
One-touch Speed Dialing allows you to start a document transmission by
pressing only one button. You can register up to 72 destinations for One-
touch Speed Dialing. The first group of buttons numbered 1 to 25 are on
the operation panel. Open the first panel to see buttons 26 to 50, then the
second panel to see the last set of buttons 51 to 72.
Coded Speed Dialing
Coded Speed Dialing allows you to start a document transmission by
pressing the Coded Dial button followed by a three-digit code of your
choice. While Coded Speed Dialing requires you to press more buttons, it
allows you to register up to 128 numbers.
Group Dialing
Group Dialing allows you to dial a group of registered One-touch or
Coded Speed Dialing fax numbers. By registering each group for One-
touch (or Coded Speed dialing) buttons, you press only one (or four
buttons) to send the same document to several locations.

Chapter 4 Setting Up and Using Speed Dialing 4-7
Setting Up and
Using Speed
Dialing
LASER CLASS 3170 Series.
CFYA/YAH/YAN 120v US V1.0
2. Specify the One-touch Speed Dialing button that you want to
register.
Press the search buttons to scroll the display. Press the down
search button to scroll to the next number or press the up search
button to scroll to the previous number.
-if not-
Close the appropriate One-touch Speed Dialing panel and press
the One-touch Speed Dialing button that you want to register.
If a number is already registered for a button, you will see that number
displayed. If a button is registered for Group Dialing, you will see
GROUP DIAL.
1-TOUCH SPD DIAL
10 =
Set
With the number of the button you want to register displayed on
the LCD, press Set.
1-TOUCH SPD DIAL
1.
TELEPHONE NUMBER
3.
Set
Press Set.
TELEPHONE NUMBER
TEL =_
1
4
7
2
5
8
0
3
6
9
ABC
GHI
PRS
JKL
TUV
OPER
MNO
WXY
DEF
Tone
SYMBOLS
Enter the telephone number.
❏Use the buttons on the numeric keypad to enter the fax
number.
❏To enter a space, press Space. Spaces are optional and ignored
during dialing.
❏After you have entered the number if you see that one of the
digits is incorrect, press the left cursor key (f) to move the
cursor to the digit you want to correct and press Delete. Then
enter the correct number.

4-8 Setting Up and Using Speed Dialing Chapter 4
LASER CLASS 3170 Series.
CFYA/YAH/YAN 120v US V1.0
❏If you make a mistake, press Clear to erase the number and
start again.
TELEPHONE NUMBER
TEL =123 4567_
4.
Set
Press Set.
TELEPHONE NUMBER
DATA ENTRY OK
1-TOUCH SPD DIAL
2.NAME
5. Enter a name.
Set
Press Set.
NAME :A
_
1
4
7
2
5
8
0
3
6
9
ABC
GHI
PRS
JKL
TUV
OPER
MNO
WXY
DEF
Tone
SYMBOLS
Use the buttons on the numeric keypad to enter a name for the
number up to 16 characters long. (➞3-7)
NAME :A
CANON U.S.A. NY
6.
Set
Press Set.
NAME :A
DATA ENTRY OK
1-TOUCH SPD DIAL
3.OPTIONAL SETTING
This completes the minimum settings for registering a One-touch
Speed Dialing button.

Chapter 4 Setting Up and Using Speed Dialing 4-9
Setting Up and
Using Speed
Dialing
LASER CLASS 3170 Series.
CFYA/YAH/YAN 120v US V1.0
To stop here and register another button
Data
Registration
Press Data Registration.
Repeat the procedure from step 2.
To end the procedure and return to standby
Stop
Press Stop.
To perform the optional settings
7. Open the OPTIONAL SETTING menu.
Set
Press Set.
OPTIONAL SETTING
OFF
Press the search buttons until you see the display below.
OPTIONAL SETTING
ON
Set
Press Set.
OPTIONAL SETTING
1.SET TIME
8. Set the time for the transmission.
❏If you set the timer for the One-touch Speed Dialing button,
every document you send with this button will be sent at the
same time every day.
❏You can set up to 5 different times in a 24-hour period for
sending.
❏You can use this feature together with BATCH TX. If BATCH
TX is ON, the documents will be grouped and sent together at
the preset time. The fax unit will make only one phone call,
saving you time and money. (➞16-34)
Set
Press Set.
SET TIME
1: :

4-10 Setting Up and Using Speed Dialing Chapter 4
LASER CLASS 3170 Series.
CFYA/YAH/YAN 120v US V1.0
Set
Press Set again.
SET TIME
_:
1
4
7
2
5
8
0
3
6
9
ABC
GHI
PRS
JKL
TUV
OPER
MNO
WXY
DEF
Tone
SYMBOLS
Use the buttons on the numeric keypad to enter the time. Enter
the time in the 24-hour format (e.g. 1:00 p.m. as 13:00).
SET TIME
00:30
If you want to clear the time you have set, do the procedure from the
beginning and press Clear at this step, then press Set.
Set
Press Set.
SET TIME
2: :
Set
Press Set.
SET TIME
_:
Set
Enter another time and press Set. You can register up to 5 sending
times.
Data
Registration
To continue registration for the current button, press Data
Registration. Then go to step 9.
OPTIONAL SETTING
2.TX TYPE
-if not-
Stop
To end registration and return to standby, press Stop.

Chapter 4 Setting Up and Using Speed Dialing 4-11
Setting Up and
Using Speed
Dialing
LASER CLASS 3170 Series.
CFYA/YAH/YAN 120v US V1.0
9. Perform the transmission type settings.
Set
Press Set. Then press the search buttons to display the transmis-
sion type items.
TX TYPE
REGULAR TX
TX TYPE
POLLING RX
For details about using ITU-T subaddresses and passwords, see the
description of setting up and using a memory box. (➞8-12)
The TX TYPE menu includes these items:
REGULAR TX Designates the transaction as a normal
transmission with no special features.
You can cancel the currently set TX TYPE
by selecting REGULAR TX.
CONFIDENTIAL TX Designates the transaction as a transmis-
sion to a confidential mailbox. Press Set
then enter the subaddress and password
for the confidential mailbox.(➞10-10)
1.PASSWORD The ITU-T password for the other
party’s confidential mailbox.
2.SUBADDRESS The ITU-T subaddress for the other
party’s confidential mailbox.
ORIG RELAY TX Designates the transaction as a relay
transmission with your fax as the
originator. Press Set then enter the
subaddress and password for the relay
broadcast.(➞9-10)
1.PASSWORD The ITU-T password for the relay
broadcast.
2.SUBADDRESS The ITU-T subaddress for the relay
broadcast.

4-12 Setting Up and Using Speed Dialing Chapter 4
LASER CLASS 3170 Series.
CFYA/YAH/YAN 120v US V1.0
PSWD/SUBADDRESS Allows you to enter an ITU-T password
or subaddress for the transmission.
(➞6-28)
1.PASSWORD The ITU-T password for the transmis-
sion.
2.SUBADDRESS The ITU-T subaddress for the transmis-
sion.
POLLING RX Allows you to set a One-touch Speed
Dialing button to poll another fax every
time you use it to dial. Press Set then
enter the ITU-T subaddress and
password.(➞11-3)
1.PASSWORD The ITU-T password for the other
party’s polling box.
2.SUBADDRESS The ITU-T subaddress for the other
party’s polling box.
Display the TX TYPE you wish to register, then press Set. Next, set
the ITU-T password and subaddress for the feature you selected.
You can cancel the currently set TX TYPE by selecting REGULAR
TX.
Only one feature can be set for TX TYPE. The next time you open the TX
TYPE menu to change the setting, you will see the currently set item
displayed first.
OPTIONAL SETTING
3.LONG DISTANCE
10. If you experience transmission errors during long distance
sending, change the long distance setting.
OPTIONAL SETTING
3.LONG DISTANCE
Set
Press Set.
LONG DISTANCE
DOMESTIC

Chapter 4 Setting Up and Using Speed Dialing 4-13
Setting Up and
Using Speed
Dialing
LASER CLASS 3170 Series.
CFYA/YAH/YAN 120v US V1.0
Press the search buttons until you see the display you want.
LONG DISTANCE
LONG DISTANCE (1)
Select LONG DISTANCE (1) and try to send the document again.
If this setting does not solve the problem, try settings (2) and (3).
Set
Press Set.
OPTIONAL SETTING
4.TX SPEED
11. Change the transmission speed if it takes a long time for your
document transmissions to begin.
Set
Press Set.
TX SPEED
33600bps
If your document transmissions are slow in starting, this may mean that
the telephone lines in your area are in poor condition. Select a lower
speed. You can select 33600, 14400, 9600, or 4800 bps.
Press the search buttons to display the speed you want to select.
Then press Set.
Set
OPTIONAL SETTING
5.ECM

4-14 Setting Up and Using Speed Dialing Chapter 4
LASER CLASS 3170 Series.
CFYA/YAH/YAN 120v US V1.0
12. Turn ECM off or on.
Set
Press Set.
ECM
ON
Press the search buttons to display OFF or ON.
ECM (error correction mode) reduces system and line errors during
sending or receiving with another fax that supports ECM. Otherwise,
this setting is ignored. If transmission speed appears to be extremely
slow, you may be able to speed up transmission time by turning ECM
off.
Set
Press Set.
1-TOUCH SPD DIAL
11 =
This completes all settings for telephone registration of a One-
touch Speed Dialing button.
If you want to set up other buttons, repeat from step 2.
-if not-
Stop
Press Stop to return to standby.
13. After you register a number for One-touch Speed Dialing, make
sure you write the name of the other party on a destination label
and stick it on the One-touch Speed Dialing panel above the
number of the One-touch Speed Dialing button where the number
is registered.

Chapter 4 Setting Up and Using Speed Dialing 4-15
Setting Up and
Using Speed
Dialing
LASER CLASS 3170 Series.
CFYA/YAH/YAN 120v US V1.0
Setting Up Coded Speed Dialing
Coded Speed Dialing allows you to dial a number and send a document
by pressing four buttons. First you press Coded Dial and then enter a
three-digit code. You can register up to 128 fax numbers for this speed
dialing method. In addition to the telephone number and name of the
other party, you can set the timer for the transmission and as well as
enter other important settings identical to those for One-touch Speed
Dialing.
Follow this procedure to register a telephone number for Coded Speed
Dialing.
1. Open the Coded Speed Dialing menu.
Open all three of the One-touch Speed Dialing panels. Then press
Data Registration.
Data
Registration
REGISTRATION
1.DATA REGISTRATION
Press the search buttons until you see the display below.
REGISTRATION
2.TEL REGISTRATION
Set
Press Set.
TEL REGISTRATION
1.1-TOUCH SPD DIAL
Press the search buttons until you see the display below.
TEL REGISTRATION
2.CODED SPD DIAL

4-16 Setting Up and Using Speed Dialing Chapter 4
LASER CLASS 3170 Series.
CFYA/YAH/YAN 120v US V1.0
Set
Press Set.
CODED SPD DIAL
*000 =
2. Specify the Coded Speed Dialing code that you want to register.
Coded Dial
Press Coded Dial. Then use the buttons on the numeric keypad to
enter a three-digit code (000-127).
1
4
7
2
5
8
0
3
6
9
ABC
GHI
PRS
JKL
TUV
OPER
MNO
WXY
DEF
Tone
SYMBOLS
-if not-
Press the search buttons to scroll the display. Press the down
search button to scroll to the next number or press the up search
button to scroll to the previous number.
If a telephone number is already registered for a three-digit code, you
will see that number displayed. If a button is registered for Group
Dialing, you will see GROUP DIAL displayed.
CODED SPD DIAL
*012 =
Set
With the code you want to register displayed on the LCD, press
Set.
CODED SPD DIAL
1.
TELEPHONE NUMBER
Set
Press Set again.
TELEPHONE NUMBER
TEL= _

Chapter 4 Setting Up and Using Speed Dialing 4-17
Setting Up and
Using Speed
Dialing
LASER CLASS 3170 Series.
CFYA/YAH/YAN 120v US V1.0
1
4
7
2
5
8
0
3
6
9
ABC
GHI
PRS
JKL
TUV
OPER
MNO
WXY
DEF
Tone
SYMBOLS
3. Enter the telephone number.
❏Use the buttons on the numeric keypad to enter the number.
❏To enter a space, press Space. Spaces are optional and ignored
during dialing.
❏After you have entered the number if you see that one of the
digits is incorrect, press the left cursor key (f) to move the
cursor to the digit you want to correct and press Delete. Then
enter the correct number.
❏If you make a mistake, press Clear to erase the number and
start again.
TELEPHONE NUMBER
TEL =123 4567_
Set
Press Set.
TELEPHONE NUMBER
DATA ENTRY OK
CODED SPD DIAL
2.NAME
4. Enter a name.
Set
Press Set.
NAME :A
_
1
4
7
2
5
8
0
3
6
9
ABC
GHI
PRS
JKL
TUV
OPER
MNO
WXY
DEF
Tone
SYMBOLS
Use the buttons on the numeric keypad to enter a name for the
number up to 16 characters long. (➞3-7)
NAME :A
CANON CANADA

4-18 Setting Up and Using Speed Dialing Chapter 4
LASER CLASS 3170 Series.
CFYA/YAH/YAN 120v US V1.0
Set
Press Set.
NAME :A
DATA ENTRY OK
CODED SPD DIAL
3.OPTIONAL SETTING
This completes the minimum settings for registering a three-digit
Coded Speed Dialing code.
To stop here and register another code
Data
Registration
Press Data Registration.
Repeat the procedure from step 2.
To end the procedure and return to standby
Stop
Press Stop.
To perform the optional setting
5.
Set
Press Set to continue.
OPTIONAL SETTING
OFF
Press the search buttons until you see the display below.
OPTIONAL SETTING
ON
Set
Press Set.
OPTIONAL SETTING
1.SET TIME
6. Set the time for the transmission.
❏If you set the timer for the Coded Speed Dialing code, every
document you send with this code will be sent at the same
time every day.
❏You can set up to 5 different times in a 24-hour period for
sending.
❏You can use this feature together with BATCH TX. If BATCH
TX is ON, the documents will be grouped and sent together at
the preset time. The fax unit will make only one phone call,
saving you time and money.(➞16-34)

Chapter 4 Setting Up and Using Speed Dialing 4-19
Setting Up and
Using Speed
Dialing
LASER CLASS 3170 Series.
CFYA/YAH/YAN 120v US V1.0
Set
Press Set.
SET TIME
1: :
Set
Press Set again.
SET TIME
_:
1
4
7
2
5
8
0
3
6
9
ABC
GHI
PRS
JKL
TUV
OPER
MNO
WXY
DEF
Tone
SYMBOLS
Use the buttons on the numeric keypad to enter the time. Enter
the time in the 24-hour format (e.g. 1:00 p.m. as 13:00).
SET TIME
00:30
If you want to clear the time you have set, do the procedure from the
beginning and press Clear at this step, then press Set.
Set
Press Set.
SET TIME
2: :
Set
Press Set.
SET TIME
_:
1
4
7
2
5
8
0
3
6
9
ABC
GHI
PRS
JKL
TUV
OPER
MNO
WXY
DEF
Tone
SYMBOLS
Set
Enter another time and press Set. You can register up to 5 sending
times.
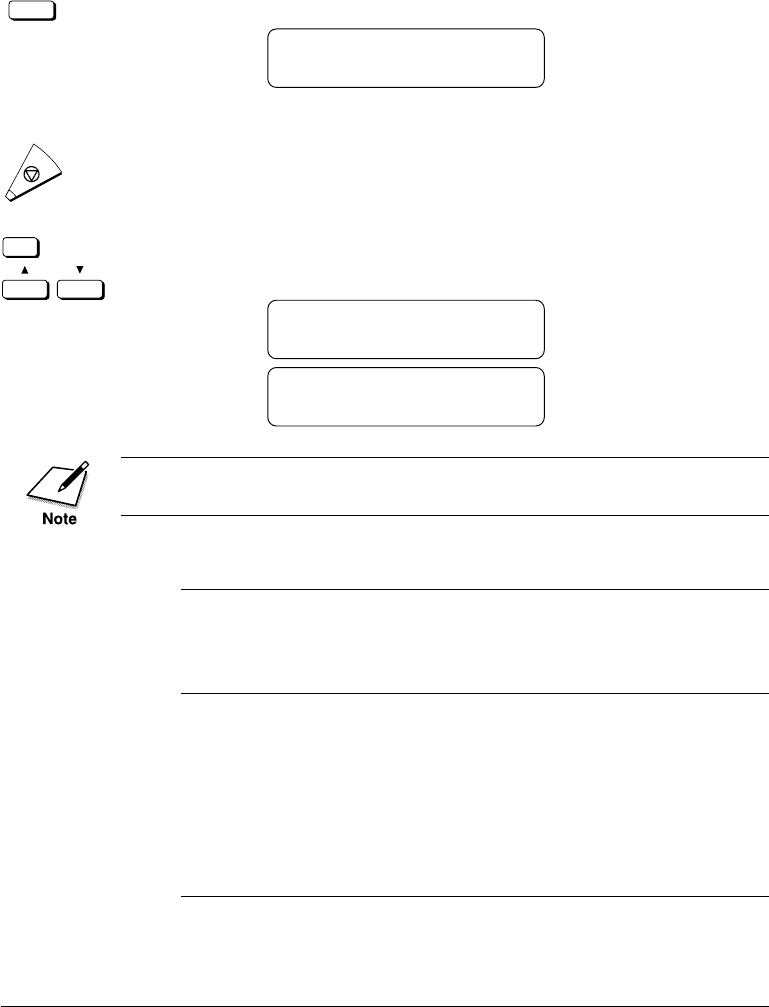
4-20 Setting Up and Using Speed Dialing Chapter 4
LASER CLASS 3170 Series.
CFYA/YAH/YAN 120v US V1.0
Data
Registration
To continue registration for the current button, press Data
Registration. Then go to step 7.
OPTIONAL SETTING
2.TX TYPE
-if not-
Stop
To end registration and return to standby, press Stop.
7. Perform the transmission type settings.
Set
Press Set. Then press the search buttons to display the transmis-
sion type items.
TX TYPE
REGULAR TX
TX TYPE
POLLING RX
For details about using ITU-T subaddresses and passwords, see the
description of setting up and using a memory box. (➞8-11)
The TX TYPE menu includes these items:
REGULAR TX Designates the transaction as a normal
transmission with no special features. You
can cancel the currently set TX TYPE by
selecting REGULAR TX.
CONFIDENTIAL TX Designates the transaction as a transmis-
sion to a confidential mailbox. Press Set
then enter the subaddress and password
for the confidential mailbox. (➞10-10)
1.PASSWORD The ITU-T password for the other party’s
confidential mailbox.
2.SUBADDRESS The ITU-T subaddress for the other
party’s confidential mailbox.
Chapter 4 Setting Up and Using Speed Dialing 4-21
Setting Up and
Using Speed
Dialing
LASER CLASS 3170 Series.
CFYA/YAH/YAN 120v US V1.0
ORIG RELAY TX Designates the transaction as a relay
transmission with your fax as the origina-
tor. Press Set then enter the subaddress
and password for the relay broadcast.
(➞9-10)
1.PASSWORD The ITU-T password for the relay broad-
cast.
2.SUBADDRESS The ITU-T subaddress for the relay
broadcast.
PSWD/SUBADDRESS Allows you to enter an ITU-T password
or subaddress for the transmission.
(➞6-28)
1.PASSWORD The ITU-T password for the transmission.
2.SUBADDRESS The ITU-T subaddress for the transmission.
POLLING RX Allows you to set a Coded Speed Dialing
button to poll another fax every time you
use it to dial. Press Set then enter the ITU-
T subaddress and password. (➞11-3)
1.PASSWORD The ITU-T password for the other party’s
polling box.
2.SUBADDRESS The ITU-T subaddress for the other
party’s polling box.
Display the TX TYPE you wish to register then press Set. Next, set
the ITU-T password and subaddress for the feature you just
selected.
You can cancel the currently set TX TYPE by selecting REGULAR
TX.
Only one feature can be set for TX TYPE. The next time you open the TX
TYPE menu to change the setting you will see the currently set item
displayed first.
OPTIONAL SETTING
3.LONG DISTANCE

4-22 Setting Up and Using Speed Dialing Chapter 4
LASER CLASS 3170 Series.
CFYA/YAH/YAN 120v US V1.0
8. If you experience transmission errors during long distance
sending, change the long distance setting.
OPTIONAL SETTING
3.LONG DISTANCE
Set
Press Set.
LONG DISTANCE
DOMESTIC
Press the search buttons until you see the display you want.
LONG DISTANCE
LONG DISTANCE (1)
Select LONG DISTANCE (1) and try to send the document again.
If this setting does not solve the problem, try settings (2) and (3).
Set
Press Set.
OPTIONAL SETTING
4.TX SPEED
9. Change the transmission speed if it takes a long time for your
document transmissions to begin.
Set
Press Set.
TX SPEED
33600bps
If your document transmissions are slow in starting, this may mean that
the telephone lines in your area are in poor condition. Select a lower
speed. You can select 33600, 14400, 9600, or 4800 bps.
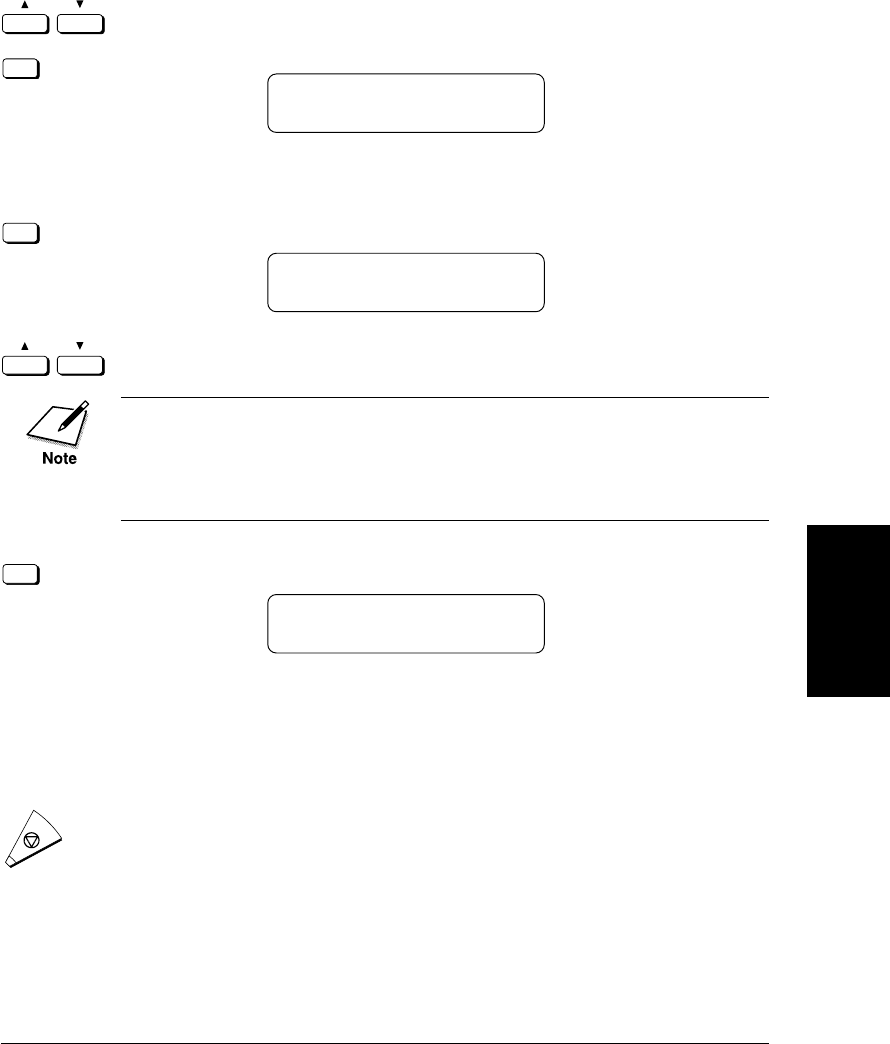
Chapter 4 Setting Up and Using Speed Dialing 4-23
Setting Up and
Using Speed
Dialing
LASER CLASS 3170 Series.
CFYA/YAH/YAN 120v US V1.0
Press the search buttons to display the speed you want to select.
Then press Set.
Set
OPTIONAL SETTING
5.ECM
10. Turn ECM off or on.
Set
Press Set.
ECM
ON
Press the search buttons to display OFF or ON.
ECM (error correction mode) reduces the effect of system and line errors
on documents that occur during sending or receiving with another fax
that supports ECM. Otherwise, this setting is ignored. If transmission
speed appears to be extremely slow, you may be able to speed up
transmission time by turning ECM off.
Set
Press Set.
CODED SPD DIAL
*013 =
This completes all settings for telephone registration of Coded
Speed Dialing codes.
If you want to set up other codes, repeat from step 2.
-if not-
Stop
Press Stop to return to standby.

4-24 Setting Up and Using Speed Dialing Chapter 4
LASER CLASS 3170 Series.
CFYA/YAH/YAN 120v US V1.0
Setting Up Group Dialing
Group Dialing allows you to register several telephone numbers for One-
touch Speed Dialing or for Coded Speed Dialing so you can dial a large
group of numbers by pressing a One-touch Speed Dialing button, or by
pressing Coded Dial, followed by a three-digit code. Telephone numbers
already registered for One-touch or Coded Speed Dialing can be
registered as members of the group.
Follow this procedure to register a group of telephone numbers for
Group Dialing.
1. Open the Group Dialing menu.
Open all three of the One-touch Speed Dialing panels. Then press
Data Registration.
Data
Registration
REGISTRATION
1.DATA REGISTRATION
Press the search buttons until you see the display below.
REGISTRATION
2.TEL REGISTRATION
Set
Press Set.
TEL REGISTRATION
1.1-TOUCH SPD DIAL
Press the search buttons until you see the display below.
TEL REGISTRATION
3.GROUP DIAL
Set
Press Set.
GROUP DIAL
01 =

Chapter 4 Setting Up and Using Speed Dialing 4-25
Setting Up and
Using Speed
Dialing
LASER CLASS 3170 Series.
CFYA/YAH/YAN 120v US V1.0
2. Register the group of numbers for a One-touch Speed Dialing
button or for a Coded Speed Dialing code.
To register the group for a One-touch Speed Dialing button
Press the search buttons to scroll the number display. Press the
down search button to scroll to the next number or press the up
search button to scroll to the previous number.
-if not-
1
72
Close the appropriate One-touch Speed Dialing panel and press
the One-touch Speed Dialing button you want to register.
If a number is already in use, you will see 1-TOUCH SPD DIAL,
CODED SPD DIAL or GROUP DIAL is displayed.
With an empty button number displayed, press Set.
To register the group for Coded Speed Dialing
Coded Dial
Press Coded Dial.
1
4
7
2
5
8
0
3
6
9
ABC
GHI
PRS
JKL
TUV
OPER
MNO
WXY
DEF
Tone
SYMBOLS
Use the buttons on the numeric keypad to enter the three-digit
code you want to use for group dialing (000-127).
GROUP DIAL
*020=
Set
Press Set.
GROUP DIAL
1.TELEPHONE NUMBER

4-26 Setting Up and Using Speed Dialing Chapter 4
LASER CLASS 3170 Series.
CFYA/YAH/YAN 120v US V1.0
3. Register all the numbers for the group.
Set
Press Set.
TEL =
To register a One-touch Speed Dialing button
1
72
Close the appropriate One-touch Speed Dialing panel.
Press the One-touch Speed Dialing button with the telephone
number you want to include in the group.
To register a Coded Speed Dialing button
Coded Dial
1
4
7
2
5
8
0
3
6
9
ABC
GHI
PRS
JKL
TUV
OPER
MNO
WXY
DEF
Tone
SYMBOLS
Press Coded Dial then use the numeric keypad to enter the three-
digit code where the telephone number you want to include in the
group is registered.
You can enter up to 199 numbers.
Set
When you are finished entering telephone numbers, press Set.
GROUP DIAL
2.NAME
4. Enter a name for the group.
Set
Press Set.
NAME :A
_
1
4
7
2
5
8
0
3
6
9
ABC
GHI
PRS
JKL
TUV
OPER
MNO
WXY
DEF
Tone
SYMBOLS
Use the buttons on the numeric keypad to enter a name for the
number up to 16 characters long. (➞3-7)
NAME :A
CANON GROUP A

Chapter 4 Setting Up and Using Speed Dialing 4-27
Setting Up and
Using Speed
Dialing
LASER CLASS 3170 Series.
CFYA/YAH/YAN 120v US V1.0
Set
Press Set.
NAME :A
DATA ENTRY OK
GROUP DIAL
3.SET TIME
5. Set the time for the group transmission.
❏This setting is optional. If you do not set the timer, the trans-
mission will begin after you press the One-touch Speed
Dialing button, or press Coded Dial followed by a three-digit
code, for the group.
❏If you set the timer for the Group Dialing code, every docu-
ment you send with this code will be sent at the same time
every day.
❏You can set up to 5 different times in a 24-hour period for
sending.
❏You can use this feature together with BATCH TX. If BATCH
TX is ON, the documents will be grouped and sent together at
the preset time. The fax unit will make only one phone call,
saving you time and money. (➞16-34)
Set
Press Set.
SET TIME
1: :
Set
1
4
7
2
5
8
0
3
6
9
ABC
GHI
PRS
JKL
TUV
OPER
MNO
WXY
DEF
Tone
SYMBOLS
Press Set again then use the buttons on the numeric keypad to
enter the time. Enter the time in the 24-hour format (e.g. 1:00 p.m.
as 13:00).
SET TIME
00:30
Set
Press Set.
SET TIME
2: :

4-28 Setting Up and Using Speed Dialing Chapter 4
LASER CLASS 3170 Series.
CFYA/YAH/YAN 120v US V1.0
Set
6. Press Set, enter another time, and press Set. You can register up to
5 sending times.
-if not-
Data
Registration
To continue registering another group, press Data Registration.
-if not-
Stop
To end registration and return to standby, press Stop.
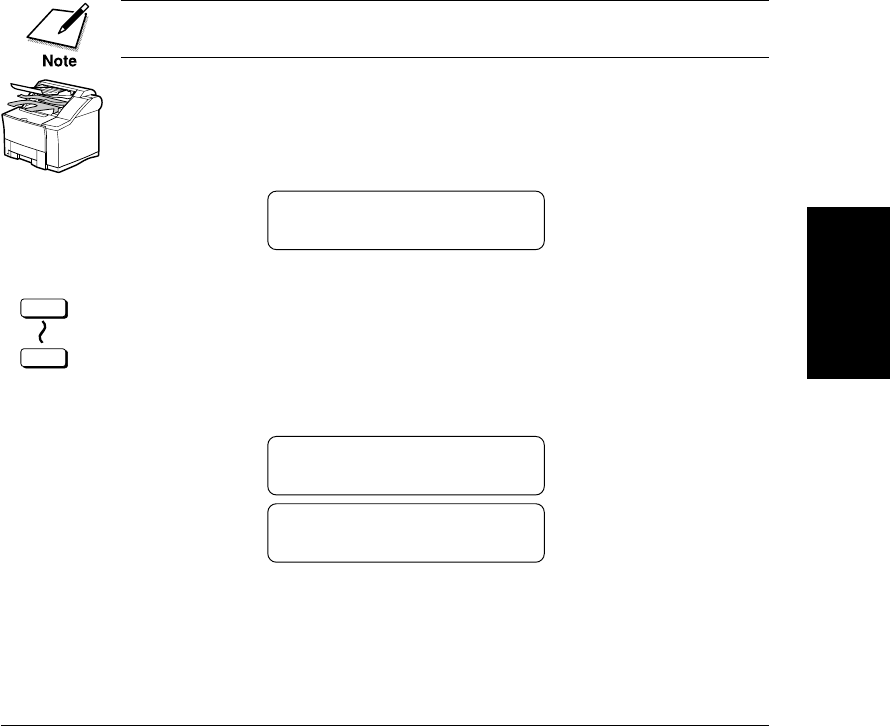
Chapter 4 Setting Up and Using Speed Dialing 4-29
Setting Up and
Using Speed
Dialing
LASER CLASS 3170 Series.
CFYA/YAH/YAN 120v US V1.0
Using Speed Dialing
Follow the procedures in this section to use speed dialing. The three
speed dialing methods are One-touch Speed Dialing, Coded Speed
Dialing, and Group Dialing. If you forget where a number is registered,
you can find it and dial it with directory dialing. (➞4-35)
Using One-touch Speed Dialing
Follow this procedure to start a transmission and send a docu-
ment at the press of a One-touch Speed Dialing button.
To use this feature, you must first register a telephone number for One-
touch Speed Dialing. (➞4-6)
1. Set the document on the fax. (➞6-3)
Set the document resolution, contrast, and document type. (➞6-4)
You can also select a sender’s name with the TTI Selector. (➞6-6)
DOCUMENT READY
2.
1
72
Press the One-touch Speed Dialing button where the telephone
number you want to dial is registered.
If you do not see the number of the button you want, open the
first or second One-touch Speed Dialing panel to see more but-
tons. After 5 seconds, the fax starts to send the document.
TEL = 123 4567
01 CANON USA
TRANSMIT 0025
SCANNING DOC. P.001
You will see a series of brief, alternating messages that tell you the
fax is dialing, calling, then transmitting the document. The
number being dialed, name of the other party, and the transaction
number of the document are also displayed.

4-30 Setting Up and Using Speed Dialing Chapter 4
LASER CLASS 3170 Series.
CFYA/YAH/YAN 120v US V1.0
Here are some important points you should keep in mind when
you use One-touch Speed Dialing:
❏To start scanning immediately, press Start/Scan. Otherwise the
fax will wait 5 seconds before it starts scanning. This timeout
feature can be turned off. (➞16-11)
❏To locate and press the correct button, you may have to open
the One-touch Speed Dialing panels.
❏The fax will not dial the number registered for the One-touch
Speed Dialing button until you set the document on the fax
for sending. If you press the button before you load the
document, the fax will prompt you:
SET DOCUMENT
❏If you press a One-touch Speed Dialing button where no
number has been registered, the fax tells you:
NO TEL#
12
❏If you want to cancel the transmission after you press a One-
touch Speed Dialing button, press Stop. (➞6-8)
❏When you come to a step in any procedure where you have to
dial a number, you can press a One-touch Speed Dialing
button to dial.
When you register a number for One-touch Speed Dialing, Coded Speed
Dialing and Group Dialing, you can, as an option, set the time you want
your document to go out (up to 5 different times in a day). If you are
using a speed dial button that was set by someone else, and you would
like your document to go out at the preset time, verify if the preset time
feature is being used for that button. (➞4-9, 4-18, 4-27, 16-34)

Chapter 4 Setting Up and Using Speed Dialing 4-31
Setting Up and
Using Speed
Dialing
LASER CLASS 3170 Series.
CFYA/YAH/YAN 120v US V1.0
Using Coded Speed Dialing
Follow this procedure to start a transmission and send a document at the
press of the Coded Dial button followed by a three-digit code.
To use this feature, you must first register a telephone number for Coded
Speed Dialing. (➞4-15)
1. Set the document on the fax. (➞6-3)
Set the document resolution, contrast, and document type. (➞6-4)
You can also select a sender’s name with the TTI Selector. (➞6-6)
DOCUMENT READY
2.
Coded Dial
Press Coded Dial once.
TEL =
*
3.
1
4
7
2
5
8
0
3
6
9
ABC
GHI
PRS
JKL
TUV
OPER
MNO
WXY
DEF
Tone
SYMBOLS
Use the buttons on the numeric keypad to enter the three-digit
code of the telephone number you want to dial (000-127).
After 5 seconds, the fax starts to send the document.
TEL = 123 4567
*001 CANON ONTARIO
TRANSMIT 0026
SCANNING DOC. P.001
You will see a series of brief, alternating messages that tell you the
fax is dialing, calling, then transmitting the document. The
number being dialed, name of the other party, and the transaction
number of the document are also displayed.

4-32 Setting Up and Using Speed Dialing Chapter 4
LASER CLASS 3170 Series.
CFYA/YAH/YAN 120v US V1.0
Here are some important points you should keep in mind when
you use Coded Speed Dialing:
❏To start scanning immediately, press Start/Scan. Otherwise the
fax will wait 5 seconds before it starts scanning. This timeout
feature can be turned off. (➞16-11)
❏The fax will not dial the Coded Speed Dialing number until
you set the document on the fax for scanning. If you press the
buttons before you load the document, the fax will prompt
you:
SET DOCUMENT
❏If you press Coded Dial and a three-digit code where no
numbers are registered, the fax tells you:
NO TEL #
*013
❏If you want to cancel the transmission after you press the
buttons for Coded Speed Dialing, press Stop.
❏When you come to a step in any procedure where you have to
dial a number, you can press the buttons for Coded Speed
Dialing to dial.
When you register a number for One-touch Speed Dialing, Coded Speed
Dialing and Group Dialing, you can, as an option, set the time you want
your document to go out (up to 5 different times in a day). If you are
using a speed dial button that was set by someone else, and you would
like your document to go out at the preset time, verify if the preset time
feature is being used for that button. (➞4-9, 4-18, 4-27, 16-34)
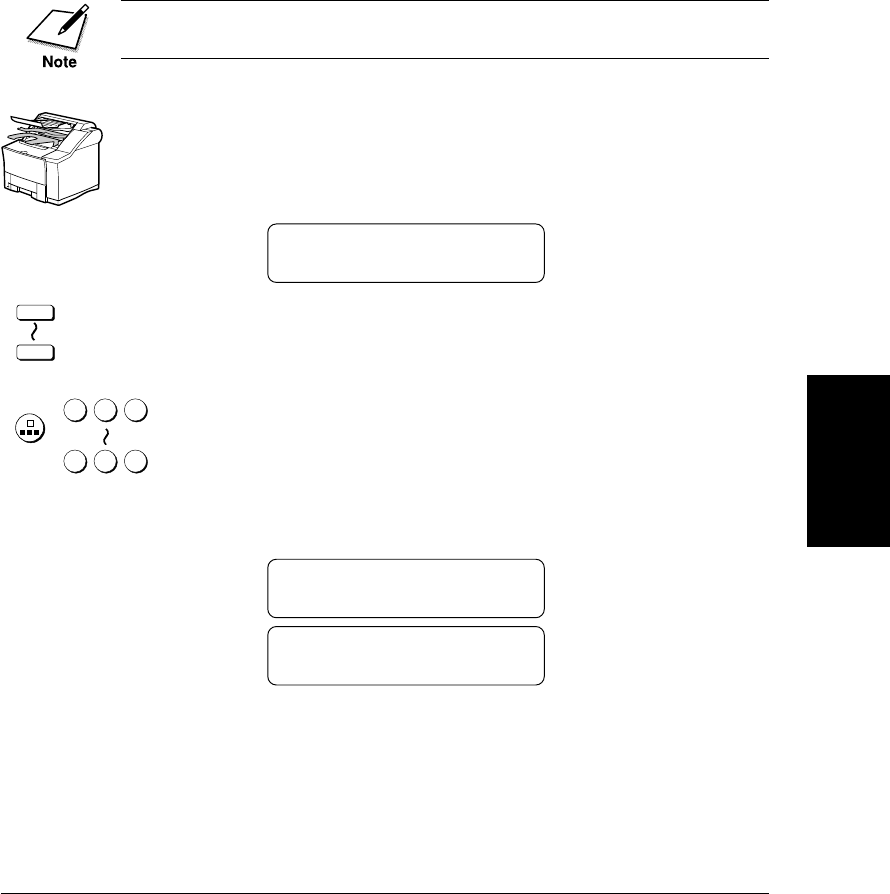
Chapter 4 Setting Up and Using Speed Dialing 4-33
Setting Up and
Using Speed
Dialing
LASER CLASS 3170 Series.
CFYA/YAH/YAN 120v US V1.0
Using Group Dialing
Follow this procedure to start a transmission and send a document to
several destinations with a One-touch or Coded Speed dialing number
registered for group dialing.
To use this feature, you must first register a group of telephone numbers
for One-touch or Coded Speed Dialing. (➞4-24)
1. Set the document on the fax. (➞6-3)
Set the document resolution, contrast, and document type. (➞6-4)
You can also select a sender’s name with the TTI Selector. (➞6-6)
DOCUMENT READY
2.
1
72
Press the One-touch Speed Dialing button, or press Coded Dial
followed by the three-digit code, where the group of telephone
numbers you want to dial is registered.
or
Coded Dial
000
127
The fax starts to send the document.
TEL =GROUP DIAL
01 CANON USA
TRANSMIT 0025
SCANNING DOC. P.001
You will see a series of brief, alternating messages that tell you the
fax is dialing, calling, then transmitting the document. The
number being dialed, name of the other party, and the transaction
number of the document are also displayed.
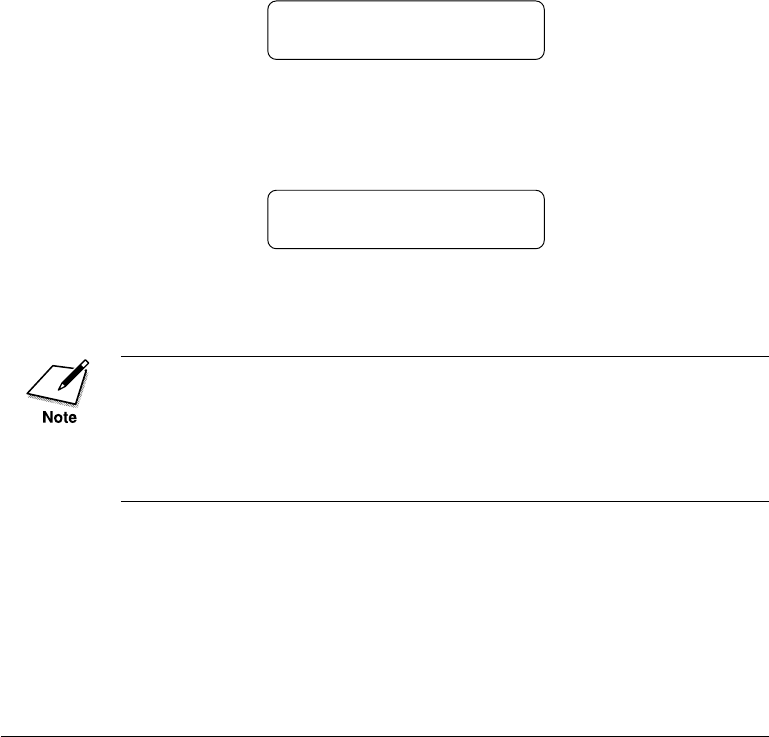
4-34 Setting Up and Using Speed Dialing Chapter 4
LASER CLASS 3170 Series.
CFYA/YAH/YAN 120v US V1.0
Here are some important points you should keep in mind when
you use Group Dialing:
❏To start scanning immediately, press Start/Scan. Otherwise the
fax will wait 5 seconds before it starts scanning. This timeout
feature can be turned off. (➞16-11)
❏The fax will not dial the numbers for the Group Dialing
number until you set the document on the fax. If you press the
One-touch Speed Dialing button or press Coded Dial followed
by a three-digit code, before you load the document, the fax
will prompt you:
SET DOCUMENT
❏If you press a One-touch Speed Dialing button, or press Coded
Dial followed by a three-digit code, where no number has been
registered, the fax will display:
NO TEL#
12
If you want to cancel the transmission after you press a One-touch
or Coded Speed Dialing button, press Stop.
When you register a number for One-touch Speed Dialing, Coded Speed
Dialing and Group Dialing, you can, as an option, set the time you want
your document to go out (up to 5 different times in a day). If you are
using a speed dial button that was set by someone else, and you would
like your document to go out at the preset time, verify if the preset time
feature is being used for that button. (➞4-9, 4-18, 4-27, 16-34)
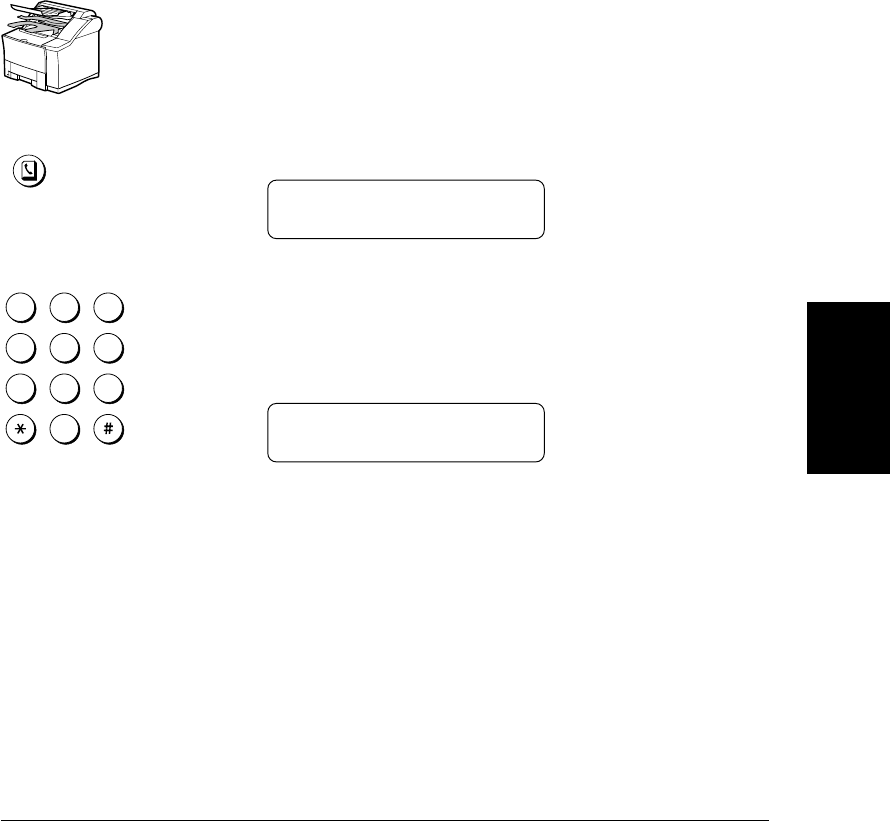
Chapter 4 Setting Up and Using Speed Dialing 4-35
Setting Up and
Using Speed
Dialing
LASER CLASS 3170 Series.
CFYA/YAH/YAN 120v US V1.0
Using Directory Dialing
Follow this procedure to look up the other party’s name and retrieve the
number for dialing. This feature is convenient when you know the other
party’s name but cannot recall the One-touch Speed Dialing button ,the
code for Coded Speed Dialing, or Group Dialing where the number is
registered.
1. Set the document on the fax. (➞6-3)
Set the document resolution, contrast, and document type. (➞6-4)
You can also select a sender’s name with the TTI Selector. (➞6-6)
2.
Directory
Press Directory.
DIRECTORY DIAL
1ST LETT OF NAME :A
1
4
7
2
5
8
0
3
6
9
ABC
GHI
PRS
JKL
TUV
OPER
MNO
WXY
DEF
Tone
SYMBOLS
3. Press a numeric keypad button to enter the first letter of the name
of the party you are searching for.
For example, if you press PRS the first name and number regis-
tered for this button letter group is displayed.
TEL = 123 4567
10 PACIFIC BEACH
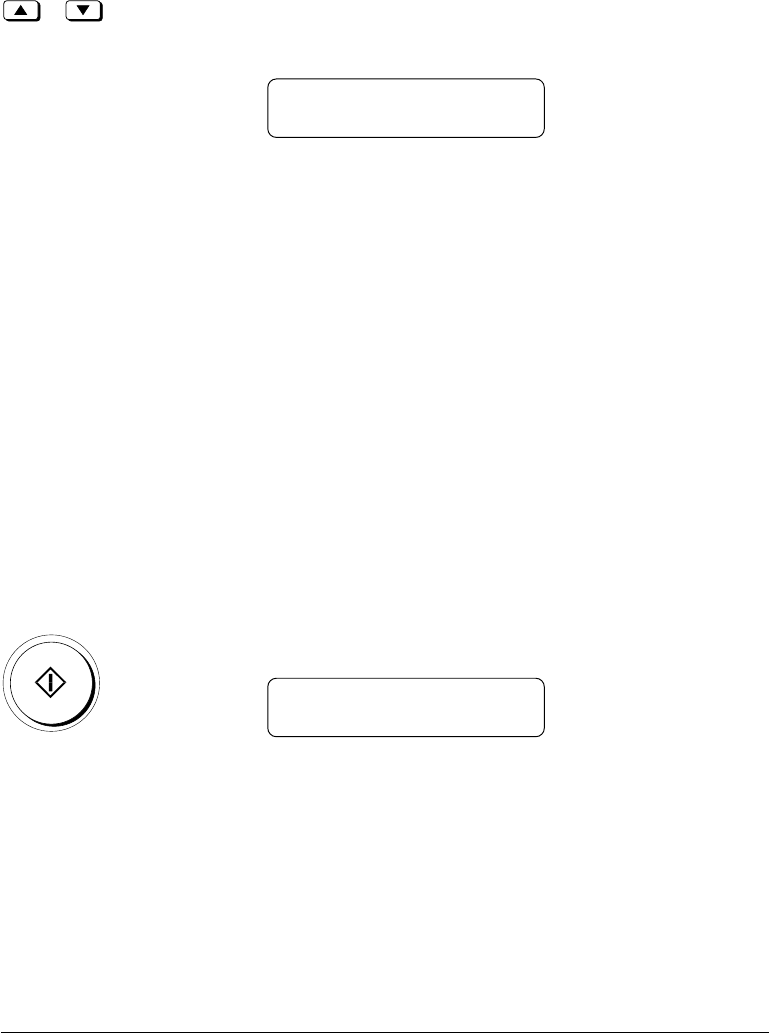
4-36 Setting Up and Using Speed Dialing Chapter 4
LASER CLASS 3170 Series.
CFYA/YAH/YAN 120v US V1.0
4. Press the directory search buttons on the front of the operation
panel to display the other names and numbers registered for the
button letter group.
TEL = 123 4567
12 SOUTHWEST
❏The names for One-touch Speed Dial are prefixed with two
digits and the names for Coded Speed Dial numbers are
prefixed with an asterisk (*) and three digits.
❏When you reach the last number and name registered for the
letter group, you will return to the first number and name in
the group.
❏To see numbers and names registered for other letter groups,
ABC for example, you will have to press the ABC button on
the numeric keypad.
❏After you press a button, if you see NO TEL# in the display,
this means there are no names that begin with a letter of the
button you just pressed.
❏After you press the directory search keys, if the display does
not change this means only one name and number is regis-
tered for the button you just pressed.
Start / Scan
5. With the telephone number you want to dial displayed, press
Start/Scan to start the document transmission.
TRANSMIT 0031
SCANNING DOC. P.001

Chapter 5 Using the Fax as a Copier 5-1
Using the Fax as
a Copier
LASER CLASS 3170 Series.
CFYA/YAH/YAN 120v US V1.0
Chapter 5
Using the Fax as a Copier
This chapter describes all the settings and procedures for using the fax
unit as a copier.
❏Preparing the Document.......................................................................... 5-2
❏Setting a Document on the Fax ............................................................... 5-3
❏Performing the Document Settings ........................................................ 5-4
❏Making Copies .......................................................................................... 5-6

5-2 Using the Fax as a Copier Chapter 5
LASER CLASS 3170 Series.
CFYA/YAH/YAN 120v US V1.0
Preparing the Document
Follow these simple guidelines to check your document before you set
the document on the fax for copying.
❏For best results, load only documents of recommended standard size
and weight. Refer to Appendix B. (➞B-1)
❏The document guides on the document feeder tray can be adjusted
to the width of non-standard size paper. For best results, however, all
sheets in the stack should be of the same width.
❏Although the document guides on the document feeder tray indicate
11 × 17 in. size and such a document can be set on the document
feeder tray, the effective scanning width is up to B4 size (10 in.).
❏To avoid document jams, never feed thick documents or documents
backed with carbon paper.
❏To avoid document jams and possible damage to the fax, avoid
wrinkled or creased paper, carbon paper, curled paper, coated paper,
and onion skin or other very thin paper.
❏The fax does not scan completely to the edges of the paper and
anything beyond this recommended margin will not be scanned for
copying. See Appendix B and check your document. (➞B-2)
❏To avoid paper jams or damaging the fax, inspect the document
carefully and make sure it is free of pins, staples, paper clips, and
other metal fasteners.
❏Make sure all the documents are dry. They should not have wet ink,
glue, or paste on their surfaces.
❏Before you feed a stack of documents into the fax, make sure all the
pages are the same size and thickness. Do not attempt to feed
documents of mixed sizes and thickness in the same stack.

Chapter 5 Using the Fax as a Copier 5-3
Using the Fax as
a Copier
LASER CLASS 3170 Series.
CFYA/YAH/YAN 120v US V1.0
Setting a Document on the Fax
You can set a stack of up to 50 letter- or A4-size pages, or 20 legal- or 11 ×
17 in.- or B4-size pages into the fax for copying. However, the effective
scanning width is up to B4 size (10 in.).
1. Place the document face up on the document feeder tray of the fax
unit.
2. If the document is too long for the document feeder tray (e.g. legal
size, 11 × 17 in. size), pull out the document extension tray.
3. Slide the document guides to fit the width of the document.
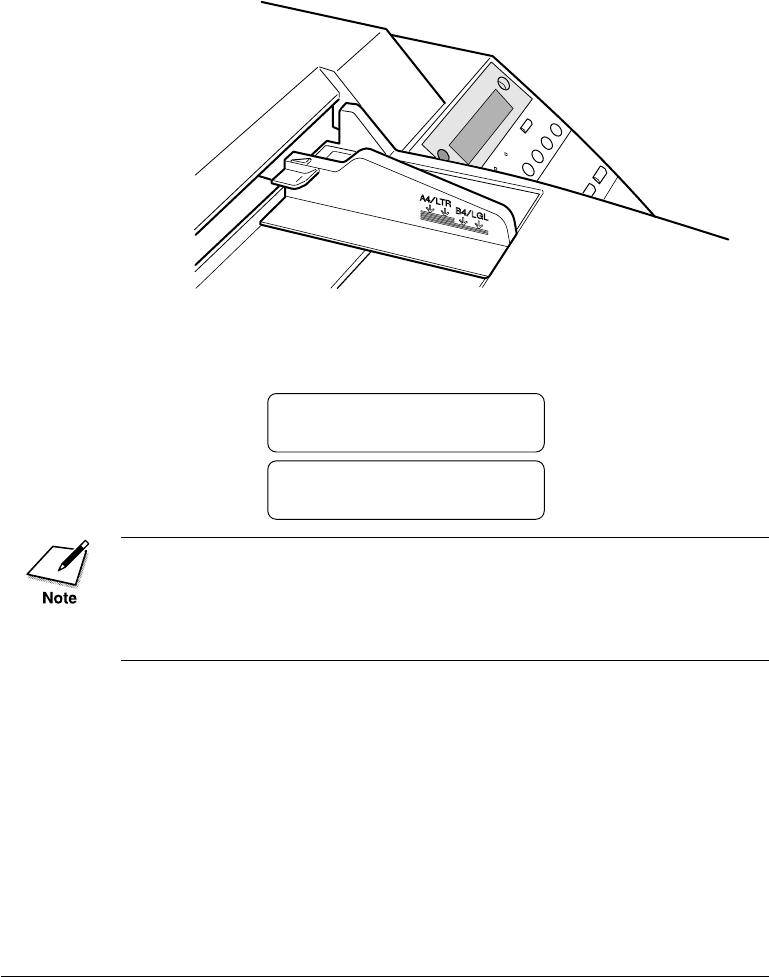
5-4 Using the Fax as a Copier Chapter 5
LASER CLASS 3170 Series.
CFYA/YAH/YAN 120v US V1.0
4. Make sure the document is below the load limit marks for A4/
LTR and B4/LGL sizes.
5. Insert the document fully into the fax until the leading edge of the
document stops in the ADF.
The fax will display some messages.
MEMORY IN USE
36%
DOCUMENT READY
If the fax already displays DOCUMENT READY before you set a
document, a small-sized document, such as a STMT-size document, may
have remained in the ADF from a previous fax or copy job. In such a
case, remove the small-sized document from the ADF and then set your
document.
Performing the Document Settings
Canon’s original Ultra High Quality (UHQ) imaging technology allows
you to make copies that are very close to the quality of the original
document. For best results, adjust the settings for special documents
before copying.
Follow these guidelines to change a setting:
❏The lighted indicator tells you the current setting.

Chapter 5 Using the Fax as a Copier 5-5
Using the Fax as
a Copier
LASER CLASS 3170 Series.
CFYA/YAH/YAN 120v US V1.0
❏Press the appropriate button repeatedly to light the setting you want.
❏After the document is copied, the settings return to the setting before
copying.
Ultra Fine
Super Fine
Fine
Standard
Resolution
Darker
Standard
Lighter
Contrast
Document T
yp
e
Text
Text / Photo
Resolution When copying a document, Ultra Fine is automati-
cally selected for you.
Contrast Adjusts the lightness/darkness of the document
pages scanned for copying.
Darker For documents with light text or
colors.
Standard For standard printed or typewrit-
ten text.
Lighter For documents with dark text or
colors.
Document Type Select for documents with text only or with text
and photos on the same page.
Text For documents that contain text
without photographs.
Text/Photo For documents that contain text
and photographs on the same
page. Automatically adjusts the
quality of the image and text on
the same page.
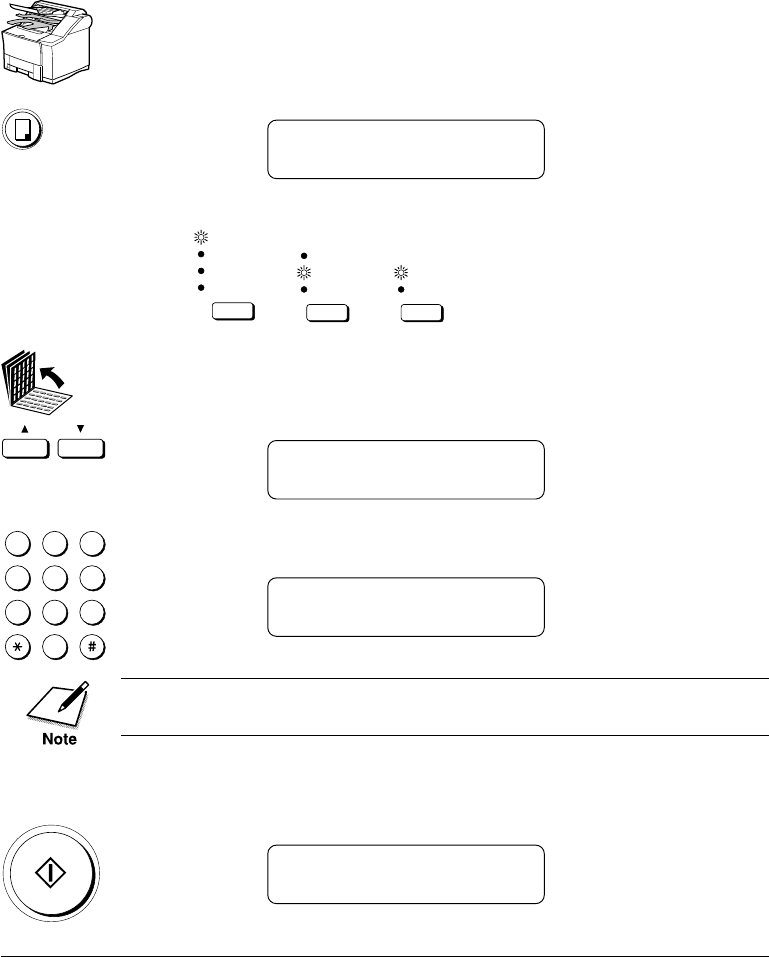
5-6 Using the Fax as a Copier Chapter 5
LASER CLASS 3170 Series.
CFYA/YAH/YAN 120v US V1.0
Making Copies
Follow this procedure to use the fax as a copier.
1. Set the document on the fax. (➞5-3)
2.
Copy
Press Copy.
COPY 01
CASSETTE 1 LTR
3. Perform the document settings. (➞5-4)
Ultra Fine
Super Fine
Fine
Standard
Resolution
Darker
Standard
Lighter
Contrast
Document T
yp
e
Text
Text / Photo
4. If you want to select another paper cassette or the MP tray, open
all three of the One-touch Speed Dialing panels, then press the
search buttons.
COPY 01
MP TRAY LGL
5.
1
4
7
2
5
8
0
3
6
9
ABC
GHI
PRS
JKL
TUV
OPER
MNO
WXY
DEF
Tone
SYMBOLS
Use the buttons on the numeric keypad to enter the number of
copies (01 to 99).
COPY 03
MP TRAY LGL
In order to select MP TRAY, USE MP TRAY must be set to ON in the
FAX'S PRINTER SET menu. (➞2-48)
❏If you make a mistake and want to start again, press Clear.
6.
Start / Scan
Press Start/Scan to start copying.
COPY
❏If you want to cancel the operation, press Stop.

Chapter 6 Sending Documents 6-1
Sending
Documents
LASER CLASS 3170 Series.
CFYA/YAH/YAN 120v US V1.0
Chapter 6
Sending Documents
This chapter describes fundamental procedures for dialing and sending
documents.
We will also show you how to send a document to more than one
location, set a document for delayed sending, and send a document with
a subaddress and password.
❏Setting a Document for Sending ............................................................. 6-2
•Preparing the Document .................................................................... 6-2
•Setting the Document on the Fax ...................................................... 6-3
•Adjusting the Scanning Settings ....................................................... 6-4
❏Selecting a Sender Name ......................................................................... 6-6
❏Using Regular Dialing .............................................................................. 6-7
❏Canceling Sending a Document.............................................................. 6-8
❏Dialing Long Distance with Regular Dialing ..................................... 6-10
❏Overview of Sending Methods ............................................................. 6-12
•Memory Sending ............................................................................... 6-12
•Direct Sending ................................................................................... 6-15
•Manual Sending................................................................................. 6-17
❏Re-dialing When the Line is Busy ........................................................ 6-19
•What is Automatic Redialing? ......................................................... 6-19
•Setting Up Redialing ......................................................................... 6-20
❏Sequential Broadcasting to More Than One Location ....................... 6-22
❏Sending Documents at a Preset Time ................................................... 6-24
❏Sending a Document with a Subaddress/Password ......................... 6-27
•Subaddress/Password Sending with Speed Dialing ................... 6-27
•Subaddress/Password Sending with the Operation
Panel Buttons ..................................................................................... 6-28

6-2 Sending Documents Chapter 6
LASER CLASS 3170 Series.
CFYA/YAH/YAN 120v US V1.0
Setting a Document for Sending
This section describes how to prepare a document for sending and how
to perform the initial settings before dialing.
Preparing the Document
Follow these simple guidelines to check your document before you set
the document on the fax for scanning.
❏For best results, load only documents of recommended standard size
and weight. Refer to Appendix B. (➞B-1)
❏The document guides on the document feeder tray can be adjusted
to the width of non-standard size paper. For best results, all sheets in
the stack should be of the same width.
❏Although the document guides on the document feeder tray indicate
11 × 17 in. size and such a document can be set on the document
feeder tray, the effective scanning width is up to B4 size (10 in.).
❏To avoid document jams, never feed thick documents or documents
backed with carbon paper.
❏For documents that are larger or smaller than these recommended
limits, reduce them or enlarge them on a copy machine and then
send the copy. Refer to Appendix B. (➞B-2)
❏To avoid document jams and possible damage to the fax, avoid
wrinkled or creased paper, carbon paper, curled paper, coated paper,
and onion skin or other very thin paper.
❏The fax does not scan completely to the edges of the paper and
anything beyond this recommended margin will not be scanned for
sending. For details, refer to Appendix B. (➞B-2)
❏To avoid paper jams or damaging the fax, inspect the document
carefully and make sure it is free of pins, staples, paper clips, and
other metal fasteners.
❏Make sure all the documents are dry. They should not have wet ink,
glue, or paste on their surfaces.
❏Before you feed a stack of documents into the fax, make sure all the
pages are the same size and thickness. Do not attempt to feed
documents of mixed sizes and thickness.

Chapter 6 Sending Documents 6-3
Sending
Documents
LASER CLASS 3170 Series.
CFYA/YAH/YAN 120v US V1.0
Setting the Document on the Fax
You can set a stack of up to 50 letter- or A4-size pages, or 20 legal- or 11 ×
17 in.- or B4-size pages into the fax for scanning. However, the effective
scanning width is up to B4 size (10 in.).
1. Place the document face up on the document feeder tray of the fax
unit.
2. If the document is too long for the document feeder tray (e.g. legal
size, 11 × 17 in. size), pull out the document extension tray.
3. Slide the document guides to fit the width of the document.

6-4 Sending Documents Chapter 6
LASER CLASS 3170 Series.
CFYA/YAH/YAN 120v US V1.0
4. Make sure the document is below the load limit marks for A4/
LTR and B4/LGL sizes.
5. Insert the document fully into the fax until the leading edge of the
document stops in the ADF.
The fax will display some messages.
MEMORY IN USE
36%
DOCUMENT READY
If the fax already displays DOCUMENT READY before you set a
document, a small-sized document, such as a STMT-size document, may
have remained in the ADF from a previous fax or copy job. In such a
case, remove the small-sized document from the ADF and then set your
document.
Adjusting the Scanning Settings
Canon’s original Ultra High Quality (UHQ) imaging technology allows
you to send documents that are very close to the quality of the original
document. For best results, adjust the settings for special documents
before sending.
Follow these guidelines to change a setting:
❏The lighted indicator tells you the current setting.
❏Press the appropriate button repeatedly to light the setting you want.
❏For documents that require special settings, you can set the Program
button to perform the settings with a single button press. (➞12-5)
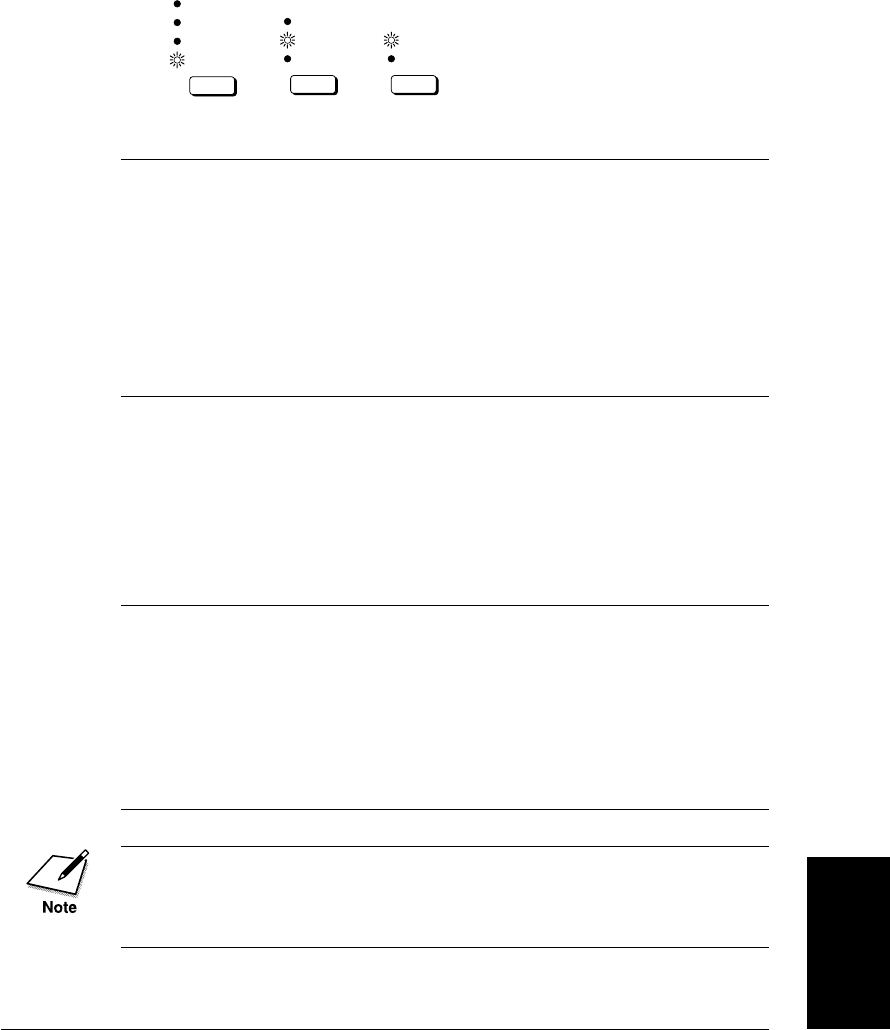
Chapter 6 Sending Documents 6-5
Sending
Documents
LASER CLASS 3170 Series.
CFYA/YAH/YAN 120v US V1.0
Ultra Fine
Super Fine
Fine
Standard
Resolution
Darker
Standard
Lighter
Contrast
Document T
yp
e
Text
Text / Photo
Resolution Adjusts the resolution for documents with fine text
and thin lines. The higher the resolution, the higher
the quality output, but the slower the scanning
speed.
Ultra Fine Eight times the Standard resolution.
Super Fine Four times the Standard resolution.
Fine Twice the Standard resolution.
Standard For normal printed or typewritten
text.
Contrast Adjusts the lightness/darkness of the document
pages scanned for sending.
Darker For documents with light text or
colors.
Standard For standard printed or typewritten
text.
Lighter For documents with dark text or
colors.
Document Type Select for documents with text only or with text and
photos on the same page.
Text For documents that contain text
without photographs.
Text/Photo For documents that contain text and
photographs on the same page.
Automatically adjusts the quality of
the image and text on the same page.
If the other party does not have the ultra fine feature and you send a
document with Text/Photo set for the document type setting and Ultra
Fine set for the resolution setting, the image the other party receives will
reproduce at the other party's maximum resolution setting.

6-6 Sending Documents Chapter 6
LASER CLASS 3170 Series.
CFYA/YAH/YAN 120v US V1.0
Selecting a Sender Name
Follow this procedure to select one of the registered sender names.
❏Sender names are selected by pressing the TTI Selector button.
❏This setting is optional. If you do not select a sender name before
sending a document, the registered unit name will be printed at the
top of the document in the sender information area. (➞3-12)
❏If you select a sender name before you send a document, it will
replace the unit name printed in the sender information area.
(➞3-12)
❏Up to 19 sender names can be registered. At least one sender name
must be registered so you can use this feature. (➞3-18)
1. Set the document on the fax and adjust the document guides to
the width of the document. (➞6-3)
2. Dial the number.
1
4
7
2
5
8
0
3
6
9
ABC
GHI
PRS
JKL
TUV
OPER
MNO
WXY
DEF
Tone
SYMBOLS
Press the buttons on the numeric keypad to dial the number.
-if not-
Press a One-touch Speed Dialing button to dial the number.
(➞4-29)
-if not-
Press Coded Dial and a three-digit code to dial the number. (➞4-31)
-if not-
Use directory dialing. (➞4-35)
3. Open all three of the One-touch Speed Dialing panels.
TTI Selector
Press TTI Selector until the desired name appears in the display.
-if not-
Press TTI Selector. Then press the search button until the desired
name appears in the display.

6-8 Sending Documents Chapter 6
LASER CLASS 3170 Series.
CFYA/YAH/YAN 120v US V1.0
Canceling Sending a Document
Follow this procedure to cancel a transmission in progress.
To Cancel Sending on a Single-Line
1.
Stop
Press Stop.
If you are using direct sending, an alarm sounds and the transmis-
sion is canceled immediately.
-if not-
If you are using memory sending, a message is displayed.
CANCEL DURING TX/RX?
YES=(*)NO=(#)
2.
or Press * to cancel the transmission or press # if you change your
mind and do not want to cancel.
After you press * to cancel the transmission, an alarm sounds and
a report prints unless this feature has been turned off. (➞16-8)
PRINTING REPORT
12/31/1999 11:48 FAX 833 4423 WORLD ESTATE,INC. 001
***************************
***
ERROR TX REPORT
***
***************************
TX FUNCTION WAS NOT COMPLETED
TX/RX NO 0006
CONNECTION TEL 761 1298
CONNECTION ID JOHN BARRISTER
ST. TIME 12/31 11:48
USAGE T 00'00
PGS. SENT 0
RESULT NG STOP

Chapter 6 Sending Documents 6-9
Sending
Documents
LASER CLASS 3170 Series.
CFYA/YAH/YAN 120v US V1.0
To Cancel Sending on a Dual-Line
If you have installed the Dual-line Upgrade Kit and both lines are in use
at the same time and you want to select a transmission which you want
to cancel, follow this procedure.
1.
Press the search buttons to view the displays for each transaction.
12/31/1999 FRI 23:01
TX/RX NO. 5432
12/31/1999 FRI 23:01
TX/RX NO. 1234
If you are using direct sending, you cannot change the line.
2.
Stop
Press Stop.
If you are using memory sending, a message is displayed.
CANCEL DURING TX/RX?
YES=(*)NO=(#)
3.
or Press * to cancel the transmission or press # if you change your
mind and do not want to cancel.
After you press * to cancel the transmission, an alarm sounds and
a report prints unless this feature has been turned off.(➞16-8)
PRINTING REPORT

6-10 Sending Documents Chapter 6
LASER CLASS 3170 Series.
CFYA/YAH/YAN 120v US V1.0
Dialing Long Distance with Regular Dialing
Follow this procedure to dial a long distance number and send a docu-
ment with regular dialing.
1. Set the document on the fax. (➞6-3)
Set the document resolution, contrast, and document type. (➞6-4)
•You cannot select a sender’s name after you press Hook or pick up the
handset.
•You cannot insert a pause when you dial using the numeric keypad
after pressing Hook or after picking up the handset.
2.
Hook
Press Hook if you want to use manual sending. After you press
Hook, the In Use lamp blinks green and you will be able to hear
the dial tone.
TEL =
If you know the other party's fax is set to automatic receiving, go
to the next step.
3.
1
4
7
2
5
8
0
3
6
9
ABC
GHI
PRS
JKL
TUV
OPER
MNO
WXY
DEF
Tone
SYMBOLS
Use the buttons on the numeric keypad to dial the long distance
number.
If you did not press Hook in step 2, you may have to insert a pause into a
number for long distance dialing. (➞4-2) For details about the location
and length of the pause, contact your local telephone company or local
authorized Canon dealer.
TEL = 011p81

Chapter 6 Sending Documents 6-11
Sending
Documents
LASER CLASS 3170 Series.
CFYA/YAH/YAN 120v US V1.0
4.
1
4
7
2
5
8
0
3
6
9
ABC
GHI
PRS
JKL
TUV
OPER
MNO
WXY
DEF
Tone
SYMBOLS
Dial the remainder of the number then press Start/Scan. After a
few moments the call will connect.
TEL = 011p81 123 4567P
Start / Scan
If you did not press Hook in step 2, you may have to insert a pause at the
end of the telephone number. The pause at the end of the number is 10
seconds. For details about the necessary length of the pause, contact your
local telephone company or local authorized Canon dealer.
If you have installed the optional handset, when the other party
answers, you can pick up the handset and talk.
Tell the other party to press the start button on their fax then hang
up their handset. When you hear a high pitched tone, the other
fax is ready to receive.
-if not-
If you hear a high pitched tone as soon as the call connects, the
other party is ready to receive.
5.
Start / Scan
Press Start/Scan on your fax and hang up your handset.
The fax starts to send the document.
If the offhook alarm starts beeping, make sure the handset is
sitting correctly on the handset cradle. The volume of the offhook
alarm can be adjusted. (➞16-6)
To take advantage of the speed dialing features, register frequently
dialed long distance numbers for One-touch or Coded Speed Dialing
buttons. (➞4-6, 4-15)

6-12 Sending Documents Chapter 6
LASER CLASS 3170 Series.
CFYA/YAH/YAN 120v US V1.0
Overview of Sending Methods
This section briefly describes the methods and advantages of the three
main sending methods: memory sending, direct sending, and manual
sending.
Memory Sending
With memory sending, document scanning and sending is fast, allowing
you to get your document back quickly so you do not have to spend so
much time standing around the fax. You can start scanning a document
for sending even while the fax is busy sending another document.
SEND
MEMORY
1. Set the document on the fax. (➞6-3)
Set the document resolution, contrast, and document type. (➞6-4)
You can also select a sender’s name with the TTI Selector. (➞6-6)

Chapter 6 Sending Documents 6-13
Sending
Documents
LASER CLASS 3170 Series.
CFYA/YAH/YAN 120v US V1.0
2.
1
4
7
2
5
8
0
3
6
9
ABC
GHI
PRS
JKL
TUV
OPER
MNO
WXY
DEF
Tone
SYMBOLS
Dial the other party’s fax number.
Use the buttons on the numeric keypad to dial the number. (➞6-7)
-if not-
Press a One-touch Speed Dialing button to dial the number. (➞4-29)
-if not-
Press Coded Dial and a three-digit code to dial the number. (➞4-31)
-if not-
Press Directory and search for the name to dial the number.
(➞4-35)
If you make a mistake during dialing, press Stop to return to
standby and start again.
If you use One-touch or Coded Speed Dialing with the time out feature
on, the fax will pause 5 seconds before it starts scanning the document.
(➞16-11)
3.
Start / Scan
To start scanning right away, press Start/Scan.
If you use One-touch or Coded Speed Dialing, wait for the fax to
start scanning automatically.
The timeout feature can be turned off. (➞16-11)
You can start sending a document while it is being scanned into
the memory. When scanning a multi-page document and the
telephone line is free, the unit will call the other party after the
first page is scanned. Once the connection is made, the fax unit
will begin to transmit the information while the remaining pages
are being scanned. This feature is called Quick-on-line TX and can
be turned off and on. (➞16-11)
When the fax sends a document, messages report the following
information about the transmission.
Transaction number
TRANSMIT 0031
SCANNING DOC. P.001
A transaction number is assigned to every document sent from
your fax starting with 0001 up to 4999. When the number 4999 is
reached, numbering will begin again from 0001.
TRANSACTION NUMBER

6-14 Sending Documents Chapter 6
LASER CLASS 3170 Series.
CFYA/YAH/YAN 120v US V1.0
Other party’s fax number and name
12/31/1999 FRI 23:01
DIALING
12/31/1999 FRI 23:01
123 4567
12/31/1999 FRI 23:01
CALLING
12/31/1999 FRI 23:01
TX/RX NO. 0031
12/31/1999 FRI 23:01
CANON CANADA
Displayed only if the other party’s telephone number and name are
registered for the speed dialing button used to dial the number.
ECM transmission mode
12/31/1999 FRI 23:05
ECM TX P.001
Unless this feature has been turned off, the document is sent in the
ECM (error correction mode) for transmission. (➞16-10)
Successful completion
12/31/1999 FRI 23:05
TRANSMITTING OK
12/31/1999 FRI 23:05
TX/RX NO. 0031
Alternating messages tell you the transmission was successful.
The message will disappear after approximately 10 seconds.
Transmission error
If a transmission error occurs, read the error message in the
display and look it up in the error message table. (➞15-38)
Optional Dual-line transactions
If you have installed the Dual-line Upgrade Kit and both lines are
in use at the same time, press the search buttons to switch the
display so you can view either transaction in progress. (➞2-54)

Chapter 6 Sending Documents 6-15
Sending
Documents
LASER CLASS 3170 Series.
CFYA/YAH/YAN 120v US V1.0
Direct Sending
The fax dials the number, connects the call, and then scans and sends the
document one page at a time. Direct sending is slower than memory
sending, but because this method bypasses memory you can send a
document ahead of other documents stored in the memory.
SEND
❏Direct sending scans and sends each page one at a time.
❏With direct sending you can watch each page as it is scanned and
sent.
❏Although direct sending is slower than memory sending, you can
use direct sending when you need to send an urgent document
ahead of other documents stored in the memory.
❏You can also use direct sending when the memory is full and there is
no space to hold another document in memory.
1. Set the document on the fax. (➞6-3)
Set the document resolution, contrast, and document type. (➞6-4)
You can also select a sender’s name with the TTI Selector. (➞6-6)

6-16 Sending Documents Chapter 6
LASER CLASS 3170 Series.
CFYA/YAH/YAN 120v US V1.0
2.
Direct TX
Press Direct TX.
The Direct TX lamp lights. The fax is now in the direct sending
mode.
3. Dial the other party’s fax number.
1
4
7
2
5
8
0
3
6
9
ABC
GHI
PRS
JKL
TUV
OPER
MNO
WXY
DEF
Tone
SYMBOLS
Use the buttons on the numeric keypad to dial the number. (➞6-7)
-if not-
Press a One-touch Speed Dialing button to dial the number. (➞4-29)
-if not-
Press Coded Dial and a three-digit code to dial the number. (➞4-31)
-if not-
Press Directory and search for the name to dial the number.
(➞4-35)
If you make a mistake during dialing, press Stop to return to
standby and start again.
4.
Start / Scan
Press Start/Scan.
The fax dials the other party’s number and sends the fax. Each
page is sent as it is scanned.
A series of messages report the other party’s name, telephone
number, and transaction number in the LCD display. The final
message reports successful transmission.
12/31/1999 FRI 12:05
TRANSMITTING OK
When sending a small-sized document, such as a STMT-size document,
the document may remain in the ADF after sending. This document
might then be sent again with the next sender’s document. Therefore,
when sending a small-sized document, make sure that the document
does not remain in the ADF after sending.
5.
Direct TX
Press Direct TX to turn off the direct sending mode.

Chapter 6 Sending Documents 6-17
Sending
Documents
LASER CLASS 3170 Series.
CFYA/YAH/YAN 120v US V1.0
Manual Sending
Manual sending allows you to talk to the other party before you send the
document. This method is useful if the operator of the other fax must
manually set the other fax to receive before it can receive a document.
❏ The sending speed is 14400 bps or less when sending manually.
❏ The handset is available as an option. (➞2-16)
1. Set the document on the fax. (➞6-3)
Set the document resolution, contrast, and document type. (➞6-4)
You cannot set sender's name when sending manually.
2.
Hook
Press Hook.
After you press Hook the In Use lamp blinks green and you will be
able to hear the dial tone.
-if not-
Without pressing Hook, just pick up the handset if you have
installed the optional handset.

6-18 Sending Documents Chapter 6
LASER CLASS 3170 Series.
CFYA/YAH/YAN 120v US V1.0
3. Dial the other party’s fax number.
1
4
7
2
5
8
0
3
6
9
ABC
GHI
PRS
JKL
TUV
OPER
MNO
WXY
DEF
Tone
SYMBOLS
Use the buttons on the numeric keypad to dial the number. (➞6-7)
-if not-
Press a One-touch Speed Dialing button to dial the number. (➞4-29)
-if not-
Press Coded Dial and a three-digit code to dial the number. (➞4-31)
-if not-
Press Directory and search for the name to dial the number and
press Set. Then press Start/Scan. (➞4-35)
If you make a mistake during dialing, press Stop to return to
standby and start again.
4. When you hear the other party answer the call, you can talk.
When you hear the other party answer, pick up the handset so
you can talk if you have not already done so. Then go to step 5.
-if not-
If you hear a high pitched signal, instead of the other party’s
voice, they are ready to receive your document. Go to step 7.
5. Ask the other party to press the start button on their fax and then
hang up their handset.
6. After the other party presses the start button on their fax, you will
hear a high pitched signal.
7.
Start / Scan
Press Start/Scan on your fax and hang up your handset.
The fax begins to send the document. If the offhook alarm starts
beeping, make sure the handset is resting properly on the handset
cradle.

Chapter 6 Sending Documents 6-19
Sending
Documents
LASER CLASS 3170 Series.
CFYA/YAH/YAN 120v US V1.0
Re-dialing When the Line is Busy
If the other party’s line is busy or if there is no answer, the fax waits two
minutes and then dials the same number again. This feature is called
automatic redialing.
What is Automatic Redialing?
After the initial dial attempt, the fax will wait two minutes and try to dial
again. If the second attempt fails, the fax will again wait for two minutes
and make a final attempt to complete the call.
Even if the fax machine is set to redial several times, it will redial only
once if there is no tone or there is a ring back tone during the first
attempt.
Auto redial can be turned off and on. The number of redialing attempts
and the time interval between attempts can be set up with the auto redial
feature. (➞6-20, 16-11)
While the fax is waiting to redial, the following messages are displayed
alternately:
12/31/1999 FRI 09:30
AUTO REDIAL
12/31/1999 FRI 09:30
TX/RX NO. 3888
If both redial attempts are unsuccessful the fax will cancel the transac-
tion, display the following message, and print an Error TX report to
remind you that the transmission was not completed.
12/31/1999 FRI 09:30
BUSY/NO SIGNAL

6-20 Sending Documents Chapter 6
LASER CLASS 3170 Series.
CFYA/YAH/YAN 120v US V1.0
To cancel redialing
Stop
If you are using direct sending, press Stop.
-if not-
Delete File
If you are using memory sending, press Delete File. (➞8-9)
To erase the document from the memory
Delete File
Use the Delete File button to delete the file from the memory.
(➞8-9)
Setting Up Redialing
Follow this procedure to set up these redialing features:
❏The number of times the fax attempts to redial.
❏The length of the time interval the fax waits between dialing
attempts.
1. Open the TX SETTINGS menu.
Open all three of the One-touch Speed Dialing panels. Then press
Data Registration.
Data
Registration
REGISTRATION
1.DATA REGISTRATION
Set
Press Set.
DATA REGISTRATION
1.USER SETTINGS
Press the search buttons until you see the display below.
DATA REGISTRATION
3.TX SETTINGS
Set
Press Set.
TX SETTINGS
1.ECM TX

Chapter 6 Sending Documents 6-21
Sending
Documents
LASER CLASS 3170 Series.
CFYA/YAH/YAN 120v US V1.0
2.
Press the search buttons until you see the display below.
TX SETTINGS
3.AUTO REDIAL
Set
Press Set.
AUTO REDIAL
ON
If OFF is displayed, press the search buttons until you see ON.
Set
Press Set.
3.
Press the search buttons to display the item you want to set up,
then press Set.
Set
4.
Stop
Press Stop to return to standby.
Auto Redial Setup Summary
The default settings, shown in bold, remain in effect unless you change
them.
1.REDIAL TIMES Sets the number of times the fax attempts to dial a number
before it cancels the transaction automatically.
Even if the fax machine is set to redial several times, it will
redial only once if there is no tone or there is a ring back tone
during the first attempt.
02TIMES You can set between 01 to 10 dialing
attempts.
2.REDIAL INTERVAL Sets the length of time the fax waits
between dialing attempts.
02MIN. You can set the time interval between 02
to 99 minutes.

6-22 Sending Documents Chapter 6
LASER CLASS 3170 Series.
CFYA/YAH/YAN 120v US V1.0
Sequential Broadcasting to More Than One
Location
Follow this procedure to scan a document once and send it to several
locations. With this sending method, called sequential broadcasting, you
can send the same document to a maximum of 210 locations.
If you frequently send the same document to several locations, use
Group Dialing. With Group Dialing you can register up to 199 facsimile
numbers and send the same document to these numbers at the press of
only one or four buttons. (➞4-24)
If you use sequential broadcasting frequently and you want to make sure
that all transactions are completed, assign the REPORT function to the
Program button. Then before you send a document, press Program to have
the fax unit print a Multi-transaction Report to confirm that the
document was sent to all the destinations. (➞12-5, 14-14)
1. Set the document on the fax. (➞6-3)
Set the document resolution, contrast, and document type. (➞6-4)
You can also select a sender’s name with the TTI Selector. (➞6-6)
2. Dial the telephone numbers by entering the numbers one right
after the other.
Following are the three methods you can use to enter the numbers
for Sequential Broadcasting:
1
72
Use the One-touch Speed Dialing buttons to dial up to 72 destina-
tions.
TEL = 123 4567
01 CANON INC
Coded Dial
000
127
Use the Coded Speed Dialing buttons to dial up to 128 destina-
tions.
TEL = 123 4567
*002 CANON INC CA

Chapter 6 Sending Documents 6-23
Sending
Documents
LASER CLASS 3170 Series.
CFYA/YAH/YAN 120v US V1.0
1
4
7
2
5
8
0
3
6
9
ABC
GHI
PRS
JKL
TUV
OPER
MNO
WXY
DEF
Tone
SYMBOLS
Set
Use regular dialing with the numeric keypad to dial up to 10
destinations, but make sure that you press Set after each number
you enter with regular dialing.
You can also press the Redial button to redial the last number
dialed with the numeric keypad.
You must dial the second number within 5 seconds of dialing the first
number. All subsequent numbers must be dialed within 10 seconds. If
you wait longer than the timeout interval before dialing the next number,
the fax will start scanning the document. The timeout interval can be
turned off. (➞16-11)
3.
Start / Scan
After you have entered all of the numbers, press Start/Scan.
Regardless of the order you used when dialing, the fax will send the
document to the locations you entered in this order: One-touch Speed
Dialing numbers, Coded Speed Dialing numbers, then regular dial
numbers.
To cancel sequential broadcasting
Stop
To cancel a sequential broadcast, press Stop.
After CANCEL DURING TX/RX is displayed, press *. All desti-
nations are canceled.

6-24 Sending Documents Chapter 6
LASER CLASS 3170 Series.
CFYA/YAH/YAN 120v US V1.0
Sending Documents at a Preset Time
Follow this procedure to set a time for sending. This feature is called
delayed sending or timer sending. Use timer sending to store a document in
the memory and then have it sent at a later time when telephone rates
are lower.
You can set up to 70 documents for delayed sending.
1. Set the document on the fax. (➞6-3)
Set the document resolution, contrast, and document type. (➞6-4)
You can also select a sender’s name with the TTI Selector. (➞6-6)
2. Open all three of the One-touch Speed Dialing panels. Then press
Delayed Transmission.
DELAYED TX
SET TIME 17:30
Delayed
Transmission
3.
1
4
7
2
5
8
0
3
6
9
ABC
GHI
PRS
JKL
TUV
OPER
MNO
WXY
DEF
Tone
SYMBOLS
Use the buttons on the numeric keypad to enter the time.
❏Enter the time in the 24-hour format (e.g. 1:00 p.m. as 13:00).
❏Enter all the numbers, including zeros.
DELAYED TX
SET TIME 23:05

Chapter 6 Sending Documents 6-25
Sending
Documents
LASER CLASS 3170 Series.
CFYA/YAH/YAN 120v US V1.0
4.
Set
Press Set.
DELAYED TX
SELECT LOCATIONS
TEL =
1
4
7
2
5
8
0
3
6
9
ABC
GHI
PRS
JKL
TUV
OPER
MNO
WXY
DEF
Tone
SYMBOLS
Dial the other party's fax number.
Use the buttons on the numeric keypad to dial the number. (➞6-7)
-if not-
Close the One-touch Speed Dialing panels and dial the other
party’s fax number by pressing a One-touch Speed Dialing button.
(➞4-29)
-if not-
Press Coded Dial and a three-digit code to dial the number. (➞4-31)
-if not-
Press Directory and search for the name to dial the number.
(➞4-35)
If you make a mistake during dialing, press Stop to return to
standby and start again.
TEL= 1 123 4567
09 CALIFORNIA MRKTS
You can press more than one speed dialing button to send the document
to more than one location after the timer goes off. If you want to enter the
numbers with regular dialing for a sequential broadcast, make sure you
press Set after every number.
DELAYED TX
SENDER’S NAME
SENDER’S NAME
CANON DIV. #20

6-26 Sending Documents Chapter 6
LASER CLASS 3170 Series.
CFYA/YAH/YAN 120v US V1.0
5. If you want to skip selecting a sender name, go to step 6.
-if not-
TTI Selector
If you want to select a sender name, press the TTI Selector button
until you see the sender name you want to use.
You can also use the search buttons to scroll up or down the TTI
list.
SENDER’S NAME
19 CANON FAX DIV.
6.
Set
Press Set. The fax scans the document and stores it in the memory.
DELAYED TX 2339
SCANNING DOC. P.001
❏The fax will hold the document in the memory until the timer
for the document goes off. Then it will send the document to
the destinations you specified.
❏To cancel a document set for timer sending, use the Delete File
button. (➞8-9)

Chapter 6 Sending Documents 6-27
Sending
Documents
LASER CLASS 3170 Series.
CFYA/YAH/YAN 120v US V1.0
Sending a Document with a Subaddress/
Password
You can send documents with ITU-T standard subaddresses and pass-
words. In order for a transaction to succeed, the subaddresses and
passwords on the sending and receiving fax units must match. You can
use two methods to send a document with an ITU-T subaddress and
password:
❏Press a One-touch or Coded Speed Dialing button registered for
subaddress/password sending.
❏Enter the subaddress and password with the Subaddress and
Password buttons on the operation panel when you send the
document.
Subaddress/Password Sending with Speed Dialing
If you register the subaddress and/or password for a One-touch or
Coded Speed Dialing button, the subaddress/password are entered for
you automatically after you press the speed dialing buttons. (➞4-6, 4-15)
1. To use subaddress/password sending with a speed dialing
button, you must first register the subaddress/password for the
telephone number when you register the number for One-touch or
Coded Speed Dialing. (➞4-6, 4-15)
2. Set the document on the fax. (➞6-3)
Set the document resolution, contrast, and document type. (➞6-4)
You can also select a sender’s name with the TTI Selector. (➞6-6)

6-28 Sending Documents Chapter 6
LASER CLASS 3170 Series.
CFYA/YAH/YAN 120v US V1.0
3.
1
72
Press the One-touch Speed Dialing button registered for
subaddress/password sending. (➞4-29)
-if not-
Coded Dial
000
127
Press the Coded Dial button followed by the three-digit code for the
Coded Speed Dialing number registered for subaddress/pass-
word sending. (➞4-31)
-if not-
Directory
Press Directory and search for the name to dial a number registered
for subaddress/password sending. (➞4-35)
4.
Start / Scan
Press Start/Scan.
TRANSMITTING 0010
SCANNING DOC. P.001
Subaddress/Password Sending with the Operation Panel
Buttons
Note these limitations on entering the subaddress/password with the
Subaddress and Password buttons on the operation panel:
❏If you frequently need to use a subaddress/password to send a
document to more than one location, register the number,
subaddress, and password for a One-touch or Coded Speed Dialing
button so you can use multiple broadcasting. (➞6-22)
❏You cannot use the Subaddress or Password buttons for One-touch or
Coded Speed Dialing button that is set for anything other than
REGULAR TX. (➞4-6, 4-15)
❏The password setting is optional but required if the other party has
set a password on the other fax unit.
Follow this procedure to send a document with a subaddress/password
entered with the Subaddress and Password buttons on the operation
panel.

Chapter 6 Sending Documents 6-29
Sending
Documents
LASER CLASS 3170 Series.
CFYA/YAH/YAN 120v US V1.0
1. Set the document on the fax. (➞6-3)
Set the document resolution, contrast, and document type. (➞6-4)
You can also select a sender’s name with the TTI Selector. (➞6-6)
2.
1
4
7
2
5
8
0
3
6
9
ABC
GHI
PRS
JKL
TUV
OPER
MNO
WXY
DEF
Tone
SYMBOLS
Dial the telephone number.
Use the buttons on the numeric keypad to enter the telephone
number, or use the speed dialing buttons to dial.
To dial with One-touch Speed dialing, press the One-touch Speed
Dialing button where the number is registered.
To dial with a Coded Speed Dialing, press Coded Dial and then use
the numeric keypad to enter the three-digit dialing code.
Set
Then press Set.
TEL = 123 4567
02 JOHN BARRISTER
3. Immediately after pressing Set, open all three of the One-touch
Speed Dialing panels and press Subaddress.
SUBADDRESS
Subaddress
You must press Subaddress within 5 seconds of pressing Set. If you wait
longer than the timeout interval before pressing Subaddress, the fax will
start scanning the document. The timeout interval can be turned off.
(➞16-11)
4.
1
4
7
2
5
8
0
3
6
9
ABC
GHI
PRS
JKL
TUV
OPER
MNO
WXY
DEF
Tone
SYMBOLS
Set
Use the buttons on the numeric keypad to enter the ITU-T
subaddress. Then press Set.
TEL = 123 4567
02 JOHN BARRISTER

6-30 Sending Documents Chapter 6
LASER CLASS 3170 Series.
CFYA/YAH/YAN 120v US V1.0
5.
Password
If you want to enter a password, press Password.
PASSWORD
You must press Password within 5 seconds of pressing Set. If you wait
longer than the timeout interval before pressing Password, the fax will
start scanning the document. The timeout interval can be turned off.
(➞16-11)
6.
1
4
7
2
5
8
0
3
6
9
ABC
GHI
PRS
JKL
TUV
OPER
MNO
WXY
DEF
Tone
SYMBOLS
Set
Use the buttons on the numeric keypad to enter the ITU-T pass-
word. Then press Set.
TEL = 123 4567
02 JOHN BARRISTER
7.
Start / Scan
Press Start/Scan. The fax starts to scan the document.
TRANSMIT 0021
SCANNING DOC. P.001
❏The fax dials the number and sends the document with the
subaddress and password you just entered.
❏To cancel the transmission, press Stop and press * when you
are prompted to confirm the cancellation.
❏To cancel a transmission set for delayed or timer sending, use
the Delete File button. (➞8-9)

Chapter 7 Receiving Documents 7-1
Receiving
Documents
LASER CLASS 3170 Series.
CFYA/YAH/YAN 120v US V1.0
Chapter 7
Receiving Documents
This chapter describes the basic receive features.
You can receive document transmission automatically or manually. In the
automatic receive mode the fax will receive a document automatically.
In the manual receive mode, if you have installed the optional handset
kit you can answer the telephone by picking up the handset on the fax
and pressing Start/Scan to start receiving the fax. You can also start
manual receiving from an extension telephone with remote receiving.
In the last section of this chapter, we will show you how to put the fax
unit in the transfer mode and send all documents automatically to a fax
at your home or at another work site.
❏Receiving Documents Automatically .................................................... 7-2
•Setting the Automatic Receive Mode ............................................... 7-2
•Messages Displayed When Receiving a Document ....................... 7-2
•Turning on and Adjusting the Auto Switch Time........................... 7-5
❏Receiving Documents Manually with the Optional Handset ............ 7-7
•Receiving a Document Manually at the Fax.................................... 7-7
•Receiving a Document Manually with an Extension Telephone .. 7-8
•Changing the Remote Receive ID ..................................................... 7-9
❏Canceling Receiving a Document..........................................................7-11
❏Transferring Documents ........................................................................ 7-13
•Before You Set Up Document Transfer ........................................... 7-13
•Setting Up the Fax for Document Transfer .................................... 7-14
•Turning the Transfer Mode ON and OFF ...................................... 7-17
•Changing the Transfer Settings ....................................................... 7-18
•Canceling the Transfer Settings ....................................................... 7-20

7-2 Receiving Documents Chapter 7
LASER CLASS 3170 Series.
CFYA/YAH/YAN 120v US V1.0
Receiving Documents Automatically
After you take your fax out of the box and set it up, it is set to receive
documents automatically. Use automatic receiving for a fax on a dedi-
cated telephone line that you do not need for telephone voice
communication.
Setting the Automatic Receive Mode
Manual RX
Check the indicator above the Manual RX button. When this indicator is
off, the fax is in the automatic receive mode.
When a fax document is sent to you, your fax unit receives the document
automatically. During receiving a series of brief messages report the
progress of the reception by displaying the transaction number, name
and telephone of the caller, and the transmission mode.
•If you install the handset and you don't want the fax to ring when the
other party sends to you, turn the ringer volume switch to OFF.
•If you have installed the optional Dual-line Upgrade Kit, when the fax
unit receives a document on Line 2 it will switch to automatic receiving
regardless of whether the Manual RX lamp is on or off. (➞2-56)
Messages Displayed When Receiving a Document
This is a summary of the messages you will see displayed while your fax
is receiving a document. While you are receiving a document, informa-
tion about the document and other party is displayed.
Receiving a transmission
12/31/1999 FRI 23:31
RECEIVE

Chapter 7 Receiving Documents 7-3
Receiving
Documents
LASER CLASS 3170 Series.
CFYA/YAH/YAN 120v US V1.0
Transaction number
Every document is assigned a transaction number as soon as it is re-
ceived.
12/31/1999 FRI 12:20
TX/RX NO. 5001
Documents received are assigned transaction numbers in ascending
order starting with the number 5001 up to 9999. After 9999 is reached,
numbering starts from 5001 again.
Other party’s fax number
The other party’s facsimile number is displayed only if it is registered on
the other party's fax.
12/31/1999 FRI 11:34
123 4567
Other party’s name
According to the type of machine the other party is using to send the
document, you may also see the other party’s name displayed alternately
with the telephone number.
12/31/1999 FRI 11:34
CANON INC. K.SATO
ECM reception mode
12/31/1999 FRI 11:34
ECM RX P.001
If the other party’s fax supports ECM sending, your fax receives every
document in the error correction mode (ECM). (➞16-14)
Optional Dual-line transactions
If you have installed the Dual-line Upgrade Kit and both lines are in use
at the same time, press the search buttons to switch the display so you
can view either transaction in progress. (➞2-54)
TRANSACTION NUMBER

7-4 Receiving Documents Chapter 7
LASER CLASS 3170 Series.
CFYA/YAH/YAN 120v US V1.0
Successful reception
You will see these alternating messages displayed after a document is
successfully received.
12/31/1999 FRI 11:34
RECEPTION OK
12/31/1999 FRI 11:34
TX/RX NO. 5011
You can also confirm reception of a document by printing an Activity
Report or an Activity Management Report. (➞14-9)
Receive error messages
Here are few of the most common error messages.
The fax has run out of paper while printing or copying a document:
SUPPLY REC. PAPER
Open the paper cassette and load paper into the paper cassette. As soon
as you re-fill the paper cassette and close it, the remainder of the
document in the memory is printed. (➞2-31)
The toner cartridge has run out of toner while printing or copying a
document:
REPLACE CARTRIDGE
Open the printer cover and replace the toner cartridge. As soon as you
close the cover, the fax returns to standby and the remainder of the
document in the memory starts printing automatically. (➞15-17)
If you see any other error messages, note the message then look it up in
the error message table. (➞15-38)

Chapter 7 Receiving Documents 7-5
Receiving
Documents
LASER CLASS 3170 Series.
CFYA/YAH/YAN 120v US V1.0
Turning on and Adjusting the Auto Switch Time
If you have installed the optional handset or connected an extension
telephone to the fax machine, follow this procedure to set the ring time
before the fax switches automatically to the document receive mode
while in the manual receive mode. This allows more time for you to pick
up the handset and answer the telephone for voice communication
before the fax switches to the receive mode.
1. Open the RX SETTINGS menu.
Open all three of the One-touch Speed Dialing panels. Then press
Data Registration.
Data
Registration
REGISTRATION
1.DATA REGISTRATION
Set
Press Set.
DATA REGISTRATION
1.USER SETTINGS
Press the search buttons until you see the display below.
DATA REGISTRATION
4.RX SETTINGS
Set
Press Set.
RX SETTINGS
1.ECM RX
2. Open the MAN/AUTO SWITCH menu.
Press the search button until you see the display below.
RX SETTINGS
2.MAN/AUTO SWITCH

7-6 Receiving Documents Chapter 7
LASER CLASS 3170 Series.
CFYA/YAH/YAN 120v US V1.0
Set
Press Set.
MAN/AUTO SWITCH
OFF
Press the search buttons until you see the display below.
MAN/AUTO SWITCH
ON
Set
Press Set.
F/T RING TIME
15SEC
3. Set the amount of time the fax waits before automatically switch-
ing to the document receive mode.
1
4
7
2
5
8
0
3
6
9
ABC
GHI
PRS
JKL
TUV
OPER
MNO
WXY
DEF
Tone
SYMBOLS
Use the buttons on the numeric keypad to enter a number for the
time (01 to 99) in seconds.
-if not-
Press the search buttons to increase or decrease the number
setting.
Set
Press Set.
4.
Stop
Press Stop to return to standby.
5.
Manual RX
Press Manual RX to put the fax in the manual receive mode
whenever you want to take advantage of the MAN/AUTO
SWITCH feature. (➞16-14)

Chapter 7 Receiving Documents 7-7
Receiving
Documents
LASER CLASS 3170 Series.
CFYA/YAH/YAN 120v US V1.0
Receiving Documents Manually with the
Optional Handset
When you use manual receiving, this means you can monitor all incom-
ing calls yourself by picking up the handset every time the fax rings. If
you pick up the handset and determine the call is from another person,
start your conversation. If you hear a slow beep tone, this means the call
is a fax transmission. To receive the document, just press Start/Scan and
then hang up the handset.
The receiving speed is 14400 bps or less when receiving manually.
Receiving a Document Manually at the Fax
Follow this procedure to receive a document manually at the fax.
•Before you can use this feature, you must install the optional handset
kit or a regular telephone. (➞2-38) Make sure the document is not set
on the ADF.
•If you have installed the optional Dual-line Upgrade Kit, when the fax
unit receives a document on Line 2 it will switch to automatic receiving
regardless of whether the Manual RX lamp is on or off. (➞2-56)
1.
Manual RX
Press Manual RX to set the fax in the manual receive mode. The
Manual RX indicator should be on.
2. Every time you hear the telephone ring, pick up the handset.
If you hear someone on the line, you can talk.
-if not-
If you hear a slow-beep tone, this means another fax is trying to
send you a document.

7-8 Receiving Documents Chapter 7
LASER CLASS 3170 Series.
CFYA/YAH/YAN 120v US V1.0
3.
Start / Scan
Press Start/Scan to start receiving the document. Then hang up the
handset by placing it back in the handset cradle. The fax will start
to receive the document.
The fax will make a beeping sound if the handset is not com-
pletely on its handset cradle. This is called the offhook alarm. The
offhook alarm can be turned off. (➞16-6)
Receiving a Document Manually with an Extension
Telephone
You can connect one extension telephone to the facsimile unit. (➞2-40)
When the telephone rings with the fax in the manual receive mode, you
can use the extension telephone to start receiving the document without
walking over to the fax machine. This is called remote receiving.
1. Make sure the extension telephone is connected properly. (➞2-40)
2.
Manual RX
Check the operation panel and make sure the fax is in the manual
receive mode. The Manual RX indicator should be on. If it is off,
press Manual RX to turn on the indicator and switch the fax into the
manual receive mode.
3. When the connected extension phone rings, pick up the handset.
If you hear someone on the line, you can start talking to the other
party.
-if not-
If you hear a slow beep, dial 25 on the extension telephone and
hang up to start receiving the document.
You can change the number for the remote receiving ID (00 to 99) or turn
the feature off. (➞7-9)

Chapter 7 Receiving Documents 7-9
Receiving
Documents
LASER CLASS 3170 Series.
CFYA/YAH/YAN 120v US V1.0
Changing the Remote Receive ID
Follow this procedure to change the remote receive ID.
1. Open the RX SETTINGS menu.
Open all three of the One-touch Speed Dialing panels. Then press
Data Registration.
Data
Registration
REGISTRATION
1.DATA REGISTRATION
Set
Press Set.
DATA REGISTRATION
1.USER SETTINGS
Press the search buttons until you see the display below.
DATA REGISTRATION
4.RX SETTINGS
Set
Press Set.
RX SETTINGS
1.ECM RX
2.
Press the search buttons until you see the display below.
RX SETTINGS
3.REMOTE RX
3.
Set
Press Set.
REMOTE RX
ON
If OFF is displayed, press the search buttons until you see ON.

7-10 Receiving Documents Chapter 7
LASER CLASS 3170 Series.
CFYA/YAH/YAN 120v US V1.0
4.
Set
Press Set.
REMOTE RX ID
25
1
4
7
2
5
8
0
3
6
9
ABC
GHI
PRS
JKL
TUV
OPER
MNO
WXY
DEF
Tone
SYMBOLS
Use the buttons on the numeric keypad to enter a new number (00
to 99) for the ID.
-if not-
Press the search buttons to increase or decrease the number.
Set
Then press Set.
To turn off remote receiving
Press the search buttons in step 3 until you see the display below.
REMOTE RX
OFF
Set
Press Set.
5.
Stop
Press Stop to return to standby.

Chapter 7 Receiving Documents 7-11
Receiving
Documents
LASER CLASS 3170 Series.
CFYA/YAH/YAN 120v US V1.0
Canceling Receiving a Document
To Cancel Receiving on a Single-Line
Follow this procedure to cancel receiving a document.
1. Visually check the display to confirm that a document is being
received.
12/31/1999 FRI 12:20
RECEIVE 5012
2.
Stop
To cancel the reception, press Stop.
The following message is displayed:
CANCEL DURING TX/RX?
YES=(*)NO=(#)
3.
or Press * to cancel receiving the document or press # to let receiving
continue. After you press * an alarm sounds, document reception
is canceled, and the following messages are displayed.
12/31/1999 FRI 12:25
STOP KEY PRESSED
12/31/1999 FRI 12:25
TX/RX NO. 5012
If the receive report feature is on or set to PRINT ERROR ONLY,
an RX REPORT also prints. (➞16-8)
PRINTING REPORT

7-12 Receiving Documents Chapter 7
LASER CLASS 3170 Series.
CFYA/YAH/YAN 120v US V1.0
12/31/1999 12:50 FAX 833 4423 WORLD ESTATE,INC. 001
*********************
***
RX REPORT
***
*********************
INCOMPLETE RECEPTION
TX/RX NO 5005
CONNECTION TEL 1 213 978 3314
CONNECTION ID BELZER,INC.
ST. TIME 12/31 12:49
USAGE T 00'20
PGS. 0
RESULT NG STOP
Then the fax returns to standby.
To Cancel Receiving on a Dual-Line
If you have installed the Dual-line Upgrade Kit and both lines are in use
at the same time and you want to select a transmission which you want
to cancel, follow this procedure.
1.
Press the search buttons to view the displays for each transaction.
12/31/1999 FRI 12:20
RECEIVE
12/31/1999 FRI 12:20
RECEIVE
If you are using direct sending, you cannot change the line.
2.
Stop
Press Stop.
CANCEL DURING TX/RX?
YES=(*)NO=(#)

Chapter 7 Receiving Documents 7-13
Receiving
Documents
LASER CLASS 3170 Series.
CFYA/YAH/YAN 120v US V1.0
3.
or Press * to cancel receiving the document or press # if you change
your mind and do not want to cancel. After you press * an alarm
sounds, document reception is canceled, and the following
messages are displayed.
12/31/1999 FRI 12:21
STOP KEY PRESSED
12/31/1999 FRI 12:21
RECEIVE 5012
If the receive report feature is on or set to PRINT ERROR ONLY,
an RX REPORT also prints. (➞16-8)
PRINTING REPORT
Transferring Documents
The transfer mode tells the fax to receive documents and then transfer
them automatically to a fax at your home or at another work site. The
day and time for the fax unit to switch to the transfer mode can be preset.
This feature is especially convenient for receiving important documents
coming from countries overseas several time zones removed from your
own.
Before You Set Up Document Transfer
Note these important points before you create a transfer setup file:
❏You can create only one transfer setup file.
❏In order for the fax unit to transfer documents to a destination you
must enter the destination telephone number of the fax unit with a
speed dialing button. This means the destination fax unit must be
registered on the fax for a One-touch Speed Dialing button or a
Coded Speed Dialing code. (➞4-6, 4-15)
❏You can set the fax to transfer documents only from selected origina-
tors. In order to select an originator, you have to register the tele-
phone number of the originator’s fax unit on your fax unit for a One-
touch Speed Dialing button or a three-digit Coded Speed Dialing
code. (➞4-6, 4-15)

7-14 Receiving Documents Chapter 7
LASER CLASS 3170 Series.
CFYA/YAH/YAN 120v US V1.0
Setting Up the Fax for Document Transfer
Follow the procedure below to create a file for switching the fax auto-
matically into the transfer mode.
1. Open the TRANSFER menu.
Open all three of the One-touch Speed Dialing panels. Then press
Data Registration.
Data
Registration
REGISTRATION
1.DATA REGISTRATION
Set
Press Set.
DATA REGISTRATION
1.USER SETTINGS
Press the search buttons until you see the display below.
DATA REGISTRATION
6.FILE SETTINGS
Set
Press Set.
FILE SETTINGS
1.CONFID. MAILBOX
Press the search buttons until you see the display below.
FILE SETTINGS
6.TRANSFER
Set
Press Set.
TRANSFER
1.SETUP FILE

Chapter 7 Receiving Documents 7-15
Receiving
Documents
LASER CLASS 3170 Series.
CFYA/YAH/YAN 120v US V1.0
2.
Set
Press Set. Then press the search buttons to scroll the display so
you can see each setting.
SETUP FILE
1.FILE NAME
SETUP FILE
6.PRINT RX DOC.
3.
Set
Press Set then follow the summary in the table below to perform
the settings.
4.
Stop
Press Stop to return to standby.
Transfer Setup Summary
The default settings, shown in bold below, remain in effect unless
you change them.
1.FILE NAME Enter a file name up to 24 characters long.
2.
SELECT LOCATIONS
Select the numbers of the fax machines where you want
documents transferred.
TEL = Close the One-touch Speed Dialing panels
and press a One-touch Speed Dialing button
or press the Coded Dial button followed by a
three-digit code for the Coded Speed Dialing
number to enter the number of the fax
machine where you want documents trans-
ferred. The telephone number of the destination
fax must be registered for One-touch or Coded
Speed Dialing on your fax.
3.PASSWORD 0000-9999
Enter a four-digit number (0000-9999) to protect the transfer
file settings. Use of a password is recommended. This operation
password protects the transfer file from unauthorized access
to your settings. You will also need to enter this password
when you put the fax in the document transfer mode.

7-16 Receiving Documents Chapter 7
LASER CLASS 3170 Series.
CFYA/YAH/YAN 120v US V1.0
Transfer Setup Summary (Cont'd)
4.SELECT ORIG UNIT Allows you to set the fax to receive and relay documents
only from originator fax units that you designate.
OFF All fax transmissions are received and
transferred.
ON The fax machine receives and transfers
transmissions only from fax units that you
designate by fax telephone number.
TEL = Press the One-touch Speed Dialing button or
press the Coded Dial button followed by the
three-digit code to designate the originator
fax machines for receive and transfer. The
telephone number of the originator fax must be
registered for One-touch or Coded Speed Dialing
on your fax.
5.TIME SETUP* Sets the time to move the fax into and out of the transfer
mode. If you do not set the timer, you can still switch the fax
into the transfer mode manually.
1.START TIME Set a time to move the fax automatically into the transfer
mode.
EVERY DAY :Sets the fax to move into the transfer mode
every day. You can set up to 5 starting times
for every day of the week.
SELECT DAYS 1.SUN to 7.SAT Sets the fax to move into the transfer mode
only on selected days of the week.
:You can set up to 5 starting times for the
selected days.
2.END TIME Sets the time for the fax to leave the transfer mode and
return to the normal mode.
EVERY DAY :Sets the fax to move out of the transfer mode
every day. You can set up to 5 end times for
every day of the week.
SELECT DAYS 1.SUN to 7.SAT Sets the fax to move out of the transfer mode
:on selected days of the week. You can set up
to 5 end times for the selected days.
*The following settings are valid: You can set EVERY DAY for the start time and then use SELECT DAYS to set end times.
You can also set SELECT DAYS for start times and then use the EVERY DAY setting for the end time. However, you cannot
set both EVERY DAY and SELECT DAYS for the start time or end time.

Chapter 7 Receiving Documents 7-17
Receiving
Documents
LASER CLASS 3170 Series.
CFYA/YAH/YAN 120v US V1.0
Transfer Setup Summary (Cont'd)
6.PRINT RX DOC. Sets the fax to print a copy of the transferred document at the
transfer unit.
OFF Received and transferred documents are not
printed at the transfer unit.
ON A copy of every document received and
transferred is printed at the transfer unit.
# OF RX COPIES
To enter the number of copies (01-99) use the
numeric keypad to enter the number or
press the search buttons to increase or
decrease the number and press Set.
Turning the Transfer Mode ON and OFF
You can use this procedure to move the fax into and out of the transfer
mode if the timer has not been set to switch the fax in and out of the
transfer mode automatically. If the timer has been set to move the fax
into and out of the transfer mode automatically, you can still use this
procedure to put the fax in the transfer mode before the timer switches
the fax into the transfer mode.
Turning Transfer Mode ON
Follow this procedure to turn the transfer mode on manually at any time.
1. Open all three of the One-touch Speed Dialing panels. Then press
Transfer.
Transfer
PASSWORD
_
2.
1
4
7
2
5
8
0
3
6
9
ABC
GHI
PRS
JKL
TUV
OPER
MNO
WXY
DEF
Tone
SYMBOLS
Set
If you have registered a password, use the buttons on the numeric
keypad to enter your four-digit password, then press Set.
TRANSFER
The fax is now in the transfer mode and will transfer documents
to the destinations you specified in the transfer setup file.

7-18 Receiving Documents Chapter 7
LASER CLASS 3170 Series.
CFYA/YAH/YAN 120v US V1.0
Turning Transfer Mode OFF
Follow this procedure to turn the transfer mode off manually at any time.
TRANSFER
1.
Transfer
Open all three of the One-touch Speed Dialing panels. Then press
Transfer.
PASSWORD
_
2.
1
4
7
2
5
8
0
3
6
9
ABC
GHI
PRS
JKL
TUV
OPER
MNO
WXY
DEF
Tone
SYMBOLS
Set
If you have registered a password, use the numeric keypad to
enter your four-digit password, then press Set.
12/31/1999 FRI 08:30
The fax is now in the standby mode and is ready for normal
operation.
Changing the Transfer Settings
Follow this procedure to change settings in the transfer setup file.
1. Open the TRANSFER menu. (➞7-14)
TRANSFER
1.SETUP FILE
2.
Press the search buttons until you see the display below.
TRANSFER
2.CHANGE DATA
3.
Set
Press Set.
CHANGE DATA
PASSWORD _
If you have not set the password, you can skip the next step.

8-2 Using the Memory Features Chapter 8
LASER CLASS 3170 Series.
CFYA/YAH/YAN 120v US V1.0
When the Fax Displays RECEIVED IN MEMORY
If paper or toner runs out while you are receiving a document or the fax
detects that the output tray is full, the fax will automatically store the
unprinted pages of the document in the memory and display these
messages:
RECEIVED IN MEMORY
RECEPTION OK
12/31/1999 FRI 12:30
TX/RX NO. 5033
1. Check the LCD display and the indicators on the left of the
display.
Rec. Paper
Add paper to the paper cassettes, if the Rec. Paper indicator is on
and if you see this message: (➞2-31)
SUPPLY REC. PAPER
Change
Cartridge
Replace the toner cartridge if the Change Cartridge indicator is on
and if you see this message: (➞15-17)
REPLACE CARTRIDGE
Pick up the printed paper on the output trays if you see this
message:
OUTPUT TRAY FULL
2. As soon as you close the re-filled paper cassette, close the printer
cover over the newly installed toner cartridge, or pick up the
printed pages on the tray, the pages stored in the memory are
printed.
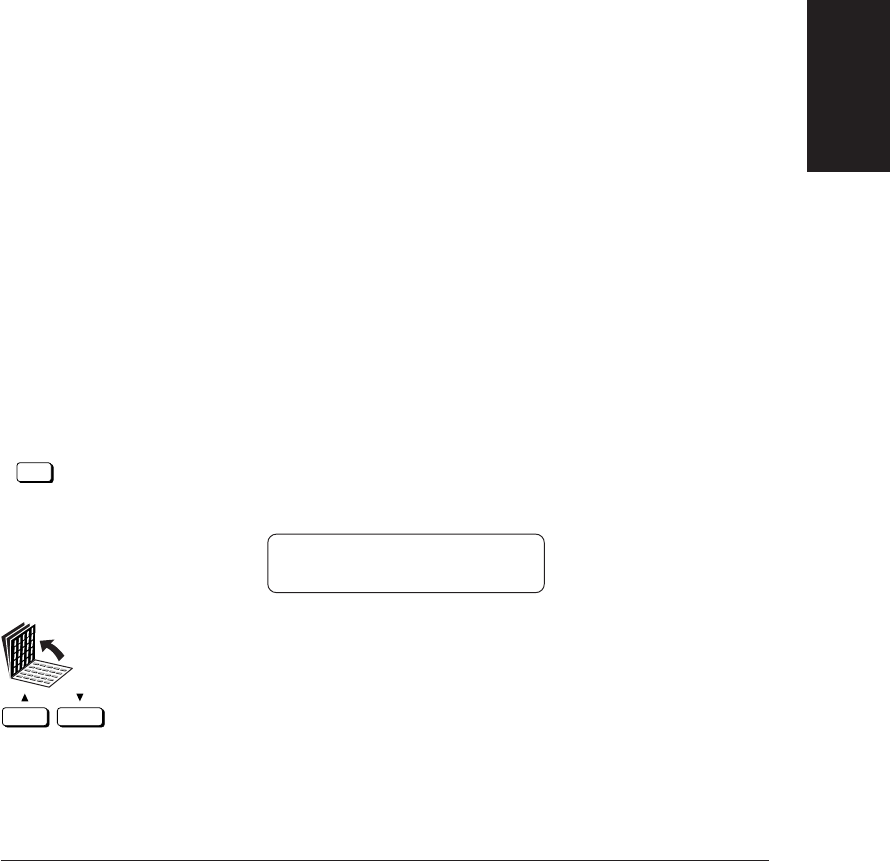
Chapter 8 Using the Memory Features 8-3
Using the
Memory Features
LASER CLASS 3170 Series.
CFYA/YAH/YAN 120v US V1.0
❏As each page is printed, it is deleted from the memory.
❏If the memory becomes full, you will not be able to receive the
remaining pages. Contact the other party and request to send
the document again.
❏The LASER CLASS® 3170/3170MS can store up to approxi-
mately 192 letter-size pages* in the memory. The LASER
CLASS® 3175 can store up to approximately 448 letter-size
pages* in the memory. With the optional memory kit, the
LASER CLASS® 3170 Series can receive up to approximately
704 pages in the memory. For details about the optional
memory kits, contact your authorized Canon dealer.
❏A memory backup function is provided to save the contents of
the memory for up to approximately 12 hours during a power
failure.
*Based on CCITT/ITU-T No. 1 Chart, Standard Mode.
Displaying the Transaction History
Follow this procedure to display results of transactions. This feature is
convenient when you want to check the status of a transaction without
printing an activity management report.
1.
Transaction
Press Transaction.
The most recent transmission is displayed first.
14:08 0015 TX OK
CANON CANADA
2. Open all three of the One-touch Speed Dialing panels.
Press the up and down arrows to view the list of transactions.
❏All transmissions are displayed first, then the receptions are
displayed.
8-4 Using the Memory Features Chapter 8
LASER CLASS 3170 Series.
CFYA/YAH/YAN 120v US V1.0
❏The transaction numbers for documents sent, numbered 0001
to 4999, are displayed then the transaction numbers for
documents received, numbered 5001 to 9999, are displayed.
The transaction numbers are stored in descending order, from
the larger numbers to the smaller numbers.
❏Note the following notations used to tell you about the status
of the transaction:
Notation Meaning
OK Document transaction has been completed.
NG Transaction failed.
HOLDNG Document is being held in the memory for delayed
sending.
TRANSM Document is currently being sent.
--:-- No time is displayed for a document currently being
sent or being stored in the memory for pending
transmission.
3.
Stop
Press Stop to return to standby.

Chapter 8 Using the Memory Features 8-5
Using the
Memory Features
LASER CLASS 3170 Series.
CFYA/YAH/YAN 120v US V1.0
Printing a Memory List
Follow this procedure to print a list of all documents currently stored in
the memory.
1. Open all three of the One-touch Speed Dialing panels. Then press
Memory Reference.
Memory
Reference
If no documents are currently stored in the memory, you will see
this message:
NO DOC. STORED
If documents are stored in the memory the first item on the
MEMORY REFERENCE menu is displayed.
MEMORY REFERENCE
1.DOC. MEMORY LIST
2.
Set
Press Set to start printing the memory list.
PRINTING REPORT
****************************
***
DOC. MEMORY LIST
***
****************************
12/31/1999 13:01 FAX 833 4423 WORLD ESTATE,INC. 001
TX/RX NO MODE CONNECTION TEL/ID PGS. SET TIME ST. TIME SENDER NAME
0011 TRANSMIT [*002]HUNT INVESTMENTS 2 12/31 13:00 23:30 R.LOUIS
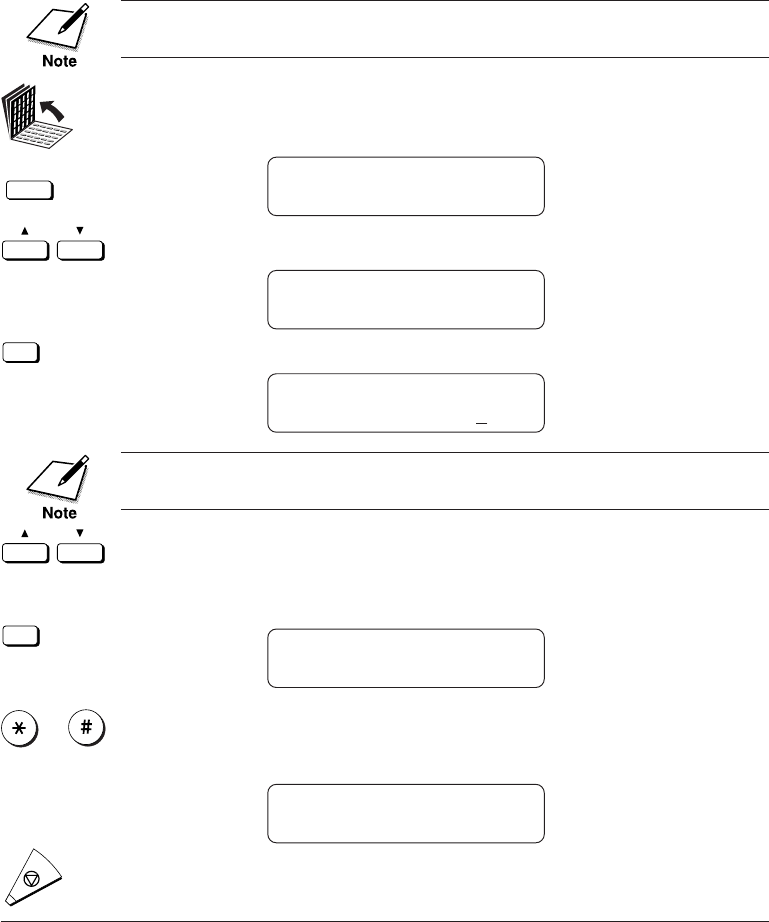
8-6 Using the Memory Features Chapter 8
LASER CLASS 3170 Series.
CFYA/YAH/YAN 120v US V1.0
Printing a Document in the Memory
Follow this procedure to print a document in the memory.
To select a document for printing, you must know its transaction num-
ber. You may want to print a memory list for reference. (➞8-5)
1. Open all three of the One-touch Speed Dialing panels. Then press
Memory Reference.
Memory
Reference
MEMORY REFERENCE
1.DOC. MEMORY LIST
2.
Press the search buttons until you see the display below.
MEMORY REFERENCE
2.PRINT DOCUMENT
3.
Set
Press Set to set up to print.
PRINT DOCUMENT
TX/RX NO. 0002
If you want to know the destination telephone number and time of the
document, press the cursor buttons (f e).
Press the search buttons to display the transaction number of the
document you want to print. Then press Set.
If you have set the operation password, enter the password here.
Set
PRINT 1ST PG ONLY?
YES=(*) NO=(#)
or Press * to print only the first page of a multi-page document, or
press # to print the entire document.
If you have set the operation password, enter the password here.
TX/RX NO. 0358
PRINTING P.001/002
4.
Stop
Press Stop to return to standby.

Chapter 8 Using the Memory Features 8-7
Using the
Memory Features
LASER CLASS 3170 Series.
CFYA/YAH/YAN 120v US V1.0
Sending a Document in Memory to a Different
Destination
Follow this procedure to select another destination for a document
waiting to be polled.
To select a document for sending, you must know its transaction number.
You may want to print a memory list for reference. (➞8-5)
1. Open all three of the One-touch Speed Dialing panels. Then press
Memory Reference.
Memory
Reference
MEMORY REFERENCE
1.DOC. MEMORY LIST
2.
Press the search buttons until you see the display below.
MEMORY REFERENCE
3.
RESEND DOCUMENT
3.
Set
Press Set then select the document you want to send.
RESEND DOCUMENT
TX/RX NO. 5010
If you want to know the destination telephone number and time of the
document, press the cursor buttons (f e).
4.
Press the search buttons to display the transaction number of the
document you want to send. Then press Set.
Set
RESEND DOCUMENT
PASSWORD _
If you have not set the operation password for the document
stored in memory, you can skip the next step.

8-8 Using the Memory Features Chapter 8
LASER CLASS 3170 Series.
CFYA/YAH/YAN 120v US V1.0
5.
1
4
7
2
5
8
0
3
6
9
ABC
GHI
PRS
JKL
TUV
OPER
MNO
WXY
DEF
Tone
SYMBOLS
Set
Enter the four-digit password and press Set.
RESEND DOCUMENT
SELECT LOCATIONS
TEL =
6. Dial the fax number.
1
4
7
2
5
8
0
3
6
9
ABC
GHI
PRS
JKL
TUV
OPER
MNO
WXY
DEF
Tone
SYMBOLS
Set
Use the buttons on the numeric keypad to dial the telephone
number and press Set.
-if not-
Use One-touch Speed Dialing, Coded Speed Dialing, or Group
Dialing to dial the number.
Set
Press Set.
RESEND DOCUMENT
SENDER’S NAME
SENDER’S NAME
CANON, INC.
7. Enter the sender’s name.
TTI Selector
Press TTI Selector and keep pressing it until the sender’s name you
want appears in the display. You can also use the search buttons to
scroll up and down the TTI list.
SENDER’S NAME
06 CANON: J.SMITH
Set
Press Set. The fax sends the document to the number you dialed.

8-10 Using the Memory Features Chapter 8
LASER CLASS 3170 Series.
CFYA/YAH/YAN 120v US V1.0
5. Press * to delete the selected document or press # to cancel the
deletion. After you press * the document is erased.
TX/RX NO. 0004
ERASING END
6.
Stop
Press Stop to return to standby.
Deleting a Document with the Memory Reference Button
1. Open all three of the One-touch Speed Dialing panels. Then press
Memory Reference.
Memory
Reference
MEMORY REFERENCE
1.DOC. MEMORY LIST
2.
Press the search buttons until you see the display below.
MEMORY REFERENCE
4.DELETE DOCUMENT
3.
Set
Press Set.
DELETE DOCUMENT
TX/RX NO. 0001
If you want to know the destination telephone number and time of the
document, press the cursor buttons (f e) before pressing Set. If the
transaction is displayed with a # mark, the document is being held in the
memory for re-dialing and sending.
4.
Press the search buttons to display the transaction number of the
document that you want to delete. Then press Set.
Set
DELETE DOCUMENT
PASSWORD _
If you have not set the operation password for the document
stored in memory, you can skip the next step.

Chapter 8 Using the Memory Features 8-11
Using the
Memory Features
LASER CLASS 3170 Series.
CFYA/YAH/YAN 120v US V1.0
5.
1
4
7
2
5
8
0
3
6
9
ABC
GHI
PRS
JKL
TUV
OPER
MNO
WXY
DEF
Tone
SYMBOLS
Set
Enter the four-digit password and press Set.
OK TO DELETE?
YES=(*) NO=(#)
6. Press * to delete the selected document or press # to cancel the
deletion. After you press *, the document is erased.
TX/RX NO. 0004
ERASING END
7.
Stop
Press Stop to return to standby.
Setting Up and Using a Memory Box
In this section we will show you how to set up a memory box and use it
to send and receive documents. A memory box is a location in the
memory you can create to store scanned or received documents for
printing or transmitting to other destinations. The main advantage to
using the memory box for sending and receiving is that you can handle
all transmissions with ITU-T passwords and subaddresses.
The ITU-T subaddress and password serve the same purpose as the bank
account number and a personal identification number on your bank
card. Just as you cannot complete a bank transaction without your
account number and your personal identification number, you cannot
complete a memory box facsimile transaction if the subaddress and
password do not match.
A subaddress or password can be up to 20 digits long and consists of
numbers, *, #, or spaces.

8-12 Using the Memory Features Chapter 8
LASER CLASS 3170 Series.
CFYA/YAH/YAN 120v US V1.0
Before You Create Memory Boxes
Before you set up a memory box, there are a few things you should know
about the other party’s fax machine to ensure efficient transactions.
You have to know how the other party is using the subaddress and
password:
❏If the other party has set a subaddress and password, you must
register both a subaddress and password for the memory box.
❏If the other party has set a subaddress only, then you must also
register a matching subaddress.
❏If the other party has set a password only, inform them that they
must register a subaddress, or a subaddress and password. Both fax
units must register an ITU-T subaddress.
For the most efficient use of the memory box, register the numbers of all
parties who will be receiving your documents or sending you documents
for a One-touch or Coded Speed Dialing number.
When You Create a Memory Box
This is a brief summary of what to do when you create or change settings
for a memory box.
Access settings SET BOX # 00
PASSWORD
Main settings 1. FILE NAME
2. PASSWORD
3. SUBADDRESS
4. TX PASSWORD
5. RX PASSWORD
Feature settings 6. RECEIVE 7. TRANSMIT 8. POLLING TX

Chapter 8 Using the Memory Features 8-13
Using the
Memory Features
LASER CLASS 3170 Series.
CFYA/YAH/YAN 120v US V1.0
Access Settings
SET BOX A two-digit code (00-99) you assign to the box to select it
when you need to scan documents into the box or to open it to view or
change the settings. The box number and file name appear in printed
reports for reference.
PASSWORD If you set a password when you create the memory box
(below 2.PASSWORD), you will have to enter the password to view or
change the rest of the settings afterwards.
Main Settings
1.FILE NAME A personal name you can assign to the memory box to
identify it in printed reports.
2.PASSWORD A four-digit password you assign to the memory box to
protect the settings from unauthorized access. You must also use this
password and the box number to print documents stored in the memory
box. Assigning a password is optional, but strongly recommended,
especially if you want to keep the memory box setup and the documents
you receive confidential.
3.SUBADDRESS This is the ITU-T subaddress.
4.TX PASSWORD This is your TX password. TX password is only for
polling sending. Your TX password must match the ITU-T password
with which the other party calls you. If they do not match the other party
will not receive your document.
5.RX PASSWORD This is your RX password. Your RX password must
match the ITU-T password assigned to documents that you receive. If the
passwords do not match, your fax will not receive the document.
TX PASSWORD
ITU-T PASSWORD
ITU-T PASSWORD
RX PASSWORD
Other party’s fax
LASER CLASS®
3170 Series
The main settings apply to all three features below, they being RECEIVE,
TRANSMIT, and POLLING TX.

Chapter 8 Using the Memory Features 8-15
Using the
Memory Features
LASER CLASS 3170 Series.
CFYA/YAH/YAN 120v US V1.0
Press the search buttons until you see the display below.
FILE SETTINGS
3.MEMORY BOX
Set
Press Set.
MEMORY BOX
1.SETUP FILE
2. Give the memory box a number.
Set
Press Set.
SETUP FILE
SET BOX # 00
1
4
7
2
5
8
0
3
6
9
ABC
GHI
PRS
JKL
TUV
OPER
MNO
WXY
DEF
Tone
SYMBOLS
Use the buttons on the numeric keypad to enter a two-digit code
for the memory box.
❏You can enter a number from 00 to 99 for the memory box
number.
You can also use the search buttons to change the number. Press
the down arrow to increase the number and the up arrow to
decrease the number.
SETUP FILE
SET BOX # 33
Set
Press Set.
3.
Press the search buttons to display the desired setting.
SETUP FILE
1.FILE NAME
SETUP FILE
8.POLLING TX

Chapter 8 Using the Memory Features 8-17
Using the
Memory Features
LASER CLASS 3170 Series.
CFYA/YAH/YAN 120v US V1.0
Memory Box Setup Summary (Cont'd)
5.RX PASSWORD 0-9, *, #, spaces (20 digits)
The ITU-T standard RX password for your memory
box. This password must match the ITU-T password
sent with a document to your fax in order for the
transaction to succeed. If your RX password does not
match the TX password sent with the document from
the other party’s fax, your fax will not receive the
document.
6.RECEIVE Determines whether or not the document is received
in the memory box and how it is received.
NO Documents are not received in the
memory box.
YES Documents are received in the memory
box and you can do some additional
settings to determine how they are
received. If selected, you can turn on
checking the originator, printing the
document, and printing method.
1.SELECT ORIG UNIT Determines whether your fax checks to make sure the
originator of the transmission is registered on your
fax. To be registered on your fax, the originator’s
telephone number must be registered for a One-touch
or Coded Speed Dialing button on your fax unit.
OFF Your fax receives an incoming document
even if the originator is not registered on
your fax.
ON Your fax will receive the document only
if the originator is registered for a One-
Touch or Coded Speed Dialing button
on your fax unit.
TEL = After you turn SELECT ORIG UNIT on,
press the appropriate One-touch Speed
Dialing button or press the Coded Dial
button followed by the appropriate
three-digit code to register the number
of the originator and press Set. In order
to register the originator’s telephone
number, the number must be registered for a
One-touch or Coded Speed Dialing button.

8-18 Using the Memory Features Chapter 8
LASER CLASS 3170 Series.
CFYA/YAH/YAN 120v US V1.0
2.PRINT RX DOC. Determines whether to print a received document.
ON Documents will be printed when
they are received in the memory
box and you can set how they will
be printed.
OFF Documents received in the
memory box are not printed.
1.PRINT METHOD If you turn on PRINT RX DOC., you can also set the
print method.
AUTO A document will print automati-
cally as soon as it is received in the
memory box.
MAN. You will have to manually print
documents received in the memory
box.
2.# OF RX COPIES 01 COPIES If you turn on PRINT RX DOC., use
this setting to specify the number of
copies you want to print (01-99).
7.TRANSMIT Determines whether to transmit documents from the
memory box and how they are to be transmitted.
NO Documents are not transmitted
from the memory box.
YES Documents are transmitted from
the memory box.
1.SELECT LOCATIONS Allows you to select the destinations of the docu-
ments to be transmitted from the memory box. Press
the appropriate One-touch button or press the Coded
Dial button followed by the appropriate three-digit
code to enter numbers for dialing.
Memory Box Setup Summary (Cont'd)

8-20 Using the Memory Features Chapter 8
LASER CLASS 3170 Series.
CFYA/YAH/YAN 120v US V1.0
3.TX START TIME Allows you to set the timer for the transmission of a
document received or scanned into the memory.
EVERYDAY Enter the time (in 24-hour format) that you want to
transmit the documents from the memory box. You
can set up to 5 times to transmit documents every day.
SELECT DAYS Select one or more days of the week to transmit
documents from the memory box. Enter the time (in
24-hour format) that you want to transmit the
documents from the memory box. You can set up to 5
times for each day you select.
8.POLLING TX Determines whether the memory box is to be used as
a polling box. A polling box holds a document in the
memory so that the fax is polled by another fax unit
requesting that the document be sent.
NO The memory box is not set up as a
polling box. The documents
received or scanned into the
memory box are not sent in re-
sponse to a polling request from
another fax unit.
YES The memory box is set up as a
polling box. The documents
received or scanned into the
memory box are sent in response to
a polling request from another fax
unit.
1.ERASE AFTER TX Determines whether the document is erased from the
memory after it is sent in response to a polling
request.
ON The document is erased after it is
sent. The memory box is polled
and sends the document only once.
OFF The document is not erased after it
is sent. The memory box can be
polled to send the document
indefinitely.
Memory Box Setup Summary (Cont'd)

Chapter 8 Using the Memory Features 8-21
Using the
Memory Features
LASER CLASS 3170 Series.
CFYA/YAH/YAN 120v US V1.0
2.TX DOCUMENT This setting determines which document is to be sent
when the memory box is polled: (1) only documents
received in the memory box or (2) only documents
scanned into the memory box.
1.RECEIVED Determines whether to transmit the documents
DOCUMENT received in the memory box when the memory box is
polled.
TRANSMIT When the memory box is polled,
documents received from other
fax units and stored into the
memory box are sent.
NOT TRANSMIT When the memory box is polled,
documents received from other
fax units and stored into the
memory box are not sent.
2.SCAN Determines whether to transmit the documents
DOCUMENT scanned into the memory box when the memory box
is polled.
TRANSMIT When the memory box is polled,
documents scanned into the
memory box are sent.
NOT TRANSMIT When the memory box is polled,
documents scanned into the
memory box are not sent.
Memory Box Setup Summary (Cont'd)

8-22 Using the Memory Features Chapter 8
LASER CLASS 3170 Series.
CFYA/YAH/YAN 120v US V1.0
Changing the Memory Box Settings
Follow this procedure to change the memory box settings.
1. Open the MEMORY BOX menu. (➞8-14)
MEMORY BOX
1.SETUP FILE
2.
Press the search buttons to display until you see the display
below.
MEMORY BOX
2.CHANGE DATA
3.
Set
Press Set.
CHANGE DATA
SET BOX # 00
4.
1
4
7
2
5
8
0
3
6
9
ABC
GHI
PRS
JKL
TUV
OPER
MNO
WXY
DEF
Tone
SYMBOLS
Set
Use the buttons on the numeric keypad to enter the number of the
box you want to change and press Set.
CHANGE DATA
PASSWORD _
If you have not set the operation password, you can skip the next
step.
5.
1
4
7
2
5
8
0
3
6
9
ABC
GHI
PRS
JKL
TUV
OPER
MNO
WXY
DEF
Tone
SYMBOLS
Set
Enter the four-digit password protecting the memory box settings
and press Set.
6.
Press the search buttons to display the setting you want to change.
CHANGE DATA
1.FILE NAME
CHANGE DATA
8.POLLING TX

Chapter 8 Using the Memory Features 8-23
Using the
Memory Features
LASER CLASS 3170 Series.
CFYA/YAH/YAN 120v US V1.0
7.
Set
With the setting you want to change on the display, press Set.
8. Follow the same procedures you used to set the initial settings or
change the defaults. (➞8-16)
If you want to change the operation password, first you will have to
enter the old password (it will not be displayed) and then enter the new
password (it will be displayed as you enter it).
9.
Stop
When you are finished making changes, press Stop to return to
standby.
Canceling a Memory Box
Follow this procedure to cancel a memory box.
1. Open the MEMORY BOX menu. (➞8-14)
MEMORY BOX
1.SETUP FILE
2.
Press the search buttons until you see the display below.
MEMORY BOX
3.DELETE FILE
3.
Set
Press Set.
DELETE FILE
SET BOX # 00
4.
1
4
7
2
5
8
0
3
6
9
ABC
GHI
PRS
JKL
TUV
OPER
MNO
WXY
DEF
Tone
SYMBOLS
Set
Enter the number of the box you want to delete and press Set.
DELETE FILE
PASSWORD _
If you have not set the operation password, you can skip the next
step.

8-24 Using the Memory Features Chapter 8
LASER CLASS 3170 Series.
CFYA/YAH/YAN 120v US V1.0
5.
1
4
7
2
5
8
0
3
6
9
ABC
GHI
PRS
JKL
TUV
OPER
MNO
WXY
DEF
Tone
SYMBOLS
Set
Enter the four-digit password protecting the memory box settings
and press Set.
DELETE FILE
FILE DELETED
6.
Stop
Press Stop to return to standby.
Sending a Document Stored in the Memory Box
Follow this procedure to store a document in the memory box for
sending according to the memory box setup. (➞8-14)
1. Set the document on the fax. (➞6-3)
Set the document resolution, contrast, and document type. (➞6-4)
You can also select a sender’s name with the TTI Selector. (➞6-6)
2. Open all three of the One-touch Speed Dialing panels. Then press
Memory Box.
Memory Box
MEMORY BOX
1.MEMORY BOX TX
3.
Set
Press Set.
SUBADDRESS
4.
1
4
7
2
5
8
0
3
6
9
ABC
GHI
PRS
JKL
TUV
OPER
MNO
WXY
DEF
Tone
SYMBOLS
Set
Use the buttons on the numeric keypad to enter the ITU-T
subaddress of the memory box. Then press Set.
MEMORY BOX TX
SENDER’S NAME
SENDER’S NAME
CANON, INC.

Chapter 8 Using the Memory Features 8-25
Using the
Memory Features
LASER CLASS 3170 Series.
CFYA/YAH/YAN 120v US V1.0
5.
TTI Selector
Press TTI Selector until you see the sender name you want to use.
You can also use the search buttons to scroll up and down the TTI
list.
SENDER’S NAME
01 R.LOUIS
6.
Set
Press Set.
TRANSMIT 0037
SCANNING DOC. P.001
The fax begins to scan the document.
The document is stored in the memory box and will be sent
according to the memory box settings. (➞8-14)
Printing a Document Received in a Memory Box
Follow this procedure to print a document that has been received and
stored in a memory box according to the memory box setup. (➞8-14)
You can use this procedure to print a document from the memory box
only after you have set PRINT RX DOC. to ON and set PRINT METHOD
to MAN. under the RECEIVE item of the memory box setup.
After the fax receives a document in a memory box, the fax displays a
message and prints a report, unless this feature has been turned off. (➞16-8)
PRINTING REPORT
12/31/1999 13:29 FAX 833 4423 WORLD ESTATE,INC. 001
*****************************
***
MEMORY BOX REPORT
***
*****************************
BOX # #66
FILE NAME R.LOUIS
TX/RX NO 5006
CONNECTION TEL 1 213 978 3314
SUBADDRESS 0000
CONNECTION ID BELZER,INC.
ST. TIME 12/31 13:29
USAGE T 00'18
PGS. 1
RESULT OK

8-26 Using the Memory Features Chapter 8
LASER CLASS 3170 Series.
CFYA/YAH/YAN 120v US V1.0
A message will alternate with the standby display (date and time) until
you print the document received in the memory box.
RECEIVED IN MEM. BOX
1. Open all three of the One-touch Speed Dialing panels. Then press
Memory Box.
MEMORY BOX
1.MEMORY BOX TX
Memory Box
2.
Press the search buttons until you see the display below.
MEMORY BOX
2.MEMORY BOX RX
3.
Set
Press Set.
SUBADDRESS
4.
1
4
7
2
5
8
0
3
6
9
ABC
GHI
PRS
JKL
TUV
OPER
MNO
WXY
DEF
Tone
SYMBOLS
Set
Use the buttons on the numeric keypad to enter the ITU-T
subaddress of the memory box holding the document you want to
print. Then press Set.
MEMORY BOX RX
PASSWORD _
If you have not set the operation password, the documents starts
printing.
5.
1
4
7
2
5
8
0
3
6
9
ABC
GHI
PRS
JKL
TUV
OPER
MNO
WXY
DEF
Tone
SYMBOLS
Set
Enter the four-digit operation password that protects the memory
box setup and press Set.
After you enter the operation password, the document starts
printing.
MEMORY BOX RX
PR INTING P.001/002

Chapter 8 Using the Memory Features 8-27
Using the
Memory Features
LASER CLASS 3170 Series.
CFYA/YAH/YAN 120v US V1.0
What Happens to Memory after a Power Failure
If power to the fax is lost due to a power failure, or if the fax is acciden-
tally unplugged, a built-in battery keeps a trickle of current supplied to
the memory so all the documents currently stored in the memory can be
saved for up to approximately 12 hours.
How Your Registered Data Is Protected
This is what happens when the fax is disconnected:
❏The backup battery takes over and keeps a trickle of current flowing
to the memory in order to preserve all the documents in the memory
waiting to be sent or printed.
❏However, if the fax is left off for longer than approximately 12 hours,
all documents in the fax memory will be lost after the battery runs
down, and as soon as power is restored to the fax a Memory Clear
Report is printed that shows you what documents were erased.
(➞14-20)
❏Because your user data and speed dialing settings are constantly
refreshed by a lithium battery, they will not be lost as a result of a
power failure, even if power to the fax is cut off for longer than
approximately 12 hours.
❏When many documents are stored in the fax memory, the fax may
need about 2 minutes to recover after power is restored to the fax.
About the Backup Battery
Here is a list of things to keep in mind about the backup battery.
❏The backup battery that preserves document data in the memory for
up to 12 hours in case of a power loss is a rechargeable battery, and it
requires about 1 day to reach full charge after power to the fax unit is
restored.
❏Frequently disconnecting the fax unit from the power source short-
ens the service life of the battery.

8-28 Using the Memory Features Chapter 8
LASER CLASS 3170 Series.
CFYA/YAH/YAN 120v US V1.0
❏To avoid shortening the backup battery service life, use the fax
within a temperature range of 50°F to 90.5°F (10°C to 32.5°C). If the
fax is used in an environment that is too hot or too cold, this can
shorten the service life of the backup battery.
❏If the backup battery cannot preserve data even after you plug in the
power source and the fax is left on for 1 day (24 hours), call for
service and have the backup battery replaced.

Chapter 9 Using a Relay Network 9-1
Using a Relay
Network
LASER CLASS 3170 Series.
CFYA/YAH/YAN 120v US V1.0
Chapter 9
Using a Relay Network
This chapter shows you how to relay documents and how to have
documents relayed for you.
You can set up your fax unit as a relay station to relay documents that
you receive, or you can send documents to another fax and have the
documents relayed for you.
❏What is Relay Broadcasting? ................................................................... 9-2
❏Setting Up and Using a Standard Relay Unit ....................................... 9-3
•Setting Your Fax as a Relay Unit ....................................................... 9-4
•Changing the Relay Broadcast Settings ........................................... 9-7
•Deleting the Relay Group................................................................... 9-9
❏Sending a Document to a Relay Unit for Relay Broadcasting .......... 9-10
•Sending a Document to a Relay Unit with Speed Dialing .......... 9-12
•Sending with the Relay Broadcast Button ..................................... 9-12
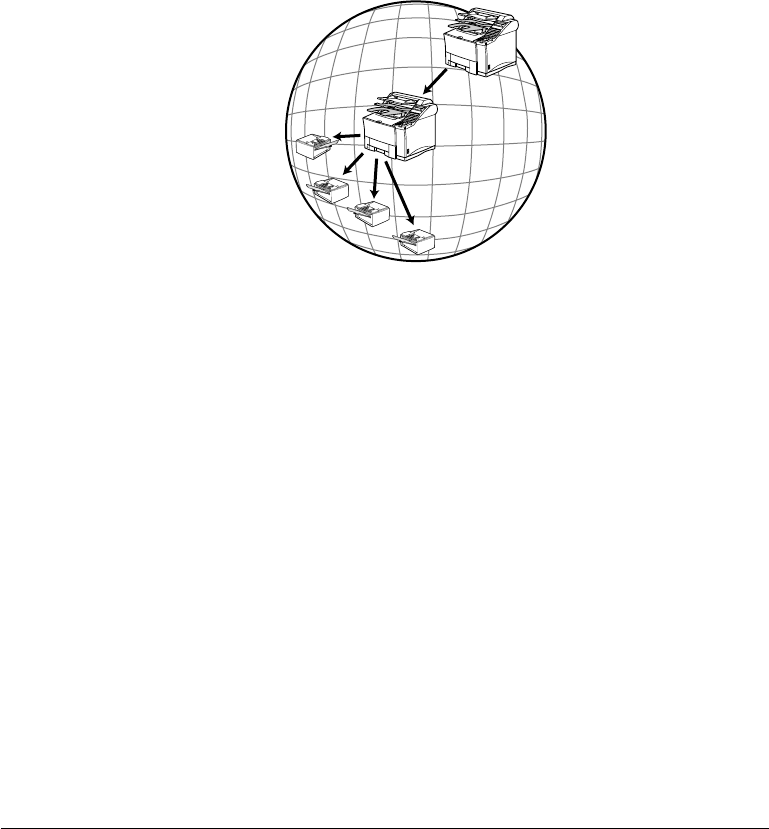
9-2 Using a Relay Network Chapter 9
LASER CLASS 3170 Series.
CFYA/YAH/YAN 120v US V1.0
What is Relay Broadcasting?
In a relay broadcast, the originator fax unit sends a document over a long
distance to another fax called the relay unit. After the relay unit receives
your document, it automatically sends the document to several other fax
units in the local area. In this way you can send a document to several
fax units in the same locality with only one long distance transmission.
Originator
Relay Unit
In a relay network your fax unit can function as both an originator and a
relay unit. When your fax unit is the originator, it sends a document to a
relay unit from which the document is relayed to several destination in
the same locality. When your fax unit is the relay unit it receives a docu-
ment from another party and relays it to one or several other faxes in
your own locality.

Chapter 9 Using a Relay Network 9-3
Using a Relay
Network
LASER CLASS 3170 Series.
CFYA/YAH/YAN 120v US V1.0
Setting Up and Using a Standard Relay Unit
In this section we will show you how to set up and manage a relay
network with the standard relay features provided on the fax.
Before you set up your fax to relay documents from the originator fax
unit, confirm the following points:
❏Make sure your unit telephone number is correctly registered.
(➞3-13, 14-5)
❏Make sure the telephone number of the originator fax unit is regis-
tered on your fax for a speed dialing button. (➞14-2)
❏After your fax receives the document from the originators it will
relay the document to one or several destination units. Make sure the
telephone numbers of all the destination units are registered on your
unit for speed dialing buttons. (➞14-2)
❏Ask the originator if they would like to receive a report of successful
transmission after your fax relays the document.
❏Make sure the relay feature on your fax is turned on.
Follow the procedure in this section to set up your fax as a relay unit.
When your fax is the relay unit, it receives the document from the
originator and relays it to several other destinations.

9-4 Using a Relay Network Chapter 9
LASER CLASS 3170 Series.
CFYA/YAH/YAN 120v US V1.0
Setting Your Fax as a Relay Unit
Follow this procedure to set your fax to participate in a relay network as
a relay unit.
1. Open the RELAY TX GROUP menu.
Open all three of the One-touch Speed Dialing panels and press
Data Registration.
Data
Registration
REGISTRATION
1.DATA REGISTRATION
Set
Press Set.
DATA REGISTRATION
1.USER SETTINGS
Press the search buttons until you see the display below.
DATA REGISTRATION
6.FILE SETTINGS
Set
Press Set.
FILE SETTINGS
1.CONFID. MAILBOX
Press the search buttons until you see the display below.
FILE SETTINGS
2.RELAY TX GROUP
Set
Press Set.
RELAY TX GROUP
1.SETUP FILE

Chapter 9 Using a Relay Network 9-5
Using a Relay
Network
LASER CLASS 3170 Series.
CFYA/YAH/YAN 120v US V1.0
2. Give the relay group a number from 00 to 99.
Set
Press Set.
SETUP FILE
SET RLY TX GROUP# 00
1
4
7
2
5
8
0
3
6
9
ABC
GHI
PRS
JKL
TUV
OPER
MNO
WXY
DEF
Tone
SYMBOLS
Set
Use the buttons on the numeric keypad to enter the two-digit
relay group number and press Set.
SETUP FILE
1.GROUP DIAL NAME
Use the search buttons to display all the items in the menu.
Set
With the item displayed that you want to set, press Set. Then
follow the instructions in the table below to set up the relay group.
Stop
When you are finished, press Stop.
Relay Group Setup Summary
The default settings, shown in bold, remain in effect unless you change
them.
1.GROUP DIAL NAME Name (24 characters)
Enter a name for the relay group. The name can be up to 24-
characters long. Then press Set.
2.PASSWORD 0000-9999
A four-digit password protects the relay box settings you are
about to set up. After you set a password, you will have to enter it
every time you want to view or change these settings. Enter a
four-digit password and press Set.
3.SUBADDRESS 20 digits (* # spaces)
This is the ITU-T subaddress. Enter a number up to 20 digits long
(it can include spaces and the symbols * and #).

9-6 Using a Relay Network Chapter 9
LASER CLASS 3170 Series.
CFYA/YAH/YAN 120v US V1.0
4.RX PASSWORD 20 digits (* # spaces)
When your fax is the relay unit, this ITU-T password must match
the ITU-T password of the document sent from the originator in
order for your fax to receive the document. Otherwise, your fax
will not receive the document. Enter a number up to 20 digits long
(it can include spaces and the symbols * and #).
5.SELECT ORIG UNIT When your fax is the relay unit, this feature forces your fax to
check the identity of the originator before it receives the document
for relay to other units.
ON When your fax receives a document for relay,
it will check the identity of the originator
before it receives the document. In order for
this feature to perform correctly, the telephone
number of the originator unit must be registered
correctly for speed dialing on your fax unit.
TEL = Press the One-touch Speed Dialing button or
press the Coded Dial button followed by the
three-digit code where the number for the
originator fax is registered and press Set.
OFF Your fax will receive a document for relay
without checking the identity of the
originator.
6.PRINT RX DOC. When your fax is the relay unit, this setting determines if your fax
unit prints a copy of every document that it relays.
OFF Your fax does not print a copy of every
document it relays to other fax units.
ON Your fax prints a copy of every document it
relays to other fax units.
# OF RX COPIES
01 COPIES If you turn on PRINT RX
DOC., use this setting to
specify the number of copies
you want to print (01-99).
7.SELECT LOCATIONS
This item allows you to select the fax units to receive the docu-
ment your unit relays. The number of fax units to receive the document
must be registered for One-touch or Coded Speed Dialing. You cannot
enter a number with regular dialing.
TEL = Close the One-touch Speed Dialing panels and
press the speed dialing buttons where the
numbers of the fax units to receive the relay
broadcast are registered then press Set. You
can select up to 200 destinations.
Relay Group Setup Summary (Cont'd)

Chapter 9 Using a Relay Network 9-7
Using a Relay
Network
LASER CLASS 3170 Series.
CFYA/YAH/YAN 120v US V1.0
8.TX REPORT This feature determines if your fax unit returns a relay transmis-
sion report to the originator after your fax unit receives and relays
a document.
TRANSMIT After your fax unit relays a document, it sends
a transmission report back to the originator. In
order for the feature to perform correctly, the
originator’s unit telephone number must be
registered on your fax for One-touch or Coded
Speed Dialing.
NOT No relay transmission report is sent to the
TRANSMIT originator after a document has been relayed.
9.TX START TIME You can set your fax to hold documents and then relay them at a
preset time. If you do not set this item, all documents received for
relay are relayed immediately. If you want to use this feature,
press Set.
Use the buttons on the numeric keypad to enter the time in 24-
hour format. You can set up to 5 times to relay documents within a
24-hour period every day.
10.RELAY B’CAST This feature switches relay broadcasting for this group on and off
without altering any of the other settings.
ON Your fax unit receives and relays a document
set for relay broadcasting.
OFF Your fax unit will not receive and relay a
document set for relay broadcasting.
Changing the Relay Broadcast Settings
Follow this procedure to change the relay broadcast settings.
❏If you want to add to the list of fax units to receive relay broadcasts
from your fax unit, make sure that the numbers you want to add are
registered for One-touch or Coded Speed Dialing.
❏If you want to set your fax unit to confirm the identity of the origina-
tor before it receives a document for relay broadcasting, make sure
the telephone number of the originator’s fax unit is registered for
One-touch or Coded Speed Dialing on your fax unit.
Relay Group Setup Summary (Cont'd)
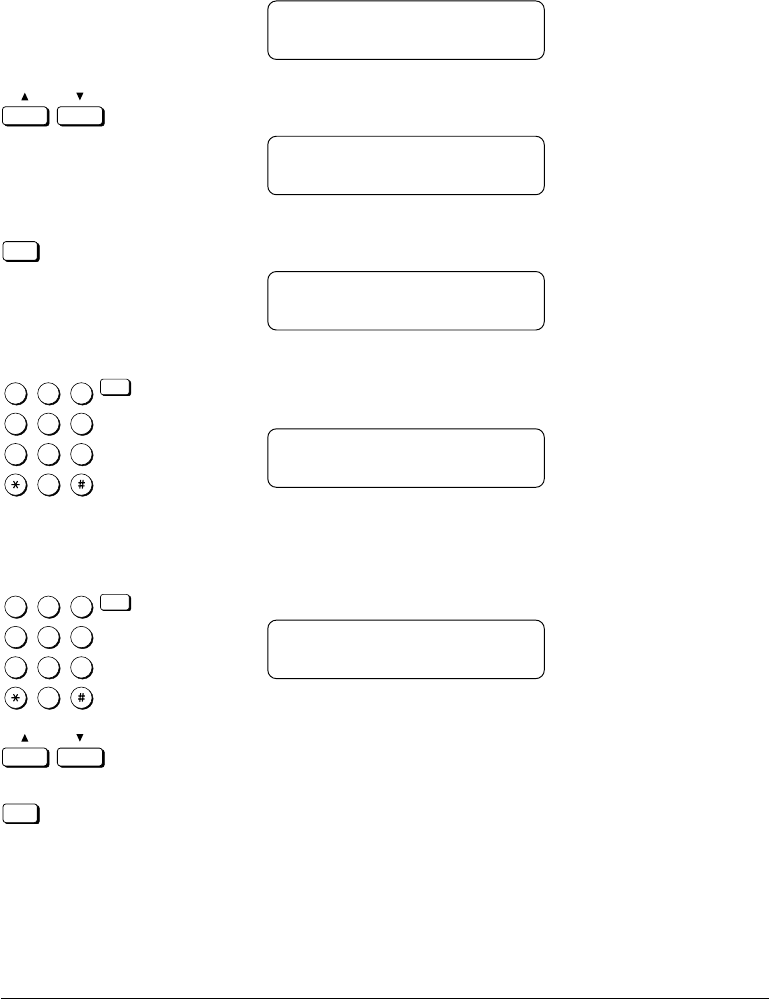
9-8 Using a Relay Network Chapter 9
LASER CLASS 3170 Series.
CFYA/YAH/YAN 120v US V1.0
1. Open the RELAY TX GROUP menu. (➞9-4)
RELAY TX GROUP
1.SETUP FILE
2.
Press the search buttons until you see the display below.
RELAY TX GROUP
2.CHANGE DATA
3.
Set
Press Set.
CHANGE DATA
SET RLY TX GROUP# 00
4.
1
4
7
2
5
8
0
3
6
9
ABC
GHI
PRS
JKL
TUV
OPER
MNO
WXY
DEF
Tone
SYMBOLS
Set
Use the buttons on the numeric keypad to enter the group num-
ber. Then press Set.
CHANGE DATA
PASSWORD _
If you have not set the operation password, you can skip the next
step.
5.
1
4
7
2
5
8
0
3
6
9
ABC
GHI
PRS
JKL
TUV
OPER
MNO
WXY
DEF
Tone
SYMBOLS
Set
Enter the four-digit operation password and press Set.
CHANGE DATA
1.GROUP DIAL NAME
6.
Press the search buttons to display the item you want to change
and press Set.
Set
❏To change the settings for an item, follow the same procedure
you used for initial setup of the relay group. (➞9-5)
❏To delete an item, press Clear and then press Set.

Chapter 9 Using a Relay Network 9-9
Using a Relay
Network
LASER CLASS 3170 Series.
CFYA/YAH/YAN 120v US V1.0
❏To turn off the relay feature for the group and retain the setup,
press the search buttons to display 10.RELAY B’CAST, press
Set, and turn this feature off. You do not have to delete the
relay group to disable it temporarily.
❏To change the operation password, first you have to enter the
old password (it is not displayed as you enter it) and then you
have to enter the new password (it is displayed as you enter
it).
7.
Stop
When you are finished making changes, press Stop to return to
standby.
Deleting the Relay Group
Follow this procedure to delete the relay group and all of its settings.
1. Open the RELAY TX GROUP menu. (➞9-4)
RELAY TX GROUP
1.SETUP FILE
2.
Press the search buttons until you see the display below.
RELAY TX GROUP
3.DELETE FILE
Set
Press Set.
DELETE FILE
SET RLY TX GROUP# 00
3.
1
4
7
2
5
8
0
3
6
9
ABC
GHI
PRS
JKL
TUV
OPER
MNO
WXY
DEF
Tone
SYMBOLS
Set
Use the buttons on the numeric keypad to enter the relay group
number then press Set.
DELETE FILE
PASSWORD _
If you have not set the operation password, you can skip the next
step.
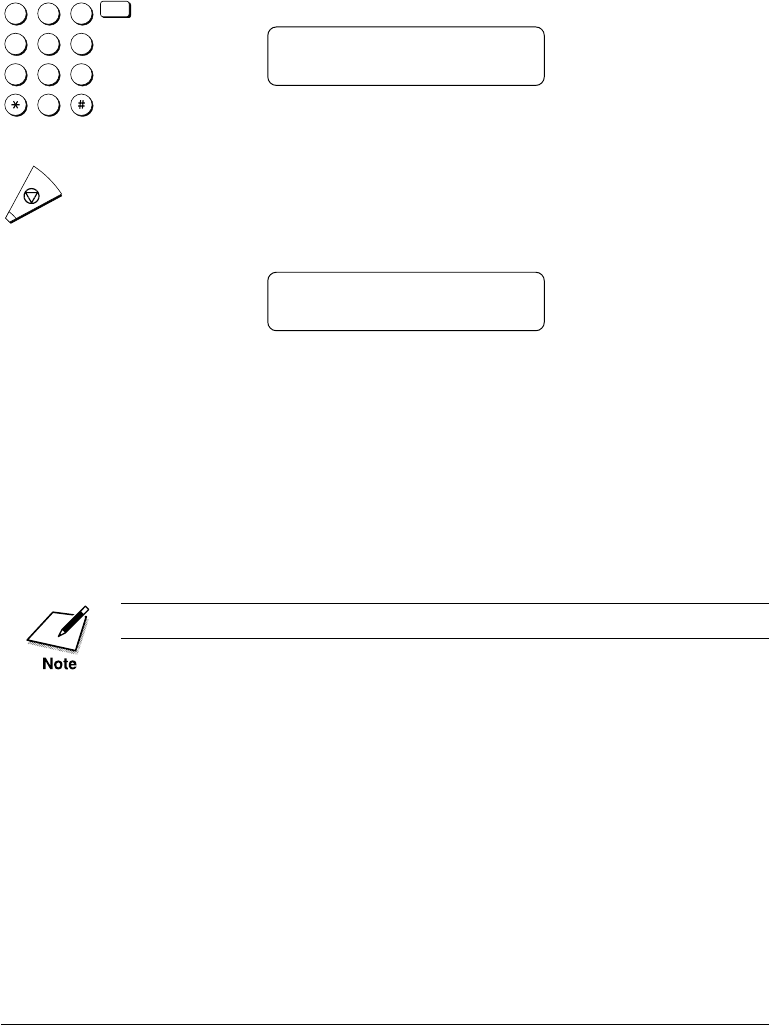
9-10 Using a Relay Network Chapter 9
LASER CLASS 3170 Series.
CFYA/YAH/YAN 120v US V1.0
4.
1
4
7
2
5
8
0
3
6
9
ABC
GHI
PRS
JKL
TUV
OPER
MNO
WXY
DEF
Tone
SYMBOLS
Set
Enter the four-digit operation password and press Set.
DELETE FILE
FILE DELETED
5.
Stop
Press Stop to return to standby.
If the relay has been set for timer sending and the document is still
in the memory, you will not be able to delete the relay group until
the document is sent. In this case the fax will prompt:
CANNOT DELETE
Wait until the document is sent before you attempt to delete the
relay group.
Sending a Document to a Relay Unit for
Relay Broadcasting
Follow this procedure to send a document to a relay unit.
In this procedure your fax is the originator.
Before you send a document to another fax for relay broadcasting,
confirm the following points on your fax:
❏Make sure your own fax unit telephone number is correctly regis-
tered. (➞3-13, 14-5)
❏Enter a subaddress.

Chapter 9 Using a Relay Network 9-11
Using a Relay
Network
LASER CLASS 3170 Series.
CFYA/YAH/YAN 120v US V1.0
Before you send a document to another fax for relay broadcasting,
contact the other party and confirm the following points about their fax:
❏The relay unit must support ITU-T subaddress/password transac-
tions.
❏If you want a relay transmission report sent back to your fax from
the relay unit, instruct the relay unit to turn this feature on when
they set up the relay function on their fax.
❏Make sure the relay unit has registered the telephone numbers of all
destinations for the speed dialing buttons of the relay unit.
❏Make sure you have the correct subaddress for the other party’s fax.
❏Confirm that the subaddress you have been given has been used to
set up the other party’s fax as a relay station. Your fax cannot confirm
whether or not the other party’s fax has been set up properly as a
relay unit.
❏If an ITU-T password is set on the other party’s fax you must send
the document with a password. Otherwise, the other fax will not
receive your document.
After the relay fax is set up to participate in a relay network, it should
receive and relay documents automatically. By following the initial setup
procedures in the previous section, the relay fax unit can be set to
confirm the identity of the originator before sending and to send a relay
transmission report to the originator after your fax unit requests the
other unit to relay a document.
When your fax unit is the originator of a relay transmission with this
method, it does not check to ensure that the fax to receive and relay the
transmission is set up properly for relay transmission. Even when the fax
is not set up to relay your documents, your fax unit reports such a
transmission as a successful relay transmission. Make sure the relay unit
is set up correctly to relay documents that it receives from your fax unit.

9-12 Using a Relay Network Chapter 9
LASER CLASS 3170 Series.
CFYA/YAH/YAN 120v US V1.0
Sending a Document to a Relay Unit with Speed Dialing
You can register a telephone number for relay sending under a One-
touch or Coded Speed Dialing button.
Check these points before you send a document to another party for
relay:
❏Contact the other party and ask for the ITU-T subaddress and
password they are using for receiving documents to relay.
❏The other party’s fax unit does not have to be a Canon fax unit, but
make sure the other party’s fax unit supports the use of ITU-T
subaddresses and passwords.
❏Perform the procedure to register a telephone number for One-touch
or Coded Speed Dialing. (➞4-6, 4-15) If the speed dialing buttons are
already set up, perform the procedure to change the One-touch or
Coded Speed Dialing settings. (➞4-6, 4-15)
❏When you do the speed dialing settings, turn on the OPTIONAL
SETTING feature and select TX TYPE. Select ORIG RELAY TX and
then set the ITU-T subaddress and password. (➞4-11, 4-21) Confirm
that the other party is set up properly to relay documents received
from your fax. Your fax cannot confirm whether or not the other fax
has been set up properly for relaying a document sent from your fax.
Sending with the Relay Broadcast Button
Follow this procedure to send the original document for a relay broad-
cast with the Relay Broadcast button.
You can set only one destination.
1. Set the document on the fax. (➞6-3)
Set the document resolution, contrast, and document type. (➞6-4)
You can also select a sender’s name with the TTI Selector. (➞6-6)

Chapter 9 Using a Relay Network 9-13
Using a Relay
Network
LASER CLASS 3170 Series.
CFYA/YAH/YAN 120v US V1.0
2. Open all three of the One-touch Speed Dialing panels and press
Relay Broadcast.
Relay
Broadcast
ORIG RELAY TX
SELECT LOCATIONS
TEL=
3. Dial the relay units.
1
4
7
2
5
8
0
3
6
9
ABC
GHI
PRS
JKL
TUV
OPER
MNO
WXY
DEF
Tone
SYMBOLS
Use regular dialing. (➞6-7)
-if not-
Press a One-touch Speed Dialing button, or press Coded Dial
followed by a three-digit code. (➞4-29, 4-31)
-if not-
Dial the number with directory dialing. (➞4-35)
TEL= 123 4567
01 CANON, INC.
Set
Press Set.
SUBADDRESS

9-14 Using a Relay Network Chapter 9
LASER CLASS 3170 Series.
CFYA/YAH/YAN 120v US V1.0
4.
1
4
7
2
5
8
0
3
6
9
ABC
GHI
PRS
JKL
TUV
OPER
MNO
WXY
DEF
Tone
SYMBOLS
Set
Enter the ITU-T subaddress required to start the relay broadcast
on the other party’s fax. Then press Set.
TEL= 123 4567
01 CANON, INC.
If a password is not required go on to the next step.
-if not-
Password
If an ITU-T password is also required to start the relay broadcast,
press Password.
PASSWORD
You must press Password within 5 seconds of pressing Set. If you wait
longer than the timeout interval before pressing Password, the fax will
start scanning the document. The timeout interval can be turned off.
(➞16-11)
1
4
7
2
5
8
0
3
6
9
ABC
GHI
PRS
JKL
TUV
OPER
MNO
WXY
DEF
Tone
SYMBOLS
Set
Enter the ITU-T password required to start the relay broadcast on
the other party’s fax. Then press Set.
TEL= 123 4567
01 CANON, INC.
5.
Start / Scan
Press Start/Scan to start the transmission.
The Fax will begin scanning automatically if the Time Out function is set
to on. (➞6-23, 16-11)

Chapter 10 Using Confidential Mailboxes 10-1
Using
Confidential
Mailboxes
LASER CLASS 3170 Series.
CFYA/YAH/YAN 120v US V1.0
Chapter 10
Using Confidential Mailboxes
This chapter shows you how to send and receive confidential docu-
ments.
A confidential document is a document that does not print as soon as it is
received. The receiving party must use a password to unlock his or her
mailbox in order to print the document. Use confidential sending and
receiving for documents that you want only the person with the correct
password to read.
You cannot use the conventional Canon confidential mailbox feature.
❏Setting Up and Using the Standard Mailbox Features ...................... 10-2
•Creating a Mailbox ............................................................................ 10-2
•Changing Mailbox Settings .............................................................. 10-6
•Canceling a Mailbox ......................................................................... 10-7
•Receiving a Confidential Document............................................... 10-8
❏Sending a Confidential Document ..................................................... 10-10
•Sending a Confidential Document with Speed Dialing ............ 10-10
•Sending a Confidential Document with the Confidential
Mailbox Button .................................................................................10-11

10-2 Using Confidential Mailboxes Chapter 10
LASER CLASS 3170 Series.
CFYA/YAH/YAN 120v US V1.0
Setting Up and Using the Standard
Mailbox Features
In this section we will describe how to create your own mailbox, change
the mailbox settings when necessary, and delete the mailbox when it is
no longer needed.
Creating a Mailbox
Follow this procedure to create a mailbox to hold confidential documents
in a private mailbox protected with a password.
1. Open the CONFID. MAILBOX menu.
Open all three of the One-touch Speed Dialing panels. Then press
Data Registration.
Data
Registration
REGISTRATION
1.DATA REGISTRATION
Set
Press Set.
DATA REGISTRATION
1.USER SETTINGS
Press the search buttons until you see the display below.
DATA REGISTRATION
6.FILE SETTINGS
Set
Press Set.
FILE SETTINGS
1.CONFID. MAILBOX
Set
Press Set.
CONFID. MAILBOX
1.SETUP FILE
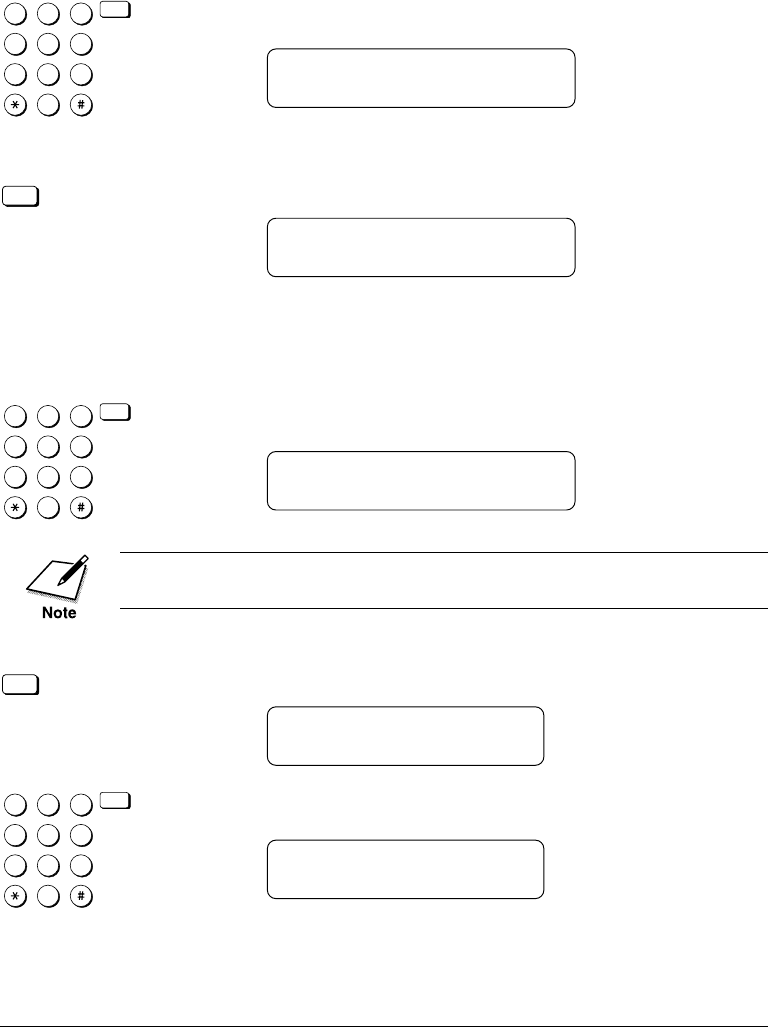
10-4 Using Confidential Mailboxes Chapter 10
LASER CLASS 3170 Series.
CFYA/YAH/YAN 120v US V1.0
1
4
7
2
5
8
0
3
6
9
ABC
GHI
PRS
JKL
TUV
OPER
MNO
WXY
DEF
Tone
SYMBOLS
Set
Use the buttons on the numeric keypad to enter a four-digit
password. Then press Set.
SETUP FILE
3.SUBADDRESS
5. Give the mailbox an ITU-T subaddress.
Set
Press Set.
SUBADDRESS
This item is the ITU-T standard subaddress. This setting is required.
All confidential documents must be sent to your fax with this
subaddress in order to be stored in your mailbox. If the
subaddresses do not match, the document will not be received.
1
4
7
2
5
8
0
3
6
9
ABC
GHI
PRS
JKL
TUV
OPER
MNO
WXY
DEF
Tone
SYMBOLS
Set
Use the buttons on the numeric keypad to enter an ITU-T
subaddress up to 20-digits long. Then press Set.
SETUP FILE
4.RX PASSWORD
The next setting is optional. If you set a password, however, the confi-
dential documents sent to you must include this password.
6.
Set
To enter an ITU-T password, press Set.
RX PASSWORD
1
4
7
2
5
8
0
3
6
9
ABC
GHI
PRS
JKL
TUV
OPER
MNO
WXY
DEF
Tone
SYMBOLS
Set
Use the buttons on the numeric keypad to enter an ITU-T pass-
word up to 20-digits long. Then press Set.
SETUP FILE
5.# OF RX COPIES

10-6 Using Confidential Mailboxes Chapter 10
LASER CLASS 3170 Series.
CFYA/YAH/YAN 120v US V1.0
Changing Mailbox Settings
Follow this procedure to change the settings for a mailbox. To open a
mailbox to view and change the settings, you must know the mailbox
number and password.
1. Open the CONFID. MAILBOX menu. (➞10-2)
CONFID. MAILBOX
1.SETUP FILE
2.
Press the search buttons until you see the display below.
CONFID. MAILBOX
2.CHANGE DATA
3. Open the mailbox with its number and password.
Set
Press Set.
CHANGE DATA
SET BOX # 00
1
4
7
2
5
8
0
3
6
9
ABC
GHI
PRS
JKL
TUV
OPER
MNO
WXY
DEF
Tone
SYMBOLS
Set
Use the buttons on the numeric keypad to enter the two-digit code
of the mailbox you want to change. Then press Set.
CHANGE DATA
PASSWORD _
1
4
7
2
5
8
0
3
6
9
ABC
GHI
PRS
JKL
TUV
OPER
MNO
WXY
DEF
Tone
SYMBOLS
Set
Use the buttons on the numeric keypad to enter the four-digit
password protecting access to the mailbox. Then press Set.
CHANGE DATA
1.FILE NAME

Chapter 10 Using Confidential Mailboxes 10-7
Using
Confidential
Mailboxes
LASER CLASS 3170 Series.
CFYA/YAH/YAN 120v US V1.0
4.
Press the search buttons to display the item you want to change.
CHANGE DATA
1.FILE NAME
CHANGE DATA
5.# OF RX COPIES
5.
Set
With the item you want to change shown in the display, press Set.
6. To change an item, follow the same procedure you used to
perform the initial settings. (➞10-3)
7.
Stop
Press Stop to return to standby.
Canceling a Mailbox
Follow this procedure to cancel a mailbox.
1. Open the CONFID. MAILBOX menu. (➞10-2)
CONFID. MAILBOX
1.SETUP FILE
2.
Press the search buttons until you see the display below.
CONFID. MAILBOX
3.DELETE FILE
3.
Set
Press Set.
DELETE FILE
SET BOX # 00
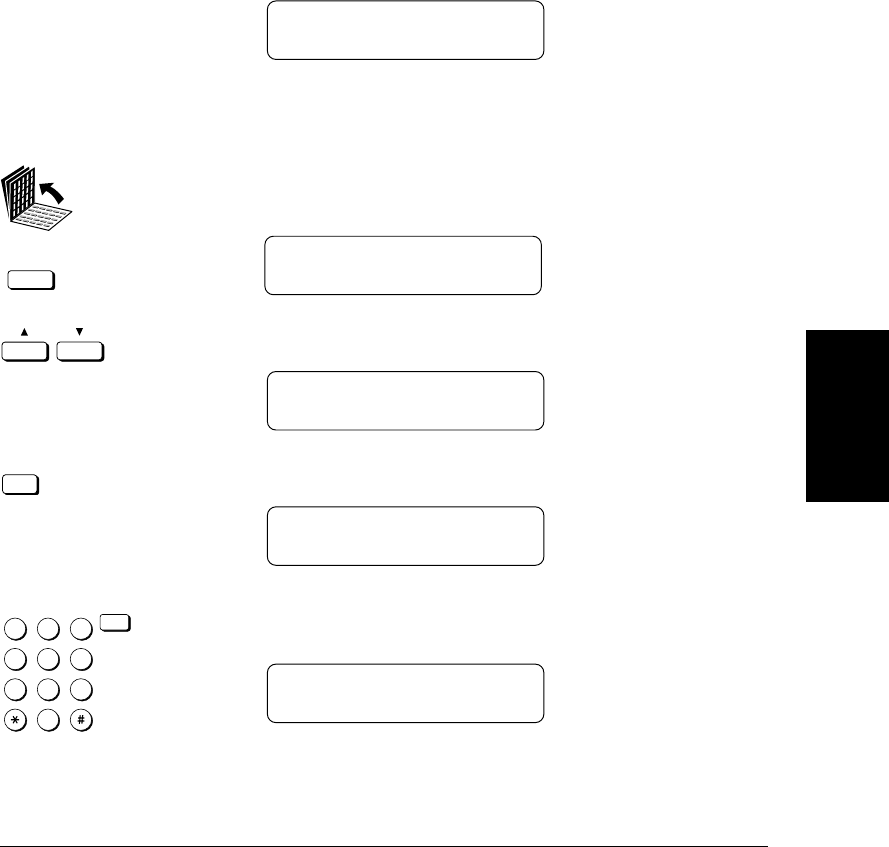
Chapter 10 Using Confidential Mailboxes 10-9
Using
Confidential
Mailboxes
LASER CLASS 3170 Series.
CFYA/YAH/YAN 120v US V1.0
❏The report lists the subaddress where the documents have been
received.
❏Printing this Confidential Receive Report every time you receive a
confidential document can be turned off and on. (➞16-8)
After the report prints, a message alternates with the standby display
(date and time) until you print the report received in the mailbox.
RECEIVED IN MAILBOX
Follow this procedure to print a document received in a confidential
mailbox.
1. Open all three of the One-touch Speed Dialing panels. Then press
Confidential Mailbox.
Confidential
Mailbox
CONFID. TX/RX
1.CONFIDENTIAL TX
2.
Press the search buttons until you see the display below.
CONFID. TX/RX
2.CONFIDENTIAL RX
3.
Set
Press Set.
SUBADDRESS
4.
1
4
7
2
5
8
0
3
6
9
ABC
GHI
PRS
JKL
TUV
OPER
MNO
WXY
DEF
Tone
SYMBOLS
Set
Use the buttons on the numeric keypad to enter the subaddress
for the mailbox. Then press Set.
CONFIDENTIAL RX
PASSWORD _

Chapter 10 Using Confidential Mailboxes 10-11
Using
Confidential
Mailboxes
LASER CLASS 3170 Series.
CFYA/YAH/YAN 120v US V1.0
❏The other party’s fax unit does not have to be a Canon fax unit, but
make sure the other party’s fax unit supports the use of ITU-T
subaddresses and passwords.
❏Perform the procedure to register a telephone number for One-touch
or Coded Speed Dialing. (➞4-6, 4-15)
❏If the speed dialing buttons are already set up, perform the proce-
dure to change the One-touch or Coded Speed Dialing settings.
(➞4-6, 4-15)
❏When you do the speed dialing settings, turn on the OPTIONAL
SETTING feature and select TX TYPE. Select CONFIDENTIAL TX
and then set the ITU-T subaddress and password. (➞4-11, 4-20)
❏Confirm that the other party has set up a confidential mailbox with
the subaddress you have been given. Your fax cannot confirm whether
or not the subaddress has been used to set up a confidential mailbox.
Sending a Confidential Document with the Confidential
Mailbox Button
Note these points about sending a confidential document to a confiden-
tial mailbox.
❏You can dial only one telephone number.
❏If you frequently need to send a confidential document to more than
one location, register the number, subaddress, and password for
One-touch or Coded Speed Dialing so you can use multiple broad-
casting. (➞4-6, 4-15)
❏If you use One-touch or Coded Speed Dialing to dial the number
after you perform the following operation, the transmission mode
settings registered for the speed dialing button are ignored.
❏The password setting is optional but required if the other party has
set a password on the other fax unit.
1. Set the document on the fax. (➞6-3)
Set the document resolution, contrast, and document type. (➞6-4)
You can also select a sender’s name with the TTI Selector. (➞6-6)

10-12 Using Confidential Mailboxes Chapter 10
LASER CLASS 3170 Series.
CFYA/YAH/YAN 120v US V1.0
2. Open all three of the One-touch Speed Dialing panels and press
Confidential Mailbox.
Confidential
Mailbox
CONFID. TX/RX
1.CONFIDENTIAL TX
3.
Set
Press Set.
CONFIDENTIAL TX
SELECT LOCATIONS
TEL =
4.
1
4
7
2
5
8
0
3
6
9
ABC
GHI
PRS
JKL
TUV
OPER
MNO
WXY
DEF
Tone
SYMBOLS
Use the buttons on the numeric keypad to dial the number. (➞6-7)
-if not-
Close the One-touch Speed Dialing panels and press a One-touch
Speed dialing button to dial the number, or press Coded Dial and
enter the three-digit code. (➞4-29, 4-31)
-if not-
Dial the number with directory dialing. (➞4-35)
❏You can dial only one number.
❏The transmission mode settings for the speed dialing button
are ignored.
Set
Press Set.
SUBADDRESS
5.
1
4
7
2
5
8
0
3
6
9
ABC
GHI
PRS
JKL
TUV
OPER
MNO
WXY
DEF
Tone
SYMBOLS
Set
Use the buttons on the numeric keypad to enter the ITU-T
subaddress. Then press Set.
TEL= 123 4567
01 CANON, INC.

Chapter 10 Using Confidential Mailboxes 10-13
Using
Confidential
Mailboxes
LASER CLASS 3170 Series.
CFYA/YAH/YAN 120v US V1.0
6.
Password
If you must also enter an ITU-T password, press Password. Other-
wise, just go on to the next step.
PASSWORD
You must press Password within 5 seconds of pressing Set. If you wait
longer than the timeout interval before pressing Password, the fax will
start scanning the document. The timeout interval can be turned off.
(➞16-11)
1
4
7
2
5
8
0
3
6
9
ABC
GHI
PRS
JKL
TUV
OPER
MNO
WXY
DEF
Tone
SYMBOLS
Set
Use the buttons on the numeric keypad to enter the ITU-T pass-
word. Then press Set.
TEL= 123 4567
01 CANON, INC.
7.
Start / Scan
Press Start/Scan to start the transmission.
The Fax will begin scanning automatically if the Time Out function is set
to on. (➞6-23, 16-11)

10-14 Using Confidential Mailboxes Chapter 10
LASER CLASS 3170 Series.
CFYA/YAH/YAN 120v US V1.0

Chapter 11 Setting Up and Using Polling 11-1
Setting Up and
Using Polling
LASER CLASS 3170 Series.
CFYA/YAH/YAN 120v US V1.0
Chapter 11
Setting Up and Using Polling
This chapter shows you how to set up and use polling sending and
receiving. Polling is useful when one or both parties cannot be in the
office at the same time.
❏What is Polling? ....................................................................................... 11-2
•Before You Use Polling Receiving .................................................... 11-2
❏Polling Other Fax Machines to Receive a Document .........................11-3
•Polling to Receive at a Preset Time ..................................................11-5
•Changing the Preset Polling Settings ............................................ 11-12
•Canceling Preset Polling.................................................................. 11-13
❏Setting Up Polling Sending .................................................................. 11-15
•Before You Can Be Polled to Send ................................................. 11-15
•Setting Up a Polling Box.................................................................. 11-15
•Scanning a Document into the Memory for Polling Sending .... 11-20
•Changing the Polling Box Setup ....................................................11-21
•Canceling a Polling Box...................................................................11-23

11-2 Setting Up and Using Polling Chapter 11
LASER CLASS 3170 Series.
CFYA/YAH/YAN 120v US V1.0
What is Polling?
Polling means a fax calls another fax and requests that the other fax send
a document that it is holding. Unlike normal sending and receiving, in
polling the receiver always calls the sender. This is called polling to
receive a document. The sender sends the document in response to the
polling by a telephone call from the receiver.
Your fax can be set up to function in both roles. Your fax can poll to
receive a document, or it can be polled to send a document that it is
holding.
Before You Use Polling Receiving
Before you try to set up polling, note the following points:
❏With one operation you can poll several faxes. You can dial up to 210
telephone numbers and poll those faxes to receive documents that
they are holding.
❏You can poll a document at any time, but you may find it more
useful to set your fax for polling other faxes at specified times
throughout the day. (➞11-5)
❏You must know if the other fax is holding the document under both
a subaddress and password or only a subaddress or password. You
must also know the subaddress and password so you can enter them
on your fax. If you do not know the subaddress or password, contact
the other party.
❏If the other party's documents are registered for polling without a
subaddress or password, you can still perform polling receiving.
❏If the other party's fax does not support ITU-T subaddress/password
transactions, you can ask them to set the polling ID to 255 or 1111
1111 binary when the other party's fax machine is a Canon fax.

Chapter 11 Setting Up and Using Polling 11-3
Setting Up and
Using Polling
LASER CLASS 3170 Series.
CFYA/YAH/YAN 120v US V1.0
Polling Other Fax Machines to Receive a
Document
Follow this procedure to poll another fax to receive the document that it
is holding. This procedure starts polling the other fax immediately. You
can also set the fax to poll at a preset time. (➞11-5)
1. Open all three of the One-touch Speed Dialing panels. Then press
Polling.
POLLING
1.POLLING TX
Polling
2.
Press the search buttons until you see the display below.
POLLING
2.POLLING RX
3.
Set
Press Set.
TEL=
TTI Selector
You can select a sender's name with the TTI Selector. (➞6-6)
4. Close all three of the One-touch Speed Dialing panels and dial the
other party’s number.
1
4
7
2
5
8
0
3
6
9
ABC
GHI
PRS
JKL
TUV
OPER
MNO
WXY
DEF
Tone
SYMBOLS
Set
Use the buttons on the numeric keypad to dial the number. If you
use regular dialing, make sure you press Set after you dial the
number. (➞6-7)
-if not-
Press a One-touch Speed Dialing button to dial the number. (➞4-29)
-if not-
Press Coded Dial and a three-digit code to dial the number. (➞4-31)
-if not-
Dial the number with directory dialing. (➞4-35)

11-4 Setting Up and Using Polling Chapter 11
LASER CLASS 3170 Series.
CFYA/YAH/YAN 120v US V1.0
If you make a mistake during dialing, press Stop to return to
standby and start again.
If you want to receive a document from a fax unit that does not
support ITU-T subaddress/password transactions, press Start/
Scan.
-if not-
If you want to receive a document from a fax unit that supports
ITU-T transactions, press Set. Then press the Subaddress button.
SUBADDRESS
You must press Subaddress within 5 seconds of pressing Set. If you wait
longer than the timeout interval before pressing Subaddress, the fax will
start dialing the number. The timeout interval can be turned off.
(➞16-11)
An ITU-T subaddress is a number up to 20 digits long which can
include spaces and the symbols * and #.
5.
1
4
7
2
5
8
0
3
6
9
ABC
GHI
PRS
JKL
TUV
OPER
MNO
WXY
DEF
Tone
SYMBOLS
Set
Use the buttons on the numeric keypad to enter the ITU-T
subaddress. Then press Set.
TEL= 123 4567
01 CANON, INC.
6.
Password
If you must also enter an ITU-T password, press the Password
button. Otherwise, go on to the next step.
PASSWORD
You must press Password within 5 seconds of Set. If you wait longer than
the timeout interval before pressing Password, the fax will start dialing
the number. The timeout interval can be turned off.(➞16-11)

Chapter 11 Setting Up and Using Polling 11-5
Setting Up and
Using Polling
LASER CLASS 3170 Series.
CFYA/YAH/YAN 120v US V1.0
An ITU-T password is a number up to 20 digits long which can
include spaces and the symbols * and #.
1
4
7
2
5
8
0
3
6
9
ABC
GHI
PRS
JKL
TUV
OPER
MNO
WXY
DEF
Tone
SYMBOLS
Set
Use the buttons on the numeric keypad to enter the ITU-T pass-
word. Then press Set.
TEL= 123 4567
01 CANON, INC.
7.
Start / Scan
Press Start/Scan to start polling the other faxes.
❏If the other document is holding the document under a
subaddress, your subaddress must match the other party’s
subaddress.
❏If the other document is holding the document under both a
subaddress and password, then you must poll the fax with
both a matching subaddress and password.
Polling to Receive at a Preset Time
Follow this procedure to set the fax to poll another fax at a preset time.
Polling faxes at preset times allows you to conduct document transac-
tions later at night when the telephone rates are lower.
Before you set up polling at a preset time, make sure you have per-
formed the following tasks:
❏The numbers you want to register for dialing must be registered for
One-touch or Coded Speed Dialing buttons. (➞4-6, 4-15)
❏When you register the One-touch or Coded Speed dialing button,
you must turn on OPTIONAL SETTINGS and set the TX TYPE for
POLLING RX when the other party set subaddress/password, you
have to register an ITU-T subaddress and/or password for the speed
dialing button. (➞4-12, 4-21)
❏If you have to poll a number that you use regularly, you should
register it once again for another speed dialing button so you can set
the ITU-T subaddress and/or password to match the polling box of
the other party’s fax and register the second number for preset
polling.

11-8 Setting Up and Using Polling Chapter 11
LASER CLASS 3170 Series.
CFYA/YAH/YAN 120v US V1.0
6.
Set
Press Set to set a password.
1
4
7
2
5
8
0
3
6
9
ABC
GHI
PRS
JKL
TUV
OPER
MNO
WXY
DEF
Tone
SYMBOLS
Set
Enter a four-digit password and press Set.
SETUP FILE
3.SELECT LOCATIONS
Set
Press Set.
TEL =
7.
1
4
7
2
5
8
0
3
6
9
ABC
GHI
PRS
JKL
TUV
OPER
MNO
WXY
DEF
Tone
SYMBOLS
Dial the other party’s fax number.
Press a One-touch Speed Dialing button to dial the number.
(➞4-29)
-if not-
Press Coded Dial and a three-digit code to dial the number. (➞4-31)
If you make a mistake during dialing, press Stop to return to
standby and start again.
You can enter up to 200 numbers to be polled by your fax.
Set
Press Set.
SETUP FILE
4.START TIME
You can set the fax to poll other faxes everyday or only for se-
lected days. For any day you can set up to 5 times for the fax to
poll another unit during a 24-hour period.

Chapter 11 Setting Up and Using Polling 11-9
Setting Up and
Using Polling
LASER CLASS 3170 Series.
CFYA/YAH/YAN 120v US V1.0
8. Set the fax to poll other faxes every day or on selected days.
To set preset polling for every day
SETUP FILE
4.START TIME
Set
Press Set.
START TIME
EVERYDAY
Set
Press Set.
EVERYDAY
1: :
Set
Press Set.
EVERYDAY
_:
1
4
7
2
5
8
0
3
6
9
ABC
GHI
PRS
JKL
TUV
OPER
MNO
WXY
DEF
Tone
SYMBOLS
Use the buttons on the numeric keypad to enter the time.
Enter the time in the 24-hour format (e.g. 1:00 p.m. as 13:00).
❏If you make a mistake, press Clear to erase the number and try
again.
EVERYDAY
00:30
Set
Press Set.
If you want to set more than one time for your fax unit to poll the
other faxes, press the search buttons to display another empty
setting.
EVERYDAY
2: :

Chapter 11 Setting Up and Using Polling 11-11
Setting Up and
Using Polling
LASER CLASS 3170 Series.
CFYA/YAH/YAN 120v US V1.0
1
4
7
2
5
8
0
3
6
9
ABC
GHI
PRS
JKL
TUV
OPER
MNO
WXY
DEF
Tone
SYMBOLS
Use the buttons on the numeric keypad to enter the time.
Enter the time in the 24-hour format (e.g. 1:00 p.m. as 13:00).
❏If you make a mistake, press Clear to erase the number and try
again.
MON
02:00
Set
Press Set.
If you want to set more than one time for your fax unit to poll the
other faxes on the selected day, press the search buttons to display
another empty setting.
MON
2: :
Set
Press Set and use the numeric keypad to enter another time in 24-
hour format.
You can register up to 5 times for your fax to poll other faxes on the
selected day.
Data
Registration
If you want to select another day, press Data Registration to return
to the previous level so you can select another day and repeat the
procedure to set the times for that day.
-if not-
Stop
When you are finished selecting days and setting times, press Stop
to return to standby.

11-14 Setting Up and Using Polling Chapter 11
LASER CLASS 3170 Series.
CFYA/YAH/YAN 120v US V1.0
4.
1
4
7
2
5
8
0
3
6
9
ABC
GHI
PRS
JKL
TUV
OPER
MNO
WXY
DEF
Tone
SYMBOLS
Set
Use the buttons on the numeric keypad to enter the preset two-
digit code of the polling box. Then press Set.
DELETE FILE
PASSWORD _
If you have not set the operation password, you can skip the next
step.
5.
1
4
7
2
5
8
0
3
6
9
ABC
GHI
PRS
JKL
TUV
OPER
MNO
WXY
DEF
Tone
SYMBOLS
Set
Use the buttons on the numeric keypad to enter the four-digit
password protecting the preset polling setup file. Then press Set.
After you enter the password, the file is deleted.
DELETE FILE
FILE DELETED
DELETE FILE
SET BOX# 00
6.
Stop
Press Stop to return to standby.

Chapter 11 Setting Up and Using Polling 11-15
Setting Up and
Using Polling
LASER CLASS 3170 Series.
CFYA/YAH/YAN 120v US V1.0
Setting Up Polling Sending
This section shows you how to set up your fax to store and hold a
document until it is polled by another fax to send it.
Before You Can Be Polled to Send
Before you set up your polling box, contact the parties who are going to
poll your fax to receive documents and confirm the following points:
❏The other parties must know your ITU-T subaddress number.
❏If you are also using an ITU-T password for the polling box, they
must also know this password. This password setting is optional.
❏Your TX PASSWORD must match the ITU-T password attached
when the other party calls you. Confirm that the TX PASSWORD on
your fax matches the ITU-T password attached when the other party
calls you.
❏If the other party’s fax does not support ITU-T subaddress/pass-
word transactions, you may be able to use the polling box #00.
Setting Up a Polling Box
Before you can use polling sending, you must create a polling box with
the File settings. The polling box holds the document in the memory
until the other party polls your fax to send the document.
1. Open the FILE SETTINGS menu.
Open all three of the One-touch Speed Dialing panels. Then press
Data Registration.
Data
Registration
REGISTRATION
1.DATA REGISTRATION
Set
Press Set.
DATA REGISTRATION
1.USER SETTINGS

Chapter 11 Setting Up and Using Polling 11-17
Setting Up and
Using Polling
LASER CLASS 3170 Series.
CFYA/YAH/YAN 120v US V1.0
4. Create a file name to store the document in the memory where it
will wait to be polled by other fax units.
Set
Press Set.
FILE NAME :A
_
1
4
7
2
5
8
0
3
6
9
ABC
GHI
PRS
JKL
TUV
OPER
MNO
WXY
DEF
Tone
SYMBOLS
Use the buttons on the numeric keypad to enter a name of up to
24 characters. (➞3-7)
FILE NAME :A
CANON TOKYO
Set
Press Set.
SETUP FILE
2.PASSWORD
5.
If you don't want to set password, press the search buttons to go
to the next step.
-if not-
Set
If you want to enter a password to protect the polling box setup
file, Press Set.
PASSWORD
_
1
4
7
2
5
8
0
3
6
9
ABC
GHI
PRS
JKL
TUV
OPER
MNO
WXY
DEF
Tone
SYMBOLS
Use the buttons on the numeric keypad to enter a four-digit
password.
PASSWORD
1147
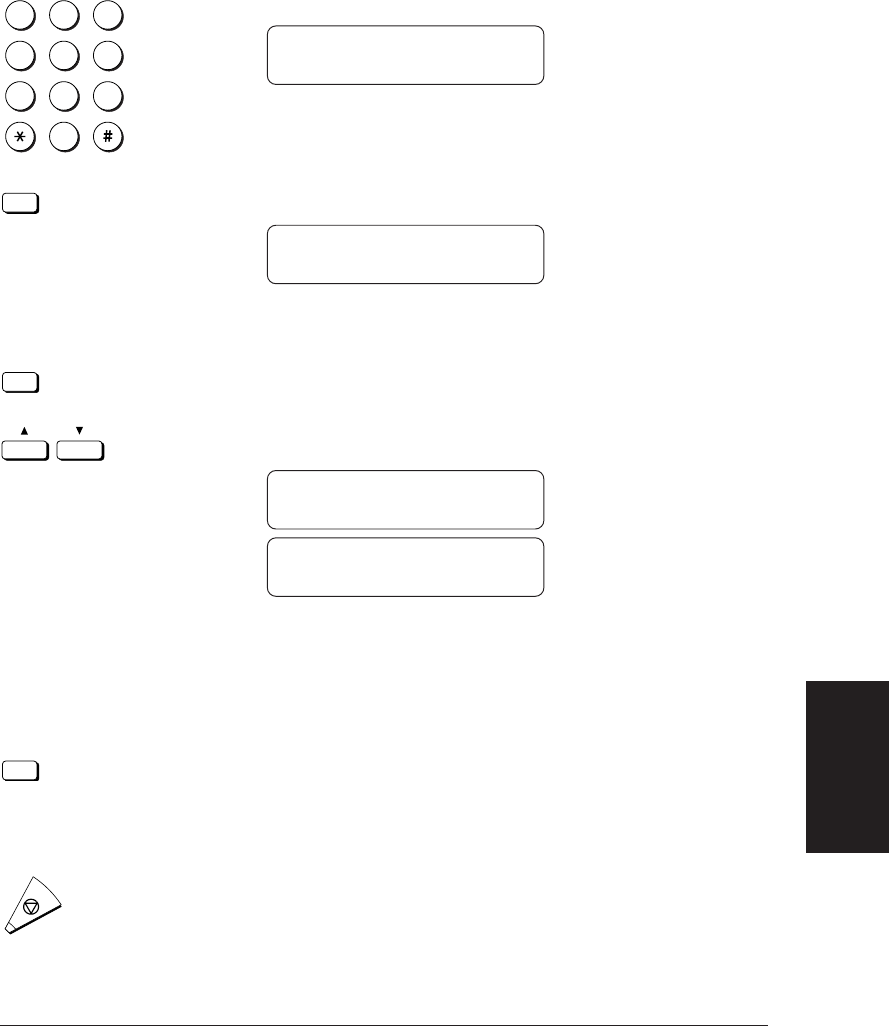
Chapter 11 Setting Up and Using Polling 11-19
Setting Up and
Using Polling
LASER CLASS 3170 Series.
CFYA/YAH/YAN 120v US V1.0
1
4
7
2
5
8
0
3
6
9
ABC
GHI
PRS
JKL
TUV
OPER
MNO
WXY
DEF
Tone
SYMBOLS
Use the buttons on the numeric keypad to enter the password.
TX PASSWORD
#12345676
Set
Press Set.
SETUP FILE
5.ERASE AFTER TX
8. Set the polling box to erase or keep the document after polling.
Set
Press Set.
Press the search buttons to display the setting you want.
ERASE AFTER TX
ON
ERASE AFTER TX
OFF
ON The document in the memory box is erased after it is
sent once in response to polling by another fax.
OFF The document in the memory box is not erased after it is
polled. Select this setting if you expect the document
will be polled by more than one fax.
Set
With the selection you want displayed, press Set.
9. You can repeat this procedure to set up another polling box.
-if not-
Stop
Press Stop to return to standby.

Chapter 12 Other Special Features 12-1
Other Special
Features
LASER CLASS 3170 Series.
CFYA/YAH/YAN 120v US V1.0
Chapter 12
Other Special Features
This chapter describes some convenient features that you may want to
use in daily operations.
❏Using the Telephone ............................................................................... 12-2
❏Tone Dialing on a Pulse Line ................................................................. 12-3
❏Setting and Using the Program Button ................................................ 12-5
❏Setting Up and Using the Optional Stamp Feature ........................... 12-8
•Setting Up the Stamp Feature .......................................................... 12-8
•Turning the Stamp Feature ON/OFF ........................................... 12-10
❏How the Fax Operates with Default Settings ................................... 12-12

Chapter 12 Other Special Features 12-3
Other Special
Features
LASER CLASS 3170 Series.
CFYA/YAH/YAN 120v US V1.0
3. When the other party answers your call, you can talk into the
handset.
-if not-
If you did not pick up handset in step 1, pick up the handset as
soon as you hear the other party answer. The other party will not
be able to hear you until you pick up the handset.
-if not-
or
Hook
If the other party does not answer, or if the line is busy, just hang
up the handset or press Hook to disconnect.
Tone Dialing on a Pulse Line
Many telephone information services for banks, airline reservations,
hotel reservations, etc., require tone dialing for their services. If your fax
is connected to a rotary pulse line, follow this procedure to set the fax
temporarily for tone dialing.
1.
Hook
Press Hook.
The In Use lamp blinks green and you will hear the dial tone.
-if not-
Just pick up the handset if you have installed the optional handset
kit.(➞2-38)
The level of the dial tone can be adjusted. (➞2-18)
TEL =
2. Dial the telephone number.
1
4
7
2
5
8
0
3
6
9
ABC
GHI
PRS
JKL
TUV
OPER
MNO
WXY
DEF
Tone
SYMBOLS
Use the buttons on the numeric keypad to dial the telephone
number of the information service.
TEL = 123 4567

Chapter 13 Restricting Use of the Fax 13-13
Restricting Use
of the Fax
LASER CLASS 3170 Series.
CFYA/YAH/YAN 120v US V1.0
3.
1
4
7
2
5
8
0
3
6
9
ABC
GHI
PRS
JKL
TUV
OPER
MNO
WXY
DEF
Tone
SYMBOLS
Set
Use the buttons on the numeric keypad to enter the four-digit user
access code that you set previously to restrict access to copying.
Then press Set.
COPY 01
CASSETTE 1 LTR
4. Follow the normal procedure to complete copying the document.
(➞5-6)
Printing a Report with Restrictions ON
Follow this procedure to print a report about information stored in the
fax with the printing restriction set up and turned on.
1. Open all three of the One-touch Speed Dialing panels. Then press
Report.
Report
REPORT
1.ACTIVITY REPORT
2.
Press the search buttons to select the type of report you want to
print then press Set.
Set
USER ACCESS CODE
_
3.
1
4
7
2
5
8
0
3
6
9
ABC
GHI
PRS
JKL
TUV
OPER
MNO
WXY
DEF
Tone
SYMBOLS
Set
Use the buttons on the numeric keypad to enter the four-digit user
access code you set to protect printing reports. Then press Set.
The fax starts printing the report.
PRINTING REPORT
Using the Telephone with Restrictions ON
When the telephone restriction feature is turned on, the handset and
Hook button are disabled. If you pick up the handset or press the Hook
button, you will not hear a dial tone.

13-14 Restricting Use of the Fax Chapter 13
LASER CLASS 3170 Series.
CFYA/YAH/YAN 120v US V1.0
Turning Restrictions OFF and ON
Follow this procedure to turn off the following features temporarily
without changing the settings.
1. Open the SYSTEM SETTINGS menu with your system settings
password. (➞13-4)
SYSTEM SETTINGS
1.PASSWORD
2.
Press the search buttons until you see the display below.
SYSTEM SETTINGS
2.RESTRICTIVE CODES
3.
Set
Press Set.
RESTRICTIVE CODES
1.TX SETTINGS
4.
Press the search buttons to display the feature you want to turn
off.
RESTRICTIVE CODES
1.TX SETTINGS
RESTRICTIVE CODES
3.TEL SETTING
To turn off restricted sending
Press the search buttons until you see the display below.
RESTRICTIVE CODES
1.TX SETTINGS
Set
Press Set.
TX SETTINGS
ON

13-16 Restricting Use of the Fax Chapter 13
LASER CLASS 3170 Series.
CFYA/YAH/YAN 120v US V1.0
Receiving Documents from Registered
Senders Only
Follow this procedure to turn restricted receiving on and off. Restricted
receiving limits document reception to fax units whose telephone
numbers are registered on your fax for One-touch or Coded Speed
Dialing buttons. You cannot receive a document from another fax unless
it is registered on your fax for a speed dialing button, so the fax will not
receive unsolicited direct mail.
1. Open the SYSTEM SETTINGS menu with your system settings
password. (➞13-4)
2.
Press the search buttons until you see the display below.
SYSTEM SETTINGS
4.RX RESTRICTION
3.
Set
Press Set.
4.
Press the search buttons to display the setting you want, then
press Set.
Set
RX RESTRICTION
OFF
RX RESTRICTION
ON
OFF Your fax will receive a document even if the fax tele-
phone number of the originator is not registered on your
fax for a One-touch Speed Dialing or a Coded Speed
Dialing button. However, other restrictions like pass-
words, subaddresses, and so on, still apply.
ON Your fax will receive a document only if the fax tele-
phone number of the originator is registered on your fax
for a One-touch Speed Dialing or a Coded Speed Dialing
button.
5.
Stop
Press Stop to return to standby.
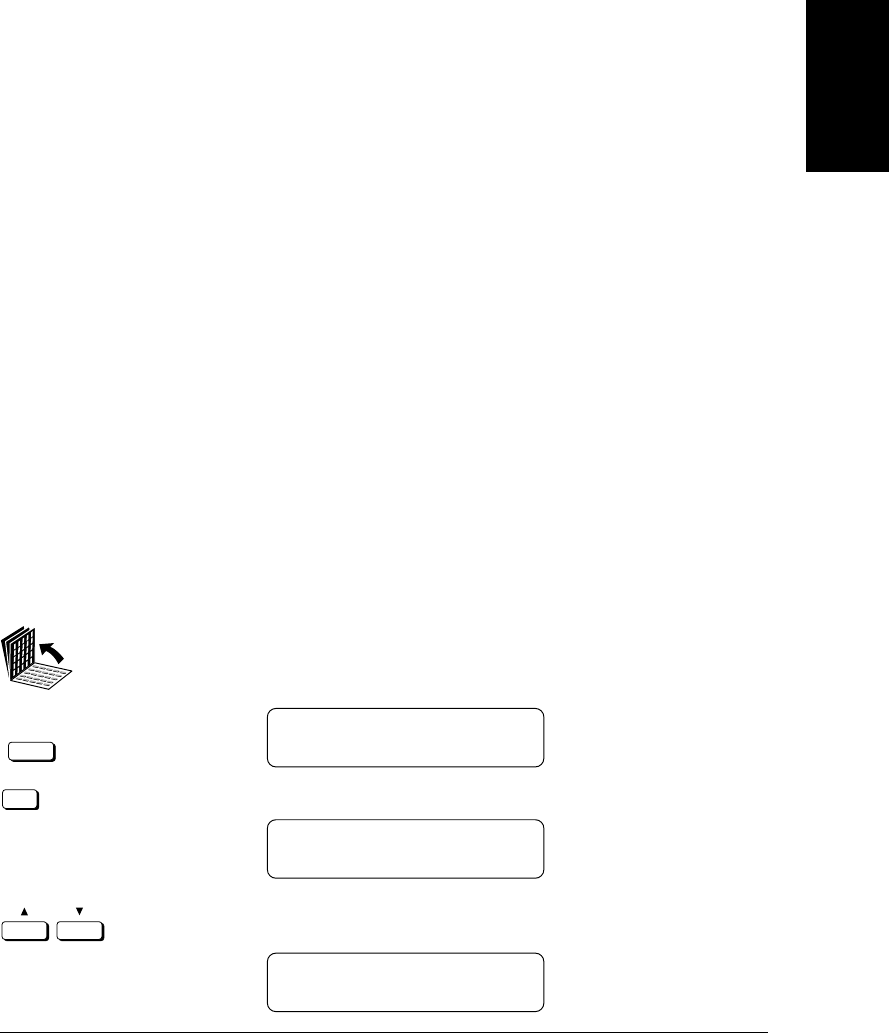
Chapter 13 Restricting Use of the Fax 13-17
Restricting Use
of the Fax
LASER CLASS 3170 Series.
CFYA/YAH/YAN 120v US V1.0
Using Memory Lock
Normally a document prints as soon as you receive it. However, there
may be occasions when you want the fax to store all documents in the
memory until you are ready to print them. Locking the fax to receive and
store all documents in the memory is called memory lock.
You may want to turn the memory lock on when the fax is left
unattended at night or over long holidays to prevent a large volume of
printed documents from collecting on the paper output tray. After you
return to the office, you can review the contents of the memory and then
enter the memory lock password to print all the documents stored in the
memory.
Setting a Time and Password for Memory Lock
After the memory lock is turned on, the fax will automatically enter and
leave the memory lock mode at times you specify. The documents
received when the fax is in the memory lock mode are stored in the
memory until you unlock the memory with a password and print them.
Follow the procedure below to define a memory lock password and set
the times for the fax to enter and leave the memory lock mode.
1. Open the MEMORY LOCK menu.
Open all three of the One-touch Speed Dialing panels. Then press
Data Registration.
Data
Registration
REGISTRATION
1.DATA REGISTRATION
Set
Press Set.
DATA REGISTRATION
1.USER SETTINGS
Press the search buttons until you see the display below.
DATA REGISTRATION
7.SYSTEM SETTINGS
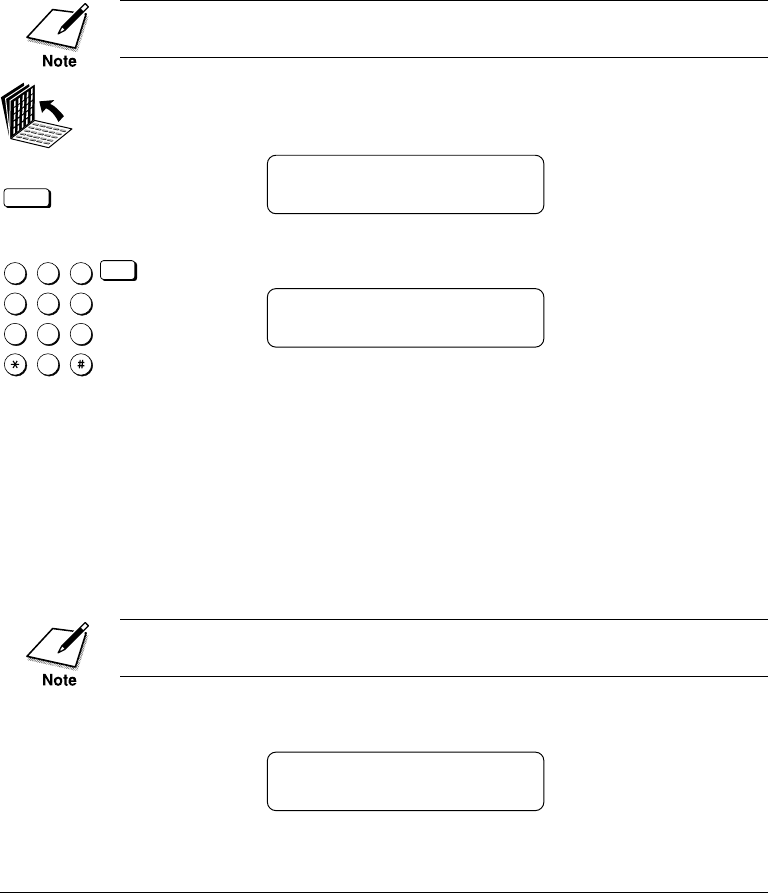
13-20 Restricting Use of the Fax Chapter 13
LASER CLASS 3170 Series.
CFYA/YAH/YAN 120v US V1.0
Turning the Memory Lock ON
Follow this procedure to put the fax in the memory lock mode if the
memory lock mode timer has not been set or if you want to put the fax in
the memory lock mode before the timer turns the memory lock on.
If the timer is set for the memory lock feature, the fax will enter and
leave the memory lock mode automatically. (➞13-17)
1. Open all three of the One-touch Speed Dialing panels. Then press
Memory Reception.
Memory
Reception
MEM LOCK PASSWORD
_
1
4
7
2
5
8
0
3
6
9
ABC
GHI
PRS
JKL
TUV
OPER
MNO
WXY
DEF
Tone
SYMBOLS
Set
Enter the memory lock password then press Set.
MEMORY LOCK RX
The fax is now in the memory lock receive mode. All documents
will be received in the memory until you unlock memory receiv-
ing and print them.
Turning the Memory Lock OFF and Printing Documents
Follow this procedure to turn the memory lock off and print the
documents received in the memory.
If the timer is set for the memory lock feature, the fax will enter and
leave the memory lock mode automatically. (➞13-17)
1. When the memory lock is on, a message is displayed.
MEMORY LOCK RX

Chapter 13 Restricting Use of the Fax 13-21
Restricting Use
of the Fax
LASER CLASS 3170 Series.
CFYA/YAH/YAN 120v US V1.0
2. Open all three of the One-touch Speed Dialing panels. Then press
Memory Reception.
Memory
Reception
MEM LOCK PASSWORD
_
3.
1
4
7
2
5
8
0
3
6
9
ABC
GHI
PRS
JKL
TUV
OPER
MNO
WXY
DEF
Tone
SYMBOLS
Set
Use the buttons on the numeric keypad to enter the four-digit
memory lock password and press Set.
All the documents received in the memory while the fax was in
the memory lock mode are printed.
Setting Up and Using PIN Codes
PIN (Personal Identification Number) codes prevent unauthorized
personnel from making calls. To protect privileged access to the tele-
phone lines, only authorized users are entrusted with the PIN codes for
daily operations. Some Private Branch Exchange (PBX) systems require
that a PIN code be entered when dialing a number to make a call or send
a document by fax. Depending on the requirements of the PBX system,
the PIN code may be entered either before the number as a prefix, or
after the number as a suffix.
If your PBX requires a PIN code to connect to an outside line, the fax
machine can be set up with the USER DATA SETTINGS to prompt you
for a PIN code every time you dial.
Setting a PIN Code
1. Open the TX SETTINGS menu.
Open all three of the One-touch Speed Dialing panels and press
Data Registration.
Data
Registration
REGISTRATION
1.DATA REGISTRATION
Set
Press Set.
DATA REGISTRATION
1.USER SETTINGS

Chapter 13 Restricting Use of the Fax 13-23
Restricting Use
of the Fax
LASER CLASS 3170 Series.
CFYA/YAH/YAN 120v US V1.0
6.
Set
If your PBX requires PIN code entry depending on destination,
press Set to leave NECESS. PIN CODE set to OFF.
-if not-
If your PBX always requires PIN code entry, press the search
buttons until ON appears.
NECESS. PIN CODE
ON
7.
Set
Press Set.
PIN CODE BEF/AFT
BEFORE TEL NO.
8.
Set
To select BEFORE TEL NO., press Set.
-if not-
To select AFTER TEL NO., press the search buttons until AFTER
TEL NO. appears and press Set.
Set
9.
Stop
Press Stop.

13-24 Restricting Use of the Fax Chapter 13
LASER CLASS 3170 Series.
CFYA/YAH/YAN 120v US V1.0
Dialing with a PIN Code after the Number
When NECESS. PIN CODE of the pin code setting (➞13-22) is OFF, you
can operate as described below.
1. Set the document on the fax machine.
DOCUMENT READY
2.
1
4
7
2
5
8
0
3
6
9
ABC
GHI
PRS
JKL
TUV
OPER
MNO
WXY
DEF
Tone
SYMBOLS
Enter the telephone number.
TEL = 123 4567
3.
Pin Code
Open all three of the One-touch Speed Dialing panels, press Pin
Code, then press Set.
TEL = 123 4567C
Set
4. Repeat steps 2 and 3 for each number in a sequential broadcast.
5.
Start / Scan
Press Start/Scan.
ENTER PIN CODE
6.
1
4
7
2
5
8
0
3
6
9
ABC
GHI
PRS
JKL
TUV
OPER
MNO
WXY
DEF
Tone
SYMBOLS
Use the buttons on the numeric keypad to enter the PIN code.
ENTER PIN CODE
********
The PIN code is not displayed as it is entered.
7.
Set
Press Set to start the transmission.

Chapter 13 Restricting Use of the Fax 13-25
Restricting Use
of the Fax
LASER CLASS 3170 Series.
CFYA/YAH/YAN 120v US V1.0
Dialing with a PIN Code before the Number
When NECESS. PIN CODE of the pin code setting (➞13-22) is OFF, you
can operate as described below.
1. Set the document on the fax machine.
DOCUMENT READY
2. Open all three of the One-touch Speed Dialing panels and press
Pin Code.
TEL= C
Pin Code
3.
1
4
7
2
5
8
0
3
6
9
ABC
GHI
PRS
JKL
TUV
OPER
MNO
WXY
DEF
Tone
SYMBOLS
Set
Use the buttons on the numeric keypad to enter the other party’s
fax number. Then press Set.
TEL= C123 4567
4. Repeat steps 2 and 3 for each number in a sequential broadcast.
5.
Start / Scan
Press Start/Scan.
ENTER PIN CODE
1
4
7
2
5
8
0
3
6
9
ABC
GHI
PRS
JKL
TUV
OPER
MNO
WXY
DEF
Tone
SYMBOLS
Enter the PIN code with the buttons on the numeric keypad. A
maximum of 20 digits can be entered.
ENTER PIN CODE
********
The PIN code is not displayed as it is entered.
7.
Set
Press Set to start transmission.

13-26 Restricting Use of the Fax Chapter 13
LASER CLASS 3170 Series.
CFYA/YAH/YAN 120v US V1.0
Setting PIN Code Access for Speed Dialing
This method allows you to register One-touch and Coded Speed Dialing
buttons for PIN Code Access. When a user attempts to dial with a speed
dialing button, the fax machine will prompt the user to enter a PIN Code.
When NECESS. PIN CODE of the pin code setting (➞13-22) is OFF, you
can operate as described below.
1. Select the speed dialing location to register the telephone number.
(➞4-7, 4-16)
TELEPHONE NUMBER
TEL=_
2.
Pin Code
If the PIN code is to be dialed before the telephone number, press
Pin Code then enter the telephone number.
TELEPHONE NUMBER
TEL=C123 4567
-if not-
Pin Code
If the PIN code is to be dialed after the telephone number, enter
the telephone number then press Pin Code.
TELEPHONE NUMBER
TEL=123 4567C
3.
Set
Press Set.
4. Repeat the procedure to continue registering additional numbers.
5.
Stop
When you are finished, press Stop.

Chapter 13 Restricting Use of the Fax 13-27
Restricting Use
of the Fax
LASER CLASS 3170 Series.
CFYA/YAH/YAN 120v US V1.0
Using Speed Dialing with PIN Code Access
If you register the PIN Code entry when registering automatic dialing
(➞13-26), do the following procedures.
1. Set the document on the fax machine.
DOCUMENT READY
2.
Coded Dial
1
72
Press a speed dialing button.
TEL= C123 4567
01 CANON
3.
Start / Scan
Press Start/Scan.
ENTER PIN CODE
4.
1
4
7
2
5
8
0
3
6
9
ABC
GHI
PRS
JKL
TUV
OPER
MNO
WXY
DEF
Tone
SYMBOLS
Enter the PIN code using the buttons on the numeric keypad.
A maximum of 20 digits can be entered for the PIN code.
ENTER PIN CODE
********
The PIN code is not displayed as it is entered.
5.
Set
Press Set to start transmission.

13-28 Restricting Use of the Fax Chapter 13
LASER CLASS 3170 Series.
CFYA/YAH/YAN 120v US V1.0
Forced PIN Code Access
Follow this procedure to dial when Forced PIN Code Access (NECESS.
PIN CODE) has been turned ON. With Forced PIN Code Access ON, you
must enter a PIN Code every time you dial. The PIN Code must be
entered either before or after the number, depending on how PIN Code
Access has been set up. (➞13-23)
1. Set the document on the facsimile.
DOCUMENT READY
2.
1
4
7
2
5
8
0
3
6
9
ABC
GHI
PRS
JKL
TUV
OPER
MNO
WXY
DEF
Tone
SYMBOLS
Dial the telephone number with the numeric keypad or the speed
dialing buttons.
TEL= 123 4567
01 CANON
3.
Start / Scan
Press Start/Scan.
ENTER PIN CODE
4.
1
4
7
2
5
8
0
3
6
9
ABC
GHI
PRS
JKL
TUV
OPER
MNO
WXY
DEF
Tone
SYMBOLS
Enter the PIN code with the buttons on the numeric keypad.
A maximum of 20 digits can be entered for the PIN code.
ENTER PIN CODE
*******
The PIN code is not displayed as it is entered.
5.
Set
Press Set.
The fax starts to send the document.

14-2 Printing Reports and Lists Chapter 14
LASER CLASS 3170 Series.
CFYA/YAH/YAN 120v US V1.0
Printing the Speed Dialing Lists
Follow this procedure to print the speed dialing lists. You can print two
types of One-touch or Coded Speed Dialing list: a standard list (List 1) or
a detailed list (List 2).
1. Open the SPEED DIAL LIST menu.
Open all three of the One-touch Speed Dialing panels. Then press
Report.
Report
REPORT
1.ACTIVITY REPORT
Press the search buttons until you see the display below.
REPORT
2.SPEED DIAL LIST
Set
Press Set.
SPEED DIAL LIST
1.1-TOUCH LIST
2.
Press the search buttons to display the name of the list you want
to print.
1.1-TOUCH LIST Prints the standard list (List 1) of all One-
touch Speed Dialing buttons and numbers
registered in the fax.
2.CODED DIAL LIST Prints the standard list (List 1) of all Coded
Speed Dialing buttons and numbers
registered in the fax.
3.1-TOUCH (DETAIL) Prints the detailed list (List 2) of all One-
touch Speed Dialing buttons and numbers
registered in the fax in a stacked format.
4.CODED (DETAIL) Prints the detailed list (List 2) of all Coded
Speed Dialing buttons and numbers
registered in the fax in a stacked format.
5.GROUP DIAL LIST Prints the list of buttons and numbers
registered for Group Dialing.

Chapter 15 Maintenance & Frequently Asked Questions 15-3
Maintenance &
Frequently Asked
Questions
LASER CLASS 3170 Series.
CFYA/YAH/YAN 120v US V1.0
3. Pull the document straight out to remove it.
Always open the ADF cover before you attempt to remove a jammed
document.
4. Close the ADF cover and press down on it gently until you hear it
lock in place.

15-4 Maintenance & Frequently Asked Questions Chapter 15
LASER CLASS 3170 Series.
CFYA/YAH/YAN 120v US V1.0
Removing Printer Feed Jams
Observe these guidelines when you are inspecting the fax for printer
feed jams:
❏If the paper jam occurred as a result of a power failure, restore power
to the fax unit by re-connecting it to the power source before you
follow the procedures below.
❏Make sure you check all the areas described below because paper
jams can occur at more than one location.
❏Follow the exact order of the steps below.
❏When removing the paper cassettes, remove them gently.
If a paper jam occurs during printing, the Error lamp blinks red and a
message will appear in the display:
REC. PAPER JAM
Wash off any toner from your hands or clothing immediately with cold
water.
THE FIXING AREA BECOMES VERY HOT. DO NOT TOUCH ANY
PARTS IN THE FIXING AREA WHEN YOU ARE REMOVING A
PAPER JAM.

Chapter 15 Maintenance & Frequently Asked Questions 15-5
Maintenance &
Frequently Asked
Questions
LASER CLASS 3170 Series.
CFYA/YAH/YAN 120v US V1.0
Locating a Paper Jam
A paper jam can occur in any of the following locations shown below.
You should check each location for jammed paper and remove it.
Area Page
1. Face-up tray area 15-6
2. Output trays area 15-6
3. Imaging area 15-8
4. MP tray area 15-11
5. Paper Cassette 1 area 15-12
6. Paper Cassette 2 area (if installed) 15-13
Paper jams can occur in more than one location at a time, so ensure all
locations indicated in the illustration are checked.
4.MP TRAY AREA
5.PAPER CASSETTE 1 AREA
6.PAPER CASSETTE 2 AREA
(if installed)
2.OUTPUT TRAYS
AREA
1.FACE-UP TRAY
AREA
3.IMAGING AREA

15-6 Maintenance & Frequently Asked Questions Chapter 15
LASER CLASS 3170 Series.
CFYA/YAH/YAN 120v US V1.0
1. Face-up tray area
Gently pull out the jammed paper.
If the jammed paper cannot be easily removed, do not force it. This can
happen when the trailing edge of the paper is still within the paper feed
area. The pressure from the pressure roller must be released before
removing the paper. To do this, open the printer cover and follow the
instructions (➞15-9) to hold the green lever and flip the transfer guide
up. Then, try removing the jammed paper from this area. After
removing the paper, gently guide the transfer guide back to its original
position.
2. Output trays area
1. Open the face-up tray.

15-8 Maintenance & Frequently Asked Questions Chapter 15
LASER CLASS 3170 Series.
CFYA/YAH/YAN 120v US V1.0
3. After the paper’s edge has rolled out, pull the paper forward
carefully.
If the jammed paper cannot be easily removed, do not force it. This can
happen when the trailing edge of the paper is still within the paper feed
area. The pressure from the pressure roller must be released before
removing the paper. To do this, open the printer cover and follow the
instructions (➞15-9) to hold the green lever and flip the transfer guide
up. Then, try removing the jammed paper from this area. After
removing the paper, gently guide the transfer guide back to its original
position.
3. Imaging area
1. Lift the document feeder tray, the document output tray and the
upper output tray.
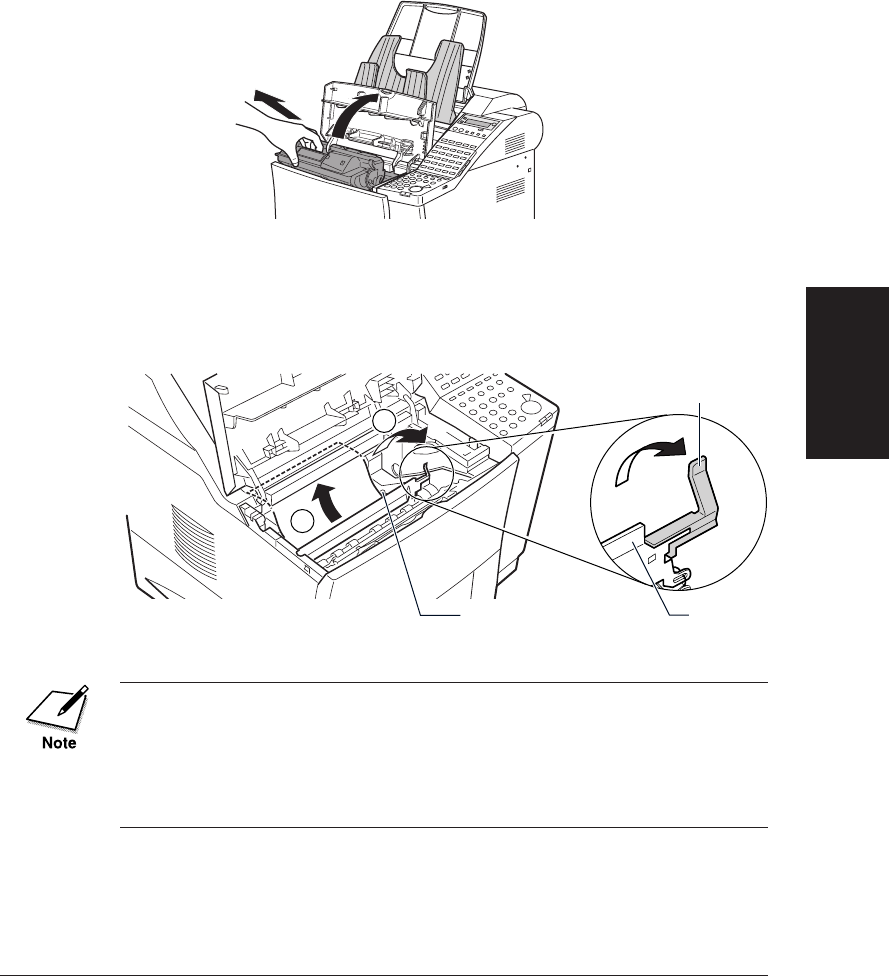
Chapter 15 Maintenance & Frequently Asked Questions 15-9
Maintenance &
Frequently Asked
Questions
LASER CLASS 3170 Series.
CFYA/YAH/YAN 120v US V1.0
2. Open the printer cover and remove the toner cartridge. Store the
cartridge in its original protective bag to avoid exposure to light.
3. While holding the green lever, flip the transfer guide up. Gently
ease the edge of the paper away from the guide. After the paper
rear-most edge has come out, slowly pull the paper forward and
out of the fax unit.
1
2
•The spring for the transfer guide is strong. Always guide the transfer
guide slowly back to its original position by holding the green lever.
Never let it jump back by releasing the lever.
•When removing the jammed paper, be careful not to touch the transfer
charging roller. If the roller becomes dirty, the print quality will
deteriorate.
TRANSFER
CHARGING ROLLER
GREEN LEVER
TRANSFER
GUIDE
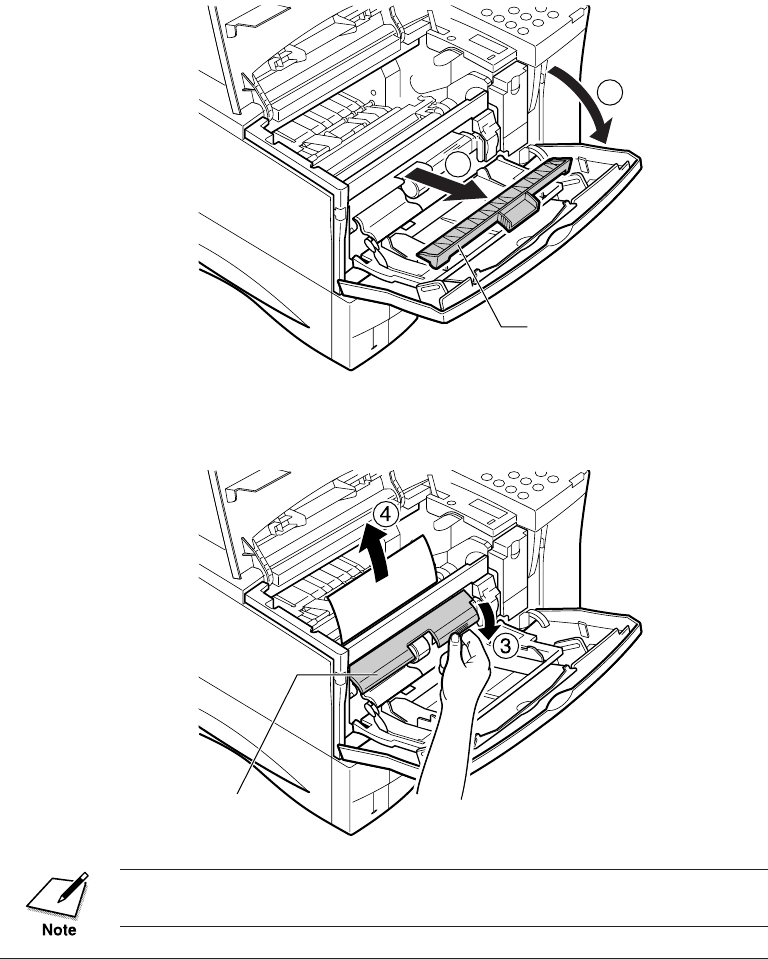
15-10 Maintenance & Frequently Asked Questions Chapter 15
LASER CLASS 3170 Series.
CFYA/YAH/YAN 120v US V1.0
4. If you cannot reach the paper, open the MP tray and remove the
envelope feeder slot cover if attached.
1
2
5. Pull out the jammed paper holding its leading edge while
opening the release guide as far as it will go.
Replace the envelope feeder slot cover onto the MP tray after removing
the jam.
ENVELOPE FEEDER
SLOT COVER
RELEASE GUIDE

Chapter 15 Maintenance & Frequently Asked Questions 15-11
Maintenance &
Frequently Asked
Questions
LASER CLASS 3170 Series.
CFYA/YAH/YAN 120v US V1.0
4. MP tray area
1. If a paper jam occurs in the MP tray area follow the procedure for
removing the paper jam in the imaging area on pages 15-8 to 15-
10.
2. If you cannot easily reach the paper to clear the jam, slowly pull
the jammed paper out from the front.
Do not pull the jammed paper upwards when removing it from the fax
unit. This could damage the paper sensor.
If the paper does not come out easily, do not force it. Follow the
instructions from step 2 of the Paper Cassette 1 area description to
remove the jammed paper. (➞15-12)
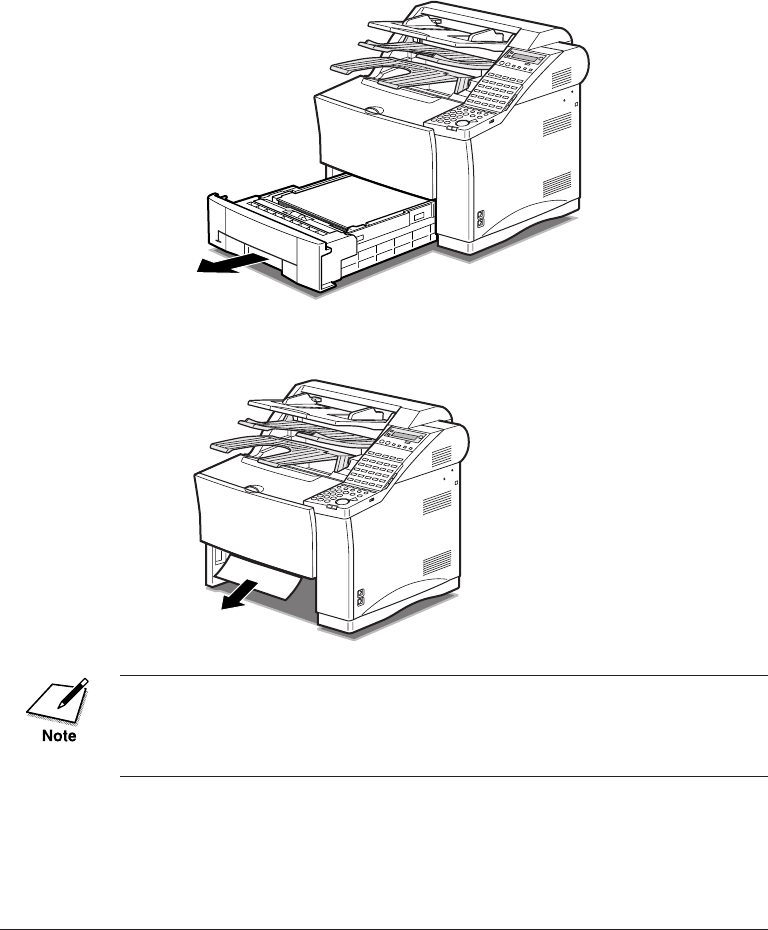
15-12 Maintenance & Frequently Asked Questions Chapter 15
LASER CLASS 3170 Series.
CFYA/YAH/YAN 120v US V1.0
5. Paper Cassette 1 area
1. Remove Paper Cassette 1. If Paper Cassette 2 is installed, be sure
to remove it first.
If you can see the edge of the paper
Locate the jammed paper inside the fax unit and gently pull it out.
If the paper does not come out easily or you cannot grasp the edge of the
paper easily, do not force it. Go to step 2. Always release the transfer guide
inside the fax unit before removing the paper. (➞15-9) After removing the
paper, gently guide the transfer guide back to its original position.
If you cannot see the edge of the paper
2. Open the printer cover and remove the toner cartridge. (➞15-9)
Store the cartridge in its original protective bag to avoid exposure
to light.

Chapter 15 Maintenance & Frequently Asked Questions 15-13
Maintenance &
Frequently Asked
Questions
LASER CLASS 3170 Series.
CFYA/YAH/YAN 120v US V1.0
3. Hold the green lever and flip the transfer guide up, then slowly
pull the paper out from below.
2
1
•The spring for the transfer guide is strong. Always guide the transfer
guide slowly back to its original position by holding the green lever.
Never let it jump back by releasing the lever.
•When removing the jammed paper, be careful not to touch the transfer
charging roller. If the roller becomes dirty, the print quality will
deteriorate.
•After removing the jammed paper, make sure you insert the cassette all
the way into the fax unit until it locks into place.
6. Paper Cassette 2 area
Before removing Paper Cassette 2, check inside the printer cover. If you
see the edge of the paper, follow the procedure of removing the jammed
paper in the imaging area. (➞15-8 to 15-10) If you do not see the edge,
follow the procedure below:
GREEN LEVER
TRANSFER
GUIDE

15-14 Maintenance & Frequently Asked Questions Chapter 15
LASER CLASS 3170 Series.
CFYA/YAH/YAN 120v US V1.0
1. Remove Paper Cassette 2.
2. Locate the jammed paper inside Paper Cassette 2 and gently pull
it out.
•If the jammed paper is still within the paper feed area inside the fax
unit, do not force it. Always release the transfer guide inside the fax
unit before removing the paper. (➞15-9)
•When removing the jammed paper, be careful not to touch the transfer
charging roller. If the roller becomes dirty, the print quality will
deteriorate.
•After removing the jammed paper, make sure you insert the cassette all
the way into the fax unit until it locks into place.

Chapter 15 Maintenance & Frequently Asked Questions 15-15
Maintenance &
Frequently Asked
Questions
LASER CLASS 3170 Series.
CFYA/YAH/YAN 120v US V1.0
Storing Recording Paper
Use only the recommended paper or paper of similar quality, and store it
carefully. When installing the recording paper, refer to page 2-31.
Recommended Paper
We recommend using Canon paper with this fax machine.
Quality Use plain bond, typewriter quality without curls, folds,
or rough edges.
Weight 17-24 lb. (64-90 g/m2)
Storage 64°F to 75°F (18°C to 24°C)
40%-60% relative humidity
❏Before buying large quantities of other paper, test it with the fax to
make sure it is reliable.
❏Use only plain white paper. Do not use perforated or colored paper.
❏Paper that is either too smooth or rough may reduce print quality or
cause printer jams.

15-16 Maintenance & Frequently Asked Questions Chapter 15
LASER CLASS 3170 Series.
CFYA/YAH/YAN 120v US V1.0
Storing the Paper Supply
Improper paper storage can affect the quality of the printing. Follow
these guidelines when you store paper.
❏Store unused paper in its wrapping to protect the paper against
humidity.
❏Do not store paper on the floor where humidity is higher.
❏If the humidity of the surrounding area is higher than normal, store
the paper in a specially designed storage box.
❏To prevent excessive paper curl, do not stack paper too high.
❏Do not expose the stored paper supply to direct sunlight.
❏If paper is moved to a location of very different temperature, store
the paper in the new location for at least one day before you use it.
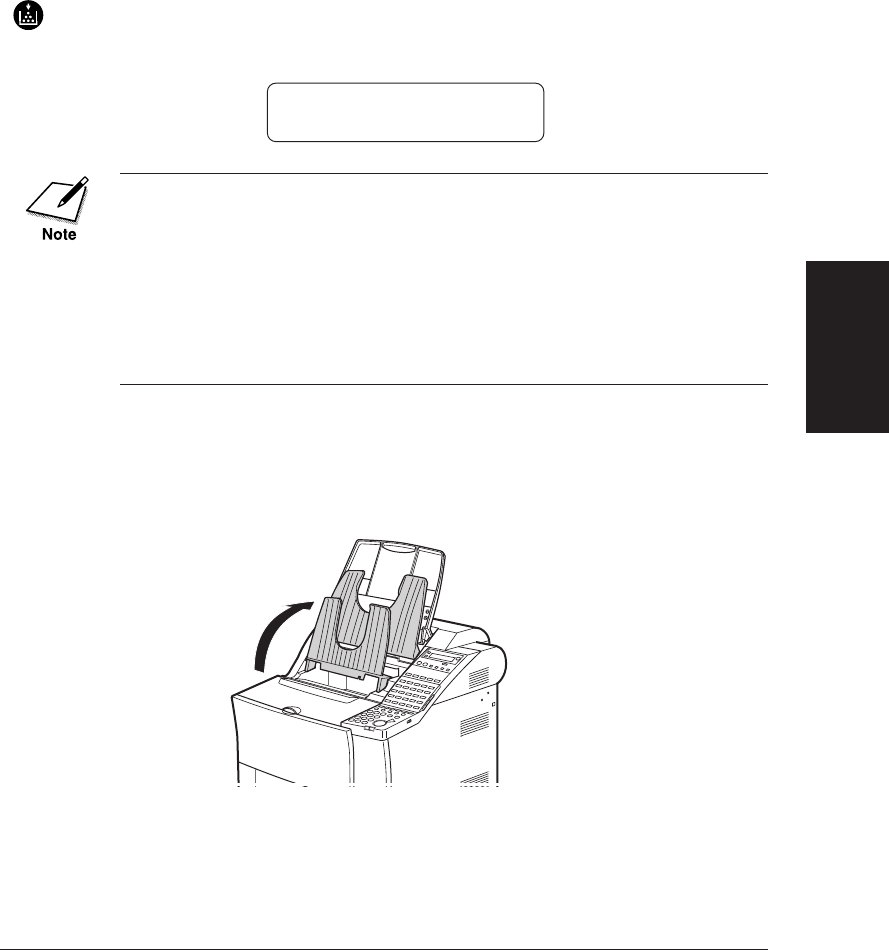
Chapter 15 Maintenance & Frequently Asked Questions 15-17
Maintenance &
Frequently Asked
Questions
LASER CLASS 3170 Series.
CFYA/YAH/YAN 120v US V1.0
Changing the Toner Cartridge
Change
Cartridge
When the toner runs low in the toner cartridge, the Change
Cartridge indicator on the operation panel will light and you
will see this message:
REPLACE CARTRIDGE
The fax may be set to continue printing or to store the remainder of a
document being received into the memory. (➞16-18)
You may be able to extend the service life of the toner cartridge by
removing it and rotating it 5 or 6 times to re-distribute the toner inside
the cartridge. After you re-set the cartridge in the fax unit, if the mes-
sages goes off, you can continue printing but make sure you have a new
cartridge on hand to replace the old one when it finally runs out of toner.
If the message does not go off, then you will have to follow the proce-
dure below to replace the old cartridge.
Follow this procedure to replace the toner cartridge.
1. Lift the document feeder tray, the document output tray and the
upper output tray.

15-18 Maintenance & Frequently Asked Questions Chapter 15
LASER CLASS 3170 Series.
CFYA/YAH/YAN 120v US V1.0
2. Open the printer cover to remove the old cartridge and discard it.
Do not attempt to disassemble the cartridge or refill the cartridge.
DO NOT INCINERATE THE CARTRIDGE. SCATTERED TONER
POWDER IS HIGHLY FLAMMABLE.
To dispose of the cartridge:
To protect the environment, Canon has started a special program
to help you dispose of your empty toner cartridges.
After you install a toner cartridge, keep the original packing
material. Inside the box is a shipping label. Fill out this label and
call UPS for pickup. UPS will pick up the empty toner cartridge at
Canon’s expense and return it to a recycling center.
For details about this program, contact your authorized Canon
dealer.
3. Remove a new toner cartridge from its protective bag.
Save the protective bag. You may need it to transport the cartridge later.
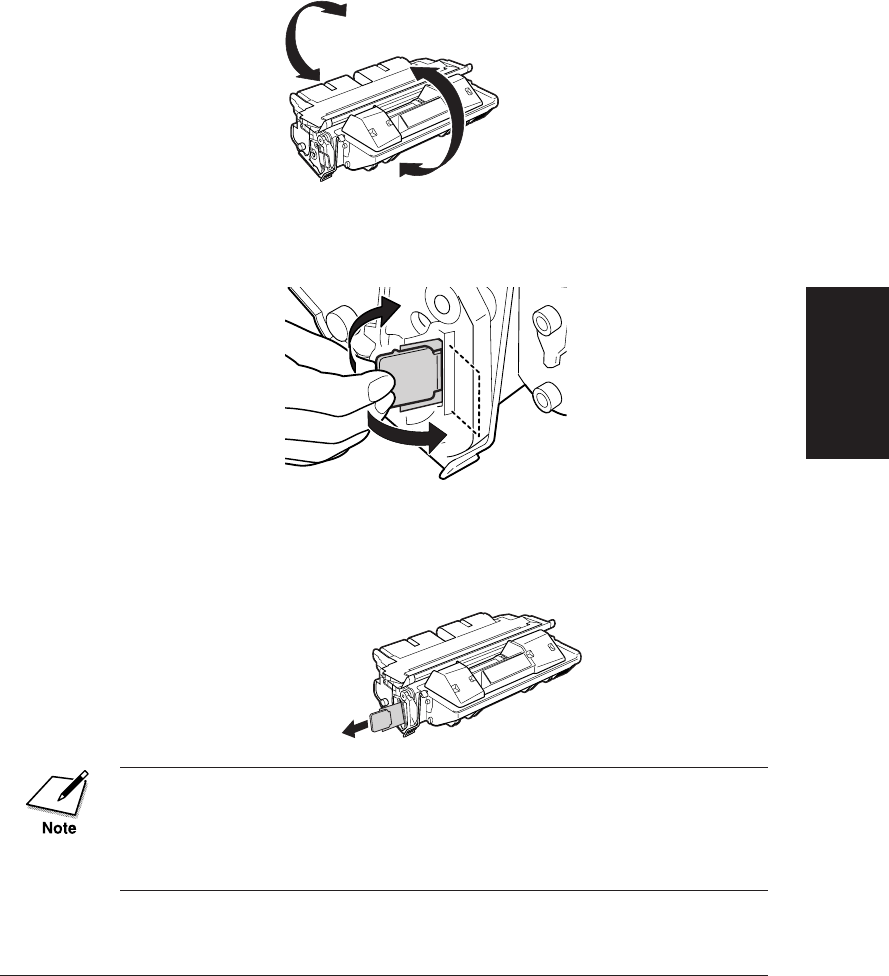
Chapter 15 Maintenance & Frequently Asked Questions 15-19
Maintenance &
Frequently Asked
Questions
LASER CLASS 3170 Series.
CFYA/YAH/YAN 120v US V1.0
4. Rock the new cartridge five or six times to distribute the toner
evenly inside the cartridge.
5. Place the cartridge on a flat, clean surface.
6. Snap the tab to detach it from the cartridge.
7. As you steady the cartridge with one hand, remove the seal by
gently pulling the plastic tab with your other hand.
Use a firm, even pull to avoid breaking the seal.
•Do not pull the tab upwards or downwards; the tape may break.
•If the tab breaks off from the tape, pull the tape out by pulling on the
end of the tape where the tab was originally attached.
•Wash off any toner from your hands or clothing immediately with cold
water.
PULL STRAIGHT OUT

Chapter 15 Maintenance & Frequently Asked Questions 15-21
Maintenance &
Frequently Asked
Questions
LASER CLASS 3170 Series.
CFYA/YAH/YAN 120v US V1.0
❏The fax unit will not operate if the cover is not closed com-
pletely. If the printer cover is open you will see a message:
CHECK PRINTER COVER
Open the printer cover again and make sure the toner car-
tridge is sitting level and close the printer cover again.
11. Lower the upper output tray, the document output tray, and the
document feeder tray.

15-22 Maintenance & Frequently Asked Questions Chapter 15
LASER CLASS 3170 Series.
CFYA/YAH/YAN 120v US V1.0
Storing Toner Cartridges
Follow these simple guidelines when you handle and store toner car-
tridges.
Handling Cartridges
❏Do not remove the toner cartridge from its protective bag until you
are ready to install it.
❏Save the protective bag. You may need it later to re-pack the car-
tridge temporarily to protect it from exposure to light.
❏Never expose a toner cartridge to direct sunlight, and do not leave it
exposed to normal room light (about 1,000 lux) for longer than 5
minutes.
❏There are strong magnets inside a toner cartridge. To avoid possible
destruction of valuable data on disks or other media, keep the toner
cartridge away from computer screens, hard disks, floppy disks, or
any other kind of material sensitive to magnetic fields.
❏Never touch or try to open the protective shutter that protects the
light-sensitive drum inside the toner cartridge. If the drum is ex-
posed to light, this can cause printing quality deterioration.
❏Handle the toner cartridge with care. Do not subject it to shock or
vibrations.
❏Always set toner cartridges down with the arrow on the cartridge
facing up.

Chapter 15 Maintenance & Frequently Asked Questions 15-27
Maintenance &
Frequently Asked
Questions
LASER CLASS 3170 Series.
CFYA/YAH/YAN 120v US V1.0
6. Pull the transfer guide back to its full extent, then wipe the silver
metal strip with cloth. Then gently guide the transfer guide back
to its original position.
1
2
•The spring for the transfer guide is strong. Always guide the transfer
guide slowly back to its original position by holding the green lever.
Never let it jump back by releasing the lever.
•To avoid deterioration in print quality, never touch the transfer
charging roller when you clean the metal strip.
7. Replace the toner cartridge in the fax unit.
8. Close the printer cover, lower the upper output tray, the document
output tray and the document feeder tray, and connect the power
cord of the fax unit to the power source.
Cleaning the Scanning Area
Periodically check the scanning glass, the white scanning strip, and
rollers. If the underside of the ADF cover or the scanning glass is dirty,
the documents you send will look dirty.
1. Disconnect the power cord of the fax unit from its power source.
TRANSFER CHARGING
ROLLER

15-28 Maintenance & Frequently Asked Questions Chapter 15
LASER CLASS 3170 Series.
CFYA/YAH/YAN 120v US V1.0
2. Gently open the upper unit of the ADF cover, as shown in the
illustration below.
CBE SURE NOT TO OPEN THE ADF COVER FULLY TO THE EXTENT
THAT THE LOWER UNIT IS LIFTED AS SHOWN IN THE
ILLUSTRATION ON THE RIGHT. THE LOWER UNIT MAY FALL
HEAVILY WHEN YOU UNLOCK THE ADF COVER ON STEP 3.

15-30 Maintenance & Frequently Asked Questions Chapter 15
LASER CLASS 3170 Series.
CFYA/YAH/YAN 120v US V1.0
5. Gently close the upper unit of the ADF cover until you hear it
lock.
MAKE SURE THAT THE UPPER UNIT OF THE ADF COVER IS
LOCKED IN POSITION SECURELY BEFORE PROCEEDING TO
STEP 6.
6. Lift the document feeder tray, and gently open the ADF cover
until it stops, grasping the document feeder tray and the ADF
cover at the same time.

Chapter 15 Maintenance & Frequently Asked Questions 15-31
Maintenance &
Frequently Asked
Questions
LASER CLASS 3170 Series.
CFYA/YAH/YAN 120v US V1.0
7. While holding the ADF cover open with one hand, use one finger
of your other hand to gently push in the black plastic loop to
separate it from the stub on the fax machine.
8. Gently lift the ADF cover up to the full open position.

15-32 Maintenance & Frequently Asked Questions Chapter 15
LASER CLASS 3170 Series.
CFYA/YAH/YAN 120v US V1.0
9. Use a soft, dry cloth to wipe clean the scanning glass, the white
strip above, rollers and the area around the glass. Use a soft cloth
that will not scratch the scanning glass.
❏Use a dry cloth to wipe clean the underside of the ADF cover.
❏Use a dry cloth to wipe up paper dust around the rollers.
If you have installed the optional stamp kit, be careful not to touch the
stamp ink compartment when cleaning the scanning area.
10. Lower the ADF cover until the plastic loop is even with the stub
on the fax machine.
ROLLERS
WHITE STRIP
SCANNING GLASS
STAMP (option)

Chapter 15 Maintenance & Frequently Asked Questions 15-33
Maintenance &
Frequently Asked
Questions
LASER CLASS 3170 Series.
CFYA/YAH/YAN 120v US V1.0
11. Place the end of the plastic loop over the end of the stub so it stays
in place.
12. Close the ADF cover and press down on it slightly until you hear
it lock in place, and lower the document feeder tray.
13. Connect the power cord of the fax unit at the power source.
Refilling the Stamp Ink Compartment (option)
Follow this procedure to refill the stamp ink compartment if you are
using the optional stamp feature.
❏Please contact your local authorized Canon dealer when you run out
of ink.
1. Disconnect the power cord of the fax unit from its power source.
2. Follow steps 6 to 8 on pages 15-30 and 15-31 to open the ADF
cover up to the full open position.
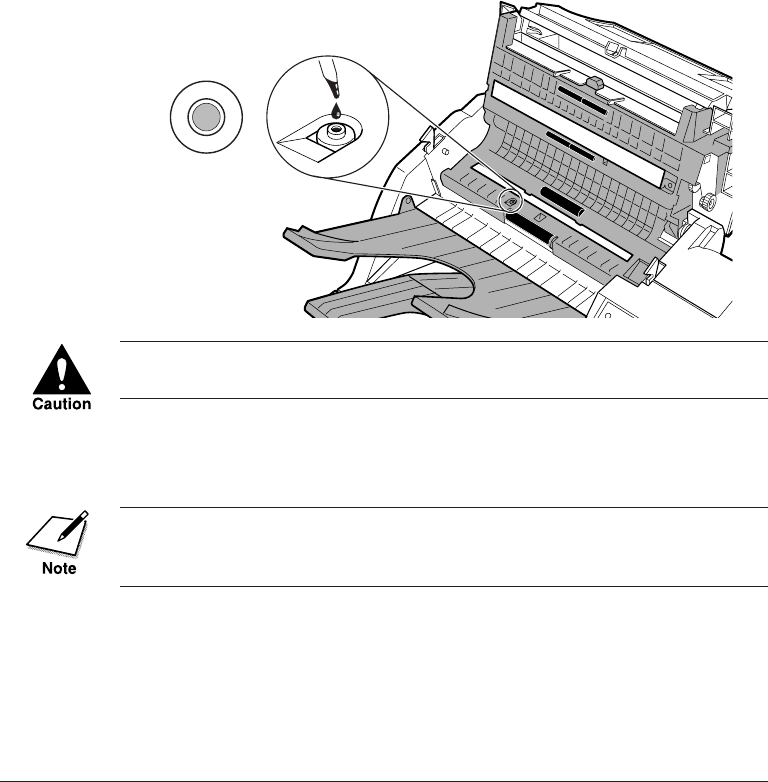
15-34 Maintenance & Frequently Asked Questions Chapter 15
LASER CLASS 3170 Series.
CFYA/YAH/YAN 120v US V1.0
3. Locate the stamp pad then apply only one drop of ink to the
stamp ink compartment.
❏To avoid a malfunction, do not add too much ink.
❏Use only Shachihata X Stamper Ink CS-20 Yellow.
❏Do not use the stamp feature for at least one hour. If you have
to send a document, turn off the stamp feature for the first
hour. (➞12-10)
TO AVOID INK SPILLAGE, APPLY ONLY ONE DROP OF INK TO
THE STAMP PAD.
4. Follow steps 10 to 12 on pages 15-32 and 15-33 to close the ADF
cover, lower the document feeder tray, and connect the power cord
of the fax unit to the power source.
•Make sure that you do not drip ink on any other part of the fax.
•Make sure that you put the plastic loop back in place when you close
the ADF cover. (➞15-33)

15-36 Maintenance & Frequently Asked Questions Chapter 15
LASER CLASS 3170 Series.
CFYA/YAH/YAN 120v US V1.0
Make sure the subaddress/passwords match
the settings on the other party’s fax unit. If the
other party's fax is a Canon fax and can set a
polling ID, request that they set the polling ID
to 255 decimal or 1111 1111 binary.
PROBLEM SOLUTION
CODE
You cannot be polling receiving.
#0021
#0022 The settings for the One-touch or Coded
Speed dialing buttons you are using to dial the
other party have been deleted.
Correct the One-touch or Coded Speed dial
registration settings. (➞4-6, 4-15)
#0025 During registration of the number for One-
touch or Coded Speed Dialing, you registered
the number for confidential or relay sending
but you omitted the subaddress.
Open the optional settings for One-touch or
Coded Speed Dialing and make sure that you
have entered a subaddress and password (if
required) for the telephone number. (➞4-8, 4-18)
After setting up relay sending or confidential
sending, the settings for One-touch or Coded
Speed dialing may have been changed.
Open the settings for One-touch or Coded
Speed Dialing and make sure the settings have
not been changed. (➞4-6, 4-15)
#0033 You have attempted to send a confidential
document to a fax unit that does not support
the use of ITU-T subaddresses.
Send the document without confidential
settings, or send the document to a fax that
supports the use of ITU-T subaddresses.
#0034 You sent a confidential document to another
fax unit but it was rejected.
Contact the other party and confirm the
settings on the other party’s confidential
mailbox.
#0035 You have attempted to relay a document to a
fax unit that does not support the use of ITU-
T subaddresses.
Send the document by regular transmission.
#0036 You have attempted to relay a document to a
fax unit but it was rejected.
Contact the other party and confirm that their
relay settings match the relay settings on your
fax unit.
#0037 Before you try to clear the memory, you may
want to print a memory list for reference.
(➞8-5)
If there are documents in the memory that you
do not need, erase those documents from the
memory. (➞8-9)
The memory in your fax is full and cannot
store a document for sending or receiving.
#0059 The number you had dialed did not match
with the registered number on the other
party's fax. The number is not registered on
the other party's fax or the number registered
on the other party's fax is not correct.
Call the other party and ask the other party to
register the number or to correct the number.
Or, set PHONE NO. CHECK of the system
setting to OFF on your fax. (➞16-31)

Chapter 15 Maintenance & Frequently Asked Questions 15-37
Maintenance &
Frequently Asked
Questions
LASER CLASS 3170 Series.
CFYA/YAH/YAN 120v US V1.0
PROBLEM SOLUTION
CODE
Call the other party and confirm whether or
not their fax supports subaddress receiving. Try
sending again without a subaddress.
Call the other party and confirm whether or
not their fax supports ITU-T password
receiving. Try sending again without a
password.
The other party’s fax does not support
receiving a document with an ITU-T pass-
word.
#0081
#0084
Call the other party and confirm whether or
not their fax can accept a polling request with a
subaddress. Try sending again without a
subaddress.
The other party’s fax does not support
accepting a polling request with a subaddress.
#0082
You cannot poll the other party to receive a
document because a subaddress and/or
password does not match.
#0083
Call the other party and confirm whether or
not the other party’s fax supports receiving a
polling request with an ITU-T password. Ask
the other party to try again without an ITU-T
password.
The other party cannot receive a document
with an ITU-T password.
Call the other party and confirm that the
subaddress and/or password that you are
using are correct.
The other party’s fax does not support
receiving a document with a subaddress.
#0080
#0995 Documents in the memory to be sent have
been cleared.
You cannot receive documents because a
subaddress and/or password does not match.
#0102 Call the other party and confirm whether or
not you are using the correct subaddress and/
or password.
The current transmission has been cleared. You
may start again, start a new operation, or leave
the fax in standby.
CODE
SOLUTION
##0322 - ##0330 Contact your local authorized Canon dealer where you purchased your Canon product.

15-38 Maintenance & Frequently Asked Questions Chapter 15
LASER CLASS 3170 Series.
CFYA/YAH/YAN 120v US V1.0
List of LCD Display Messages
(Alphabetic List)
Here is a list of messages that are displayed on the screen when a
problem occurs in the fax or the printer.
The box number you entered is already in use. For example, you cannot
use the same box number for a confidential mailbox and a polling box.
Try again with another box number.
WHAT IT MEANSMESSAGE
#ALREADY IN USE
A document page may be jammed or may not be fed correctly in the
automatic document feeder (ADF). Remove the document and try again.
(➞15-2) If the document does not feed correctly, clean the rollers. (➞15-29)
CHECK DOCUMENT
Check the printer cover and make sure that it is completely closed. Make
sure a toner cartridge is installed under the printer cover.
You attempted sending or polling receiving with an incorrect
subaddress/password. Contact the other party and confirm that you are
using the correct subaddress/password.
You tried to use direct sending while the fax was sending another
document. Wait until the transmission is finished, then try again.
CHECK PRINTER COVER
CHECK SUBADDR/PASSWD
COMMUNICATING
PLEASE WAIT
The other party’s line was busy on the previous dialing attempt and
your fax unit is dialing the number again. To cancel redialing, press Stop
when direct dialing or press Delete File, select transaction number then
press Set when memory sending.
AUTO REDIAL
The other party did not answer, even after redialing. Wait for a few
minutes and try again. When you send documents long distance, press
Pause after dialing. If you still cannot send the document, the other party
may have turned off their fax unit.
BUSY/NO SIGNAL
Your attempt at polling receiving failed. The polling ID may be incorrect
or your subaddress/password does not match the subaddress/password
set on the polling box of the other party’s fax unit. Contact the other
party and make sure you are using the correct polling ID or subaddress/
password. (➞11-3)
CHECK POLLING ID
Printer malfunction. Press Stop. Unplug the fax unit from its power
source, wait a few minutes, then plug in power cord again. If the fax is
connected to an uninterruptable power supply (UPS), unplug the power
cord, and then plug it to an AC outlet. If message remains in the LCD
display and the fax unit cannot return to standby, call for service.
CHECK PRINTER
CHECK PAPER SIZE (For
the LASER CLASS® 3170/
3175 with the PCL6 Printer
Board installed)
Paper-size-matching error of the MP tray. You have set different paper
sizes in the fax menus and in the printer menus, or you have not turned
off USE MP TRAY while you are using the MP tray for the printer
function and loading paper of sizes other than letter, legal or A4. Set the
correct paper size in both of the fax and printer menus, or turn off USE
MP TRAY in the fax menus.

Chapter 15 Maintenance & Frequently Asked Questions 15-39
Maintenance &
Frequently Asked
Questions
LASER CLASS 3170 Series.
CFYA/YAH/YAN 120v US V1.0
MESSAGE WHAT IT MEANS
The transaction has completed but the handset is not sitting completely
on its cradle. Make sure the handset is sitting completely on its cradle.
HANG UP PHONE
If documents have been received in confidential mailboxes, print them.
(➞10-8)
If documents have been received in memory boxes, print them. (➞8-25)
Check the content of the memory and if there are documents in the
memory that you do not need, delete them from the memory. (➞8-9)
If you tried to send a document with “Ultra Fine,” “Super Fine,” or
“Text/Photo,” try sending by direct sending, or set to “Fine” or “Text”
and send by memory sending.
MEMORY FULL The memory is full. If the document has been received in the memory,
print the document. (➞8-6)
You may be using the wrong ITU-T subaddress/password. Contact the
other party and make sure you are using the correct subaddress/password.
The memory of the other party’s fax unit may be full. Contact the other
party and request that they clear the memory on their fax unit.
You have tried to check the contents of the memory but no documents are
currently stored in the memory.
The other party’s fax unit may not be able to function as a relay station, or
it may not be set up correctly to receive and relay documents. Contact the
other party and make sure it can function as a relay station.
If the fax unit can be set up as relay station, confirm that it is set up
correctly for relay transmissions. Make sure you have both registered the
same ITU-T subaddress/password.
If the memory of the other party’s fax unit is full, it will not be able to
receive and relay documents. Ask them to clear part or all of the memory
on their fax unit.
NO DOC. STORED
NO ORIGINAL RELAY TX
The memory is full. Wait until the current document transmission has
completed.
The other party did not answer. Start the procedure again from the
beginning and try again. If the connection fails again, make sure the other
party is using a G3-compatible fax machine.
The other party’s fax unit may not support the use of confidential
mailboxes. Contact the other party and confirm whether or not they can
set up confidential mailboxes.
MEMORY FULL
PLEASE WAIT
NO ANSWER
NO CONFID. TX
The document is longer than 39.4 inches (1 meter). Cut the document into
smaller sheets. Reduce them on a copy machine if necessary. Then paste
them on standard letter or A4-size sheets for scanning.
DOCUMENT TOO LONG
You have to enter department access code to send document.ENTER DAC
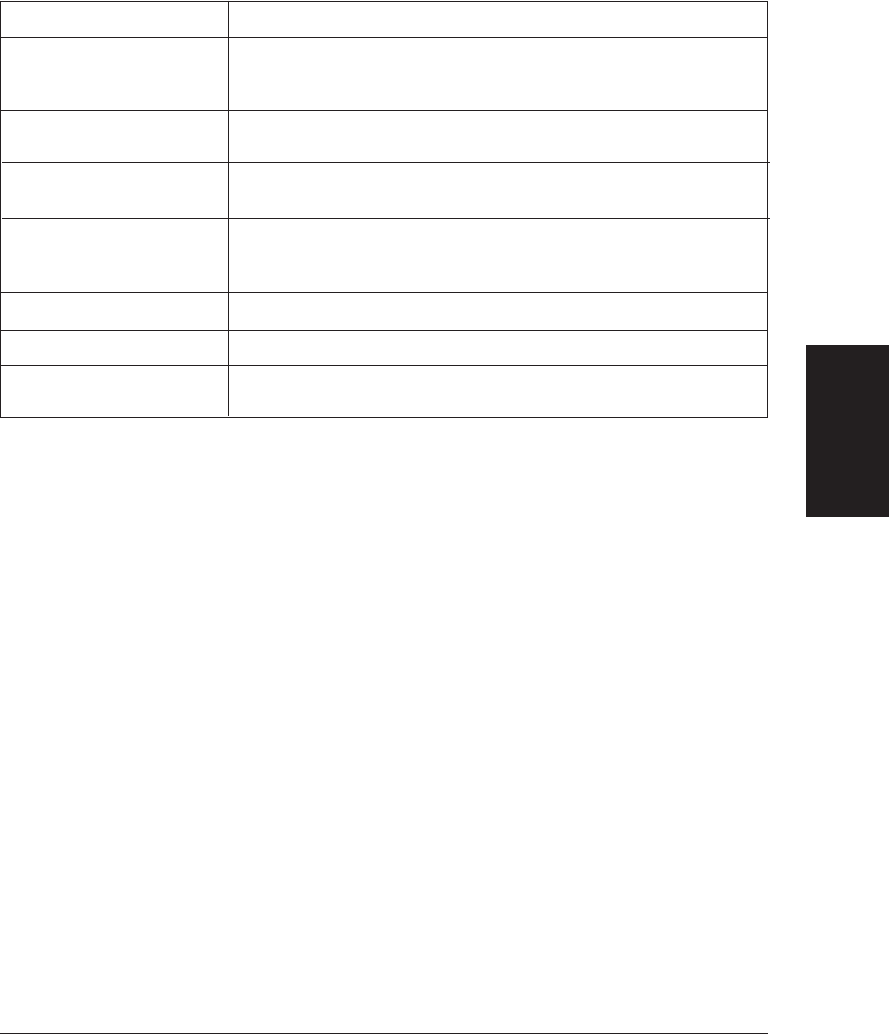
Chapter 15 Maintenance & Frequently Asked Questions 15-41
Maintenance &
Frequently Asked
Questions
LASER CLASS 3170 Series.
CFYA/YAH/YAN 120v US V1.0
MESSAGE WHAT IT MEANS
Your fax unit has run out of paper. Re-fill the paper cassettes. (➞2-31)SUPPLY REC. PAPER
You have pressed the Stop button to cancel the current transaction. The
fax unit should return to standby in a few moments.
An error has occurred on the telephone line or in your fax unit. Start the
procedure from the beginning. If the problem persists, call for service.
START AGAIN
STOP KEY PRESSED
You attempted to send a document with an ITU-T subaddress, but the
other party’s fax unit does not support receiving a document with an
ITU-T subaddress.
SUBADDRESS TX REJECTD
USER ACCESS CODE You have to enter user access code to send, copy or print reports.
USER ACCESS LOCK Sending or printing has been restricted. Set the TX SETTINGS or FAX'S
PRINTER SET of the restrictive codes to OFF. (➞13-14)
SELECTIVE POLL REJECT You have set up a polling box for polling sending with an ITU-T
subaddress, but the other party’s fax unit does not support use of an
ITU-T subaddress for polling receiving.

15-42 Maintenance & Frequently Asked Questions Chapter 15
LASER CLASS 3170 Series.
CFYA/YAH/YAN 120v US V1.0
Questions and Answers
Documents Are Not Being Sent Correctly.
❏
Cannot send after dialing?
Is the document set in the automatic document feeder (ADF)
correctly?
Remove the document and set it correctly. (➞6-3,15-2)
Is the number dialing correctly?
Check the number registered for the speed dialing button and
make sure it is correct. You may want to print a list of all regis-
tered speed dialing buttons. (➞14-2) If you do not have time to
check and correct the registration immediately, use regular
dialing. (➞6-7)
Is the transmission speed too fast for the telephone lines in your
area?
The telephone lines in your area may be in poor condition. Select
a lower transmission speed. (➞4-13, 4-22, 16-30)
Is the other fax out of paper?
Call the other party and make sure their fax is supplied with
paper.
Are the rollers dirty?
Clean the rollers. (➞15-29)
❏
Does memory fill up immediately when you try to send?
Are the document mode settings on?
The Fine, Super Fine, Ultra Fine or Text/Photo settings can use
large amounts of memory when scanning certain types of
documents. Use direct sending. (➞6-15)
❏
Are documents streaked with lines after they print on the other
fax?
Is the scanning glass on your fax clean?
Copy a document on your fax and see if the copy is streaked or
dirty. If the print is streaked, clean the scanning glass. (➞15-32)
❏
Are your documents printing at a reduced size on the other fax?
Are the document feed guides set properly when you scan docu-
ments for sending?
Make sure the document feed guides are snug against the side of
the document you scan for sending. (➞6-3)

Chapter 15 Maintenance & Frequently Asked Questions 15-43
Maintenance &
Frequently Asked
Questions
LASER CLASS 3170 Series.
CFYA/YAH/YAN 120v US V1.0
❏
Are the documents you send too light?
Is the Lighter indicator on your operation panel on?
Press the Contrast button until Standard or Darker is selected.
(➞6-5)
Is your document too light?
Press the Contrast button until Darker is selected then try send-
ing again. (➞6-5)
Is the scanning glass on your fax clean?
Copy a document on your fax and see if the copy is streaked or
dirty. If the copy is streaked or dirty, clean the scanning glass.
(➞15-32)
❏
Cannot perform relay sending?
Does the relay unit support ITU-T subaddress/password transac-
tions?
If the relay unit does not support ITU-T subaddress/password
transactions, you cannot perform relay sending.
Has the relay unit set up a relay group correctly?
The relay group must be set up correctly on the relay unit and
the relay unit must tell you the subaddress and password. If the
relay unit has set an ITU-T password, then you must send the
document with the correct password as well as the correct
subaddress. (➞9-10)
Does the ITU-T subaddress/password match those of the relay
unit?
Make sure you set the correct subaddress/password. (➞9-10)
Is the memory of the relay unit full?
Check with the relay unit and make sure there is enough
memory to receive your document. Ask the relay unit to clear
their memory then try again.
❏
Cannot perform confidential sending?
Does the other fax support ITU-T subaddress/password transac-
tions?
If the other fax does not support ITU-T subaddress/password
transactions, you cannot perform confidential sending.
Has the other party set up a confidential mailbox?
The other party must set up a confidential mailbox on the other
fax and tell you the subaddress and password. If the other party
has set an ITU-T password, then you must send the document
with the correct password as well as the correct subaddress.
(➞10-10)

15-44 Maintenance & Frequently Asked Questions Chapter 15
LASER CLASS 3170 Series.
CFYA/YAH/YAN 120v US V1.0
Does the ITU-T subaddress/password match those of the other
party?
Make sure you set the correct subaddress/password. (➞10-10)
Is the memory of the other fax full?
Check with the other party and make sure there is enough
memory to receive your document. Ask the other party to clear
their memory then try again.
❏
Cannot relay a document from another fax?
Does the other fax unit support subaddress/password transactions?
If the other party’s fax does not support subaddress/password
transactions, you cannot relay documents.
Make sure you have both registered the same ITU-T subaddress/
password. (➞9-4)
Is your fax set up to relay documents?
Make sure your fax is set up properly to relay documents. The
relay feature must be turned on. (➞9-7)
Does the other party's fax support ITU-T subaddresses and pass-
words?
Contact the other party and confirm that they called you with
the correct subaddress/password.
Are the originator’s subaddress/password correct?
The originator must send you the document with the correct
ITU-T subaddress/password.
The ITU-T password setting is optional. However, if you set a
password on your relay TX group then the originator must send
a password. Otherwise, your fax will not receive the document
for relay broadcasting. (➞9-6)
Check the relay TX group and determine if it has been set to
check the identity of the originator before it receives the docu-
ment for a relay broadcast. (➞9-6)
❏
Other party cannot poll and receive your document?
Does the other party's fax support ITU-T subaddress/password
sending?
If the other party's fax does not support ITU-T subaddress/
password, you have to make a polling box #00 for the other
party and scan the document without subaddress/password.
(➞11-15) If the other party's fax is a Canon fax and can set a
polling ID, ask them to set the polling ID for 255 decimal or 1111
1111 binary.

Chapter 15 Maintenance & Frequently Asked Questions 15-45
Maintenance &
Frequently Asked
Questions
LASER CLASS 3170 Series.
CFYA/YAH/YAN 120v US V1.0
Documents Are Not Being Received Correctly.
❏
Cannot receive documents automatically?
Is the Manual RX indicator on your operation panel on?
If this indicator is on, press the button below Manual RX to turn
it off. (➞7-2)
❏
Cannot receive manually?
Is there a document set in the automatic document feeder (ADF)?
You cannot receive with a document set in the automatic docu-
ment feeder (ADF). Remove the document and try again.
(➞15-2)
Did you press Start/Scan before you hung up the handset?
When you hear a high pitched tone, press Start/Scan before you
hang up the handset. Review the procedure for manual receiving
with the optional handset kit installed on the fax. (➞7-7)
❏
Are the documents you receive of poor quality?
Is your toner cartridge running low on toner?
Remove your toner cartridge and rotate it 5 or 6 times to evenly
distribute the remaining toner and try again. If this does not
solve the problem, you should change the toner cartridge.
(➞15-17)
Is the other fax functioning properly?
The sending fax usually determines image quality. Try copying a
document on your own fax. If the copy is clean then the other fax
has a problem. Call the other party and ask them to clean the
scanning glass on the other fax.
❏
Cannot receive a confidential document in your confidential
mailbox?
Does the other party’s fax support subaddress/password transac-
tions?
If the other party’s fax does not support subaddress/password
transactions, you cannot receive confidential documents.
Make sure the other party knows the correct subaddress/
password for your confidential mailbox.
❏
Cannot poll another fax and receive its document?
Are you polling without a subaddress/password?
If the other party’s fax is a Canon fax and can set a polling ID,
ask them to set the polling ID for 255 decimal or 1111 1111 binary.

15-46 Maintenance & Frequently Asked Questions Chapter 15
LASER CLASS 3170 Series.
CFYA/YAH/YAN 120v US V1.0
Are you polling with a subaddress or password?
Contact the other party and confirm that their fax supports
receiving a polling request with a subaddress or password.
If the other party's fax supports subaddress/password polling,
confirm that you are using the correct subaddress and password.
If the other party's fax does not support subaddress/password
polling, call the other party without subaddress/password.
(➞11-3)
Documents Are Not Being Copied.
❏
Cannot copy?
Is the toner cartridge out of toner?
Change the toner cartridge. (➞15-17)
❏
Is the copied document reduced?
Are the document feed guides snug against the sides of the docu-
ment that you are copying?
Make sure the document feed guides are both against the sides
of the document on the document feeder tray before you start
copying. (➞5-3)
❏
Are copied documents cut at the margins?
Is the selector on the paper cassettes or the MP tray set for the
width of the paper loaded?
Adjust the selector to the width of the paper loaded. (➞2-32 to 2-
34, 2-46)
Having Other Problems.
❏
Is sending and receiving documents too slow?
When sending, is the document mode set for Ultra Fine, Super
Fine, Fine, or Text/Photo?
If the indicator for Ultra Fine, Super Fine, Fine, or Text/Photo is
on, press Resolution to select Standard, or press Document Type to
select Text. (➞6-5)

Chapter 15 Maintenance & Frequently Asked Questions 15-47
Maintenance &
Frequently Asked
Questions
LASER CLASS 3170 Series.
CFYA/YAH/YAN 120v US V1.0
Is your fax set for ECM receiving or sending?
Because the fax is constantly checking for errors during trans-
mission, ECM receiving or sending requires more time. The fax
is set to conduct all transactions using ECM (error correction
mode). If transmission speed appears to be extremely slow, you
may be able to speed up transmission time by turning ECM off.
(➞16-10, 16-14)
❏
Are the documents received not printed out?
Are the paper cassettes set correctly into the fax?
Insert the paper cassettes all the way into the fax unit until it
locks into place. (➞2-37)
❏
Cannot get faxes from information services?
Is your fax connected to a rotary dial telephone line?
Even if your fax is connected to a rotary dial line, you can still
get faxes from information services that require tone dialing.
Press Tone to receive faxes from information services that require
touch-tone telephone lines for transmission. (➞12-3)

15-48 Maintenance & Frequently Asked Questions Chapter 15
LASER CLASS 3170 Series.
CFYA/YAH/YAN 120v US V1.0
Recording the User Reminder Sheets
The user reminder sheets are essential for recording the passwords, box
numbers, subaddresses, and so on, so you do not forget them. We
recommend that you make a copy of these sheets, fill them out, and use
them for reference.
After you fill out these reminder sheets, store them in a safe place to
protect their confidentiality and so you can find them later for reference.
Password Reminder
Item Description Password (four-digit)
System Settings Protects the user data System
Settings from unauthorized
access.
Sending Restrictions Restricts document sending to
holders of the User Access
Code.
Printing Restrictions Restricts report printing and
document copying.
Memory Reception Protects your Memory Reception
button setup from unautho-
rized access.
Transfer Protects your Transfer button
setup from unauthorized
access.

Chapter 15 Maintenance & Frequently Asked Questions 15-49
Maintenance &
Frequently Asked
Questions
LASER CLASS 3170 Series.
CFYA/YAH/YAN 120v US V1.0
Department Access Code
Dept. Access Code Password Dept. Access Code Password
(four-digit) (four-digit) (four-digit) (four-digit)
Preset Polling
Box No. Box Name Password
(two-digit) (four-digit)

15-50 Maintenance & Frequently Asked Questions Chapter 15
LASER CLASS 3170 Series.
CFYA/YAH/YAN 120v US V1.0
Confidential Mailboxes
Box No. Box Name Password Subaddress RX Password
(two-digit) (four-digit) (Max. 20-digit) (Max. 20-digit)
Relay Broadcast Groups
Group No. Group Name Password Subaddress RX Password
(two-digit) (four-digit) (Max. 20-digit) (Max. 20-digit)

Chapter 15 Maintenance & Frequently Asked Questions 15-51
Maintenance &
Frequently Asked
Questions
LASER CLASS 3170 Series.
CFYA/YAH/YAN 120v US V1.0
Memory Boxes
Box No. Box Name Password Subaddress TX Password RX Password
(two-digit) (four-digit) (Max. 20-digit) (Max. 20-digit) (Max. 20-digit)
Polling Boxes
Box No. Box Name Password Subaddress TX Password
(two-digit) (four-digit) (Max. 20-digit) (Max. 20-digit)

15-52 Maintenance & Frequently Asked Questions Chapter 15
LASER CLASS 3170 Series.
CFYA/YAH/YAN 120v US V1.0

16-2 Summary of Important Settings Chapter 16
LASER CLASS 3170 Series.
CFYA/YAH/YAN 120v US V1.0
Opening the Data Registration Menu
Follow this procedure to display the user data settings.
1. Open all three of the One-touch Speed Dialing panels. Then press
Data Registration.
REGISTRATION
1.DATA REGISTRATION
Data
Registration
2.
Set
Press Set to display the next menu.
DATA REGISTRATION
1.USER SETTINGS
3.
Use the search buttons to display the item you want to set or
change.
DATA REGISTRATION
1.USER SETTINGS
DATA REGISTRATION
7.SYSTEM SETTINGS
4.
Set
Display the item you want to set or change and press Set. For
details, refer to the following section.
The user data menu selections are displayed one line at a time.
Use the search buttons to display these settings so you can check
the settings or change them.

Chapter 16 Summary of Important Settings 16-3
Summary of
Important
Settings
LASER CLASS 3170 Series.
CFYA/YAH/YAN 120v US V1.0
Summary of User Data Settings
Here is a summary of the user data menus.
1.USER SETTINGS
Use these settings to set up the operating environment of the fax unit.
These settings include important features like registering the names,
telephone number and the date and time that prints on documents you
send, setting alarms and scanning density, and so on. Do these settings as
soon as you set up your fax. After they are set, you should not need to
change them very often. (➞16-4)
2.REPORT SETTINGS
Use these settings to set the fax to print a report every time you send or
receive a document and set up printing a summary report for all your
sending and receiving transactions. Use these features to keep track of
your fax transactions. (➞16-7)
3.TX (Send) SETTINGS
Use these settings to customize how the fax sends documents. With these
settings you can turn ECM on and off, set mid-pause time, set up re-
dialing and other features. (➞16-10)
4.RX (Receive) SETTINGS
Use these settings to customize how the fax receives documents. These
settings are important because they determine how the fax operates
when it receives a document. (➞16-13)
5.FAX’S PRINTER SET
Use these settings to set how the fax unit prints documents you receive.
These features include selecting a cassette or the MP tray for paper
supply and reducing the size of the page. (➞16-16)
6.FILE SETTINGS
Use these settings to set up major features like confidential mailboxes
and polling. (➞16-20)
7.SYSTEM SETTINGS
Use these settings to set up security and tracking features with pass-
words and department passwords and codes. You can also set important
defaults such as the format in which the date and time will be displayed,
selecting the display language, and the sending and receiving start
speeds. (➞16-27)

16-4 Summary of Important Settings Chapter 16
LASER CLASS 3170 Series.
CFYA/YAH/YAN 120v US V1.0
8. DUAL LINE OPTIONS
Use these settings to set up the operating environment of the additional
telephone line. This menu only appears after installing the optional
Dual-line Upgrade Kit for LASER CLASS® 3170 Series. These settings
include registering the second telephone line number and line type, the
telephone line priority on Line 1 and Line 2. (➞16-32)
User Settings
1. Open all three of the One-touch Speed Dialing panels. Then press
Data Registration.
Data
Registration
REGISTRATION
1.DATA REGISTRATION
2.
Set
Press Set.
DATA REGISTRATION
1.USER SETTINGS
3.
Set
Press Set.
USER SETTINGS
1.DATE & TIME
4.
Use the search buttons to display the item you want to set or
change.
*Default settings are in bold.
1. DATE & TIME Register the current date and time using the 24-hour
system. (➞3-13) This setting is required in the United
States.
Note that the year setting is made in two digit numbers
though in the standby mode the year is displayed in four
digit numbers. Also note that it is necessary to enter 00, 01,
02, ..., etc., to set the year to 2000 or later.

Chapter 16 Summary of Important Settings 16-5
Summary of
Important
Settings
LASER CLASS 3170 Series.
CFYA/YAH/YAN 120v US V1.0
2. UNIT TELEPHONE # Register your fax number. (➞3-14) This setting is required
in the United States.
3. UNIT NAME Register your name or company name. (➞3-15) In the
United States, you are required to enter your name or
company name.
4. SENDER’S NAME Register up to 19 alternate sender names. Before you send
a document, press the TTI Selector button and select a name
to replace the name you registered for 3.UNIT NAME.
(➞3-18)
5. TX TERMINAL ID
Print your ID (transmitting terminal ID) on each page you
transmit. (➞3-12) In the United States, this setting must be ON.
ON After you turn the terminal ID ON, you can do the follow-
ing settings.
1.TTI POSITION
OUTSIDE IMAGE Terminal ID prints outside the
image border.
INSIDE IMAGE Terminal ID prints inside the
image border.
2.TELEPHONE # MARK You can prefix your number
with the abbreviations FAX or
TEL in your sender ID.
FAX Prefixes the number with the
abbreviation FAX.
TEL Prefixes the number with the
abbreviation TEL.
OFF No terminal ID is printed on the pages you send.
6. DENSITY CONTROL Adjust the scanning density from 1-5 for DK (2 is default),
2-6 for STD (4 is default), 3-7 for LT (6 is default).

16-6 Summary of Important Settings Chapter 16
LASER CLASS 3170 Series.
CFYA/YAH/YAN 120v US V1.0
7. PROGRAM KEY Use the program button to streamline the procedures for
printing activity reports or doing the scanner settings. (➞12-5)
PRINT REPORT Press the Program button whenever you need a transmis-
sion report for a document you are sending.
REPORT If you select this setting, you do not have to open all three of
the One-touch Speed Dialing panels to start printing a report.
Whenever you need to print a report, press the Program
button.
SCANNING MODE Set the scanner buttons (Resolution, Contrast, Document
Type) for special settings, like sending a photograph for
example. Then you can adjust all the settings just by
pressing the Program button.
STAMP If you have installed the optional stamp feature, this
option is available. If you select STAMP you can turn the
stamp feature on or off without opening all three of the
One-touch Speed Dialing panels to press the Stamp button.
8. OFFHOOK ALARM Turn the off hook alarm off or on, which alerts you if the
optional handset is not in the handset cradle.
ON Offhook alarm sounds if optional handset or extension
telephone is left off the hook.
OFF No offhook alarm.
9. VOLUME CONTROL Adjust the volume of the fax unit.
1. KEYPAD VOLUME 1 (0 to 3)
2. ALARM VOLUME 1 (0 to 3)
10.TEL LINE TYPE Set the telephone line type. (➞3-10)
TOUCH TONE The telephone line is set for touch-tone dialing.
ROTARY PULSE The telephone line is set for rotary pulse dialing. If you
need to dial into an information service that requires tone
dialing, use the Tone button on the operation panel.
(➞12-3)
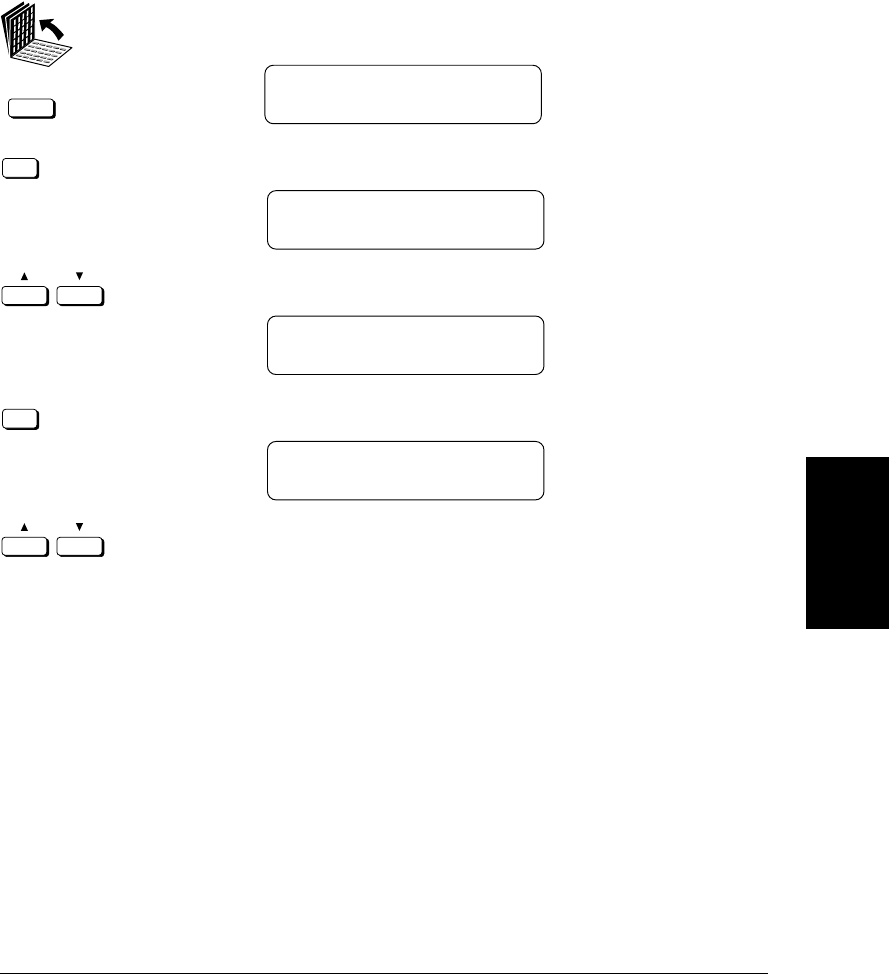
Chapter 16 Summary of Important Settings 16-7
Summary of
Important
Settings
LASER CLASS 3170 Series.
CFYA/YAH/YAN 120v US V1.0
Report Settings
1. Open all three of the One-touch Speed Dialing panels. Then press
Data Registration.
Data
Registration
REGISTRATION
1.DATA REGISTRATION
2.
Set
Press Set.
DATA REGISTRATION
1.USER SETTINGS
3.
Press the search buttons to display 2.REPORT SETTINGS.
DATA REGISTRATION
2.REPORT SETTINGS
4.
Set
Press Set.
REPORT SETTINGS
1.TX REPORT
5.
Use the search buttons to display the item you want to set or
change.

16-8 Summary of Important Settings Chapter 16
LASER CLASS 3170 Series.
CFYA/YAH/YAN 120v US V1.0
*Default settings are in bold.
1.TX REPORT Print a transmission report. (➞14-11)
P
RINT ERROR ONLY Print a report only if an error occurs.
OUTPUT YES A report prints for every transmission.
REPORT WITH TX IMAGE
Only available for PRINT ERROR ONLY or OUTPUT YES.
ON A prompt asks you to confirm whether to print the first
page of the document to remind you of what it contains.
OFF No prompt appears and no first page is printed.
OUTPUT NO Print no report, even if an error occurs.
2.RX REPORT Print a reception activity report. (➞14-14)
OUTPUT NO No report prints for document receptions.
PRINT ERROR ONLY A report prints for reception errors only.
OUTPUT YES A report prints for every reception.
3.CONFID. RX REPORT Print a reception activity report every time you receive a
document in a confidential mailbox. (➞10-8, 14-15)
OUTPUT YES A report prints every time a document is received in a
confidential mailbox.
OUTPUT NO No report prints when a document is received in a
confidential mailbox.
4.
MEMORY BOX REPORT
Print a reception activity report every time you receive a
document in a memory box. (➞8-25, 14-16)
OUTPUT YES A report prints every time a document is received in a
memory box.
OUTPUT NO No report prints when a document is received in a
memory box.

Chapter 16 Summary of Important Settings 16-9
Summary of
Important
Settings
LASER CLASS 3170 Series.
CFYA/YAH/YAN 120v US V1.0
5.ACTIVITY REPORT Print an activity management report. (➞14-9)
1. AUTO PRINT Print an activity report after every 40 transactions.
ON An activity report prints after the 40th transaction
is completed.
OFF No activity report prints after the 40th transaction
is completed.
2.DAILY REPORT TIME
OFF A time is not set to print a transaction report every
day.
ON Allows you to set a time for an activity to be
printed every day. Set the report time for the daily
report. Use 24-hour settings.
3.TX/RX SEPARATE Print an activity report with receptions and transmissions
listed separately.
OFF Transmissions and receptions are listed together in
chronological order.
ON Transmissions and receptions are arranged in
chronological order in separate lists.
6.PRT REPORT WHERE Select a paper supply source for the activity report.
OFF Report prints from the first available paper supply source.
ON The number and type of cassettes available depends on
the paper cassettes currently installed. Paper Cassette 2 is
optional for the LASER CLASS® 3170/3170MS and
standard for the LASER CLASS® 3175.
LASER CLASS® 3170
CASSETTE 1
MP TRAY
LASER CLASS® 3175 or LASER CLASS® 3170/3170MS
with optional cassette
CASSETTE 1
CASSETTE 2
MP TRAY

16-10 Summary of Important Settings Chapter 16
LASER CLASS 3170 Series.
CFYA/YAH/YAN 120v US V1.0
TX (Send) Settings
1. Open all three of the One-touch Speed Dialing panels. Then press
Data Registration.
Data
Registration
REGISTRATION
1.DATA REGISTRATION
2.
Set
Press Set.
DATA REGISTRATION
1.USER SETTINGS
3.
Press the search buttons to display 3.TX SETTINGS.
DATA REGISTRATION
3.TX SETTINGS
4.
Set
Press Set.
TX SETTINGS
1.ECM TX
5.
Use the search buttons to display the item you want to set or
change.
*Default settings are in bold.
1.ECM TX Turn ECM (error correction mode) transmission off and
on. This switch does not affect the button setups for One-
touch or Coded Speed dialing. (➞4-6, 4-15)
ON All transmissions are conducted with ECM if the other
party’s fax supports ECM.
OFF ECM is turned off.
2.MID PAUSE SET Set the length of the pause entered between number when
you press the Pause button (01 to 15SEC). (➞4-3)
02SEC

Chapter 16 Summary of Important Settings 16-11
Summary of
Important
Settings
LASER CLASS 3170 Series.
CFYA/YAH/YAN 120v US V1.0
3.AUTO REDIAL Select whether to perform automatic redial when the other
line is busy or no answer. (➞6-20)
ON Customize the redial operation.
1. REDIAL TIMES From 01 to 10 times.
(02TIMES)
Even if the fax machine is set to redial several times, it will
redial only once if there is no tone or there is a ring back
tone during the first attempt.
2. REDIAL INTERVAL From 02 to 99 minutes.
(02MIN.)
OFF After the first attempt at dialing fails, re-dialing is not
attempted.
4.BATCH TX If there is more than one document waiting in the memory
to be sent to the same destination, after the timer goes off
ON to send the first document, then all documents are sent
OFF together in the same transmission. With this feature the fax
unit makes one phone call instead of faxing each docu-
ment with a separate phone call. This feature saves time
and money. (➞16-34)
5.QUICK ON-LINE TX Turn quick memory sending off and on. When ON is
ON selected, the fax unit starts sending the document while it
OFF is still being scanned. (➞6-13)
6.TIME OUT Set the interval between dialing (entering phone numbers)
when sending to more than one destination. (➞6-22)
ON Fax scans the document in 5 or 10 seconds after you enter
the phone number.
OFF Press Start/Scan to begin transmission. Otherwise, the fax
unit returns to standby.

16-12 Summary of Important Settings Chapter 16
LASER CLASS 3170 Series.
CFYA/YAH/YAN 120v US V1.0
7.TX STAMP Turn stamping off or on and how documents are to be
stamped. (➞12-8)
ON STAMP ACTION
DIRECT & MEMORY TX Stamps only documents sent
direct and from memory.
DIRECT TX Stamps documents sent with
direct sending only.
OFF The stamp feature is turned off and disabled.
Note: The stamp feature is available as an option. If the stamp option is not provided on your
fax machine, this item will not appear in the menu and PIN CODE will appear as item 7.
8.PIN CODE Turns on the PIN code feature for dialing through a PBX
that requires PIN codes. (➞13-21)
OFF Turn off the PIN code feature.
ON
NECESS. PIN CODE The Force PIN Code feature
requires entering PIN code for
every transaction.
OFF
ON
PIN CODE BEF/AFT Set the PIN code to appear as a
prefix or suffix of the telephone
number.
BEFORE TEL NO.
The PIN code appears as a
prefix.
AFTER TEL NO. The PIN code appears as a
suffix.

Chapter 16 Summary of Important Settings 16-13
Summary of
Important
Settings
LASER CLASS 3170 Series.
CFYA/YAH/YAN 120v US V1.0
RX (Receive) Settings
1. Open all three of the One-touch Speed Dialing panels. Then press
Data Registration.
Data
Registration
REGISTRATION
1.DATA REGISTRATION
2.
Set
Press Set.
DATA REGISTRATION
1.USER SETTINGS
3.
Press the search buttons to display 4.RX SETTINGS.
DATA REGISTRATION
4.RX SETTINGS
4.
Set
Press Set.
RX SETTINGS
1.ECM RX
5.
Use the search buttons to display the item you want to set or
change.

16-14 Summary of Important Settings Chapter 16
LASER CLASS 3170 Series.
CFYA/YAH/YAN 120v US V1.0
*Default settings are in bold.
1.ECM RX Turn the ECM (error correction mode) receiving off and
on. This switch does not affect the button setups for One-
touch or Coded Speed Dialing. (➞4-6, 4-15)
ON All receptions are conducted with ECM if the other party's
fax supports ECM.
OFF ECM is turned off.
2.MAN/AUTO SWITCH Set the fax machine to switch to document receive mode
after ringing for a specified length of time in the manual
receive mode.
OFF The fax will keep ringing until someone answers the call
manually with the optional handset or a connected
extension telephone.
ON F/T RING TIME Set the length of time to elapse before
the fax machine switches to document
receiving. Default is 15SEC. Setting
range: 01 to 99SEC
3.REMOTE RX Receive from a remote telephone with preset setting.
(➞7-9)
ON Remote receiving is turned on.
REMOTE RX ID You can dial a number code on the
remote extension to start receiving a
document. Default is 25. Setting range:
00 to 99
OFF Remote receiving is turned off.

Chapter 16 Summary of Important Settings 16-15
Summary of
Important
Settings
LASER CLASS 3170 Series.
CFYA/YAH/YAN 120v US V1.0
4.MEMORY RX Select how incoming documents are to be received in the
memory if the fax runs out of toner or paper, or the output
trays are full of printed pages. (➞8-2)
ON Remainder of the fax is stored in the memory and can be
printed out as soon as you re-fill the paper cassette,
change the toner cartridge, clear the paper jam, or pick up
the printed pages from the output trays.
MEMORY RX ALARM The memory alarm alerts you
when a document has been
received in the memory.
OFF No alarm sounds when the fax
runs out of toner or recording
paper during document
reception.
ON An audible alarm sounds
when the document is stored
temporarily in the memory.
OFF Memory receiving is turned off. If the fax runs out of toner
or recording paper during a document reception, the
remainder of the document is not saved in the memory.
The other party must re-send the document.
5.RX PAGE FOOTER Print a footer in the lower right corner of every received
page. The footer contains the date, day, time received,
transaction number, and page number. (➞3-13)
OFF No RX FOOTER prints at the bottom of the page.
ON Turns on printing of an RX FOOTER at the bottom of
every page you receive.

16-16 Summary of Important Settings Chapter 16
LASER CLASS 3170 Series.
CFYA/YAH/YAN 120v US V1.0
Fax’s Printer Set
1. Open all three of the One-touch Speed Dialing panels. Then press
Data Registration.
Data
Registration
REGISTRATION
1.DATA REGISTRATION
2.
Set
Press Set.
DATA REGISTRATION
1.USER SETTINGS
3.
Press the search buttons to display 5.FAX’S PRINTER SET.
DATA REGISTRATION
5.FAX’S PRINTER SET
4.
Set
Press Set.
FAX’S PRINTER SET
1.USE MP TRAY
5.
Use the search buttons to display the item you want to set or
change.

Chapter 16 Summary of Important Settings 16-17
Summary of
Important
Settings
LASER CLASS 3170 Series.
CFYA/YAH/YAN 120v US V1.0
1.USE MP TRAY Select whether to use the MP tray.
OFF The MP tray cannot be used.
ON The MP tray can be used as a paper supply for fax, copy,
report, and printer functions.
SET MP TRAY SIZE Select the paper size you are
loading on the MP tray.
The sizes can be set to A4,
letter, or legal.
2.# OF RX COPIES Select the number of copies (from 01 to 99) of received
documents you want printed. Default is 01 copy.
3.SELECT CASSETTE Select how you want over-size documents to be divided
when the paper in the paper cassette is too small.
1.CASSETTE SW A Selects how legal-size documents are divided. This switch
is effective only when the paper cassettes are set to legal-
size and out of legal-size paper.
ON Divide legal-size documents
into two pages.
OFF Receive legal-size documents
in memory.
2.CASSETTE SW B Selects how letter-size documents are received on larger
paper. This switch is effective only when the letter-size
paper runs out.
ON Prints the letter-size document
on the larger paper (with white
space).
OFF Prints the letter-size document
in the memory.
4.RX REDUCTION Receive images at a reduced size.
OFF Turns off image reduction.
ON Turns on image reduction.
1.RX REDUCTION
AUTO SELECTION
The fax unit automatically
reduces the image to the size of
the selected paper.
FIXED REDUCTION
You set the reduction rate.
(75%, 90%, 95%, 97%)
*Default settings are in bold.

16-18 Summary of Important Settings Chapter 16
LASER CLASS 3170 Series.
CFYA/YAH/YAN 120v US V1.0
2.
SELECT REDUCE DIR
Select the direction of reduc-
tion for the percentage of fixed
reduction selected above.
VERTICAL ONLY Reduction performed in the
vertical direction only.
HORIZ & VERTICAL
Reduction performed in the
horizontal and vertical
direction.
5.SELECT DENSITY Adjust the print density of documents you receive.
LT (Light), STD (Standard), DK (Dark)
6.TONER SUPPLY LOW Set the fax to continue printing even after toner runs low
and the Change Cartridge indicator lights and the
REPLACE CARTRIDGE message appears.
RX TO MEMORY Stop printing and receive the remainder of the document
in the memory.
KEEP PRINTING Ignore the warning and keep printing until the document
is completely printed. This setting is convenient when a
new toner cartridge is not at hand. However, even if the
toner cartridge is out of toner, the fax will not receive the
document in the memory. After installing the new toner
cartridge, be sure to set to RX TO MEMORY.

Chapter 16 Summary of Important Settings 16-19
Summary of
Important
Settings
LASER CLASS 3170 Series.
CFYA/YAH/YAN 120v US V1.0
7.
SELECT OUTPT TRAY
Select one output tray for each function (FAX, COPY,
REPORT and PRINTER) to classify the output documents.
OFF All the printed documents are delivered to the lower
output tray. When the full paper sensor detects the tray is
full, the paper delivery automatically switches to the
upper output tray. If the face-up tray is open, the paper is
delivered to the face-up tray.
ON Select either the upper output tray or the lower output
tray for each function.
1. FAX
UPPER OUTPUT TRAY
Received documents by fax are
delivered to the upper output tray.
LOWER OUTPUT TRAY
Received documents by fax are
delivered to the lower output tray.
2. COPY
UPPER OUTPUT TRAY
Copied pages are delivered to the
upper output tray.
LOWER OUTPUT TRAY
Copied pages are delivered to the
lower output tray.
3.
REPORT UPPER OUTPUT TRAY
Printed reports are delivered to the
upper output tray.
LOWER OUTPUT TRAY
Printed reports are delivered to the
lower output tray.
4.
PRINTER UPPER OUTPUT TRAY
Data input from a PC are printed
and delivered to the upper output
tray.
LOWER OUTPUT TRAY
Data input from a PC are printed
and delivered to the lower output
tray.
16-20 Summary of Important Settings Chapter 16
LASER CLASS 3170 Series.
CFYA/YAH/YAN 120v US V1.0
File Settings
1. Open all three of the One-touch Speed Dialing panels. Then press
Data Registration.
Data
Registration
REGISTRATION
1.DATA REGISTRATION
2.
Set
Press Set.
DATA REGISTRATION
1.USER SETTINGS
3.
Press the search buttons to display 6.FILE SETTINGS.
DATA REGISTRATION
6.FILE SETTINGS
4.
Set
Press Set.
FILE SETTINGS
1.CONFID. MAILBOX
5.
Use the search buttons to display the item you want to set or
change.

Chapter 16 Summary of Important Settings 16-21
Summary of
Important
Settings
LASER CLASS 3170 Series.
CFYA/YAH/YAN 120v US V1.0
1.CONFID. MAILBOX Set up confidential mailbox. (➞10-2)
1.SETUP FILE Set up a confidential mailbox.
SET BOX # Create a two-digit confidential mailbox number.
1.FILE NAME Give the mailbox a name up to 24 characters long.
2.PASSWORD Assign a password to protect the mailbox from being changed or deleted.
3.SUBADDRESS Enter a 20-digit (max.) ITU-T subaddress for reception.
4.RX PASSWORD Enter a 20-digit (max.) ITU-T password for reception.
5.# OF RX COPIES Sets the number of copies printed from every document.
2.CHANGE DATA Change all the mailbox settings done with the settings
above.
SET BOX # Enter the number of the mailbox you want to change.
PASSWORD Enter the password protecting the mailbox settings.
You can now change any of the settings listed in the table
above (1.SETUP FILE).
3.DELETE FILE Delete a mailbox.
SET BOX # Enter the number of the mailbox you want to delete.
PASSWORD Enter the password protecting the mailbox you want to
delete.
2.RELAY TX GROUP Set up relay box so your fax machine can relay document
transmissions to other fax machines in your area. (➞9-3)
1.SETUP FILE Set up the relay box.
SET RLY TX GROUP#
Set a two-digit relay group number (00-99).
1.GROUP DIAL NAME Give the relay group a name (length: 24 characters).
2.PASSWORD Assign a four-digit password to protect the relay box settings.
3.SUBADDRESS Enter a 20-digit (max.) ITU-T subaddress.
4.RX PASSWORD Enter a 20-digit (max.) ITU-T password.
5.SELECT ORIG UNIT Set your fax to check the incoming relay command to make sure the
originator is registered.
ON Receives and obeys incoming relay commands for registered
TEL= originators only. Use the One-touch or Coded Speed Dialing buttons to
register originators.
OFF Receives and obeys all incoming relay commands.
6.PRINT RX DOC. Turns printing on/off for documents received for relay.
ON Prints a copy of every document relayed.
# OF RX COPIES
Set the number of document copies to print.
OFF No copy is printed.
7.SELECT LOCATIONS Use the One-touch or Coded Speed Dialing buttons to select the fax
TEL= numbers to receive the document relayed from your fax machine.
*Default settings are in bold.

16-22 Summary of Important Settings Chapter 16
LASER CLASS 3170 Series.
CFYA/YAH/YAN 120v US V1.0
8.TX REPORT Send a TX report from your fax machine (the relay unit) to the
originator of the transmission.
TRANSMIT Transmits a document relay report to the originator.
NOT TRANSMIT No report is transmitted.
9.TX START TIME Set the fax machine to hold the document from the originator and then
relay it at a specified time. Use 24-hour setting. Up to 5 time settings are
possible.
10.RELAY B’CAST
OFF Turn relay broadcasting off temporarily without canceling or changing
all of the relay box settings.
ON In order for relay broadcasting to occur, this setting must be on.
2.CHANGE DATA Change or add the settings on the relay box.
SET RLY GROUP TX#
Enter the number of the relay box you want to change.
PASSWORD Enter the password protecting the relay box settings.
You can now change any of the settings listed in the table
above (1.SETUP FILE).
3.DELETE FILE Delete a relay box and all settings.
SET RLY TX GROUP#
Enter the number of the relay box you want to delete.
PASSWORD Enter the password of the relay box you want to delete.
3.MEMORY BOX Set up a general memory box to handle ITU-T subaddress
and password transactions. (➞8-11)
1.SETUP FILE Create a general memory box and do all the general
memory box settings.
SET BOX # Give the general memory box a box number.
1.FILE NAME Give the memory box a name up to 24 characters long.
2.PASSWORD Assign a four-digit password to protect the memory box
settings.
3.SUBADDRESS Enter a 20-digit (max.) ITU-T standard subaddress. Yo u
must enter a subaddress in order to use the memory box features.
4.TX PASSWORD Enter a 20-digit (max.) ITU-T password.
5.RX PASSWORD Enter a 20-digit (max.) ITU-T password.

Chapter 16 Summary of Important Settings 16-23
Summary of
Important
Settings
LASER CLASS 3170 Series.
CFYA/YAH/YAN 120v US V1.0
6.RECEIVE
NO Turn memory box receiving off.
YES Turn memory box receiving on.
1.SELECT ORIG UNIT Turn on checking to make sure the originator is registered
on your fax.
OFF Receive all documents, regardless of origin.
ON Receive documents from registered sources only.
TEL= Use the One-touch or Coded Speed Dialing buttons to
register fax numbers from which you want the memory
box to receive documents.
2.PRINT RX DOC. Turn on printing of documents received in the memory
box.
OFF Documents received in the memory box are not printed.
ON Documents received in the memory box are printed.
1.PRINT METHOD Set the print method.
AUTO Print documents automatically as they are received.
MAN.Print documents manually.
2.# OF RX COPIES Set the number of document copies to print.
7.TRANSMIT Transmit documents from the memory box.
NO A document cannot be transmitted from the memory box.
YES A document can be transmitted from the memory box.
1.SELECT LOCATIONS Select fax telephone numbers to which to send documents
TEL= from the memory box. Use One-touch or Coded Speed
Dialing buttons to register the destinations.
2.TX DOCUMENT Transmit documents received in the memory box or scanned
into the memory box.
1.RECEIVED DOCUMENT Transmit or do not transmit documents received in the
memory box.
TRANSMIT Documents received in the memory box are to be transmit-
ted.
TX REPORT Send a TX report to the originator for every document
received and transmitted from the memory box.
TRANSMIT A transmission report is sent.
NOT TRANSMIT
A transmission report is not sent.
NOT TRANSMIT Documents received in the memory box are not to be
transmitted.
2.SCAN DOCUMENT Transmit or do not transmit documents scanned into the
memory box.
TRANSMIT Scanned documents can be transmitted.
NOT TRANSMIT Scanned documents cannot be transmitted.
3.TX START TIME Set a time for transmission of documents from the memory
box.
EVERYDAY Set the time using the 24-hour system. Up to 5 times can be
sent.
SELECT DAYS Select a day. Up to 5 times can be set for each day.

16-24 Summary of Important Settings Chapter 16
LASER CLASS 3170 Series.
CFYA/YAH/YAN 120v US V1.0
8.POLLING TX For the memory box, turn polling sending on and off.
NO Memory box cannot be used as a polling box.
YES Memory box can be used as a polling box.
1.ERASE AFTER TX Set how the document in the memory box is to be handled
after being polled and sent.
ON Document is erased after polling/sending.
OFF Document remains in the memory box after polling/
sending.
2.TX DOCUMENT Transmit documents received in the memory box or scanned
into the memory box for polling.
1.RECEIVED DOCUMENT Set documents received in the memory box for sending
after polling.
TRANSMIT Documents received in the memory box from other faxes
can be transmitted.
NOT TRANSMIT Documents received in the memory box from other faxes
cannot be transmitted.
2.SCAN DOCUMENT Set documents scanned into the memory box for sending
after polling.
TRANSMIT Documents scanned into the memory box can be transmit-
ted.
NOT TRANSMIT Documents scanned into the memory box cannot be
transmitted.
2.CHANGE DATA Change settings for the memory box or add settings you
did not do when you created the memory box.
SET BOX # Enter the number of the box you want to change.
PASSWORD Enter the password protecting the memory box settings.
You can now change any of the settings listed in the table
above.
3.DELETE FILE Delete the general memory box.
SET BOX # Enter the box number of the memory box you want to
delete.
PASSWORD Enter the password protecting the memory box that you
want to delete.

Chapter 16 Summary of Important Settings 16-25
Summary of
Important
Settings
LASER CLASS 3170 Series.
CFYA/YAH/YAN 120v US V1.0
4.PRESET POLLING Set up preset polling/receiving setting. (➞11-5)
1.SETUP FILE Set up a setting to poll at preset time.
SET BOX # Create a two-digit preset polling box.
1.FILE NAME Enter the name of the file (24 characters).
2.PASSWORD Enter a four-digit password to protect the polling settings.
3.SELECT LOCATIONS Select the numbers of the fax units you want to poll. Use the One-
TEL= touch or Coded Speed Dialing buttons to enter the numbers of the
fax machine that you want to poll.
4.START TIME Set the time(s) that you want to start polling.
EVERY DAY Set up to 5 times for every day.
SELECT DAYS Set up to 5 times for each day selected.
2.CHANGE DATA Change the settings for preset polling/receiving.
SET BOX # Enter the number of the box you want to change.
PASSWORD Enter the password protecting the preset polling settings.
You can now change any of the settings listed in the table
above (1.SETUP FILE).
3.DELETE FILE Delete the setting to poll at preset time.
SET BOX # Set the box number for the box you want to delete.
PASSWORD Enter the password of the file you want to delete.
5.POLLING BOX Set up a polling box to store a document in your fax
machine until your fax machine is polled to send the
document. (➞11-15)
1.SETUP FILE Set up a polling box to hold a document until it is polled
by and sent to another fax machine.
SET BOX # Set a box number for the polling box.
1.FILE NAME Enter a file name (24 characters).
2.PASSWORD Enter a password to protect the polling box settings.
3.SUBADDRESS Enter a 20-digit (max.) standard ITU-T subaddress.
4.TX PASSWORD Enter a 20-digit (max.) standard ITU-T password.
5.ERASE AFTER TX Tell the fax machine how to handle the document after it is polled
and sent.
ON Document is erased from the memory after it is polled and sent.
OFF Document is not erased and remains in the memory after it is
polled and sent.
2.CHANGE DATA Change the settings on the polling box. You can now change
any of the settings listed in the table above (1.SETUP FILE).
SET BOX # Set a box number you want to change.

16-26 Summary of Important Settings Chapter 16
LASER CLASS 3170 Series.
CFYA/YAH/YAN 120v US V1.0
PASSWORD Enter the password of the polling box you want to change.
You can now change any of the settings listed in the table
above (1.SETUP FILE).
3.DELETE FILE Delete the polling box file.
SET BOX # Set the box number for the box you want to delete.
PASSWORD Enter the password of the polling box file you want to delete.
6.TRANSFER Set the fax unit to transfer the documents it receives to
other faxes. (➞7-14)
1.SETUP FILE Create a file to receive and transfer documents.
1.FILE NAME Enter a file name (24 characters).
2.SELECT LOCATIONS Select the numbers of the fax machines where you want
TEL= documents transferred. Use the One-touch or Coded Speed
Dialing buttons to enter the numbers of the fax machines where
you want documents transferred.
3.PASSWORD Enter a four-digit password to protect the transfer file settings.
4.SELECT ORIG UNIT Select the telephone numbers of the fax machines you want have
received and transferred.
OFF All fax transmissions are received and transferred.
ON The fax machine receives and transfers transmissions only from fax
units that you designate by fax telephone number.
TEL = Use the One-touch or Coded Speed Dialing buttons to designate
originator fax machines for receive and transfer.
5.TIME SETUP Set a time period wherein documents are to be received and transferred.
1.START TIME Set a specified time to start transfer operation.
EVERY DAY Set up to 5 times every day.
SELECT DAYS Select one or several days for document transfer. You can set 5
times for any day(s) you select.
2.END TIME Set a specified time to end transfer operation.
EVERY DAY Set up to 5 times every day.
SELECT DAYS Select one or several days for document transfer. You can set 5
times for any day(s) you select.
6.PRINT RX DOC. Set the fax machine that transfers the document to print a copy of
the transferred document.
OFF Received and transferred documents are not printed.
ON A copy of every document received and transferred is printed.
# OF RX COPIES Set the number of document copies to print.
2.CHANGE DATA Change the transfer settings.
PASSWORD Enter the four-digit password protecting the transfer
settings. You can now change any of the settings listed in
the table above (1.SETUP FILE).
3.DELETE FILE Delete the transfer settings file.
PASSWORD Enter the four-digit password of the transfer file you want
to delete.

Chapter 16 Summary of Important Settings 16-27
Summary of
Important
Settings
LASER CLASS 3170 Series.
CFYA/YAH/YAN 120v US V1.0
System Settings
1. Open all three of the One-touch Speed Dialing panels. Then press
Data Registration.
Data
Registration
REGISTRATION
1.DATA REGISTRATION
2.
Set
Press Set.
DATA REGISTRATION
1.USER SETTINGS
3.
Press the search buttons to display 7.SYSTEM SETTINGS.
DATA REGISTRATION
7.SYSTEM SETTINGS
4.
Set
Press Set.
SYSTEM SETTINGS
1.PASSWORD
5.
Use the search buttons to display the item you want to set or
change.

16-28 Summary of Important Settings Chapter 16
LASER CLASS 3170 Series.
CFYA/YAH/YAN 120v US V1.0
PASSWORD Enter the system password protecting the System Settings.
(You will not have to do this if the System Settings are not
yet password protected.) (➞13-2)
1. PASSWORD Enter a four-digit password to protect the System Settings.
2.
RESTRICTIVE CODES
Set restrictions for sending and printing with department
access codes and user access codes. (➞13-6)
1.TX SETTINGS Restrict sending with department and user access codes.
OFF Turn off restrictions on sending. This turns the
feature off without canceling the department
access codes and passwords.
ON
DAC SETUP Set a DAC (department access
code).
ON Turn on department access
codes.
ENTER DAC
01: Press the search buttons to
select a number (01 to 19), then
enter a four-digit department
access code.
DAC PASSWORD
Enter a four-digit password for
the department access pass-
word.
OFF Turn off restrictions by depart-
ment access codes and pass-
words but turn on restrictions
by user access code.
USER ACCESS CODE
A four-digit number you set to
restrict sending.
2.
FAX’S PRINTER SET
Restricts document printing and copying with a four-digit
access code.
OFF
ON
USER ACCESS CODE
A four-digit number you set to
restrict printing and copying.
*Default settings are in bold.

Chapter 16 Summary of Important Settings 16-29
Summary of
Important
Settings
LASER CLASS 3170 Series.
CFYA/YAH/YAN 120v US V1.0
3.TEL SETTING Allows you to restrict use of the telephone for voice
communication.
OFF
ON
3. MEMORY LOCK RX Turn forced memory receiving on and off. (➞13-17)
OFF
ON
1.
MEM LOCK PASSWORD
Enter a four-digit password.
2.REPORT Set reports to print (or not
print) when the forced
memory receiving feature is
on.
OUTPUT NO Reports are not printed when
the forced memory receiving
feature is on.
OUTPUT YES Reports are printed when the
forced memory receiving
feature is on.
3.TIME SETUP Set a time to turn on forced
memory receiving.
OFF
ON
1.START TIME Turn on memory receiving at a
specified time.
EVERY DAY Set up to 5 times for every day.
SELECT DAYS Set up to 5 times for each
selected day of the week.
2.END TIME Turn off memory receiving at
specified time.
EVERY DAY Set up to 5 times for every day.
SELECT DAYS Set up to 5 times for each
selected day of the week.
4. RX RESTRICTION Turn off junk mail. (➞13-16)
OFF Anyone can dial your fax and send a document.
ON Another party can dial your fax and send a document only
if their number is registered on your fax for a One-touch
or Coded Speed Dialing button.
Specyfikacje produktu
| Marka: | Canon |
| Kategoria: | Komunikacja sieciowa |
| Model: | Super G3 - LASER-CLASS-3170-Series |
Potrzebujesz pomocy?
Jeśli potrzebujesz pomocy z Canon Super G3 - LASER-CLASS-3170-Series, zadaj pytanie poniżej, a inni użytkownicy Ci odpowiedzą
Instrukcje Komunikacja sieciowa Canon

4 Lipca 2024
Instrukcje Komunikacja sieciowa
- Komunikacja sieciowa Motorola
- Komunikacja sieciowa Gigaset
- Komunikacja sieciowa EZVIZ
- Komunikacja sieciowa D-Link
- Komunikacja sieciowa Profoon
- Komunikacja sieciowa ZyXEL
- Komunikacja sieciowa Linksys
- Komunikacja sieciowa Digitus
- Komunikacja sieciowa AVM
- Komunikacja sieciowa Apple
- Komunikacja sieciowa Lancom
- Komunikacja sieciowa Devolo
- Komunikacja sieciowa Draytek
- Komunikacja sieciowa Edimax
- Komunikacja sieciowa Axis
- Komunikacja sieciowa Hama
- Komunikacja sieciowa Barco
- Komunikacja sieciowa Sagemcom
- Komunikacja sieciowa Topcom
- Komunikacja sieciowa Belkin
- Komunikacja sieciowa Hirschmann
- Komunikacja sieciowa Abit
- Komunikacja sieciowa Sitecom
- Komunikacja sieciowa Envivo
- Komunikacja sieciowa LaCie
- Komunikacja sieciowa Phicomm
- Komunikacja sieciowa Freecom
- Komunikacja sieciowa EZ Control
- Komunikacja sieciowa Hercules
- Komunikacja sieciowa Mastervolt
- Komunikacja sieciowa XS4ALL
- Komunikacja sieciowa Novita
- Komunikacja sieciowa On Networks
- Komunikacja sieciowa Konig Electronic
- Komunikacja sieciowa Edup
Najnowsze instrukcje dla Komunikacja sieciowa

27 Września 2024
27 Września 2024
27 Września 2024
27 Września 2024
26 Września 2024
26 Września 2024
26 Września 2024
26 Września 2024
26 Września 2024
26 Września 2024