Instrukcja obsługi Acer XD1170
Przeczytaj poniżej 📖 instrukcję obsługi w języku polskim dla Acer XD1170 (47 stron) w kategorii Projektor. Ta instrukcja była pomocna dla 3 osób i została oceniona przez 2 użytkowników na średnio 4.5 gwiazdek
Strona 1/47

Manual for
Acer Projector XD1170/XD1270/XD1280 series
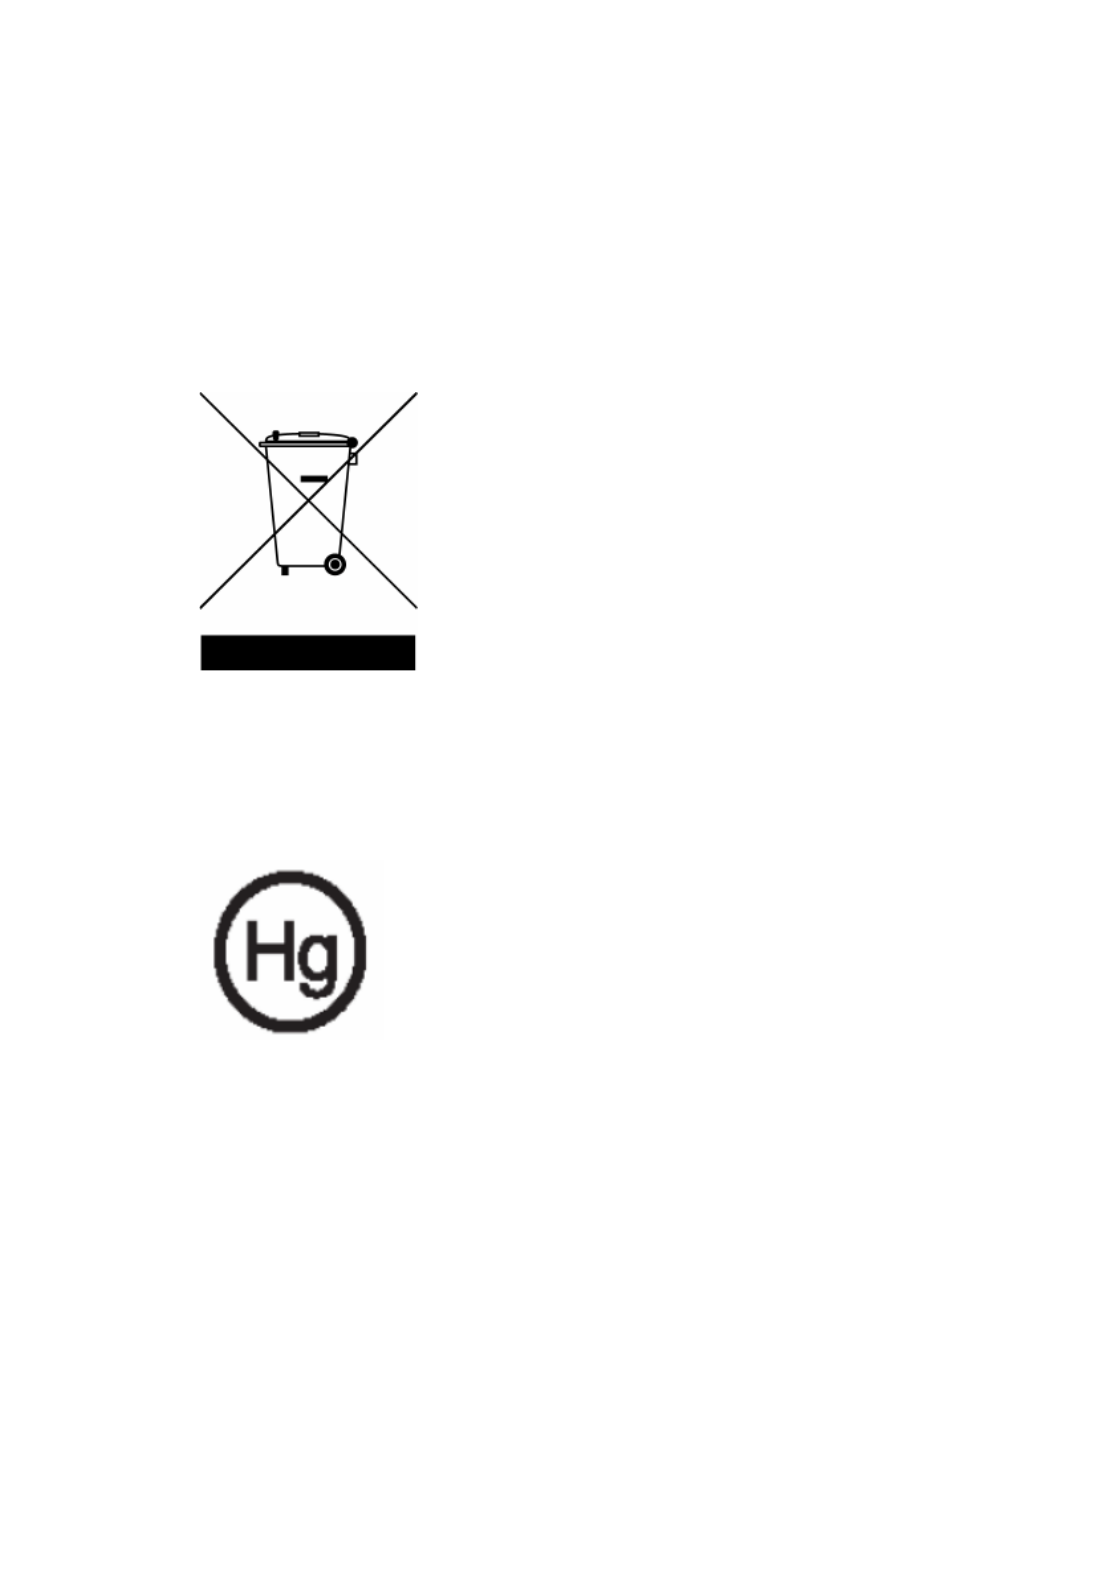
Disposal instructions
Do not throw this electronic device into the trash when discarding. To minimize
pollution and ensure utmost protection of the global environment, please re-
cycle it.
USA
For electronic products containing an LCD/CRT monitor or display, or a super
high pressure mercury lamp:
Lamp(s) inside this product contain mercury and must be recycled or disposed
of according to local, state or federal laws. For more information, contact the
Electronic Industries Alliance at www.eiae.org. For lamp-specic disposal infor-
mation, check www.lamprecycle.org.

1... English
Table of Contents
Table of Contents ......................................................................................... 1
Usage Notice ................................................................................................ 2
Precautions...........................................................................................................2
Introduction................................................................................................... 4
Product Features ..................................................................................................4
Package Overview................................................................................................5
Product Overview ................................................................................................6
Main Unit ........................................................................................................................6
Control Panel .................................................................................................................7
Connection Ports ...........................................................................................................8
Remote Control with Laser Pointer ................................................................................9
Installation .................................................................................................. 10
Connecting the Projector ....................................................................................10
Powering On/Off the Projector ............................................................................11
Powering On the Projector ...........................................................................................11
Powering Off the projector ...........................................................................................12
Warning Indicator .........................................................................................................12
Adjusting the Projected Image............................................................................13
Adjusting the Projector Image Height ..........................................................................13
Adjusting the Projector Zoom / Focus ..........................................................................14
Adjusting Projected Image Size ...................................................................................14
User Controls ............................................................................................. 15
Control Panel & Remote Control ........................................................................15
On-Screen Display Menus..................................................................................19
How to operate ............................................................................................................19
Color (Computer/Video Mode) ....................................................................................20
Image (Computer/Video Mode) ....................................................................................22
Management (Computer/Video Mode) ........................................................................24
Audio (Computer/Video Mode) ...................................................................................30
Timer (Computer/Video Mode) ....................................................................................31
Language (Computer/Video Mode) .............................................................................32
Appendices................................................................................................. 33
Troubleshooting ..................................................................................................33
Replacing the lamp .............................................................................................37
Specications .....................................................................................................38
Compatibility Modes ...........................................................................................40
Regulation & Safety Notices
.......................................................................
41

2
English ... 2
English ...
Usage Notice
Precautions
Follow all warnings, precautions and maintenance as recommended in this
user’s guide to maximize the life of your unit.
Warning- Do not look into the projector’s lens when the lamp is
on. The bright light may hurt your eyes.
Warning- Toreducetheriskofreorelectricshock,donot
expose this product to rain or moisture.
Warning- Please do not open or disassemble the product as this
may cause electric shock.
Warning- Whenchangingthelamp,pleaseallowunittocool
down,andfollowallchanginginstructions.
Warning- This product will detect the life of the lamp itself.
Please be sure to change the lamp when it shows
warning messages.
Warning- Reset the “Lamp Hour Reset” function from the On
Screen Display “Management” menu after replacing
the lamp module (refer to page 26)
Warning- Whenswitchingtheprojectoroff,pleaseensurethe
projector completes its cooling cycle before
disconnecting power.
Warning- Turnontheprojectorrstandthenthesignal
sources.
Warning- Do not use lens cap when projector is in operation.
Warning- Whenthelampreachestheendofitslife,itwillburn
out and may make a loud popping sound. If this
happens,theprojectorwillnotturnbackonuntilthe
lampmodulehasbeenreplaced.Toreplacethelamp,
follow the procedures listed under “Replacing the
Lamp”.

3... English
3... English
Usage Notice
Do:
Turn off the product before cleaning.
Use a soft cloth moistened with mild detergent to clean the dis-
play housing.
Disconnect the power plug from AC outlet if the product is not
being used for a long period of time.
Don’t:
Block the slots and openings on the unit provided for ventila-
tion.
Useabrasivecleaners,waxesorsolventstocleantheunit.
Use under the following conditions:
- Inextremelyhot,coldorhumidenvironments.
- In areas susceptible to excessive dust and dirt.
- Nearanyappliancethatgeneratesastrongmagneticeld.
- Place in direct sunlight.

4
English ... 4
English ...
Introduction
Product Features
This product is a SVGA (XD1170) / XGA (XD1270, XD1280)
single chip 0.55” DLPTM projector.
Outstanding features include:
u
TrueSVGA,800x600addressablepixels(forXD1170
series only)
TrueXGA,1024x768addressablepixels(forXD1270,
XD1280series only)
u Single chip DLPTM technology
uNTSC3.58/NTSC4.43/PAL/SECAMandHDTVcom-
patible(480i/p,576i/p,720p,1080i)
u High-tech DVI connection for digital signal with HDCP
functionandsupports480p,576p,720pand1080i(Op-
tional)
u Full function remote control with laser pointer (excluding
XD1170series/Japanmodes)
u User friendly multilingual on screen display menu
u Advanced digital keystone correction and high quality
full screen image re-scaling
u User friendly control panel
u SXGA+,SXGAcompressionandVGAre-sizing
u Mac compatible

5... English
Introduction
PowerCord1.8m VGACable1.8m
2 x Battery
Composite Video Cable
1.8m
Projector with lens cap
Package Overview
This projector comes with all the items shown below.
Check to make sure your unit is complete. Contact your
dealer immediately if anything is missing.
Carrying Case
USBCable2.0m
User’s Guide
S-VideoCable2.0m
AudioCableJack/Jack
2.0m
VGAtoComponent/
HDTV Adapter
Quick Start Card
Remote Control

6
English ... 6
English ...
Introduction
Main Unit
Product Overview
1. FocusRing
2. Zoom Ring
3. Zoom Lens
4. RemoteControlReceiver
5. ElevatorButton
6. ElevatorFoot
7. PowerSocket
8. ConnectionPorts
9. Control Panel
2
5
8
1
7
4
6
3
9
4
7... English
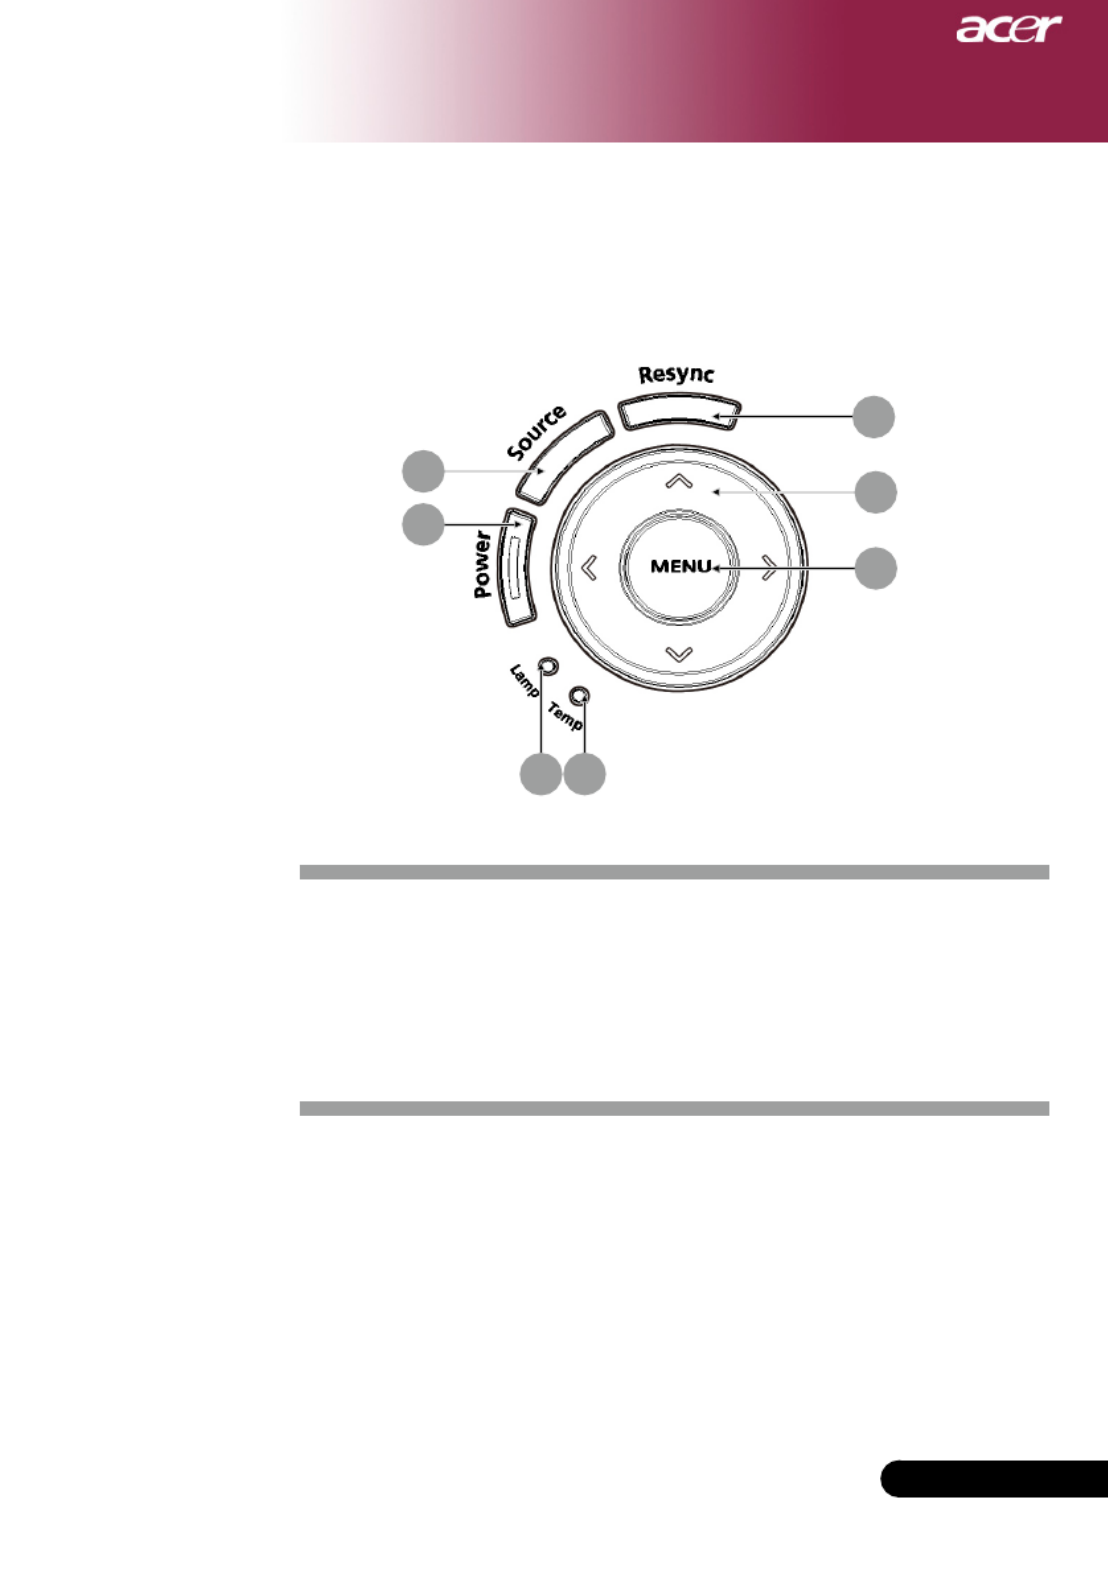
Introduction
Control Panel
1. TempIndicatorLED
2. LampIndicatorLED
3. PowerandIndicatorLED(PowerLED)
4. Source
5. Resync
6. Four Directional Select Keys
7. Menu
6
5
7
4
3
21

8
English ... 8
English ...
Introduction
Connection Ports
1 4 7
2 356
1. DVIInputConnector(forDigitalsignalwithHDCPfunction)(Op-
tional)
2. PCAnalogSignal/HDTV/ComponentVideoInputConnector
3. Audio Input Connector
4. S-VideoInputConnector
5. Monitor Loop-through Output Connector (VGA-Out)
6. USB Connector
7. RS232Connector
8. KensingtonTM Lock Port
9. Composite Video Input Connector
10. 5VDCOutputJack(forattacheddongledevice)
(forXD1170/XD1270only)
9
8
10
For XD
1170/
XD1270
only

10
English ... 10
English ...
Installation
USB
S-Video Output
DVI VGA
DVDPlayer,SettopBox,
HDTV receiver
Video Output
1
3
2
4
5
6
10
8
7
9
1......................................................................................................Power Cord
2.....................................................................DVI Cable (Optional Function)
3....................................................................................................... VGA Cable
4.................................................................................................. S-Video Cable
5.........................................................................................................USB Cable
6..........................................................VGAtoComponent/HDTVAdapter
7. AudioCableJack/Jack..................................................................................
8..................................................................................Composite Video Cable
9......................................................................................................RS232 Cable
10...................................5VDCOutputJackforattachedDongleDevicee
(forXD1170/XD1270only)
To ensure the projector works well with your computer, please
make sure the timing of the display mode is compatible with the
projector. Refer to the “Compatibility Modes” section on page 40.
Connecting the Projector
RS232
for
XD1170/
XD1270
only

11 ... English
Installation
Power
Powering On the Projector
1. Removethelenscap.
2. Ensurethatthepowercordandsignalcablearesecurely
connected.ThePowerLEDwillashred.
3. Turn on the lamp by pressing “Power” button on the control
panel.AndthePowerLEDwillturnblue.
4. Turnonyoursource(computer,notebook,videoplayer
,etc.).Theprojectorwilldetectyoursourceautomatically.
If the screen displays “No Signal”, please make sure the signal
cables are securely connected.
If you connect multiple sources at the same time, using the
“Source” button on the remote control or control panel to
switch.
Powering On/Off the Projector
Turn on the projector
rstandthenthesignal
sources.
1

12
English ... 12
English ...
Installation
Warning Indicator
When the “LAMP” indicator lights solid red, the projector will
automatically shut itself down. Please contact your local reseller
or service center.
When the “TEMP” indicator lights solid red for about
20 sec-
onds, it indicates the projector has been overheated. You will see a
message “Projector Overheated. Lamp will automatically turn off
soon.” on the on-screen display. The projector will automatically
shut itself down.
Under normal conditions, the projector can be switched on again
after it has cooled down. If the problem persists, you should con-
tact your local dealer or our service center.
When the “TEMP” indicator ashs red for about 30 seconds, you
will see a message “Fan fail. Lamp will automatically turn off
soon.” on the on-screen display. Please contact your local dealer
or our service center.
Powering Off the Projector
1.Pressthe“Power”buttontoturnofftheprojectorlamp,youwill
see a message “Please press power button again to complete the
shutdown process. Warning: DO NOT unplug while the projec-
tor fan is still running.” displayed on the projector’s screen. Press
the“Power”buttonagaintoconfirm,otherwisethemessagewill
disappear after 5 seconds.
2.Thecoolingfanscontinuetooperateforabout30secondsfor
coolingcycleandthePowerLEDwillbequickred ash. When
thePowerLEDbecomesslowflashing,theprojectorhasentered
standbymode.Ifyouwishtoturntheprojectorbackon,you
must wait until the projector has completed the cooling cycle and
hasenteredstandbymode.Onceinstandbymode,simplypress
“Power” button to restart the projector.
3. Disconnect the power cord from the electrical outlet and the pro-
jector.
4.Donotturnontheprojectorimmediatelyfollowingapoweroff
procedure.
13 ... English
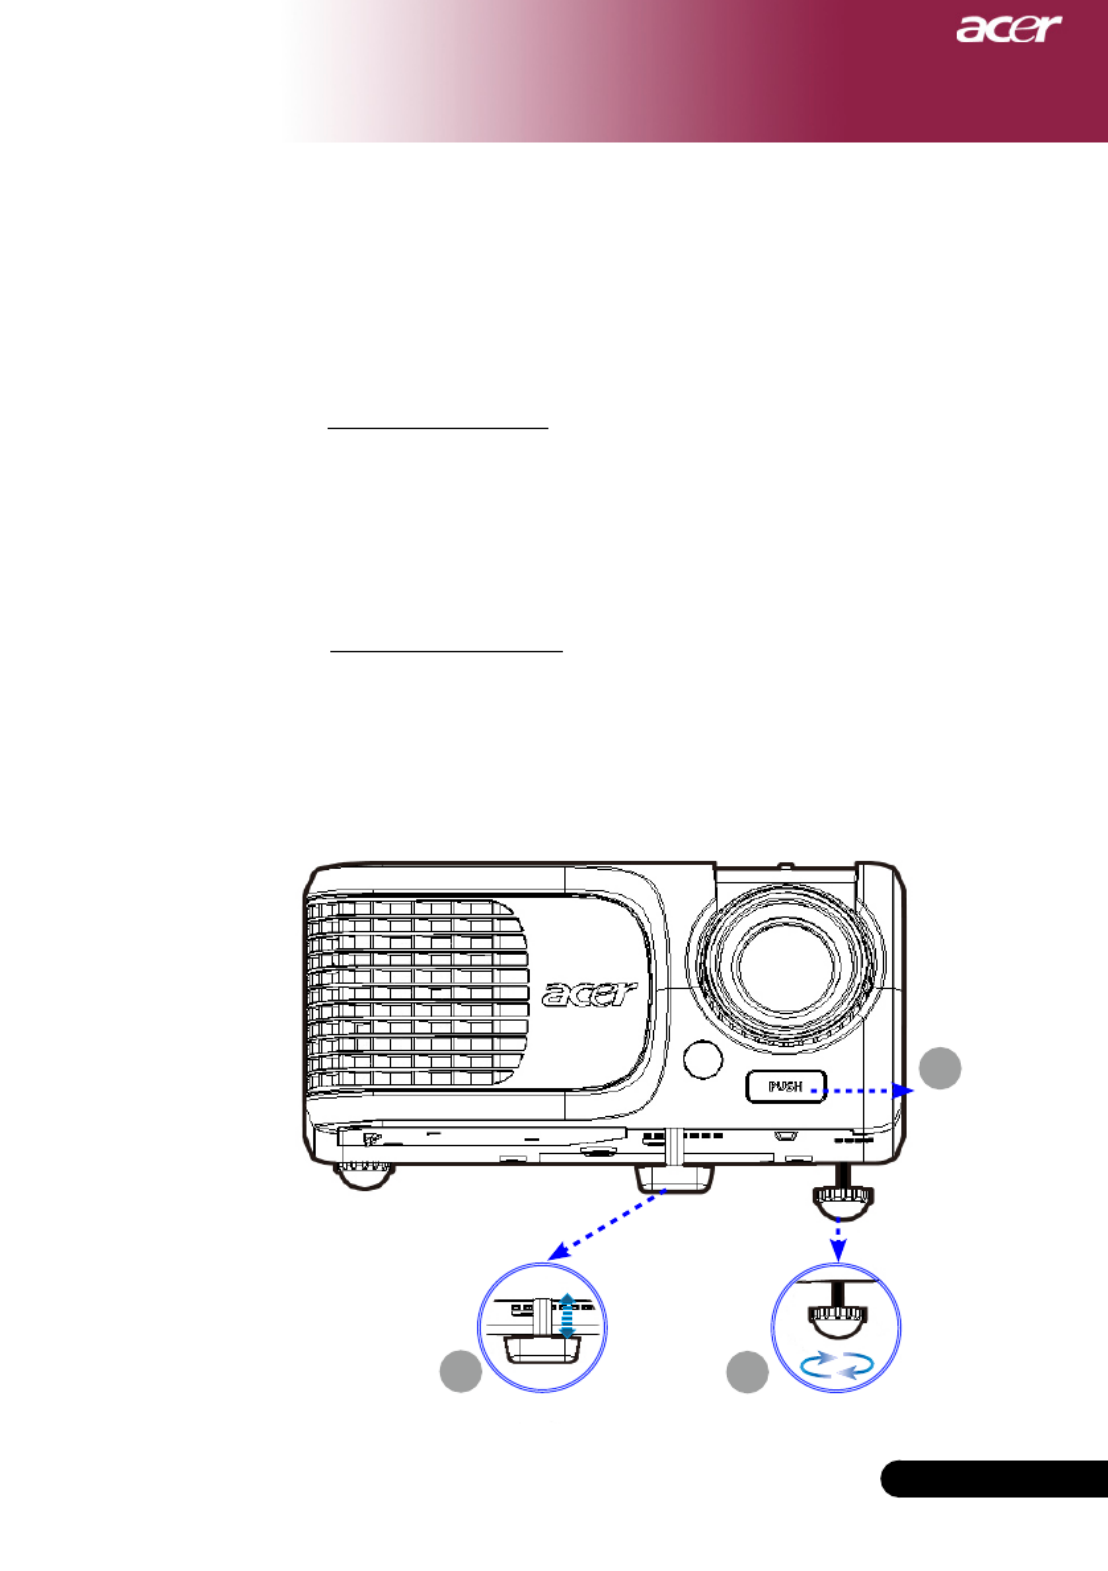
Installation
Adjusting the Projected Image
Adjusting the Projector Image Height
The projector is equipped with an elevator foot for adjusting
the image height.
To raise the image:
1.Presstheelevatorbutton.
2. Raise the image to the desired height angle ,then
release the button to lock the elevator foot into position.
3. Use tone-tunethedisplayangle.
To lower the image:
1.Presstheelevatorbutton.
2.Lowertheimage,thenreleasethebuttontolockthe
elevator foot into position.
3. Use tone-tunethedisplayangle.
1
2
ElevatorFoot
Elevator
Button
3
Tile Adjusting Wheel

14
English ... 14
English ...
Installation
Max. 38.1"(96.8cm) 76.2"(193.6cm) 127.1"(322.7cm) 177.9"(451.8cm)
203.3"(516.3cm) 304.9"(774.5cm)
Min. 34.7"(88.1cm) 69.3"(176.1cm) 115.6"(293.5cm) 161.8"(410.9cm) 184.9"(469.6cm) 277.3"(704.4cm)
Max.(WxH) 30.5" x 22.9"
(77.4 x 58.1cm)
61.0" x 45.7"
(154.9 x 116.2cm)
101.7" x 76.3"
(258.2 x 193.6cm)
142.3" x 106.7"
(361.4 x 271.1cm)
162.6" x 122.0"
(413.0 x 309.8cm)
243.9" x 182.9"
(619.6 x 464.7cm)
Min.(WxH) 27.8" x 20.8"
(70.5 x 52.9cm)
55.4" x 41.6"
(140.9 x 105.7cm)
92.5" x 69.4"
(234.8 x 176.1cm)
129.4" x 97.1"
(328.7 x 246.5cm)
147.9" x 110.9"
(375.7 x 281.8cm)
221.8" x 166.4"
(563.5 x 422.6cm)
4.9'(1.5m)
9.8'(3.0m) 16.4'(5.0m) 23.0'(7.0m) 26.3'(8.0m) 39.4'(12.0m)
Adjusting the Projector Zoom / Focus
You may turn the zoom ring to zoom in or out. To focus the image,
rotate the focus ring until the image is clear. The projector will focus
at distances from 4.9 to 39.4 feet (1.5 to 12.0 meters).
Adjusting Projection Image Size
69.3"
(176.1cm)
115.6"
(293.5cm)
161.8"
(410.9cm)
184.9"
(469.6cm)
277.3"
(704.4cm)
38.1"
(96.8cm)
76.2"
(193.6cm)
127.1"
(322.7cm)
177.9"
(451.8cm)
203.3"
(516.3cm)
304.9"
(774.5cm)
4.9'
39.4'
26.3'
23.0'
16.4'
9.8'
(1.5m)
(12.0m)
(8.0m)
(7.0m)
(5.0m)
(3.0m)
34.7"
(88.1cm)
Screen
(Diagonal)
Distance
This graph is for user’s reference only.
Focus Ring
Zoom Ring
Screen
Size

15 ... English
15 ... English
User Controls
Remote ControlControl Panel
Control Panel & Remote Control
There are two ways for you to control the functions:
Remote Control and Control Panel.
Using the Control Panel
Power
Refertothe“PowerOn/OfftheProjector”sectiononpages11,12.
Resync
Automaticallysynchronizestheprojectortotheinputsource.
Source
Press“Source”tochooseRGB,Component-p,Component-i,
S-Video,Composite,DVI-D(Optional),VideoandHDTVsources.
Menu
Press “Menu” to launch the on screen display (OSD) menu. To exit
OSD,press“Menu”again.
Conrmyourselectionofitems.
Four Directional Select Keys
Use to select items or make adjustments to your
selection.

16
English ... 16
English ...
User Controls
Using the Remote Control
Power
Refertothe“PowerOn/OfftheProjector”sectiononpages11,
12.
Laser Button (forXD1270/XD1280seriesonly)
Aimtheremoteattheviewingscreen,pressandholdthisbut-
ton to activate the laser pointer.
Resync
Automaticallysynchronizestheprojectortotheinputsource.
Source
Press“Source”tochooseRGB,Component-p,Component-i,
S-Video,CompositeVideo,DVI-D(Optional)andHDTV
sources.
Freeze
Press“Freeze”topausethescreenimage.
Hide
Momentarilyturnsoffthevideo.Press“Hide”tohideimage,
press again to restore display of the image.
Aspect Ratio
Use this function to choose your desired aspect ratio.
(Auto/4:3/16:9)
Mute
Use this key to close the volume.
Four Directional Select Keys
Use to select items or make adjustments to your
selection for the OSD menu operation.
Keystone
Adjustsimagedistortioncausedbytiltingtheprojector(±16
degrees).
Menu
Press Menu” to launch the on screen display menu. To exit
OSD,press“Menu”again.
Zoom
DigitalZoomin/out.
Back
Back to the previous step for the OSD menu operation.

17 ... English
17 ... English
User Controls
Mouse / Mouse Right Click / Mouse Left Click
These functions are the same as a mouse of PC or Mac.
Empowering Key
AcerEmpoweringKeyprovidesthreeAceruniquefunctions,they
are"AcereViewManagement","AcereTimerManagement"and
"Acer eOpening Management" respectively. Press "e" key for more
than one second to launch the on screen display main menu to
modify its function.
Acer eView Management
Press "e" to launch “Acer eView Management”
submenu.
“Acer eView Management” is for display mode
selection. Please refer to On Screen Display Menus
section for more detail.
Acer eTimer Management
Press "e" to launch “Acer eTimer Management”
submenu.
“Acer eTimer Management” provides the
reminding function for presentation time control.
Please refer to On Screen Display Menus section
for more detail.
Acer eOpening Management
Press "e" to launch “Acer eOpening Management”
submenu.
“Acer eOpening Management” allows user to
changetheStartupscreentotheirpersonalized
image. Please refer to On Screen Display section
for details.
Volume
Increase/decreasethevolume.
Page Up (Computer mode only)
Use this button to page up. This function is only available when
the projector is connected to a computer via an USB cable.
Page Down (Computer mode only)
Use this button to page down. This function is only available
when the projector is connected to a computer via an USB cable.

18
English ... 18
English ...
User Controls
VGA
Press “VGA” to change source to VGA-In connector. This con-
nectorsupportsAnalogRGB,YPbPr(480p/576p/720p/1080i),
YCbCr(480i/576i)andRGBsync.
Video
Press “Video” to change source to Composite Video source.
Component
Press “Component” to change source to component connec tor.
ThisconnectorsupportsYPbPr(480p/576p/720p/1080i)and
YCbCr(480i/576i)
DVI
Press “DVI” to change source to DVI connector. This
connector
supportsDigitalRGB,AnalogRGB,YPbPr(480p/576p/720p/
1080i),YCbCr(480i/576i)andHDCPsignal.
Language (forXD1170/Japanmodelsseriesonly)
Choose the multi-lingual OSD menu.

19 ... English
19 ... English
User Controls
The Projector has multilingual On Screen Display menus that
allow you to make image adjustments and change a variety of
settings. The projector will automatically detect the source.
How to operate
1. ToopentheOSDmenu,press“Menu”ontheRemoteControl
or Control Panel.
2. WhenOSDisdisplayed,use keys to select any item in
themainmenu.Afterselectingthedesiredmainmenuitem,
press to enter sub menu for feature setting.
3. Use keys to select the desired item and adjust the set-
tings by key.
4. Select the next item to be adjusted in the sub menu and adjust
as described above.
5. Press “Menu” or "Back" on the Remote Control or Control
Panel,thescreenwillreturntothemainmenu.
6. ToexitOSD,press“Menu”or"Back"ontheRemoteControlor
Control Panel again. The OSD menu will close and the projec-
tor will automatically save the new settings.
On Screen Display Menus
Main Menu
Sub Menu
Settings
20
English ... 20
English ...
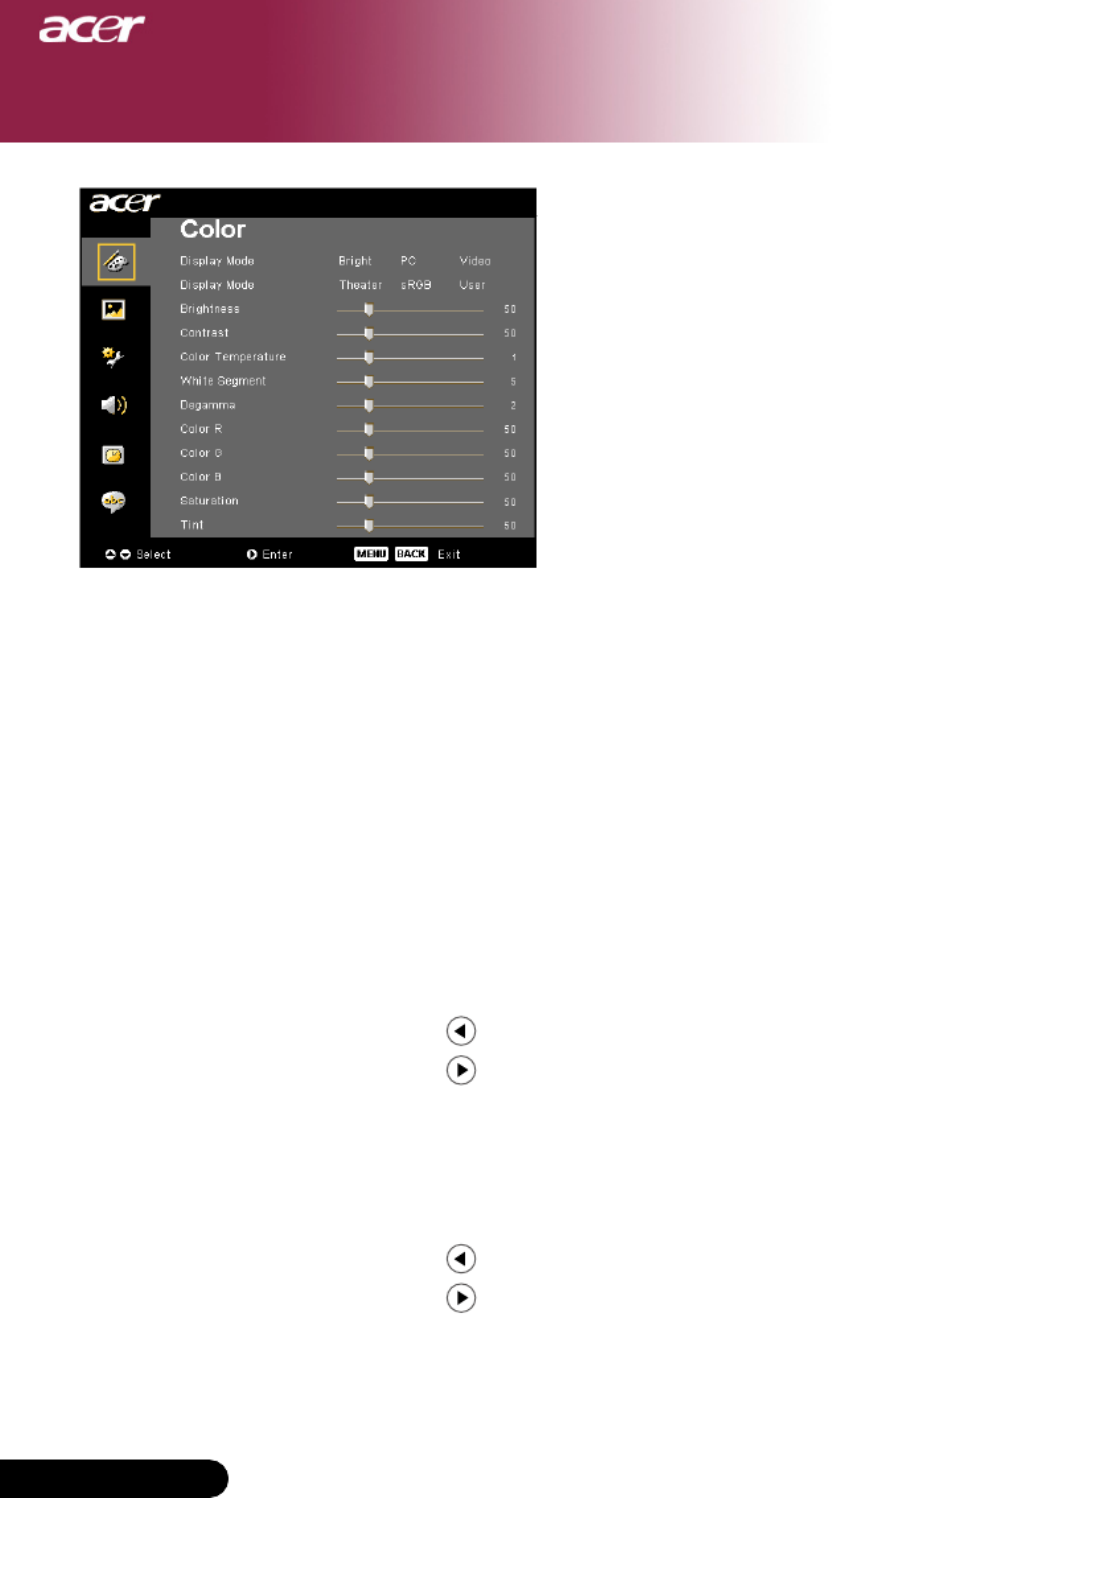
User Controls
Color
(Computer / Video
Mode)
Display Mode
Therearemanyfactorypresetsoptimizedforvarioustypesof
images.
Bright:Forbrightnessoptimization.
PC : For computer or notebook.
Video : For playing video in a bright environment.
Theater : For Home Theatre usage in a dark room.
sRGB:Fortrue-coloroptimization.
User:Memorizeuser’ssettings.
Brightness
Adjust the brightness of the image.
Press the to darken image.
Press the to lighten the image.
Contrast
The contrast controls the degree of difference between the lightest
and darkest parts of the picture. Adjusting the contrast changes
the amount of black and white in the image.
Press the to decrease the contrast.
Press the to increase the contrast.
Color Temperature
Adjustthecolortemperature.Athighertemperature,thescreen
lookscolder;atlowertemperature,thescreenlookswarmer.

21 ... English
21 ... English
User Controls
Color
(Computer / Video
Mode)
White Segment
Use the white Segment control to set the white peaking level of
DMDchip.0standsforminimalsegment,and10standsformaxi-
mumsegment.Ifyoupreferastrongerimage,adjusttowardsthe
maximumsetting.Forasmoothandmorenaturalimage,adjust
towards the minimum setting.
Degamma
Effectstherepresentofdarkscenery.Withgreatergammavalue,
dark scenery will look brighter.
Color R
Adjusts the red color.
Color G
Adjusts the green color.
Color B
Adjusts the blue color.
Saturation
Adjusts a video image from black and white to fully saturated color.
Press the to decrease the amount of color in the image.
Press the to increase the amount of color in the image.
Tint
Adjusts the color balance of red and green.
Press the to increase the amount of green in the image.
Press the to increase the amount of red in the image.
“Saturation” and
“Tint” functions are
not supported under
computer mode or DVI
mode.
22
English ... 22
English ...
User Controls
Keystone
Adjustimagedistortioncausedbytiltingprojection.(±16degrees)
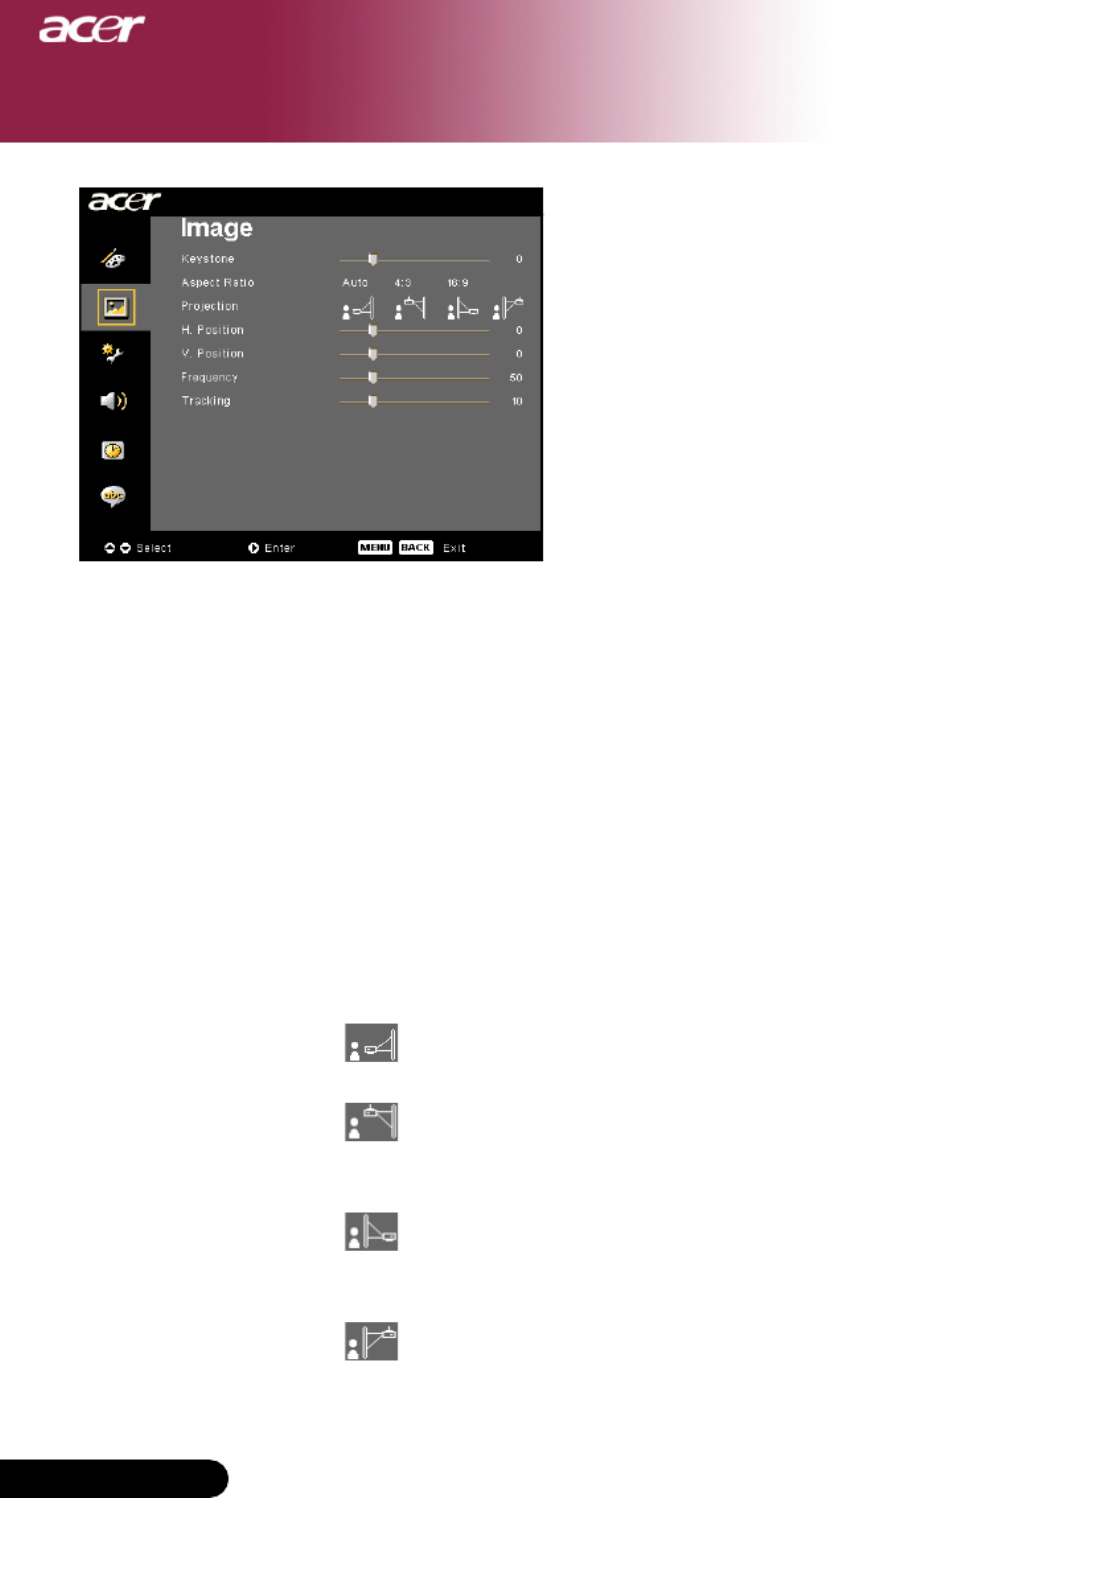
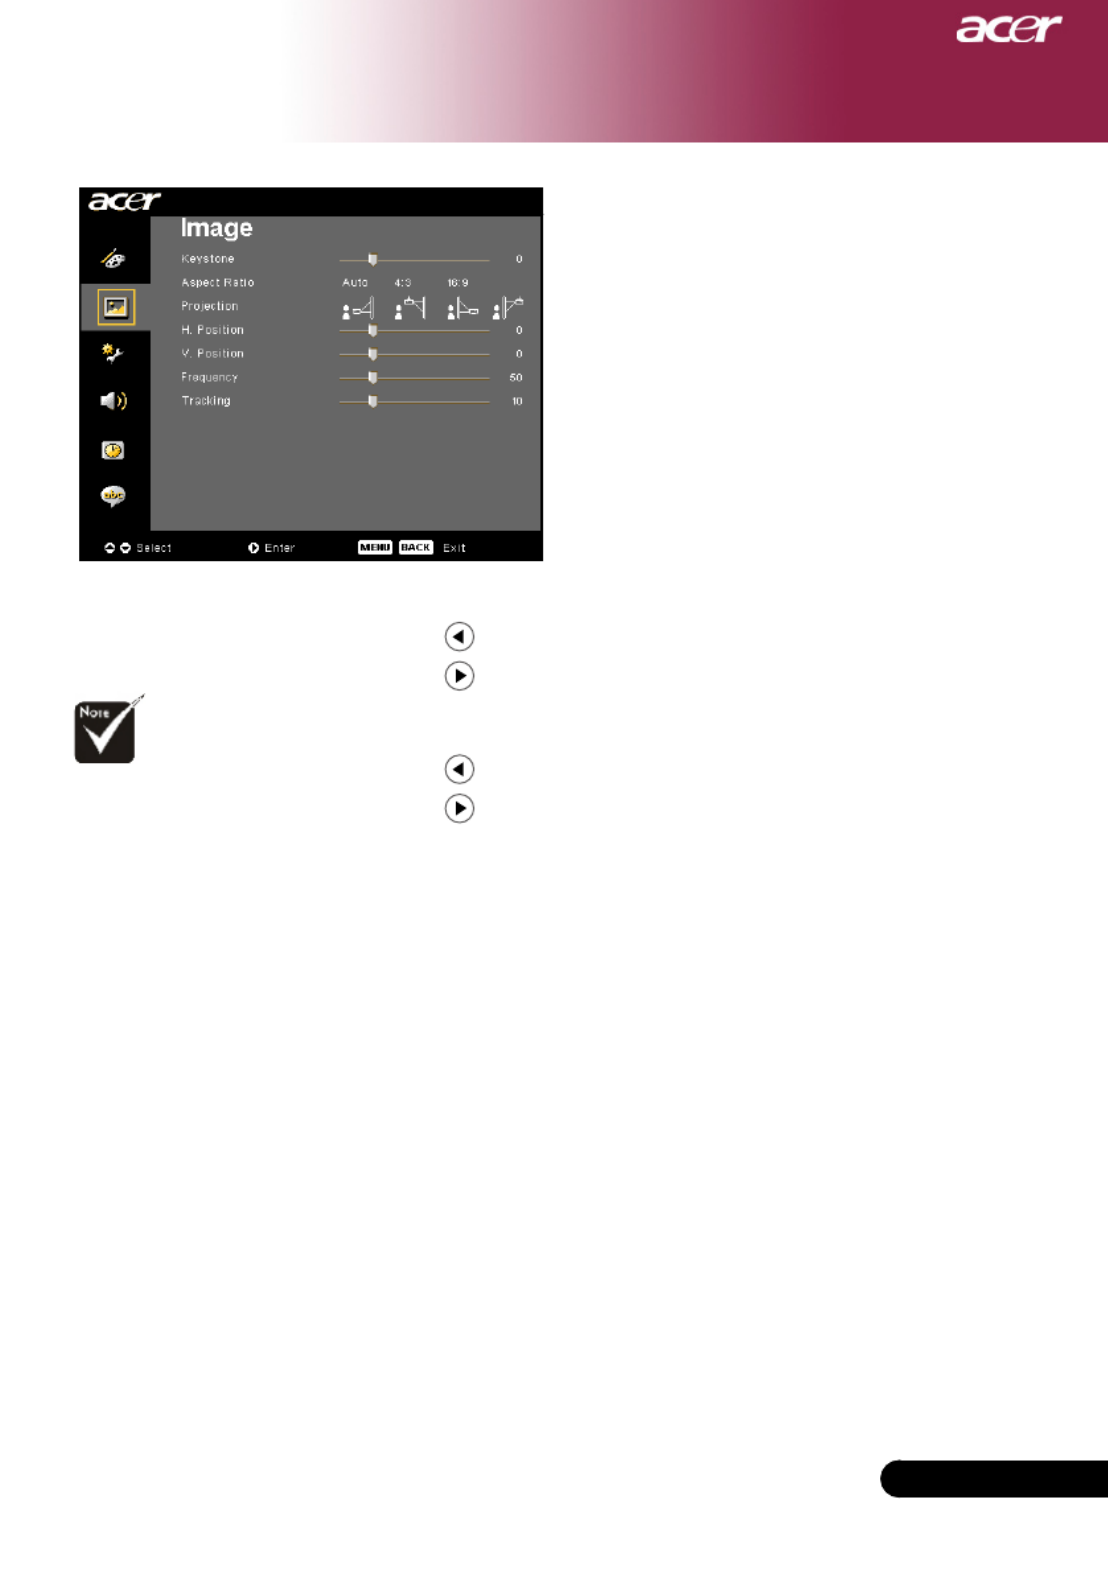
Aspect Ratio
Use this function to choose your desired aspect ratio.
Auto : Keep the image with original width-higth ratio and maxi
mizetheimagetofitnativehorizontalorverticalpixels.
4:3:The input source will be scaled to fit the projection screen
andbecomes4:3ratio.
16:9:The input source will be scaled to fit the width of the screen
and narrowed the height to make the displayed image be-
comes16:9ratio.
Projection
Front-Desktop
The factory default setting.
Front-Ceiling
Whenyouselectthisfunction,theprojectorturnstheim-
age upside down for ceiling-mounted projection.
Rear-Desktop
Whenyouselectthisfunction,theprojectorreversesthe
image so you can project behind a translucent screen.
Rear-Ceiling
Whenyouselectthisfunction,theprojectorreverses
andturnstheimageupsidedownatsametime.Youcan
project from behind a translucent screen with ceiling
mounted projection.
Image
(Computer / Video
Mode)
23 ... English
23 ... English
User Controls
H. Position (Horizontal Position)
Press the to move the image left.
Press the to move the image right.
V. Position (Vertical Position)
Press the to move the image down.
Press the to move the image up.
Frequency
“Frequency”changes the display data frequency to match the
frequency of your computer’s graphic card. If you experience a
verticalflickeringbar,usethisfunctiontomakeanadjustment.
Tracking
“Tracking”synchronizesthesignaltimingofthedisplaywiththe
graphiccard.Ifyouexperienceanunstableorflickeringimage,use
this function to correct it.
“H.Position”,“V.
Position”,“Frequency”
and “ Tracking” func-
tions are not supported
under DVI and Video
mode.
Image
(Computer / Video
Mode)
24
English ... 24
English ...
User Controls
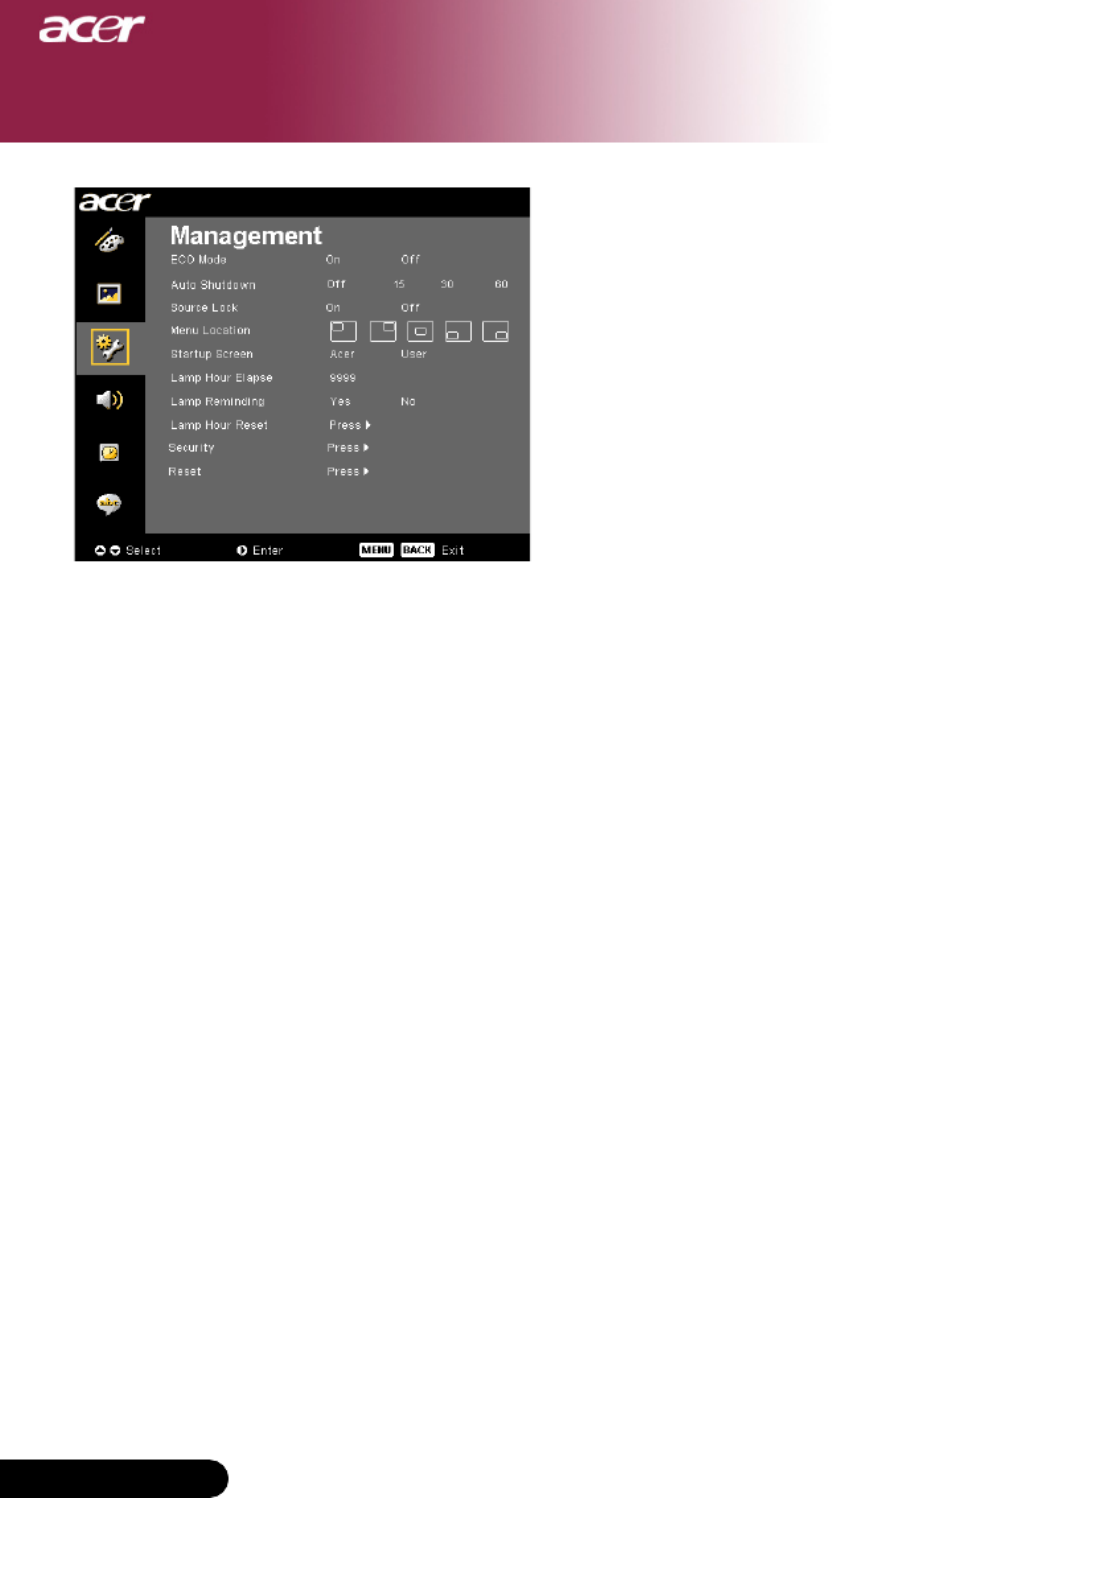
ECO Mode
Choose “On” to dim the projector lamp which will lower power
consumption,extendthelamplifeandreducenoise.Choose”Off”
to return normal mode.
Auto Shutdown(Minutes)
The projector will auto shutdown while there is no signal input
after the setting time.
Source Lock
Whensourcelockisturnedoff,theprojectorwillsearchforother
signals if the current input signal is lost. When source lock is
turnedon,itwill“Lock”thecurrentsourcechannelbeforeyou
press “Source” button on remote control for next channel.
Menu Location
Choose the Menu location on the display screen.
Startup Screen
Use this function to select your desired startup screen. If you
changethesettingfromonetoanother,whenyouexittheOSD
menu,thenewsettingwilltakeeffect.
Acer : The default startup screen of Acer projector.
User:Theusercustomizedstartupscreen,whichisdown
loaded from PC to projector via the USB cable and Acer
eOpening Management utility (refer to the description of
below section).
Management
(Computer / Video
Mode)
25 ... English
25 ... English
User Controls
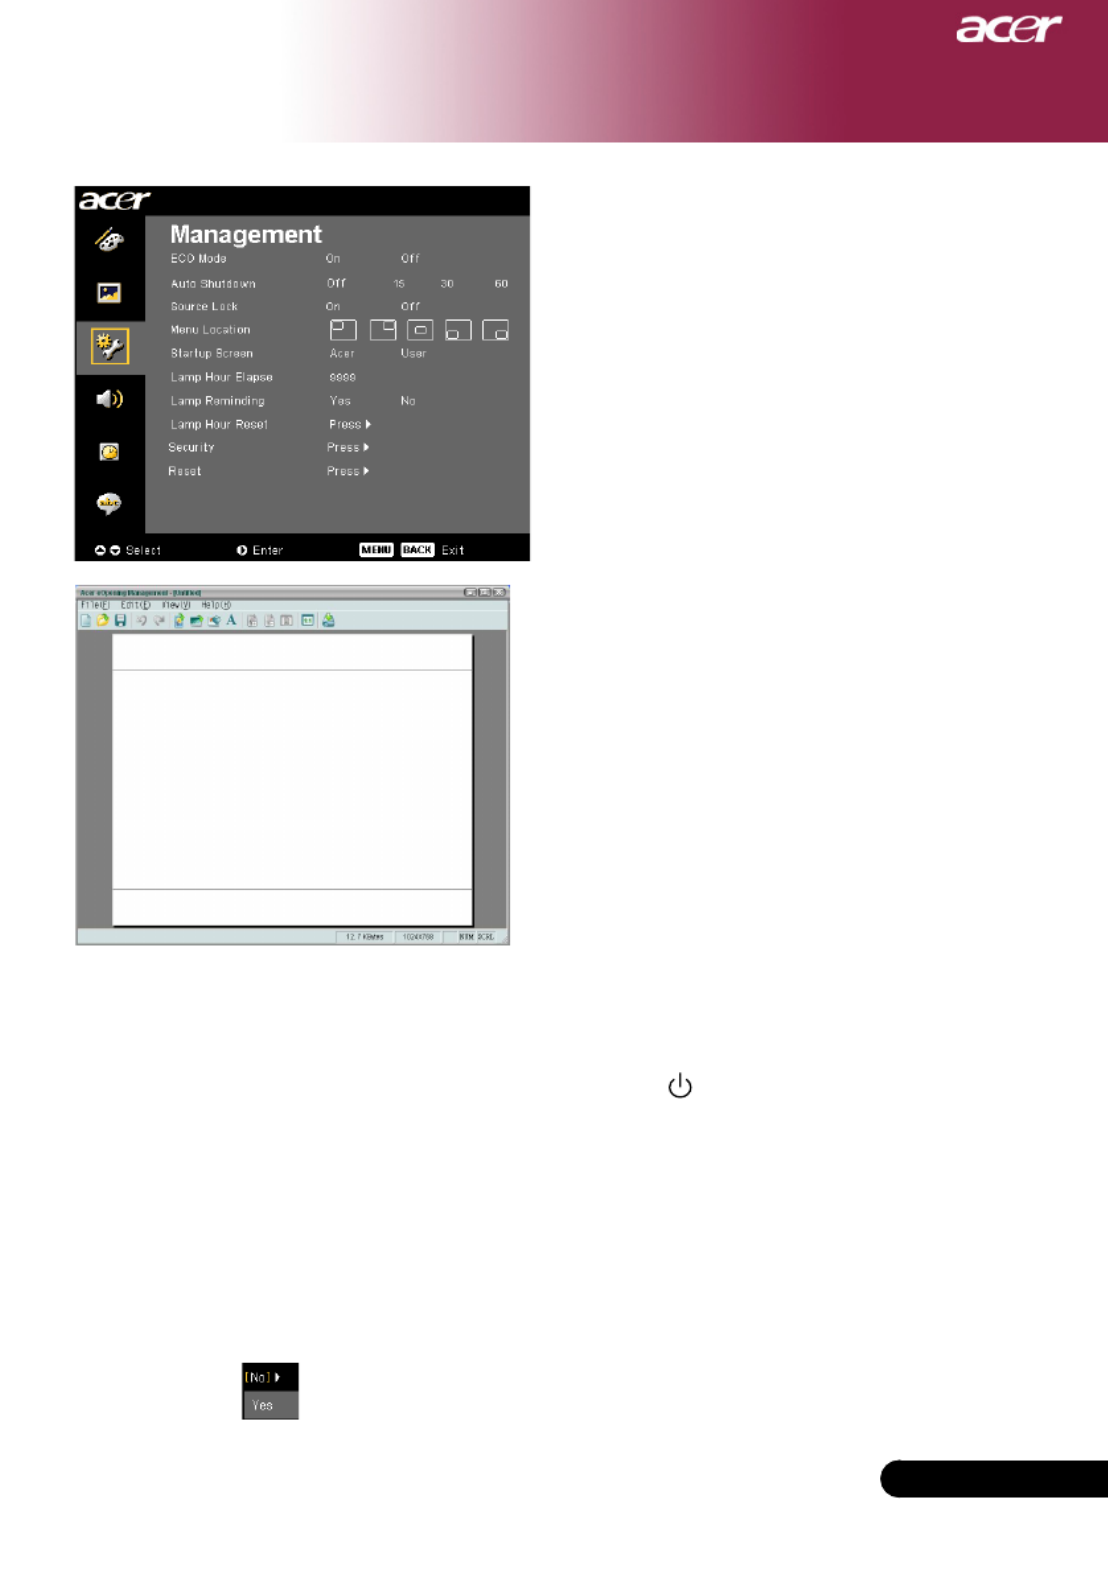
Acer eOpening Management is a PC utility for
user to change the default startup screen of
Acerprojectortotheirdesiredimage.Youcan
install Acer eOpening Management from the
bundled CD. Connect the projector to your PC
with the bundled USB cable then execute Acer
eOpening Management utility to download
your desired image from your PC to projector.
Beforethedownloadstarts,theprojectormust
enter “Download Mode” first. Please follow
the instruction below to enter “Download
Mode”.
1. Iftheprojectorwasturnedon,presspowerbuttontwicetoturn
off the projector.
2. Unplug the AC power cord from the projector.
3. Press and hold “Menu” and “ “ buttons simultaneously then
plug the AC power cord to the projector.
4.WhenTempandLampLEDsareturnedlight,releaseboth
buttons,projectorentersdownloadmode.
5. Please make sure the USB cable has been connected to the
projector from your PC.
Lamp Hour Elapse
Displays the lamp’s elapsed operating time (in hours).
Lamp Reminding
Choose this function to show or to hide warning message when the
changinglampmessageisdisplayed.Themessagewillshowup30
hours before end of life.
Management
(Computer / Video
Mode)
Specyfikacje produktu
| Marka: | Acer |
| Kategoria: | Projektor |
| Model: | XD1170 |
Potrzebujesz pomocy?
Jeśli potrzebujesz pomocy z Acer XD1170, zadaj pytanie poniżej, a inni użytkownicy Ci odpowiedzą
Instrukcje Projektor Acer

11 Lutego 2025
7 Lutego 2025
30 Stycznia 2025
30 Stycznia 2025
30 Stycznia 2025
30 Stycznia 2025
30 Stycznia 2025
30 Stycznia 2025
30 Stycznia 2025
15 Stycznia 2025
Instrukcje Projektor
- Projektor Sony
- Projektor Yamaha
- Projektor Samsung
- Projektor Leica
- Projektor LG
- Projektor Xiaomi
- Projektor Sharp
- Projektor Lenovo
- Projektor Philips
- Projektor Livoo
- Projektor Epson
- Projektor Hisense
- Projektor Panasonic
- Projektor Promethean
- Projektor Canon
- Projektor Viewsonic
- Projektor Asus
- Projektor Medion
- Projektor OK
- Projektor Lenco
- Projektor Toshiba
- Projektor D-Link
- Projektor Blaupunkt
- Projektor Salora
- Projektor Casio
- Projektor HP
- Projektor Prixton
- Projektor Strong
- Projektor Steinel
- Projektor Kodak
- Projektor Smart
- Projektor ZTE
- Projektor JVC
- Projektor Dell
- Projektor Auna
- Projektor Dahua Technology
- Projektor Eurolite
- Projektor Ricoh
- Projektor Krüger&Matz
- Projektor Renkforce
- Projektor Klarstein
- Projektor Pyle
- Projektor Marantz
- Projektor Showtec
- Projektor Mitsubishi
- Projektor ION
- Projektor XGIMI
- Projektor NEC
- Projektor Polaroid
- Projektor Sanyo
- Projektor Optoma
- Projektor Vogel's
- Projektor Hama
- Projektor Cameo
- Projektor Barco
- Projektor 3M
- Projektor Nebula
- Projektor Anker
- Projektor Hitachi
- Projektor Futurelight
- Projektor RCA
- Projektor BenQ
- Projektor Technaxx
- Projektor GPX
- Projektor Overmax
- Projektor Odys
- Projektor EasyMaxx
- Projektor Smartwares
- Projektor Adj
- Projektor Miroir
- Projektor Stairville
- Projektor Elmo
- Projektor Planar
- Projektor Acco
- Projektor Aiptek
- Projektor ASK Proxima
- Projektor Reflecta
- Projektor Yaber
- Projektor Da-Lite
- Projektor Steren
- Projektor Eiki
- Projektor Derksen
- Projektor InFocus
- Projektor Bauer
- Projektor Naxa
- Projektor Vivitek
- Projektor Emtec
- Projektor Celly
- Projektor Vankyo
- Projektor Laserworld
- Projektor Ibm
- Projektor Maxell
- Projektor La Vague
- Projektor Kogan
- Projektor Tzumi
- Projektor EKO
- Projektor MicroVision
- Projektor Elite Screens
- Projektor Celexon
- Projektor Christie
- Projektor Fun Generation
- Projektor Beghelli
- Projektor Magnavox
- Projektor PLUS
- Projektor Varytec
- Projektor AOpen
- Projektor Ultimea
- Projektor Dracast
- Projektor Dukane
- Projektor Dream Vision
- Projektor Knoll
- Projektor DTS
- Projektor Touchjet
- Projektor Boxlight
- Projektor AAXA Technologies
- Projektor Mimio
- Projektor AWOL Vision
- Projektor Smart Tech
- Projektor Atlantis Land
- Projektor KickAss
- Projektor Microtek
- Projektor VAVA
- Projektor Panamorph
- Projektor Mirabella Genio
Najnowsze instrukcje dla Projektor

9 Kwietnia 2025
9 Kwietnia 2025

2 Kwietnia 2025

5 Marca 2025
5 Marca 2025

3 Marca 2025

1 Marca 2025

26 Lutego 2025

20 Lutego 2025
20 Lutego 2025