Instrukcja obsługi Scholtes CI 66 HW
Przeczytaj poniżej 📖 instrukcję obsługi w języku polskim dla Scholtes CI 66 HW (72 stron) w kategorii piekarnik. Ta instrukcja była pomocna dla 9 osób i została oceniona przez 2 użytkowników na średnio 4.5 gwiazdek
Strona 1/72

IT
CUCINA E FORNO
CI 66 H W
CI 66 H I
CI 66 H A
Sommario
Installazione, 2-3
Posizionamento e livellamento
Collegamento elettrico
Tabella caratteristiche
Descrizione dellapparecchio, 4
Vista dinsieme
Pannello di controllo
Display
Avvio e utilizzo, 5-9
Impostare lorologio
Impostare il contaminuti
Uso del forno
Programmi di cottura manuali
Programmi di cottura automatici
Programmare la cottura
Consigli pratici di cottura
Tabella cottura in forno
Utilizzo del piano cottura vetroceramica,
10
Accendere e spegnere le zone di cottura
Le zone di cottura
Precauzioni e consigli, 11
Sicurezza generale
Smaltimento
Risparmiare e rispettare lambiente
Manutenzione e cura, 12-13
Escludere la corrente elettrica
Pulire lapparecchio
Sostituire la lampadina di illuminazione del forno
Pulire il piano cottura vetroceramica
Pulizia automatica PIROLISI
Assistenza, 14
Assistenza attiva 7 giorni su 7
Istruzioni per luso
Italiano, 1
IT
Français, 29
Deutsch, 57Nederlands, 43
English,15
GB FR
DENL

2
IT
È importante conservare questo libretto per poterlo
consultare in ogni momento. In caso di vendita, di
cessione o di trasloco, assicurarsi che resti insieme
allapparecchio.
Leggere attentamente le istruzioni: ci sono
importanti informazioni sullinstallazione, sulluso e
sulla sicurezza.
Linstallazione dellapparecchio va effettuata
secondo queste istruzioni da personale qualificato.
Qualsiasi intervento di regolazione o manutenzione
deve essere eseguito con la cucina disinserita
dallimpianto elettrico.
Posizionamento e livellamento
È possibile installare lapparecchio di fianco a
mobili che non superino in altezza il piano di lavoro.
Assicurarsi che la parete a contatto con il retro
dellapparecchio sia di materiale non infiammabile e
resistente al calore (T 90°C).
Per una corretta installazione:
porre lapparecchio in cucina, in sala da pranzo o
in un monolocale (non in bagno);
se il piano della cucina è più alto di quello dei
mobili, essi devono essere posti ad almeno 600
mm dallapparecchio;
se la cucina viene installata sotto un pensile, esso
dovrà mantenere una
distanza minima dal
piano di 420 mm.
Tale distanza deve
essere di 700 mm se i
pensili sono
infiammabili (vedi
figura);
non posizionare
tende dietro la cucina o
a meno di 200 mm dai
suoi lati;
eventuali cappe devono essere installate secondo
le indicazioni del relativo libretto di istruzione.
Livellamento
Se è necessario livellare
lapparecchio, avvitare i
piedini di regolazione forniti in
dotazione nelle apposite sedi
poste negli angoli alla base
della cucina (vedi figura).
Le gambe* si montano a
incastro sotto la base della
cucina.
Collegamento elettrico
Montaggio cavo di alimentazione
Apertura morsettiera:
Servendosi di un cacciavite, fare leva sulle
linguette laterali del coperchio della morsettiera;
Tirare ed aprire il
coperchio della
morsettiera.
Per la messa in opera del cavo eseguire le seguenti
operazioni:
svitare la vite del serracavo e le viti dei contatti
I ponticelli vengono predisposti dalla Fabbrica per
il collegamento a 230V monofase (vedi figura).
NL
230V 1N~
H07RN-F 3x4 CEI-UNEL 35364
1
3
2
4
5
per effettuare i collegamenti elettrici delle figure,
utilizzare i due ponticelli alloggiati dentro la
scatola (vedi figura - riferimento "P")
N
L2
L1
L3
P
Installazione
HOOD
420
Min.
min. 650 mm. with hood
min. 700 mm. without hood
mm.
600
Min. mm.
420
Min. mm.
* Presente solo su alcuni modelli.

IT
3
NL2L1
400V 2N~
H05RR-F 4x2.5 CEI-UNEL 35363
1
3
2
4
5
NL3L1L2
400V 3N~
H05RR-F 5x2.5 CEI-UNEL 35363
1
3
2
4
5
fissare il cavo di alimentazione nellapposito
fermacavo e chiudere il coperchio.
Collegamento del cavo di alimentazione alla rete
Montare sul cavo una spina normalizzata per il
carico indicato nella targhetta caratteristiche posta
sullapparecchio (vedi tabella Dati tecnici).
In caso di collegamento diretto alla rete è necessario
interporre tra lapparecchio e la rete un interruttore
onnipolare con apertura minima fra i contatti di 3
mm, dimensionato al carico e rispondente alle norme
nazionali in vigore (il filo di terra non deve essere
interrotto dallinterruttore). Il cavo di alimentazione
deve essere posizionato in modo tale che in nessun
punto superi di 50°C la temperatura ambiente.
Prima di effettuare lallacciamento accertarsi che:
la presa abbia la messa a terra e sia a norma di
legge;
la presa sia in grado di sopportare il carico
massimo di potenza della macchina, indicato
della targhetta caratteristiche;
la tensione di alimentazione sia compresa nei
valori nella targhetta caratteristiche;
la presa sia compatibile con la spina
dellapparecchio. In caso contrario sostituire la
presa o la spina; non usare prolunghe e multiple.
Ad apparecchio installato, il cavo elettrico e la
presa della corrente devono essere facilmente
raggiungibili.
Il cavo non deve subire piegature o compressioni.
Il cavo deve essere controllato periodicamente e
sostituito solo da tecnici autorizzati.
Lazienda declina ogni responsabilità qualora
queste norme non vengano rispettate.
* Presente solo su alcuni modelli.
TABELLA CARATTERISTICHE
Dimensioni
Forno HxLxP 32x43,5x40 cm
Volume lt. 56
Dimensioni utili
del cassetto
scaldavivande
larghezza cm 42
profondità cm 44
altezza cm 8,5
Tensione e
frequenza
d'alimentazione
vedi targhetta caratteristiche
Piano di cottura in
ceramica
Anteriore sx
Posteriore sx
Posteriore dx
Anteriore dx
Assorbimento piani
di cottura in
ceramica Max
1700W
1200W
2200W
1200W
6300W
ENERGY LABEL
Direttiva 2002/40/CE sulletichetta
dei forni elettrici.
Norma EN 50304
Consumo energia convezione
Naturale funzione di riscaldamento:
Tradizione
Consumo energia dichiarazione
Classe convezione Forzata
funzione di riscaldamento:
Rosticceria
Direttive Comunitarie: 2006/95/CEE
del 12/12/06 (Bassa Tensione) e
successive modificazioni -
89/336/CEE del 03/05/89
(Compatibilità Elettromagnetica) e
successive modificazioni -
93/68/CEE del 22/07/93 e
successive modificazioni -
2002/96/EC.

4
IT
Descrizione
dellapparecchio
Vista dinsieme
Pannello di controllo
* Presente solo su alcuni modelli.
Manopole delle
PIASTRE ELETTRICHE
del piano cottura
Manopola
PROGRAMMI
Manopola
TERMOSTATO/
IMPOSTAZIONE
TEMPI
DISPLAY
Tasto
IMPOSTAZIONE TEMPI
Spia
FUNZIONAMENTO PIASTRA
Tasto
PIROLISI
Display
Icona
FINE COTTURA
Icona
OROLOGIO
Digit numerici TEMPERATURA
e TEMPI
Icona
DURATA
Icona
CONTAMINUTI
Indicatore del
Preriscaldamento
Icona
STOP
Indicatore
PORTA BLOCCATA
Icone PROGRAMMI
AUTOMATICI
Icona PROGRAMMA
BASSA TEMPERATURA
Pannello di controllo
Ripiano GRIGLIA
Ripiano LECCARDA
GUIDE
di scorrimento dei ripiani
posizione 3
posizione 2
posizione 1
Piano cottura
vetroceramica
Piedino di regolazione Piedino di regolazione
posizione 5
posizione 4

IT
5
Avvio e utilizzo
Impostare lorologio
Si può impostare sia quando il forno è spento che
quando è acceso, ma non si è programmata la fine di
una cottura.
1. Premere più volte il tasto finchè non
lampeggiano licona e i primi due digit numerici
sul DISPLAY;
2. ruotare la manopola IMPOSTAZIONE TEMPI verso il
+ e - per regolare lora;
3. premere di nuovo il tasto finchè non
lampeggiano gli altri due digit numerici sul DISPLAY;
4. ruotare la manopola IMPOSTAZIONE TEMPI verso il
+ e - per regolare i minuti;
5. premere nuovamente il tasto per confermare.
Impostare il contaminuti
Questa funzione non interrompe la cottura e
prescinde dallutilizzo del forno; permette solo di
azionare il segnale acustico allo scadere dei minuti
impostati.
1. Premere più volte il tasto finchè non
lampeggiano licona e i tre digit numerici sul
DISPLAY;
2. ruotare la manopola IMPOSTAZIONE TEMPI verso il
+ e - per regolare i minuti;
3. premere nuovamente il tasto per confermare.
Seguirà la visualizzazione del conto alla rovescia al
termine del quale si azionerà il segnale acustico.
Uso del forno
Prima dell'uso, togliere tassativamente le pellicole
in plastica poste ai lati dell'apparecchio
Alla prima accensione fare funzionare il forno a
vuoto per almeno unora con il termostato al
massimo e a porta chiusa. Poi spegnere, aprire la
porta del forno e aerare il locale. Lodore che si
avverte è dovuto allevaporazione delle sostanze
usate per proteggere il forno.
1. Selezionare il programma di cottura desiderato
ruotando la manopola PROGRAMMI.
2. Il forno entra nella fase di preriscaldamento,
lindicatore del preriscaldamento si illumina.
È possibile modificare la temperatura ruotando la
manopola TERMOSTATO.
3. Quando si spegne lindicatore del
preriscaldamento e si avverte un segnale
acustico il preriscaldamento è completo: introdurre
gli alimenti.
4. Durante la cottura è sempre possibile:
- modificare il programma di cottura agendo sulla
manopola PROGRAMMI;
- modificare la temperatura agendo sulla manopola
TERMOSTATO;
- pianificare la durata e lora di fine della cottura
(vedi programmi di cottura);
- interrompere la cottura riportando la manopola
PROGRAMMI in posizione 0.
5. È possibile modificare la durata della cottura
(vedi programmi di cottura).
6. In caso di black-out, se la temperatura del forno
non si è abbassata troppo, lapparecchio è dotato di
un sistema che riattiva il programma dal punto in cui
è stato interrotto. Le pianificazioni in attesa di avvio,
invece, non vengono ripristinate al ritorno della
corrente e devono essere riprogrammate.
Nel programma ROSTICCERIA non è previsto il
preriscaldamento.
! Non appoggiare mai oggetti sul fondo del forno
perché si rischiano danni allo smalto.
! Porre sempre i recipienti di cottura sulla griglia in
dotazione.
Ventilazione di raffreddamento
Per ottenere una riduzione delle temperature esterne, una
ventola di raffreddamento genera un getto daria che esce
tra il pannello di controllo e la porta del forno. Allinizio del
programma PIROLISI la ventola funziona a bassa
velocità.
A fine cottura la ventola rimane attiva finché il forno non è
sufficientemente freddo.
Luce del forno
A forno spento la lampadina può essere accesa in
qualunque momento aprendo la porta del forno.

6
IT
Programmi di cottura manuali
Tutti i programmi hanno una temperatura di cottura
preimpostata. Essa può essere regolata manualmente,
impostandola a piacere tra 40°C e 250°C. Nel
programma GIRARROSTO il valore preimpostato è
270°C.
Programma FORNO TRADIZIONE
Con questa cottura tradizionale è meglio utilizzare un
solo ripiano.
Programma MULTILIVELLO
Poiché il calore è costante in tutto il forno, laria cuoce
e rosola il cibo in modo uniforme. È possibile utilizzare
fino a un massimo di due ripiani contemporaneamente.
Programma ROSTICCERIA
Unisce allirradiazione termica unidirezionale la
circolazione forzata dellaria allinterno del forno.
Ciò impedisce la bruciatura superficiale degli alimenti
aumentando il potere di penetrazione del calore.
Effettuare le cotture con la porta del forno chiusa.
Programma GIRARROSTO
La funzione è ottimizzata per le cotture al girarrosto.
Effettuare le cotture con porta del forno chiusa.
Programmi BASSA TEMPERATURA
Questo tipo di cottura consente di lievitare,
scongelare, di preparare lo yogurth, riscaldare più o
meno rapidamente, cuocere lentamente a bassa
temperatura. Le temperature selezionabili sono: 40, 65,
90 °C.
Girarrosto
Per azionare il girarrosto
(vedi figura) procedere
come segue:
1. mettere la leccarda in posizione 1;
2. mettere il sostegno del girarrosto in posizione 3 e
inserire lo spiedo nellapposito foro posto sulla parete
posteriore del forno;
3. azionare il girarrosto selezionando le icone ;
Col programma avviato, se si apre la porta il
girarrosto si arresta.
Programmi di cottura automatici
La temperatura e la durata di cottura sono
prestabilite tramite il sistema C.O.P.® (Cottura
Ottimale Programmata) che garantisce
automaticamente un risultato perfetto. La cottura si
interrompe automaticamente e il forno avvisa quando la
pietanza è cotta. La durata di cottura può essere
modificata di alcuni minuti, come di seguito specificato
nella descrizione delle singole funzioni.
Programma PIZZA
Utilizzare questa funzione per realizzare della pizza.
Fare riferimento al capitolo seguente per la ricetta e
dettagli. E possibile modificare solo la durata di -5/+5
minuti.
Per ottenere i migliori risultati vi consigliamo di seguire
attentamente le indicazioni sotto riportate:
rispettare la ricetta;
il peso dellimpasto deve essere da 500g a 700g.
ungere leggermente la leccarda e le teglie.
Infornare a forno freddo. Nel caso in cui si desideri
infornare a forno caldo, a seguito di una cottura che ha
raggiunto alte temperature, il display visualizzerà la
scritta Hot fino a quando la temperatura del forno
raggiungerà 120°. A questo punto sarà possibile
infornare la pizza.
Ricetta per la PIZZA :
1 Leccarda, Ripiano basso, a Forno Freddo o Caldo
Ricetta per 3 pizze di circa 550g : 1000g Farina, 500g
Acqua, 20g Sale, 20g Zucchero, 10cl Olio di Oliva, 20g
lievito fresco (oppure 2 bustini in polvere)
Lievitazione nell ambiente : 1 ora o funzione manuale
BASSA TEMPERATURA a 40° e lasciar lievitare per
circa 30/45 minuti.
Infornare a forno freddo.
Lanciare la cottura PIZZA
Programma PANE
Utilizzare questa funzione per realizzare del pane.
Per ottenere i migliori risultati vi consigliamo di seguire
attentamente le indicazioni sotto riportate:
rispettare la ricetta;
il peso massimo per leccarda;
non dimenticare di mettere 1dl di acqua fredda
sulla leccarda alla posizione 5;
Infornare a forno freddo. Nel caso in cui si desideri
infornare a forno caldo, a seguito di una cottura che ha
raggiunto alte temperature, il display visualizzerà la
scritta Hot fino a quando la temperatura del forno
raggiungerà 40°. A questo punto sarà possibile
infornare il pane.

IT
7
Ricetta per il PANE :
1 Leccarda di 1000g Max, Ripiano basso
Ricetta per 1000g dimpasto : 600g Farina, 360g
Acqua, 11g Sale, 25g lievito fresco (oppure 2 bustini in
polvere)
Processo:
Mescolare la farina ed il sale in un grande recipiente.
Diluire il lievito nellacqua leggermente tiepida (circa
35 gradi).
Aprite la farina a fontana.
Versare il miscuglio di acqua e lievito
Lavorare fino ad ottenimento di un impasto
omogeneo e poco colloso, stirandolo col palmo
della mano e ripiegandolo su se stesso per 10
minuti.
Formare una palla, mettere limpasto in uninsalatiera
e ricoprirla con pellicola trasparente per evitare che
la superficie dellimpasto si secchi. Mettere
linsalatiera nel forno alla funzione manuale BASSA
TEMPERATURA a 40°C e lasciar lievitare per circa
1 ora (il volume dellimpasto deve raddoppiare)
Dividere la palla per ottenere i diversi pani.
Disporli sulla leccarda su una carta forno.
Cospargere i pani di farina.
Fare dei tagli sui pani.
non dimenticare di mettere 1dl di acqua fredda
sulla leccarda alla posizione 5. Per la pulizia, si
consiglia lutilizzo di acqua e aceto.
Infornare a forno freddo.
Lanciare la cottura PANE
Alla fine della cottura, lasciare riposare i pani su una
griglia fino a completo raffreddamento.
Programma DOLCI
Questa funzione è ideale per la cottura di dolci.
Infornare a forno freddo. E comunque possibile
infornare anche a forno caldo. E possibile modificare
solo la durata di -10/+10 minuti.
Programmare la cottura
La programmazione è possibile solo dopo aver
selezionato un programma di cottura.
Programmare la durata di cottura
1. Premere più volte il tasto finchè non
lampeggiano licona e i tre digit numerici sul
DISPLAY;
2. ruotare la manopola IMPOSTAZIONE TEMPI verso il
+ e - per regolare il tempo desiderato;
3. premere nuovamente il tasto per confermare;
4. a tempo scaduto, sul DISPLAY compare la scritta
END, il forno termina la cottura e viene emesso un
segnale acustico.
Esempio: sono le 9:00 e viene programmata una
durata di 1 ora e 15 minuti. Il programma si arresta
automaticamente alle 10:15.
Programmare la fine di una cottura
La programmazione della fine di una cottura è
possibile solo dopo aver impostato una durata di
cottura.
1. Seguire la procedura da 1 a 3 descritta per la
durata;
2. poi premere il tasto finchè non lampeggiano
licona e i due digit numerici sul DISPLAY;
3. ruotare la manopola IMPOSTAZIONE TEMPI verso il
+ e - per regolare lora;
4. premere di nuovo il tasto finchè non
lampeggiano gli altri due digit numerici sul DISPLAY;
5. ruotare la manopola IMPOSTAZIONE TEMPI verso il
+ e - per regolare i minuti;
6. premere nuovamente il tasto per confermare;
7. a tempo scaduto, sul DISPLAY compare la scritta
END, il forno termina la cottura e viene emesso un
segnale acustico.
Esempio: sono le ore 9:00, viene programmata una
durata di 1 ora e 15 minuti e le 12:30 come ora di
fine. Il programma inizia automaticamente alle ore
11:15.
Le icone e accese segnalano che è stata
effettuata una programmazione. Sul DISPLAY vengono
visualizzate alternativamente lora di fine cottura e la
durata.
Per annullare una programmazione ruotare la manopola
PROGRAMMI in posizione 0.
Consigli pratici di cottura
Nelle cotture ventilate non utilizzare le posizioni
1 e 5: sono investite direttamente dallaria calda che
potrebbe provocare bruciature sui cibi delicati.
Nelle cotture GIRARROSTO e ROSTICCERIA,
disporre la leccarda in posizione 1 per raccogliere i
residui di cottura (sughi e/o grassi).
MULTICOTTURA
Utilizzare le posizioni 2 e 4, mettendo alla 2 i cibi
che richiedono maggior calore.
Disporre la leccarda in basso e la griglia in alto.

8
IT
Tabella cottura in forno
PIETANZE ESEMPI FUNZIONE TEMPERATURA SUPPORTI
Volatili arrosto pollo, anatra, galletto, cappone,. Rosticceria 200 °C volatile su griglia
Volatili allo spiedo pollo, galletti Girarrosto 270 °C supporto per girarrosto
Arrosti arrosto di maiale, di vitello, di tacchino, roast-beef,
coscia d'agnello, coscia di capriolo, petto farcito di
vitello, ecc. Rosticceria 200 °C carne su griglia
grossi pezzi brasati cosciotto intero brasato, cappone o tacchino
grande, ecc. Multilivello 180 °C(a un terzo
della cottura,
abbassare a 160 °C)
carne su leccardabagnare a
intervalli regolari con il sugo di
cottura
Sauté di carne in cocottee
pietanze tradizionali
manzo bourguignon, coniglio alla cacciatora, sauté
di vitello Marengo, stufato d'agnello, pollo alla
basca, ecc.backenhof, terrine, ecc. Tradizione 190 °C cocotte su leccarda
Grigliate bistecche, braciole, salsicce da grigliare, spiedini,
cosce di pollo, ecc. Multilivello 200 °C
su griglia (ripiano in funzione
dello spessore)
Carni in pastella filetto di manzo Wellington, cosciotto in pastella,
ecc. Multilivello 200 °C
su leccarda (per pezzi grandi,
abbassare a 160 °C dopo la
cottura della pastella)
LE CARNI
Pietanze in pastella di sale volatili in pastella di sale, ecc. Multilivello 240 °C carne su leccarda o vassoio su
leccarda
Pesci alla griglia e spiedini spigola, sgombro, sardina, triglia, tonno, ecc. Multilivello 180 °C su griglia (ripiano in funzione
dello spessore)
Pesci interi (farciti) orata, carpa, ecc. Multilivello 200 °C su leccarda
Filetti di pesce (con aggiunta di
vino o altro liquido) salmone, scorfano, merluzzo, spigola, ecc. Tradizione 200 °C su leccarda
Cartoccio sogliola, limanda, conchiglie di saint jacques, ecc. Multilivello 200 °C su leccarda
Pesce in pastella (pasta sfoglia
o pasta frolla) salmone, spiedino, ecc. Multilivello 200 °C su leccarda
Pesce al gratin merluzzo alla provenzale gratinato, ecc. gratin(o rosticceria) 200-210 °C vassoio su leccarda
Soufflé conchiglie di saint jacques, ecc. Multilivello 200 °C tortiera su leccarda
I PESCI
Pesci in pastella di sale spigola, carpa, ecc. Multilivello 240 °C pesce su leccarda o vassoio su
leccarda
PIETANZE ESEMPI FUNZIONE TEMPERATURA SUPPORTI
Plum-cake salati plum-cake alle olive, al tonno, ecc. Dolci o Multilivello 160 °C tortiera su leccarda
Torte rustiche torte rustiche al formaggio, pasticcio al salmone,… Dolci o Multilivello 200 °C su leccarda
Terrine terrine di pesce, carne, verdure, foie gras, ecc. Tradizione 160 °C stampo da terrine su leccarda
(bagno-maria con acqua già
calda)
Tegamino pasticci di fegato di volatile, purè di salmone, uova
in cocotte, ecc. Tradizione 160 °C
tegamino su leccarda (bagno-
maria con acqua già calda)
PRIME
PORTATE
Soufflé soufflé al formaggio, alle verdure, al pesce, ecc. Multilivello 200 °C tortiera su leccarda
Cibi al gratin gratin di patate, zuppa parmentier, lasagne, ecc. gratin
(o rosticceria) 200-210 °C vassoio su leccarda
Verdure farcite patate, pomodori, zucchine, cavoli, ecc. Multilivello 200 °C su leccarda
o tortiera su leccarda
Verdure brasate in cocotte lattuga, carote allo zafferano, scorzobianca, ecc. Tradizione 200 °C cocotte su leccarda
Flan flan ai funghi, frittelle di verdura, ecc. Tradizione 160 °C tegamino o tortiera su leccarda
(bagno-maria con acqua già
calda)
Terrine terrine di verdure Tradizione 160 °C tortiera su leccarda (bagno-
maria con acqua già calda)
Soufflé soufflé d'asparagi, al pomodoro, ecc. Multilivello 200 °C tortiera su leccarda
Pietanze in pastella pasticcio di verdure, ecc. Multilivello 200 °C su leccarda
Cartoccio tartufi, ecc. Multilivello 200 °C cartoccio su leccarda
I LEGUMI
Riso Pilaf Tradizione 180 °C vassoio su leccarda

IT
9
Tabella cottura in forno
Programmi di cottura au tom a tici
Funzione Cottura raccomandata per … ESEMPI SUPPORTI
Livello
leccarda
Durata cottura
(minuti) Infornatura
Plum-cake e quattro quarti
(con lievito chimico)
plum-cake alla frutta, marezzati,
quattro quarti, ecc.
tortiera su
leccarda 2
Crostate alla frutta (pasta frolla
o pasta sfoglia, con o senza
flan)
crostate di mele, mirabelle, pere,
ecc.
tortiera su
leccarda 2
Pasta sfoglia panzerotti alle mele, torte
rustiche, pasticci, ecc. su leccarda 2
Dolci
Dolci senza lievito (clafoutis,
torta pithivier alle mandorle,
torta rustica, ecc.)
su leccarda 2
45** Freddo
Pizze Pizze alte, focacce (impasto di
pane) 2 28** Caldo o freddo
Pane *** 2 55 Freddo
* I tempi di cottura sono indicativi e possono essere modificati in base ai proprio gusti personali. I tempi di preriscaldamento del forno sono preimpostati e non modificabili manualmente.
** Le durate delle cotture automatiche sono preimpostate. I valori in tabella si riferiscono ai valori di durata minima e massima, modificabile dallutente a partire dalla durata preimpostata.
*** Come da ricetta, a
gg
iun
g
ere 100
g
r di ac
q
ua nella leccarda.
PIETANZE ESEMPI FUNZIONE TEMPERATURA SUPPORTI
Yogurt Bassa temperatura 40 °C tegamino su leccarda
VARIE
Cibi secchi funghi, erbe, frutta o verdura a fette, ecc.
Bassa temperatura 65 °C su griglia
PIETANZE ESEMPI FUNZIONE TEMPERATURA SUPPORTI
Biscotti (senza lievito) pan di spagna, savoiradi, biscotti arrotolati,
Brownie, 200 °C tortiera su leccarda
Torte al formaggio bianco 200 °C tortiera su leccarda
Crostate in pasta lievitata crostate allo zucchero, torte di pane briosciato alla
frutta 180 °C tortiera su leccarda
Cottura di basi per crostate
(pasta sablée) crostate alla frutta cruda (fragole, lamponi, ecc.) 180 °C tortiera su leccarda(fagiolo
secchi in pasta)
Pasticci (pasta sfoglia o pasta
frolla) pasticci alle pere, ecc. 220 °C tortiera su leccarda
bigné profiterol, piccoli bigné, bigné, paris brest, saint
honoré, ecc. 190 °C su leccarda
Piccoli dolci di pasticceria
(lievito naturale) croissant, crostate allo zucchero, brioche vuote,
piccoli savarin, ecc. 180 °C su leccarda
DOLCI DI PASTICCERIA
Dolci di pasticceria grandi
(lievito naturale) kougloff, brioche, panettone, pane dolce,...
Dolci o Multilivello
160 °C su leccarda o tortiera su
leccarda
Pasta da biscotti biscotti in vassoietti di carta, biscotti al cucchiaio,
ecc. 180 °C su leccarda
Pasta sablée frollini, biscotti spritz, biscottini secchi, ecc. 200 °C su leccarda
Pasta sfoglia dolci sfogliati di vario tipo, ecc. 200 °C su leccarda
Amaretti, palline di cocco amaretti alla noce di cocco o alla mandorla 180 °C su leccarda
Pasta lievitata mini-brioche, mini-croissant, ecc. 180 °C su leccarda
Meringhe bianche 70 °C su leccarda
PASTICCINI
Meringhe ambrate
Dolci o Multilivello
110 °C su leccarda
Pudding pudding a base di pane o brioche, pudding al riso 190 °C tortiera su leccarda
Creme e flanDolci di semola crème caramel, crème brûlée, flan al cioccolato,
ecc. 160 °C Stampi o tegamino su leccarda
(bagno-maria su leccarda)
Dolci al riso riso alla condé, riso imperatrice, ecc. 180 °C tortiera su leccarda
ENTRE
METS
Soufflé soufflé al liquore, soufflé alla frutta, ecc.
Dolci o Multilivello
200 °C tortiera su leccarda
FRUTTA Frutta farcita o al cartoccio mele al forno, ecc. Multilivello 200 °C tortiera o cartoccio su leccarda

10
IT
Utilizzo del piano cottura
vetroceramica
La colla applicata sulle guarnizioni lascia alcune
tracce di grasso sul vetro. Prima di utilizzare
lapparecchio, si raccomanda di eliminarle con un
prodotto specifico per la manutenzione non
abrasivo. Durante le prime ore di funzionamento è
possibile avvertire un odore di gomma, che
comunque scomparirà presto.
Accendere e spegnere le zone di cottura
Per accendere una zona di cottura ruotare in senso
orario la manopola corrispondente.
Per spegnere, ruotare la manopola in senso
antiorario fino allo 0.
Laccensione della spia FUNZIONAMENTO PIASTRE
segnala che almeno una piastra del piano cottura è
in funzione.
Le zone di cottura
Il piano di cottura è munito di 3 elementi riscaldanti
radianti e 1 elemento riscaldante alogeno. Questi
riscaldatori sono incorporati al di sotto della
superficie del piano di cottura (zone che diventano
rosse durante il funzionamento):
A. Elementi riscaldanti
radianti
B. Elemento riscaldante
alogeno
C. Luci che indicano se la
temperatura dei riscaldatori
corrispondenti supera i 60°C, anche se la zona del
piano di cottura è stata spenta.
Descrizione delle zone di cottura
Gli elementi riscaldanti radianti sono costituiti da
elementi riscaldanti circolari, che diventano rossi
soltanto dopo 10-20 secondi dall'accensione.
Gli elementi riscaldanti alogeni sono costituiti da
elementi riscaldanti circolari che garantiscono una
distribuzione uniforme della temperatura, oltre ai
vantaggi caratteristici degli elementi riscaldanti
alogeni.
Le lampade alogene emettono istantaneamente
un'elevata quantità di luce e calore con i
conseguenti vantaggi pratici:
· rapido riscaldamento (rispetto ad un bruciatore a
gas)
· rapido raffreddamento
· temperatura uniforme sull'intera superficie (grazie
agli elementi riscaldanti circolari)
In quanto simili alle altre zone di cottura, sono facili
da usare. Basta consultare le tabelle di cottura
riportate nel libretto d'uso.
Pos. Piastra elettrica radiante in
ceramica
Piastra elettrica rapida o normale
Piastra elettrica
alogena in ceramica
Piastra elettrica
automatica
0Off Off
1Per la cottura del pesce Per fondere burro o
cioccolato
2Per la cottura di patate (al vapore),
minestre, ceci, fagioli Per riscaldare i liquidi
3Per la cottura prolungata di grandi
quantità di cibo, zuppe di verdure
4Per arrosti (cottura media) Per sughi (incluse salse
dense)
5Per arrosti (ben cotti)
6Per la rosolatura o per l'ebollizione
rapida Per la cottura al
momento dell'ebollizione
7
8Per arrosti
9
10 Per stufati
11
12 Per la frittura
Consigli pratici per luso del piano cottura
Adoperare pentole con fondo piatto e di elevato
spessore, per essere certi che aderiscano
perfettamente alla zona riscaldante;
adoperare pentole di diametro sufficiente a coprire
completamente la zona riscaldante, in modo da
garantire lo sfruttamento di tutto il calore;
accertarsi che il fondo delle pentole sia sempre
perfettamente asciutto e pulito: laderenza alle
zone di cottura sarà così ottimale e sia le pentole
sia il piano cottura dureranno più a lungo;
evitare di utilizzare le stesse pentole utilizzate
sui bruciatori a gas: la concentrazione di calore
sui bruciatori a gas può deformare il fondo della
pentola, che perde aderenza;
non lasciare mai una zona di cottura accesa
senza pentola poiché potrebbe danneggiarsi.
AB
C

IT
11
Precauzioni e consigli
Lapparecchio è stato progettato e costruito in conformità alle norme
internazionali di sicurezza.
Queste avvertenze sono fornite per ragioni di sicurezza e devono essere
lette attentamente.
Sicurezza generale
Queste istruzioni sono valide solo per i paesi di
destinazione i cui simboli figurano sul libretto e sulla
targa matricola dellapparecchio.
Lapparecchio è stato concepito per un uso di tipo non professionale
allinterno dellabitazione.
Lapparecchio non va installato allaperto, nemmeno se lo spazio è
riparato, perché è molto pericoloso lasciarlo esposto a pioggia e
temporali.
Non toccare la macchina a piedi nudi o con le mani o con i piedi
bagnati o umidi.
Lapparecchio deve essere usato per cuocere alimenti, solo da
persone adulte e secondo le istruzioni riportate in questo libretto.
Il libretto riguarda un apparecchio di classe 1 (isolato) o classe 2
sottoclasse 1 (incassato tra due mobili).
Durante l'uso dell'apparecchio gli elementi
riscaldanti e alcune parti della porta forno
diventano molto calde. Fare attenzione a non
toccarle e tenere i bambimi a distanza.
Evitare che il cavo di alimentazione di altri elettrodomestici entri in
contatto con parti calde dellapparecchio.
Non ostruire le aperture di ventilazione e di smaltimento di calore.
Sulle piastre non debbono essere poste pentole instabili o deformate
onde evitare incidenti per rovesciamento. Posizionatele sul piano di
cottura in modo che i manici siano rivolti verso linterno, per evitare urti
accidentali.
Utilizzare sempre guanti da forno per inserire o estrarre recipienti.
Non utilizzare liquidi infiammabili (alcol, benzina, ecc.) in prossimità
dellapparecchio quando esso è in uso.
Non riporre materiale infiammabile nel vano inferiore di deposito o nel
forno: se lapparecchio viene messo inavvertitamente in funzione
potrebbe incendiarsi.
Quando lapparecchio non è utilizzato, assicurarsi sempre che le
manopole siano nella posizione .
Non staccare la spina dalla presa della corrente tirando il cavo, bensì
afferrando la spina.
Non fare pulizia o manutenzione senza aver prima staccato la spina
dalla rete elettrica.
In caso di guasto, in nessun caso accedere ai meccanismi interni per
tentare una riparazione. Contattare lAssistenza.
Non appoggiare oggetti pesanti sulla porta del forno aperta.
Le superfici interne del cassetto (se presente) possono diventare
calde.
Il piano in vetroceramica è resistente agli urti meccanici, tuttavia può
incrinarsi (o eventualmente frantumarsi) se colpito con un oggetto
appuntito, quale un utensile. In questi casi, scollegare immediatamente
lapparecchio dalla rete di alimentazione e rivolgersi allAssistenza.
Se la superficie del piano è incrinata, spegnere l'apparecchio per
evitare la possibilità di scosse elettriche.
Non dimenticare che la temperatura delle zone di cottura rimane
piuttosto elevata per almeno trenta minuti dopo lo spegnimento.
Tenere a debita distanza dal piano cottura qualsiasi oggetto che
potrebbe fondere, ad esempio oggetti in plastica, in alluminio o prodotti
con un elevato contenuto di zucchero. Fare particolare attenzione a
imballaggi e pellicole in plastica o alluminio: se dimenticati sulle superfici
ancora calde o tiepide possono causare un grave danno al piano.
Non posare oggetti metallici (coltelli, cucchiai, coperchi, ecc.) sul piano
perchè possono diventare caldi.
Non è previsto che l'apparecchio venga utilizzato da persone (bambini
compresi) con ridotte capacità fisiche, sensoriali o mentali, da persone
inesperte o che non abbiano familiarità con il prodotto, a meno che
non vengano sorvegliate da una persona responsabile della loro
sicurezza o non abbiano ricevuto istruzioni preliminari sull'uso
dell'apparecchio.
Evitare che i bambini giochino con l'apparecchio.
Non guardare direttamente le lampade alogene
Se la cucina viene posta su di un piedistallo, prendere adeguati
accorgimenti affinchè l'apparecchio non scivoli dal piedistallo stesso.
Smaltimento
Smaltimento del materiale di imballaggio: attenersi alle norme locali, così
gli imballaggi potranno
essere riutilizzati.
La direttiva Europea 2002/96/CE sui rifiuti di apparecchiature elettriche
ed elettroniche (RAEE), prevede che gli elettrodomestici non debbano
essere smaltiti nel normale flusso dei rifiuti solidi urbani. Gli apparecchi
dismessi devono essere raccolti separatamente per ottimizzare il tasso
di recupero e riciclaggio dei materiali che li compongono ed impedire
potenziali danni per la salute e lambiente. Il simbolo del cestino barrato
è riportato su tutti i prodotti per ricordare gli obblighi di raccolta
separata.
Per ulteriori informazioni, sulla corretta dismissione degli elettrodomestici,
i detentori potranno rivolgersi al servizio pubblico preposto o ai
rivenditori.
Risparmiare e rispettare lambiente
Azionando il forno negli orari che vanno dal tardo pomeriggio fino alle
prime ore del mattino si collabora a ridurre il carico di assorbimento delle
aziende elettriche. Le opzioni di pianificazione dei programmi, in
particolar modo la cottura ritardata (vedi Programmi), permettono di
organizzarsi in tal senso.
Si raccomanda di effettuare sempre le cotture al GIRARROSTO e
ROSTICCERIA a porta chiusa: sia per ottenere migliori risultati che per
un sensibile risparmio di energia (10% circa).
Mantenere efficienti e pulite le guarnizioni, in modo che aderiscano
bene alla porta e non procurino
dispersioni di calore.

12
IT
Manutenzione e cura
* Presente solo su alcuni modelli.
Escludere la corrente elettrica
Prima di ogni operazione isolare lapparecchio dalla
rete di alimentazione elettrica.
Pulire il forno
Non utilizzare mai pulitori a vapore o ad alta
pressione per la pulizia dellapparecchio.
Pulire il vetro della porta con spugne e prodotti
non abrasivi e asciugare con un panno morbido;
non usare materiali ruvidi abrasivi o raschietti
metallici affilati che possono graffiare la superficie
e causare la frantumazione del vetro.
Le parti esterne smaltate o inox e le guarnizioni in
gomma possono essere pulite con una spugnetta
imbevuta di acqua tiepida e sapone neutro. Se le
macchie sono difficili da asportare usare prodotti
specifici. Si consiglia di sciacquare
abbondantemente e di asciugare dopo la pulizia. Non
usare polveri abrasive o sostanze corrosive.
Linterno del forno va pulito preferibilmente ogni volta
dopo luso, quando è ancora tiepido. Usare acqua
calda e detersivo, risciaquare e asciugare con un
panno morbido. Evitare gli abrasivi.
Gli accessori possono essere lavati come normali
stoviglie, anche in lavastoviglie.
Il pannello di controllo va pulito da sporco e grassi
con una spugna non abrasiva o con un panno
morbido.
Lacciaio inossidabile può macchiarsi se lasciato
parecchio tempo a contatto con unacqua molto
calcarea o con prodotti di pulizia contenenti
fosforo. Si consiglia di sciacquare
abbondantemente e asciugare con cura.
Controllare le guarnizioni del forno
Controllare periodicamente lo stato della guarnizione
attorno alla porta del forno. In caso risulti danneggiata
rivolgersi al Centro Assistenza più vicino. È consigliabile
non usare il forno fino allavvenuta riparazione.
Sostituire la lampadina di illuminazione
del forno
Per sostituire la
lampadina di
illuminazione del
forno:
1. Togliere il coperchio in vetro, servendosi
di un cacciavite.
2. Svitare la lampadina e sostituirla con una analoga:
potenza 15 W, attacco E 14.
Rimontare il coperchio, prestando attenzione a
posizionare correttamente la guarnizione (vedi
figura).
Pulire il piano cottura vetroceramica
Evitare luso di detergenti abrasivi o corrosivi, quali i
prodotti in bombolette spray per barbecue e forni,
smacchiatori e prodotti antiruggine, i detersivi in polvere
e le spugne con superficie abrasiva: possono graffiare
irrimediabilmente la superficie.
Per una manutenzione ordinaria, è sufficiente lavare il
piano con una spugna umida, asciugando quindi con
una carta assorbente per cucina.
Se il piano è particolarmente sporco, strofinare con
un prodotto specifico per la pulizia delle superfici in
vetroceramica, sciacquare e asciugare.
Per rimuovere gli accumuli di sporco più consistenti
servirsi di un apposito raschietto (non fornito in
dotazione). Intervenire non appena possibile, senza
attendere che lapparecchio si sia raffreddato, per
evitare lincrostazione dei residui. Eccellenti risultati
si possono ottenere usando una spugnetta in filo
dacciaio inossidabile specifica per piani in
vetroceramica imbevuta di acqua e sapone.
In caso sul piano cottura si fossero accidentalmente
fusi oggetti o materiali quali plastica o zucchero,
rimuoverli con il raschietto immediatamente, finchè la
superficie è ancora calda.
Una volta pulito, il piano può essere trattato con un
prodotto specifico per la manutenzione e la
protezione: la pellicola invisibile lasciata da questo
prodotto protegge la superficie in caso di scolamenti
durante la cottura. Si raccomanda di eseguire queste
operazioni con lapparecchio tiepido o freddo.
Ricordarsi sempre di risciacquare con acqua pulita e
asciugare accuratamente il piano: i residui di prodotti
potrebbero infatti incrostarsi durante la successiva
cottura.
Prodotti specifici per la pulizia
del vetroceramica
Dove acquistarli
Raschietto a lametta e Lamette
di ricambi
Hobbistica e
Ferramenta
Stahl-Fix
SWISSCLEANER
WK TOP
Altri prodotti per vetroceramica
Casalinghi
Fai-Da-Te
Ferramenta
Supermercati
coperchio
guarnizione
lampadina
cavità

IT
13
Pulizia automatica PIROLISI
Il programma PIROLISI porta la temperatura interna
del forno a raggiungere i 500°C e attiva il processo
di pirolisi, ossia la carbonizzazione dei residui. Lo
sporco viene letteralmente incenerito.
Durante la pulizia automatica, le superfici possono
diventare molto calde: tenere i bambini a distanza.
Attraverso il vetro della porta forno è possibile
notare alcune particelle che si illuminano: si tratta di
una combustione istantanea, assolutamente
normale, che non comporta alcun pericolo.
Prima di attivare PIROLISI:
con una spugna umida togliere dallinterno del
forno i residui più consistenti. Non usare
detergenti;
estrarre tutti gli accessori;
non lasciare strofinacci o presine sulla maniglia.
posizionare la manopola PROGRAMMI su 0
! Se il forno è eccessivamente caldo la pirolisi
potrebbe non avviarsi. Aspettare che si raffreddi.
! Lattivazione del programma è possibile solo dopo
aver chiuso la porta del forno.
Per attivare il ciclo di pulizia PIROLISI premere per
circa 4 secondi il tasto . Tramite la manopole
IMPOSTAZIONE TEMPI è possibile scegliere il
livello di pulizia desiderato con durata preimpostata
e non modificabile:
1. Economico (ECO): ruotare la manopola verso -.
Durata 1 ora;
2. Normale (NOR): livello iniziale. Durata 1 ora e 30
minuti;
3. Intensivo (INT): ruotare la manopola verso +.
Durata 2 ore.
4. Premere il tasto per confermare.
Anche per il ciclo PIROLISI, come per un normale
ciclo di cottura, è possibile programmare quando far
terminare il ciclo di pulizia (vedi Programmare la fine
della pulizia automatica).
Dispositivi di sicurezza
licona sul display illuminata indica che la
porta del forno si è bloccata automaticamente non
appena la temperatura ha raggiunto valori elevati;
licona indica che in qualsiasi momento
premendo il tasto è possibile annullare il ciclo
di pulizia;
in caso di evento anomalo, lalimentazione degli
elementi riscaldanti viene interrotta;
a bloccaggio della porta avvenuto non è più
possibile modificare le impostazioni di durata e
fine ciclo.
Programmare la fine della pulizia automatica
1. Premere il tasto finchè non lampeggiano
licona e i due digit numerici sul DISPLAY;
2. ruotare la manopola IMPOSTAZIONE TEMPI verso
il + e - per regolare lora;
3. premere di nuovo il tasto finchè non
lampeggiano gli altri due digit numerici sul
DISPLAY;
4. ruotare la manopola IMPOSTAZIONE TEMPI verso
il + e - per regolare i minuti;
5. premere nuovamente il tasto per confermare;
6. a tempo scaduto, sul DISPLAY la scritta END e
viene emesso un segnale acustico.
Esempio: sono le ore 9:00, viene scelta una
PIROLISI con livello Economico e quindi con una
durata preimpostata di 1 ora. Si pianifica le 12:30
come ora di fine. Il programma inizia
automaticamente alle ore 11:30.
Le icone e accese segnalano che è stata
effettuata una programmazione. Sul DISPLAY vengono
visualizzate alternativamente lora di fine PIROLISI e
la durata.
Al termine della pulizia automatica
Per poter aprire la porta del forno sarà necessario
attendere che la temperatura del forno sia scesa a
un livello accettabile. A questo punto è possibile
constatare la presenza di alcuni depositi di polvere
bianca sul fondo e sulle pareti del forno: rimuoverle
con una spugna umida a forno freddo. Se invece si
desidera approfittare del calore immagazzinato per
avviare una cottura, le polveri possono anche
restare: non comportano alcun pericolo per gli
alimenti da cucinare.

14
IT
Assistenza
Attenzione:
Lapparecchio è dotato di un sistema di diagnostica automatica che consente di rilevare eventuali
malfunzionamenti. Questi vengono comunicati dal display tramite messaggi del tipo: F seguito da numeri.
In questi casi è necessario lintervento dellassistenza tecnica.
Non ricorrere mai a tecnici non autorizzati.
Comunicare:
Il tipo di anomalia;
Il modello della macchina (Mod.)
Il numero di serie (S/N)
Queste ultime informazioni si trovano sulla targhetta caratteristiche posta sullapparecchio
Assistenza attiva 7 giorni su 7
In caso di necessità dintervento chiamare il Numero Unico Nazionale 199.199.199*.
Un operatore sarà a completa disposizione per fissare un appuntamento con il Centro Assistenza Tecnico
Autorizzato più vicino al luogo da cui si chiama.
È attivo 7 giorni su 7, sabato e domenica compresi, e non lascia mai inascoltata una richiesta.
*Al costo di 14,26 centesimi di Euro al minuto(iva inclusa) dal Lun. al Ven. dalle 08:00 alle 18:30, il Sab. dalle 08:00 alle
13:00 e di 5,58 centesimi di Euro al minuto (iva inclusa) dal Lun. al Ven. dalle 18:30 alle 08:00, il Sab. dalle 13:00 alle
08:00 e i giorni festivi, per chi chiama da telefono fisso.
Per chi chiama da radiomobile le tariffe sono legate al piano tariffario delloperatore telefonico utilizzato.
Le suddette tariffe potrebbero essere soggette a variazione da parte delloperatore telefonico; per maggiori informazioni
consultare il sito www.scholtes.com.

GB
COOKER AND OVEN
CI 66 H W
CI 66 H I
CI 66 H A
Operating Instructions
Italiano, 1
IT
Français, 29
Deutsch, 57Nederlands, 43
English,15
GB FR
DENL
Contents
Installation, 16-17
Positioning and levelling
Electrical connection
Table of characteristics
Description of the appliance, 18
Overall view
Control panel
Display
Start-up and use, 19-23
Setting the clock
Setting the timer
Using the oven
Manual cooking modes
Automatic cooking modes
Programming cooking
Practical cooking advice
Oven cooking advice table
Using the glass ceramic hob, 24
Switching the cooking zones on and off
Cooking zones
Precautions and tips, 25
General safety
Disposal
Respecting and conserving the environment
Care and maintenance, 26-27
Switching the appliance off
Cleaning the appliance
Replacing the oven light bulb
Cleaning the glass ceramic hob
Automatic cleaning using the PYROLYTIC cycle
Assistance, 28

16
GB
Please keep this instruction booklet in a safe place
for future reference.. Make sure the booklet remains
with the appliance if it is sold, given away or moved.
Please read this manual carefully: it contains
important information on installation, operation and
safety.
The appliance must be installed by a qualified
professional in accordance with the instructions
provided.
Any necessary adjustment or maintenance must be
performed after the cooker has been disconnected
from the electricity supply.
Positioning and levelling
The appliance may be installed alongside any
cupboards whose height does not exceed that of the
hob surface.
Make sure that the wall which is in contact with the
back of the appliance is made from a non-
flammable, heat-resistant material (T 90°C).
To install the appliance correctly:
Place it in the kitchen, the dining room or the
studio flat (not in the bathroom).
If the top of the hob is higher than the cupboards,
the appliance must be installed at least 600 mm
away from them.
If the cooker is installed underneath a wall cabinet,
there must be a minimum distance of 420 mm
between this cabinet and the top of the hob.
This distance should
be increased to 700
mm if the wall cabinets
are flammable (see
figure).
Do not position
blinds behind the
cooker or less than 200
mm away from its
sides.
Any hoods must be installed in accordance with
the instructions listed in the relevant operating
manual.
Levelling
If it is necessary to level the
appliance, screw the
adjustable feet into the
positions provided on each
corner of the base of the
cooker (see figure).
The legs* fit into the slots on
the underside of the base of
the cooker.
Electrical connection
Fitting the power supply cable
To open the terminal board:
Insert a screwdriver into the side tabs of the
terminal board cover.
Pull the cover to
open it.
To install the cable, follow the instructions below:
Loosen the cable clamp screw and the wire
contact screws.
The jumpers are pre-set at the Factory for 230 V
single-phase connection (see figure).
NL
230V 1N~
H07RN-F 3x4 CEI-UNEL 35364
1
3
2
4
5
To carry out the electrical connections as shown in
the figures, use the two jumpers inside the box
(see figure - labelled P).
Installation
HOOD
420
Min.
min.
650
mm. with hood
min.
700
mm. without hood
mm.
600
Min. mm.
420
Min. mm.

GB
17
N
L2
L1
L3
P
NL2L1
400V 2N~
H05RR-F 4x2.5 CEI-UNEL 35363
1
3
2
4
5
NL3L1L2
400V 3N~
H05RR-F 5x2.5 CEI-UNEL 35363
1
3
2
4
5
Secure the power supply cable by fastening the
cable clamp screw then put the cover back on.
Connecting the supply cable to the electricity mains
Install a standardised plug corresponding to the
load indicated on the appliance data plate (see
Technical data table).
The appliance must be directly connected to the
mains using an omnipolar switch with a minimum
contact opening of 3 mm installed between the
appliance and the mains. The switch must be
suitable for the charge indicated and must comply
with current electrical regulations (the earthing wire
must not be interrupted by the switch). The supply
cable must be positioned so that it does not come
into contact with temperatures higher than 50°C at
any point.
Before connecting the appliance to the power
supply, make sure that:
The appliance is earthed and the plug is compliant
with the law.
The socket can withstand the maximum power of
the appliance, which is indicated by the data
plate.
The voltage falls between the values indicated on
the data plate.
The socket is compatible with the plug of the
appliance. If the socket is incompatible with the
plug, ask an authorised technician to replace it.
Do not use extension cords or multiple sockets.
Once the appliance has been installed, the power
supply cable and the electrical socket must be
easily accessible.
The cable must not be bent or compressed.
The cable must be checked regularly and replaced
by authorised technicians only.
The manufacturer declines any liability should
these safety measures not be observed.
TABLE OF CHARACTERISTICS
Oven dimensions
(HxWxD) 32x43.5x40 cm
Volume 56 l
Useful
measurements
relating to the oven
compartment
width 42 cm
depth 44 cm
height 8.5 cm
Burners may be adapted for use with any type
of gas shown on the data plate
Voltage and
frequency see data plate
Glass Ceramic Hob
Front Left
Back Left
Back Right
Front Right
Max. Ceramic Hob
Consumption
1700W
1200W
2200W
1200W
6300W
ENERGY LABEL
Directive 2002/40/EC on the label of
electric ovens. Standard EN 50304
Energy consumption for Natural
convection heating mode:
Convection mode
Declared energy consumption for
Forced convection Class
heating mode: Roasting
EC Directives: 2006/95/EEC dated
12.12.06 (Low Voltage) and
subsequent amendments -
89/336/EEC dated 03/05/89
(Electromagnetic Compatibility) and
subsequent amendments -
90/369/EEC dated 29/06/90 (Gas) and
subsequent amendments - 93/68/EEC
dated 22/07/93 and subsequent
amendments - 2002/96/EC.

18
GB
Description of the appliance
Overall view
Control panel
*Only available in certain models.
Hob ELECTRIC
HOTPLATE control knobs
SELECTOR
knob
THERMOSTAT/TIMER
knob
DISPLAY
SET TIMER
button
Indicator light for
ELECTRIC HOTPLATE
PYROLITIC CYCLE
button
Display
AUTOMATIC
COOKING MODE icons
LOW TEMPERATURE
MODE icon
END OF COOKING
icon
CLOCK
icon
TEMPERATURE
and TIME digits
DURATION
icon
TIMER
icon
Preheating
indicator
STOP
icon
DOOR LOCK
indicator
Glass ceramic
hob
GUIDE RAILS
for the sliding racks
position 3
position 2
position 1
Adjustable foot
position 5
position 4
Control panel
RACK shelf
DRIPPING PAN shelf
Adjustable foot

GB
19
Start-up and use
Setting the clock
The clock may be set when the oven is switched
off or when it is switched on, provided that the end
time of a cooking cycle has not been programmed
previously.
1. Press the button several times until the
icon and the first two numerical digits on the display
start to flash.
2. Turn the TIMER KNOB towards + and - to
adjust the hour value.
3. Press the button again until the other two
digits on the DISPLAY begin to flash.
4. Turn the TIMER KNOB towards + and - to
adjust the minute value.
5. Press the button again to confirm.
Setting the timer
This function does not interrupt cooking and does
not affect the oven; it is simply used to activate the
buzzer when the set amount of time has elapsed.
1. Press the button several times until the
icon and the three numerical digits on the DISPLAY
begin to flash.
2. Turn the TIMER KNOB towards + and - to
adjust the minute value.
3. Press the button again to confirm.
The display will then show the time as it counts
down. When this period of time has elapsed the
buzzer will be activated.
Using the oven
Before operating the product, remove all plastic
film from the sides of the appliance.
The first time you use your appliance, heat the
empty oven with its door closed at its maximum
temperature for at least half an hour. Make sure that
the room is well ventilated before switching the oven
off and opening the oven door. The appliance may
emit a slightly unpleasant odour caused by
protective substances used during the
manufacturing process burning away.
1. Select the desired cooking mode by turning the
SELECTOR knob.
2. The oven begins its preheating stage and the
preheating indicator lights up.
The temperature may be changed by turning the
THERMOSTAT knob
3. When the preheating indicator switches off
and a buzzer sounds the preheating process is
complete: you may now place the food in the oven.
4. During cooking it is always possible to:
- Change the cooking mode by turning the
SELECTOR knob.
- Change the temperature by turning the
THERMOSTAT knob.
- Set the cooking duration and the cooking end time
(see Cooking modes).
- Stop cooking by turning the SELECTOR knob to
the 0 position.
5. The cooking time may be modified (see Cooking
Modes).
6. If a blackout occurs while the oven is already in
operation, an automatic system within the appliance
will reactivate the cooking mode from the point at
which it was interrupted, provided that the
temperature has not dropped below a certain level.
Programmed cooking modes which have not started
will not be restored and must be reprogrammed.
There is no preheating stage for the ROASTING
modes.
Never put objects directly on the bottom of the
oven; this will prevent the enamel coating from being
damaged.
Always place cookware on the rack(s) provided.
Cooling ventilation
In order to cool down the external temperature of the oven,
a cooling fan blows a stream of air between the control
panel and the oven door. At the beginning of the
PYROLYTIC cycle, the cooling fan operates at low
speed.
Once cooking has been completed, the cooling fan
remains on until the oven has cooled down sufficiently.
Oven light
When the oven is not in operation, the lamp can be
switched on at any time by opening the oven door.
* Only available in certain models.

20
GB
Manual cooking modes
All cooking modes have a default cooking
temperature which may be adjusted manually to a
value between 40°C and 250°C as desired.
In the SPIT ROAST mode, the default power level
value is 270°C.
TRADITIONAL OVEN mode
When using this traditional cooking mode, it is best
to use one cooking rack only.
MULTILEVEL mode
Since the heat remains constant throughout the oven, the
air cooks and browns food in a uniform manner. A
maximum of two racks may be used at the same time.
ROASTING mode
This combination of features increases the
effectiveness of the unidirectional thermal radiation
provided by the heating elements through the forced
circulation of the air throughout the oven.
This helps prevent food from burning on the surface
and allows the heat to penetrate right into the food.
Always cook in this mode with the oven door closed.
SPIT ROAST mode
The function is ideal for rotisserie spit cooking.
Always cook in this mode with the oven door closed.
LOW TEMPERATURE modes
This type of cooking can be used for proving, defrosting,
preparing yoghurt, heating dishes at the required speed
and slow cooking at low temperatures. The temperature
options are: 40, 65, 90 °C.
Spit roast
To operate the spit roast
function (see diagram)
proceed as follows:
1. Place the dripping
pan in position 1.
2. Place the rotisserie
support in position 3
and insert the spit in
the hole provided on
the back panel of the
oven.
3. Start the spit roast function by selecting the
symbols.
When this mode is enabled, the rotisserie spit will
stop if the door is opened.
Automatic cooking modes
The temperature and cooking duration are pre-set
values, guaranteeing a perfect result every time -
automatically. These values are set using the C.O.P.®
(Programmed Optimal Cooking) system. The cooking
cycle stops automatically and the oven indicates when
the dish is cooked. The cooking duration may be modified
by a period of several minutes, as specified in the
description of the individual functions below.
PIZZA mode
Use this function to make pizza. Please see the following
chapter for further details. It will only be possible to adjust
the duration by -5/+5 minutes.
To achieve the best possible results, we recommend that
you carefully observe the instructions below:
Follow the recipe.
The weight of the dough should be between 500 g and
700 g.
Lightly grease the dripping pan and the baking trays.
Place the food inside the oven while it is still cold. If you
wish to place the food in the oven after it has been
preheated, immediately following a high-temperature
cooking programme, the text Hot will appear on the
display until the temperature of the oven has fallen to
120°. At this point it will be possible to place the pizza in
the oven.
Recipe for PIZZA:
1 Dripping pan on a low shelf level, hot or cold oven
Recipe for 3 pizzas weighing approximately 550 g: 1000
g flour, 500 ml water, 20 g salt, 20 g sugar, 100 ml olive
oil, 20 g fresh yeast (or 2 sachets of powder yeast)
Leavening at room temperature: 1 hour, or LOW
TEMPERATURE manual function set to 40°. Leave to
rise for approximately 30-45 minutes.
Place the food inside the oven while it is still cold.
Start the PIZZA cooking mode.
BREAD mode
To obtain the best results, we recommend that you
carefully observe the instructions below:
Follow the recipe.
Do not exceed the maximum weight of the dripping
pan.
Remember to pour 100 ml of cold water into the
baking tray in position 5.
Place the food inside the oven while it is still cold. If you
wish to place the food in the oven after it has been
preheated, immediately following a high-temperature
cooking programme, the text Hot will appear on the
display until the temperature of the oven has fallen to 40°.

GB
21
At this point it will be possible to place the bread in the
oven.
Recipe for BREAD:
1 Dripping pan weighing 1000 g max placed on a low
shelf level
Recipe for 1000 g of dough: 600 g flour, 360 g water, 11g
salt, 25 g fresh yeast (or 2 sachets of powder yeast)
Method:
Mix flour and salt in a large bowl.
Dilute yeast in lukewarm water (approximately 35
degrees).
Make a small well in the mound of flour.
Pour in water and yeast mixture.
Knead dough by stretching and folding it over itself
with the palm of your hand for 10 minutes until it has a
uniform consistency and is not too sticky.
Form the dough into a ball shape, place it in a large
bowl and cover it with transparent plastic wrap to
prevent the surface of the dough from drying out.
Select the manual LOW TEMPERATURE function on
the oven and set the temperature to 40°C. Place the
bowl inside and leave the dough to rise for
approximately 1 hour (the dough should double in
volume).
Cut the dough into equal sized loaves.
Place them in the dripping pan on oven paper.
Cover the loaves with flour.
Make incisions on the loaves.
Remember to pour 100 ml of cold water into the
baking tray in position 5. For cleaning purposes, we
recommend the use of water and vinegar.
Place the loaves inside the oven while it is still cold.
Start the BREAD cooking mode.
Once baked, leave the loaves on one of the grill racks
until they have cooled completely.
BAKED CAKES mode
This function is ideal for baking cakes. Place the food
inside the oven while it is still cold. The dish may also be
placed in a preheated oven. It will only be possible to
adjust the duration by -10/+10 minutes.
Programming cooking
A cooking mode must be selected before
programming can take place.
Programming the cooking duration
1. Press the button several times until the
icon and the three digits on the DISPLAY begin to
flash.
2. Turn the TIMER KNOB towards + and - to
adjust the duration.
3. Press the button again to confirm;
4. When the set time has elapsed, the text END
appears on the DISPLAY, the oven will stop cooking
and a buzzer sounds.
For example: it is 9:00 a.m. and a time of 1 hour
and 15 minutes is programmed. The programme
will stop automatically at 10:15 a.m.
Setting the end time for a cooking mode
A cooking duration must be set before the cooking
end time can be scheduled.
1. Follow steps 1 to 3 to set the duration as detailed
above.
2. Next, press the button until the icon and
the two digits on the DISPLAY begin to flash.
3. Turn the TIMER KNOB towards + and - to
adjust the hour value.
4. Press the button again until the other two
digits on the DISPLAY begin to flash.
5. Turn the TIMER KNOB towards + and - to
adjust the minute value.
6. Press the button again to confirm.
7. When the set time has elapsed, the text END
appears on the DISPLAY, the oven will stop cooking
and a buzzer sounds.
For example: it is 9:00 a.m. and a time of 1 hour
and 15 minutes is programmed, while the end
time is set to 12:30. The programme will start
automatically at 11:15 a.m.
Programming has been set when the and
buttons are illuminated. The DISPLAY shows the
cooking end time and the cooking duration
alternately.
To cancel programming, turn the SELECTOR knob to
the 0 position.
Practical cooking advice
Do not place racks in position 1 and 5 during fan-
assisted cooking. This is because excessive direct
heat can burn temperature sensitive foods.
In the SPIT ROAST and ROASTING cooking
modes, place the dripping pan in position 1 to
collect cooking residues (fat and/or grease).
MULTILEVEL
Use positions 2 and 4, placing the food which
requires more heat on 2.
Place the dripping pan on the bottom and the rack
on top.

22
GB
Oven cooking advice table
DISHES EXAMPLES COOKING MODE TEMPERATURE SUPPORTS
Roast poultry chicken, duck, cockerel, capon. Roasting 200 °C poultry on the grid
Poultry on the spit chicken, cockerel Turnspit 270 °C turnspit support
Roasts roast pork, veal, turkey, beef, leg of lamb, haunch of
venison, stuffed veal breast, etc. Roasting 200 °C meat directly on the grid
large pieces of braised meat whole ham on the bone, large capon or turkey, etc. Multi-level
180 °C (one third
into cooking, lower
the temperature to
160°C)
meat on the oven tray baste
regularly with the juice
Meat casseroles and traditional
dishes
beef bourguignon, rabbit chasseur, veal Marengo,
lamb stew, Basquaise chicken, etc. hotpots,
cassoulet, etc. Convection mode 190 °C casserole dish on the oven tray
Grilled meat ribs, cutlets, sausages, kebabs, chicken thighs, etc. Multi-level 200 °C on the grid (the rack depends
on the size)
Meat pies Beef Wellington, steak and kidney pie, etc. Multi-level 200 °C
on the tray (for large pieces of
meat, lower the temperature to
160°C when the pastry crust is
baked)
MEAT
Salt-baking salt-baked poultry, etc. Multi-level 240 °C meat on the oven tray or in a
dish on the oven tray
Grilled fish and fish kebabs bass, mackerel, sardines, mullet, tuna, etc. Multi-level 180 °C on the grid (the rack depends
on the size)
Whole fish (stuffed) sea bream, carp, etc. Multi-level 200 °C on the oven tray
Fish fillets (with basting) salmon, scorpion fish, cod, bass, etc. Convection mode 200 °C on the oven tray
Foil parcels sole, dab, scallops, etc. Multi-level 200 °C on the oven tray
Fish pies (flaky or shortcrust
pastry) salmon, pike, etc. Multi-level 200 °C on the oven tray
Fish au gratin brandade gratin, etc. gratin (or roasting) 200-210 °C dish on the oven tray
Soufflés scallop soufflé, etc. Multi-level 200 °C soufflé dish on the oven tray
FISH
Salt-baked fish bass, carp, etc. Multi-level 240 °C fish on the oven tray or in a
dish on the oven tray
DISHES EXAMPLES FUNCTION TEMPERATURE SUPPORT
Savoury sponge cake
made with yoghurt savoury sponge cake with olives, tuna, etc. Baked cakes or Multilevel 160 °C cake tin on dripping pan
Country-style pie cheese country-style pie, salmon pastry, … Baked cakes or Multilevel 200 °C on dripping pan
Terrines fish, meat, vegetable, foie gras terrines, etc. Traditional oven 160 °C terrine mould on dripping pan (bain-
marie filled with hot water)
“En cocotte” dishes poultry liver pie, salmon mousse, eggs en cocotte,
etc. Traditional oven 160 °C baking dish on dripping pan (bain-
marie filled with hot water)
CANAPES AND
STARTERS
Soufflé cheese soufflé, vegetable soufflé, fish soufflé, etc. Multilevel 200 °C cake tin on dripping pan
Gratin dishes potato gratin, parmentier, lasagne, etc. Gratin
(or Roasting) 200-210 °C tray on dripping pan
Stuffed vegetables potatoes, tomatoes, courgettes, cabbages, etc. Multilevel 200 °C on dripping pan
or cake tin on dripping pan
Braised vegetables en
cocotte lettuce, saffron carrots, salsify, etc. Traditional oven 200 °C baking dish on dripping pan
Flan mushroom flan, vegetable pancake, etc. Traditional oven 160 °C baking dish or cake tin on dripping
pan (bain-marie filled with hot water)
Terrines vegetable terrines Traditional oven 160 °C cake tin on dripping pan (bain-marie
filled with hot water)
Soufflé asparagus soufflé , tomato soufflé, etc. Multilevel 200 °C cake tin on dripping pan
Dishes with a crust vegetable pie, etc. Multilevel 200 °C on dripping pan
Baking in foil (“en
papillote”) truffles, etc. Multilevel 200 °C foil pouch on dripping pan
I LEGUMI
Rice Pilaff Traditional oven 180 °C tray on plate

GB
23
Oven cooking advice table
Automatic cooking modes
Mode Cooking programme recommended for … EXAMPLES SUPPORT Dripping pan level Cooking time
(minutes) Oven at start
Sponge cake with yoghurt and pound cake (with baking
powder)
fruit cake, marble cake,
pound cake, etc.
cake tin on dripping
pan 2
Fruit tarts (short crust pastry or puff pastry, with or
without flan filling)
apple tart, Mirabelle plum
tart, pear tart, etc.
cake tin on dripping
pan 2
Puff pastry apple puffs, country-style
tarts, pastries, etc. on dripping pan 2
Baked
cakes
Desserts without yeast (clafoutis, almond pithivier,
country-style cake, etc.) on dripping pan 2
45** Cold
Pizzas Deep-pan pizza, focaccia (bread dough) 2 28** Hot or cold
Bread *** 2 55 Cold
* The cooking times listed above are intended as guidelines only and may be modified to suit personal tastes. Oven preheating times are set by default and cannot be modified manually.
** The duration of the automatic cooking functions are set by default. The values in the table refer to the minimum and maximum duration, which may be modified by the user, taking the
default value as a starting point.
*** As stated in the recipe, pour 100 g water into the dripping pan.
DISHES EXAMPLES FUNCTION TEMPERATURE SUPPORT
Yoghurt Low temperature 40 °C baking dish on dripping pan
VARIOUS
Dried foods mushrooms, herbs, sliced fruit or vegetables, etc. Low temperature 65 °C on grille
DISHES EXAMPLES FUNCTION TEMPERATURE SUPPORT
Biscuit cakes (without yeast) sponge cake, sponge fingers, swirled biscuits,
brownies, etc. 200 °C cake tin on dripping pan
White cheese tart 200 °C cake tin on dripping pan
Tarts made using leavened dough sugar pie, fruit brioche loaf, etc. 180 °C cake tin on dripping pan
Tart cases (crumbly sweet pastry) fresh fruit tarts (strawberry, raspberry, etc.) 180 °C
cake tin on dripping pan (with
baking beans weighing the
pastry down )
Pies (shortcrust or puff pastry) pear pie, etc. 220 °C cake tin on dripping pan
Cream puffs
profiteroles, mini cream puffs, cream puffs,
Paris-Brest pastry dessert, Saint Honoré cake,
etc.
190 °C on dripping pan
Mini sweet pastries (natural
yeast)
croissants, sugar pie, plain brioche (no filling),
mini savarin cakes, etc. 180 °C on dripping pan
BAKED DESSERTS
Large sweet pastries (natural
yeast)
Kugelhopf, brioche, panettone, sweet bread,
etc.
Baked cakes or Multilevel
160 °C on dripping pan or cake tin on
dripping pan
Biscuit dough biscuits in paper trays, scooping biscuits, etc. 180 °C on dripping pan
Crumbly sweet pastry shortbread, spritz cookies, plain biscuits, etc. 200 °C on dripping pan
Puff pastry various types of puff pastry dessert, etc. 200 °C on dripping pan
Amaretti, coconut balls coconut or almond amaretti 180 °C on dripping pan
Leavened dough mini-brioches, mini-croissants, etc. 180 °C on dripping pan
White meringues 70 °C on dripping pan
PASTRIES
Golden meringues
Baked cakes or Multilevel
110 °C on dripping pan
Pudding pudding made with bread or brioche, rice
pudding 190 °C cake tin on dripping pan
Cream desserts and flans,
semolina
crème caramel, crème brûlée, chocolate flan,
etc. 160 °C
moulds or baking dish on
dripping pan (bain-marie on
dripping pan)
Rice desserts riz condé rice pudding, Imperial rice pudding,
etc. 180 °C cake tin on dripping pan
DESSERTS
Soufflé liqueur soufflé, fruit soufflé, etc.
Baked cakes or Multilevel
200 °C cake tin on dripping pan
FRUIT Stuffed or foil-baked fruit baked apples, etc. Multilevel 200 °C cake tin or foil pouch on
dripping pan

24
GB
The glue applied on the gaskets leaves traces of
grease on the glass. Before using the appliance, we
recommend you remove these with a special non-
abrasive cleaning product. During the first few hours
of use there may be a smell of rubber which will
disappear very quickly.
Switching the cooking zones on and off
To switch on a cooking zone, turn the corresponding
knob in a clockwise direction.
To switch it off again, turn the knob in an
anticlockwise direction until it is in the 0 position.
If the COOKING ZONE ON indicator light is lit, this
shows that at least one pf the cooking zones on the
hob is switched on.
Cooking zones
The hob is equipped with electric halogen heating
elements. When they are in use the following items
on the hob become red.
A. The cooking zone with
radiant heating elements.
B. The cooking zone with a
halogen heating element.
C. The residual heat indicator
light: this indicates that the
temperature of the corresponding cooking zone is
greater than 60°C, even when the heating element
has been switched off but is still hot.
Cooking zones with halogen heating elements
These emit heat via radiation from the halogen
lamps they contain. They have similar properties to
gas burners: they are easy to control and reach set
temperatures quickly, allowing you to actually see
the power they are providing.
Description of the heating elements
The circular radiant heating elements become red 10
- 20 seconds after they have been switched on.
The circular halogen heating elements guarantee
even heat distribution in addition to the usual
advantages that halogen heating elements bring.
Halogen lamps emit high levels of heat and light as
soon as they are switched on, offering the following
practical advantages:
· rapid heating (in relation to a gas burner)
· rapid cooling
· even temperature across the whole surface (due
to the circular heating elements).
They are similar to the other cooking zones on the
hob and are therefore easy to use. To ensure you
use the hob correctly, all you need to do is consult
the cooking tables in the instruction booklet.
Pos. Radiant Ceramic Hot Plate
Normal or Fast Hot Plate Ceramic Halogen Hot Plate
Automatic Hot Plate
0Off Off
1To cook fish To melt butter or chocolate
2To cook potatoes (steam),
soup, chickpeas, beans
To reheat liquids
3
To continue cooking large
quantities of food, vegetable
soup
4To roast (medium) For sauces (including cream
sauces)
5To roast (well done)
6To brown or quickly bring to a
boil To cook at boiling point
7
8For roasts
9
10 For stews
11
12 To fr y
Practical advice on using the hob
Use pans with a thick, flat base to ensure that
they adhere perfectly to the cooking zone.
Always use pans with a diameter that is large
enough to cover the hotplate fully, in order to use
all the heat produced.
Always make sure that the base of the pan is
completely clean and dry: this ensures that the
pans adhere perfectly to the cooking zones and
that both the pans and the hob remain effective
for a longer period of time.
Avoid using the same cookware that is used on
gas burners: the heat concentration on gas
burners may have warped the base of the pan,
causing it not to adhere to the surface correctly.
Never leave a cooking zone switched on without a
pan on top of it, as doing so may cause the zone
to become damaged.
AB
C
Using the glass ceramic hob

GB
25
Precautions and tips
!This appliance has been designed and manufactured in
compliance with international safety standards. The
following warnings are provided for safety reasons and
must be read carefully.
General safety
These instructions are only valid for the countries whose
symbols appear in the manual and on the serial number
plate located on the appliance.
The appliance was designed for domestic use inside the
home and is not intended for commercial or industrial use.
The appliance must not be installed outdoors, even in
covered areas. It is extremely dangerous to leave the
appliance exposed to rain and storms.
Do not touch the appliance with bare feet or with wet or
damp hands and feet.
The appliance must be used by adults only for the
preparation of food, in accordance with the instructions
provided in this booklet.
The instruction booklet accompanies a class 1 (insulated)
or class 2 - subclass 1 (recessed between 2 cupboards)
appliance.
Do not touch the heating elements or certain parts of
the oven door when the appliance is in use; these parts
become extremely hot. Keep children well away from
the appliance.
Make sure that the power supply cables of other electrical
appliances do not come into contact with the hot parts of
the oven.
The openings used for the ventilation and dispersion of heat
must never be covered.
Do not use unstable or misshapen pans on the cooking
zones; this will help to avoid accidental spills. Make sure
pan handles are turned towards the centre of the hob in
order to avoid accidental burns.
Always use oven gloves when placing cookware in the
oven or when removing it.
Do not use flammable liquids (alcohol, petrol, etc...) near the
appliance while it is in use.
Do not place flammable material in the lower storage
compartment or in the oven itself. If the appliance is
switched on accidentally, it could catch fire.
Always make sure the knobs are in the position when the
appliance is not in use.
When unplugging the appliance, always pull the plug from
the mains socket; do not pull on the cable.
Never perform any cleaning or maintenance work without
having disconnected the appliance from the electricity
mains.
If the appliance breaks down, under no circumstances
should you attempt to perform the repairs yourself. Repairs
carried out by inexperienced persons may cause injury or
further malfunctioning of the appliance. Contact Assistance.
Do not rest heavy objects on the open oven door.
The internal surfaces of the compartment (where present)
may become hot.
The glass ceramic hob is resistant to mechanical shocks,
but it may crack (or even break) if hit with a sharp object
such as a tool. If this happens, disconnect the appliance
from the electricity mains immediately and contact a
Service Centre.
If the surface of the hob is cracked, switch off the appliance
to prevent electric shocks from occurring.
Remember that the cooking zones remain relatively hot for
at least thirty minutes after they have been switched off.
Keep any object which could melt away from the hob, for
example plastic and aluminium objects, or products with a
high sugar content. Be especially careful when using
plastic film and aluminium foil or packaging: if placed on
surfaces that are still hot, they may cause serious damage
to the hob.
Do not place metal objects (knives, spoons, pan lids, etc.)
on the hob as they may become hot.
The appliance should not be operated by people (including
children) with reduced physical, sensory or mental
capacities, by inexperienced individuals or by anyone who
is not familiar with the product. These individuals should, at
the very least, be supervised by someone who assumes
responsibility for their safety or receive preliminary
instructions relating to the operation of the appliance.
Disposal
When disposing of packaging material: observe local
legislation so that the packaging may be reused.
The European Directive 2002/96/EC relating to Waste
Electrical and Electronic Equipment (WEEE) states that
household appliances should not be disposed of using the
normal solid urban waste cycle. Exhausted appliances
should be collected separately in order to optimise the cost
of re-using and recycling the materials inside the machine,
while preventing potential damage to the atmosphere and
to public health. The crossed-out dustbin is marked on all
products to remind the owner of their obligations regarding
separated waste collection.
For further information relating to the correct disposal of
exhausted household appliances, owners may contact the
public service provided or their local dealer.
Respecting and conserving the
environment
You can help to reduce the peak load of the electricity
supply network companies by using the oven in the hours
between late afternoon and the early hours of the morning.
The cooking mode programming options, and particularly
the delayed cooking mode (see Cooking modes), make
this possible.
Always keep the oven door closed when using the SPIT
ROAST and ROASTING modes. this will achieve improved
results while saving energy (approximately 10%).
Check the door seals regularly and wipe them clean to
ensure they are free of debris so that they adhere properly
to the door, thus avoiding the dispersal of heat.
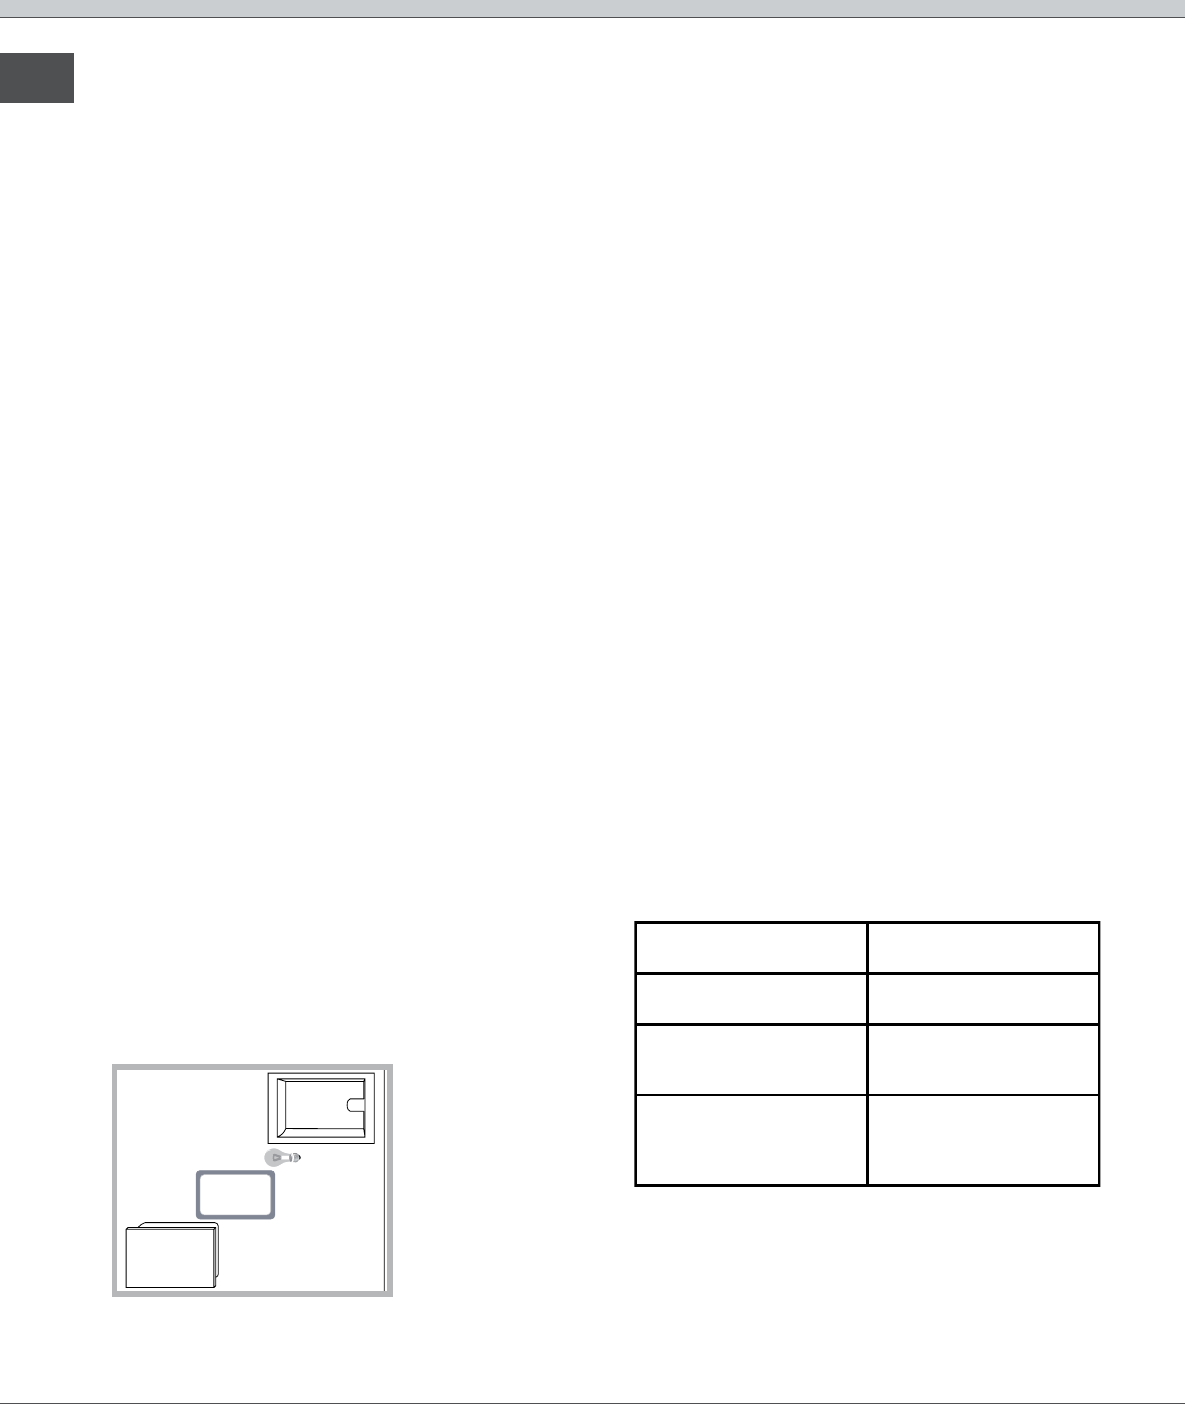
26
GB
Switching the appliance off
Disconnect your appliance from the electricity supply
before carrying out any work on it.
Cleaning the oven
Never use steam cleaners or pressure cleaners on
the appliance.
Clean the glass part of the oven door using a
sponge and a non-abrasive cleaning product,
then dry thoroughly with a soft cloth. Do not use
rough abrasive material or sharp metal scrapers
as these could scratch the surface and cause the
glass to crack.
The stainless steel or enamel-coated external
parts and the rubber seals may be cleaned using
a sponge which has been soaked in lukewarm
water and neutral soap. Use specialised products
for the removal of stubborn stains. After cleaning,
rinse and dry thoroughly. Do not use abrasive
powders or corrosive substances.
The inside of the oven should ideally be cleaned
after each use, while it is still lukewarm. Use hot
water and detergent, then rinse well and dry with
a soft cloth. Do not use abrasive products.
The accessories can be washed like everyday
crockery, and are even dishwasher safe.
Dirt and grease should be removed from the control
panel using a non-abrasive sponge or a soft cloth.
Stainless steel can be marked by hard water that
has been left on the surface for a long time, or by
aggressive detergents that contain phosphorus.
We recommend that the steel surfaces are rinsed
well then dried thoroughly.
Inspecting the oven seals
Check the door seals around the oven regularly. If the
seals are damaged, please contact your nearest After-
sales Service Centre. We recommend that the oven is
not used until the seals have been replaced.
Replacing the oven light bulb
To replace the
oven light bulb:
1. Remove the glass cover using a screwdriver.
2. Unscrew the light bulb and replace it with a
similar one: Wattage 15 W, cap E 14.
Replace the glass cover, making sure the seal is
positioned correctly (see diagram).
Cleaning the glass ceramic hob
Do not use abrasive or corrosive detergents (for
example, products in spray cans for cleaning barbecues
and ovens), stain removers, anti-rust products, powder
detergents or sponges with abrasive surfaces: these
may scratch the surface beyond repair.
It is usually sufficient simply to wash the hob using a
damp sponge and dry it with absorbent kitchen roll.
If the hob is particularly dirty, rub it with a special
glass ceramic cleaning product, then rinse well and
dry thoroughly.
To remove more stubborn dirt, use a suitable scraper
(this is not supplied with the appliance). Remove
spills as soon as possible, without waiting for the
appliance to cool, to avoid residues forming crusty
deposits. You can obtain excellent results by using a
rustproof steel wire sponge - specifically designed for
glass ceramic surfaces - soaked in soapy water.
If plastic or sugary substances have accidentally
been melted on the hob, remove them immediately
with the scraper, while the surface is still hot.
Once it is clean, the hob may be treated with a special
protective maintenance product: the invisible film left
by this product protects the surface from drips during
cooking. This maintenance should be carried out
while the appliance is warm (not hot) or cold.
Always remember to rinse the appliance well with
clean water and dry it thoroughly: residues can
become encrusted during subsequent cooking
processes.
Glass ceramic hob
cleaners Available from
Window scraper Razor blade
scrapers
DIY Stores
Replacement blades DIY Stores,
supermarkets,
chemists
COLLO luneta
HOB BRITE
Hob Clean
SWISSCLEANER
Boots, Co-op stores,
department stores, Regional
Electricity Company shops,
supermarkets
Care and maintenance
*Only available in certain models.
Cover
Seal
Light bulb
Cavity

GB
27
Automatic cleaning using the
PYROLYTIC cycle
During the PYROLYTIC cycle, the internal
temperature of the oven reaches 500°C. The
pyrolytic cycle is activated and burns away food
and grime residues. Dirt is literally incinerated.
Keep children away from the appliance during the
automatic cleaning cycle as surfaces may become
very hot. Particles may ignite inside the oven as a
result of the combustion process. There is no cause
for concern: this process is both normal and hazard-
free.
Before initiating the PYROLYTIC CYCLE:
Remove large or coarse food residues from the
inside of the oven using a damp sponge. Do not
use detergents.
Remove all accessories.
Do not place tea towels or pot holders over the
oven handle.
Turn the SELECTOR knob to the 0 position.
! If the oven is too hot, the pyrolytic cycle may not
start. Wait for the oven to cool down.
! The programme may only be started once the oven
door has been closed.
To activate the PYROLITIC CYCLE cleaning
procedure, press and hold the button for
approximately 4 seconds. The TIMER KNOB may be
used to select the desired cleaning level; there are
three default time settings which cannot be
modified.
1. Economy (ECO): turn the knob towards -.
Duration 1 hour.
2. Normal (NOR): initial level. Duration 1 hour and 30
minutes.
3. Intensive (INT): turn the knob towards +.
Duration 2 hours.
4. Press the button to confirm.
An end time for the PYROLITIC CYCLE (as for a
normal cooking cycle) may be programmed (see
Programming the automatic cleaning end time).
Safety devices
The icon on the display, when lit, indicates
that the oven door was automatically locked as
soon as the temperature reached a high value.
The icon indicates that the cleaning cycle
may be cancelled at any time by pressing the
button.
If a malfunction occurs, the heating elements will
be switched off.
Once the oven door has been locked, you cannot
change the duration and cycle end time settings.
Programming the automatic cleaning end time
1. Press the button until the icon and the two
digits on the DISPLAY begin to flash.
2. Turn the TIMER KNOB towards + and - to
adjust the hour value.
3. Press the button again until the other two
digits on the DISPLAY begin to flash.
4. Turn the TIMER KNOB towards + and - to
adjust the minute value.
5. Press the button again to confirm;
6. When the set time has elapsed, the text END
appears on the display and a buzzer sounds.
For example: it is 9:00 a.m. and the Economy
PYROLYTIC cycle has been selected: default set
time 1 hour. 12:30 is scheduled as the end time.
The programme will start automatically at 11:30
a.m.
Programming has been set when the and
buttons are illuminated. The DISPLAY shows the
PYROLITIC CYCLE end time and duration
alternately.
Once the automatic cleaning cycle is over
You will have to wait until the temperature inside the
oven has cooled down sufficiently before you can
open the oven door. You will notice some white dust
deposits on the bottom and the sides of your oven;
remove these deposits with a damp sponge once
the oven has cooled down completely. Alternatively,
you can make use of the already heated oven, in
which case it is not necessary to remove the
deposits, they are completely harmless and will not
affect your food in any way.

28
GB
Assistance
Warning:
The appliance is fitted with an automatic diagnostic system which detects any malfunctions. Malfunctions are
displayed by messages of the following type: F followed by numbers.
Call for technical assistance in the event of a malfunction.
Never use the services of an unauthorised technician.
Please have the following information to hand:
The type of problem encountered.
The appliance model (Mod.).
The serial number (S/N).
The latter two pieces of information can be found on the data plate located on the appliance.

FR
CUISINE ET FOUR
CI 66 H W
CI 66 H I
CI 66 H A
Mode demploi
Français, 29
FR
Italiano, 1
IT
Deutsch, 57Nederlands, 43
English,15
GB
DENL
Sommaire
Installation, 30-31
Positionnement et nivellement
Raccordement électrique
Tableau des caractéristiques
Description de lappareil, 32
Vue densemble
Tableau de bord
Afficheur
Mise en marche et utilisation, 33-37
Mise à lheure de lhorloge
Programmer la minuterie
Utilisation du four
Programmes de cuisson manuels
Programmes de cuisson automatiques
Comment programmer une cuisson
Conseils de cuisson
Tableau de cuisson au four
Utilisation du plan de cuisson
vitrocéramique, 38
Allumer et éteindre les foyers
Les foyers
Précautions et conseils, 39
Sécurité générale
Mise au rebut
Economies et respect de lenvironnement
Nettoyage et entretien, 40-41
Mise hors tension
Nettoyage de lappareil
Remplacement de lampoule déclairage du four
Nettoyage du plan de cuisson vitrocéramique
Nettoyage automatique par PYROLYSE
Assistance, 42

30
FR
Conserver ce mode demploi pour pouvoir le
consulter à tout moment. En cas de vente, de
cession ou de déménagement, veiller à ce quil
suive lappareil.
Lisez attentivement les instructions : elles
contiennent des conseils importants sur linstallation,
lutilisation et la sécurité de lappareil
Linstallation de lappareil doit être effectuée par un
professionnel du secteur conformément aux
instructions du fabricant.
Nimporte quelle opération de réglage, dentretien
ou autre, doit être effectuée après avoir débranché
la prise de la cuisinière.
Positionnement et nivellement
Lappareil peut être installé à côté de meubles dont
la hauteur ne dépasse pas celle du plan de cuisson.
Sassurer que le mur en contact avec la paroi
arrière de lappareil est réalisé en matériel ignifuge
résistant à la chaleur (T 90°C).
Pour une installation correcte :
installer cet appareil dans une cuisine, une salle à
manger ou un studio (jamais dans une salle de
bain) ;
si le plan de cuisson de la cuisinière dépasse le
plan de travail des meubles, ces derniers doivent
être placés à au moins 600 mm de lappareil.
si la cuisinière est installée sous un élément suspendu,
il faut que ce dernier soit placé à moins de 420 mm
de distance du plan.
Il faut prévoir une
distance de 700 mm si
les éléments suspendus
sont inflammables (voir
figure);
ne pas placer de
rideaux derrière ou sur
les côtés de la
cuisinière à moins de
200 mm de distance.
pour linstallation de hottes, se conformer aux
instructions de leur notice demploi.
Nivellement
Pour mettre lappareil bien à
plat, visser les pieds de
réglage fournis aux
emplacements prévus aux
coins à la base de la
cuisinière (voir figure).
Montage des pieds* par
encastrement sous la base.
Raccordement électrique
Montage du cordon dalimentation
Ouverture du bornier:
Faites pression à laide dun tournevis sur les
languettes latérales du couvercle du bornier;
Tirez et ouvrez le
couvercle du bornier.
Pour monter le cordon dalimentation, procédez
comme suit:
dévissez la vis du serre-câble de même que les
vis des contacts
Les pontets sont montés en usine pour
raccordement à 230V monophasé (voir figure).
NL
230V 1N~
H07RN-F 3x4 CEI-UNEL 35364
1
3
2
4
5
pour effectuer les raccordements électriques
illustrés figure, utilisez les deux pontets placés
dans le boîtier (voir figure - référence P)
Installation
HOOD
420
Min.
min.
650
mm. with hood
min.
700
mm. without hood
mm.
600
Min. mm.
420
Min. mm.

FR
31
N
L2
L1
L3
P
NL2L1
400V 2N~
H05RR-F 4x2.5 CEI-UNEL 35363
1
3
2
4
5
NL3L1L2
400V 3N~
H05RR-F 5x2.5 CEI-UNEL 35363
1
3
2
4
5
fixez le câble dalimentation dans le serre-câble
correspondant et fermez le couvercle.
Branchement du câble dalimentation au réseau
électrique
En cas de raccordement direct au réseau, intercaler
entre lappareil et le réseau un interrupteur à coupure
omnipolaire ayant au moins 3 mm décartement
entre les contacts, dimensionné à la charge et
conforme aux normes en vigueur (le fil de terre ne
doit pas être interrompu par linterrupteur). Le câble
dalimentation ne doit atteindre, en aucun point, une
température dépassant de 50°C la température
ambiante.
Avant de procéder au branchement, sassurer que :
la prise est bien munie dune terre conforme à la loi;
la prise est bien apte à supporter la puissance
maximale de lappareil, indiquée sur la plaque
signalétique;
la tension dalimentation est bien comprise entre
les valeurs indiquées sur la plaque signalétique;
Ne pas utiliser de rallonges ni de prises multiples.
Après installation de lappareil, le câble électrique
et la prise de courant doivent être facilement
accessibles
Le câble ne doit être ni plié ni excessivement
écrasé.
Le câble doit être contrôlé périodiquement et ne
peut être remplacé que par un technicien agréé.
Nous déclinons toute responsabilité en cas de
non respect des normes énumérées ci-dessus.
*Nexiste que sur certains modèles
TABLEAU DES CARACTERISTIQUES
Dimensions du
four HxLxP 32x43,5x40 cm
Volume l 56
Dimensions utiles
du tiroir chauffe-
plats
largeur 42 cm
profondeur 44 cm
hauteur 8,5 cm
Brûleurs
adaptables à tous les types de gaz
indiqués dans la plaque
signalétique
Tension et
fréquence
dalimentation
voir plaque signalétique
Table de cuisson
vetrocéramique
Avant gauche
Arrière gauche
Arrière droit
Avant droit
Absorption Max.
plans de cuisson
vitrocéramique
1700W
1200W
2200W
1200W
6300W
ETIQUETTE
ENERGIE
Directive 2002/40/CE sur l'étiquette
des fours électriques Norme EN
50304
Consommation énergie convection
Naturelle fonction four :
Tradition
Consommation énergie déclaration
Classe convection Forcée
fonction four : Rôtisserie
Directives Communautaires :
2006/95/CEE du 12.12.06 (Basse
Tension) et modifications
successives - 89/336/CEE du
03/05/89 (Compatibilité
Electromagnétique) et
modifications successives -
90/369/CEE du 29/06/90 (Gaz) et
modifications successives
93/68/CEE du 22/07/93 et
modifications successives -
2002/96/CEE.

32
FR
Description de lappareil
Vue densemble
Tableau de bord
*Nexiste que sur certains modèles
Afficheur
Boutons
PLAQUE ÉLECTRIQUE
du plan de cuisson
Bouton
PROGRAMMES
Bouton
THERMOSTAT/
SELECTION
TEMPS
AFFICHEUR
Touche
SELECTION TEMPS
Voyant
PLAQUE ÉLECTRIQUE
Touche
PYROLYSE
Tableau de bord
Support GRILLE
Support LECHEFRITE
Pied de réglage
GLISSIERES
de coulissement
niveau 3
niveau 2
niveau 1
Pied de réglage
niveau 5
niveau 4
Table de cuisson
Vitrocéramique
Icônes PROGRAMMES
AUTOMATIQUES
Icône PROGRAMME
BASSE TEMPERATURE
Icône
FIN DE CUISSON
Icône
HORLOGE
Chiffres TEMPERATURE
et TEMPS
Icône
DUREE
Icône
MINUTEUR
Indicateur de
Préchauffage
Icône
STOP
Voyant
PORTE VERROUILLEE

FR
33
Mise en marche et utilisation
Mise à lheure de lhorloge
Son réglage est possible que le four soit éteint ou
allumé mais ceci ne correspond pas à une
programmation de fin de cuisson.
1. Appuyer plusieurs fois de suite sur la touche
jusquà ce que licône et les deux digits
numériques de lAFFICHEUR se mettent à clignoter;
2. tourner le bouton SELECTION DES TEMPS vers le
«+» et «-» pour régler lheure;
3. appuyer à nouveau sur la touche jusquà ce
que les deux autres digits numériques de
lAFFICHEUR se mettent à clignoter;
4. tourner le bouton SELECTION DES TEMPS vers le
«+» et «-» pour régler les minutes ;
5. appuyer à nouveau sur la touche pour
confirmer.
Programmer la minuterie
Cette fonction ne stoppe pas la cuisson et est
indépendante du fonctionnement du four ; elle sert
uniquement à déclencher un signal sonore à
lexpiration des minutes sélectionnées.
1. Appuyer plusieurs fois de suite sur la touche
jusquà ce que licône et les trois digits
numériques de lAFFICHEUR se mettent à clignoter ;
2. tourner le bouton SELECTION DES TEMPS vers le
«+» et «-» pour régler les minutes ;
3. appuyer à nouveau sur la touche pour
confirmer.
Laffichage du compte à rebours suivra. Un signal
sonore indiquera la fin du décompte.
Utilisation du four
Avant toute utilisation, enlever les pellicules
plastiques sur les côtés de lappareil
Lors de son premier allumage, faire fonctionner le
four à vide, porte fermée, pendant au moins une
heure en réglant la température à son maximum.
Puis éteindre le four, ouvrir la porte et aérer la pièce.
Lodeur qui se dégage est due à lévaporation des
produits utilisés pour protéger le four.
1. Pour sélectionner le programme de cuisson
souhaité, tourner la manette PROGRAMMES.
2. Le four se place en phase de préchauffage,
lindicateur préchauffage sallume.
Pour modifier la température, tourner le bouton
THERMOSTAT.
3. Lextinction de lindicateur de préchauffage et
le déclenchement du signal sonore indiquent la fin
du préchauffage: il est temps denfourner les plats.
4. En cours de cuisson, il est possible à tout
moment de :
- modifier le programme de cuisson à laide du
bouton PROGRAMMES;
- modifier la température à laide du bouton
THERMOSTAT;
- programmer la durée et lheure de fin de cuisson
(voir programmes de cuisson);
- stopper la cuisson en ramenant le bouton
PROGRAMMES sur 0;
5. Possibilité de modifier la durée de cuisson (voir
Programmes de cuisson).
6. En cas de coupure de courant, si la température
du four nest pas trop redescendue, un dispositif
spécial fait repartir le programme à partir du moment
où il a été interrompu. Les programmations en
attente de démarrage ne sont par contre pas
rétablies et doivent être reprogrammées dès
rétablissement du courant.
Aucun préchauffage nest prévu pour les
programmes ROTISSERIE.
Ne jamais poser dobjets à même la sole du four,
lémail risque de sabîmer.
Il faut toujours enfourner les plats sur la grille
fournie avec lappareil.
Système de refroidissement
Pour obtenir un abaissement des températures
extérieures, un système de refroidissement souffle de lair
à lextérieur par une fente située entre le bandeau et la
porte du four. Au début du programme PYROLYSE, le
ventilateur fonctionne à faible vitesse.
Le ventilateur continue à tourner après larrêt du four
jusquà ce quil se soit suffisamment refroidi.
Eclairage du four
Four éteint, il sallume dès ouverture de la porte du four.

34
FR
Programmes de cuisson manuels
Tous les programmes ont une température de
cuisson présélectionnée. Il est possible de la régler
manuellement, entre 40°C et 250°C au choix. Pour le
programme TOURNEBROCHE, la valeur
présélectionnée est 270°C.
Programme FOUR TRADITION
Pour cette cuisson traditionnelle mieux vaut cuire sur
un seul niveau.
Programme MULTINIVEAUX
La chaleur est constante et bien répartie à lintérieur du
four, lair cuit et dore de façon uniforme en tous points.
Il est possible de cuire au maximum sur deux niveaux
en même temps.
Programme ROTICCERIE
Lirradiation thermique unidirectionnelle sajoute au
brassage de lair pour une répartition uniforme de la
chaleur dans lenceinte du four. Plus de risque de brûler
les aliments en surface et plus grande pénétration de la
chaleur. Cuisson porte du four fermée.
Programme TOURNEBROCHE
Cette fonction est optimisée pour les cuissons au
tournebroche. Cuissons porte du four fermée.
Programmes BASSE TEMPERATURE
Ce type de cuisson permet de faire lever les pâtes, de
décongeler, de préparer du yaourt, de réchauffer plus
ou moins rapidement et de cuire lentement à basse
température. Températures sélectionnables : 40, 65, 90
°C.
Tournebroche
Pour actionner le
tournebroche (voir figure),
procéder comme suit:
1. placer la lèchefrite au
niveau 1;
2. placer le berceau au
niveau 3 et encastrer le
bout arrière de la broche
dans le trou situé au
fond de lenceinte;
3. actionner le
tournebroche en sélectionnant les icônes ;
Quand le programme est lancé, le tournebroche
sarrête dès ouverture de la porte du four.
Programmes de cuisson automatiques
La température et la durée de cuisson sont
présélectionnées et ne peuvent pas être modifiées à
laide du système C.O.P.® (Cuisson Optimale
Programmée) qui garantit automatiquement un résultat
parfait. La cuisson sarrête automatiquement et le four
signale que le plat est cuit. La durée de cuisson peut
être modifiée de quelques minutes, comme indiqué ci-
dessous dans la description des différentes fonctions.
Programme PIZZA
Cest la fonction idéale pour la cuisson des pizzas. Se
reporter au paragraphe suivant pour une recette
détaillée. Seule la durée peut être modifiée, à raison de
-5/+5 minutes.
Pour obtenir de meilleurs résultats, nous
recommandons de suivre attentivement les conseils
suivants :
suivre la recette à la lettre;
le poids de la pâte doit être compris entre 500g et
700g.
graisser légèrement la lèchefrite et les plats à rôti.
Enfourner à froid. Au cas où vous souhaiteriez
enfourner à chaud, après une cuisson à haute
température, lafficheur visualisera le message Hot
jusquà ce que la température du four aura atteint 120
°C. Vous pouvez alors enfourner la pizza.
Recette PIZZA :
1 Plaque, gradin du bas, four froid ou chaud
Recette pour 3 pizzas denviron 550g : 1.000g de
farine, 500g deau, 20g de sel, 20 g de sucre, 10 cl
dhuile dolive, 20g de levure de boulanger fraîche (ou
bien 2 sachets en poudre)
Levage à température ambiante : 1 heure ou fonction
manuelle BASSE TEMPÉRATURE à 40°C et laisser
lever environ 30/45 minutes.
Enfourner à froid.
Démarrer la cuisson PIZZA
Programme PAIN
Pour obtenir de meilleurs résultats, nous
recommandons de suivre attentivement les conseils
suivants :
suivre la recette à la lettre;
respecter le poids maximal pour chaque plaque;
ne pas oublier de verser 1dl deau froide dans la
lèchefrite au gradin 5;
Enfourner à froid. Au cas où vous souhaiteriez
enfourner à chaud, après une cuisson à haute
température, lafficheur visualisera le message Hot
jusquà ce que la température du four aura atteint 40
°C. Vous pouvez alors enfourner le pain.

FR
35
Recette du PAIN :
1 Plaque de 1000g Maxi. gradin du bas
Recette pour 1000g de pâte : 600g de farine, 360g
deau, 11g de sel, 25g de levure de boulanger fraîche
(ou bien 2 sachets en poudre)
Procédé :
Mélanger la farine et le sel dans un grand récipient.
Diluer la levure de boulanger dans de leau
légèrement tiède (35 degrés environ).
Disposer la farine en fontaine.
Verser le mélange deau et de levure
Mélanger et pétrir jusquà obtenir une pâte
homogène et peu collante, létirer avec la paume de
la main et la replier sur elle-même pendant 10
minutes.
Former une boule, la placer dans un saladier et
couvrir d'un film plastique pour éviter que la surface
de la pâte ne sèche. Glisser le saladier dans le four,
sélectionner la fonction manuelle BASSE
TEMPERATURE à 40°C et laisser lever environ 1
heure (la pâte doit doubler de volume).
Diviser la boule pour obtenir plusieurs pains.
Les placer sur la plaque du four recouverte de
papier sulfurisé.
Saupoudrer les pains de farine.
Pratiquer des entailles sur les pains.
ne pas oublier de verser 1dl deau froide dans la
lèchefrite au gradin 5; Pour son nettoyage, utiliser
le leau et du vinaigre.
Enfourner à froid.
Démarrer la cuisson PAIN
En fin de cuisson, laisser reposer les pains sur une
grille jusquà ce quils aient complètement refroidi.
Programme GATEAUX
Cette fonction est idéale pour la cuisson des gâteaux.
Enfourner à froid. Il est aussi possible denfourner à
chaud. Seule la durée peut être modifiée, à raison de -
10/+10 minutes.
Comment programmer une cuisson
La programmation nest possible quaprès avoir
sélectionné un programme de cuisson.
Programmer la durée de cuisson
1. Appuyer plusieurs fois de suite sur la touche
jusquà ce que licône et les trois chiffres
numériques de lAFFICHEUR se mettent à clignoter;
2. tourner le bouton SELECTION DES TEMPS vers le
«+» et «-» pour régler la durée désirée ;
3. appuyer à nouveau sur la touche pour confirmer;
4. à expiration de la durée sélectionnée, lAFFICHEUR
affiche END, le four stoppe la cuisson et un signal
sonore retentit.
Exemple: il est 9h00 et la durée programmée est de
1h15. Le programme sarrête automatiquement à
10h15.
Programmer la fin dune cuisson
La programmation dune fin de cuisson nest possible
quaprès avoir sélectionné une durée de cuisson.
1. Suivre la procédure de 1 à 3 décrite pour la durée;
2. appuyer ensuite sur la touche jusquà ce que
licône et les deux digits numériques de
lAFFICHEUR se mettent à clignoter;
3. tourner le bouton SELECTION DES TEMPS vers le
«+» et «-» pour régler lheure;
4. appuyer à nouveau sur la touche jusquà ce que
les deux autres digits numériques de lAFFICHEUR se
mettent à clignoter;
5. tourner le bouton SELECTION DES TEMPS vers le
«+» et «-» pour régler les minutes ;
6. appuyer à nouveau sur la touche pour confirmer;
7. à expiration de la durée sélectionnée, lAFFICHEUR
affiche END, le four stoppe la cuisson et un signal
sonore retentit.
Exemple: il est 9h00, la durée programmée est de
1h15 et lheure de fin de cuisson est fixée à 12h30.
Le programme démarre automatiquement à 11h15.
Les icônes et éclairées signalent quune
programmation a été lancée. LAFFICHEUR affiche à tour
de rôle lheure de fin de cuisson et la durée.
Pour annuler une programmation, amener le bouton
PROGRAMMES sur «0».
Conseils de cuisson
Pour les cuissons ventilées ne pas utiliser les gradins
1et 5: ils sont directement frappés par lair chaud qui
pourrait brûler les mets délicats.
En cas de cuisson en mode TOURNEBROCHE ou
ROTISSERIE, placer la lèchefrite au gradin 1 pour
récupérer les jus ou graisses de cuisson.
MULTICUISSON
Utiliser les gradins 2 et 4 et placer au 2 les plats qui
exigent davantage de chaleur.
Placer la lèchefrite en bas et la grille en haut.

36
FR
Tableau de cuisson au four
PLATS EXEMPLES FONCTION TEMPERATURE SUPPORTS
Volailles rôties poulet, canard, coquelet, chapon,. rôtisserie 200°C volaille sur grille
Volailles au tournebroche poulet, coquelets tournebroche 270°C berceau tournebroche
Rôtis rôti de porc, de veau, de dinde, rosbif, gigot
d'agneau, gigue de chevreuil, poitrine de veau
farcie,… rôtisserie 200°C viande sur grille
Grosses pièces braisées jambon entier braisé à l'os, très gros chapon ou
dinde, … multiniveaux
180°C
(au tiers de la
cuisson, baisser à
160°C)
viande sur plateau
arroser régulièrement avec le
jus
Sauté de viande en cocotte
et plats traditionnels
bœuf bourguignon, lapin chasseur, sauté de veau
Marengo, navarin d'agneau, poulet basquaise,...
baeckenhoffe, cassoulet,… tradition 190°C cocotte sur plateau
Grillades côtes, côtelettes, saucisses à griller, brochettes,
cuisses de poulet,… multiniveaux 200°C
sur grille (le gradin est fonction
de l'épaisseur)
Viandes en croûte filet de bœuf Wellington, jambon en croûte,… multiniveaux 200°C sur plateau (pour les grosses
pièces, baisser à 160°C après la
cuisson de la croûte)
LES VIANDES
Préparations en croûte de sel volailles en croûte de sel,… multiniveaux 240°C viande sur plateau ou plat sur
plateau
Poissons grillés et brochettes bar, maquereau, sardine, rouget, thon,… multiniveaux 180°C
sur grille (le gradin est fonction
de l'épaisseur)
Poissons entiers (farcis) dorade, carpe,… multiniveaux 200°C sur plateau
Filets de poissons (avec
mouillement) saumon, rascasse, cabillaud, loup,… tradition 200°C sur plateau
Papillotes sole, limande, saint jacques,… multiniveaux 200°C sur plateau
Poissons en croûte (pâte
feuilletée ou brisée) saumon, brochet,… multiniveaux 200°C sur plateau
Gratins de poisson brandade de morue gratinée,… gratin
(ou rôtisserie) 200-210°C plat sur plateau
Soufflés saint jacques,… multiniveaux 200°C moule sur plateau
LES POISSONS
Poissons en croûte de sel bar, dorade,… multiniveaux 240°C poisson sur plateau ou plat sur
plateau
PLATS EXEMPLES FONCTION TEMPÉRATURE SUPPORTS
Gâteaux salés Gâteaux aux olives, au thon, etc. Gâteaux ou
multiniveaux 160 °C moule sur lèchefrite
Gâteaux rustiques gâteaux rustiques au fromage, terrine de saumon,… Gâteaux ou
multiniveaux 200 °C sur lèchefrite
Terrines terrines de poisson, viandes, légumes, foie gras, etc. Tradition 160 °C moule à terrine sur lèchefrite (bain-marie
avec eau déjà chaude)
Ramequins individuels Terrines de foie de volaille, purée de saumon, œufs en
cocotte, etc. Tradition 160 °C ramequins sur lèchefrite (bain-marie
avec eau déjà chaude)
ENTRÉES
Soufflés soufflé au fromage, aux légumes, au poisson, etc. Multiniveaux 200 °C moule sur lèchefrite
Mets au gratin gratin de pommes de terre, soupe Parmentier, lasagnes,
etc.
gratin
(ou rôtisserie) 200-210 °C plat sur lèchefrite
Légumes farcis pommes de terre, tomates, courgettes, choux, etc. Multiniveaux 200 °C sur lèchefrite
ou moule sur lèchefrite
Légumes braisés en cocotte laitue, carottes au safran, salsifis blanc, etc. Tradition 200 °C cocotte sur lèchefrite
Flans flan aux champignons, omelettes aux légumes, etc. Tradition 160 °C ramequin ou moule sur lèchefrite (bain-
marie avec eau déjà chaude)
Terrines terrine de légumes Tradition 160 °C moule sur lèchefrite (bain-marie avec
eau déjà chaude)
Soufflés soufflé d’asperges, aux tomates, etc. Multiniveaux 200 °C moule sur lèchefrite
Beignets terrine de légumes, etc. Multiniveaux 200 °C sur lèchefrite
Papillote truffes, etc. Multiniveaux 200 °C Papillote sur lèchefrite
LES LÉGUMES
Riz Pilaf Tradition 180 °C plat sur lèchefrite

FR
37
Tableau de cuisson au four
Program m es de cuisson auto m atiques
Fonction Cuisson préconisée pour … EXEMPLES SUPPORTS
Gradin
plateau
émaillé
Durée
cuisson
(minutes)
Enfournement
Plum-cake et 4/4 (avec levure
chimique) plum-cake aux fruits, marbrés, 4/4, etc. moule sur
lèchefrite 2
Tartes aux fruits (pâte brisée ou
pâte feuilletée, avec ou sans flan) tartes aux pommes, mirabelles, poires, etc. moule sur
lèchefrite 2
Pâte feuilletée chaussons aux pommes, gâteaux rustiques,
terrines, etc. sur lèchefrite 2
Gâteaux
Gâteaux sans levure (clafoutis,
pithiviers, feuilletés, gâteau
rustique, etc.)
sur lèchefrite 2
45** Froid
Pizzas* Pizzas à pâte épaisse, fougasses
(pâte à pain) 2 28**
Chaud ou
froid
Pain *** 2 55 Froid
* Les temps de cuisson sont purement indicatifs et peuvent être modifiés selon les goûts de chacun. Les temps de préchauffage du four sont présélectionnés et ne sont pas modifiables
manuellement.
** Les durées des cuissons automatiques sont présélectionnées. Les valeurs figurant dans le tableau se réfèrent à la durée minimale et maximale, pouvant être modifiée par l'utilisateur à
partir de la durée présélectionnée.
*** Comme indiqué dans la recette, ajouter 100
g
d'eau dans la lèchefrite.
PLATS EXEMPLES FONCTION TEMPÉRATURE SUPPORTS
Yaourt Basse temperature 40 °C ramequin sur lèchefrite
DIVERS
Aliments secs champignons, fines herbes, fruits ou légumes en tranches,
etc. Basse temperature 65 °C sur grille
PLATS EXEMPLES FONCTION TEMPÉRATURE SUPPORTS
Biscuits (sans levure) génoise, biscuits à la cuiller, biscuits roulés, Brownies, 200 °C moule sur lèchefrite
Tartes au fromage blanc 200 °C moule sur lèchefrite
Tartes à pâte levée tartes au sucre, tartes aux fruits à pâte brioche 180 °C moule sur lèchefrite
Cuisson de bases pour tartes (pâte sablée) tartes aux fruits frais (fraises, framboises, etc.) 180 °C moule sur lèchefrite (haricots
secs sur pâte)
Terrines (pâte feuilletée ou pâte brisée) Terrines aux poires, etc. 220 °C moule sur lèchefrite
choux profiteroles, petits choux, choux, Paris Brest, Saint
honoré, etc. 190 °C sur lèchefrite
Petites pâtisseries (levure de boulanger) croissants, tartes au sucre, brioches vides, petits
savarins, etc. 180 °C sur lèchefrite
PÂTISSERIES
Grandes pâtisseries (levure de boulanger) kougloff, brioches panettone, pain sucré,...
Gâteaux ou
multiniveaux
160 °C sur lèchefrite ou moule sur
lèchefrite
Pâte à biscuits biscuits en caissettes papier, biscuits à la cuiller, etc. 180 °C sur lèchefrite
Pâte sablée sablés, biscuits spritz, biscuits secs, etc. 200 °C sur lèchefrite
Pâte feuilletée diverses pâtisseries feuilletées, etc. 200 °C sur lèchefrite
Macarons, boules à la noix de coco macarons à la noix de coco ou aux amandes 180 °C sur lèchefrite
Pâte levée mini-brioche, mini-croissant, etc. 180 °C sur lèchefrite
Meringues blanches 70 °C sur lèchefrite
PETITS
FOURS
Meringues ambrées
Gâteaux ou
multiniveaux
110 °C sur lèchefrite
Pudding pudding à base de pain ou pâte à brioche, pudding au riz 190 °C moule sur lèchefrite
Crèmes et flancs Gâteaux de semoule crème au caramel, crème brûlée, flan au chocolat, etc. 160 °C
Moules ou ramequins sur
lèchefrite (bain-marie sur
lèchefrite)
Desserts au riz riz condé, riz impératrice, etc. 180 °C moule sur lèchefrite
ENTREMETS
Soufflés soufflé à la liqueur, soufflé aux fruits, etc.
Gâteaux ou
multiniveaux
200 °C moule sur lèchefrite
FRUITS Fruits farcis ou en papillote pommes au four, etc. Multiniveaux 200 °C moule ou papillote sur lèchefrite

38
FR
Utilisation du plan de cuisson
vitrocéramique
La colle utilisée pour les joints laisse des traces de
graisse sur le verre. Nous conseillons de les éliminer
avant dutiliser lappareil à laide dun produit
dentretien non abrasif. Une odeur de caoutchouc
peut se dégager au cours des premières heures
dutilisation, elle disparaîtra très vite.
Allumer et éteindre les foyers
Pour allumer un foyer, tourner le bouton
correspondant dans le sens des aiguilles dune
montre.
Pour léteindre, tourner le bouton dans le sens
inverse des aiguilles dune montre jusquà 0.
Lallumage du voyant FONCTIONNEMENT FOYERS
signale quau moins un foyer du plan de cuisson est
allumé.
Les foyers
Le plan de cuisson est équipé déléments
chauffants électriques halogènes. Ils deviennent
rouges pendant leur fonctionnement :
A. Foyers radiants
B. Foyers halogènes.
C. Voyant de chaleur
résiduelle: il signale une
température supérieure à 60°C
du foyer correspondant et ce
même après extinction de ce dernier.
Foyers halogènes
Ils transmettent la chaleur par irradiation de la lampe
halogène quils contiennent. Ils se caractérisent par
leurs propriétés qui rappellent celles du gaz : une
prompte réponse aux commandes et une
visualisation immédiate de la puissance.
Description des éléments chauffants
Les résistances circulaires des foyers radiants
deviennent rouges 10-20 secondes à peine après
allumage.
Les résistances circulaires des foyers halogènes
garantissent une distribution uniforme de la
température en plus de tous les autres avantages
propres aux foyers halogènes.
Les lampes halogènes produisent instantanément
une quantité de lumière et de chaleur très élevée
avec tous les avantages pratiques qui sensuivent :
· montée rapide en température (par rapport à un
brûleur à gaz)
· refroidissement rapide
· température uniforme sur toute la surface (grâce
aux éléments chauffants circulaires)
Son utilisation est extrêmement simple car celle est
semblable à celle des autres zones de cuisson; il
suffit donc de consulter les tableaux de cuisson
figurant dans le livret dinstructions.
Pos. Plaque Radiant en
Céramique Plaque Normale
o Rapide
Plaque Halogène en
Céramique Plaque
Automatique
0Eteint Eteint
1Cuisson de poissons Pour faire fondre le beurre, le
chocolat
2
Cuisson de pommes de terre
(à la vapeur), soupes,pois
chiches,haricots Pour réchauffer les liquides
3
Pour continuer la cuisson de
grandes quantités d'aliments,
minestrone
4Rôtir (moyen) Pour crèmes et sauces
5Rôtir (fort)
6Rissoler ou rejoindre
l'ébullition en peu de temps Pour cuire à la température
d'ébullition
7
8Pour les rôtis
9
10 Pour les grands pot-au-feu
11
12 Pour frire
Conseils dutilisation du plan de cuisson
Utiliser des casseroles à fond plat et de forte
épaisseur pour quelles adhèrent parfaitement à la
zone de chauffe;
utiliser des casseroles dont le diamètre couvre
complètement la zone de chauffe de façon à
exploiter au mieux toute la chaleur disponible;
sassurer que le fond des casseroles est
parfaitement sec et propre: ladhérence aux
foyers sera ainsi optimale et tant les casseroles
que le plan de cuisson dureront plus longtemps;
éviter dutiliser des casseroles qui sont aussi
utilisées sur les brûleurs à gaz: la concentration
de chaleur des brûleurs à gaz peut déformer le
fond de la casserole qui perd son adhérence;
ne jamais laisser un foyer allumé sans casserole,
il risque de sendommager.
AB
C

FR
39
Précautions et conseils
!Cet appareil a été conçu et fabriqué conformément aux
normes internationales de sécurité. Ces consignes de
sécurité sont très importantes et doivent être lues
attentivement.
Sécurité générale
Ces instructions ne sont valables que pour les pays
dont les symboles figurent dans la notice et sur la
plaquette dimmatriculation de lappareil.
Cet appareil a été conçu pour un usage familial, de type
non professionnel.
Cet appareil ne doit pas être installé en extérieur, même
dans un endroit abrité, il est en effet très dangereux de le
laisser exposé à la pluie et aux orages.
Ne pas toucher lappareil avec les mains mouillées ou
humides ou si lon est pieds nus.
Cet appareil qui sert à cuire des aliments ne doit être utilisé
que par des adultes conformément aux instructions du
mode demploi.
Cette notice concerne un appareil classe 1 (libre pose) ou
classe 2 - sous-classe 1 (encastré entre deux meubles).
En cours de fonctionnement, les éléments chauffants et
certaines parties de la porte peuvent devenir très
chauds. Attention à ne pas les toucher et à garder les
enfants à distance.
Eviter que le cordon dalimentation dautres petits
électroménagers touche à des parties chaudes de
lappareil.
Les orifices ou les fentes daération ou dévacuation de la
chaleur ne doivent pas être bouchés
Ne pas poser de casseroles instables ou déformées sur les
foyers pour éviter tout risque de renversement. Placer les
casseroles sur le plan de cuisson, manches tournés vers
lintérieur, pour éviter de les heurter par mégarde.
Utiliser toujours des gants de protection pour enfourner ou
sortir des plats du four.
Ne pas utiliser de solutions inflammables (alcool,
essence..) à proximité de lappareil lorsquil est en marche.
Ne pas stocker de matériel inflammable dans la niche de
rangement du bas ou dans le four : si lappareil était par
inadvertance mis en marche, il pourrait prendre feu.
Quand lappareil nest pas utilisé, sassurer que les boutons
sont bien sur la position .
Ne pas tirer sur le câble pour débrancher la fiche de la
prise de courant.
Neffectuer aucune opération de nettoyage ou dentretien
sans avoir auparavant débranché la fiche de la prise de
courant.
En cas de panne, nessayer en aucun cas daccéder aux
mécanismes internes pour tenter de réparer lappareil.
Faire appel au service dassistance.
Ne pas poser dobjets lourds sur la porte du four ouverte.
Les surfaces intérieures du tiroir (sil y en a un) peuvent
devenir chaudes.
Le plan vitrocéramique résiste aux chocs mécaniques, il peut
toutefois se fendre (ou même se briser) sous leffet dun choc
provoqué par un objet pointu, tel quun ustensile par exemple.
Dans ce cas, débrancher immédiatement lappareil du réseau
électrique et sadresser à un centre dassistance technique.
Si la surface de la table est fêlée, éteindre lappareil pour
éviter tout risque délectrocution.
Ne pas oublier que la température des foyers reste assez
élevée pendant trente minutes au moins après leur
extinction.
Garder à bonne distance de la table de cuisson tout objet
qui pourrait fondre, des objets en plastique ou en
aluminium par exemple, ou des produits à haute teneur en
sucre. Faire très attention aux emballages, au film plastique
et au papier aluminium : au contact des surfaces encore
chaudes ou tièdes, ils risquent dendommager gravement
la table.
Ne pas poser dobjets métalliques (couteaux, cuillères,
couvercles, etc.) sur la table, ils risquent de devenir
brûlants.
Cet appareil nest pas prévu pour être utilisé par des
personnes (y compris les enfants) dont les capacités
physiques, sensorielles ou mentales sont réduites, ou des
personnes dénuées dexpérience ou de connaissance,
sauf si elles ont pu bénéficier, par lintermédiaire dune
personne responsable de leur sécurité, dune surveillance
ou dinstructions préalables concernant dutilisation de
lappareil.
Mise au rebut
Mise au rebut du matériel demballage : se conformer aux
réglementations locales, les emballages pourront ainsi être
recyclés.
La directive européenne 2002/96/CE relative aux déchets
déquipements électriques et électroniques (DEEE), prévoit
que les électroménagers ne peuvent pas être traités
comme des déchets solides urbains courants. Les
appareils usagés doivent faire lobjet dune collecte
séparée pour optimiser le taux de récupération et de
recyclage des matériaux qui les composent et empêcher
tout danger pour la santé et pour lenvironnement. Le
symbole de la poubelle barrée est appliqué sur tous les
produits pour rappeler quils font lobjet dune collecte
sélective.
Pour de plus amples renseignements sur la mise au rebut
des électroménagers, les possesseurs peuvent sadresser
au service public prévu à cet effet ou aux commerçants.
Economies et respect de
lenvironnement
Pour faire des économies délectricité, utiliser autant que
possible le four pendant les heures creuses. Les options de
programmation des cuissons et plus particulièrement la
cuisson différée (voir Programmes), permettent de
sorganiser en ce sens.
Pour les cuissons au TOURNEBROCHE et ROTISSERIE,
nous recommandons de garder la porte du four fermée: les
résultats obtenus sont meilleurs et la consommation
dénergie est moindre (environ 10% déconomie).
Garder les joints propres et en bon état pour quils adhèrent
bien à la porte et ne causent pas de déperdition de chaleur.

40
FR
Mise hors tension
Avant toute opération de nettoyage ou dentretien
couper lalimentation électrique de lappareil.
Nettoyage du four
! Ne jamais nettoyer lappareil avec des nettoyeurs
vapeur ou haute pression.
Nettoyer la vitre de la porte avec des produits non
abrasifs et des éponges non grattantes, essuyer
ensuite avec un chiffon doux. Ne pas utiliser de
matériaux abrasifs ou de racloirs métalliques
aiguisés qui risquent de rayer la surface et de
briser le verre.
Nettoyer lextérieur émaillé ou inox et les joints en
caoutchouc à laide dune éponge imbibée deau
tiède additionnée de savon neutre. Si les taches
sont difficiles à enlever, utiliser des produits
spéciaux. Il est conseillé de rincer abondamment
et dessuyer après le nettoyage. Ne pas utiliser
de poudres abrasives ni de produits corrosifs.
Nettoyer lenceinte après toute utilisation, quand
le four est encore tiède. Utiliser de leau chaude et
du détergent, rincer et essuyer avec un chiffon
doux. Eviter tout produit abrasif.
Les accessoires peuvent être lavés comme de la
vaisselle courante y compris en lave-vaisselle.
Pour éliminer la graisse et la saleté du tableau de
bord, le nettoyer avec une éponge non abrasive
ou avec un chiffon doux.
Des taches peuvent se former sur lacier inox si
ce dernier reste trop longtemps au contact dune
eau très calcaire ou de détergents agressifs
contenant du phosphore. Nous conseillons de
rincer abondamment et de bien essuyer.
Contrôler les joints du four
Contrôler périodiquement létat du joint autour de la
porte du four. Sil est abîmé, sadresser au service
après-vente le plus proche de son domicile. Mieux
vaut ne pas utiliser le four tant quil nest pas réparé.
Remplacement de lampoule déclairage
du four
Pour changer
lampoule
déclairage du
four :
1. enlever le couvercle en verre à laide dun
tournevis.
Nettoyage et entretien
*Nexiste que sur certains modèles
Couvercle
Joint
Ampoule
Cavité
2. Dévisser lampoule et la remplacer par une autre
de même type : puissance 15 W, culot E 14.
Remettre le couvercle en place en prenant bien soin
de repositionner correctement le joint (voir figure).
Nettoyage du plan de cuisson
vitrocéramique
! Ne jamais utiliser de détergents abrasifs ou corrosifs,
tels que des bombes aérosols pour grilloirs et fours,
des détacheurs et dérouilleurs, des poudres à récurer
ou des éponges à surface abrasive : ils risquent de
rayer irrémédiablement la surface.
Pour un entretien courant, passer une éponge
humide sur la surface de la table et essuyer avec
du papier essuie-tout.
Si la table est sale, frotter avec un produit
dentretien adapté au verre vitrocéramique, rincer
et essuyer.
Pour enlever les salissures en relief, utiliser un
grattoir spécial (pas fourni avec lappareil).
Intervenir dès que possible, ne pas attendre que
lappareil ait refroidi afin déviter toute incrustation
des salissures. Lutilisation dune éponge en fil
dacier inoxydable, spéciale verre vitrocéramique,
imprégnée deau savonneuse donne dexcellents
résultats.
Tout objet, matière plastique ou sucre ayant
accidentellement fondu sur la table de cuisson
doit être aussitôt enlevé à laide du grattoir tant
que la surface est encore chaude.
Une fois que la table est propre, elle peut être
traitée avec un produit dentretien et de protection
spécial : celui-ci forme un film invisible qui
protège la surface en cas de débordement
accidentel. Opérer de préférence quand lappareil
est tiède ou froid.
Prendre soin de toujours bien rincer à leau claire
et dessuyer la table : les résidus des produits
pourraient en effet sincruster lors dune prochaine
cuisson.
Produits de nettoyage
spéciaux pour
vitrocéramique
Où les acheter
Raclette à lames et lames de
rechange
Bricolage et
quincaillerie
Stahl-Fix
SWISSCLEANER
WK TOP
Autres produits pour
vitrocéramique
Articles ménagers
Bricolage
Quincaillerie
Supermarchés

FR
41
Nettoyage automatique par PYROLYSE
Pendant le programme PYROLYSE, la température à
lintérieur du four atteint 500°C et lance le processus
de pyrolyse, autrement dit, la carbonisation des
salissures alimentaires. Les salissures sont
littéralement incinérées.
Pendant la pyrolyse, les surfaces peuvent devenir
très chaudes : garder les enfants à distance. Il peut
arriver de voir, à travers la vitre, des particules qui
silluminent: il sagit dune combustion instantanée,
phénomène tout à fait normal et sans danger.
Avant dactiver la PYROLYSE :
enlevez avec une éponge humide les salissures
en excès. Ne pas utiliser de détergents;
sortir tous les accessoires;
ne pas placer de serviettes ou de maniques sur la
poignée du four.
positionner le bouton PROGRAMMES sur «0»
! Si le four est excessivement chaud, la pyrolyse
pourrait ne pas démarrer. Attendre quil refroidisse.
! Lactivation du programme nest possible quaprès
avoir fermé la porte du four.
Pour activer le cycle de nettoyage PYROLYSE,
appuyer 4 secondes sur la touche . Le bouton
SELECTION TEMPS permet de choisir le niveau de
nettoyage désiré avec durée présélectionnée et non
modifiable :
1. Economique (ECO) : tournez le bouton vers «- ».
Durée 1 heure ;
2. Normal (NOR) : niveau initial. Durée 1 heure 30 ;
3. Intensif (INT) : tournez le bouton vers «+». Durée
2 heures.
4. Appuyer sur la touche pour confirmer.
Egalement pour le cycle PYROLYSE, comme pour
tout cycle de cuisson, il est possible de programmer
la fin du cycle de nettoyage (voir Programmer la fin
du nettoyage automatique).
Les sécurités
licône sallume sur lafficheur pour indiquer
le verrouillage automatique de la porte du four
dès que la température a atteint des valeurs
élevées;
licône indique quil est possible dannuler,
à tout moment, le cycle de nettoyage par
pression sur la touche ;
en cas danomalie de fonctionnement,
lalimentation des résistances est
automatiquement coupée;
une fois que la porte est verrouillée, aucune
modification de sélection de durée et de fin de
cycle nest plus possible.
Programmer la fin du nettoyage automatique
1. Appuyer sur la touche jusquà ce que licône
et les deux digits numériques de lAFFICHEUR
ne se mettent à clignoter;
2. tourner le bouton SELECTION DES TEMPS vers le
«+» et «-» pour régler lheure;
3. appuyer à nouveau sur la touche jusquà ce
que les deux autres digits numériques de
lAFFICHEUR ne se mettent à clignoter;
4. tourner le bouton SELECTION DES TEMPS vers le
«+» et «-» pour régler les minutes ;
5. appuyer à nouveau sur la touche pour
confirmer;
6. un signal sonore indique que le temps est écoulé
et lAFFICHEUR affiche END.
Exemple: il est 9 h, choix dune PYROLYSE
niveau Economique avec une durée
présélectionnée de 1 heure. Lheure finale de la
pyrolyse est fixée à 12h30. Le programme
démarre automatiquement à 11h30.
Les icônes et éclairées signalent quune
programmation a été lancée. LAFFICHEUR affiche à
tour de rôle lheure de fin PYROLYSE et la durée.
A la fin du nettoyage automatique
Pour pouvoir ouvrir la porte du four, il faudra attendre
que la température du four descende à un niveau
acceptable. Il se peut que des résidus blancs
poussiéreux se déposent sur lenceinte du four : les
enlever avec une éponge humide après
refroidissement complet de lappareil. Pourquoi ne
pas profiter de la chaleur emmagasinée pour faire
démarrer une cuisson sans se soucier des résidus
poussiéreux: ils sont tout à fait inoffensifs.

42
FR
Assistance
Attention :
Lappareil monte un système dautotest qui permet de détecter toute anomalie de fonctionnement. Ces
anomalies sont affichées sous la forme: F suivi des chiffres.
Contactez alors un service dassistance technique.
Ne jamais faire appel à des techniciens non agréés.
Indiquer :
le type danomalie;
le modèle de lappareil (Mod.);
Son numéro de série (S/N).
Ces informations figurent sur la plaque signalétique apposée sur lappareil

NL
FORNUIS EN OVEN
CI 66 H W
CI 66 H I
CI 66 H A
Gebruiksaanwijzing
Nederlands,43
NL
Italiano, 1
IT
Français, 29
Deutsch, 57
English,15
GB FR
DE
Inhoud
Installatie, 44-45
Plaatsen en waterpas zetten
Elektrische aansluiting
Tabel eigenschappen
Beschrijving van het apparaat, 46
Aanzichttekening
Bedieningspaneel
Display
Starten en gebruik, 47-51
De klok instellen
De timer instellen
Gebruik van de oven
Handmatige kookprogrammas
Automatische kookprogrammas
De bereiding programmeren
Praktische kooktips
Kooktabel oven
Starten en gebruik, 52
De kookzones in- en uitschakelen
De kookzones
Voorzorgsmaatregelen en advies, 53
Algemene veiligheid
Afvalverwijdering
Energiebesparing en milieubehoud
Onderhoud en verzorging, 54-55
De elektrische stroom afsluiten
Reinigen van het apparaat
Vervangen van het ovenlampje
Het reinigen van de glaskeramische kookplaat
Automatische reiniging PYROLYSE
Service, 56

46
NL
Beschrijving van het apparaat
Aanzichttekening
Bedieningspaneel
* Slechts op enkele modellen aanwezig.
Knoppen ELEKTRISCHE
KOOKPLAAT van de
kookplaat
PROGRAMMAKNOP
Knop THERMOSTAAT/INSTELLEN
TIJDEN
DISPLAY
Toets
INSTELLEN TIJDEN
Controlelampje
ELEKTRISCHE
KOOKPLAAT
Toets
PYROLYSE
Display
Symbolen AUTOMATISCHE
PROGRAMMA'S
Symbool PROGRAMMA
LAGE TEMPERATUR
Symbool
EINDE BEREIDING
Symbool
KLOK
Cijfers TEMPERATUREN
en TIJDEN
Symbool
DUUR
Symbool
TIMER
Aanwijzer van de
Voorverwarming
Symbool
STOP
Aanwijzer
DEURBLOKKERING
Bedieningspaneel
Rooster GRILL
Rooster LEKPLAAT
Stelvoetje
GELEIDERS
van de roosters
stand 3
stand 2
stand 1
Stelvoetje
stand 5
stand 4
Keramisch
kookvlak

NL
47
Starten en gebruik
De klok instellen
U kunt de klok zowel instellen als de oven uit is als
wanneer hij aan is, maar alleen als u geen
uitgestelde bereiding heeft ingesteld.
1. Druk meerdere malen op de toets totdat het
symbool en de eerste twee cijfers op het
DISPLAY beginnen te knipperen;
2. draai de knop INSTELLEN TIJDEN richting de +
en de - om de uren in te stellen;
3. druk nogmaals op de toets totdat de andere
twee cijfers op het DISPLAY beginnen te knipperen;
4. draai aan de knop INSTELLEN TIJDEN richting de
+ en de - om de minuten in te stellen;
5. druk nogmaals op de toets om te bevestigen.
De timer instellen
Deze functie onderbreekt de bereiding niet en is
onafhankelijk van het gebruik van de oven. Hij dient
er uitsluitend voor een geluidssignaal te laten horen
als de ingestelde minuten zijn verstreken.
1. Druk meerdere malen op de toets totdat het
symbool en de drie cijfers op het DISPLAY
beginnen te knipperen;
2. draai aan de knop INSTELLEN TIJDEN richting de
+ en de - om de minuten in te stellen;
3. druk nogmaals op de toets om te bevestigen.
Nu verschijnt het terugtellen, aan het einde waarvan
u een geluidssignaal zult horen.
Gebruik van de oven
Vóór gebruik is het strikt noodzakelijk het plastic
folie aan de zijkanten van het apparaat te
verwijderen.
Wij raden u aan bij het eerste gebruik de oven
minstens een uur leeg te laten functioneren, op
maximum temperatuur en met de deur dicht. Nadat
u de oven heeft uitgeschakeld, opent u de ovendeur
en lucht u het vertrek. De lucht die u ruikt komt door
het verdampen van de middelen die worden
gebruikt om de oven te beschermen.
1. Selecteer het gewenste kookprogramma door aan
de PROGRAMMAKNOP te draaien.
2. De oven begint voor te verwarmen, de aanwijzers
van de voorverwarming gaan aan.
De temperatuur kan veranderd worden door te
draaien aan de THERMOSTAATKNOP.
3. Als de aanwijzer van de voorverwarming
uitgaat en u een geluidssignaal hoort, is de
voorverwarming compleet: zet de etenswaren in de
oven.
4. Tijdens het koken kunt u nog altijd:
- het kookprogramma veranderen met behulp van de
PROGRAMMAKNOP;
- de temperatuur veranderen met behulp van de
THERMOSTAATKNOP;
- de kookduur programmeren of de tijd van einde
bereiding ( zie kookprogrammas);
- het koken onderbreken door de
PROGRAMMAKNOP weer op stand 0 te zetten.
5. U kunt de kookduur veranderen ( zie
kookprogrammas).
6. Indien de stroom uitvalt en de oventemperatuur
niet te laag is geworden, gaat de oven automatisch
terug naar het punt waar het koken is onderbroken.
De geprogrammeerde functies worden echter niet
onthouden. U dient ze daarom bij het terugkeren van
de stroom opnieuw in te stellen.
Bij de programmas BRADEN is geen
voorverwarming nodig.
! Zet nooit voorwerpen op de bodem van de oven; u
riskeert hiermee het email te beschadigen.
! Plaats de ovenschalen altijd op bijgeleverde
roosters.
Ventilator
Om de oven van buiten niet te heet te laten worden,
brengt een verkoelingsventilator een luchtstroom teweeg
die tussen het bedieningspaneel en de ovendeur naar
buiten komt. Aan het begin van het programma
PYROLYSE draait de ventilator op lage snelheid.
Aan het einde van de kooktijd blijft de ventilator draaien
totdat de oven voldoende is afgekoeld.
Ovenverlichting
Als de oven uit is, kan het ovenlicht op ieder willekeurig
moment aan worden gedaan door de ovendeur te openen.
* Slechts op enkele modellen aanwezig.

50
NL
Kooktabel oven
GERECHTEN VOORBEELDEN FUNCTIE TEMPERATUUR HET PLAATSEN
Gebraden gevogelte kip, eend, haantje, kapoen. Braden 200 °C gevogelte op rooster
Gevogelte aan het spit kip, haantje Braadspit 270 °C vleespen van braadspit
Braadstukken varkensgebraad, kalfsgebraad, kalkoen, roastbeef,
lamsbout, reebout, gefarceerde kalfsborst, enz. Braden 200 °C vlees op rooster
braadstukken van grote
afmetingen hele lamsbout, grote kapoen of kalkoen enz. Multiniveau
180 °C (op een
derde van de
braadtijd verlagen
tot 160 °C)
vlees op bakplaat, regelmatig
bedruipen met de jus
Gesauteerd vlees in
ovenschotel en traditionele
gerechten
boeuf bourguignon, konijn alla cacciatora,
gesauteeerd kalfsvlees Marengo, gestoofd
lamsvlees, kip a la basque, enz. Traditie 190 °C cocotte op bakplaat
Grilleren biefstuk, karbonaden, worstjes, vleesstokjes,
kippenborst, enz. Multiniveau 200 °C
op rooster (inzethoogte naar
gelang de dikte
Vlees in deegkorst filet van rundvlees à la Wellington, lamsbout in
deegkorst, enz. Multiniveau 200 °C
op bakplaat (voor grote
stukken, verlagen tot 160 °C als
het deeg gaar is)
VLEES
Gerechten met deegkorst gevogelte met deegkorst, enz. Multiniveau 240 °C vlees op bakplaat of schotel op
bakplaat
Gegrillde vis en aan
satéstokjes baars, makreel, sardine, zeebarbeel, tonijn enz. Multiniveau 180 °C op rooster (inzethoogte naar
gelang de dikte
Hele vissen (gefarceerd) zeebrasem, karper enz. Multiniveau 200 °C op bakplaat
Visfilets (met wijn of andere
vloeistof) zalm, schorpioenvis, kabeljouw, baars enz. Traditie 200 °C op bakplaat
In aluminiumfolie tong, schelpen saint jacques, enz. Multiniveau 200 °C op bakplaat
Vis in deegkorst (bladerdeeg of
pasteideeg) zalm, vis aan satéstokjes enz. Multiniveau 200 °C op bakplaat
Vis au gratin kabeljouw gegratineerd a là provençale enz. gratin (of braden) 200-210 °C schotel op bakplaat
Soufflé schelpen Saint Jacques enz. Multiniveau 200 °C vorm op bakplaat
VIS
Vis in zoute deegkorst baars, karper enz. Multiniveau 240 °C vis op bakplaat of schotel op
bakplaat
GERECHTEN VOORBEELDEN FUNCTIE TEMPERATUUR HULPMIDDELEN
Hartige plum-cakes plum-cake met olijven, tonijn, enz. Gebak- of
multiniveau 160 °C taartvorm op lekplaat
Boerentaarten kaastaart, zalmschotel Gebak- of
multiniveau 200 °C op lekplaat
Terrines terrine van vis, vlees, groenten, foie gras, enz. Traditioneel 160 °C
terrinevorm op lekplaat (au
bain-marie met warm
water)
Ovenschotel leverpastei van gevogelte, zalmpuree, eieren en cocotte, enz. Traditioneel 160 °C
schotel op lekplaat (au
bain-marie met warm
water)
VOORGERECHTEN
Soufflé kaassoufflé, groentesoufflé, vissoufflé, enz. Multiniveau 200 °C taartvorm op lekplaat
Gegratineerde gerechten gegratineerde aardappels, parmentiersoep, lasagne, enz. gratineren
(of braden) 200-210 °C schotel op lekplaat
Gevulde groenten aardappels, tomaten, courgettes, kool, enz. Multiniveau 200 °C op lekplaat
of vorm op bakplaat
Gestoofde groenten en cocotte sla, wortels, haverwortel, enz. Traditioneel 200 °C cocotte op lekplaat
Flan paddestoelenflan, groentebeignets, enz. Traditioneel 160 °C
schotel of taartvorm op
lekplaat (au bain-marie
met warm water)
Terrines groenteterrine Traditioneel 160 °C
taartvorm op lekplaat (au
bain-marie met warm
water)
Soufflé soufflé van asperges, tomaten, enz. Multiniveau 200 °C taartvorm op lekplaat
Gerechten in beslag groenteschotel, enz. Multiniveau 200 °C op lekplaat
In aluminiumfolie truffels, enz. Multiniveau 200 °C aluminiumfolie op lekplaat
PEULVRUCHTEN
Rijst Pilaf Traditioneel 180 °C schotel op lekplaat

NL
51
Kooktabel oven
Automatische kookprogrammas
Functie Aanbevolen bereiding voor... VOORBEELDEN HULPMIDDELEN Niveau bakplaat Kooktijd
(minuten)
In oven
plaatsen
Plum-cake en marmercake (met gedroogde
gist) vruchtencake, marmercake, enz. taartvorm op
lekplaat 2
Vruchtentaart (kruimeldeeg of bladerdeeg,
met of zonder flan) appeltaart, pruimentaart, perentaart enz. taartvorm op
lekplaat 2
Bladerdeeg apfelstrudel, boerentaarten, pasteitjes,
enz. op lekplaat 2
Taarten
Gebak zonder gist (clafoutis, amandeltaart,
boerentaart, enz.) op lekplaat 2
45** Koud
Pizza Dikke pizza's (brooddeeg) 2 28** Warm of koud
PaneBrood *** 2 55 Koud
* De kooktijden dienen slechts als indicatie en kunnen naar eigen smaak aangepast worden. De voorverwarming van de oven is door de fabriek ingesteld en kan niet handmatig worden
gewijzigd.
** De duur van de automatische bereidingen is van te voren ingesteld. De waarden in de tabel hebben betrekking op de minimum en maximum waarden. Zij kunnen door de gebruiker worden
gewijzigd, te beginnen met de vooringesteld duur.
*** Zoals het recept aangeeft, dient u 100 gr water in de lekplaat toe te voegen.
GERECHTEN VOORBEELDEN FUNCTIE TEMPERATUUR HULPMIDDELEN
Yoghurt LAGE TEMPERATUUR 40 °C schotel op lekplaat
VARIA
Droge etenswaren paddestoelen, kruiden, fruit of groenten in schijven, enz. LAGE TEMPERATUUR 65 °C op rooster
GERECHTEN VOORBEELDEN FUNCTIE TEMPERATUUR HULPMIDDELEN
Koekjes (zonder gist) cake, lange vingers, opgerolde koekjes, Brownies, 200 °C taartvorm op
lekplaat
Cheesecake 200 °C taartvorm op
lekplaat
Vruchtenaart van gistdeeg suikertaart, vlaaien 180 °C taartvorm op
lekplaat
Bereiding bodem voor vruchtentaarten
(zandtaartdeeg) taart met verse vruchten (aardbeien, frambozen, enz.) 180 °C
taartvorm op
lekplaat (bruine
bonen in deegkorst)
Gebakjes (bladerdeeg of kruimeldeeg) peergebakjes, enz. 220 °C taartvorm op
lekplaat
soesjes profiteroles, kleine soesjes, paris brest, gâteau saint
honoré, enz. 190 °C op lekplaat
Kleine gebakjes (bakkersgist) croissants, suikertaarten, brioches, kleine savarins, enz. 180 °C op lekplaat
GEBAK
Groot gebak (bakkersgist) kougloff, brioches, panettone, zoet brood
Gebak- of
multiniveau
160 °C
op lekplaat of
taartvorm op
lekplaat
Koekjesdeeg gebakjes in papieren cups, lepelkoekjes, enz. 180 °C op lekplaat
Zandtaartdeeg zandkoekjes, spritsen, biscuits, enz. 200 °C op lekplaat
Bladerdeeg verschillende soorten feuilletee-gebak, enz. 200 °C op lekplaat
Bitterkoekjes, kokosballetjes kokoskoekjes, amandelkoekjes 180 °C op lekplaat
Gistdeeg mini-brioches, mini-croissants, enz. 180 °C op lekplaat
Lichtgebakken meringues 70 °C op lekplaat
PATISSERIE
Doorgebakken meringues
Gebak- of
multiniveau
110 °C op lekplaat
Pudding broodpudding, rijstpudding 190 °C taartvorm op
lekplaat
Crème en flans Griesmeelpuddingen crème caramel, crème brûlée, chocoladeflan, enz. 160 °C
Vorm of ovenschotel
op lekplaat (au bain-
marie op lekplaat)
Rijstdesserts rijst à la condé, rijst à l’imperatrice, enz. 180 °C taartvorm op
lekplaat
DESSERTS
Soufflé soufflé met likeur, soufflé met fruit, enz.
Gebak- of
multiniveau
200 °C taartvorm op
lekplaat
FRUIT Gevuld fruit of fruit in aluminiumfolie gestoofde appels, enz. Multiniveau 200 °C
taartvorm of
aluminiumfolie op
lekplaat

52
NL
Keramisch kookvlak
! De lijm die gebruikt is voor de afdichtingen laat
wat vetvlekjes achter op het glas. Voordat u het
apparaat gebruikt raden wij u aan de vlekken te
verwijderen met een speciaal niet-schurend
schoonmaakmiddel. Gedurende de eerste paar uur
dat u het apparaat gebruikt kan het zijn dat u een
rubbergeur ruikt. Deze zal echter snel wegtrekken.
De kookzones in- en uitschakelen
Voor het inschakelen van een kookzone drukt u de
bijbehorende knop rechtsom.
Om hem uit te schakelen draait u de knop linksom
tot aan de "0".
Het aangaan van het controlelampje WERKING
KOOKPLATEN geeft aan dat minstens één
kookplaat aan is.
De kookzones
De kookplaat is voorzien van 3 stralingselementen
en 1 halogeen verwarmingselement. De
verwarmingselementen bevinden zich onder het
kookoppervlak (gedeeltes die rood worden tijdens
de werking):
A. Gloei-elementen
B. Halogeenelementen
C. Lichtjes die aangeven dat
de temperatuur van de
betreffende
verwarmingselementen
boven de 60°C C is, ook als
de kookzone is
uitgeschakeld.
Beschrijving van de kookzones
De stralingselementen zijn ronde
verwarmingselementen die na 10-20 seconden na
het aansteken rood worden.
De halogene verwarmingselementen bestaan uit
ronde verwarmingselementen die een gelijkmatige
verspreiding van de temperatuur verzekeren, naast
de kenmerken waarover de halogene elementen in
het algemeen al beschikken.
Halogeenlampen verspreiden onmiddellijk een grote
hoeveelheid licht en warmte met de daaruit
voortkomende praktische voordelen:
· snelle verwarming (ten opzichte van een
gasbrander);
· snelle afkoeling;
· gelijkmatige temperatuur over het gehele
oppervlak (dankzij de ronde
verwarmingselementen).
Aangezien ze erg lijken op andere kookelementen,
zijn ze eenvoudig in het gebruik. Raadpleeg de
kooktabellen in de gebruiksaanwijzing.
Pos. Stralingsplaten in keramiek
Normale of snell kook plaat Halogeenplaten in keramiek
Automatische kookplaten
0Uit Uit
1Vis Boter, chocola smelten
2Aardappelen (op stoom)
soep, bonen Vloeistoffen opwarmen
3Doorkoken grote
hoeveelheden, soep
4Braden (medium) Vla en sausen
5Braden (hard)
6Fruiten of snel aan de kook
brengen Koken op het kookpunt
7
8Braadstukken
9
10 Groot stoofvlees
11
12 Bakken
Praktische tips voor het gebruik van het apparaat
gebruik pannen met een platte bodem die perfect
aansluiten op het verwarmgedeelte;
gebruik pannen die groot genoeg zijn om de
kookplaat geheel te bedekken teneinde alle
beschikbare hitte te benutten;
houd de bodem van de pannen altijd schoon en
droog zodat ze goed aansluiten op het kookvlak.
Dit verlengt de levensduur van zowel de pannen
als het kookgedeelte;
vermijd dezelfde pannen te gebruiken die u ook
op een gasfornuis gebruikt: de
warmteconcentratie van gasbranders kan de
bodem van pannen vervormen, waardoor ze niet
goed meer aansluiten;
laat nooit een kookgedeelte aan staan zonder een
pan erop. De verhitting, die snel het maximum
niveau bereikt, zou de verwarmingselementen
kunnen beschadigen.
AB
C

NL
53
Voorzorgsmaatregelen en advies
! Dit apparaat is ontworpen en vervaardigd volgens de
geldende internationale veiligheidsvoorschriften.
Deze aanwijzingen zijn geschreven voor uw veiligheid en u
dient ze derhalve goed door te nemen.
Algemene veiligheidsmaatregelen
Deze instrukties zijn alleen geldig voor de landen
waarvan de symbolen voorkomen in de handleiding
en op het typeplaatje van het apparaat.
Dit apparaat is vervaardigd voor niet-professioneel
gebruik binnenshuis.
Het apparaat dient niet buitenshuis te worden geplaatst,
ook niet in overdekte toestand. Het is erg gevaarlijk als
het in aanraking komt met regen of als het onweert.
Raak het apparaat niet aan als u blootsvoets bent of met
natte of vochtige handen of voeten.
Het apparaat dient om gerechten te koken. Het mag
uitsluitend door volwassenen worden gebruikt en alleen
volgens de instructies die beschreven staan in deze
handleiding.
Deze handleiding betreft een apparaat van klasse 1
(losstaand) of klasse 2 - subklasse 1 (ingebouwd tussen
2 meubels).
Tijdens het gebruik van de oven worden de
verwarmingselementen en enkele delen van de
ovendeur zeer heet. Raak ze niet aan en houd
kinderen op een afstand.
Voorkom dat elektrische snoeren van andere kleine
keukenapparaten op warme delen van het apparaat
terechtkomen.
Laat de ventilatieopeningen en warmteafvoer vrij.
Plaats geen wankele of vervormde pannen op de
branders en kookplaten om omvallen te vermijden. Zorg
dat de handvaten naar het midden van het fornuis zijn
gericht zodat men er niet tegen kan stoten.
Gebruik altijd ovenwanten om gerechten in de oven te
zetten en eruit te halen.
Gebruik geen ontvlambare vloeistoffen (alcohol, benzine
enz.) in de buurt van het apparaat als het in gebruik is.
Plaats geen brandbaar materiaal in de onderste
opberglade of in de oven: als de oven plotseling aan
zou worden gezet zou dit materiaal vlam kunnen vatten.
De interne oppervlakken van de lade (indien aanwezig)
kunnen warm worden.
Het glaskeramische kookvlak is bestand tegen
mechanische stoten. Het kan echter worden beschadigd
(of barsten) als het wordt geraakt door een puntig object,
bijvoorbeeld door gereedschap. Als dit gebeurt moet u
onmiddellijk het apparaat afsluiten van de elektrische
stroom en contact opnemen met de Technische Dienst.
Als het oppervlak van de kookplaat gebarsten is moet u
het apparaat uitschakelen om te voorkomen dat u een
elektrische schok krijgt.
Voorkom dat elektrische snoeren van andere kleine
keukenapparaten op warme delen van de kookplaat
terechtkomen.
Vergeet niet dat de temperatuur in het kookgedeelte
aanzienlijk hoog blijft tot minstens 30 minuten nadat u
het uitschakelt. De resterende warmte wordt aangeduid
door een aanwijzer (zie Starten en gebruik).
Houd voorwerpen die kunnen smelten op afstand van de
kookplaat, zoals bv. plastic, aluminium of
suikerhoudende etenswaren. Let vooral op plastic of
aluminium verpakkingen en folie: als u ze op het nog
warme of lauwe kookvlak neerlegt, kunt u zware schade
aanrichten.
Richt de handvaten van de pannen altijd naar de
binnenzijde van de kookplaat zodat u er niet per ongeluk
tegenaan stoot.
Trek de stekker nooit uit het stopcontact door aan het
snoer te trekken, maar altijd door de stekker beet te
pakken.
Maak de oven niet schoon of voer geen onderhoud uit
als de stekker nog in het stopcontact zit.
Plaats geen metalen voorwerpen (messen, lepels,
deksels enz.) op de kookplaat aangezien zij heet
kunnen worden.
Controleer altijd dat de knoppen in de stand staan als
het apparaat niet gebruikt wordt.
Trek nooit de stekker aan het snoer uit het stopcontact,
maar pak altijd de stekker direct beet.
Maak het apparaat niet schoon of voer geen onderhoud
uit als de stekker nog in het stopcontact zit.
Probeer in geval van storingen nooit zelf de interne
mechanismen van het apparaat te repareren. Neem
contact op met de Technische Dienst.
Plaats geen zware voorwerpen op de open ovendeur.
Dit apparaat mag niet worden gebruikt door personen
(kinderen inbegrepen) met een beperkt lichamelijk,
sensorieel of geestelijk vermogen of personen die niet
de nodige ervaring of kennis hebben met het apparaat,
tenzij onder toezicht van een persoon die
verantwoordelijk is voor hun veiligheid of nadat hun is
uitgelegd hoe het apparaat werkt.
Voorkom dat kinderen met het apparaat spelen.
Kijk nooit direct in het halogeenlicht.
Als het fornuis op een voetstuk wordt geplaatst moet u
er voor zorgen dat het er niet af kan schuiven.
Afvalverwijdering
Het verwijderen van het verpakkingsmateriaal: houdt u
aan de plaatselijke normen zodat het materiaal
hergebruikt kan worden.
De Europese richtlijn 2002/96/EG, betreffende
afgedankte elektrische en elektronische apparatuur
(AEEA), voorziet dat huishoudelijke apparatuur niet met
het normale afval mag worden meegegeven. De
verwijderde apparaten moeten apart worden opgehaald
om het terugwinnen en recyclen van de materialen
waaruit ze bestaan te optimaliseren en te voorkomen dat
er eventuele schade voortvloeit voor de gezondheid en
het milieu. Het symbool van de afvalemmer met een
kruis staat op alle producten om de consument eraan te
herinneren dat dit gescheiden afval is.
Om meer informatie te verkrijgen betreffende een juiste
verwijdering van huishoudapparaten kan de consument
zich richten tot de gemeentelijke reinigingsdienst of de
verkopers.
Energiebesparing en milieubehoud
Door de oven te gebruiken vanaf het late middaguur tot
aan de vroege ochtend zorgt u ervoor dat de
elektriciteitscentrales minder worden belast tijdens het
spitsuur. De optie waarmee u programmas
programmeert, in het bijzonder de uitgestelde start (zie
Programmas) kunnen u hierbij helpen.
Houd bij de functies DRAAISPIT en ROOSTEREN altijd
de ovendeur dicht: u bereikt betere kookresultaten en
een aanzienlijke energiebesparing (circa 10%).
Houd de afdichtingen altijd schoon zodat ze goed
aansluiten op de deur en er geen hitte vrij kan komen.

54
NL
De elektrische stroom afsluiten
Sluit altijd eerst de elektrische stroom af voordat u
tot enige handeling overgaat.
Reinigen van het apparaat
Gebruik nooit stoom- of hogedrukreinigers voor het
reinigen van het apparaat.
Reinig het glas van de deur met een spons en
niet schurende producten. Droog met een zachte
doek. Gebruik geen ruwe schurende materialen of
scherpe schrapertjes die het oppervlak zouden
kunnen krassen waardoor als gevolg het glas zou
kunnen barsten.
De buitenkant, dus zowel het email en het roestvrij
staal als de rubberen afdichtingen, kunnen met
een spons en een sopje worden afgenomen. Als
de vlekken moeilijk te verwijderen zijn, kunt u een
speciaal reinigingsmiddel gebruiken. Spoel en
droog het na het schoonmaken goed af. Gebruik
geen schuurmiddelen of bijtende producten.
De binnenkant van de oven kunt u het beste
direct na gebruik schoonmaken, als hij nog lauw
is. Gebruik warm water en een
schoonmaakmiddel, spoel vervolgens af en droog
met een zachte doek. Gebruik geen
schuurmiddelen.
De accessoires kunnen gewoon worden
afgewassen (eventueel ook in de vaatwasser).
Het bedieningspaneel moet worden gereinigd met
een niet schurende spons of een zachte doek.
Roestvrij staal kan vlekken vertonen als er langere
tijd kalkhoudend water of fosforhoudende
schoonmaakmiddelen op hebben gelegen. We
raden u dus aan alles goed af te spoelen en te
drogen.
Het controleren van de afdichtingen van de oven
Controleer regelmatig de staat van de afdichtingen
rondom de ovendeur. In het geval de afdichting
beschadigd is, dient u zich tot de dichtstbijzijnde
Erkende Servicedienst te wenden. Gebruik de oven
niet voordat de reparatie is uitgevoerd.
Vervangen van het ovenlampje
Voor het
vervangen van het
ovenlampje:
1. Verwijder het
glazen
lampenkapje met
behulp van een
schroevendraaier.
2. Schroef het lampje los en vervang het met
eenzelfde soort lampje: vermogen 15 W, fitting E 14.
Zet het deksel weer op zijn plaats en let erop dat de
afdichting goed is bevestigd (zie afbeelding).
Het reinigen van de glaskeramische
kookplaat
Vermijd het gebruik van schuurmiddelen of bijtende
middelen, zoals vlekkenmiddelen en
roestverwijderende producten, schoonmaakmiddelen
in poedervorm of schuursponzen: deze kunnen het
oppervlak onherstelbaar krassen.
Voor normaal onderhoud moet u de kookplaat met
een vochtige spons reinigen en afdrogen met
keukenpapier.
Als de plaat erg vuil is moet hij worden
schoongemaakt met een speciaal middel voor
keramiekplaten. Daarna moet u hem afspoelen en
afdrogen.
Voor het verwijderen van hardnekkig vuil kunt u
een hiervoor bestemd schrapertje gebruiken. Doe
dit zo snel mogelijk zonder te wachten tot het
apparaat koud is geworden, om het hard worden
van de resten te vermijden Uitstekende resultaten
kunnen ook worden bereikt met een speciaal
roestvrij staalwolsponsje voor keramiekplaten in
een sopje gedoopt.
Als er op de kookplaat onverhoopt voorwerpen of
plastic materiaal of suiker zouden smelten, moet
u ze onmiddellijk met het schrapertje verwijderen
zolang het oppervlak nog warm is.
Als de plaat is schoongemaakt, kan hij worden
behandeld met een speciaal product voor
onderhoud en bescherming: het onzichtbare
laagje dat dit product achterlaat beschermt de
plaat in het geval er iets overkookt. Dit soort
handelingen moeten worden uitgevoerd als de
plaat lauw of koud is.
Vergeet niet de kookplaat altijd met schoon water
af te spoelen en goed af te drogen: restjes
schoonmaakmiddel kunnen de volgende keer dat
u kookt aankoeken.
Speciale producten voor het
reinigen van keramisch glas
Waar het te
krijgen is
Radeermesje of scheermesje Hobby-shop en
Ijzerhandel
Stahl-Fix
SWISSCLEANER
WK TOP
Andere producten voor
keramisch glas
Huishoudwinkel
Doe-het-zelf winkel
Ijzerhandel
Supermarkt
Onderhoud en verzorging
* Slechts op enkele modellen aanwezig.
Deksel
Afdichting
Lamp
Holte

NL
55
Automatische reiniging PYROLYSE
Het programma PYROLYSE brengt de
oventemperatuur op 500°C om het pyrolyseproces
(ofwel het verbranden van voedselrestjes) te starten.
Het vuil wordt letterlijk as.
Gedurende de automatische reiniging kunnen de
oppervlakken zeer heet worden: houd kinderen op
een afstand. Door de ovendeur heen kunt u zien dat
bepaalde deeltjes oplichten: dit is een plotselinge
verbranding, hetgeen een absoluut normaal
verschijnsel is dat geen enkel gevaar met zich mee
brengt.
Voor het activeren van de PYROLYSE:
verwijder met een natte spons het ergste vuil uit
de oven. Gebruik geen schoonmaakmiddelen;
haal alle accessoires uit de oven;
laat geen keukendoeken of pannenlappen aan het
handvat hangen.
zet de PROGRAMMAKNOP op 0
Als de oven te heet is kan het gebeuren dat de
pyrolyse niet start. Wacht tot de oven is afgekoeld.
Het programma zal alleen van start gaan als de
ovendeur gesloten is.
Om de reinigingscyclus PYROLYSE te activeren
drukt u circa 4 seconden op de toets . Met de
knop INSTELLEN TIJDEN kunt u het gewenste
reinigingsniveau kiezen met een vooringestelde en
niet wijzigbare tijdsduur:
1. Economisch (ECO): draai de knop richting -.
Duur 1 uur;
2. Normaal (NOR): beginniveau. Duur 1 uur en 30
minuten;
3. Intensief (INT): draai de knop richting +. Duur 2
uur.
4. Druk op de toets om te bevestigen.
Zoals voor een normaal kookprogramma is het ook
voor de PYROLYSE cyclus mogelijk een einde te
programmeren (zie Programmeren van het einde van
de automatische reiniging).
Veiligheidsmechanismen
het verlichte symbool op het display geeft
aan dat de ovendeur automatisch is geblokkeerd
omdat de temperatuur zeer hoog is geworden;
het symbool geeft aan dat op elk
willekeurig moment dat u op de toets drukt u
de reinigingscyclus kunt annuleren;
als er iets onverwachts of vreemds gebeurt zal de
verwarming worden onderbroken;
als de deur geblokkeerd is kunnen de tijdsduur en
de eindtijd van de cyclus niet meer veranderd
worden.
Het einde van de automatische reiniging
programmeren
1. Druk op de toets totdat het symbool en
de twee cijfers op het DISPLAY beginnen te
knipperen;
2. draai aan de knop INSTELLEN TIJDEN richting de
+ en de - om de uren in te stellen;
3. druk nogmaals op de toets totdat de andere
twee cijfers op het DISPLAY beginnen te knipperen;
4. draai aan de knop INSTELLEN TIJDEN richting de
+ en de - om de minuten in te stellen;
5. druk nogmaals op de toets om te bevestigen.
6. als de ingestelde tijd is verstreken verschijnt op
het DISPLAY het woord END en hoort u een
geluidssignaal.
B.v.: het is 9:00 uur, u kiest het Economische
niveau van PYROLYSE met een vooringestelde
tijd van 1 uur. U programmeert 12:30 als eindtijd.
Het programma zal automatisch om 11:30
beginnen.
De symbolen en gaan aan om aan te geven
dat een programmering is uitgevoerd. Op het DISPLAY
verschijnen om de beurt de eindtijd en de duur van
de PYROLYSE.
Na de automatische reiniging
De ovendeur kan pas worden geopend als de
temperatuur tot op een acceptabel niveau is gezakt. U
zult nu wat wit poeder waarnemen op de bodem en op
de wanden van de oven: verwijder dit met een natte
spons als de oven is afgekoeld. Als u wilt profiteren
van de overgebleven warmte van de oven om te gaan
koken, kunt u het witte poeder rustig laten liggen: het
levert geen enkel gevaar op voor de gerechten die u
wilt gaan koken.

56
NL
Servicedienst
Belangrijk:
Het apparaat is voorzien van een automatisch diagnostisch systeem dat eventuele storingen opspoort. Deze
kunt u op het display aflezen met berichten zoals: F gevolgd door enkele nummers.
In deze gevallen moet u de technische dienst inschakelen.
Wendt u nooit tot niet erkende monteurs.
Dit dient u door te geven:
Het soort storing;
Het model apparaat (Mod.)
Het serienummer (S/N)
Deze informatie bevindt zich op het typeplaatje op het apparaat.

58
DE
Bewahren Sie diese Bedienungsanleitung bitte sorgfältig
auf, damit Sie sie jederzeit zu Rate ziehen können. Sorgen
Sie dafür, dass sie im Falle eines Verkaufs, einer
Übergabe oder eines Umzugs das Gerät stets begleitet.
Lesen Sie bitte die nachfolgenden Hinweise aufmerksam
durch: sie liefern wichtige Informationen hinsichtlich der
Installation, des Gebrauchs und der Sicherheit.
Die Installation des Gerätes ist gemäß den vorliegenden
Anweisungen von Fachpersonal durchzuführen.
Jeder beliebige Eingriff zur Einstellung oder Wartung darf
nur dann vorgenommen werden, wenn der Herd zuvor von
der Stromversorgung getrennt wurde.
Aufstellung und Ausrichtung
Das Gerät kann neben Schränken installiert werden,
deren Höhe die der Kochfläche nicht überschreitet.
Vergewissern Sie sich, dass die mit der Rückwand des
Herdes in Berührung kommende Wand aus nicht
entzündbarem Material beschaffen und wärmeresistent ist
(T 90°C).
Beachten Sie Folgendes zur korrekten Installation des
Gerätes:
Das Gerät kann in der Küche, im Esszimmer oder in
einer Einzimmerwohnung (jedoch nicht im Bad)
installiert werden.
Ist die Kochfläche des Herdes höher als die der
Schränke, sind diese in einem Mindestabstand von
600 mm vom Gerät aufzustellen.
Sollte der Herd unter einem Hängeschrank installiert
werden, ist letzterer in einem Mindestabstand von 420
mm von der Arbeitsfläche anzubringen.
Sollten die
Hängeschränke aus
entzündbarem Material
geschaffen sein, muss
der Abstand 700 mm
betragen (siehe
Abbildung).
Bringen Sie keine
Vorhänge hinter dem Herd
oder in einem
Seitenabstand von
weniger als 200 mm an.
Eventuelle Dunstabzugshauben sind gemäß den in den
Bedienungsanleitungen der Dunstabzugshaube
aufgeführten Anweisungen zu installieren.
Nivellieren
Sollte es erforderlich sein, das
Gerät eben auszurichten,
schrauben Sie die mitgelieferten,
höhenverstellbaren Stellfüße an
den dafür in den Ecken des
Herdbodens vorgesehenen
Stellen ein (siehe Abbildung).
Die Stellfüße* werden unter dem
Herdboden eingesteckt.
Elektroanschluss
Verlegen des Netzkabels
Öffnen des Klemmengehäuses:
Heben Sie unter Zuhilfenahme eines Schraubenziehers
die seitlichen Zungen des Klemmengehäusedeckels
an.
Ziehen Sie den Deckel
des Klemmengehäuses
ab.
Verlegen Sie nun das Versorgungskabel wie folgt:
Schrauben Sie die Schraube der Kabelklemme sowie
die der Kontakte aus.
Die Brücken sind werkseitig für einen 230V-
Einphasenstrom-Anschluss vorgesehen (siehe Abbildung)
NL
230V 1N~
H07RN-F 3x4 CEI-UNEL 35364
1
3
2
4
5
Für den elektrischen Anschluss gemäß der
Abbildungen verwenden Sie die im Gehäuse (siehe
Abbildung Bezug "P") befindlichen Brücken
Installation
DUNSTABZUGSHAUBE
420
Min.
Minuten
650
mm mit Dunstabzugshaube
Minuten
700
mm ohne Dunstabzugshaube
mm.
600
Min. mm.
420
Min. mm.

DE
59
N
L2
L1
L3
P
NL2L1
400V 2N~
H05RR-F 4x2.5 CEI-UNEL 35363
1
3
2
4
5
NL3L1L2
400V 3N~
H05RR-F 5x2.5 CEI-UNEL 35363
1
3
2
4
5
Befestigen Sie das Versorgungskabel in der
entsprechenden Kabelklemme und schließen Sie den
Deckel.
Anschluss des Versorgungskabels an
das Stromnetz
Versehen Sie das Kabel mit einem Normstecker für die auf
dem am Gerät angebrachten Typenschild angegebene
Belastung (siehe Tabelle Technische Daten).
Wird das Gerät direkt an das Stromnetz angeschlossen,
ist zwischen Stromnetz und Gerät ein allpoliger, der Last
und den inländischen Vorschriften entsprechender
Schalter mit einer Mindestöffnung der Kontakte von 3 mm
zwischenzuschalten. (Der Erdleiter darf vom Schalter nicht
unterbrochen werden.) Das Versorgungskabel muss so
verlegt werden, dass es an keiner Stelle einer Temperatur
ausgesetzt ist, die 50 °C über der Raumtemperatur liegt.
Vor dem Anschluss stellen Sie bitte sicher, dass:
die Netzsteckdose geerdet ist und den gesetzlichen
Bestimmungen entspricht.
die Netzsteckdose für die auf dem Typenschild
angegebene maximale Leistungsaufnahme des
Gerätes ausgelegt ist;
die Netzspannung im Bereich der auf dem Typenschild
angegebenen Werte liegt;
die Steckdose mit dem Netzstecker kompatibel ist. Die
Steckdose oder den Netzstecker anderenfalls
austauschen. Keine Verlängerungen und
Mehrfachsteckdosen verwenden.
Das Netzkabel und die Steckdose müssen bei
installiertem Gerät leicht zugänglich sein.
Das Netzkabel darf nicht gebogen oder eingeklemmt
werden.
Das Netzkabel muss regelmäßig kontrolliert werden und
darf nur durch autorisiertes Fachpersonal ausgetauscht
werden.
Der Hersteller weist jegliche Verantwortung zurück,
falls diese Vorschriften nicht eingehalten werden
sollten.
* Nur an einigen Modellen
TABELLE DER EIGENSCHAFTEN
Backofen-Abmessungen
(HxBxT): 32x43,5x40 cm
Nutzvolumen Liter 56
Nutzabmessungen des
Geschirrwagens:
Breite 42 cm
Tiefe 44 cm
Höhe 8,5 cm
Brenner: einstellbar auf alle auf dem
Typenschild genannten Gasarten
Versorgungsspannung
und -frequenz: siehe Typenschild
Glaskeramik- Kochfeld
Vordere linke Kochstelle
Hintere linke Kochstelle
Vordere rechte Kochstelle
Hintere rechte Kochstelle
Max. Verbrauch d.
Glaskeramik-Kochfeldes
1700W
1200W
2200W
1200W
6300W
ENERGY LABEL
Richtlinie 2002/40/EG
Energieetikettierung für
Elektrobacköfen Norm EN 50304
Energieverbrauch Natürliche
Konvektion Heizfunktion:
Ober-Unterhitze
Energieverbrauch Umluft
Heizfunktion: Braten
EG-Richtlinien: EG-Richtlinien:
2006/95/EWG vom 12.12.06
(Niederspannung) und
nachfolgende Änderungen -
89/336/EWG vom 03.05.89
(elektromagnetische Verträglichkeit)
und nachfolgende Änderungen
90/369/EWG vom 29.06.90 (Gas)
und nachfolgende Änderungen-
93/68/EWG vom 22.07.93 und
nachfolgende Änderungen -
2002/96 /EG

60
DE
Beschreibung des Gerätes
Geräteansicht
Bedienfeld
* Nur an einigen Modellen
Reglerknopf
ELEKTROPLATTE
Reglerknopf
PROGRAMME
Drehknopf
THERMOSTAT/
ZEITEINSTELLUNG DISPLAY
Taste
ZEITEINSTELLUNG
Kontrolleuchte
ELEKTROPLATTE
Taste
PYROLYSE
Display
Symboltasten AUTOMATIK-
GARPROGRAMME
Symbol PROGRAMME
NIEDRIGE TEMPERATUR
Symbol
GARENDE
Symbol
UHR
Digit-Anzeige TEMPERATUR
und ZEITEN
Symbol
DAUER
Symbol
KURZZEITWECKER
Vorheizanzeige
Symbol
STOPP
Anzeige
TÜRSPERRE
Glaskeramik-
Kochfeld
Bedienfeld
Einschub BACKOFENROST
Einschub FETTPFANNE
GLEITFÜHRUNGEN
der Einschübe
Einschubhöhe 3
Einschubhöhe 2
Einschubhöhe 1
Höhenverstellbarer Stellfuß Höhenverstellbarer Stellfuß
Einschubhöhe 5
Einschubhöhe 4

DE
61
Inbetriebsetzung
und Gebrauch
Uhr einstellen
Die Uhr kann bei ausgeschaltetem und auch bei
eingeschaltetem Backofen eingestellt werden, jedoch
nicht, wenn das Ende einer Garzeit programmiert wurde.
1. Die Taste wiederholt drücken, bis auf dem DISPLAY
das Symbol und die ersten zwei numerischen
Digitalanzeigen blinken.
2. Drehen Sie den Knopf ZEITEINSTELLUNG in Richtung
+ und - , um die Stunden einzustellen.
3. Drücken Sie erneut die Taste , bis auf dem DISPLAY
die nächsten zwei Digit-Anzeigen blinken.
4. Drehen Sie den Knopf ZEITEINSTELLUNG in Richtung
+ und - , um die Minuten einzustellen.
5. Drücken Sie erneut die Taste , um die Eingabe zu
bestätigen.
Einstellung des Kurzzeitweckers
Diese Funktion beeinflusst weder den Garvorgang, noch
den Gebrauch des Backofens. Sie weist ausschließlich
durch ein akustisches Signal darauf hin, dass die
eingestellten Minuten abgelaufen sind.
1. Die Taste wiederholt drücken, bis auf dem DISPLAY
das Symbol und die drei numerischen Digitalanzeigen
blinken.
2. Drehen Sie den Knopf ZEITEINSTELLUNG in Richtung
+ und - , um die Minuten einzustellen.
3. Drücken Sie erneut die Taste , um die Eingabe zu
bestätigen.
Daraufhin wird das Count-down angezeigt, nach dessen
Ablauf ein akustisches Signal ertönt.
Gebrauch des Backofens
Vor Gebrauch müssen unbedingt die seitlich am Gerät
angebrachten Kunststofffilme abgenommen werden.
Bei erstmaliger Inbetriebnahme sollte der leere Backofen
für etwa eine Stunde bei Höchsttemperatur und
geschlossener Backofentür in Betrieb genommen werden.
Das Gerät danach ausschalten, die Backofentür öffnen
und die Küche lüften. Der bei diesem Vorgang erzeugte
Geruch entsteht durch die Verflüchtigung der zum Schutz
des Backofens aufgetragenen Stoffe.
1. Das gewünschte Garprogramm über den Drehschalter
PROGRAMME auswählen.
2. Der Backofen schaltet auf Vorheizen. Die Vorheiz-
Anzeige leuchtet auf.
Die Temperatur kann mithilfe des Drehschalters
THERMOSTAT abgeändert werden.
3. Sobald die Vorheizzeit-Anzeige erlischt, ertönt ein
akustisches Signal. Die Vorheizzeit ist abgelaufen: Gargut
in den Backofen geben.
4. Während des Garvorgangs sind folgende Einstellungen
jederzeit möglich:
- Ändern des Garprogramms über den Drehschalter
PROGRAMME.
- Ändern der Temperatur über den Drehschalter
THERMOSTAT.
- Programmieren der Dauer und des Garendes (siehe
Garprogramme).
- Unterbrechen des Garvorgangs durch das Drehen des
Drehschalters PROGRAMME auf Position 0.
5. Die Garzeitdauer kann verändert werden (siehe
Garprogramme).
6. Das Gerät ist mit einem System ausgestattet, das im
Falle eines Stromausfalls das Programm wieder an dem
Punkt aktiviert, an dem es unterbrochen wurde (wenn die
Temperatur im Backofen nicht zu stark abgesunken ist).
Noch auszuführende, vorprogrammierte Vorgänge werden
hingegen bei der Wiederherstellung der Stromversorgung
nicht berücksichtigt und sind neu zu programmieren.
Bei den Programmen BRATEN ist keine Vorheizphase
vorgesehen.
Zur Vermeidung einer Beschädigung der Beschichtung
nie Kochgeschirr auf dem Backofenboden positionieren.
Das Kochgeschirr stets auf dem mit dem Gerät
gelieferten Backofenrost abstellen.
Kühlluftgebläse
Um die Temperaturen an den äußeren Teilen des
Backofens abzusenken, wird mit Hilfe eines
Kühlluftgebläses ein Luftstrahl erzeugt, der zwischen dem
Bedienfeld und der Backofentür austritt. In der
Anfangsphase eines PYROLYSE-Programms arbeitet das
Gebläse auf einer niedrigen Geschwindigkeitsstufe.
Nach Abschluss des Garvorgangs bleibt das Gebläse
solange in Betrieb, bis der Backofen ausreichend
abgekühlt ist.
Backofenbeleuchtung
Bei ausgeschaltetem Backofen kann das Backofenlicht
jederzeit durch das Öffnen der Backofentür eingeschaltet
werden.
* Nur an einigen Modellen

62
DE
Manuelle Garprogramme
Alle Programme verfügen über eine voreingestellte
Gartemperatur. Diese kann manuell auf einen beliebigen Wert
zwischen 40 °C und 250 °C eingestellt werden.
Bei dem Programm DREHSPIESS ist der voreingestellte Wert
270°C.
Programm TRADITIONELL
Bei dieser traditionellen Garart verwenden Sie bitte nur eine
Einschubhöhe.
Programm ECHTE HEISSLUFT
Da die Hitze im gesamten Backofen konstant ist, werden die
Speisen sehr gleichmäßig gegart und gebräunt. Es kann auf
maximal zwei Einschubhöhen gleichzeitig gegart werden.
Programm BRATEN
Die einseitige Strahlungshitze wird im Inneren des Backofens
mit Umluft kombiniert.
Hierdurch wird ein Verbrennen der Speiseoberflächen
verhindert und die Hitze dringt tiefer in die Speisen ein. Diese
Garart bei geschlossener Backofentür durchführen.
Programma DREHSPIESS
Diese Funktion wurde für das Garen mit dem Drehspieß
optimiert. Garen Sie bei geschlossener Backofentür.
Programme NIEDRIGE TEMPERATUR
Diese Programme eignen sich zum Gären von Hefeteigen, zum
Auftauen von Gefriergut, zur Bereitung von Yoghurt, zum mehr
oder weniger schnellen Aufheizen, zum langsamen Garen bei
niedriger Temperatur. Folgende Temperaturen können
eingestellt werden: 40, 65, 90°C.
Drehspieß
Zur Inbetriebnahme des
Drehspießes (siehe
Abbildung) verfahren Sie
wie folgt:
1. Schieben Sie die
Fettpfanne auf
Einschubhöhe 1 ein;
2. Schieben Sie die
Drehspießhalterung auf
Einschubhöhe 3 ein und
stecken Sie den Spieß in die entsprechende Öffnung der
Backofenrückwand;
3. Setzen Sie den Drehspieß durch Wahl der Symboltaste
in Betrieb.
Ist das Programm eingeschaltet, stoppt der Drehspieß, wenn
die Tür geöffnet wird.
Automatik-Garprogramme
Temperatur und Garzeitdauer sind vorbestimmt
und durch das System C.O.P.® (Cottura Ottimale
Programmata Programmierte optimale
Garzeit) unveränderlich. Somit wird ein perfektes Ergebnis
garantiert. Der Backvorgang wird automatisch unterbrochen;
der Backofen signalisiert, wenn das Backgut gar ist. Die
Garzeit kann um einige Minuten verändert werden, wie
nachfolgend in der Beschreibung der einzelnen Funktionen
angegeben.
Programm PIZZA
Benutzen Sie diese Funktion zum Backen von Pizzen.
Befolgen Sie das angeführte Rezept sowie die Details. Nur die
Gardauer kann um -5/+5 Minuten verändert werden.
Für optimale Ergebnisse befolgen Sie bitte aufmerksam die
nachfolgend aufgeführten Anweisungen:
Halten Sie sich bitte an das Rezept.
Der Teig muss zwischen 500 g und 700 g wiegen.
fetten Sie die Fettpfanne und die Backbleche leicht ein.
Schieben Sie das Gargut in den kalten Ofen. Möchte man das
Gargut in den vorgeheizten Ofen geben, nachdem er für eine
andere Zubereitung bereits hohe Temperaturen erreicht hat,
dann zeigt das Display den Hinweis Hot bis die Temperatur
des Backofens die 120° erreicht hat. Nun kann die Pizza in
den Ofen gegeben werden.
PIZZAREZEPT:
1 Backblech, untere Einschubhöhe, bei kaltem oder
vorgeheiztem Backofen
Rezept für 3 Pizzen mit etwa 550 g: 1000 g Mehl, 500 g
Wasser, 20 g Salz, 20 g Zucker, 10 cl Olivenöl, 20 g frische
Hefe (oder zwei Tütchen Instanthefe)
Aufgehen bei Raumtemperatur: 1 Stunde oder manuelle
Betriebsart NIEDRIGE TEMPERATUR bei 40° und etwa 30/
45 Minuten gehen lassen.
Schieben Sie das Gargut in den kalten Ofen.
Starten Sie das Garprogramm PIZZA.
Programm BROT
Für optimale Ergebnisse befolgen Sie bitte aufmerksam die
nachfolgend aufgeführten Anweisungen:
Halten Sie sich bitte an das Rezept.
Berücksichtigen Sie das Maximalgewicht pro
Backblech.
Vergessen Sie bitte nicht, 1 dl kaltes Wasser
auf die auf Einschubhöhe 5 eingeschobene
Fettpfanne zu geben.
Schieben Sie das Gargut in den kalten Ofen. Möchte man das
Gargut in den vorgeheizten Ofen geben, nachdem er für eine
andere Zubereitung bereits hohe Temperaturen erreicht hat,
dann zeigt das Display den Hinweis Hot bis die Temperatur
des Backofens die 40° erreicht hat. Nun kann das Brot in den
Ofen gegeben werden.
Specyfikacje produktu
| Marka: | Scholtes |
| Kategoria: | piekarnik |
| Model: | CI 66 HW |
Potrzebujesz pomocy?
Jeśli potrzebujesz pomocy z Scholtes CI 66 HW, zadaj pytanie poniżej, a inni użytkownicy Ci odpowiedzą
Instrukcje piekarnik Scholtes

1 Kwietnia 2025
31 Marca 2025
28 Marca 2025
28 Marca 2025
28 Marca 2025
8 Marca 2025
4 Marca 2025
1 Lutego 2025
31 Stycznia 2025
28 Stycznia 2025
Instrukcje piekarnik
- piekarnik Bauknecht
- piekarnik Ikea
- piekarnik Samsung
- piekarnik Bertazzoni
- piekarnik Electrolux
- piekarnik DeLonghi
- piekarnik AEG
- piekarnik Balay
- piekarnik Beko
- piekarnik Teka
- piekarnik LG
- piekarnik Küppersbusch
- piekarnik Smeg
- piekarnik Götze & Jensen
- piekarnik Gram
- piekarnik Caso
- piekarnik Amica
- piekarnik Gorenje
- piekarnik Etna
- piekarnik LERAN
- piekarnik Sharp
- piekarnik Cookology
- piekarnik Russell Hobbs
- piekarnik Sage
- piekarnik Tefal
- piekarnik Philips
- piekarnik Livoo
- piekarnik SilverCrest
- piekarnik Dometic
- piekarnik Bosch
- piekarnik Xblitz
- piekarnik Dash
- piekarnik Candy
- piekarnik Whirlpool
- piekarnik Ferroli
- piekarnik Cramer
- piekarnik Miele
- piekarnik Brentwood
- piekarnik Midea
- piekarnik Lamona
- piekarnik Severin
- piekarnik Hisense
- piekarnik Berg
- piekarnik Infiniton
- piekarnik Panasonic
- piekarnik Liebherr
- piekarnik Nedis
- piekarnik Medion
- piekarnik Baumatic
- piekarnik Black & Decker
- piekarnik OK
- piekarnik Adler
- piekarnik Hoover
- piekarnik Toshiba
- piekarnik Tesla
- piekarnik Ribimex
- piekarnik Westinghouse
- piekarnik Rinnai
- piekarnik Hendi
- piekarnik Quigg
- piekarnik Romo
- piekarnik Maytag
- piekarnik Domo
- piekarnik GE
- piekarnik Ardes
- piekarnik Taurus
- piekarnik Orbegozo
- piekarnik Blaupunkt
- piekarnik Brandt
- piekarnik Vivax
- piekarnik Siemens
- piekarnik Ambiano
- piekarnik Danby
- piekarnik Grundig
- piekarnik Haier
- piekarnik KKT Kolbe
- piekarnik Cylinda
- piekarnik Jocel
- piekarnik Hyundai
- piekarnik Silverline
- piekarnik Blomberg
- piekarnik Bimar
- piekarnik Rowenta
- piekarnik Brother
- piekarnik Mesko
- piekarnik Husqvarna
- piekarnik BLOW
- piekarnik Concept
- piekarnik Fisher & Paykel
- piekarnik Tripp Lite
- piekarnik ECG
- piekarnik Indesit
- piekarnik Ilve
- piekarnik Unold
- piekarnik Viking
- piekarnik Nodor
- piekarnik CATA
- piekarnik Cambridge
- piekarnik Fiap
- piekarnik Hotpoint
- piekarnik Kenwood
- piekarnik V-Zug
- piekarnik Trisa
- piekarnik Ariston Thermo
- piekarnik Zelmer
- piekarnik Mestic
- piekarnik PKM
- piekarnik Ninja
- piekarnik Cuisinart
- piekarnik Unox
- piekarnik Wilfa
- piekarnik Thor
- piekarnik Amana
- piekarnik Dacor
- piekarnik Hotpoint Ariston
- piekarnik Krups
- piekarnik Furrion
- piekarnik Bomann
- piekarnik Moulinex
- piekarnik Ursus Trotter
- piekarnik PowerXL
- piekarnik Emerio
- piekarnik Create
- piekarnik Biltema
- piekarnik H.Koenig
- piekarnik InAlto
- piekarnik Meireles
- piekarnik Melissa
- piekarnik Schneider
- piekarnik Enders
- piekarnik Thetford
- piekarnik Stirling
- piekarnik MPM
- piekarnik OneConcept
- piekarnik CDA
- piekarnik Sam Cook
- piekarnik Philco
- piekarnik Neff
- piekarnik Qilive
- piekarnik Corbero
- piekarnik Morphy Richards
- piekarnik Zanussi
- piekarnik Bourgini
- piekarnik Instant
- piekarnik Ravanson
- piekarnik Thermex
- piekarnik Fagor
- piekarnik Redmond
- piekarnik Koenic
- piekarnik Everdure
- piekarnik Thomson
- piekarnik Bröhn
- piekarnik Izzy
- piekarnik Ardo
- piekarnik WMF
- piekarnik ProfiCook
- piekarnik Klarstein
- piekarnik BEEM
- piekarnik Coyote
- piekarnik Güde
- piekarnik Arendo
- piekarnik Witt
- piekarnik Manta
- piekarnik Wolkenstein
- piekarnik Cecotec
- piekarnik Artusi
- piekarnik KitchenAid
- piekarnik AFK
- piekarnik Eta
- piekarnik Camry
- piekarnik Steba
- piekarnik Germanica
- piekarnik Weber
- piekarnik Lenoxx
- piekarnik Qlima
- piekarnik Imperial
- piekarnik Scarlett
- piekarnik Sôlt
- piekarnik Nevir
- piekarnik Navitel
- piekarnik TriStar
- piekarnik Landmann
- piekarnik Exquisit
- piekarnik Bartscher
- piekarnik First Austria
- piekarnik Hestan
- piekarnik Gastroback
- piekarnik GYS
- piekarnik Mitsubishi
- piekarnik Privileg
- piekarnik Dimplex
- piekarnik Aurora
- piekarnik Falmec
- piekarnik Arçelik
- piekarnik Hanseatic
- piekarnik Continental Edison
- piekarnik Delta
- piekarnik Bifinett
- piekarnik Linarie
- piekarnik Maginon
- piekarnik Atag
- piekarnik Rosieres
- piekarnik Franke
- piekarnik DCG
- piekarnik Beautiful
- piekarnik G3 Ferrari
- piekarnik Axis
- piekarnik Sanyo
- piekarnik Westfalia
- piekarnik Hamilton Beach
- piekarnik Gourmetmaxx
- piekarnik Novy
- piekarnik Clatronic
- piekarnik Telefunken
- piekarnik Ferrari
- piekarnik Rommer
- piekarnik Inventum
- piekarnik SVAN
- piekarnik Ariete
- piekarnik IFB
- piekarnik Tepro
- piekarnik TurboTronic
- piekarnik Napoleon
- piekarnik Princess
- piekarnik Innoliving
- piekarnik Sunbeam
- piekarnik Solac
- piekarnik Heller
- piekarnik Euro Appliances
- piekarnik Waring Commercial
- piekarnik Mora
- piekarnik Caple
- piekarnik Duronic
- piekarnik Omega
- piekarnik Comfee
- piekarnik Classique
- piekarnik Bush
- piekarnik New Pol
- piekarnik Kenmore
- piekarnik Kaiser
- piekarnik Breville
- piekarnik BORA
- piekarnik VOX
- piekarnik Insignia
- piekarnik Hiberg
- piekarnik AYA
- piekarnik Pelgrim
- piekarnik Veripart
- piekarnik Esperanza
- piekarnik Chefman
- piekarnik Frilec
- piekarnik Benavent
- piekarnik Element
- piekarnik Tower
- piekarnik Orima
- piekarnik Rex
- piekarnik Kernau
- piekarnik Aspes
- piekarnik Hitachi
- piekarnik Zerowatt
- piekarnik Tracer
- piekarnik Salton
- piekarnik Respekta
- piekarnik Technika
- piekarnik Vedette
- piekarnik Seiki
- piekarnik JennAir
- piekarnik Frigidaire
- piekarnik Galanz
- piekarnik Matrix
- piekarnik Barazza
- piekarnik RCA
- piekarnik Summit
- piekarnik Gemini
- piekarnik Sirius
- piekarnik Foster
- piekarnik Chef
- piekarnik Rommelsbacher
- piekarnik Fulgor Milano
- piekarnik Electroline
- piekarnik Kelvinator
- piekarnik Gaggenau
- piekarnik Sencor
- piekarnik Hobart
- piekarnik Mistral
- piekarnik Elica
- piekarnik Nabo
- piekarnik Avanti
- piekarnik Asko
- piekarnik Kalorik
- piekarnik Binatone
- piekarnik Suntec
- piekarnik Nextbase
- piekarnik Zenith
- piekarnik Flavel
- piekarnik Altus
- piekarnik Esatto
- piekarnik Signature
- piekarnik Daewoo
- piekarnik Capital
- piekarnik Cosori
- piekarnik BlueStar
- piekarnik Consul
- piekarnik BioChef
- piekarnik Porter & Charles
- piekarnik Kunft
- piekarnik Robinhood
- piekarnik Grunkel
- piekarnik Becken
- piekarnik Haeger
- piekarnik Scandomestic
- piekarnik Bizerba
- piekarnik Traeger
- piekarnik Ignis
- piekarnik Guzzanti
- piekarnik Mach
- piekarnik Emilia
- piekarnik Aroma
- piekarnik Edilkamin
- piekarnik Dualit
- piekarnik Comelec
- piekarnik Campart
- piekarnik Belling
- piekarnik De Dietrich
- piekarnik ZLine
- piekarnik Campingaz
- piekarnik Magic Chef
- piekarnik Eurom
- piekarnik Clas Ohlson
- piekarnik Arctic Cooling
- piekarnik Sauber
- piekarnik Smith&Brown
- piekarnik Sogo
- piekarnik George Foreman
- piekarnik Crosley
- piekarnik Nutrichef
- piekarnik Constructa
- piekarnik Proline
- piekarnik Euromaid
- piekarnik Char-Broil
- piekarnik Flama
- piekarnik BLANCO
- piekarnik Emax
- piekarnik Ideal
- piekarnik Scancool
- piekarnik AENO
- piekarnik Thermador
- piekarnik Bass Polska
- piekarnik Finlux
- piekarnik Bestron
- piekarnik Optimum
- piekarnik Atosa
- piekarnik Swan
- piekarnik Zanker
- piekarnik Kluge
- piekarnik Acec
- piekarnik Alpina
- piekarnik Airlux
- piekarnik Aga
- piekarnik Ariston
- piekarnik Techwood
- piekarnik Arthur Martin
- piekarnik Korona
- piekarnik Saturn
- piekarnik Tiger
- piekarnik Progress
- piekarnik Zanussi-electrolux
- piekarnik Tomado
- piekarnik Bellini
- piekarnik Oster
- piekarnik Vestel
- piekarnik Sinbo
- piekarnik Jata
- piekarnik Fritel
- piekarnik Prima
- piekarnik Junker
- piekarnik Outwell
- piekarnik Mabe
- piekarnik Monogram
- piekarnik Iberna
- piekarnik Logik
- piekarnik Valberg
- piekarnik Profilo
- piekarnik Ernesto
- piekarnik Mellerware
- piekarnik Castor
- piekarnik Heinner
- piekarnik Lakeland
- piekarnik Termozeta
- piekarnik Bella
- piekarnik Palson
- piekarnik Eldom
- piekarnik Jocca
- piekarnik Maxxmee
- piekarnik Hoover-Helkama
- piekarnik Juno
- piekarnik Defy
- piekarnik Premium
- piekarnik Blokker
- piekarnik Trebs
- piekarnik Luxor
- piekarnik Nordmende
- piekarnik Rangemaster
- piekarnik Friac
- piekarnik Boretti
- piekarnik Eico
- piekarnik Hansa
- piekarnik Drew & Cole
- piekarnik Kubo
- piekarnik Elba
- piekarnik WLA
- piekarnik SEB
- piekarnik Champion
- piekarnik Everglades
- piekarnik Steel Cucine
- piekarnik Buffalo
- piekarnik Jenn-Air
- piekarnik Limit
- piekarnik Freggia
- piekarnik Listo
- piekarnik Edesa
- piekarnik Ufesa
- piekarnik Milectric
- piekarnik Leonard
- piekarnik Presto
- piekarnik Lofra
- piekarnik Zavor
- piekarnik Laica
- piekarnik New World
- piekarnik Leisure
- piekarnik Kayoba
- piekarnik Bompani
- piekarnik Glem Gas
- piekarnik FriFri
- piekarnik Viva
- piekarnik Nova
- piekarnik M-System
- piekarnik Koblenz
- piekarnik Proctor Silex
- piekarnik Primo
- piekarnik Barbecook
- piekarnik German Pool
- piekarnik Creda
- piekarnik Atlantic
- piekarnik Falcon
- piekarnik Saro
- piekarnik Airforce
- piekarnik Godrej
- piekarnik Konig
- piekarnik Ices
- piekarnik Conrad
- piekarnik Mx Onda
- piekarnik Igenix
- piekarnik Kleenmaid
- piekarnik Essentiel B
- piekarnik RGV
- piekarnik Montiss
- piekarnik Team
- piekarnik Schock
- piekarnik Stoves
- piekarnik Faber
- piekarnik Edy
- piekarnik CaterChef
- piekarnik Kambrook
- piekarnik Parmco
- piekarnik Roadstar
- piekarnik Zephir
- piekarnik Eurotech
- piekarnik Efbe-schott
- piekarnik Cadac
- piekarnik Wolf
- piekarnik Carrefour Home
- piekarnik Equator
- piekarnik Brixton
- piekarnik Vestfrost
- piekarnik Superior
- piekarnik Day
- piekarnik Koenig
- piekarnik Outdoorchef
- piekarnik Smev
- piekarnik Upo
- piekarnik Belion
- piekarnik Nesco
- piekarnik Waves
- piekarnik SIBIR
- piekarnik Coline
- piekarnik White And Brown
- piekarnik Eccotemp
- piekarnik Home Electric
- piekarnik Sauter
- piekarnik Café
- piekarnik ARC
- piekarnik Ellrona
- piekarnik Lynx
- piekarnik Bluesky
- piekarnik Burco
- piekarnik Khind
- piekarnik Tecnolux
- piekarnik Tisira
- piekarnik Micromaxx
- piekarnik Fratelli Onofri
- piekarnik Ronco
- piekarnik Eurochef
- piekarnik Premier
- piekarnik Weasy
- piekarnik Marynen
- piekarnik Opera
- piekarnik Therma
- piekarnik La Germania
- piekarnik Luxell
- piekarnik Krefft
- piekarnik Solitaire
- piekarnik Oranier
- piekarnik Leventi
- piekarnik Orava
- piekarnik Rösle
- piekarnik James
- piekarnik Roadeyes
- piekarnik Jamie Oliver
- piekarnik Globe
- piekarnik Esmaltec
- piekarnik Riviera And Bar
- piekarnik Apelson
- piekarnik Dominox
- piekarnik Thermomate
- piekarnik Melchioni
- piekarnik Fine Dine
- piekarnik Venga
- piekarnik OBU
- piekarnik Rival
- piekarnik Eudora
- piekarnik Thomas
- piekarnik Steelmatic
- piekarnik Supra
- piekarnik Wells
- piekarnik Kucht
- piekarnik Avantco
- piekarnik Kogan
- piekarnik Mibrasa
- piekarnik Vulcan
- piekarnik Lacanche
- piekarnik Emeril Lagasse
- piekarnik Verona
- piekarnik Riviera Bar
- piekarnik Thane
- piekarnik LotusGrill
- piekarnik APW Wyott
- piekarnik Cuckoo
- piekarnik General Electric
- piekarnik MSR
- piekarnik SPT
- piekarnik Pit Boss
- piekarnik Hatco
- piekarnik Elin
- piekarnik High One
- piekarnik Ciarra
- piekarnik WestBend
- piekarnik Companion
- piekarnik XO
- piekarnik NU-VU
- piekarnik Curtiss
- piekarnik Blodgett
- piekarnik Nemco
- piekarnik K&H
- piekarnik Winia
- piekarnik Bakers Pride
- piekarnik Alto-Shaam
- piekarnik TurboChef
- piekarnik Simfer
- piekarnik Firefriend
- piekarnik Merrychef
- piekarnik LAFE
- piekarnik Promis
- piekarnik Inno-Hit
- piekarnik Fisher Paykel
- piekarnik Brock
- piekarnik Arda
- piekarnik Casselin
- piekarnik Girmi
- piekarnik Americana
- piekarnik Petromax
- piekarnik YUNA
- piekarnik Spring USA
- piekarnik Cosmo
- piekarnik Elements
- piekarnik Forge Adour
- piekarnik Chef-Master
- piekarnik UGo
- piekarnik Eltac
- piekarnik Kitchenware
- piekarnik FAURE
- piekarnik Novamatic
- piekarnik VENINI
- piekarnik Buschbeck
- piekarnik Blackstone
- piekarnik BSK
- piekarnik New.Up!
- piekarnik Roller Grill
- piekarnik DPM
- piekarnik Studio
- piekarnik Adora
- piekarnik Sunpentown
- piekarnik Backyard Pro
- piekarnik Brastemp
- piekarnik Royal Catering
- piekarnik BAXTER
- piekarnik Vitrokitchen
- piekarnik Longvie
- piekarnik Gasmate
- piekarnik Arthur Martin-Electrolux
- piekarnik Triomph
- piekarnik PITT
- piekarnik Elektra Bregenz
- piekarnik KB Elements
- piekarnik TZS First Austria
- piekarnik Pyramis
- piekarnik Pando
- piekarnik Wiggo
- piekarnik Nestor Martin-Electrolux
- piekarnik Imarflex
- piekarnik Mayer
- piekarnik Acros
- piekarnik Thermarest
- piekarnik HomeCraft
- piekarnik La Cornue
- piekarnik Master Kitchen
- piekarnik Goldbrunn
- piekarnik Platypus
- piekarnik Yamazen
- piekarnik Masterpro
- piekarnik Fratelli
- piekarnik St George
- piekarnik Helkama
- piekarnik Pitsos
- piekarnik Sheffield
- piekarnik Lacunza
- piekarnik Globe Fire
- piekarnik Radiola
Najnowsze instrukcje dla piekarnik

9 Kwietnia 2025

9 Kwietnia 2025

9 Kwietnia 2025

9 Kwietnia 2025
9 Kwietnia 2025
9 Kwietnia 2025
9 Kwietnia 2025
9 Kwietnia 2025

9 Kwietnia 2025

9 Kwietnia 2025