Instrukcja obsługi Motorola Motosmart Flip XT611
Przeczytaj poniżej 📖 instrukcję obsługi w języku polskim dla Motorola Motosmart Flip XT611 (78 stron) w kategorii smartfon. Ta instrukcja była pomocna dla 15 osób i została oceniona przez 2 użytkowników na średnio 4.5 gwiazdek
Strona 1/78

MOTOROLA XT611
EN


1Congratulations
Congratulations
MOTOROLA XT611
Your MOTOROLA XT611 phone delivers more for your
work and play!
• Search: Touch Search to search across your apps,
contacts, web, and maps—or just enter the address
for a place or a web page.
• Apps: Open Market to download games for fun,
social networking apps to keep in touch (like
Facebook™ or Twitter), or find something else you like
with “Apps” on page 9.
• Touchscreen: Browse the web and pinch-to-zoom on
the touch display in “Web” on page 32.
• Camera: Capture photos and videos with the 5MP
auto-focus camera in “Photos & videos” on page 37.
Note: Some apps and features might not be available in
all countries.
Caution: Before assembling, charging, or using your
phone for the first time, please read the important
safety, regulatory and legal information provided at
the end of the guide.

2Congratulations
More
• Support: Phone updates, PC software, online help
and more at www.motorola.com/support.
• Accessories: Find accessories for your phone at
www.motorola.com/products.

3Your phone
Your phone
the important keys & connectors
To uc chs reen
Volume Keys
C mera a Key
Se ra ch
Key
M ro USB ic
Connector
Menu Key
Touch to open
menu options.
Home Key
B k Keyac
3.5mm
He dset Ja ack
Power/
Press = sleep
Hold = turn off.
Lock Key

5Let’s go
Let’s go
let’s get you up and running
Assemble & charge
Caution:
Please read “Battery Use & Safety
” on page 53.
1Cover off 2SIM in
3microSD in (may
already be inserted)
4Battery in
5Cover on 6Charge up
3H

6Let’s go
Set up & go
Note: This phone supports apps and services that use a
lot of data, so make sure your data plan meets your
needs. Contact your service provider for details.
When you turn on your new phone, you can create or
enter a Google™ account so that you can download
apps, use Gmail™, and much more:
1Press and hold
Power/Lock key to
turn on your phone.
2Touch the Android™
image to begin setup.
3Touch a button to Create a Google account, Sign in
with one you have, or Skip.
You can log into your account from a computer at
accounts.google.com.
4Enter details to create or sign into your account.
When your phone confirms the account, it shows
account sync options.
• To change whether your phone shows the Google
account’s contacts, Gmail™, and calendar, touch
the Google account name.
• To add another account, touch Add account. For
details, see “Email” on page 23.
•To exit setup touch Home .
Power/
Lock Key

7Let’s go
If your phone cannot connect, you can touch Menu
> Wireless & networks > Wi-Fi settings to change
mobile network settings.
flip closed
You can access some of the features on your phone,
such as answering an incoming call, playing music or
viewing a message, with the flip closed.
To lock the screen when the flip is closed, touch
Menu > Settings > Display > Close flip to lock
screen.
sleep & wake up
Your screen sleeps when you hold it to your ear during a
call, or when it is inactive. To change the sleep delay,
touch Menu > Settings > Display > Screen timeout.
Keys
Use your phone’s keys to navigate and open options at
any time.
Press the volume keys to change the ringer volume (in
the home screen), or the earpiece volume (during a call).
From any screen, press the camera key on the right side
of the phone to open the camera.
Touch Home to return to the home screen. Touch
and hold Home to see your recent apps.

8Home screen & apps
Home screen & apps
a few essentials
Use your home screen for quick access to apps, search,
and more. Download social networking apps to keep in
touch!
Quick start: Home screen
You’ll see the home screen when you turn on the phone
or touch Home from a menu:
http://w ww.
Browser Market
Not f t onsi ica i
Flick down for details.
St tus Ind torsa ica
Shortcuts
Open the app enu.m
W d etsi g
Touch to open. Touch & hold
to ove or delete.m
Drag or flick to open panels
(or scroll in lists).

9Home screen & apps
•To open shortcuts or widgets, touch them. Touch
Home to return to the home screen.
When you open shortcuts or widgets,
touch Menu for options.
•To move or delete shortcuts or widgets, touch and
hold them until you feel a vibration, then drag it to
another spot, another panel, or at the top.
In lists like Contacts, touch and hold list items for
options.
•To add shortcuts, widgets, or wallpaper, touch and
hold an empty spot until you see the menu. You can
also add a folder to organize your shortcuts.
•To show more panels, or drag flick right or left. Touch
and hold Home to show recent apps.
In lists like Contacts, drag or flick to scroll.
To change your ringtone, display brightness, and more,
touch Menu >
Settings > Sound
or Display
. For
details, see “Personalize” on page 12.
Apps
To show your apps menu, touch .
•To scroll through the menu, flick up or down.
•To open an app, touch an icon.
•To close the app menu, touch Back .

10 Home screen & apps
Tip: To show the last eight apps you opened, touch
Home from the home screen.
To download new apps from Android Market™, touch
> Market. Touch Search to find an app, or
touch My Apps to show or reinstall the apps you
downloaded. To download apps from websites, you
need to change your security settings: Touch Menu
> Settings > Applications > Unknown sources.
Tip: Choose your apps and updates carefully, from
trusted sites like Market, as some may impact your
phone’s performance.
Note: When installing an app, make sure you read the
alerts that tell you what information the app will access.
If you don’t want the app to have access to this
information, cancel the installation.
To move or uninstall your apps, touch Menu >
Settings > Applications > Manage applications. Touch
an app in the list to show details and options.
On your computer, you can browse and manage apps for
all your devices powered by Android™ at
market.android.com.

11Home screen & apps
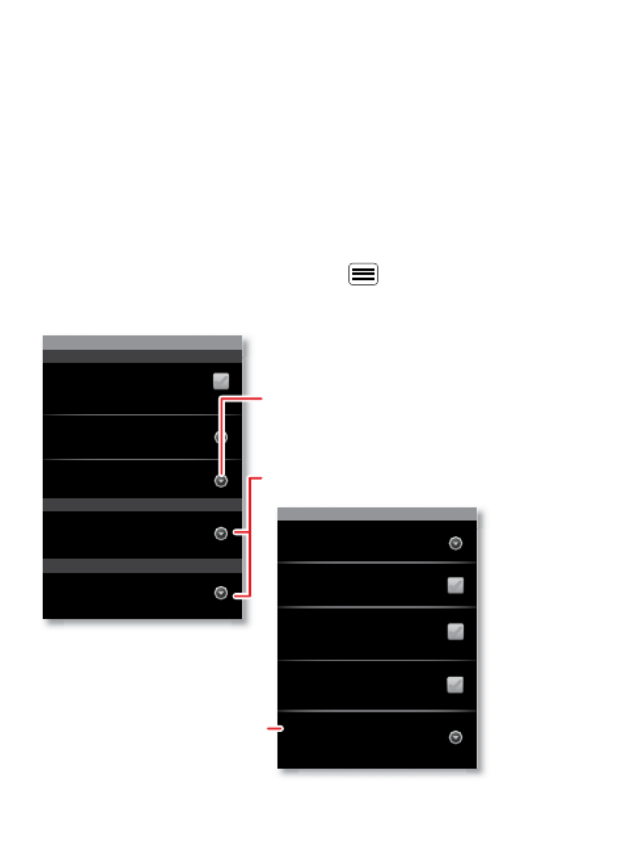
Phone status & notifications
In the status bar at the top of
your screen, the right side
shows phone status. The left
side shows new messages or
events (for details, flick the
bar down).
network strength battery strength
new voicemail new text message
Bluetooth™ on Bluetooth
connected
Wi-Fi connected airplane mode
USB connected alarm set
silent ringer silent ringer, vibrate
on
mute call speakerphone
Clear
Notifications
10:32
New voicemail
Dial (Your Voicemail Number)
11:19
12 Personalize
Personalize
add your personal touch
Customize your phone’s sounds and appearance to
make it unique to you!
Quick start: Personalize
From the home screen, touch Menu > Settings >
Sound
or Display
.
Display settings
Brightness
All window animations are shown
Animation
Auto-rotate screen
Close flip to lock screen
Rush breath LED
Sound settings
General
Incoming calls
Only in Silent mode
Vibrate
Volume
Silent mode
Silence all sounds except media &
alarms
Phone ringtone
Notifications
Notification ringtone
Choose separate volume
settings for inco ing calls, m
m media, alar s, and notifications.
C ll & Mess e Not f t onsa ag i ica i
Turn on or off enu ani ations.m m

13Personalize
To .. .
Choose a
ringtone or
vibration for
calls and
messages
Touch Menu > Settings >
Sound, then choose Phone
ringtone , Notification ringtone, or
Vibrate.
Change the
volume
Touch Menu > Settings >
Sound > Volume.
Tu rn dialpad
sounds on or off.
Touch Menu > Settings >
Sound > Audible touch tones.
Turn menu
selection
sounds on or off
Touch Menu > Settings >
Sound > Audible selection.
Change your
wallpaper
Touch and hold an empty spot on
the home screen, then touch
Wallpapers.
Change
shortcuts and
widgets on your
home screen
Touch and hold them. For details,
see “Home screen & apps” on
page 8.
Close flip to lock
screen
Touch Menu > Settings >
Display > Close flip to lock
screen.

14 Personalize
Language & region
To set your menu language and region, touch Menu
> Settings > Language & keyboard > Select language
Control whether
some apps
rotate the
screen when
you rotate your
phone
Touch Menu > Settings >
Display> Auto-rotate screen.
Turn on or off
animations that
make your
menus look
smoother
Touch Menu > Settings >
Display > Animation.
Delete a
shortcut or
widget
Touch and hold the shortcut or
widget until you feel a vibration,
then drag it to the trash can.
Calibrate the
sensors used by
some games or
navigation apps
Touch Menu > Settings >
Display > G-Sensor Calibration
(movement) or E-Compass
Calibration (direction).
To .. .

16 Calls
•To make a call, touch Phone, enter a number, then
touch .
•To answer a call, open the flip or drag to the right.
•During a call, touch Home or Back to hide the
active call display (to reopen it, touch Phone).
Note: Using a mobile device or accessory while
driving may cause distraction and may be illegal.
Always obey the laws and drive safely.
•To use the speakerphone during a call, touch
Speaker.
•To
enter numbers
during a call, touch Dial Pad.
•To mute or unmute a call, touch
Mute.
•To end a call, close the flip or touch .
•To ignore an incoming call, drag to the left.
Tip: For quick access to contacts, see “Favorites” on
page 20.
Recent calls
To show recent calls, touch Phone > Call log.
•To call, text, open, or save an entry, touch and hold it.
•To clear the list, touch Menu > Clear call log.
Conference calls
To start a conference call, call the first number. After
they answer, touch Add call and call the next number.
End call

17Calls
When the next number answers, touch Merge calls. To
remove individual callers, touch Manage.
Call waiting
If you are on a call and a new call arrives:
•With call waiting on, touch Answer to answer the new
call and put the old call on hold. Then, touch Swap to
switch between calls, or Merge calls to combine
them.
•With call waiting off, the new call goes straight to your
voicemail.
To turn on call waiting, touch Menu > Settings > Call
settings > Additional settings > Call waiting.
Emergency calls
Note: Your service provider programs one or more
emergency phone numbers that you can call under any
circumstances, even when your phone is locked.
Emergency numbers vary by country. Your
pre-programmed emergency number(s) may not work in
all locations, and sometimes an emergency call cannot
be placed due to network, environmental, or
interference issues.
1Open the phone, then touch Phone (if your phone
is locked, touch Emergency Call).
2Enter the emergency number.
3Touch Call to call the emergency number.

18 Calls
Note: Your phone can use location based services (GPS
and AGPS) to help emergency services find you. See
”GPS & AGPS” in your legal and safety information.
Cool down
In very limited circumstances, such as where your
phone has been exposed to extreme heat, you may see
“Cool Down” messages. To avoid possible damage to
your battery and phone, you should follow these
instructions until the phone is within its recommended
temperature range. When your phone is in “Cool Down”
mode, only emergency calls can be made.

19Contacts
Contacts
contacts like you’ve never had before
Keep each friend’s email, phone number, and even
address all in your Contacts for quick access.
Quick start: Contacts
From the home screen, touch Phone > Contacts
•To create
a contact, touch
Phone > Contacts >
Menu > New contact, choose where you want to
Phone
Displaying 20 contacts
Contacts FavoritesCall log
A
B
C
Arthur Baudo
Barry Smyth
Cheyenne Medina
Christine Fanning
Search New contact
Accounts Import/Export Delete contacts
Display options
Drag or flick to scroll.
Switch to the dialer, recent calls,
or favorites.
Touch to search, create, and
more.

20 Contacts
store the contact, then enter details (to close the
display keyboard, touch Back ).
Contacts shows the contacts from your Google™
account, which you can open from any computer at
contacts.google.com (or open your contacts within
mail.google.com). To stop synchronizing with your
account, touch Phone > Contacts > Menu >
Accounts, touch your Google account, then uncheck
Sync Contacts.
•To call, text, or email a contact, touch Phone
> Contacts, touch the contact, then touch (call),
(text), or (email).
•To edit or delete a contact, touch Phone
> Contacts, touch the contact, then touch Menu .
Favorites
For quick access to a favorite contact, open the contact,
then touch the star next to their name. To show your
favorites, touch Phone and touch Favorites at the
top.
To add a shortcut to your favorites, touch and hold a
blank spot on your home screen, then touch Folders >
Starred contacts. You can also add a shortcut for an
individual contact: Touch and hold a blank spot on your
home screen, then choose Shortcuts > Contacts.

21Contacts
Storage & transfer
When you create a new contact, your phone asks if you
want to store it in your Google™ account, phone
memory, or SIM card. Contacts in all three places appear
in your Contacts list, but if you change phones:
•Contacts in your Google™ account can download
when you log into your Google account on a new
Android™ device. You can open these contacts from
any computer at contacts.google.com.
•Contacts on your SIM card can load to a new device
when you insert your SIM card.
•Contacts in your phone memory stay in your old
phone, unless you export them.
To import or export contacts between your phone
memory and a SIM or memory card, touch Phone
> Contacts, then touch Menu > Import/Export.

23Messaging
•To open
text messages, touch Messaging
, then
touch the sender’s name.
When you see in the status bar at the top of your
screen, flick down the status bar and touch the new
message to open it.
•To respond to a text message, just open it and enter
your response in the text box at the bottom.
•To forward, copy, and more, touch Messaging,
touch the sender’s name, then touch and hold the
message.
Attachments
To send a file in a text message, touch Messaging >
New message, then touch Menu > Attach.
When you open a message with an attachment, touch
Download to download it. Touch the downloaded
attachment to open it, then touch it again to save it,
share it, and more.
Tip: To send and receive large attachments faster, use
“Wi-Fi networks” on page 47.
Email
•To set up Google or Corporate (Microsoft™ Exchange
server) accounts, touch Menu > Settings >

24 Messaging
Accounts & sync > Add account. For details, contact
the account provider.
To set up standard email accounts (not Gmail™ or
Microsoft™ Exchange), touch > Email and
follow the wizard. To add more standard accounts,
open Email and touch Menu > Accounts >
Menu > Add account. For details, contact the
account provider.
•To open email, touch >
Email
or
Gmail.
Touch a message to open it.
Tip: Touch Menu for options like Refresh or
Search.
•To create an email, touch >
Email
or
Gmail,
then touch Menu > Compose.
Tip: Touch Menu for options, like Attach or Add
Cc/Bcc.
Gmail synchronizes with your Google™ account mail,
which you can open from any computer at
mail.google.com. To stop synchronizing with your
account, touch Menu > Settings > Accounts & sync,
touch your Google account, then uncheck Sync Gmail.
Voicemail
When you have a new voicemail, shows in the status
bar at the top of your screen. To hear voicemails,
touch Phone then touch and hold 1.

25Messaging
If you need to change your voicemail number, in the
home screen touch Menu > Settings > Call settings
> Voicemail settings. For your voicemail number or
other details, contact your service provider.

26 Text entry
Text entry
keys when you need them
When you enter text, like in a message or search, you
have keyboard options.
Quick start: Text entry
To change the keyboard, touch and hold a blank spot in
a text box. A menu opens, where you can choose Input
method > Multi-touch keyboard
or
Swype.
Note:
Swype is not available in all regions. Your keyboard
might change depending on what you’re entering.
Swype lets you drag your finger over the letters of a
word, in one continuous motion.
•To move the cursor, touch and hold a word you
entered. This opens a magnifier where you can drag
the cursor.
Send
:-)
A S D F G H J K L
Q W E R T Y U I O P
Z X C V B N M
@ #
1 2 3 _% ( )
! 7 8 9 0 / ?
& $ 4 5 6 + : ; “
,,
.
SYM
To enter a word, just
trace a path through
the letters.
To capitalize, go above
the keypad.
For double letters,
circle the letter.
To enter a word, just
trace a path through
the letters.
To capitalize, go above
the keypad.
For double letters,
circle the letter.
Anne
Anne
Anne
Anne
AnneAnne
Anne
A
E
N

27Text entry
•To copy and paste, double-tap a word to highlight it
(if needed, drag the ends of the highlight). Then touch
and hold a blank spot for the copy and paste menu.
•To add a word to your dictionary, double-tap the
word to highlight it. Then touch and hold a blank spot
to open the menu where you can add the word.
•To enter the small number or symbol at the top of a
key, touch and hold the key.
To enter several numbers or symbols, touch SYM.
•If Swype doesn’t know a word, touch individual letters
to enter it. Swype remembers, so next time you can
just drag over the letters.
Multi-touch keyboard lets you enter letters by touching
them one at a time.
Send
:-)
A S D F G H J K L
Q W E R T Y U I O P
Z X C V B N M
123 7 8 9 04 5 6
?123
.
Touch and hold an
e pty spot to open a m
menu.
Delete
Symb bols/Num ers
Specyfikacje produktu
| Marka: | Motorola |
| Kategoria: | smartfon |
| Model: | Motosmart Flip XT611 |
Potrzebujesz pomocy?
Jeśli potrzebujesz pomocy z Motorola Motosmart Flip XT611, zadaj pytanie poniżej, a inni użytkownicy Ci odpowiedzą
Instrukcje smartfon Motorola

25 Lutego 2025
16 Stycznia 2025
15 Stycznia 2025
10 Stycznia 2025
19 Grudnia 2024
13 Października 2024
12 Października 2024
7 Października 2024
16 Września 2024
15 Września 2024
Instrukcje smartfon
- smartfon Sony
- smartfon Samsung
- smartfon AEG
- smartfon LG
- smartfon Xiaomi
- smartfon MyPhone
- smartfon Sharp
- smartfon Huawei
- smartfon TCL
- smartfon Lenovo
- smartfon TP-Link
- smartfon Philips
- smartfon SilverCrest
- smartfon Gigabyte
- smartfon Acer
- smartfon Realme
- smartfon Gigaset
- smartfon Geemarc
- smartfon Nokia
- smartfon Hisense
- smartfon Infiniton
- smartfon Panasonic
- smartfon Mio
- smartfon Asus
- smartfon Nedis
- smartfon Medion
- smartfon OK
- smartfon Audioline
- smartfon Toshiba
- smartfon Tesla
- smartfon Alcatel-Lucent
- smartfon Majestic
- smartfon Bluebird
- smartfon Garmin
- smartfon Blaupunkt
- smartfon Profoon
- smartfon Vivax
- smartfon Evolveo
- smartfon Alcatel
- smartfon Haier
- smartfon HP
- smartfon Hyundai
- smartfon Honeywell
- smartfon Honor
- smartfon Kodak
- smartfon ZTE
- smartfon MaxCom
- smartfon Dell
- smartfon Google
- smartfon Intex
- smartfon Oppo
- smartfon Kyocera
- smartfon Krüger&Matz
- smartfon Qilive
- smartfon Thomson
- smartfon Manta
- smartfon Apple
- smartfon NGS
- smartfon CRUX
- smartfon Emporia
- smartfon Nevir
- smartfon Mitsubishi
- smartfon Razer
- smartfon GoClever
- smartfon SPC
- smartfon Intermec
- smartfon NEC
- smartfon Polaroid
- smartfon Prestigio
- smartfon Aiwa
- smartfon Sanyo
- smartfon Telefunken
- smartfon OnePlus
- smartfon Amazon
- smartfon Olympia
- smartfon Microsoft
- smartfon Bush
- smartfon HTC
- smartfon CAT
- smartfon Denver
- smartfon Saiet
- smartfon Albrecht
- smartfon RCA
- smartfon Media-Tech
- smartfon BenQ
- smartfon Trevi
- smartfon Lexibook
- smartfon Overmax
- smartfon Micromax
- smartfon Sencor
- smartfon NUU Mobile
- smartfon Alecto
- smartfon Binatone
- smartfon Hammer
- smartfon Allview
- smartfon Oukitel
- smartfon Best Buy
- smartfon Cyrus
- smartfon Kazam
- smartfon Tecdesk
- smartfon KPN
- smartfon Swissvoice
- smartfon I.safe Mobile
- smartfon TrekStor
- smartfon Brondi
- smartfon Fysic
- smartfon Wiko
- smartfon Yarvik
- smartfon Aligator
- smartfon Amplicomms
- smartfon AQISTON
- smartfon Amplicom
- smartfon Archos
- smartfon Androidtech
- smartfon Crosscall
- smartfon Ecom
- smartfon Sony Ericsson
- smartfon Vestel
- smartfon Sonim
- smartfon Energy Sistem
- smartfon Doro
- smartfon Sagem
- smartfon Lava
- smartfon Blu
- smartfon Easypix
- smartfon Konrow
- smartfon Brigmton
- smartfon Sunstech
- smartfon Aspera
- smartfon Sunny
- smartfon Nordmende
- smartfon Blackberry
- smartfon Vivo
- smartfon Wolder
- smartfon NGM
- smartfon Vodafone
- smartfon Switel
- smartfon InFocus
- smartfon GreatCall
- smartfon XD
- smartfon Pantech
- smartfon Alba
- smartfon RugGear
- smartfon Umidigi
- smartfon AT&T
- smartfon Mpman
- smartfon Bury
- smartfon Logicom
- smartfon Karbonn
- smartfon Palm
- smartfon Hannspree
- smartfon Phicomm
- smartfon Plum
- smartfon Lumigon
- smartfon Infinix
- smartfon Keneksi
- smartfon Klipad
- smartfon Iget
- smartfon T-Mobile
- smartfon JCB
- smartfon Casper
- smartfon Unnecto
- smartfon Wileyfox
- smartfon ITT
- smartfon Yota
- smartfon Avus
- smartfon Spice
- smartfon Wolfgang
- smartfon BQ
- smartfon ORA
- smartfon Danew
- smartfon Echo
- smartfon Primux
- smartfon Tiptel
- smartfon UTStarcom
- smartfon Zipy
- smartfon Mediacom
- smartfon Beafon
- smartfon BGH
- smartfon Billow
- smartfon Telstra
- smartfon Ulefone
- smartfon CSL
- smartfon ToughGear
- smartfon Benefon
- smartfon Komu
- smartfon Doogee
- smartfon Energizer
- smartfon Tremay
- smartfon Kurio
- smartfon Piranha
- smartfon Coolpad
- smartfon Syco
- smartfon TAG Heuer
- smartfon Mobistel
- smartfon Itel
- smartfon Garmin-Asus
- smartfon Handheld
- smartfon Fero
- smartfon AT Telecom
- smartfon Xtreamer
- smartfon Verykool
- smartfon O2
- smartfon General Mobile
- smartfon Mustang
- smartfon Kogan
- smartfon Pharos
- smartfon Storex
- smartfon Fairphone
- smartfon Freeman
- smartfon HomTom
- smartfon Leotec
- smartfon Auro
- smartfon Maxx
- smartfon ITTM
- smartfon Posh Mobile
- smartfon THL
- smartfon NGM-Mobile
- smartfon POCO
- smartfon Nothing
- smartfon Lark
- smartfon Senifone
- smartfon Tecno
- smartfon Telme
- smartfon UMi
- smartfon Olitech
- smartfon Mobiola
- smartfon Meizu
- smartfon Neffos
- smartfon Gionee
- smartfon TIM
- smartfon Cubot
- smartfon Leagoo
- smartfon NTech
- smartfon Nubia
- smartfon LeEco
- smartfon GSmart
- smartfon Bea-fon
- smartfon Opticon
- smartfon EStar
- smartfon Facom
- smartfon Jitterbug
- smartfon Custom
- smartfon Aplic
- smartfon HMD
- smartfon Opis
- smartfon Volla
- smartfon Nothing Tech
- smartfon Maxwest
- smartfon Kalley
Najnowsze instrukcje dla smartfon

2 Kwietnia 2025

30 Marca 2025
10 Marca 2025
7 Marca 2025
5 Marca 2025
5 Marca 2025
3 Marca 2025

2 Marca 2025

26 Lutego 2025
26 Lutego 2025