Instrukcja obsługi LG WKG101HWA
Przeczytaj poniżej 📖 instrukcję obsługi w języku polskim dla LG WKG101HWA (132 stron) w kategorii pralka. Ta instrukcja była pomocna dla 18 osób i została oceniona przez 2 użytkowników na średnio 4.5 gwiazdek
Strona 1/132

OWNER'S MANUAL
LAUNDRY CENTER
Read this owner's manual thoroughly before operating the
appliance and keep it handy for reference at all times.
ENGLISH
WKE100H*A / WKG101H*A
MFL71728965
Rev.00_011921
www.lg.com
Copyright © 2021 LG Electronics Inc. All Rights Reserved.

TABLE OF CONTENTS
2
3 IMPORTANT SAFETY
INSTRUCTIONS
3 READ ALL INSTRUCTIONS BEFORE USE
4 WARNING STATEMENTS
8 CAUTION STATEMENTS
9 PRODUCT OVERVIEW
9 Product Features
11 OPERATION-WASHER
11 Using the Washer
14 Adding Cleaning Products
16 Control Panel
19 Wash Cycles
22 Cycle Modifiers
22 Options and Extra Functions
24 OPERATION-DRYER
24 Using the Dryer
26 Control Panel
28 Dry Cycles
30 Cycle Modifiers
30 Options and Extra Functions
32 SMART FUNCTIONS
32 Using LG ThinQ Application
34 Smart DiagnosisTM Function
36 MAINTENANCE
36 Washer
42 Dryer
44 TROUBLESHOOTING
44 Washer
52 Dryer
56 Common
57 LIMITED WARRANTY
57 USA

3IMPORTANT SAFETY INSTRUCTIONS
ENGLISH
IMPORTANT SAFETY INSTRUCTIONS
READ ALL INSTRUCTIONS BEFORE USE
Safety for a Dryer
WARNING
Fire Hazard
Failure to follow safety warnings exactly could result in serious injury,
death or property damage.
Do not install a booster fan in the exhaust duct.
Install all clothes dryer in accordance with the installation instructions of
the manufacturer of dryer.
WARNING:
FIRE OR EXPLOSION HAZARD
Failure to follow safety warnings exactly could result in serious injury,
death or property damage.
•Do not store or use gasoline or other flammable vapors and liquids in
the vicinity of this or any other appliance.
•WHAT TO DO IF YOU SMELL GAS
- Do not try to light any appliance.
- Do not touch any electrical switch; do not use any phone in your
building.
- Clear the room, building or area of all occupants.
- Immediately call your gas supplier from a neighbor’s phone. Follow
the gas supplier’s instructions.
- If you cannot reach your gas supplier, call the fire department.
•Installation and service must be performed by a qualified installer,
service agency or your gas supplier.

4IMPORTANT SAFETY INSTRUCTIONS
Safety Messages
Your safety and the safety of others are very important.
We have provided many important safety messages in this manual and on your appliance. Always read and
follow all safety messages.
All safety messages will tell you what the potential hazard is, tell you how to reduce the chance of injury,
and tell you what may happen if the instructions are not followed.
WARNING STATEMENTS
WARNING
• To reduce the risk of explosion, fire, death, electric shock, scalding or injury to persons when using this
product, follow basic precautions, including the following:
Installation
• Adhere to all industry recommended safety procedures including the use of long-sleeved gloves and
safety glasses.
• Never attempt to operate this applia ing, partially disassembled, or has nce if it is damaged, malfunction
missing or broken parts, including a damaged cord or plug.
• Before use, the appliance must be properly installed as described in this manual.
WARNING - Risk of Fire
Install the clothes dryer according to the manufacturer’s instructions
and local codes.
•Clothes dryer installation must be performed by a qualified installer.
•Do not install a clothes dryer with flexible plastic venting materials. If
flexible metal (foil type) duct is installed, it must be of a specific type
identified by the appliance manufacturer as suitable for use with
clothes dryers. Flexible venting materials are known to collapse, be
easily crushed, and trap lint. These conditions will obstruct clothes
dryer airflow and increase the risk of fire.
•To reduce the risk of severe injury or death, follow all installation
instructions.
This is the safety alert symbol.
This symbol alerts you to potential hazards that can kill or injure you and others. All safety messages
will follow the safety alert symbol and either the word WARNING or CAUTION.
These words mean:
WARNING
You may be killed or seriously injured if you do not follow instructions.
CAUTION
You may be injured or cause damage to the product if you do not follow instructions.

5IMPORTANT SAFETY INSTRUCTIONS
ENGLISH
• To reduce the risk of severe injury or death, follow all installation instructions.
• Refer to the INSTALLATION INSTRUCTIONS for detailed grounding procedures. Installation instructions
are packed with the appliance for th If the appliance is moe installer’s reference. ved to a new location,
have it checked and reinstalled by qualified service personnel.
• When moving or installing the product in a different location, call two or more qualified service
personnel for installation and service.
• Do not install the appliance in humid spaces.
• Store and install the appliance where it will not be exposed to temperatures below freezing or exposed
to outdoor weather conditions.
• This appliance is not designed for maritime use or for mobile installations such as in RVs, trailers, or
aircraft.
• Keep packing materials out of the reach of children. Packaging material can be dangerous for children.
There is a risk of suffocation.
• Destroy the carton, plastic bag, and other packing materials after the appliance is unpacked. Children
might use them for play. Cartons covered with rugs, bedspreads, or plastic sheets can become airtight
chambers.
• The appliance must be installed and electrically grounded by qualified service personnel in accordance
with local codes.
• When installing or moving the appliance, be careful not to pinch, crush, or damage the power cord.
• Connect to a properly rated, protected, and sized power circuit to avoid electrical overload.
• This appliance must be positioned near to an electrical power supply.
• Disconnect the power cord, house fuse or circuit breaker before installing or servicing the appliance.
• The power cord of this appliance is equipped with a 3-prong (grounding) plug which mates with a
standard 3-prong (grounding) wall outlet to minimize the possibility of electric shock from this appliance.
• Do not, under any circumstances, cut or remove the third (ground) prong from the power cord.
• Use new hoses when connecting the appliance to the water supply. Do not reuse old hoses.
• Do not install the appliance with flexible plastic venting materials. If flexible metal (foil type) duct is
installed, it must be of a specific type identified by the appliance manufacturer as suitable for use with
the dryer section of the appliance. Flexible venting materials are known to collapse, be easily crushed,
and trap lint. These conditions will obstruct the dryer section's airflow and increase the risk of fire.
• Local ordinances may prohibit installation in a garage. Contact a local building inspector.
• Do not use sheet metal screws or other fasteners which extend into the duct that could catch lint and
reduce the efficiency of the exhaust system. Secure all joints with duct tape.
• Use only rigid, semi-rigid or flexible metal 4-inch diameter duct inside the appliance cabinet or for
exhausting to the outside. Use of plastic or other combustible ductwork may cause a fire. Punctured
ductwork may cause a fire if it collapses or becomes otherwise restricted in use or during installation.
• All nonrigid metal transition duct tion duct could must be UL-listed. Use of other materials for transi
affect drying time.
• Ductwork is not provided with the appliance, and you should obtain the necessary ductwork locally. The
end cap should have hinged dampers to prevent backdraft when the dryer is not in use.
• Gas dryers MUST be exhausted to the outside.
• The dryer exhaust system must be exhausted to the outside of the dwelling. If the dryer is not exhausted
outdoors, some fine lint and large amounts of moisture will be expelled into the laundry area. An
accumulation of lint in any area of the home may create a health and fire hazard.
• Do not install near another heat source such as a stove, oven or heater.
• Keep area around the exhaust opening and adjacent surrounding areas free from the accumulation of
lint, dust, and dirt.
• The appliance must not be supplied through an external switching device, such as a timer, or connected
to a circuit that is regularly switched on and off by a utility.
• Do not install a booster fan in the exhaust duct.

6IMPORTANT SAFETY INSTRUCTIONS
• This is a single appliance and a single unit for sale, delivery and installation.
• Do not disassemble this appliance as it can’t be installed in a side-by-side configuration.
Grounding Instructions
• Improper connection of the equipment-grounding conductor can result in a risk of electric shock. Check
with a qualified electrician or service personnel if you are in doubt whether the appliance is properly
grounded. Do not modify the plug provided with the appliance; if it will not fit the outlet, have a proper
outlet installed by a qualified electrician.
• The appliance must be grounded. In the event of a malfunction or breakdown, grounding will reduce the
risk of electric shock by providing a path of least resistance for electric current. The appliance is
equipped with a cord having an equipment-grounding conductor and a grounding plug. The plug must
be plugged into an appropriate outlet that is installed and grounded in accordance with all local codes
and ordinances.
Operation
• Read all instructions before using the appliance and save these instructions.
• Use this appliance only for its intended purpose.
• If the product has been submerged in water, sitting in standing water, or waterlogged, do not come in
contact with the product and immediately contact an LG Electronics Customer Information Center for
instructions before resuming use.
• If you detect a strange sound, a chemical or burning smell, or smoke coming from the appliance, unplug
it immediately, and contact an LG Electronics Customer Information Center.
• Under certain conditions, hydrogen gas may be produced in a hot-water system that has not been used
for two weeks or more. HYDROGEN GAS IS EXPLOSIVE. If the hot-water system has not been used for
such a period, before using the appliance, turn on all hot water faucets and let the water flow from each
for several minutes. This will release any accumulated hydrogen gas. As the gas is flammable, do not
smoke or use an open flame during this time.
• Do not reach into the appliance if the tub or drum, agitator, or any interior parts are moving. Before
loading, unloading, or adding items, press Start/Pause and allow the tub or drum to coast to a complete
stop before reaching inside.
• This appliance is not intended for use by persons (including children) with reduced physical, sensory or
mental capabilities, or lack of experience and knowledge, unless they have been given supervision or
instruction concerning the use of the appliance by a person responsible for their safety.
• Do not allow children or pets to play on, in or with the appliance. Close supervision is necessary when the
appliance is used near children or pets.
• Keep laundry products out of children’s reach. To prevent injury to persons, observe all warnings on
product labels.
• Repair or immediately replace all power cords that have become frayed or otherwise damaged. Do not
use a cord that shows cracks or abrasion damage along its length or at either end.
• Never unplug the appliance by pulling on the power cord. Always grip the plug firmly and pull straight
out from the outlet.
• Do not use an extension cord or adapter with this appliance.
• Do not grasp the power cord or touch the appliance controls with wet hands.
• Do not modify or extend the power cord.
• If the electrical supply cord is damaged, it must only be replaced by the manufacturer or its service agent
or a similar qualified person in order to avoid a hazard.
• Do not put oily or greasy clothing, candles or flammable materials on top of the appliance.
• Keep the area underneath and around your appliances free of combustible materials (lint, paper, rags,
etc.), gasoline, chemicals and other flammable vapors and liquids.

7IMPORTANT SAFETY INSTRUCTIONS
ENGLISH
• Do not store or use gasoline or other flammable vapors and liquids in the vicinity of this or any other
appliance.
• Do not mix chlorine bleach with ammonia or acids such as vinegar. Follow package directions when
using laundry products. Incorrect usage can produce poisonous gas, resulting in serious injury or death.
• Never use harsh chemicals, abrasive cleaners, or solvents to clean the appliance. They will damage the
finish.
• Do not wash or dry articles that have been previously cleaned in, washed in, soaked in, or spotted with
gasoline, dry-cleaning solvents, vegetable or cooking oil, or other flammable or explosive substances, as
they give off vapors that could ignite or explode.
• Do not dry unwashed items in the appliance.
• Remove all objects from pockets such as lighters and matches.
• Do not add gasoline, dry cleaning solvents, or other flammable or explosive substances to the wash
water. These substances give off vapors that could ignite or explode.
• In the event of a gas leak (propane gas, LP gas, etc.), do not operate this or any other appliance. Open a
window or door to ventilate the area immediately.
• Do not tamper with controls.
• Fix the drain hose securely in place to avoid flooding.
• Do not abuse, sit on, or stand on the door of the appliance.
• Always check the inside of the appliance for foreign objects.
• Do not allow water, bleach or other liquids to sit in the drum for extended periods. Doing so can corrode
the drum or cause mildew or odors.
• Do not use the appliance to dry articles containing foam rubber or similarly textured rubber-like
materials.
• Gas appliances can cause minor exposure to four potentially hazardous substances, namely benzene,
carbon monoxide, formaldehyde, and soot, caused primarily by the incomplete combustion of natural
gas or LP fuels.
• Properly adjusted appliances will minimize incomplete combustion. Exposure to these substances can be
minimized further by properly venting the dryer to the outdoors.
• Do not place items exposed to cooking oils in your appliance. Items contaminated with cooking oils may
contribute to a chemical reaction th reduce the risk of fire due to at could cause a load to catch fire. To
contaminated loads, the final part of a tumble dryer cycle occurs without heat (cool down period). Avoid
stopping tumble drying before the end of the drying cycle unless all items are quickly removed and
spread out so that the heat is dissipated.
• Do not put any part of your body, such as your hands or feet, or metal objects under the appliance.
• Do not let your hand get pinched when opening or closing the appliance door.
Maintenance
• Do not repair or replace any part of the appliance. All repairs and servicing must be performed by
qualified service personnel unless specifically recommended in this owner’s manual. Use only authorized
factory parts.
• Disconnect this appliance from the power supply before cleaning and attempting any user maintenance.
Turning the controls to the OFF position does not disconnect this appliance from the power supply.
• Remove any dust or foreign matter from the power plug pins.
• Do not disassemble or repair the appliance by yourself.
• Remove the door(s) before the appliance is removed from service or discarded to avoid the danger of
children or small animals getting trapped inside.
• Make sure the dispenser drawer or lid is closed at all times when not being filled with laundry products.
• Clean the lint filter of the dryer before or after each load.

8IMPORTANT SAFETY INSTRUCTIONS
SAVE THESE INSTRUCTIONS
• The interior of the appliance and exhaust duct should be cleaned periodically by qualified service
personnel.
CAUTION STATEMENTS
CAUTION
• To reduce the risk of minor or moderate injury to persons, malfunction, or damage to the product or
property when using this product, follow basic precautions, including the following:
Installation
• Install the product on a firm and level floor.
Operation
• Turn off the water faucets and unplug the appliance if the appliance is to be left for an extended period
of time, such as during vacations.
• ALWAYS follow the fabric care instructions supplied by the garment manufacturer.
• Use fabric softeners or products to eliminate static only as recommended by the manufacturer.
• Do not combine laundry products for use in one load unless specified on the label.
• Do not touch draining water which may be hot.
• If the drain hose and the water inlet hose are frozen in winter, defrost them before using the appliance.
• Do not store or spill liquid detergents, cleaners, or bleaches (chlorine bleach, oxygen bleach) on the
appliance. Doing so may result in corrosion, discoloration or damage to the surface of the appliance.
• Clothing or articles that are waterp shed in the Waterproof cycle only. roof or water resistant must be wa
(Examples include water resistant clothing, mattress covers, outdoor clothes, plastic mats.) Using
another cycle may result in personal injury or damage to the washer, clothes, walls, floor, and
surrounding objects due to abnormal vibration.

9PRODUCT OVERVIEW
ENGLISH
PRODUCT OVERVIEW
Product Features
The images in this guide may be different from the actual components and accessories, which are subject
to change by the manufacturer without prior notice for product improvement purposes.
Front View
aControl Panel
bLint Filter
cDryer Drum
dDryer Door
eDetergent Dispenser Drawer
fWasher Door
gWasher Drum
hWasher Door Magnet
iDrain Hose
jDrain Pump Filter
kDrain Pump Filter Cover
lLeveling Feet
Rear View
aPower Cord (for Gas Models)
bTerminal Block Access Panel (for Electric
Models)
cExhaust Duct Outlet
dGas connection (for Gas Models)
eHot and Cold Water Inlets
fShipping Bolts
gDrain Hose
hPower Cord (for Washer)

10 PRODUCT OVERVIEW
Product Specifications
Accessories
Included Accessories
aNon-skid Pads
bHole Caps
cWrench
dTie Strap
eElbow Bracket (for securing drain hose)
Required Accessories
aHot and Cold Water Hoses (for Washer)
WARNING
• For your safety and for extended product life,
use only authorized components. The
manufacturer is not responsible for product
malfunction, property damage or bodily injury
caused by the use of separately purchased
unauthorized components, parts, or non-LG
products.
Model WKE100H*A / WKG101H*A
Electrical Requirements Please refer to the rating label for detailed
information.
Min. / Max. Water Pressure 20 - 120 psi (138 - 827 kPa)
Dimensions (Width X Height X Depth) 27'' X 74 3/8'' X 30 3/8'' (70 cm X 189 cm X 77 cm)
Maximum Depth with Door Open 55'' (139.6 cm)
Net Weight 310.6 lb (141 kg)
Capacity (Washer/Dryer) 4.5 cu.ft. / 7.4 cu.ft.
Max. Spin Speed (Washer) 1300 RPM
Gas Requirements NG: 4 - 10.5-inch (10.2 - 26.7 cm) WC
LP: 8 - 13-inch (20.4 - 33.1 cm) WC
Operating Temperature Range 41-95 ℉ (5-35 ℃)
C
E
R
T
I
F
I
E
D
D
E
S
I
G
N

11OPERATION-WASHER
ENGLISH
OPERATION-WASHER
Using the Washer
WARNING
• To reduce the risk of fire, electric shock, or injury to persons, read the SAFETY INSTRUCTIONS before
operating this appliance.
Operation Overview
1 Sort laundry and load the washer.
• Sort laundry by fabric type, soil level, color
and load size as needed. Open the door and
load items into the washer.
• If using single-use detergent packs, or gel
or tablet detergents, place them in the
drum before loading the laundry.
2 Add cleaning products.
• Add the proper amount of HE (High-
Efficiency) detergent to the detergent
dispenser.
• If desired, add bleach or fabric softener to
the appropriate areas of the dispenser
drawer.
• Do not place liquid or powdered detergent
packs, or gel or tablet detergents in the
dispenser.
3 Turn on the washer.
• Press the Power button to turn on the
washer.
4 Select a cycle.
• Turn the cycle selector knob or press the
cycle buttons repeatedly until the desired
cycle is selected.
• The preset wash temperature, spin speed,
soil level and option settings for the
selected cycle are shown.
• The Normal cycle must be selected in order
to change its default settings.
• Pressing the Start/Pause button without
selecting a cycle immediately starts the
Normal cycle with the default settings.
5 Adjust settings.
• Default settings for the selected cycle can
be changed, if desired, using the cycle
modifier and option buttons.
• Not all modifiers and options are available
on all cycles. A different chime sounds and
the LED does not light up if the selection is
not allowed.
6 Begin cycle.
• Press the Start/Pause button to begin the
cycle. The door locks, and the washer
agitates briefly without water to measure
the weight of the load.
• If the Start/Pause button is not pressed
within a certain time, the washer shuts off
and all settings are lost.
7 End of cycle.
• When the cycle is finished, a melody
sounds. Immediately remove the clothing
from the washer to reduce wrinkling.
• Check around the door seal when removing
the load for small items that may be caught
in the seal.
NOTE
• The washer rotates the laundry in a way that
allows it to use less water while still fully
saturating the clothing. It is normal to be unable
to see water during the wash cycle.

12 OPERATION-WASHER
Sorting Laundry
CAUTION
• Clothing or articles that are waterproof or water-resistant must be washed in the Waterproof, Bedding,
Bulky/Large, or Jumbo Wash cycle only. (Examples include water resistant clothing, mattress covers,
outdoor clothes, and plastic mats.) Failure to do so may result in personal injury or damage to the
washer, clothes, walls, floor, and surrounding objects due to abnormal vibration.
• Remove the stuffing from pillows and cushions before washing the covers. Failure to do so can cause
excessive vibration, resulting in damage to the washer, clothes, nearby objects, walls, and floor.
Grouping Similar Items
For the best washing results, and to reduce the possibility of damage to clothing, sort clothing into loads
made up of similar items.
Mixing different fabric types and/or soil levels can result in poor wash performance, color transfer,
discoloration, fabric damage or linting. Fabrics should be sorted into groups as described below.
Colors
Sort articles by color. Wash dark clothes separately from light colors or whites. Mixing dark clothes with
light clothes can result in dye transfer or discoloration of the lighter clothes.
Soil Level
Wash heavily soiled clothing together. Washing lightly soiled clothing in the same load with heavily soiled
clothing could result in poor wash performance for the lightly soiled clothing.
Fabric Type
Delicate articles should not be mixed with heavy or sturdy fabric types. Washing heavy fabrics with
delicates can result in poor wash performance for the heavy fabrics and possible damage to the delicates.
Lint Type
Some fabrics attract and bind lint to give off lint in the laundry process. Avoid mixing them while others
these lint collectors and lint producers in the same load. Mixing these fabrics will result in pilling and
linting on the lint collectors. (For example, lint collector - knit sweater; lint producer - terry cloth towels.)
How to Sort Laundry
Fabric Care Labels
Many articles of clothing include a fabric care label. Using the chart below, adjust the cycle and option
selections to care for your clothing according to the manufacturer’s recommendations.
By Colors By Soil By Fabric By Lint
White Heavy Delicates Lint Producer
Lights Normal Easy Care Lint Collector
Darks Light Sturdy

13OPERATION-WASHER
ENGLISH
Loading the Washer
WARNING
• Clothing or articles that are waterproof or water-
resistant must be washed in the Waterproof,
Bedding, Bulky/Large, or Jumbo Wash cycle
only. (Examples include water resistant clothing,
mattress covers, outdoor clothes, and plastic
mats.) Failure to do so may result in personal
injury or damage to the washer, clothes, walls,
floor, and surrounding objects due to abnormal
vibration.
General Tips
• Check and empty pockets. Paper clips, coins,
matches, etc.can damage clothing and the
washer.
• Close zippers and hooks, and tie drawstrings to
prevent snagging or tangling of clothes.
• Pretreat heavily stained areas for best results.
• Brush off heavy soil, dust, and hair from items
before washing. Excess dirt or sand can abrade
other fabrics and lead to poor wash
performance.
• For best performance, load clothes as shown.
- Do not press down on items while stacking
them in the drum.
- Load clothes loosely, and do not overfill the
drum. Clothes need room to circulate in order
to get clean.
• Combine large and small items in the drum.
Load large items first. Large items should not be
more than half of the total load.
• The washer can be fully loaded, but the drum
should not be tightly packed with items. The
door of the washer must close easily.
• The washer will not fill or operate with the door
open.
Bulky Items
• Wash thick, bulky items individually. Heavy
blankets, comforters, bedspreads, or pet beds
can get tangled or cause an unbalanced load if
combined with other items.
Category Label Directions
Washing
Hand wash
Machine wash, Normal cycle
Perm Press/Wrinkle Resistant setting (which has a cool down or cold
spray before the slower spin)
Gentle/Delicate setting (slow agitation and/or reduced wash time)
Do not wash
Do not wring
Water Temperature Hot
Warm
Cold/Cool
Bleach Symbols
Any bleach (when needed)
Only non-chlorine bleach (when needed)
Do not bleach
1
3
2
4

14 OPERATION-WASHER
Small Items
• Do not wash a single small item. Add enough
similar items to the load to prevent an out-of-
balance load.
• Wash small, light items in a mesh bag. Small
items can get caught in the impeller at the
bottom of the drum, and brassiere hooks can
snag on other clothing or the drum.
Adding Cleaning Products
About Detergent Use
This washer is designed for use with only HE (High-
Efficiency) detergents.
• HE detergents produce fewer suds, dissolve
more efficiently to improve washing and rinsing
performance, and help to keep the interior of
the washer clean. Using detergent that is not HE
may cause oversudsing and unsatisfactory
performance which could result in error codes,
cycle failure, and washer damage.
• Detergents designated as HE-compatible may
not provide optimal results.
• For proper wash performance, always measure
detergent using the measuring device provided
by the detergent manufacturer. For an average
load, use less than half of the recommended
maximum. Use less detergent for soft water,
light soil, or smaller loads.
• Use extra care when measuring 2X and 3X
concentrated detergents because even a small
amount of extra detergent can lead to problems.
• Never use more than the maximum amount of
detergent recommended by the manufacturer.
Using too much detergent can lead to
oversudsing, poor rinsing, detergent buildup in
clothing, and residue buildup that can contribute
to odors in the washer.
aMaximum fill line
bAverage load fill line
cLiquid detergent
dPowdered detergent
Single-Use Detergent Packs / Gel or
Tablet Detergents
• Do not use more than one single-use detergent
pack in the washer. Using too much detergent
may cause oversudsing and unsatisfactory
performance. Reduce detergent amount or add
an extra rinse if detergent residue is left on
fabrics. To add an extra rinse, select the Extra
Rinse option.
• Place liquid or powdered detergent packs, or gel
or tablet detergents in the tub before loading
laundry. Do not place these detergents in the
dispenser.
Using the Dispenser
To add cleaning products to the automatic
dispenser:
1 Open the dispenser drawer.
2 Load the laundry products into the
appropriate compartments.
• Follow the manufacturer’s
recommendations when adding cleaning
products.
aPre-wash detergent compartment (on
some models)
bLiquid detergent cup
cMain wash detergent compartment
dLiquid fabric softener compartment
eLiquid chlorine bleach compartment

15OPERATION-WASHER
ENGLISH
3 Gently close the detergent dispenser drawer
before starting the cycle.
• Slamming the drawer closed may result in
the detergent overflowing into another
compartment or dispensing into the drum
earlier than programmed.
• Be careful not to get a hand caught in the
drawer while closing.
• It is normal for a small amount of water to
remain in the dispenser compartments at
the end of the cycle.
CAUTION
• Do not place or store laundry products, such as
detergent, bleach, or liquid fabric softener, on
top of your washer. These products can damage
the washer’s finish and controls.
Pre-wash Detergent Compartment
Add liquid or powdered detergent to this
compartment when using the Pre-wash option.
Always use HE (High-Efficiency) detergent with
your washer.
• When using the Pre-wash option, liquid
detergent for the main wash needs to be loaded
in the liquid detergent cup accessory in the main
wash dispenser (where applicable), to prevent it
from being dispensed with the pre-wash
detergent.
• The amount of detergent added for the Pre-
wash option is 1/2 the amount recommended
for the main wash cycle. For example, if the main
wash cycle requires one measure of detergent,
add 1/2 measure for the Pre-wash option.
Main Wash Detergent Compartment
This compartment holds laundry detergent for the
main wash cycle. Either powdered or liquid
detergent may be used in this compartment.
• The detergent is added to the load at the
beginning of the cycle. Always use HE (High-
Efficiency) detergent with your washer.
• Do not exceed the maximum fill line. Using too
much detergent can result in detergent buildup
in clothing and the washer.
• Liquid or powdered color-safe bleach may be
added to the main wash compartment with
detergent of the same type. Do not mix liquids
and powders
• If the dispenser has a liquid detergent cup and
insert:
- Make sure they are in place when using liquid
detergent.
- Make sure to remove them when using
powdered detergent. Powdered detergent will
not dispense with the liquid detergent cup and
insert in place.
• If you use a detergent that does not dissolve
easily or a detergent with high viscosity, it will
leave a residue and clog the dispenser.
Liquid Bleach Compartment
This compartment holds liquid bleach, which is
dispensed automatically at the proper time during
the wash cycle. The dispenser is activated twice to
ensure complete dispensing of the bleach. Any
liquid remaining in the dispenser at the end of the
cycle is water, not bleach.
WARNING
• Do not mix chlorine bleach with ammonia or
acids such as vinegar or rust/scale remover.
Mixing chemicals like these can produce a lethal
gas, resulting in severe injury or death.
NOTE
• Do not add powdered bleach to this
compartment. The bleach compartment is
designed to dispense liquid chlorine bleach only.
Powdered or liquid color-safe bleach will not
dispense properly.
• Follow the manufacturer’s recommendations
when adding bleach. Never add more than one
cup, and do not exceed the maximum fill line or
the bleach may be dispensed immediately and
damage fabrics. Using too much bleach can also
damage fabrics.
• Never pour undiluted liquid chlorine bleach
directly onto the load or into the drum. Fabric
damage can occur.
• Do not use color-safe bleach or oxygen bleach in
the same cycle with liquid chlorine bleach.
Fabric Softener Compartment
This compartment holds fabric softener, which is
automatically dispensed during the final rinse
cycle. Either powdered or liquid fabric softener
may be used.
• Do not exceed the maximum fill line. Using too
much fabric softener may stain clothes or cause
buildup on fabrics or in the washer.
• Dilute concentrated fabric softeners with warm
water.
• Never pour fabric softener directly onto the load
or into the drum.

16 OPERATION-WASHER
Control Panel
Control Panel Features for the Washer
aPower On/Off Button
• Press this button to turn the washer on or off.
• Pressing this button during a cycle will cancel that cycle and any load settings will be lost.
• The door will unlock after a brief pause.
NOTE
• If there is any water remaining in the drum after the washer shuts off, it will drain after a delay. The
washer can be restarted at any time before the drain begins. However, once the water begins to drain,
all functions will be suspended until the water has been completely drained and the washer shuts off.
bCycles
• Press a button to select the desired cycle.
• Once the desired cycle has been selected, the standard presets will appear in the display. These
settings can be adjusted using the Cycle Modifier buttons at any time before starting the cycle.
cStart/Pause Button
• Press and hold this button to start the selected cycle.
• If the washer is running, use this button to pause the cycle without losing the current settings.
NOTE
• If the Start/Pause button is not pressed to after a delay the washer start the selected cycle,
automatically turns off and all cycle settings are lost. Any water remaining in the drum will be drained.
dCycle Modifier Buttons
• Use these buttons to adjust the wash temperature, spin speed and soil level settings for the selected
cycle.
• The current settings are shown in the display.
• Press the button for that option to select other settings.
eOption and Extra Function Buttons

17OPERATION-WASHER
ENGLISH
• These buttons allow you to select additional cycle options. Certain buttons also allow you to activate
special functions by pressing and holding the button for 3 seconds.
Remote Start
Use a smartphone to control your washer remotely.
- For more information, see SMART FUNCTIONS in this manual.
Wi-Fi
When the washer is connected to a home Wi-Fi network, the f icon on the control panel is lit.
- To connect the washer to the LG ThinQ application, press and hold the Temp. button for 3 seconds.
Time and Status Display
aWi-Fi Indicator
• This indicator is lit when the product is connected to a home Wi-Fi network.
bRemote Start Indicator
• This indicator lights up when the Remote Start feature is activated.
cDoor Lock Indicator
• This indicator lights up when the cycle starts and the door is locked.
• The indicator light stays on until the cycle is paused, stopped or has finished.
dSignal Indicator
• This indicator lights up when the end-of-cycle and button tones are turned on.
eEstimated Time Remaining
• When a cycle is selected, the default time for that cycle is di change as modifiers splayed. This time will
or options are selected.
• If the display shows -I--, then the time will be displayed after the load sensing has detected the load
size.
• The time shown is only an estimate. This time is based on normal operating conditions. Several
external factors (load size, room temperature, incoming water temperature, etc.) can affect the actual
time.
NOTE
• Once the Start/Pause button is pressed, the washer will measure the size of the load. The estimated
time may change once the load size has been measured.
• If the Delay Wash function is set, the remaining delay time counts down until the cycle begins.
fAI DD Indicator
• This feature offers optimized washing by detecting the load size and laundry characteristics.
The indicator lights up when the Normal cycle is selected with a Warm wash temperature setting.

18 OPERATION-WASHER
NOTE
• The AI DD functionality may vary depending on the environment and model.
gCycle Status Indicators
• These LEDs will blink when a cycle is selected to indicate which stages will run.
• When a cycle is running, the LED for the active stage will blink, and the LEDs for the remaining stages
will remain steady. Once a stage is complete, the LED will turn off. If a cycle is paused, the active stage
LED will stop blinking.
19OPERATION-WASHER
ENGLISH
Wash Cycles
The wash cycles are designed for specific types of wash loads. Select the cycle that best matches the load
contents for maximum wash performance and fabric care. See Sorting Laundry section for best results,
and follow the fabric care labels on your garments. For a guide to fabric care symbols, see Sorting
Laundry section.
Cycle Guide
Turn the knob or press the button to e. When you select a wa select the desired cycl sh cycle, the light for
the corresponding wash cycle will turn on.
NOTE
• Whenever load weights are mentioned, assume 1 lb (0.45 kg) = 1 thick bath towel (dry).
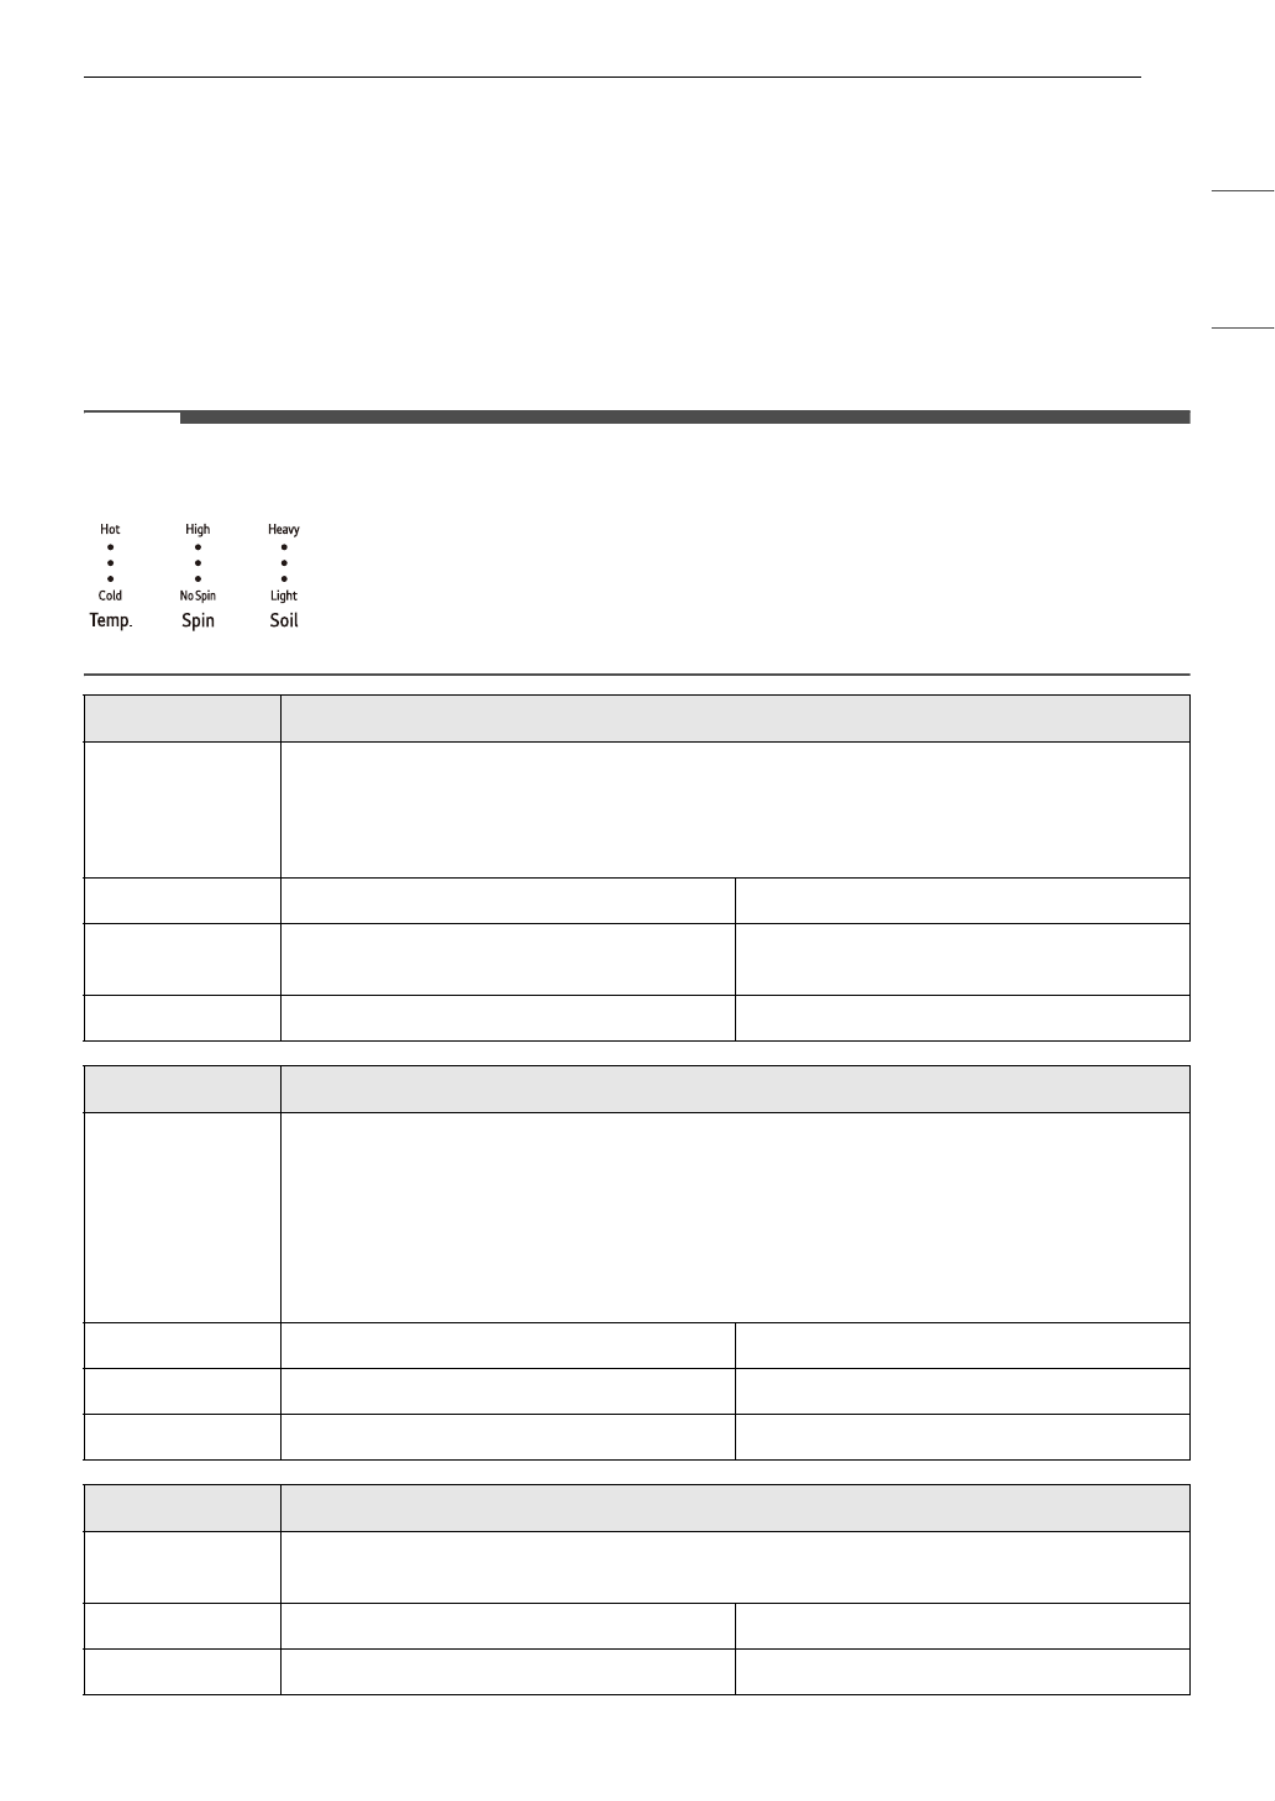
•Temperature: Cold > Cool > Warm > Very Warm > Hot
•Spin: No Spin > Low > Medium > Medium High > High
•Soil: Light > > Medium Light Normal > Medium Heavy > Heavy
Cycle Normal
Description Use to wash all normal items such as cotton, linen, shirts, jeans or mixed loads, except
delicate fabrics such as wool or silk.
• Pressing the Start/Pause button without selecting a cycle will cause the Normal
cycle to begin immediately, using the default settings.
Wash Temp. Default: Warm Available: All
Spin Speed Default: Medium High Available: High, , , Medium High Medium
Low
Soil Level Default: Normal Available: All
Cycle Bedding
Description Suitable for washing blankets or bulky items which have difficulty absorbing water, such
as pillows, blankets, comforters, sheets or pet bedding.
• Do not use this cycle to wash a mixed load of bedding and non-bedding items.
• Do not mix large/bulky items with smaller articles of clothing.
• Do not wash excessively large items. If large/bulky items do not fit easily into the
tub, there may not be enough room for them to move during washing.
Wash Temp. Default: Warm Available: Very Warm, , , Warm Cool Cold
Spin Speed Default: , , Medium Available: Medium Low No Spin
Soil Level Default: Normal Available: All
Cycle Delicates
Description Suitable for washing dress shirts/blouses, nylons, lingerie, or sheer and lacy clothes which
can easily be damaged. (less than 8 lb (3.63 kg))
Wash Temp. Default: , , Cool Available: Warm Cool Cold
Spin Speed Default: , , Medium Available: Medium Low No Spin

20 OPERATION-WASHER
Available Options
NOTE
•Delay Wash and Extra Rinse can be selected for every cycle in this table.
Soil Level Default: Normal Available: All
Cycle Heavy Duty
Description Suitable for washing heavily soiled laundry, such as cotton fabrics, using more powerful
wash motions.
• When washing large loads, there will be brief periods of 2 minutes or more
without agitation. Th the cycle’s design, and are ese soak periods are part of
normal.
Wash Temp. Default: Warm Available: All
Spin Speed Default: , , , High Available: High Medium High Medium
Low
Soil Level Default: Heavy Available: All
Cycle Speed Wash
Description Quickly washes lightly soiled clothing and small loads. For high wash and rinse efficiency,
wash small loads of 2-3 lightly soiled garments. (less than 3 lb (1.36 kg))
• Use very little detergent in this cycle. To add an extra rinse, use the Extra Rinse
option.
Wash Temp. Default: Very Warm Available: Very Warm, , , Warm Cool Cold
Spin Speed Default: High Available: All
Soil Level Default: Light Available: All
Cycle Downloaded (Rinse+Spin)
Description Use a smartphone to download a specialized cycle to this cycle position.
• The default cycle is Rinse+Spin. This cycle is also available for download.
• Refer to the LG ThinQ application to see the cycles available for download.
Wash Temp. Default: Cool Available: Cool
Spin Speed Default: Medium High Available: All
Soil Level Default: - Available: -
Cycle Steam Pre-wash
Normal # #
Bedding # #
Delicates #
Cycle Delicates

21OPERATION-WASHER
ENGLISH
Heavy Duty # #
Speed Wash
Downloaded
default: Rinse+Spin
Cycle Steam Pre-wash

22 OPERATION-WASHER
Cycle Modifiers
About Modifier Buttons
Each cycle has default settings that are selected
automatically. You can also customize these
settings using the cycle modifier buttons.
• Repeatedly press the button for the desired
modifier until the indicator light for the desired
setting is lit.
• The washer automatically adjusts the water level
for the type and size of wash load for best results
and maximum efficiency.
• This is a high-efficiency washer, and the water
levels may be much lower than you expect. This
is normal, and cleaning/rinsing performance will
not be compromised.
NOTE
• The LED next to the setting lights up when the
setting is selected.
• To protect your garments, not every wash
temperature, spin speed, soil level, or option is
available with every cycle.
• A chime will sound twice and the LED will not
light if the desired setting is not allowed for the
selected cycle.
• Follow the fabric care labels on the garment for
best results.
Temp.
Make sure the wash temperature is suitable for
the type of load you are washing.
• Press the Temp. button repeatedly to select the
wash and rinse temperature combination for the
selected cycle.
• All rinses use unheated cold water.
• Cold rinses use less energy. The actual cold rinse
temperature depends on the temperature of the
cold water at the faucet.
Spin
Higher spin speeds extract more water from
clothes, reducing drying time and saving energy.
• Press the Spin button repeatedly until the
desired speed is selected.
• Some fabrics, such as delicates, require a slower
spin speed.
Soil
Adjusting the soil level setting will modify the cycle
times and/or wash actions.
• Press the Soil button repeatedly until the desired
soil level is selected.
• The Heavy soil setting may increase cycle times.
The Light soil setting may decrease cycle times.
Options and Extra Functions
Your washer includes several additional cycle
options to customize cycles to meet your individual
needs.
• Select the desired option after selecting the
desired cycle and settings.
NOTE
• The LED for the option will light when the option
is selected.
• To protect your garments, not every option is
available with every cycle.
• A chime will sound twice and the LED will not
light if the selected option is not allowed for the
selected cycle.
Special Cycles
Sanitary
This cycle washes clothes at a high temperature.
Tub Clean
This is a special cycle designed to clean the inside
of the washer.
Steam
Adding this option to a wash cycle helps provide
superior cleaning performance. Using steam gives
fabrics the cleaning benefits of a very hot wash.
• Steam may not be clearly visible during steam
cycles. This is normal. Too much steam could
damage clothing.
• Do not use steam with delicate fabrics such as
wool and silk, or easily discolored fabrics.
WARNING
• Do not touch the door during steam cycles. The
door surface can become very hot and can cause

23OPERATION-WASHER
ENGLISH
severe burns. Allow the door lock to release
before opening the door.
• Do not attempt to override the door lock
mechanism or reach into the washer during a
steam cycle. Steam can cause severe burns.
Delay Wash
Once you have selected the cycle and other
settings, press the Delay Wash button to delay the
start of the wash cycle.
• Each press of this button increases the delay
time by 1 hour, for up to 19 hours.
• Once the desired delay time is set, press the
Start/Pause button to start the delay time.
NOTE
• If the Start/Pause button is not pressed to begin
the delay time, the washer automatically turns
off after a certain time and all cycle settings are
lost.
Extra Rinse
This option adds an extra rinse to the selected
cycle. Use this option to help ensure the removal
of detergent or bleach residue from fabrics.
• Press the Extra Rinse button to add additional
rinses to the cycle.
Using the Pre-wash Option
This option adds a pre-wash (for about 15 - 17
minutes) for improved cleaning of heavily soiled
or stained clothing.
NOTE
• If you select Pre-wash after putting the
detergent directly in the drum, the detergent
may be washed away, reducing the washing
performance.
Control Lock
Use this function to disable the controls. This
function can prevent children from changing
cycles or operating this washer.
NOTE
• The function does not lock the door.
• Once this function is set, all buttons are locked
except the Power button.
• When the controls are locked, CL and the
remaining time are alternately shown on the
display during the wash cycle.
• Turning off the power will not reset this function.
You must deactivate this function before you can
access any other options and functions.
Locking/Unlocking the Control Panel
1 Turn on the power.
2 Press and hold the Soil button for 3 seconds
to activate/deactivate this function.
• When the function is deactivated, a chime will
sound and the remaining time for the current
cycle will reappear on the display.
Signal
The washer plays a melody when the wash cycle is
finished. The buttons make a sound each time a
button is pressed. Use this button to turn the
melody and button tones on or off.
• To turn the function on/off, press and hold the
Extra Rinse button for 3 seconds.

24 OPERATION-DRYER
OPERATION-DRYER
Using the Dryer
WARNING
• To reduce the risk of fire, electric shock, or injury
to persons, read the SAFETY INSTRUCTIONS
before operating this appliance.
Operation Overview
1 Clean the Lint Filter.
• If the lint filter has not already been
cleaned, lift out the filter and remove the
lint from the last load. This will help ensure
the fastest and most efficient drying
performance. Make sure to reinstall the
filter, pressing down until it clicks firmly into
place.
2 Load the Dryer.
• Load the dryer with the wet laundry from
the washer. If the load is extra large, you
may need to divide it into smaller loads for
proper performance and fabric care.
3 Turn on the Dryer.
• Press the Power button to turn on the
dryer. The cycle LEDs will illuminate and a
chime will sound.
4 Select a Cycle.
• Press a cycle button to select a cycle. The
preset temperature, dry level, and option
settings for that cycle will be shown.
5 Adjust Settings.
Default settings for the selected cycle can now
be changed, if desired, using the cycle
modifier and option buttons.
• Not all modifiers and options are available
on all cycles. A different chime will sound
and the LED will not come on if the selection
is not allowed.
6 Begin Cycle.
• Press the Start/Pause button to begin the
cycle. The cycle can be paused at any time
either by opening the door or by pressing
the Start/Pause button.
• If the Start/Pause button is not pressed
within a certain time, the dryer shuts off
and all settings are lost.
7 End of Cycle
• When the cycle is finished, the chime will
sound. Immediately remove your clothing
from the dryer to reduce wrinkling. If
Wrinkle Care is selected, the dryer will
tumble briefly every few minutes to help
prevent wrinkles from setting in the clothes.
Check the Lint Filter Before Every
Load
Always make sure the lint filter a is clean before
starting a new load; a clogged lint filter will
increase drying time. To clean, pull the lint filter
straight up and roll any lint off the filter with your
fingers. Push the lint filter firmly back into place.
See Regular Cleaning for more information.
Always ensure the lint filter is properly installed
before running the dryer. Running the dryer with a
loose or missing lint filter will damage the dryer
and articles in the dryer.
Loading the Dryer
General Tips
• Combine large and small items in the same load.
• Close zippers, hooks and drawstrings to prevent
these items from snagging or tangling on other
clothes.

27OPERATION-DRYER
ENGLISH
Time and Status Display
aWi-Fi Indicator
• This indicator is lit when the product is connected to a home Wi-Fi network.
bRemote Start Indicator
• This indicator lights up when the Remote Start feature is activated.
cFlow Sense Indicator
• The Flow Sense duct blockage sensing system detects and alerts you to blockages in the ductwork
that reduce exhaust flow from the dryer. Maintaining a clean exhaust system improves operating
efficiency and helps minimize service calls, saving you money.
dSignal Indicator
• This indicator lights up when the end-of-cycle and button tones are turned on.
eEstimated Time Remaining
• When a drying cycle is selected, the estimated drying time for the selected cycle is displayed. This
time will change if you select extra options for the cycle.
• The cycle time on Sensor Dry cycles may fluctuate as the appliance recalculates drying time for
optimal results.
fAI Sensor Dry Indicator
• This feature optimizes drying times and temperatures by detecting the laundry's characteristics.
The indicator lights up when the Normal cycle is selected with the Normal dry level, except when the
Energy Saver option is turned on.
gLint Filter Status Indicator
•K lights up at the beginning of the cycle to remind you to check the lint filter. It also lights up if the
lint filter needs to be cleaned or is missing.
- If the lint filter is not inserted, the icon will light up and the appliance will not operate.
hCycle Status Indicators
•@ lights up when the appliance is in the drying stage.
•= lights up when the appliance is in the cool down stage.

28 OPERATION-DRYER
Dry Cycles
Cycle Guide
The appliance automatically sets the dryness level and temperature at the recommended setting for each
cycle. The estimated time remaining will be shown in the display.
•Temperature: Low > Medium Low > Medium > Medium High > High
•Dry Level: Damp > Less > Normal > More > Very
Cycle Normal
Description Use this cycle for drying all normal items such as cotton, linen, shirts, jeans or mixed
loads, except delicate fabrics such as wool or silk.
Temp. Default: Medium High Available: Medium High
Dry level Default: Normal Available: All
Cycle Bedding
Description Use this cycle for drying blankets or bulky items such as pillows, blankets, comforters,
sheets or pet bedding.
Temp. Default: Medium MediumAvailable:
Dry level Default: Normal Available: Very, More, Normal
Cycle Delicates
Description Use this cycle for drying dress shirts/blouses, nylons, lingerie, or sheer and lacy clothes
which can easily be damaged.
Temp. Default: Medium Low Available: Medium Low
Dry level Default: Normal Available: All
Cycle Heavy Duty
Description Use this cycle for drying heavy-duty clothes like jeans or garments that need extra
drying.
Temp. Default: High HighAvailable:
Dry level Default: Normal Available: All
Cycle Small Load
Description Use this cycle for drying light or small items. (up to 3 items)
Temp. Default: High HighAvailable:
Dry level Default: Normal Available: Very, More, Normal

29OPERATION-DRYER
ENGLISH
Available Options
† This option is automatically included in the cycle and can be deselected.
NOTE
• The Energy Saver option is set to on by default. If you turn on the dryer and set the Energy Saver option
to off, the Energy Saver option is turned off when you turn on the dryer.
Cycle Downloaded (Perm. Press)
Description Use a smartphone to download a specialized cycle to this cycle position.
• The default cycle is Perm. Press. This cycle is also available for download.
• Refer to the LG ThinQ application to see the cycles available for download.
Temp. Default: Medium MediumAvailable:
Dry level Default: Normal Available: All
Cycle Wrinkle Care Energy Saver
Normal ##†
Bedding
Delicates #
Heavy Duty #
Small Load #
Downloaded
default: Perm. Press
#

30 OPERATION-DRYER
Cycle Modifiers
About Modifier Buttons
Each cycle has default settings that are selected
automatically. Customize these settings using the
cycle modifier buttons. Press the button for the
desired modifier to open the modifier’s screen.
Temp.
Use this button to adjust the temperature setting.
This allows precise care of fabrics and garments.
Press the Temp. button repeatedly to scroll
through available settings.
Dry Level
Use this button to select the dryness level for the
cycle. Press the Dry Level button repeatedly to
scroll through available settings.
• The appliance will automatically adjust the cycle
time according to the selected dryness level.
Selecting More or Very will increase the cycle
time, while Less or Damp will decrease the cycle
time.
• Use a Less or Damp setting for items that you
wish to iron.
Time Dry
Use this button to manually select the drying time,
from 20 to 60 minutes, in 10-minute increments.
• Use this for small loads or to remove wrinkles.
Options and Extra Functions
Your dryer includes several additional cycle
options to customize cycles to meet your individual
needs.
Select the desired option after selecting the
desired cycle and settings.
NOTE
• The LED for the option will light up when the
option is selected.
• To protect your garments, not every option is
available with every cycle.
• A chime will sound twice and the LED will not
light up if the selected option is not allowed for
the selected cycle.
More Time / Less Time
Use these buttons to increase or decrease drying
time in 5 minutes increments when you use the
Time Dry funtion.
Wrinkle Care
Selecting this option will tumble the load
periodically for up to 3 hours after the selected
cycle, or until the door is opened. This is helpful in
preventing wrinkles when you are unable to
remove items from the dryer immediately.
Press the Wrinkle Care button before you start a
drying cycle.
NOTE
• When the option is set, a rectangle with a
dashed line and ENd appears on the display until
the feature is off.
• When the option is set, only the Power button
works after the drying cycle ends.
• When a drying cycle is running, pause the cycle
first to set the option.
• Always turn off the appliance before unloading
the clothes.
Energy Saver
This option helps to reduce the energy
consumption of the Normal cycle, depending on
the load size. When the Energy Saver option is
selected, the cycle begins with an air dry section
and the drying time is increased.
Control Lock
Use this function to disable the controls. This
function can prevent children from changing
cycles or operating this dryer.
NOTE
• The function does not lock the door.
• Once this function is set, all buttons are locked
except the Power button.
• When the controls are locked, CL and the
remaining time are alternately shown on the
display during the dry cycle.

31OPERATION-DRYER
ENGLISH
• Turning off the power will not reset this function.
You must deactivate this function before you can
access any other options and functions.
Locking/Unlocking the Control Panel
1 Turn on the power.
2 Press and hold the Time Dry button for 3
seconds to activate/deactivate this function.
• When the function is deactivated, a chime will
sound and the remaining time for the current
cycle will reappear on the display.
Signal
The dryer plays a melody when the dry cycle is
finished. The buttons make a sound each time a
button is pressed. Use this button to turn the
melody and button tones on or off.
• To turn the function on/off, press and hold the
Wrinkle Care button for 3 seconds.

32 SMART FUNCTIONS
SMART FUNCTIONS
Using LG ThinQ Application
The LG ThinQ application allows you to
communicate with the appliance using a
smartphone.
LG ThinQ Application Features
•Remote Start
- Control the appliance remotely from the LG
ThinQ application.
•Downloaded
- Download new and specialized cycles that are
not included in the standard cycles on the
appliance. Once cycle download is completed
in the appliance, the product keeps the
downloaded cycle until a new cycle is
downloaded.
•Cloud Cycle
- The Cloud cycles include many cycles which
are started from the Cloud and offer various
options. However, the downloaded cycle is
deleted from the appliance when the power is
turned off.
•Tub Clean Coach (Washer)
- Find out how many cycles remain before it is
time to run the Tub Clean cycle.
• Venting Tips (Dryer)
- Access tips for optimizing dryer ventilation.
•Energy Monitoring
- Keep track of the appliance's power
consumption and how it is affected by your
selected wash cycles and options.
•Smart DiagnosisTM
- This function provides useful information for
diagnosing and solving issues with the
appliance based on the pattern of use.
•Push Alerts
- When the cycle is complete or the appliance
has problems, you will receive a push
message.
•Settings
- Set various options on the appliance and in the
application.
NOTE
• If you change your wireless router, Internet
service provider, or password, delete the
connected appliance from the LG ThinQ
application and connect it again.
• This information is current at the time of
publication. The application is subject to change
for product improvement purposes without
notice to users.
Before Using LG ThinQ Application
1 Check the distance between the appliance
and the wireless router (Wi-Fi network).
• If the appliance is too far from the router,
the signal strength becomes weak. It may
take a long time to connect or installation
may fail.
2 Turn off the Mobile data or Cellular Data on
your smartphone.
3 Connect your smartphone to the wireless
router.
NOTE
• To verify the Wi-Fi connection, check that the f
icon on the control panel is lit.
• The appliance supports 2.4 GHz Wi-Fi networks
only. To check your network frequency, contact
your Internet service provider or refer to your
wireless router manual.
• is not responsiblLG ThinQ e for any network
connection problems or any faults, malfunctions,
or errors caused by network connection.
• If the appliance is having trouble connecting to
the Wi-Fi network, it may be too far from the
router. Purchase a Wi-Fi repeater (range
extender) to improve the Wi-Fi signal strength.
• The Wi-Fi connection may not connect or may be
interrupted because of the home network
environment.

34 SMART FUNCTIONS
installation. This equipment generates, uses, and
can radiate radio frequency energy and, if not
installed and used in accordance with the
instructions, may cause harmful interference to
radio communications. However, there is no
guarantee that interference will not occur in a
particular installation. If this equipment does
cause harmful interference to radio or television
reception, which can be determined by turning the
equipment off and on, the user is encouraged to
try to correct the interference by one or more of
the following measures:
• Reorient or relocate the receiving antenna.
• Increase the separation between the equipment
and the receiver.
• Connect the equipment to an outlet on a circuit
different from that to which the receiver is
connected.
• Consult the dealer or an experienced radio/TV
technician for help.
This device complies with part 15 of the FCC Rules.
Operation is subject to the following two
conditions:
(1) This device may not cause harmful interference
and
(2) This device must accept any interference
received, including interference that may cause
undesired operation.
Any changes or modifications in construction of
this device which are not expressly approved by
the party responsible for compliance could void
the user’s authority to operate the equipment.
FCC RF Radiation Exposure Statement
This equipment complies with FCC radiation
exposure limits set forth for an uncontrolled
environment. This transmitter must not be co-
located or operating in conjunction with any other
antenna or transmitter.
This equipment should be installed and operated
with a minimum distance of 20 cm (7.8 inches)
between the antenna and your body. Users must
follow the specific operating instructions for
satisfying RF exposure compliance.
Open Source Software Notice
Information
To obtain the source code under GPL, LGPL, MPL,
and other open source licenses, that is contained
in this product, please visit http://
opensource.lge.com. In addition to the source
code, all referred license terms, warranty
disclaimers and copyright notices are available for
download.
LG Electronics will also provide open source code
to you on CD-ROM for a charge covering the cost
of performing such distribution (such as the cost of
media, shipping, and handling) upon email
request to opensource@lge.com. This offer is
valid for a period of three years after our last
shipment of this product. This offer is valid to
anyone in receipt of this information.
Smart DiagnosisTM Function
Use this feature to help you diagnose and solve
problems with your appliance.
NOTE
• For reasons not attributable to LGE’s negligence,
the service may not operate due to external
factors such as, but not limited to, Wi-Fi
unavailability, Wi-Fi disconnection, local app
store policy, or app unavailability.
• The feature may be subject to change without
prior notice and may have a different form
depending on where you are located.
Using LG ThinQ to Diagnose Issues
If you experience a problem with your Wi-Fi
equipped appliance, it can transmit
troubleshooting data to a smartphone using the
LG ThinQ application.
• Launch the LG ThinQ application and select the
Smart DiagnosisTM feature in the menu. Follow
the instructions provided in the LG ThinQ
application.
Using Audible Diagnosis to
Diagnose Issues
Follow the instructions below to use the audible
diagnosis method.
• Launch the LG ThinQ application and select the
Smart DiagnosisTM feature in the menu. Follow
the instructions for audible diagnosis provided
in the LG ThinQ application.
1 Press the Power button to turn on the
appliance.
• Do not press any other buttons.
2 Hold the mouthpiece of your phone in front of
the appliance.
• Washer: Hold the phone to the right of the
Start/Pause button.

35SMART FUNCTIONS
ENGLISH
• Dryer: Hold the phone to the left of the
Power button.
3 Press and hold the Steam + Extra Rinse
(Washer) / More Time + Wrinkle Care (Dryer)
buttons for 3 seconds or until the audible
tones start. Hold the smartphone mouthpiece
to the logo until the data transfer is complete.
• Keep the smartphone in place until the data
transfer has finished. Time remaining for
data transfer is displayed.
4 After the data transfer is complete, the
diagnosis will be displayed in the application.
NOTE
• For best results, do not move the smartphone
while the tones are being transmitted.

36 MAINTENANCE
MAINTENANCE
WARNING
• To reduce the risk of fire, electric shock, or injury to persons, read this entire owner’s manual, including
the SAFETY INSTRUCTIONS, before operating this appliance.
• Unplug the appliance before cleaning to avoid the risk of electric shock. Failure to follow this warning
can cause serious injury, fire, electric shock, or death.
• Do not use volatile substances (benzene, paint thinner, alcohol, acetone, etc.), abrasive cleaners, or
detergents with strong chemical components when cleaning the appliance. Doing so may cause
discoloration or damage to the appliance, or may cause a fire.
• Certain internal parts are intentionally not grounded and may present a risk of electric shock only during
servicing. Service personnel - Do not contact the following parts while the appliance is energized: pump,
valve, motor, control board.
Washer
Regular Cleaning
Care after Wash
After the cycle is finished, wipe the door and the
inside of the door seal to remove any moisture.
• Wipe the body of the washer with a dry cloth to
remove any moisture.
• Leave the door open to dry the drum interior.
WARNING
• Make sure children and pets do not climb into
the drum. Engage the Control Lock feature if
needed to prevent children from accidentally
starting a wash cycle.
Cleaning the Exterior
Proper care of your washer can extend its life.
Door:
Wash with a damp cloth on the outside and inside
and then dry with a soft cloth.
Exterior:
• Immediately wipe off any spills.
• Wipe with a damp cloth.
• Do not touch the surface or the display with
sharp objects.
Cleaning the Drum
Over time, residue may build up in the drum,
leading to mildew or a musty odor. Run the Tub
Clean cycle monthly to remove residue and
prevent odor.
NOTE
• Make sure to run the Tub Clean cycle only when
the drum is empty. Never load laundry while
using this cycle. The laundry may be damaged or
contaminated with cleaning products.
• Run the cycle more often under heavy use
conditions or if odor is already present.
• If mildew or musty smell already exists, run this
cycle once a week for three consecutive weeks.
1 Remove any clothing from the drum.
2 Add cleaning agents.
Cleaner Instructions
Drum cleaner Add to main detergent
compartment of detergent
dispenser
Lime scale
remover
Liquid chlorine
bleach
Add to bleach compartment
of detergent dispenser.
Powdered cleaner Pull out liquid detergent cup
before adding to main
detergent compartment
Cleaning tablets Place directly into the washer
drum.
Specyfikacje produktu
| Marka: | LG |
| Kategoria: | pralka |
| Model: | WKG101HWA |
Potrzebujesz pomocy?
Jeśli potrzebujesz pomocy z LG WKG101HWA, zadaj pytanie poniżej, a inni użytkownicy Ci odpowiedzą
Instrukcje pralka LG

19 Lutego 2025
10 Stycznia 2025
10 Stycznia 2025
10 Stycznia 2025
10 Stycznia 2025
10 Stycznia 2025
10 Stycznia 2025
10 Stycznia 2025
10 Stycznia 2025
10 Stycznia 2025
Instrukcje pralka
- pralka Bauknecht
- pralka Ikea
- pralka Samsung
- pralka Bertazzoni
- pralka Electrolux
- pralka DeLonghi
- pralka AEG
- pralka Balay
- pralka Beko
- pralka Teka
- pralka Küppersbusch
- pralka Smeg
- pralka Gram
- pralka Amica
- pralka Gorenje
- pralka Etna
- pralka LERAN
- pralka Sharp
- pralka TCL
- pralka Triumph
- pralka Russell Hobbs
- pralka Simpson
- pralka Bosch
- pralka Candy
- pralka Whirlpool
- pralka Miele
- pralka Midea
- pralka Lamona
- pralka Hisense
- pralka Infiniton
- pralka Singer
- pralka Panasonic
- pralka Nedis
- pralka Medion
- pralka Baumatic
- pralka Black & Decker
- pralka OK
- pralka Polar
- pralka Adler
- pralka Hoover
- pralka Toshiba
- pralka Tesla
- pralka Westinghouse
- pralka Quigg
- pralka Romo
- pralka Maytag
- pralka Domo
- pralka GE
- pralka Brandt
- pralka Vivax
- pralka Salora
- pralka Siemens
- pralka Danby
- pralka Grundig
- pralka Haier
- pralka Cylinda
- pralka Jocel
- pralka Hyundai
- pralka Blomberg
- pralka Mesko
- pralka Husqvarna
- pralka Concept
- pralka Fisher & Paykel
- pralka ECG
- pralka Indesit
- pralka Matsui
- pralka Viking
- pralka Primus
- pralka Nodor
- pralka CATA
- pralka Dyson
- pralka Hotpoint
- pralka Kenwood
- pralka V-Zug
- pralka Ariston Thermo
- pralka Mestic
- pralka PKM
- pralka Thor
- pralka Amana
- pralka Hotpoint Ariston
- pralka Bomann
- pralka Ursus Trotter
- pralka Patriot
- pralka Intex
- pralka Meireles
- pralka Foppapedretti
- pralka Stirling
- pralka MPM
- pralka OneConcept
- pralka CDA
- pralka Philco
- pralka Neff
- pralka CHiQ
- pralka Corbero
- pralka Zanussi
- pralka Ravanson
- pralka Fagor
- pralka Koenic
- pralka Thomson
- pralka Ardo
- pralka Klarstein
- pralka Manta
- pralka Pyle
- pralka Wolkenstein
- pralka Cecotec
- pralka Artusi
- pralka KitchenAid
- pralka Icecool
- pralka Camry
- pralka Germanica
- pralka Sôlt
- pralka Nevir
- pralka Exquisit
- pralka Hestan
- pralka Privileg
- pralka Aurora
- pralka Arçelik
- pralka Hanseatic
- pralka Continental Edison
- pralka Rosieres
- pralka Franke
- pralka AKAI
- pralka Sanyo
- pralka Clatronic
- pralka Telefunken
- pralka Rommer
- pralka Calor
- pralka Inventum
- pralka SVAN
- pralka IFB
- pralka Carson
- pralka Olympia
- pralka Euro Appliances
- pralka Caple
- pralka AEG-Electrolux
- pralka Omega
- pralka Comfee
- pralka Classique
- pralka Wisberg
- pralka Bush
- pralka New Pol
- pralka Kenmore
- pralka VOX
- pralka Insignia
- pralka Hiberg
- pralka AYA
- pralka Pelgrim
- pralka Veripart
- pralka Frilec
- pralka Benavent
- pralka Element
- pralka Orima
- pralka Rex
- pralka Kernau
- pralka Aspes
- pralka Orion
- pralka Hitachi
- pralka Zerowatt
- pralka Technika
- pralka Vedette
- pralka Seiki
- pralka Frigidaire
- pralka Galanz
- pralka RCA
- pralka Summit
- pralka Electra
- pralka Kelvinator
- pralka Gaggenau
- pralka Nabo
- pralka EasyMaxx
- pralka Avanti
- pralka Asko
- pralka Kalorik
- pralka Zenith
- pralka Flavel
- pralka Esatto
- pralka Signature
- pralka Daewoo
- pralka Consul
- pralka Porter & Charles
- pralka Kunft
- pralka Robinhood
- pralka Becken
- pralka Scandomestic
- pralka Ignis
- pralka Emilia
- pralka Belling
- pralka De Dietrich
- pralka SanGiorgio
- pralka ZLine
- pralka Magic Chef
- pralka Eurom
- pralka Arctic Cooling
- pralka Sauber
- pralka Crosley
- pralka Constructa
- pralka Proline
- pralka Euromaid
- pralka BLANCO
- pralka Lemair
- pralka Finlux
- pralka Atlas
- pralka Swan
- pralka Zanker
- pralka Kluge
- pralka Acec
- pralka Alpina
- pralka Alluxe
- pralka Aldi
- pralka Ariston
- pralka Aristona
- pralka Ahma
- pralka Techwood
- pralka Tricity Bendix
- pralka Palsonic
- pralka Saturn
- pralka Nordland
- pralka Zanussi-electrolux
- pralka Tomado
- pralka Vestel
- pralka John Lewis
- pralka Prima
- pralka Mabe
- pralka Monogram
- pralka Iberna
- pralka Logik
- pralka Scholtes
- pralka Profilo
- pralka Castor
- pralka Heinner
- pralka Hoover-Helkama
- pralka Juno
- pralka Defy
- pralka Schulthess
- pralka Otsein-Hoover
- pralka Premium
- pralka White Knight
- pralka Sunny
- pralka ProAction
- pralka Trebs
- pralka Luxor
- pralka Nordmende
- pralka Friac
- pralka Dexter
- pralka Hansa
- pralka Kubo
- pralka Elba
- pralka WLA
- pralka Ansonic
- pralka Laden
- pralka Everglades
- pralka Freggia
- pralka Listo
- pralka Edesa
- pralka Milectric
- pralka Lloyd
- pralka New World
- pralka Speed Queen
- pralka WhiteLine
- pralka Bompani
- pralka Viva
- pralka Koblenz
- pralka Primo
- pralka Creda
- pralka Atlantic
- pralka Godrej
- pralka Mx Onda
- pralka Kleenmaid
- pralka Hilton
- pralka Essentiel B
- pralka Bendix
- pralka Edy
- pralka Zoppas
- pralka Edgestar
- pralka Parmco
- pralka Eurotech
- pralka Carrefour Home
- pralka Equator
- pralka Vestfrost
- pralka Integra
- pralka Upo
- pralka Belion
- pralka Lloyds
- pralka SIBIR
- pralka Calex
- pralka Trieste
- pralka Butler
- pralka Café
- pralka ARC
- pralka DEXP
- pralka Lynx
- pralka Teco
- pralka Bluesky
- pralka Otsein
- pralka Videocon
- pralka Khind
- pralka Tisira
- pralka Wasco
- pralka Cobal
- pralka Premier
- pralka Kenny
- pralka Marynen
- pralka Morris
- pralka Laurus
- pralka Eudora
- pralka Thomas
- pralka Linetech
- pralka Kogan
- pralka PolyJohn
- pralka ZWF81443W
- pralka T&S
- pralka Cambro
- pralka Fensa
- pralka Dishlex
- pralka Simplicity
- pralka Elin
- pralka High One
- pralka Companion
- pralka Codini
- pralka Curtiss
- pralka Winia
- pralka Ocean
- pralka IPSO
- pralka Imesa
- pralka Fisher Paykel
- pralka Arda
- pralka Camec
- pralka DAYA
- pralka Americana
- pralka Horn
- pralka MegaMove
- pralka FAURE
- pralka Novamatic
- pralka KIN
- pralka BSK
- pralka Miele Professional
- pralka Mio Star
- pralka Adora
- pralka Newpol
- pralka Samus
- pralka Dexter Laundry
- pralka Haden
- pralka Howdens
- pralka Drean
- pralka Arthur Martin-Electrolux
- pralka Elektra Bregenz
- pralka Tuscany
- pralka Smart Brand
- pralka Waltham
- pralka Imarflex
- pralka Helkama
- pralka Pitsos
- pralka Foron
- pralka Cove
- pralka EBD
Najnowsze instrukcje dla pralka

9 Kwietnia 2025

9 Kwietnia 2025

9 Kwietnia 2025

9 Kwietnia 2025
9 Kwietnia 2025

9 Kwietnia 2025
9 Kwietnia 2025
9 Kwietnia 2025
9 Kwietnia 2025

9 Kwietnia 2025