Instrukcja obsługi Lenovo Thinkcentre M77
Przeczytaj poniżej 📖 instrukcję obsługi w języku polskim dla Lenovo Thinkcentre M77 (136 stron) w kategorii Pulpit. Ta instrukcja była pomocna dla 6 osób i została oceniona przez 2 użytkowników na średnio 4.5 gwiazdek
Strona 1/136

ThinkCentre
UserGuide
MachineTypes:1982,1983,1985,1986,1987,1990,1992,1993,
1994,and1995

Note:Beforeusingthisinformationandtheproductitsupports,besuretoreadandunderstandthe
“Importantsafetyinformation”onpagevandAppendixA“Notices”onpage107.
ThirdEdition(June2012)
©CopyrightLenovo2011,2012.
LIMITEDANDRESTRICTEDRIGHTSNOTICE:IfdataorsoftwareisdeliveredpursuantaGeneralServicesAdministration
“GSA”contract,use,reproduction,ordisclosureissubjecttorestrictionssetforthinContractNo.GS-35F-05925.

Contents
Importantsafetyinformation......v
Serviceandupgrades.............v
Staticelectricityprevention...........v
Powercordsandpoweradapters........vi
Extensioncordsandrelateddevices.......vi
Plugsandoutlets..............vii
Externaldevices..............vii
Heatandproductventilation.........vii
Operatingenvironment...........viii
Modemsafetyinformation..........viii
Lasercompliancestatement..........ix
Powersupplystatement............ix
Cleaningandmaintenance...........ix
Chapter1.Productoverview......1
Features..................1
Specications................4
Softwareoverview..............4
SoftwareprovidedbyLenovo........4
AdobeReader..............7
Antivirussoftware.............7
Locations..................7
Locatingconnectors,controls,andindicators
onthefrontofyourcomputer........8
Locatingconnectorsontherearofyour
computer................9
Locatingcomponents..........11
Locatingpartsonthesystemboard....12
Locatinginternaldrives.........13
Machinetypeandmodellabel.......14
Chapter2.Usingyourcomputer...15
Frequentlyaskedquestions.........15
Usingthekeyboard.............15
UsingWindowsshortcutkeys.......15
Usingangerprintreader........16
Usingthewheelmouse...........16
Adjustingaudio..............16
Aboutyourcomputeraudio........16
Settingthevolumefromthedesktop....17
SettingthevolumefromControlPanel...17
UsingCDsandDVDs............17
HandlingandstoringCDandDVDmedia..17
PlayingaCDorDVD..........18
RecordingaCDorDVD.........18
Chapter3.Youandyourcomputer..19
Accessibilityandcomfort..........19
Arrangingyourworkspace........19
Comfort...............19
Glareandlighting............20
Aircirculation.............20
Electricaloutletsandcablelengths.....20
RegisteryourcomputerwithLenovo......21
Movingyourcomputertoanothercountryor
region..................21
Voltage-selectionswitch.........21
Replacementpowercords........21
Chapter4.Security..........23
Securityfeatures..............23
Lockingthecomputercover.........24
Attachinganintegratedcablelock.......25
Usingpasswords..............25
BIOSpasswords............25
Windowspasswords..........26
Conguringthengerprintreader.......26
Usingandunderstandingrewalls.......26
Protectingdataagainstviruses........26
Chapter5.Installingorreplacing
hardware...............29
Handlingstatic-sensitivedevices.......29
Installingorreplacinghardware........29
Installingexternaloptions........29
Removingthecomputercover.......30
Removingandreinstallingthefrontbezel..31
InstallingorreplacingaPCIcard......31
Installingorreplacingamemorymodule...34
Installingorreplacingtheopticaldrive...36
Installingorreplacingthecardreader....38
Replacingthebattery..........42
Replacingthepowersupplyassembly...44
Replacingtheheatsinkandfanassembly..45
Replacingthemicroprocessor.......47
Replacingtheprimaryharddiskdrive....49
Replacingthesecondaryharddiskdrive...51
Replacingthefrontfanassembly.....53
Replacingtherearfan..........55
ReplacingthefrontaudioandUSB
assembly...............57
Replacingtheinternalspeaker.......58
Replacingthekeyboardormouse.....60
Completingthepartsreplacement.....61
©CopyrightLenovo2011,2012 i

Chapter6.Recoveryinformation...63
Creatingandusingrecoverymedia......63
Creatingrecoverymedia.........63
Usingrecoverymedia..........64
Performingbackupandrecoveryoperations...64
Performingabackupoperation......64
Performingarecoveryoperation......65
UsingtheRescueandRecoveryworkspace...65
Creatingandusingarescuemedium......66
Creatingarescuemedium........66
Usingarescuemedium.........66
Reinstallingpreinstalledapplicationsanddevice
drivers..................
Reinstallingsoftwareprograms........68
Reinstallingdevicedrivers..........68
Solvingrecoveryproblems..........68
Chapter7.UsingtheSetupUtility
program................71
StartingtheSetupUtilityprogram.......71
Viewingandchangingsettings........71
Usingpasswords..............71
Passwordconsiderations.........72
Power-OnPassword..........72
AdministratorPassword.........72
HardDiskPassword...........72
Setting,changing,anddeletingapassword.72
Erasinglostorforgottenpasswords(clearing
CMOS)................73
Enablingordisablingadevice........73
Selectingastartupdevice..........74
Selectingatemporarystartupdevice....74
Selectingorchangingthestartupdevice
sequence...............74
EnablingErPcompliancemode........74
ExitingtheSetupUtilityprogram.......75
Chapter8.Updatingsystem
programs...............77
Usingsystemprograms...........77
Updating(ashing)theBIOSfromadisc....77
Updating(ashing)theBIOSfromyouroperating
system..................8
RecoveringfromaPOST/BIOSupdatefailure..78
Chapter9.Preventingproblems...79
Keepingyourcomputercurrent........79
Gettingthelatestdevicedriversforyour
computer...............79
Updatingyouroperatingsystem......79
UsingSystemUpdate..........80
Cleaningandmaintenance..........80
Basics................80
Cleaningyourcomputer.........81
Goodmaintenancepractices.......82
Movingyourcomputer...........82
Chapter10.Troubleshootingand
diagnostics..............83
Basictroubleshooting............83
Troubleshootingprocedure..........84
Troubleshooting..............84
Audioproblems............85
CDproblems.............86
DVDproblems.............87
Intermittentproblems..........89
Keyboard,mouse,orpointingdevice
problems...............89
Monitorproblems............90
Networkingproblems..........92
Optionproblems............95
Performanceandlockupproblems.....96
Printerproblems............97
Serialportproblems...........98
Softwareproblems...........98
USBproblems.............99
Diagnosticprograms............99
LenovoSolutionCenter.........100
LenovoThinkVantageT oolbox.......100
PC-DoctorforDOS...........101
Chapter11.Gettinginformation,help,
andservice.............103
Informationresources............103
LenovoThinkVantageT ools........103
LenovoWelcome............103
HelpandSupport............103
SafetyandWarranty...........103
LenovoWebsite(http://www.lenovo.com)..103
LenovoSupportWebsite.........
Helpandservice..............104
Usingthedocumentationanddiagnostic
programs...............104
Callingforservice............104
Usingotherservices..........105
Purchasingadditionalservices......105
AppendixA.Notices.........107
Trademarks................108
AppendixB.Regulatory
information.............109
Exportclassicationnotice..........109
iiThinkCentreUserGuide
104

Televisionoutputnotice...........109
Electronicemissionsnotices.........109
FederalCommunicationsCommission
DeclarationofConformity........109
Additionalregulatoryinformation.......111
AppendixC.WEEEandrecycling
information.............113
ImportantWEEEInformation.........113
Recyclinginformation............113
RecyclinginformationforBrazil........114
BatteryrecyclinginformationforTaiwan.....114
BatteryrecyclinginformationfortheEuropean
Union..................115
AppendixD.RestrictionofHazardous
SubstancesDirective(RoHS)....117
ChinaRoHS................117
TurkishRoHS...............117
UkraineRoHS...............117
IndiaRoHS................118
Index.................119
©CopyrightLenovo2011,2012 iii

ivThinkCentreUserGuide

Importantsafetyinformation
CAUTION:
Beforeusingthismanual,besuretoreadandunderstandalltherelatedsafetyinformationforthis
product.RefertotheinformationinthissectionandthesafetyinformationintheThinkCentreSafety
andWarrantyGuidethatyoureceivedwiththisproduct.Readingandunderstandingthissafety
informationreducestheriskofpersonalinjuryanddamagetoyourproduct.
IfyounolongerhaveacopyoftheThinkCentreSafetyandWarrantyGuide,youcanobtainaPortable
DocumentFormat(PDF)versionfromtheLenovo ®SupportWebsiteathttp://support.lenovo.com.The
LenovoSupportWebsitealsoprovidestheThinkCentreSafetyandWarrantyGuideandthisThinkCentre
UserGuideinadditionallanguages.
Serviceandupgrades
DonotattempttoserviceaproductyourselfunlessinstructedtodosobytheCustomerSupportCenteror
yourdocumentation.OnlyuseaServiceProviderwhoisapprovedtorepairyourparticularproduct.
Note:Somecomputerpartscanbeupgradedorreplacedbythecustomer.Upgradestypicallyare
referredtoasoptions.ReplacementpartsapprovedforcustomerinstallationarereferredtoasCustomer
ReplaceableUnits,orCRUs.Lenovoprovidesdocumentationwithinstructionswhenitisappropriatefor
customerstoinstalloptionsorreplaceCRUs.Y oumustcloselyfollowallinstructionswheninstallingor
replacingparts.TheOffstateofapowerindicatordoesnotnecessarilymeanthatvoltagelevelsinsidea
productarezero.Beforeyouremovethecoversfromaproductequippedwithapowercord,alwaysmake
surethatthepoweristurnedoffandthattheproductisunpluggedfromanypowersource.Formore
informationonCRUs,refertoChapter5“Installingorreplacinghardware”onpage29 .Ifyouhaveany
questionsorconcerns,contacttheCustomerSupportCenter.
Althoughtherearenomovingpartsinyourcomputerafterthepowercordhasbeendisconnected,the
followingwarningsarerequiredforyoursafety.
CAUTION:
Hazardousmovingparts.Keepngersandotherbodypartsaway.
CAUTION:
BeforereplacinganyCRUs,turnoffthecomputerandwaitthreetoveminutestoletthecomputer
coolbeforeopeningthecover.
Staticelectricityprevention
Staticelectricity,althoughharmlesstoyou,canseriouslydamagecomputercomponentsandoptions.
Improperhandlingofstatic-sensitivepartscancausedamagetothepart.Whenyouunpackanoption
©CopyrightLenovo2011,2012 v

Plugsandoutlets
Ifareceptacle(poweroutlet)thatyouintendtousewithyourcomputerequipmentappearstobedamaged
orcorroded,donotusetheoutletuntilitisreplacedbyaqualiedelectrician.
Donotbendormodifytheplug.Iftheplugisdamaged,contactthemanufacturertoobtainareplacement.
Donotshareanelectricaloutletwithotherhomeorcommercialappliancesthatdrawlargeamountsof
electricity;otherwise,unstablevoltagemightdamageyourcomputer,data,orattacheddevices.
Someproductsareequippedwithathree-prongedplug.Thisplugtsonlyintoagroundedelectricaloutlet.
Thisisasafetyfeature.Donotdefeatthissafetyfeaturebytryingtoinsertitintoanon-groundedoutlet.If
youcannotinserttheplugintotheoutlet,contactanelectricianforanapprovedoutletadapterortoreplace
theoutletwithonethatenablesthissafetyfeature.Neveroverloadanelectricaloutlet.Theoverallsystem
loadshouldnotexceed80percentofthebranchcircuitrating.Consultanelectricianformoreinformation
ifyouhavequestionsaboutpowerloadsandbranchcircuitratings.
Besurethatthepoweroutletyouareusingisproperlywired,easilyaccessible,andlocatedclosetothe
equipment.Donotfullyextendpowercordsinawaythatwillstressthecords.
Besurethatthepoweroutletprovidesthecorrectvoltageandcurrentfortheproductyouareinstalling.
Carefullyconnectanddisconnecttheequipmentfromtheelectricaloutlet.
Externaldevices
DonotconnectordisconnectanyexternaldevicecablesotherthanUniversalSerialBus(USB)and1394
cableswhilethecomputerpowerison;otherwise,youmightdamageyourcomputer.T oavoidpossible
damagetoattacheddevices,waitatleastvesecondsafterthecomputerisshutdowntodisconnect
externaldevices.
Heatandproductventilation
Computers,poweradapters,andmanyaccessoriescangenerateheatwhenturnedonandwhenbatteries
arecharging.Alwaysfollowthesebasicprecautions:
•Donotleaveyourcomputer,poweradapter,oraccessoriesincontactwithyourlaporanypartofyour
bodyforanextendedperiodwhentheproductsarefunctioningorwhenthebatteryischarging.Y our
computer,poweradapter,andmanyaccessoriesproducesomeheatduringnormaloperation.Extended
contactwiththebodycouldcausediscomfortor,potentially,askinburn.
•Donotchargethebatteryoroperateyourcomputer,poweradapter,oraccessoriesnearammable
materialsorinexplosiveenvironments.
•Ventilationslots,fans,andheatsinksareprovidedwiththeproductforsafety,comfort,andreliable
operation.Thesefeaturesmightinadvertentlybecomeblockedbyplacingtheproductonabed,sofa,
carpet,orotherexiblesurface.Neverblock,cover,ordisablethesefeatures.
Inspectyourdesktopcomputerfordustaccumulationatleastonceeverythreemonths.Beforeinspecting
yourcomputer,turnoffthepowerandunplugthecomputer'spowercordfromtheelectricaloutlet;then
removeanydustfromventsandperforationsinthebezel.Ifyounoticeexternaldustaccumulation,then
examineandremovedustfromtheinsideofthecomputerincludingheatsinkinletns,powersupplyvents,
andfans.Alwaysturnoffandunplugthecomputerbeforeopeningthecover.Ifpossible,avoidoperating
yourcomputerwithintwofeetofhigh-trafcareas.Ifyoumustoperateyourcomputerinornearahigh-trafc
area,inspectand,ifnecessary,cleanyourcomputermorefrequently.
©CopyrightLenovo2011,2012 vii
Lasercompliancestatement
CAUTION:
Whenlaserproducts(suchasCD-ROMs,DVDdrives,beropticdevices,ortransmitters)are
installed,notethefollowing:
•Donotremovethecovers.Removingthecoversofthelaserproductcouldresultinexposureto
hazardouslaserradiation.Therearenoserviceablepartsinsidethedevice.
•Useofcontrolsoradjustmentsorperformanceofproceduresotherthanthosespeciedherein
mightresultinhazardousradiationexposure.
DANGER
SomelaserproductscontainanembeddedClass3AorClass3Blaserdiode.Notethefollowing.
Laserradiationwhenopen.Donotstareintothebeam,donotviewdirectlywithoptical
instruments,andavoiddirectexposuretothebeam.
Powersupplystatement
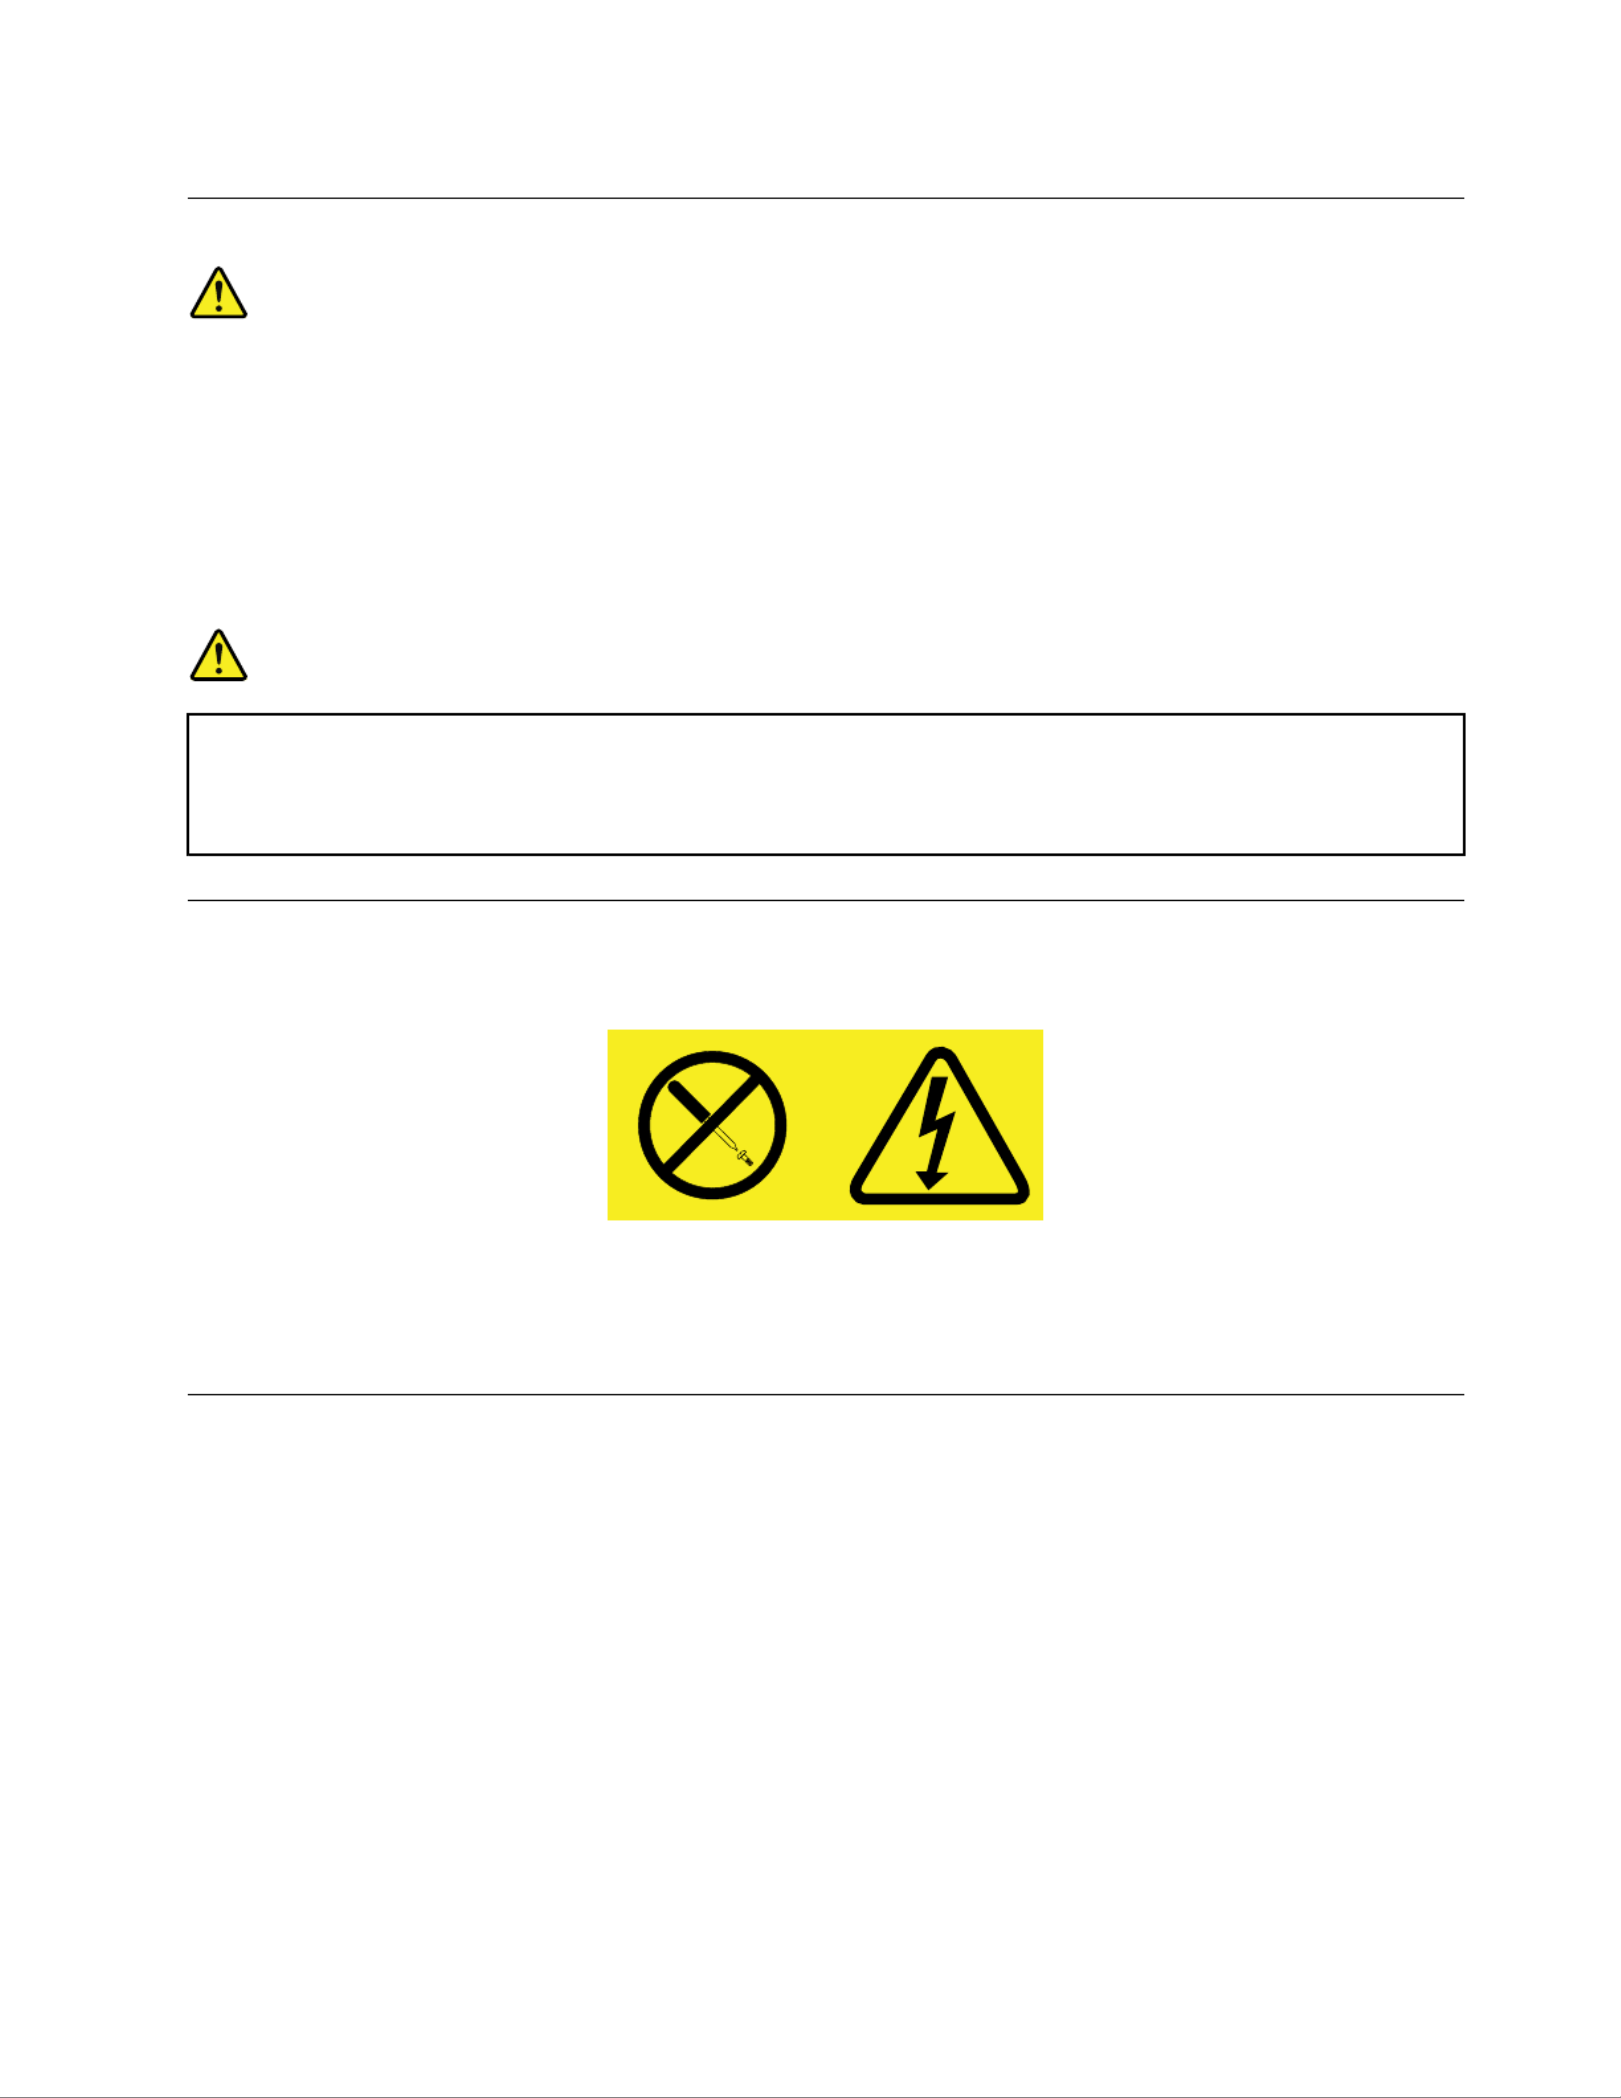
Neverremovethecoveronapowersupplyoranypartthathasthefollowinglabelattached.
Hazardousvoltage,current,andenergylevelsarepresentinsideanycomponentthathasthislabelattached.
Therearenoserviceablepartsinsidethesecomponents.Ifyoususpectaproblemwithoneoftheseparts,
contactaservicetechnician.
Cleaningandmaintenance
Keepyourcomputerandworkspaceclean.Shutdownthecomputerandthendisconnectthepower
cordbeforecleaningthecomputer.Donotsprayanyliquiddetergentdirectlyonthecomputeroruse
anydetergentcontainingammablematerialtocleanthecomputer.Spraythedetergentonasoftcloth
andthenwipethecomputersurfaces.
©CopyrightLenovo2011,2012 ix

xThinkCentreUserGuide

Chapter1.Productoverview
Thischapterprovidesinformationaboutthecomputerfeatures,specications,softwareprogramsprovided
byLenovo,andlocationsofconnectors,components,partsonthesystemboard,andinternaldrives.
Features
Thissectionintroducesthecomputerfeatures.Theinformationcoversavarietyofmodels.
Toviewtheinformationaboutyourspecicmodel,dooneofthefollowing:
•GointotheSetupUtilityprogrambyfollowingtheinstructionsinChapter7“UsingtheSetupUtility
program”onpage71.Then,selectMain➙SystemSummarytoviewtheinformation.
•IntheWindowsenvironment,clickStart,right-clickComputer,andselectPropertiestoviewthe
information.
Microprocessor
Yourcomputercomeswithoneofthefollowingmicroprocessors(internalcachesizevariesbymodeltype):
•AMD ®Sempron™microprocessor
•AMDAthlon™IImicroprocessor
•AMDPhenom™IImicroprocessor
•AMDFXseriesmicroprocessor
Memory
Yourcomputersupportsuptofourdoubledatarate3unbuffereddualinlinememorymodules(DDR3
UDIMMs).
Internaldrives
•Opticaldrive:DVD-ROMorDVD-Recordable(optional)
•SerialAdvancedTechnologyAttachment(SATA)harddiskdrive
Note:YourcomputersupportsSATA3.0devices.Formoreinformation,see“Locatingpartsonthe
systemboard”onpage12.
Videosubsystem
•IntegratedgraphicsforaVideoGraphicsArray(VGA)connectorandaDisplayPortconnector
•PeripheralComponentInterconnect(PCI)Expressx16graphicscardslotonthesystemboardfora
discretegraphicscard
Audiosubsystem
•Integratedhigh-denition(HD)audio
•Audioline-inconnector,audioline-outconnector,andmicrophoneconnectorontherearpanel
•Microphoneconnectorandheadphoneconnectoronthefrontpanel
•Internalspeaker(installedinsomemodels)
©CopyrightLenovo2011,2012 1

Specications
Thissectionliststhephysicalspecicationsforyourcomputer.
Dimensions
Width:175mm(6.89inches)
Height:414mm(16.30inches)
Depth:442mm(17.40inches)
Weight
Maximumcongurationasshipped:11kg(24.25lb)
Environment
•Airtemperature:
Operating:10°Cto35°C(50°Fto95°F)
Storage:-40°Cto60°C(-40°Fto140°F)inoriginalshippingpackage
Storage:-10°Cto60°C(14°Fto140°F)withoutpackage
•Humidity:
Operating:20%to80%(non-condensing)
Storage:20%to90%(non-condensing)
•Altitude:
Operating:-50to10000ft(-15.2to3048m)
Storage:-50to35000ft(-15.2to10668m)
Electricalinput
•Inputvoltage:
–Lowrange:
Minimum:100Vac
Maximum:127Vac
Inputfrequencyrange:50to60Hz
–Highrange:
Minimum:200Vac
Maximum:240Vac
Inputfrequencyrange:50to60Hz
Softwareoverview
Thecomputercomeswithapreinstalledoperatingsystemandseveralsoftwareprogramsprovidedby
Lenovo.
SoftwareprovidedbyLenovo
ThefollowingsoftwareprogramsareprovidedbyLenovotohelpyouimproveproductivityandreducethe
costassociatedwithmaintainingyourcomputer.Softwareprogramsprovidedwithyourcomputermight
varydependingonyourcomputermodeltypeandpreinstalledoperatingsystem.
4ThinkCentreUserGuide

LenovoThinkVantageTools
TheLenovoThinkVantage ®Toolsprogramguidesyoutoahostofinformationsourcesandprovideseasy
accesstovarioustoolstohelpyouworkmoreeasilyandsecurely.
ToaccesstheLenovoThinkVantageT oolsprogram,clickStart➙AllPrograms➙LenovoThinkVantage
Tools.
ThefollowingtableliststheprogramsthatyoucanaccessfromtheLenovoThinkVantageT oolsprogram.T o
accessaprogram,double-clickthecorrespondingicon.
T able1.ProgramiconnamesinLenovoThinkVantageT ools
ProgramnameIconnameinLenovoThinkVantageT ools
CreateRecoveryMedia FactoryRecoveryDisks
FingerprintSoftware FingerprintReader
LenovoSolutionCenterorLenovoThinkVantageT oolboxSystemHealthandDiagnostics
ThinkVantagePasswordManagerPasswordVault
ThinkVantagePowerManager PowerControls
ThinkVantageRescueandRecovery ®EnhancedBackupandRestore
ThinkVantageSystemUpdate UpdateandDrives
LenovoWelcome
TheLenovoWelcomeprogramintroducesyoutosomeinnovativebuilt-infeaturesofLenovoandguidesyou
throughafewimportantsetuptaskstohelpyoumakethemostofyourcomputer.
FingerprintSoftware
Theintegratedngerprintreaderprovidedonsomekeyboardsenablesyoutoenrollyourngerprintand
associateitwithyourpower-onpassword,harddiskdrivepassword,andWindowspassword.Asaresult,
ngerprintauthenticationcanreplacepasswordsandenablesimpleandsecureuseraccess.Angerprint
readerkeyboardisavailablewithselectcomputersorcanbepurchasedforcomputersthatsupportthis
option.
LenovoSolutionCenter
Note:Dependingonthedatewhenyourcomputerwasmanufactured,yourcomputerispreinstalledwith
eithertheLenovoSolutionCenterprogramortheLenovoThinkVantageToolboxprogramfordiagnostic
purposes.ForadditionalinformationabouttheLenovoThinkVantageT oolboxprogram,see“Lenovo
ThinkVantageToolbox”onpage100 .
TheLenovoSolutionCenterprogramenablesyoutotroubleshootandresolvecomputerproblems.It
combinesdiagnostictests,systeminformationcollection,securitystatus,andsupportinformation,along
withhintsandtipsformaximumsystemperformance.See“LenovoSolutionCenter”onpage100for
detailedinformation.
SimpleTap
TheSimpleTapprogramprovidesyouwithaquickwaytocustomizesomebasiccomputersettingssuchas
mutingthespeakers,adjustingthevolume,lockingthecomputeroperatingsystem,launchingaprogram,
openingaWebpage,openingale,andsoon.YoualsocanusetheSimpleT approgramtoaccessthe
LenovoAppShop,fromwhichyoucandownloadvariousapplicationsandcomputersoftware.
TostarttheSimpleTapprogram,doanyofthefollowing:
•ClickStart➙AllPrograms➙SimpleTap.
Chapter1.Productoverview5

•ClickStart➙AllPrograms➙LenovoThinkVantageT ools,anddouble-clickSimpleTap.
•ClicktheredSimpleTaplaunchpointonthedesktop.Theredlaunchpointisavailableonthedesktop
afteryouhavelaunchedtheSimpleTapprogramforthersttime.
•PresstheblueThinkVantagebuttonifyourkeyboardhasone.
Note:TheSimpleTapprogramisonlyavailableoncertainmodelspreinstalledwiththeWindows7operating
system.IfyourWindows7modelisnotpreinstalledwiththeSimpleT approgram,youcandownloadit
fromhttp://www.lenovo.com/simpletap.
LenovoThinkVantageT oolbox
Note:Dependingonthedatewhenyourcomputerwasmanufactured,yourcomputerispreinstalledwith
eithertheLenovoSolutionCenterprogramortheLenovoThinkVantageToolboxprogramfordiagnostic
purposes.ForadditionalinformationabouttheLenovoSolutionCenterprogram,see“LenovoSolution
Center”onpage100.
TheLenovoThinkVantageToolboxprogramhelpsyoumaintainyourcomputer,improvecomputingsecurity,
diagnosecomputerproblems,getfamiliarwiththeinnovativetechnologiesprovidedbyLenovo,andgetmore
informationaboutyourcomputer.See“LenovoThinkVantageToolbox”onpage100fordetailedinformation.
ProductRecovery
TheProductRecoveryprogramenablesyoutorestorethecontentsoftheharddiskdrivetothefactory
defaultsettings.
ThinkVantagePasswordManager
TheThinkVantagePasswordManagerprogramautomaticallycapturesandllsinauthenticationinformation
forWindowsapplicationsandWebsites.
Notes:IfthePasswordVaulticonintheLenovoThinkVantageToolsprogramisdimmed,itindicatesthat
youneedtoinstalltheThinkVantagePasswordManagerprogrammanuallybeforeenablingitsfeatures.To
installtheThinkVantagePasswordManagerprogram,dothefollowing:
1.ClickStart➙AllPrograms➙LenovoThinkVantageTools,anddouble-clickPasswordVault.
2.Followtheinstructionsonthescreen.
3.Whentheinstallationprocesscompletes,thePasswordVaulticonisactivated.
ThinkVantagePowerManager
TheThinkVantagePowerManagerprogramprovidesconvenient,exible,andcompletepowermanagement
foryourThinkCentre ®computer.ByusingtheThinkVantagePowerManagerprogram,youcanadjustyour
powersettingstoachievethebestbalancebetweensystemperformanceandpowersaving.
ThinkVantageRescueandRecovery
TheThinkVantageRescueandRecoveryprogramisaonebuttonrecoveryandrestoresolutionthatincludes
asetofself-recoverytoolstohelpyoudiagnosecomputerproblems,gethelp,andrecoverfromsystem
crashes,evenifyoucannotstarttheWindowsoperatingsystem.
Note:IftheEnhancedBackupandRestoreiconintheLenovoThinkVantageToolsprogramisdimmed,it
indicatesthatyouneedtoinstalltheThinkVantageRescueandRecoveryprogrammanuallybeforeenabling
itsfeatures.ToinstalltheThinkVantageRescueandRecoveryprogram,dothefollowing:
1.ClickStart➙AllPrograms➙LenovoThinkVantageTools,anddouble-clickEnhancedBackup
andRestore.
2.Followtheinstructionsonthescreen.
3.Whentheinstallationprocesscompletes,theEnhancedBackupandRestoreiconisactivated.
6ThinkCentreUserGuide

ThinkVantageSystemUpdate
TheThinkVantageSystemUpdateprogramhelpsyoukeepthesoftwareonyourcomputerup-to-dateby
downloadingandinstallingsoftwarepackages(ThinkVantageapplications,devicedrivers,BIOSupdates,
andotherthirdpartyapplications).
AdobeReader
TheAdobeReaderprogramisatoolusedtoview,print,andsearchPDFdocuments.
Antivirussoftware
Yourcomputercomeswithantivirussoftwarethatyoucanusetodetectandeliminateviruses.Lenovo
providesafullversionofantivirussoftwareonyourharddiskdrivewithafree30-daysubscription.After30
days,youmustrenewthelicensetocontinuereceivingtheantivirusprogramupdates.
Locations
Thissectionprovidesinformationtohelpyoulocatetheconnectorsonthefrontandrearofyourcomputer,
partsonthesystemboard,andcomponentsandinternaldrivesinyourcomputer.
Chapter1.Productoverview7

Locatingconnectors,controls,andindicatorsonthefrontofyour
computer
Figure1“Frontconnector,control,andindicatorlocations”onpage8showsthelocationsoftheconnectors,
controls,andindicatorsonthefrontofyourcomputer.
Figure1.Frontconnector,control,andindicatorlocations
1Harddiskdriveactivityindicator 5USBconnector(USBport1)
2Powerindicatorphoneconnector
3Powerswitchneconnector
4Opticaldriveeject/closebutton8USBconnector(USBport2)
8ThinkCentreUserGuide
Locatingconnectorsontherearofyourcomputer
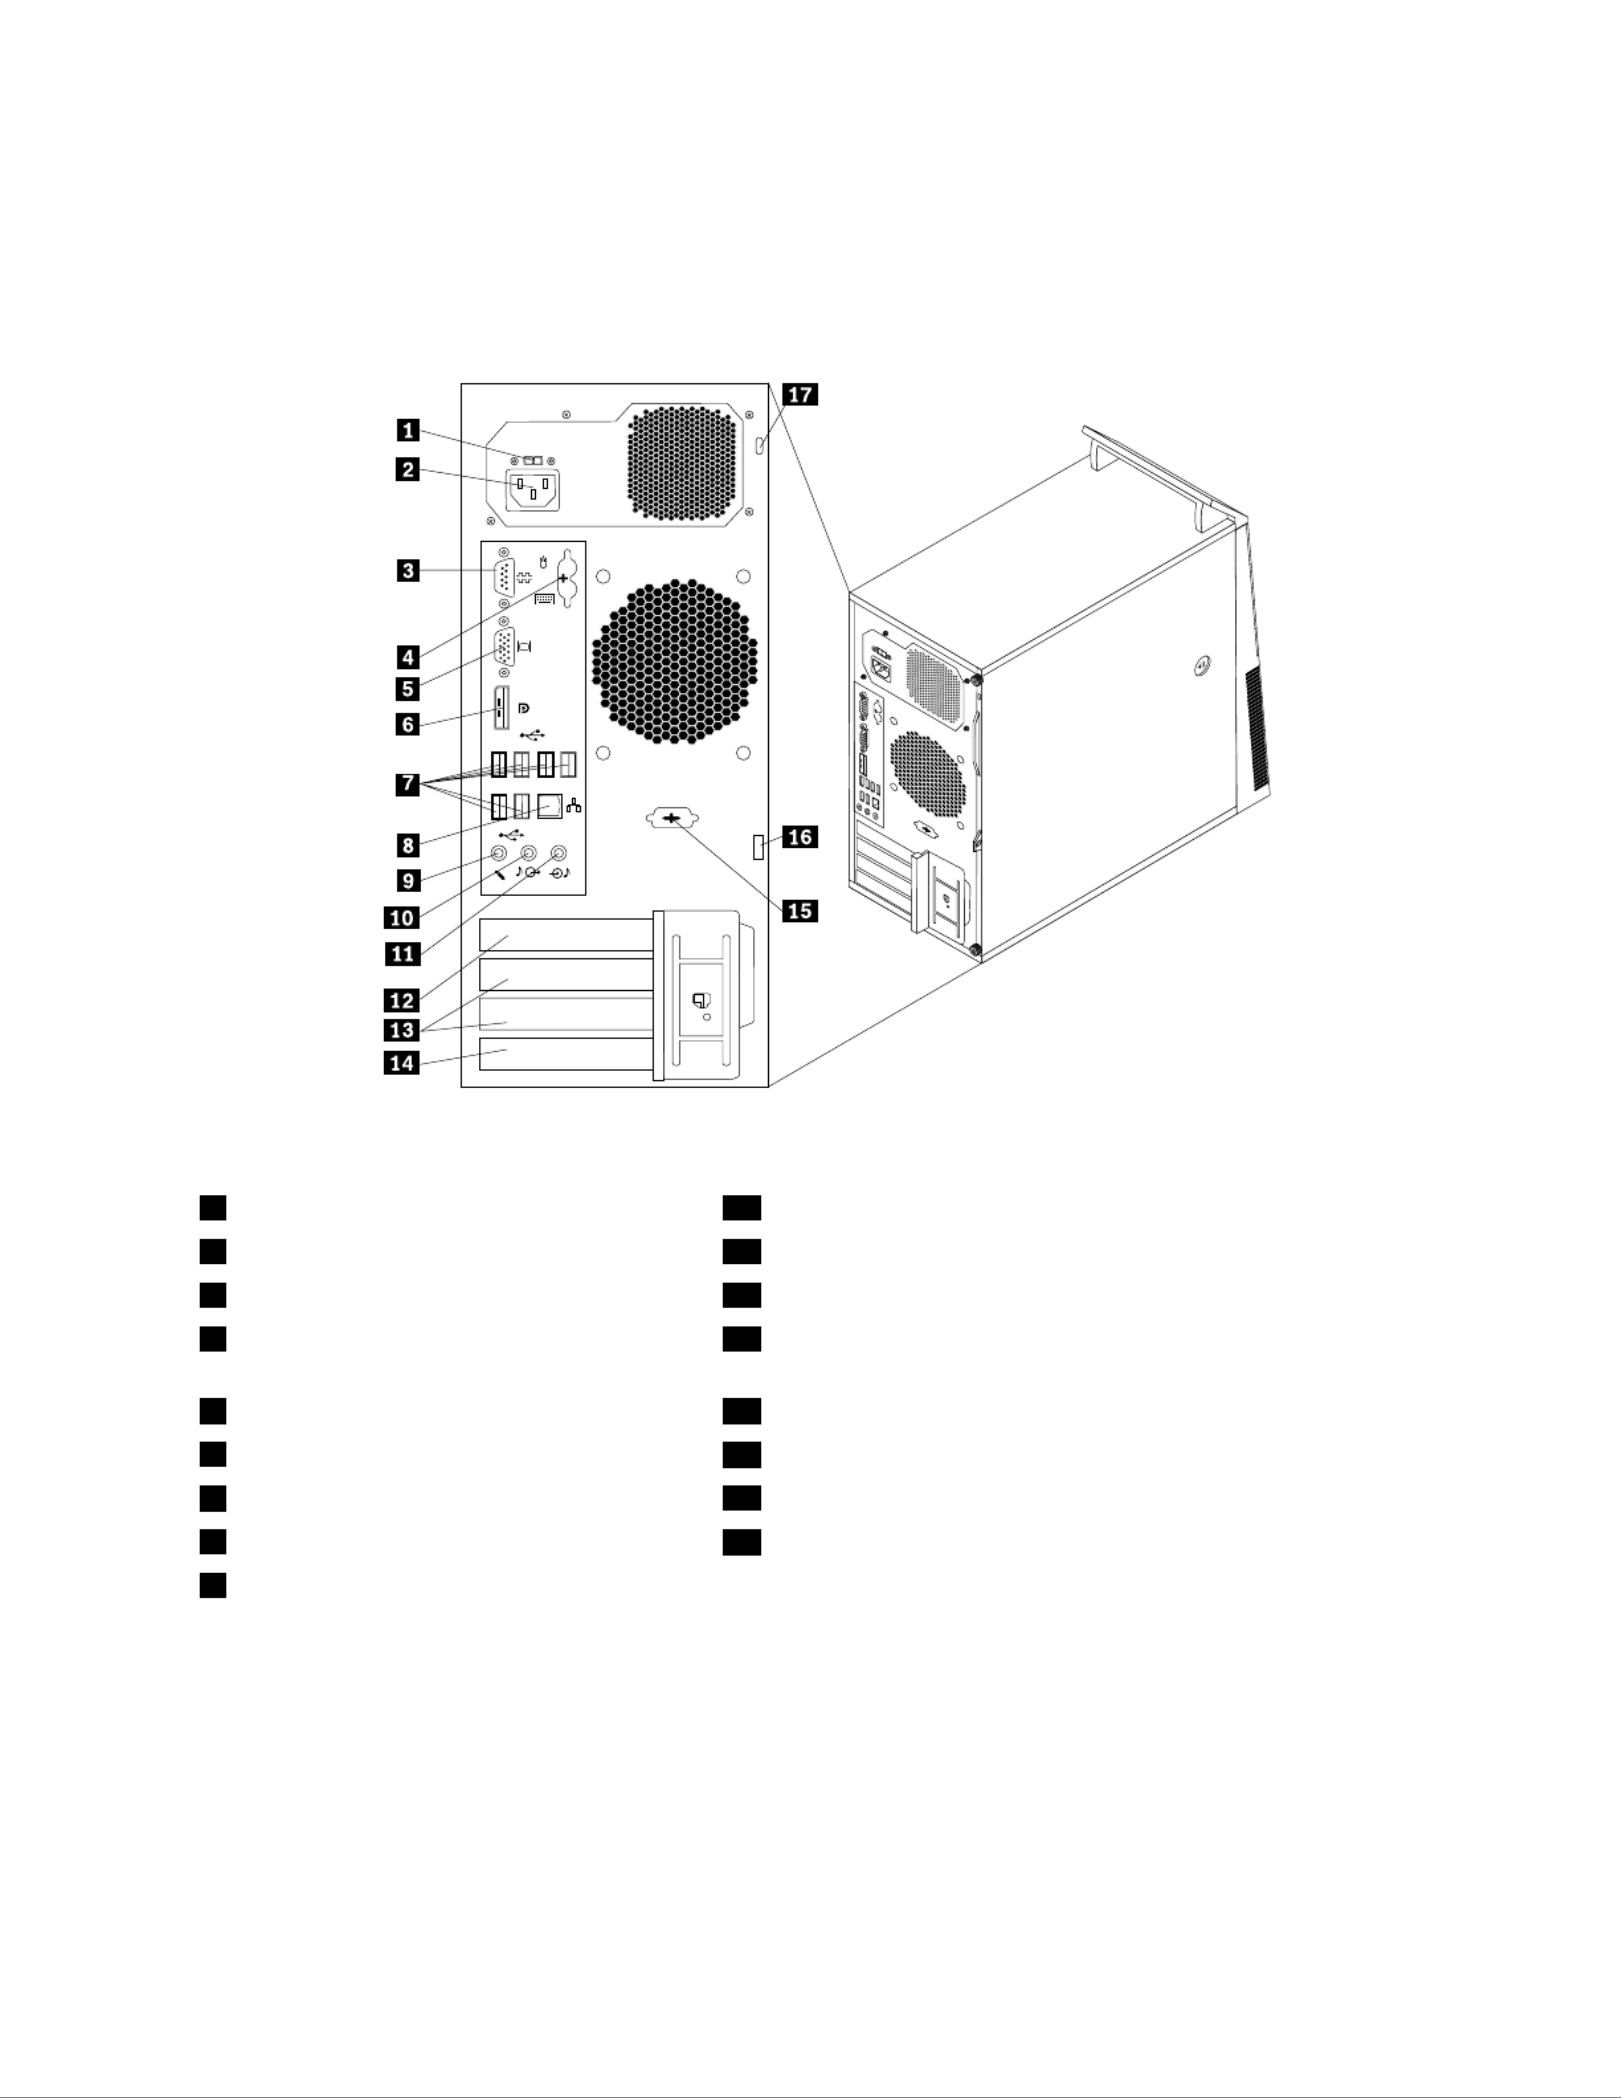
Figure2“Rearconnectorlocations”onpage9showsthelocationsoftheconnectorsontherearofyour
computer.Someconnectorsontherearofyourcomputerarecolor-codedtohelpyoudeterminewhereto
connectthecablesonyourcomputer.
3 4
5 6 7 8
Figure2.Rearconnectorlocations
1Voltage-selectionswitch(somemodels) 10Audioline-outconnector
2Powercordconnector11Audioline-inconnector
3Serialport(Serialport1)12PCIExpressx16graphicscardslot
4PS/2keyboardandmouseconnectors
(optional)
13PCIExpressx1cardslots(2)
5VGAmonitorconnector14PCIcardslot
6DisplayPortconnector 15Optionalserialport(Serialport2)
7USBconnectors(USBports3to8) 16Padlockloop
8Ethernetconnector 17Integratedcablelock(Kensingtonlock)slot
9Microphoneconnector
Chapter1.Productoverview9

Connectoron
Audioline-inconnector Usedtoreceiveaudiosignalsfromanexternalaudiodevice,suchasastereo
system.Whenyouattachanexternalaudiodevice,acableisconnectedbetween
theaudioline-outconnectorofthedeviceandtheaudioline-inconnectorofthe
computer.
Audioline-outconnector Usedtosendaudiosignalsfromthecomputertoexternaldevices,suchaspowered
stereospeakers(speakerswithbuilt-inampliers),headphones,multimedia
keyboards,ortheaudioline-inconnectoronastereosystemorotherexternal
recordingdevice.
DisplayPortconnector Usedtoattachahigh-performancemonitor,adirect-drivemonitor,orotherdevices
thatuseaDisplayPortconnector.
Ethernetconnector UsedtoattachanEthernetcableforalocalareanetwork(LAN).
Note:TooperatethecomputerwithinFCCClassBlimits,useaCategory5Ethernet
cable.
Microphoneconnector Usedtoattachamicrophonetoyourcomputerwhenyouwanttorecordsoundorif
youusespeech-recognitionsoftware.
PS/2keyboardconnector
(optional)
UsedtoattachakeyboardthatusesaPS/2keyboardconnector.
PS/2mouseconnector
(optional)
Usedtoattachamouse,atrackball,orotherpointingdevicesthatuseaPS/2
mouseconnector.
Serialport Usedtoattachanexternalmodem,aserialprinter,orotherdevicesthatusea
9-pinserialport.
USBconnectorUsedtoattachadevicethatrequiresaUSBconnector,suchasaUSBkeyboard,a
USBmouse,aUSBscanner,oraUSBprinter.IfyouhavemorethaneightUSB
devices,youcanpurchaseaUSBhub,whichyoucanusetoconnectadditional
USBdevices.
VGAmonitorconnectorUsedtoattachaVGAmonitororotherdevicesthatuseaVGAmonitorconnector.
10ThinkCentreUserGuide

Locatingpartsonthesystemboard
Figure4“Systemboardpartlocations”onpage12showsthelocationsofthepartsonthesystemboard.
Figure4.Systemboardpartlocations
1Microprocessor 14Frontpanelconnector(forconnectingLEDindicatorsand
powerswitch)
2Microprocessorfanconnector 15FrontUSBconnector1(forconnectingUSBports1and2
onthefrontbezel)
3Memoryslot1(DIMM1)16FrontUSBconnectors2and3(forconnectingadditional
USBdevices)
4Memoryslot2(DIMM3)17Coverpresenceswitchconnector(Intrusionswitch
connector)
5Memoryslot3(DIMM2)18Serial(COM2)connector
6Memoryslot4(DIMM4) 19Internalspeakerconnector
7Thermalsensorconnector20Frontaudioconnector
824-pinpowerconnector 21PCIcardslot
9ClearCMOS(ComplementaryMetalOxide
Semiconductor)/Recoveryjumper
22PCIExpressx1cardslots(2)
10Battery 23PCIExpressx16graphicscardslot
11Powerfanconnector 24Systemfanconnector
12Parallelconnector 25PS/2keyboardandmouseconnector
13SATA3.0connectors(4) 264-pinpowerconnector
12ThinkCentreUserGuide

Locatinginternaldrives
Internaldrivesaredevicesthatyourcomputerusestoreadandstoredata.Youcanadddrivestoyour
computertoincreasestoragecapacityandenableyourcomputertoreadothertypesofmedia.Internal
drivesareinstalledinbays.Inthismanual,thebaysarereferredtoasbay1,bay2,andsoon.
Wheninstallingorreplacinganinternaldrive,itisimportanttonotethetypeandsizeofthedrivethatyou
caninstallorreplaceineachbayandcorrectlyconnectthecablestothedriveinstalled.Refertothe
appropriatesectionin“Installingorreplacinghardware”onpage29forinstructionsonhowtoinstallor
replaceinternaldrivesforyourcomputer.
Figure5“Drivebaylocations”onpage13 showsthelocationsofthedrivebays.
Figure5.Drivebaylocations
1Bay1-Opticaldrivebay(withanopticaldriveinstalledinsomemodels)
2Bay2-Opticaldrivebay
3Bay3-Cardreaderdrivebay
4Bay4-SecondarySATAharddiskdrivebay
5Bay5-PrimarySATAharddiskdrivebay(witha3.5-inchSATAharddiskdriveinstalled)
Chapter1.Productoverview13
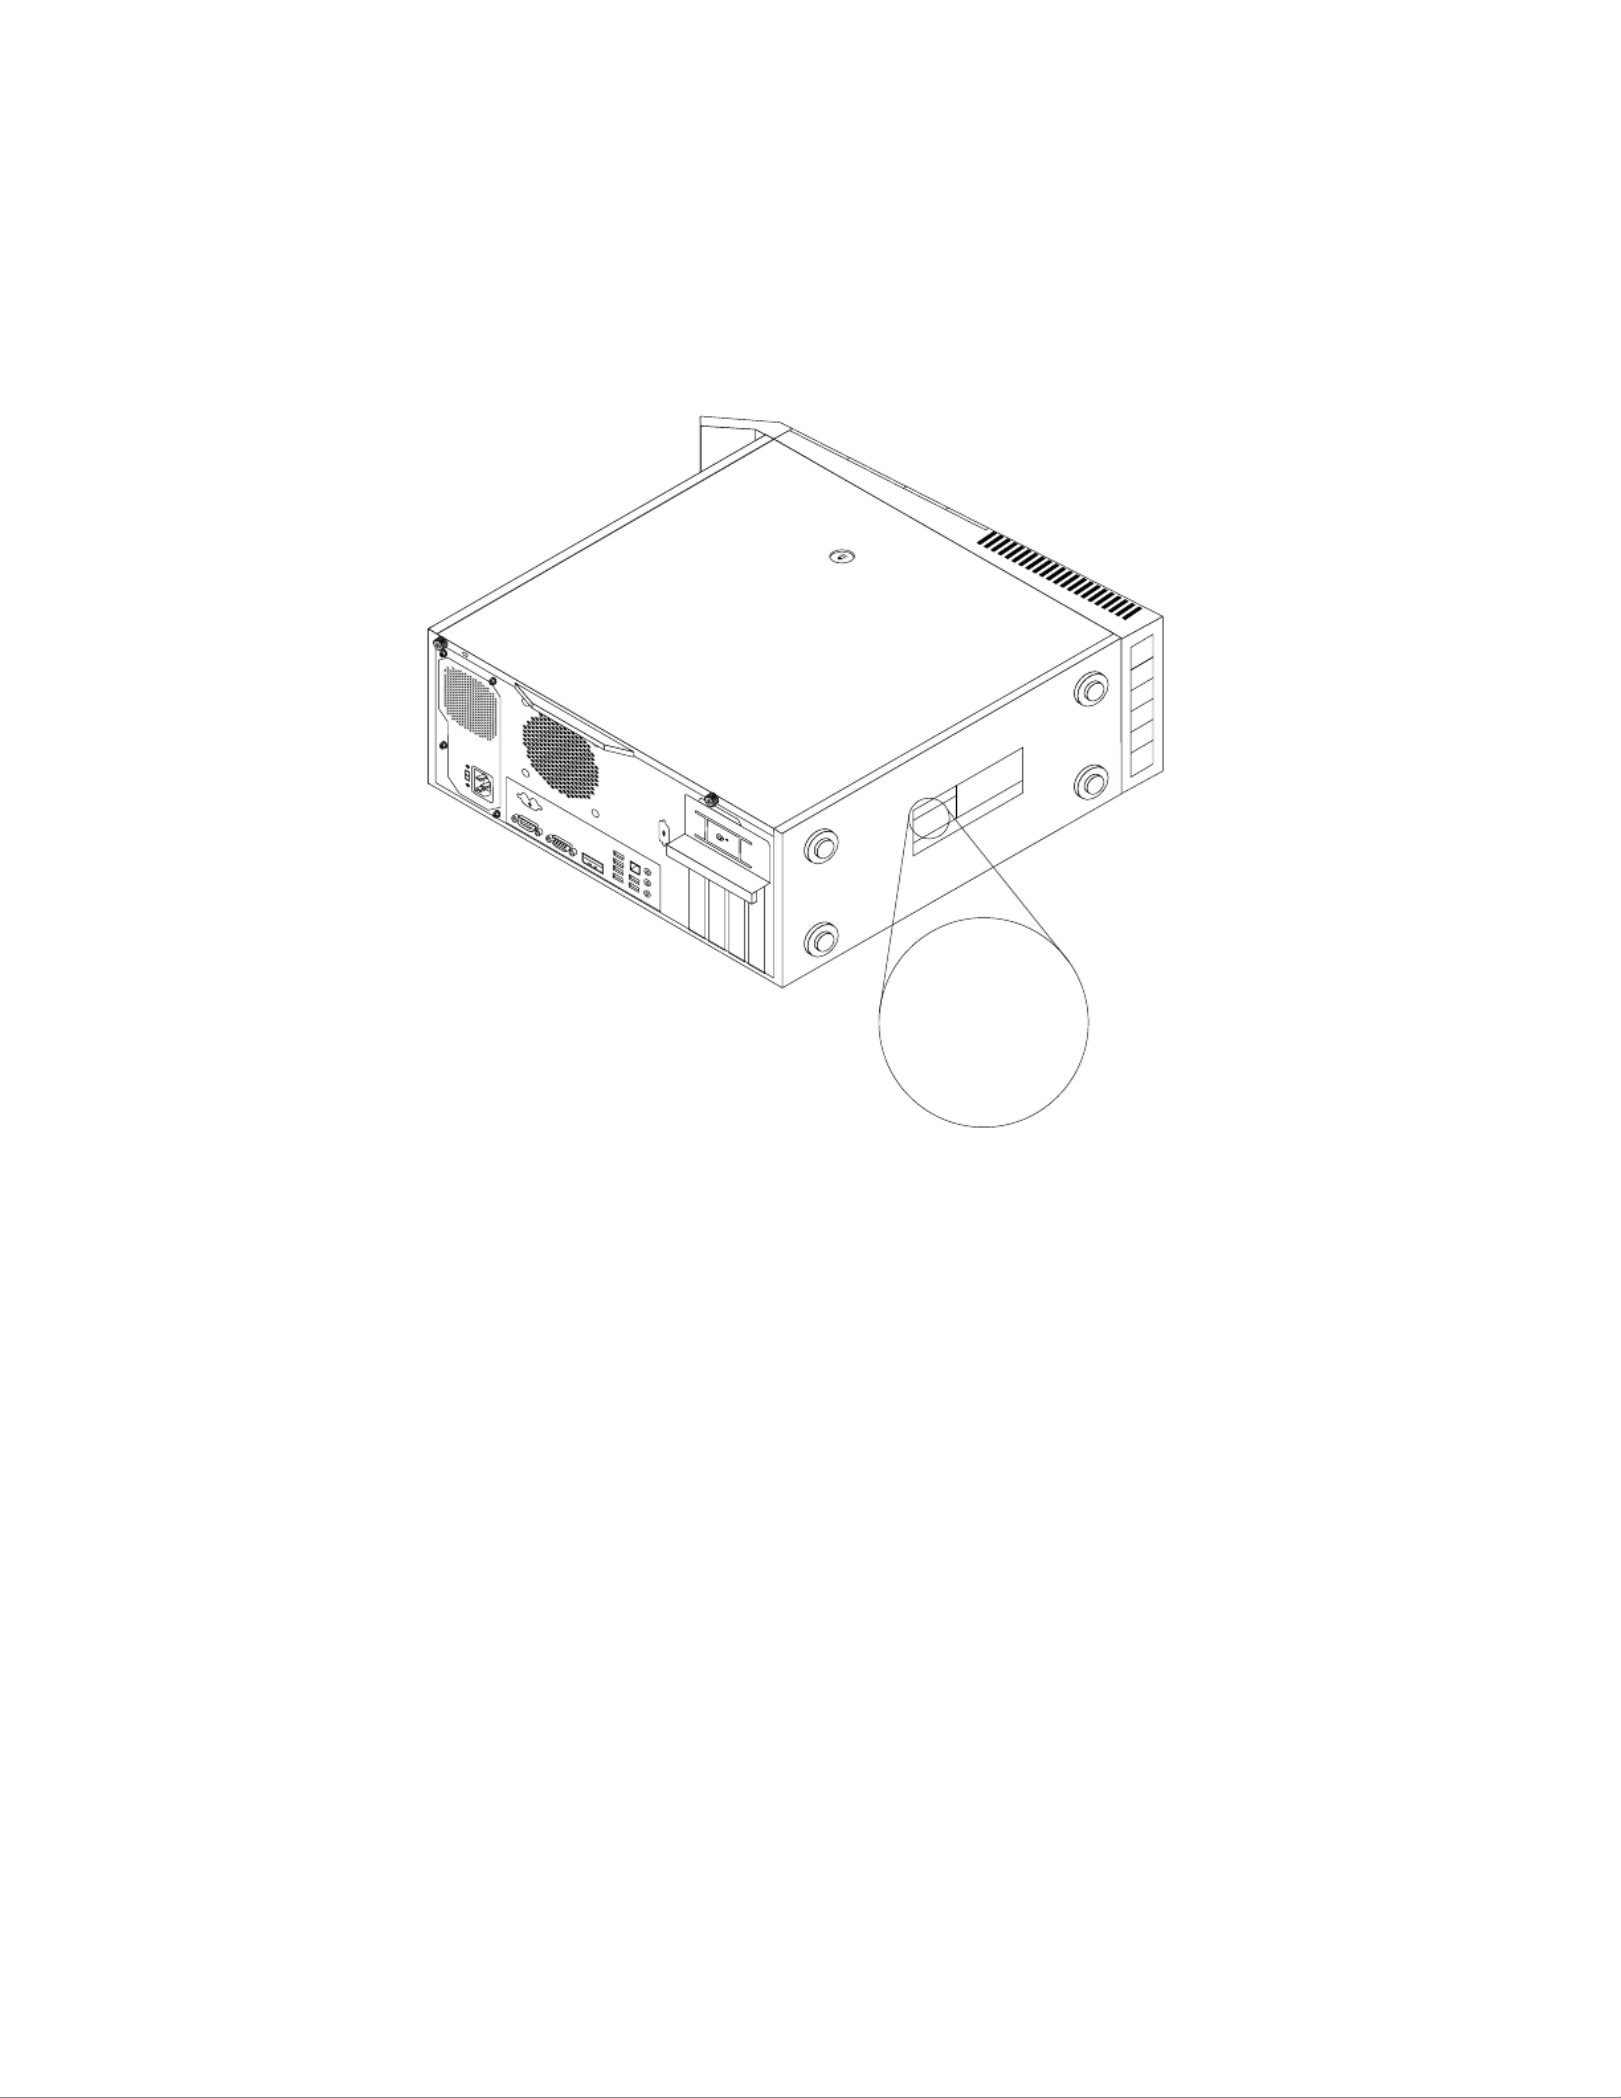
Machinetypeandmodellabel
Themachinetypeandmodellabelidentiesyourcomputer.WhenyoucontactLenovoforhelp,themachine
typeandmodelinformationhelpssupporttechnicianstoidentifyyourcomputerandprovidefasterservice.
Thefollowingisasampleofthemachinetypeandmodellabel.
Machine Type: XXXX
Model Number: XXX
Figure6.Machinetypeandmodellabel
14ThinkCentreUserGuide

Chapter2.Usingyourcomputer
Thischapterprovidesinformationonusingsomeofthecomputercomponents.
Frequentlyaskedquestions
Thefollowingareafewtipsthatwillhelpyouoptimizetheuseofyourcomputer.
CanIgetmyuserguideinanotherlanguage?
TheuserguideisavailableinvariouslanguagesontheLenovoSupportWebsiteat:
http://www.lenovo.com/ThinkCentreUserGuides
Wherearemyrecoverydiscs?
Lenovoprovidesaprogramthatenablesyoutocreaterecoverydiscs.Fordetailsaboutcreatingrecovery
discs,see“Creatingrecoverymedia”onpage63.
Additionally,incaseofaharddiskfailure,youcanorderProductRecoverydiscsfromtheLenovoCustomer
SupportCenter.ForinformationaboutcontactingtheCustomerSupportCenter,seeChapter11“Getting
information,help,andservice”onpage103.BeforeusingtheProductRecoverydiscs,refertothe
documentationthatcomeswiththediscs.
Attention:AProductRecoverydiscpackagemightcontainmultiplediscs.Makesureyouhaveallofthe
discsreadybeforestartingtherecoveryprocess.Duringtherecoveryprocess,youmightbeprompted
tochangediscs.
WherecanIndhelpabouttheWindowsoperatingsystem?
TheWindowsHelpandSupportinformationsystemprovidesyoudetailedinformationaboutusingthe
Windowsoperatingsystemtohelpyougetthemostofyourcomputer.ToaccesstheWindowsHelpand
Supportinformationsystem,clickStart➙HelpandSupport.
Usingthekeyboard
Dependingonyourmodel,yourcomputercomeswitheitherastandardkeyboardorangerprintreader
keyboard.TheMicrosoftWindowsshortcutkeysareprovidedonbothkeyboardtypes.
Thissectionprovidesinformationaboutthefollowingtopics:
•“UsingWindowsshortcutkeys”onpage15
•“Usingangerprintreader”onpage16
UsingWindowsshortcutkeys
Boththestandardkeyboardandthengerprintreaderkeyboardprovidethreekeysyoucanusewithyour
MicrosoftWindowsoperatingsystem.
•ThetwoStartmenukeysarelocatedbesidetheAltkeyoneithersideofthespacebar.Theyfeaturethe
Windowslogo.Whenyoupresseither,theWindowsStartmenuopens.ThestyleoftheWindowslogo
variesdependingonthekeyboardtype.
•Thecontext-menukeyislocatednexttotheCtrlkeyontherightsideoftheSpacebar.Pressingthe
context-menukeyopensthecontextmenufortheactiveprogram,icon,orobject.
©CopyrightLenovo2011,2012 15

Optionally,youcanconnectasetofpoweredstereospeakerstotheaudioline-outconnectortoenjoy
bettersoundwithmultimediaapplications.
Settingthevolumefromthedesktop
Thedesktopvolumecontrolisaccessiblethroughthevolumeiconinthetaskbar,whichislocatedatthe
bottom-rightcorneroftheWindowsdesktop.Clickthevolumeiconandmovethesliderupordownto
controlthevolume,orclicktheMuteicontoturntheaudiooff.Ifthevolumeiconisnotinthetaskbar,see
“Addingthevolumeicontothetaskbar”onpage17 .
Addingthevolumeicontothetaskbar
ToaddthevolumeicontothetaskbarontheWindows7operatingsystem,dothefollowing:
1.FromtheWindowsdesktop,clickStart➙ControlPanel➙AppearanceandPersonalization.
2.IntheTaskbarandStartMenutopic,clickCustomizeiconsonthetaskbar.
3.ClickTurnsystemiconsonoroffandchangethevolumebehaviorsfromOfftoOn.
4.ClickOKtosavethenewsettings.
SettingthevolumefromControlPanel
YoucansetthecomputervolumefromControlPanel.TosetthecomputervolumefromControlPanel,
dothefollowing:
1.FromtheWindowsdesktop,clickStart➙ControlPanel➙HardwareandSound.
2.IntheSoundtopic,clickAdjustsystemvolume.
3.Movetheslidersupordowntoraiseorlowerthevolumeofyourcomputer.
UsingCDsandDVDs
YourcomputermighthaveaDVDROMdriveorrecordableDVDdriveinstalled.DVDdrivesuse
industry-standard,12cm(4.75-inch)CDmediaorDVDmedia.IfyourcomputercomeswithaDVDdrive,
thedrivecanreadDVD-ROMdiscs,DVD-Rdiscs,DVD-RAMdiscs,DVD-RWdiscs,andalltypesofCDs,
suchasCD-ROMdiscs,CD-RWdiscs,CD-Rdiscs,andaudioCDs.IfyouhavearecordableDVDdrive,
itcanalsorecordonDVD-Rdiscs,DVD-RWdiscs,typeIIDVD-RAMdiscs,CD-RWstandardandhigh
speeddiscs,andCD-Rdiscs.
FollowtheseguidelineswhenusingtheDVDdrive:
•Donotplacethecomputerinalocationwherethedriveisexposedtothefollowing:
–Hightemperature
–Highhumidity
–Excessivedust
–Excessivevibrationorsuddenshock
–Aninclinedsurface
–Directsunlight
•DonotinsertanyobjectotherthanaCDorDVDintothedrive.
•Beforemovingthecomputer,removetheCDorDVDfromthedrive.
HandlingandstoringCDandDVDmedia
CDandDVDmediaaredurableandreliable,buttheydorequiresomecareandspecialhandling.When
handlingandstoringaCDorDVD,followtheseguidelines:
Chapter2.Usingyourcomputer17

•Holdthediscbyitsedges.Donottouchthesurfaceofthesidethatisnotlabeled.
•Toremovedustorngerprints,wipethediscwithaclean,softclothfromthecentertotheoutside.Wiping
thediscinacirculardirectionmightcauselossofdata.
•Donotwriteorstickpaperonthedisc.
•Donotscratchormarkthedisc.
•Donotplaceorstorethediscindirectsunlight.
•Donotusebenzene,thinners,orothercleanerstocleanthedisc.
•Donotdroporbendthedisc.
•Donotinsertdamageddiscsintothedrive.Warped,scratched,ordirtydiscscandamagethedrive.
PlayingaCDorDVD
IfyourcomputercomeswithaDVDdrive,youcanlistentoaudioCDsorwatchDVDmovies.Toplaya
CDorDVD,dothefollowing:
1.PresstheEject/LoadbuttonontheDVDdrivetoopenthetray.
2.Withthetrayfullyextended,inserttheCDorDVDintothetray.SomeDVDdriveshaveasnaphubinthe
centerofthetray.Ifyourdrivehasasnaphub,supportthetraywithonehandandthenpushonthe
centeroftheCDorDVDuntilitsnapsintoplace.
3.PresstheEject/Loadbuttonagainorgentlypushthetrayforwardtoclosethetray.TheCDorDVD
playerprogramstartsautomatically.Foradditionalinformation,refertotheCDorDVDplayerprogram
helpsystem.
ToremoveaCDorDVDfromtheDVDdrive,dothefollowing:
1.Withthecomputeron,presstheEject/Loadbutton.Whenthetrayslidesoutautomatically,carefully
removethedisc.
2.ClosethetraybypressingtheEject/Loadbuttonorbygentlypushingthetrayforward.
Note:IfthetraydoesnotslideoutofthedrivewhenyoupresstheEject/Loadbutton,insertastraightened
paperclipintotheemergency-ejectholelocatedonthefrontoftheDVDdrive.Besurethedriveispowered
offwhenusingtheemergencyeject.UsetheEject/Loadbuttoninsteadoftheemergencyejectexcept
inanemergency.
RecordingaCDorDVD
IfyourcomputercomeswitharecordableDVDdrive,youcanusethedrivetorecordCDsorDVDs.To
recordaCDorDVD,dothefollowing:
1.ClickStart➙AllPrograms➙CorelDVDMovieFactoryLenovoEdition.
2.Followtheinstructionsonthescreen.
FordetailedinformationaboutusingtheCorelDVDMovieFactoryprogram,seethehelpsystemforthe
program.
YoucanalsouseWindowsMediaPlayertorecordCDsanddataDVDs.Formoreinformation,see“Helpand
Support”onpage103 .
18ThinkCentreUserGuide

Adjustthemonitorsothetopofthescreenisat,orslightlybelow,eyelevel.Placethemonitorata
comfortableviewingdistance,usually51to61cm(20to24inches),andpositionitsoyoucanviewit
withouthavingtotwistyourbody.Also,positionotherequipmentyouuseregularly,suchasthetelephoneor
amouse,withineasyreach.
Glareandlighting
Positionthemonitortominimizeglareandreectionsfromoverheadlights,windows,andotherlightsources.
Reectedlightfromshinysurfacescancauseannoyingreectionsonyourmonitorscreen.Placethe
monitoratrightanglestowindowsandotherlightsources,whenpossible.Reduceoverheadlighting,if
necessary,byturningofflightsorusinglowerwattagebulbs.Ifyouinstallthemonitornearawindow,use
curtainsorblindstoblockthesunlight.Youcanadjustthebrightnessandcontrastcontrolsonthemonitor
astheroomlightingchangesthroughouttheday.
Whereitisimpossibletoavoidreectionsortoadjustthelighting,anantiglarelterplacedoverthescreen
mightbehelpful.However,theseltersmightaffecttheclarityoftheimageonthescreen;trythemonlyafter
youhaveexhaustedothermethodsofreducingglare.
Dustbuildupcompoundsproblemsassociatedwithglare.Remembertocleanyourmonitorscreen
periodicallyusingasoftclothasdirectedinyourmonitordocumentation.
Aircirculation
Yourcomputerandmonitorproduceheat.Thecomputerhasafanthatpullsinfreshairandforcesouthot
air.Themonitorletshotairescapethroughvents.Blockingtheairventscancauseoverheating,whichmight
resultinamalfunctionordamage.Placethecomputerandmonitorsothatnothingblockstheairvents;
usually,51mm(2inches)ofairspaceissufcient.Also,makesuretheventedairisnotblowingonpeople.
Electricaloutletsandcablelengths
Thelocationofelectricaloutlets,thelengthofpowercordsandcablesthatconnecttothemonitor,printer,
andotherdevicesmightdeterminethenalplacementofyourcomputer.
Whenarrangingyourworkspace:
•Avoidtheuseofextensioncords.Whenpossible,plugthecomputerpowercorddirectlyintoanelectrical
outlet.
•Keeppowercordsandcablesneatlyroutedawayfromwalkwaysandotherareaswheretheymight
getkickedaccidentally.
Formoreinformationaboutpowercords,see“Powercordsandpoweradapters”onpagevi .
20ThinkCentreUserGuide

RegisteryourcomputerwithLenovo
Toregisteryourcomputer,gotohttp://www.lenovo.com/register.Then,followtheinstructionsonthescreen
tocompletetheregistration.Thiscanhelpauthoritiesreturnyourcomputertoyouifitislostorstolen.
RegisteringyourcomputeralsoenablesLenovotonotifyyouaboutpossibletechnicalinformationand
upgrades.
Whenyouregisteryourcomputer,informationisenteredintoadatabase,whichenablesLenovotocontact
youincaseofarecallorothersevereproblem.Inaddition,somelocationsofferextendedprivilegesand
servicestoregisteredusers.
Movingyourcomputertoanothercountryorregion
Whenyoumoveyourcomputertoanothercountryorregion,youmusttakelocalelectricalstandardsinto
consideration.Thissectionprovidesinformationonthefollowing:
•“Voltage-selectionswitch”onpage21
•“Replacementpowercords”onpage21
Voltage-selectionswitch
Somecomputersareequippedwithavoltage-selectionswitchlocatednearthepower-cordconnection
pointonthecomputerandsomecomputersdonothaveavoltage-selectionswitch.Beforeyouinstall
yourcomputerorrelocateyourcomputertoanothercountryorregion,youmustbecertainthatyouhave
matchedyourcomputertothevoltageavailableatyourelectricaloutlet.
CAUTION:
Youmustknowthevoltageoftheelectricalconnection(outlet)whereyourcomputerwillbe
connected.Ifyoudonotknowthevoltage,contactyourlocalelectriccompanyorrefertoofcial
Websitesorotherliteraturefortravelerstothecountryorregionwhereyouarelocated.
Ifyourcomputerhasavoltage-selectionswitch,youmustsettheswitchtomatchthevoltageavailableat
yourelectricaloutlet.Settingthevoltage-selectionswitchincorrectlywillcausethecomputertomalfunction
andmightcausepermanentdamagetothecomputer.Donotconnectthecomputertoanelectrical
outletuntilyouhaveveriedthatthevoltage-selectionswitchsettingmatchesthevoltageavailableatthe
electricaloutlets.
Ifyourcomputerdoesnothaveavoltage-selectionswitch,inspectthevoltage-ratinglabelonthebottomof
thecomputerandnotethefollowing:
•Ifthevoltage-ratinglabelshowsarangeofeither“100-127V”or“200-240V,”youmustensurethatthe
voltageprovidedattheelectricaloutletmatchesthevoltageratingonthecomputerlabel.Ifitdoes
notmatch,donotattempttoconnectthecomputertotheelectricaloutlet,unlessanexternaldevice
suchasavoltage-convertingtransformerisused.
•Ifthevoltage-ratinglabelshowsadualrangeof“100-127V”and“200-240V,”thissigniesthatthe
computerissuitableforworldwideoperationandthecomputerwillautomaticallyadjusttothevoltageat
theelectricaloutletregardlessofthecountryorregionwherethecomputerisbeingconnected.
Replacementpowercords
Ifyourelocateyourcomputertoacountryorregionthatusesanelectricaloutletstyledifferentfromthe
typeyouarecurrentlyusing,youwillhavetopurchaseeitherelectricalplugadaptersornewpowercords.
YoucanorderpowercordsdirectlyfromLenovo.
Chapter3.Youandyourcomputer21

Forpowercordinformationandpartnumbers,goto:
http://www.lenovo.com/powercordnotice
22ThinkCentreUserGuide

Chapter4.Security
Thischapterprovidesinformationabouthowtoprotectyourcomputerfromtheftandunauthorizeduse.
Securityfeatures
Thefollowingsecurityfeaturesareavailableonyourcomputer:
•ComputraceAgentsoftwareembeddedinrmware
TheComputraceAgentsoftwareisanITassetmanagementandcomputertheftrecoverysolution.
Thesoftwaredetectsifchangeshavebeenmadeonthecomputer,suchashardware,software,or
thecomputercall-inlocation.
Note:YoumighthavetopurchaseasubscriptiontoactivatetheComputraceAgentsoftware.
•Coverpresenceswitch(alsocalledintrusionswitch)
Thecoverpresenceswitchpreventsyourcomputerfromloggingintotheoperatingsystemwhenthe
computercoverisnotproperlyinstalledorclosed.Toenablethecoverpresenceswitchconnector
onthesystemboard,tothefollowing:
1.StarttheSetupUtilityprogram.See“StartingtheSetupUtilityprogram”onpage71.
2.SettheAdministratorPassword.See“Setting,changing,anddeletingapassword”onpage72.
3.FromtheSecuritysubmenu,selectChassisIntrusionDetection➙Enabled.Thecoverpresence
switchconnectoronthesystemboardisenabled.
Whenthecoverpresenceswitchdetectsthatyourcomputercoverisnotproperlyinstalledorclosed
whenyouturnonthecomputer,anerrormessagewillbedisplayed.T obypasstheerrormessageand
logintotheoperatingsystem,dothefollowing:
1.Properlyinstallorcloseyourcomputercover.See“Completingthepartsreplacement”onpage61.
2.PressF1toentertheSetupUtilityprogram.ThenpressF10tosaveandexittheSetupUtility
program.Theerrormessagewillnotbedisplayedagain.
•AbilitytoenableanddisabledevicesandUSBconnectors
Formoreinformation,see“Enablingordisablingadevice”onpage73 .
•Integratedngerprintreader(availableonsomemodels)
Dependingonthemodelsofyourcomputer,thekeyboardmayhaveanintegratedngerprintreader.
ByenrollingyourngerprintandassociatingitwithaPower-onPassword,aHardDiskPassword,or
bothpasswordsbeforehand,youcanstartthecomputer,logontothesystem,andentertheSetup
Utilityprogrambyswipingyourngeroverthereader,withouttypingapassword.Thusngerprint
authenticationcanreplacepasswordsandenablesimpleandsecureuseraccess.
•Startupsequencecontrol
Formoreinformation,see“Selectingorchangingthestartupdevicesequence”onpage74 .
•Startupwithoutkeyboardormouse
Yourcomputerisabletologintotheoperatingsystemwithoutkeyboardormouseconnected.
•TrustedPlatformModule(TPM)
TrustedPlatformModuleisasecurecryptoprocessorthatcanstorecryptographickeysthatprotect
informationstoredinyourcomputer.
©CopyrightLenovo2011,2012 23

Attachinganintegratedcablelock
Anintegratedcablelock,sometimesreferredtoastheKensingtonlock,canbeusedtosecureyour
computertoadesk,table,orothernon-permanentxture.Thecablelockattachestotheintegratedcable
lockslotattherearofyourcomputerandisoperatedwithakey.Thecablelockalsolocksthebuttonsused
toopenthecomputercover.Thisisthesametypeoflockusedwithmanynotebookcomputers.Y oucan
orderanintegratedcablelockdirectlyfromLenovobysearchingforKensingtonat:
http://support.lenovo.com
Figure8.Integratedcablelock
Usingpasswords
YoucansetavarietyofpasswordsthroughtheMicrosoftWindowsoperatingsystemandthroughtheBIOS
ofyourcomputertohelpdeterunauthorizeduseofyourcomputer.
BIOSpasswords
YoucanusetheBIOSSetupUtilityprogramtosetpasswordstopreventunauthorizedaccesstoyour
computeranddata.Thefollowingtypesofpasswordsareavailable:
•Power-OnPassword:WhenaPower-OnPasswordisset,youarepromptedtotypeavalidpassword
eachtimethecomputeristurnedon.Thecomputercannotbeuseduntilthevalidpasswordistyped
in.Formoreinformation,see“Power-OnPassword”onpage72 .
•HardDiskPassword:SettingaHardDiskPasswordpreventsunauthorizedaccesstothedataonthehard
diskdrive.WhenaHardDiskPasswordisset,youarepromptedtotypeavalidpasswordeachtimeyou
trytoaccesstheharddiskdrive.Formoreinformation,see“HardDiskPassword”onpage72 .
Chapter4.Security25

•AdministratorPassword:SettinganAdministratorPassworddetersunauthorizedusersfromchanging
congurationsettings.Ifyouareresponsibleformaintainingthecongurationsettingsofseveral
computers,youmightwanttosetanAdministratorPassword.Formoreinformation,see“Administrator
Password”onpage72 .
Youdonothavetosetanypasswordstouseyourcomputer.However,usingpasswordsimproves
computingsecurity.
Windowspasswords
DependingonyourversionoftheWindowsoperatingsystem,youcanusepasswordsforavarietyof
features,includingcontrollingloginaccess,accesstosharedresources,networkaccess,andindividualuser
settings.Formoreinformation,see“HelpandSupport”onpage103 .
Conguringthengerprintreader
Ifyourkeyboardhasangerprintreader,youcancongurethengerprintreaderintheSetupUtilityprogram.
TheFingerprintSetupsubmenuundertheSecuritymenuoftheSetupUtilityprogramprovidesthe
followingoptions:
•PrebootAuthentication:enablesordisablesthengerprintauthenticationforaccessingtheBIOS.
•EraseFingerprintData:clearsthengerprintdatastoredinangerprintreader.
Tocongurethengerprintreader,dothefollowing:
1.StarttheSetupUtilityprogram.See“StartingtheSetupUtilityprogram”onpage71.
2.FromtheSetupUtilityprogrammainmenu,selectSecurity➙FingerprintSetup,andpressEnter.
TheFingerprintSetupwindowopens.
3.SelectPrebootAuthenticationorEraseFingerprintDateasdesired,andpressEnter.
4.SelectthedesiredsettingsandpressEnter.
5.PressF10tosavechangesandexittheSetupUtilityprogram.PressEnterwhenpromptedtoconrm
theexit.
Usingandunderstandingrewalls
Arewallcanbehardware,software,oracombinationofbothdependingonthelevelofsecurityrequired.
Firewallsworkonasetofrulestodeterminewhichinboundandoutboundconnectionsareauthorized.If
yourcomputerispreintalledwitharewallprogram,ithelpsprotectagainstcomputerInternetsecurity
threats,unauthorizedaccess,intrusions,andInternetattacks.Italsoprotectsyourprivacy.Formore
informationabouthowtousetherewallprogram,refertothehelpsystemofyourrewallprogram.
TheWindowsoperatingsystempreinstalledonyourcomputerprovidestheWindowsFirewall.Fordetailson
usingtheWindowsFirewall,referto“HelpandSupport”onpage103.
Protectingdataagainstviruses
Yourcomputerispreinstalledwithanantivirusprogramtohelpyouguardagainst,detect,andeliminate
viruses.
Lenovoprovidesafullversionofantivirussoftwareonyourcomputerwithafree30-daysubscription.After
30days,youmustrenewthelicensetocontinuereceivingtheantivirussoftwareupdates.
Note:Virusdenitionlesmustbekeptup-to-datetoguardagainstnewviruses.
26ThinkCentreUserGuide

Formoreinformationabouthowtouseyourantivirussoftware,refertothehelpsystemofyourantivirus
software.
Chapter4.Security27

28ThinkCentreUserGuide

Chapter5.Installingorreplacinghardware
Thischapterprovidesinstructionsonhowtoinstallorreplacehardwareforyourcomputer.
Handlingstatic-sensitivedevices
Donotopenthestatic-protectivepackagecontainingthenewpartuntilthedefectiveparthasbeenremoved
fromthecomputerandyouarereadytoinstallthenewpart.Staticelectricity,althoughharmlesstoyou,can
seriouslydamagecomputercomponentsandparts.
Whenyouhandlepartsandothercomputercomponents,taketheseprecautionstoavoidstatic-electricity
damage:
•Limityourmovement.Movementcancausestaticelectricitytobuilduparoundyou.
•Alwayshandlepartsandothercomputercomponentscarefully.HandlePCIcards,memorymodules,
systemboards,andmicroprocessorsbytheedges.Nevertouchanyexposedcircuitry.
•Preventothersfromtouchingthepartsandothercomputercomponents.
•Beforeyoureplaceanewpart,touchthestatic-protectivepackagecontainingtheparttoametal
expansion-slotcoverorotherunpaintedmetalsurfaceonthecomputerforatleasttwoseconds.This
reducesstaticelectricityinthepackageandyourbody.
•Whenpossible,removethenewpartfromthestatic-protectivepackaging,andinstallitdirectlyinthe
computerwithoutsettingthepartdown.Whenthisisnotpossible,placethestatic-protectivepackage
thatthepartcameinonasmooth,levelsurfaceandplacethepartonit.
•Donotplacethepartonthecomputercoverorothermetalsurface.
Installingorreplacinghardware
Thissectionprovidesinstructionsonhowtoinstallorreplacehardwareforyourcomputer.Y oucanexpand
thecapabilitiesofyourcomputerandmaintainyourcomputerbyinstallingorreplacinghardware.
Attention:
Donotopenyourcomputerorattemptanyrepairbeforereadingandunderstandingthe“Importantsafetyinformation”
onpagev.
Notes:
1.UseonlycomputerpartsprovidedbyLenovo.
2.Wheninstallingorreplacinganoption,usetheappropriateinstructionsinthissectionalongwiththe
instructionsthatcomewiththeoption.
Installingexternaloptions
Youcanconnectexternaloptionstoyourcomputer,suchasexternalspeakers,aprinter,orascanner.For
someexternaloptions,youmustinstalladditionalsoftwareinadditiontomakingthephysicalconnection.
Wheninstallinganexternaloption,see“Locatingconnectors,controls,andindicatorsonthefrontofyour
computer”onpage8and“Locatingconnectorsontherearofyourcomputer”onpage9toidentifythe
requiredconnector.Then,usetheinstructionsthatcomewiththeoptiontohelpyoumaketheconnection
andinstallanysoftwareordevicedriversthatarerequiredfortheoption.
©CopyrightLenovo2011,2012 29

Removingthecomputercover
Attention:
Donotopenyourcomputerorattemptanyrepairbeforereadingandunderstandingthe“Importantsafetyinformation”
onpagev .
Thissectionprovidesinstructionsonhowtoremovethecomputercover.
CAUTION:
Turnoffthecomputerandwaitthreetoveminutestoletthecomputercoolbeforeremovingthe
computercover.
Toremovethecomputercover,dothefollowing:
1.Removeanymediafromthedrivesandturnoffallattacheddevicesandthecomputer.
2.Disconnectallpowercordsfromelectricaloutlets.
3.Disconnectthepowercords,Input/Outputcables,andanyothercablesthatareconnectedtothe
computer.See“Locatingconnectors,controls,andindicatorsonthefrontofyourcomputer”onpage8
and“Locatingconnectorsontherearofyourcomputer”onpage9.
4.Removeanylockingdevicethatsecuresthecomputercover,suchasapadlockoranintegratedcable
lock.See“Lockingthecomputercover”onpage24and“Attachinganintegratedcablelock”onpage25.
5.Removeanyscrewsthatsecurethecomputercover.
6.Pressthecover-releasebuttononthesideofthecomputerandslidethecovertotherearofthe
computertoremovethecover.
Figure9.Removingthecomputercover
30ThinkCentreUserGuide

Removingandreinstallingthefrontbezel
Attention:
Donotopenyourcomputerorattemptanyrepairbeforereadingandunderstandingthe“Importantsafetyinformation”
onpagev .
Thissectionprovidesinstructionsonhowtoremoveandreinstallthefrontbezel.
Toremoveandreinstallthefrontbezel,dothefollowing:
1.Turnoffthecomputeranddisconnectallpowercordsfromelectricaloutlets.
2.Removethecomputercover.See“Removingthecomputercover”onpage30.
3.Removethefrontbezelbyreleasingthethreeplastictabsontheleftsideandpivotingthefrontbezel
outward.
Figure10.Removingthefrontbezel
4.Toreinstallthefrontbezel,alignthethreeplastictabsontherightsideofthefrontbezelwiththe
correspondingholesinthechassis,thenpivotthefrontbezelinwardsuntilitsnapsintopositionon
theleftside.
Whattodonext:
•Toworkwithanotherpieceofhardware,gototheappropriatesection.
•Tocompletetheinstallationorreplacement,goto“Completingthepartsreplacement”onpage61 .
InstallingorreplacingaPCIcard
Attention:
Donotopenyourcomputerorattemptanyrepairbeforereadingandunderstandingthe“Importantsafetyinformation”
onpagev .
Chapter5.Installingorreplacinghardware31

ThissectionprovidesinstructionsonhowtoinstallorreplaceaPCIcard.Y ourcomputerhasonestandard
PCIcardslot,twoPCIExpressx1cardslots,andonePCIExpressx16graphicscardslot.
ToinstallorreplaceaPCIcard,dothefollowing:
1.Turnoffthecomputeranddisconnectallpowercordsfromelectricaloutlets.
2.Removethecomputercover.See“Removingthecomputercover”onpage30.
3.Attherearofthecomputer,pressthereleasebutton1toopenthecardlatch2.
Figure11.OpeningthePCIcardlatch
4.DependingonwhetheryouareinstallingorreplacingaPCIcard,dooneofthefollowing:
•IfyouareinstallingaPCIcard,removetheappropriatemetalslotcover.
•IfyouarereplacinganoldPCIcard,grasptheoldcardthatiscurrentlyinstalledandgentlypullit
outoftheslot.
32ThinkCentreUserGuide

Figure12.RemovingaPCIcard
Notes:
a.Thecardtstightlyintothecardslot.Ifnecessary,alternatemovingeachsideofthecardasmall
amountuntilitisremovedfromthecardslot.
b.Ifthecardisheldinplacebyaretaininglatch,pressthecardretaininglatch1asshownto
disengagethelatch.Graspthecardandgentlypullitoutoftheslot.
5.RemovethenewPCIcardfromitsstatic-protectivepackage.
6.Installthenewcardintotheappropriateslotonthesystemboard.See“Locatingpartsonthesystem
board”onpage12.
Note:IfyouareinstallingaPCIExpressx16graphicscard,makesurethememoryslotretainingclips
areclosedbeforeyouinstallthegraphicscard.
Chapter5.Installingorreplacinghardware33

7.PivotthecardlatchtotheclosedpositiontosecurethePCIcard.
Figure13.InstallingaPCIcard
Whattodonext:
•Toworkwithanotherpieceofhardware,gototheappropriatesection.
•Tocompletetheinstallationorreplacement,goto“Completingthepartsreplacement”onpage61.
Installingorreplacingamemorymodule
Attention:
Donotopenyourcomputerorattemptanyrepairbeforereadingandunderstandingthe“Importantsafetyinformation”
onpagev .
Thissectionprovidesinstructionsonhowtoinstallorreplaceamemorymodule.
YourcomputerhasfourslotsforinstallingorreplacingDDR3UDIMMsthatprovideuptoamaximumof16
GBsystemmemory.Wheninstallingorreplacingamemorymodule,usethefollowingguidelines:
•Use2GBor4GBDDR3UDIMMsinanycombinationuptoamaximumof16GB.
•InstallmemorymodulesinthesequenceofDIMM3,DIMM4,DIMM1,andDIMM2.See“Locating
partsonthesystemboard”onpage12 .
Toinstallorreplaceamemorymodule,dothefollowing:
1.Turnoffthecomputeranddisconnectallpowercordsfromelectricaloutlets.
2.Removethecomputercover.See“Removingthecomputercover”onpage30.
3.Laythecomputeronitssideforeasieraccesstothesystemboard.
4.Locatethememoryslots.See“Locatingpartsonthesystemboard”onpage12.
34ThinkCentreUserGuide

5.Removeanypartsthatmightpreventyouraccesstothememoryslots.Dependingonyourcomputer
model,youmightneedtoremovethePCIExpressx16graphicscardforeasieraccesstothememory
slots.See“InstallingorreplacingaPCIcard”onpage31.
6.Dependingonwhetheryouareinstallingorreplacingamemorymodule,dooneofthefollowing:
•Ifyouarereplacinganoldmemorymodule,opentheretainingclipsandgentlypullthememory
moduleoutofthememoryslot.
Figure14.Removingamemorymodule
•Ifyouareinstallingamemorymodule,opentheretainingclipsofthememoryslotintowhichyou
wanttoinstallthememorymodule.
Figure15.Openingtheretainingclips
Chapter5.Installingorreplacinghardware35

7.Positionthenewmemorymoduleoverthememoryslot.Makesurethatthenotch1onthememory
modulealignscorrectlywiththeslotkey2onthesystemboard.Pushthememorymodulestraight
downintotheslotuntiltheretainingclipsclose.
Figure16.Installingamemorymodule
8.ReinstallthePCIExpressx16graphicscardifyouhaveremovedit.
Whattodonext:
•Toworkwithanotherpieceofhardware,gototheappropriatesection.
•Tocompletetheinstallationorreplacement,goto“Completingthepartsreplacement”onpage61 .
Installingorreplacingtheopticaldrive
Attention:
Donotopenyourcomputerorattemptanyrepairbeforereadingandunderstandingthe“Importantsafetyinformation”
onpagev.
Thissectionprovidesinstructionsonhowtoinstallorreplacetheopticaldrive.
Toinstallorreplaceanopticaldrive,dothefollowing:
1.Turnoffthecomputeranddisconnectallpowercordsfromelectricaloutlets.
2.Removethecomputercover.See“Removingthecomputercover”onpage30.
3.Removethefrontbezel.See“Removingandreinstallingthefrontbezel”onpage31.
4.Dependingonwhetheryouareinstallingorreplacinganopticaldrive,dooneofthefollowing:
•Ifyouareinstallingasecondaryopticaldrive,removetheplasticpanelinthefrontbezelforthe
drivebayyouwanttouse.Ifthereisametalstaticshieldinstalledinthedrivebay,removethe
metalstaticshield.
36ThinkCentreUserGuide

•Ifyouarereplacinganopticaldrive,disconnectthesignalcableandthepowercablefromtherear
oftheopticaldrive,pressthebluereleasebutton,andthenslidetheopticaldriveoutofthefront
ofthecomputer.
Figure17.Removingtheopticaldrive
5.Installtheopticaldriveretaineronthesideofthenewopticaldrive.
Figure18.Installingtheopticaldriveretainer
Chapter5.Installingorreplacinghardware37

6.Slidethenewopticaldriveintothedrivebayfromthefrontofthecomputeruntiltheopticaldrive
snapsintoposition.
Figure19.Installingtheopticaldrive
7.Connectthesignalcableandthepowercabletothenewopticaldrive.
Figure20.Connectingtheopticaldrive
8.Reinstallthefrontbezel.See“Removingandreinstallingthefrontbezel”onpage31.
Whattodonext:
•Toworkwithanotherpieceofhardware,gototheappropriatesection.
•Tocompletetheinstallationorreplacement,goto“Completingthepartsreplacement”onpage61 .
Installingorreplacingthecardreader
Attention:
Donotopenyourcomputerorattemptanyrepairbeforereadingandunderstandingthe“Importantsafetyinformation”
onpagev.
38ThinkCentreUserGuide

Thissectionprovidesinstructionsonhowtoinstallorreplacethecardreader.
Note:Thecardreaderisonlyavailableinsomemodels.Fornewinstallation,see“Installingthecardreader”
onpage39 .Forreplacement,see“Replacingthecardreader”onpage41.
Installingthecardreader
Toinstallthecardreader,dothefollowing:
1.Removeallmediafromthedrivesandturnoffallattacheddevicesandthecomputer.Then,disconnect
allpowercordsfromelectricaloutletsanddisconnectallcablesthatareconnectedtothecomputer.
2.Removethecomputercover.See“Removingthecomputercover”onpage30.
3.Removethefrontbezel.See“Removingandreinstallingthefrontbezel”onpage31.
4.Locatethecardreaderdrivebay.See“Locatinginternaldrives”onpage13.
5.Pivotthecardreaderretainertotheleftandslideitoutofthechassis.
Figure21.Removingthecardreaderretainer
6.Installthecardreaderretaineronthesideofthenewcardreader.
Figure22.Installingthecardreaderretainer
Chapter5.Installingorreplacinghardware39

7.Slidethecardreaderwithretainerintothecardreaderdrivebayuntilitsnapsintoposition.
Figure23.Installingthecardreader
8.ConnectthecardreadercabletoFrontUSBconnector2onthesystemboard.See“Locatingpartson
thesystemboard”onpage12.
9.Reinstallthefrontbezel.See“Removingandreinstallingthefrontbezel”onpage31.
Note:Youmighthavetoremovethecardreadercover2fromthefrontbezel.T oremovethecardread
cover,pivotthetworetainingclips1thatsecurethecardreadercoveroutwardsandthencompletely
disengagethecardreadercoverfromthefrontbezel.
Figure24.Removingthecardreadercover
40ThinkCentreUserGuide

Whattodonext:
•Toworkwithanotherpieceofhardware,gototheappropriatesection.
•Tocompletetheinstallationorreplacement,goto“Completingthepartsreplacement”onpage61.
Replacingthecardreader
Attention:
Donotopenyourcomputerorattemptanyrepairbeforereadingandunderstandingthe“Importantsafetyinformation”
onpagev .
Toreplacethecardreader,dothefollowing:
1.Removeallmediafromthedrivesandturnoffallattacheddevicesandthecomputer.Then,disconnect
allpowercordsfromelectricaloutletsanddisconnectallcablesthatareconnectedtothecomputer.
2.Removethecomputercover.See“Removingthecomputercover”onpage30.
3.Removethefrontbezel.See“Removingandreinstallingthefrontbezel”onpage31.
4.Locatethecardreader.See“Locatingcomponents”onpage11.
5.DisconnectthecardreadercablefromtheUSBconnectoronthesystemboard.See“Locatingpartson
thesystemboard”onpage12.
6.Presstheblueretainingcliptoremovethecardreaderoutofthechassis.
Figure25.Removingthecardreader
Chapter5.Installingorreplacinghardware41

7.Installthecardreaderretaineronthesideofthenewcardreader.
Figure26.Installingthecardreaderretainer
8.Slidethenewcardreaderintothedrivebayuntilitsnapsintoposition.
Figure27.Installingthecardreader
9.ReconnectthecardreadercabletoFrontUSBconnector2onthesystemboard.See“Locatingparts
onthesystemboard”onpage12.
10.Reinstallthefrontbezel.See“Removingandreinstallingthefrontbezel”onpage31.
Whattodonext:
•Toworkwithanotherpieceofhardware,gototheappropriatesection.
•Tocompletetheinstallationorreplacement,goto“Completingthepartsreplacement”onpage61.
Replacingthebattery
Attention:
Donotopenyourcomputerorattemptanyrepairbeforereadingandunderstandingthe“Importantsafetyinformation”
onpagev.
Yourcomputerhasaspecialtypeofmemorythatmaintainsthedate,time,andsettingsforbuilt-infeatures,
suchasparallel-portassignments(conguration).Abatterykeepsthisinformationactivewhenyouturn
offthecomputer.
42ThinkCentreUserGuide
Replacingthepowersupplyassembly
Attention:
Donotopenyourcomputerorattemptanyrepairbeforereadingandunderstandingthe“Importantsafetyinformation”
onpagev .
Thissectionprovidesinstructionsonhowtoreplacethepowersupplyassembly.
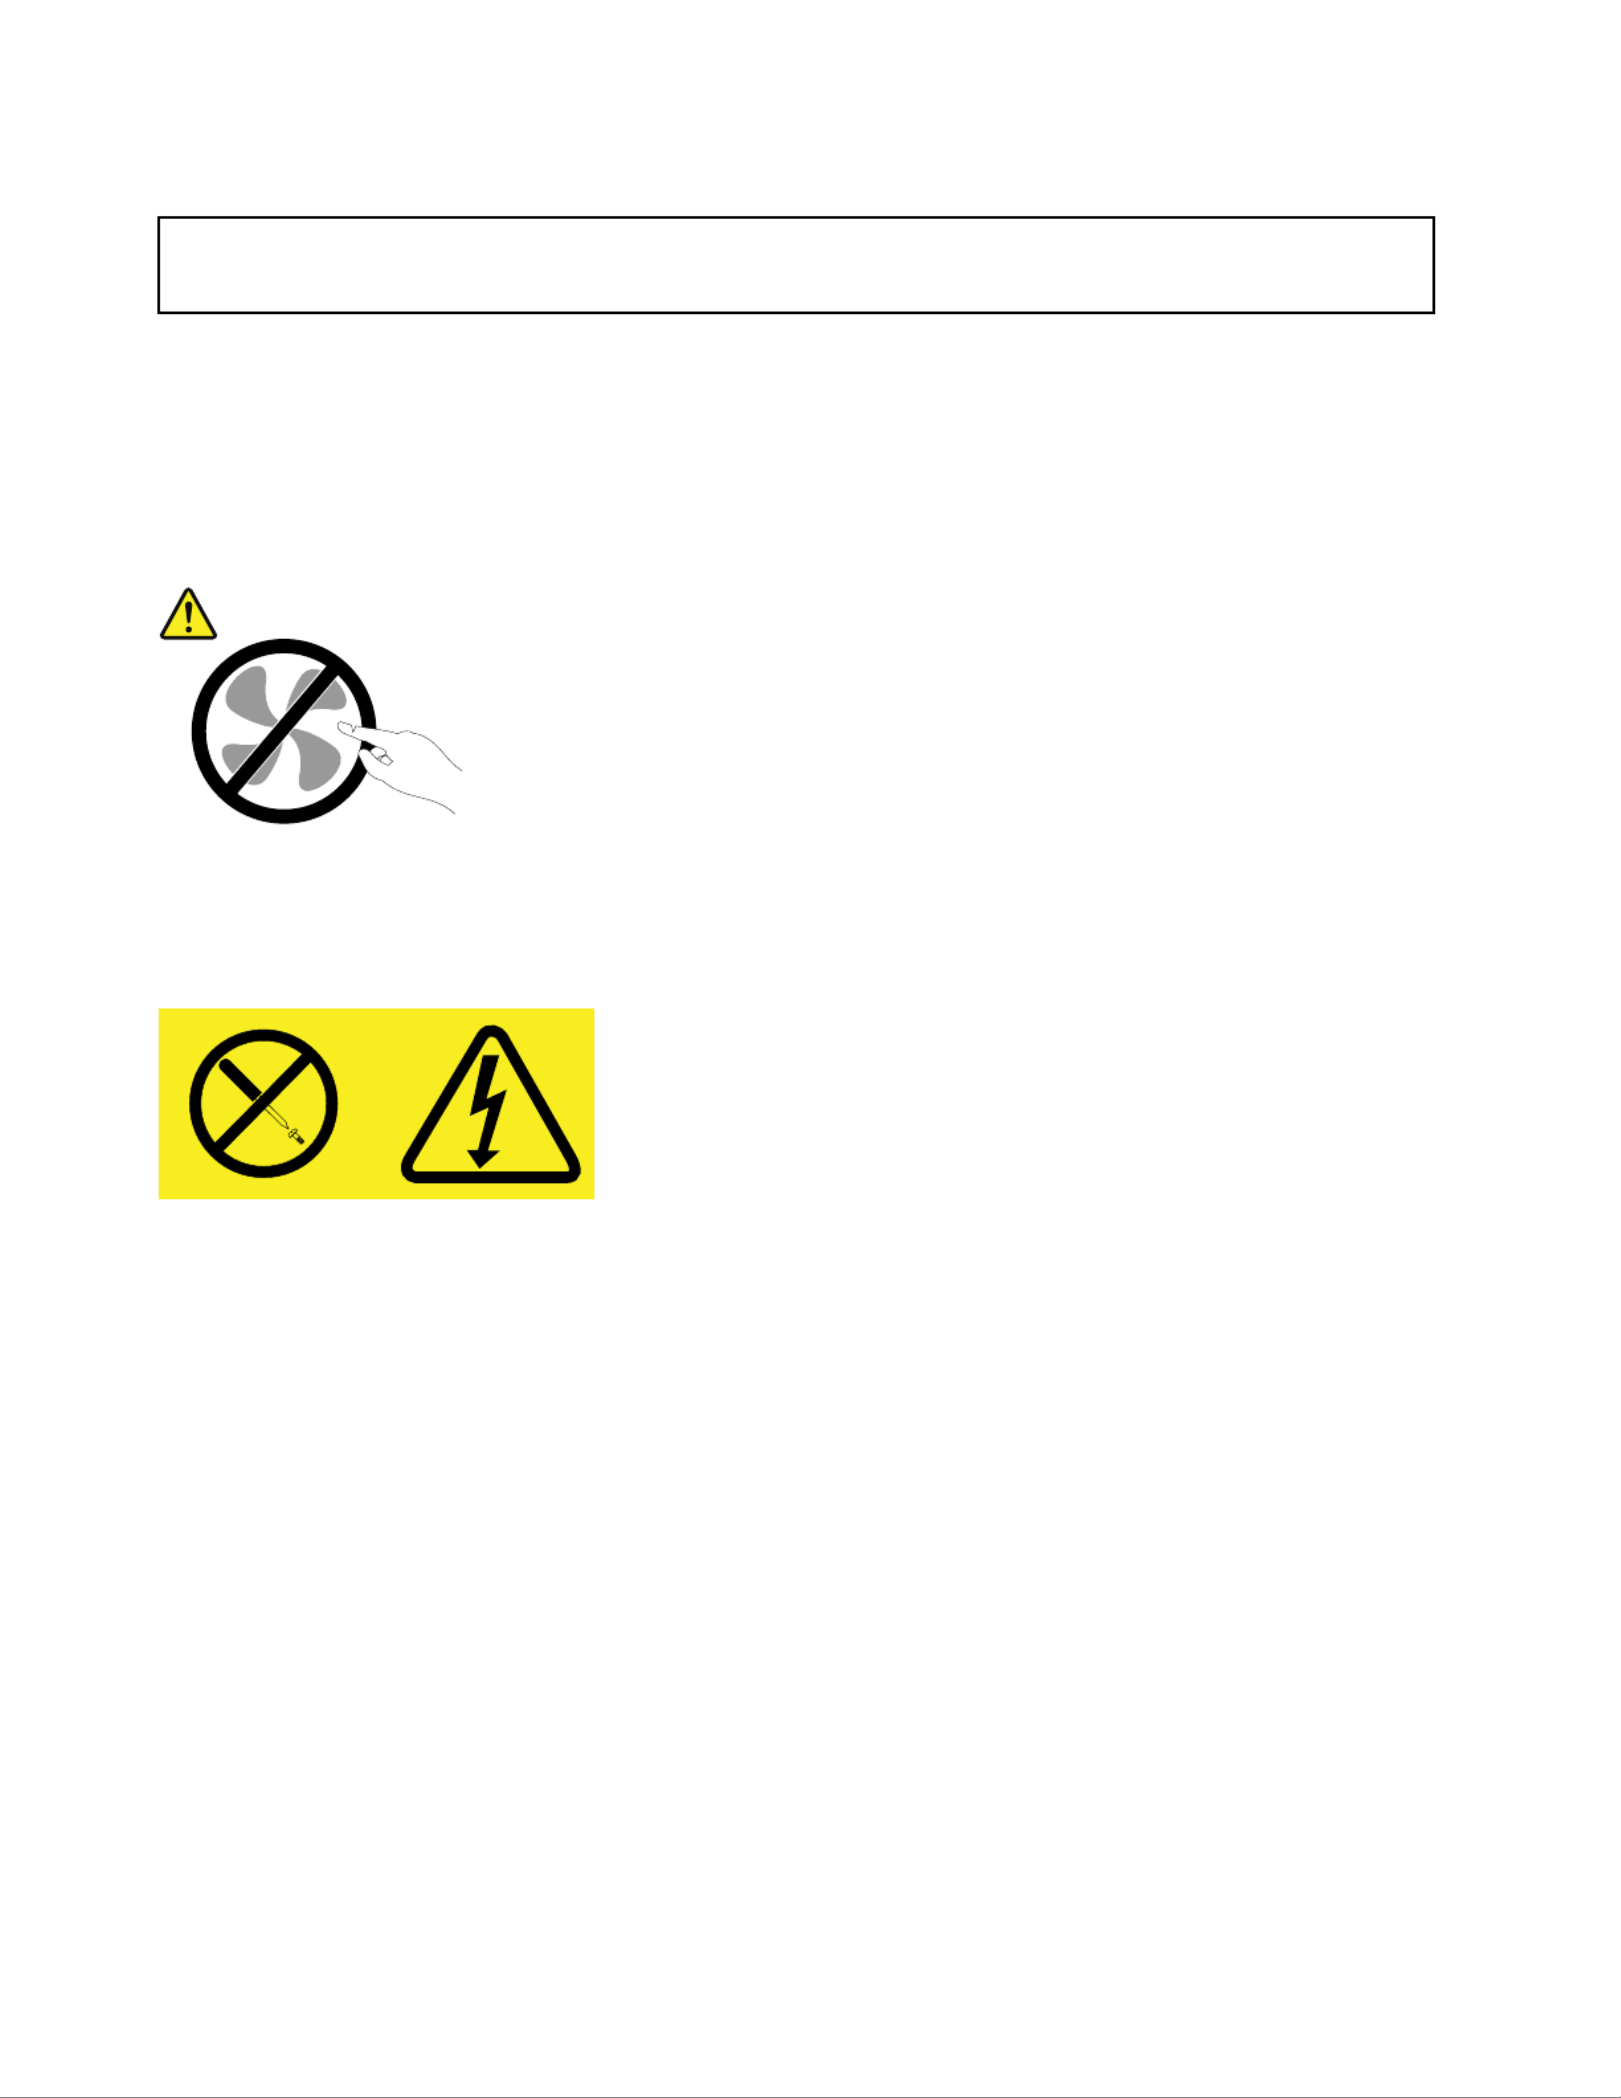
Althoughtherearenomovingpartsinyourcomputerafterthepowercordhasbeendisconnected,the
followingwarningsarerequiredforyoursafetyandproperUnderwritersLaboratories(UL)certication.
CAUTION:
Hazardousmovingparts.Keepngersandotherbodypartsaway.
CAUTION:
Neverremovethecoveronapowersupplyoranypartthathasthefollowinglabelattached.
Hazardousvoltage,current,andenergylevelsarepresentinsideanycomponentthathasthislabel
attached.Therearenoserviceablepartsinsidethesecomponents.Ifyoususpectaproblemwith
oneoftheseparts,contactaservicetechnician.
Toreplacethepowersupplyassembly,dothefollowing:
1.Turnoffthecomputeranddisconnectallpowercordsfromelectricaloutlets.
2.Removethecomputercover.See“Removingthecomputercover”onpage30.
3.Disconnectthepowersupplyassemblycablesfromthesystemboardandalldrives.See“Locating
partsonthesystemboard”onpage12.
4.Releasethepowersupplyassemblycablesfromthecableclipsandtiesinthechassis.
44ThinkCentreUserGuide

5.Laythecomputeronitssideandremovethefourscrewsattherearofthechassisthatsecurethe
powersupplyassembly.
Figure30.Removingthescrewsforthepowersupplyassembly
6.Slidethepowersupplyassemblytothefrontofthecomputerandthenliftitoutofthechassis.
7.Ensurethatthenewpowersupplyassemblyisthecorrectreplacement.
8.Installthenewpowersupplyassemblyintothechassissothatthescrewholesinthepowersupply
assemblyalignwiththoseinthechassis.
9.Installandtightenthefourscrewstosecurethepowersupplyassembly.
Note:UseonlyscrewsprovidedbyLenovo.
10.Reconnectthepowersupplyassemblycablestothesystemboardandeachofthedrives.
11.Securethepowersupplyassemblycableswiththecableclipsandtiesinthechassis.
Whattodonext:
•Toworkwithanotherpieceofhardware,gototheappropriatesection.
•Tocompletetheinstallationorreplacement,goto“Completingthepartsreplacement”onpage61.
Replacingtheheatsinkandfanassembly
Attention:
Donotopenyourcomputerorattemptanyrepairbeforereadingandunderstandingthe“Importantsafetyinformation”
onpagev.
Thissectionprovidesinstructionsonhowtoreplacetheheatsinkandfanassembly.
CAUTION:
Theheatsinkandfanassemblymightbeveryhot.Turnoffthecomputerandwaitthreetove
minutestoletthecomputercoolbeforeremovingthecomputercover.
Chapter5.Installingorreplacinghardware45

Toreplacetheheatsinkandfanassembly,dothefollowing:
1.Turnoffthecomputeranddisconnectallpowercordsfromelectricaloutlets.
2.Removethecomputercover.See“Removingthecomputercover”onpage30.
3.Laythecomputeronitssideforeasieraccesstothesystemboard.
4.Locatetheheatsinkandfanassembly.See“Locatingpartsonthesystemboard”onpage12.
5.Disconnectanycablesthatmightpreventyouraccesstotheheatsinkandfanassembly.
6.Disconnecttheheatsinkandfanassemblycablefromthemicroprocessorfanconnectoronthesystem
board.See“Locatingpartsonthesystemboard”onpage12.
7.Pivotthehandle1toreleasetheheatsinkandfanassemblyclampandthendisengagetheclampfrom
theplasticretentionbracket.
Figure31.Removingtheheatsinkandfanassembly
8.Liftthefailingheatsinkandfanassemblyoffthesystemboard.
Notes:
a.Youmighthavetogentlytwisttheheatsinkandfanassemblytofreeitfromthemicroprocessor.
b.Whenhandlingtheheatsinkandfanassembly,donottouchthethermalgreaseonthebottomofit.
46ThinkCentreUserGuide

9.Positionthenewheatsinkandfanassemblyonthemicroprocessorsocketandthenpositionthe
clampontheplasticretentionbracket.Pivotthehandle1toclamptheheatsinkandfanassemblyto
theplasticretentionbracket.
Figure32.Reinstallingtheheatsinkandfanassembly
10.Connecttheheatsinkandfanassemblycabletothemicroprocessorfanconnectoronthesystem
board.See“Locatingpartsonthesystemboard”onpage12.
11.Reconnectanycablesthathavebeenremoved.
Whattodonext:
•Toworkwithanotherpieceofhardware,gototheappropriatesection.
•Tocompletetheinstallationorreplacement,goto“Completingthepartsreplacement”onpage61 .
Replacingthemicroprocessor
Attention:
Donotopenyourcomputerorattemptanyrepairbeforereadingandunderstandingthe“Importantsafetyinformation”
onpagev.
Thissectionprovidesinstructionsonhowtoreplacethemicroprocessor.
CAUTION:
Theheatsinkandmicroprocessormightbeveryhot.Turnoffthecomputerandwaitthreetove
minutestoletthecomputercoolbeforeremovingthecomputercover.
Toreplacethemicroprocessor,dothefollowing:
1.Removeallmediafromthedrivesandturnoffallattacheddevicesandthecomputer.Then,disconnect
allpowercordsfromelectricaloutletsanddisconnectallcablesthatareconnectedtothecomputer.
2.Removethecomputercover.See“Removingthecomputercover”onpage30.
3.Laythecomputeronitssideforeasieraccesstothesystemboard.
Chapter5.Installingorreplacinghardware47

4.Locatethesystemboardanddisconnectallcablesconnectedtothesystemboard.See“Locating
partsonthesystemboard”onpage12.
5.Removetheheatsinkandfanassembly.See“Replacingtheheatsinkandfanassembly”onpage45.
Note:Placetheheatsinkandfanassemblyonitssidesothatthethermalgreaseonthebottomofit
doesnotgetincontactwithanything.
6.Liftthesmallhandle1toreleasethemicroprocessor2securedonthesystemboard.
Figure33.Accessingthemicroprocessor
7.Liftthemicroprocessorstraightupandoutofthemicroprocessorsocket.
Figure34.Removingthemicroprocessor
Notes:
a.Yourmicroprocessorandsocketmightlookdifferentfromtheoneillustrated.
48ThinkCentreUserGuide

b.Notetheorientationofthemicroprocessorinthesocket.Youcanlookforthesmalltriangle1
ononecornerofthemicroprocessor.Thisisimportantwheninstallingthenewmicroprocessor
onthesystemboard.
c.T ouchonlytheedgesofthemicroprocessor.Donottouchthegoldcontactsonthebottom.
d.Donotdropanythingontothemicroprocessorsocketwhileitisexposed.Thesocketpinsmustbe
keptascleanaspossible.
8.Makesurethatthesmallhandleisintheraisedposition.
9.Removetheprotectivecoverthatprotectsthegoldcontactsofthenewmicroprocessor.
10.Holdthenewmicroprocessorbyitssidesandalignthesmalltriangleononecornerofthenew
microprocessorwiththecorrespondingsmalltriangleononecornerofthemicroprocessorsocket.
11.Lowerthenewmicroprocessorstraightdownintothemicroprocessorsocketonthesystemboard.
12.Lowerthesmallhandletosecurethenewmicroprocessorinthesocket.
13.Reinstalltheheatsinkandfanassembly.See“Replacingtheheatsinkandfanassembly”onpage45.
14.Reconnectallcablesthatweredisconnectedfromthesystemboard.
Whattodonext:
•Toworkwithanotherpieceofhardware,gototheappropriatesection.
•Tocompletethereplacement,goto“Completingthepartsreplacement”onpage61.
Replacingtheprimaryharddiskdrive
Attention:
Donotopenyourcomputerorattemptanyrepairbeforereadingandunderstandingthe“Importantsafetyinformation”
onpagev.
Thissectionprovidesinstructionsonhowtoreplacetheprimaryharddiskdrive.
Toreplacetheprimaryharddiskdrive,dothefollowing:
1.Turnoffthecomputeranddisconnectallpowercordsfromelectricaloutlets.
2.Removethecomputercover.See“Removingthecomputercover”onpage30.
3.Locatetheprimaryharddiskdrive.See“Locatinginternaldrives”onpage13.
4.Disconnectthesignalcableandthepowercablefromtheharddiskdrive.
Chapter5.Installingorreplacinghardware49
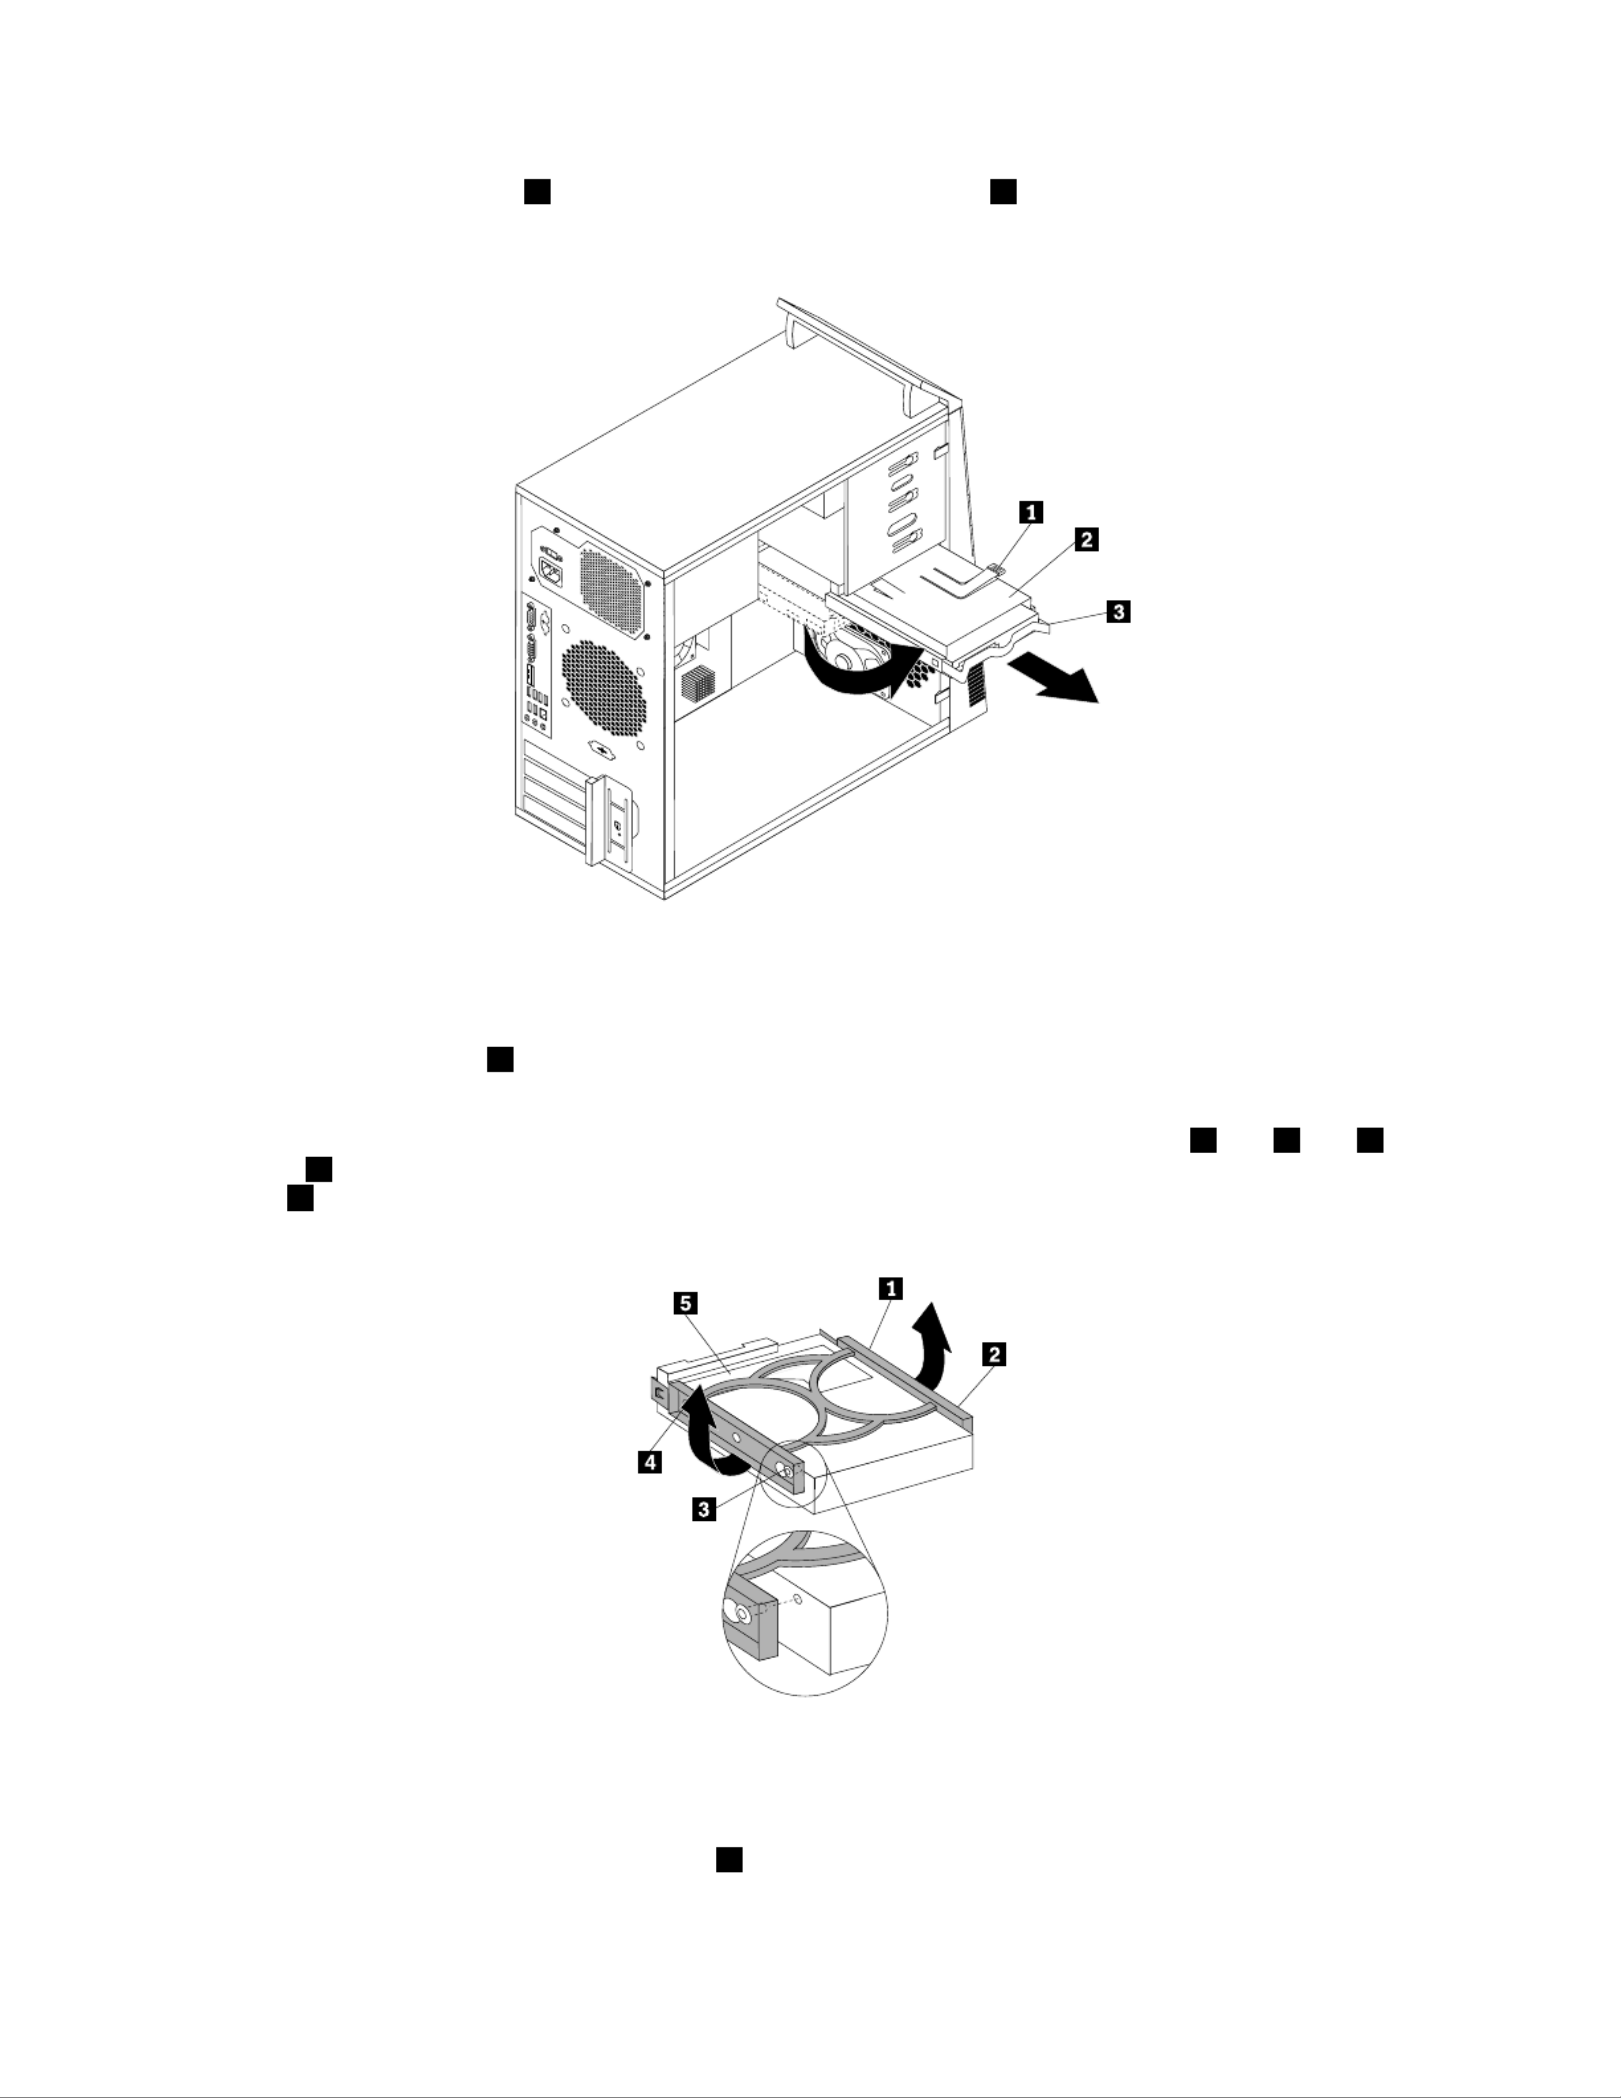
5.Pressthebluereleasetab1down,slidetheharddiskdrivecage2totherearofthecomputer,and
thenpivotitoutward.
Figure35.Removingtheprimaryharddiskdrive
6.Removetheharddiskdrivecagefromthechassisbyslidingitoutward.
7.Pullonthebluehandle3toreleaseandremovetheharddiskdrivefromthedrivecage.
8.Flexthesidesofthebluebrackettoremovetheharddiskdrivefromthebracket.
9.Toinstallanewharddiskdriveintothebluebracket,exthebracketandalignpin1,pin2,pin3,
andpin4onthebracketwiththecorrespondingholesintheharddiskdrive.Donottouchthecircuit
board5onthebottomoftheharddiskdrive.
Figure36.Installingtheharddiskdriveintothebracket
10.Slidethenewharddiskdriveintothedrivecageuntilitsnapsintoposition.
11.Alignthedrivecagepivotpinwiththeslot1intheupperdrivecageandslidetheharddiskdrive
cageintothechassis.
50ThinkCentreUserGuide

5.Pressthebluereleasebuttontoreleasetheharddiskdrivecagefromthechassis.
Figure38.Removingthesecondaryharddiskdrive
6.Removetheharddiskdrivecagefromthechassisbysimplyslidingitoutward.
7.Pullonthebluehandletoreleaseandremovetheharddiskdrivefromtheharddiskdrivecage.
8.Flexthesidesofthebluebrackettoremovetheharddiskdrivefromthebracket.
9.Toinstallanewharddiskdriveintothebluebracket,exthebracketandalignpin1,pin2,pin3,
andpin4onthebracketwiththecorrespondingholesintheharddiskdrive.Donottouchthecircuit
board5onthebottomoftheharddiskdrive.
Figure39.Installingtheharddiskdriveintothebracket
10.Slidethenewharddiskdriveintotheharddiskdrivecageuntilitsnapsintoposition.
52ThinkCentreUserGuide

11.Installtheharddiskdrivecageintothechassisuntilitsnapsintopositionunderneaththemetaltab.
Makesurethattheharddiskdrivecagereleasebuttonissecuredinthechassis.
Figure40.Installingthesecondaryharddiskdrive
12.Connectthesignalcableandthepowercabletothenewharddiskdrive.
Whattodonext:
•Toworkwithanotherpieceofhardware,gototheappropriatesection.
•Tocompletetheinstallationorreplacement,goto“Completingthepartsreplacement”onpage61.
Replacingthefrontfanassembly
Attention:
Donotopenyourcomputerorattemptanyrepairbeforereadingandunderstandingthe“Importantsafetyinformation”
onpagev.
Thissectionprovidesinstructionsonhowtoreplacethefrontfanassembly.
Note:Thefrontfanassemblyisonlyavailableinsomemodels.
Toreplacethefrontfanassembly,dothefollowing:
1.Turnoffthecomputeranddisconnectallpowercordsfromelectricaloutlets.
2.Removethecomputercover.See“Removingthecomputercover”onpage30.
3.Removethefrontbezel.See“Removingandreinstallingthefrontbezel”onpage31.
4.Disconnectthefrontfanassemblycablefromthepowerfanconnectoronthesystemboard.See
“Locatingpartsonthesystemboard”onpage12.
Chapter5.Installingorreplacinghardware53

5.Releasethetwotabs1thatattachthefrontfanassemblytothechassisasshownandthencompletely
removethefrontfanassemblyfromthechassis.
Figure41.Removingthefrontfanassembly
54ThinkCentreUserGuide
Specyfikacje produktu
| Marka: | Lenovo |
| Kategoria: | Pulpit |
| Model: | Thinkcentre M77 |
Potrzebujesz pomocy?
Jeśli potrzebujesz pomocy z Lenovo Thinkcentre M77, zadaj pytanie poniżej, a inni użytkownicy Ci odpowiedzą
Instrukcje Pulpit Lenovo

10 Października 2024
2 Października 2024
30 Września 2024
24 Września 2024
14 Września 2024
14 Września 2024
14 Września 2024
13 Września 2024
11 Września 2024
11 Września 2024
Instrukcje Pulpit
- Pulpit Sony
- Pulpit Samsung
- Pulpit LG
- Pulpit Sharp
- Pulpit Supermicro
- Pulpit Gigabyte
- Pulpit Acer
- Pulpit Fujitsu
- Pulpit LC-Power
- Pulpit Promethean
- Pulpit Mio
- Pulpit Viewsonic
- Pulpit Asus
- Pulpit Medion
- Pulpit MSI
- Pulpit Toshiba
- Pulpit Haier
- Pulpit HP
- Pulpit Tripp Lite
- Pulpit Moxa
- Pulpit ZTE
- Pulpit Dell
- Pulpit JYSK
- Pulpit Apple
- Pulpit AOC
- Pulpit Vtech
- Pulpit Razer
- Pulpit Kobo
- Pulpit NEC
- Pulpit Axis
- Pulpit Optoma
- Pulpit Asrock
- Pulpit Microsoft
- Pulpit Sharkoon
- Pulpit ECS
- Pulpit BenQ
- Pulpit BDI
- Pulpit Zotac
- Pulpit Alienware
- Pulpit Emachines
- Pulpit Parisot
- Pulpit Maxdata
- Pulpit Woood
- Pulpit Wehkamp
- Pulpit InFocus
- Pulpit Intel
- Pulpit Targa
- Pulpit Peaq
- Pulpit Seagate
- Pulpit Shuttle
- Pulpit Vorago
- Pulpit VXL
- Pulpit Foxconn
- Pulpit Ibm
- Pulpit Packard Bell
- Pulpit Advantech
- Pulpit Kogan
- Pulpit MP
- Pulpit Elitegroup
- Pulpit Smart Things
- Pulpit ONYX
- Pulpit System76
- Pulpit Zoostorm
- Pulpit Bestar
- Pulpit Pelco
- Pulpit Altra
- Pulpit Dell Wyse
- Pulpit AOpen
- Pulpit NComputing
- Pulpit MvixUSA
- Pulpit Faytech
- Pulpit AIS
- Pulpit Wyse
Najnowsze instrukcje dla Pulpit

15 Października 2024
15 Października 2024

14 Października 2024

12 Października 2024
9 Października 2024
9 Października 2024

9 Października 2024
8 Października 2024
8 Października 2024
8 Października 2024