Instrukcja obsługi KeySonic ACK-109 BL
KeySonic klawiatura ACK-109 BL
Przeczytaj poniżej 📖 instrukcję obsługi w języku polskim dla KeySonic ACK-109 BL (2 stron) w kategorii klawiatura. Ta instrukcja była pomocna dla 15 osób i została oceniona przez 2 użytkowników na średnio 4.8 gwiazdek
Strona 1/2
ACK-109 BL/EL ACK-109 BL/EL
Besonderheiten
•Voll flexible Silikontastatur (optional mit
ein- und ausschaltbarer blauer Tasten-
feldbeleuchtung
•Robust und universell: Beleuchtet, falt-
und einrollbar, staub- und wasserdicht
•Geräuschloser und spürbarer Anschlag
durch versiegelte Langhubtasten
•3× ACPI-Funktionstasten für „Power“,
„Sleep“ und „Wake up“
•Ästhetische blaue Status-LEDs für
Caps-, Num- und Scroll-Lock
•Plug & Play-Installation ohne speziellen
Treiber
•Ideal für den professionellen Einsatz in
Werkstätten, Laboratorien, in derGas-
tronomie, Lebensmittelindustrie und Me-
dizin sowie auch für alle mobilen Appli-
kationen im Außenbereich
Technische Daten
•105–108 Tasten (je nach Länderversion)
•3× ACPI Funktionstasten
•Versiegelte Langhubtasten
(Membrantechnologie)
•Zu erwartende Lebensdauer: ca. 1 Mio.
Anschläge / Taste
•Spannungsversorgung: +5 V
DC
±5 %
•Stromaufnahme: 250 mA max.
•Temperatur: 0 °C bis +60 °C (Betrieb)
–20 °C bis +80 °C (Lagerung)
•Feuchtigkeit: 0 % bis 100 % rel. (Betrieb
und Lagerung)
•Kompatibilität:
Win 95/98/NT/ME/2000/XPund höher
•Schnittstelle: USB + PS/2-Adapter
•Kabellänge:1,5 m
•Zertifizierung: CE
Bei starker Blasenbildung besteht die
Möglichkeit, die Tastatur zu entlüften:
Features
•Fully flexible silicone keyboard (option:
blue keypad illumination, which can be
switched on and off)
•Rugged and general-purpose:
illuminated, foldable and rollable,
dustproof, waterproof
•Silent stroke and tactile feedback due to
sealed full-travel keys
•3× ACPI function keys for "Power",
"Sleep", and "Wake Up"
•Appealing blue status LEDs for Caps
Lock, Num Lock, and Scroll Lock
•Plug & Play installation without any
special drivers
•Ideal for professional use in workshops,
laboratories, gastronomy, food industry
and medicine, as well as for all mobile
outdoor applications
Technical Data
•105–108 keys (depending on locale)
•3× ACPI function keys
•Sealed full-travel keys (membrane
technology)
•Expected lifetime: approx. 1 million
strokes per key
•Power supply: +5 V
DC
±5 %
•Power consumption: 250 mA max.
•Temperature: 0 °C up to +60 °C (+32 °F
up to +140 °F; operating) / –20 °C up to
+80 °C (–4 °F up to +176 °F; storage)
•Humidity: 0 % up to 100 % RH (opera-
ting and storage)
•Compatibility: Win 95/98/NT/2000/XP
and higher
•Interface: USB + PS/2 adapter
•Cable length: 1.5 m(4'11")
•Certification: CE
In case of heavy bubble accumulation, it is
possible to deflate the keyboard:
Spécialités
•Clavier complètement flexible en silicone
(option: éclairage en bleu du clavier qui
peut être allumé et éteindu)
•Robuste et polyvalent : éclairé, pliable et
roulable, imperméable à la poussière et
à l’eau
•3 touches de fonction ACPI pour
« Marche / Arrêt », «Sommeil», et
« Réveil »
•Esthétiques diodes bleues indiquantes
l’arrêt de majuscules, le verrouillage nu-
mérique, et l’arrêt de défilement
•Installation « Plug & Play » sans pilote
spécial
•Idéal pour l’usage professionel dans des
ateliers, laboratoires, la gastronomie,
industrie d’alimentation et médecine
aussie que pour toutes applications mo-
biles en plein air
Information technique
•105–108 touches (dépendant du langage)
•3 touches de fonction ACPI
•Touches cachetées à pleine course
(technologie de membranes)
•Durée de vie expectée : approx. 1 million
touches par touche
•Alimentation : +5 V
DC
±5 %
•Consommation d’électricité : 250 mA
max.
•Température : 0 °C jusqu’à +60 °C
(exploitation)
–20 °C jusqu’à +80 °C (magasinage)
•Humidité : 0 % jusqu’à 100 % h.r.
(exploitation et magasinage)
•Compatibilité : Win 95/98/NT/2000/XP
ou supérieur
•Inferface : USB + adaptateur PS/2
•Longeur du câble : 1,5 m
•Certification : CE
En cas de formation forte de bulles il est
possible de purger le clavier :
Irrtümer und Auslassungen vorbehalten. / E&OE / Sauf erreurs ou omissions.
V 5.0 (2013/04/09)
● © 2013 by Raidsonic Technology GmbH
Bedienungsanweisung
Installation
1.) PC ausschalten
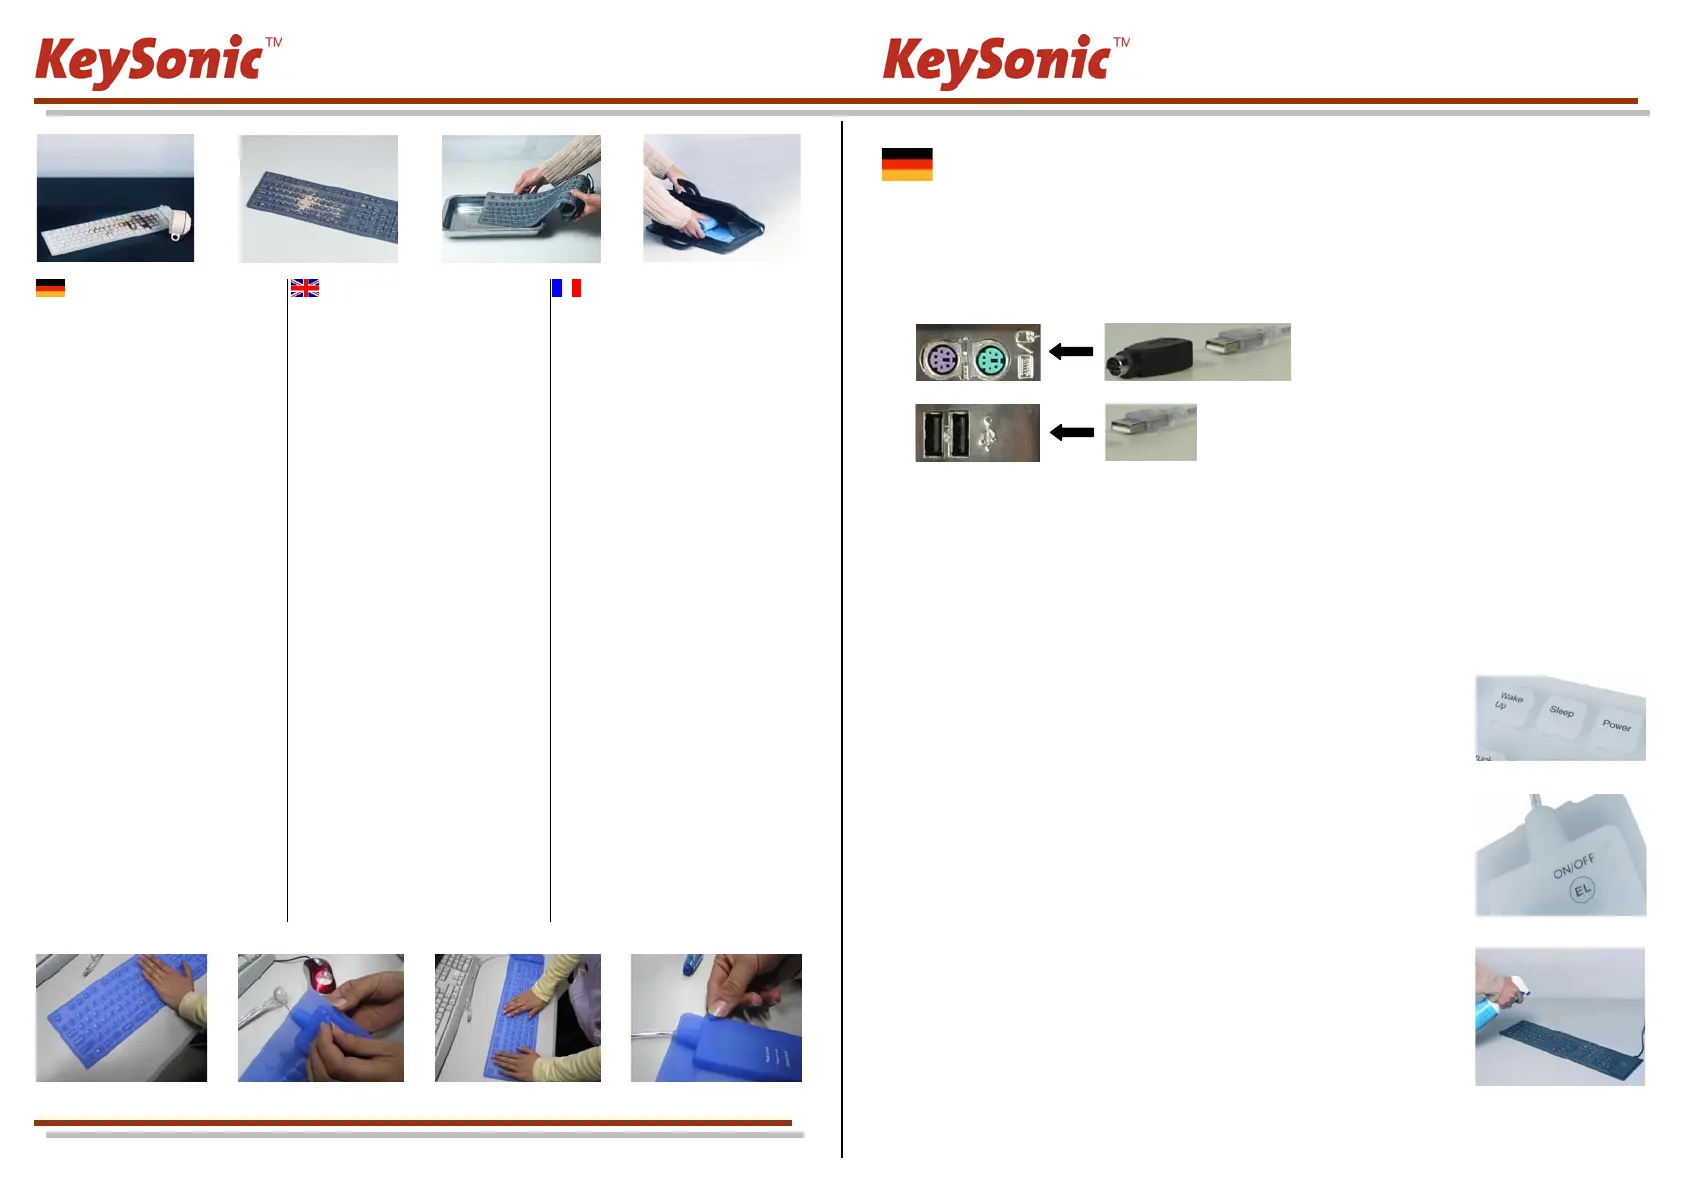
2.) Anschluss der Tastatur an Ihren Computer: Welche freien Schnittstellen besitzt Ihr PC?
3.) Sollte Ihr PC einen freien PS/2-Anschluss für Tastaturen besitzen (siehe Foto, Symbol / Farbe lila), so verbinden
Sie die Tastatur über den mitgelieferten PS/2-USB-Adapter.
Sollte Ihr PC nur einen freien USB-Anschluss besitzen, so verbinden Sie die Tastatur über den USB-Stecker.
4.) PC einschalten
Aktuelle Betriebssysteme erkennen nach dem Hochfahren die neue Tastatur automatisch; sie ist sofort bedienbar.
Ältere Betriebssysteme unterstützen nicht immer das automatische Erkennen von USB-Geräten. Haben Sie Ihre Tas-
tatur über USB angeschlossen und macht sich genau dieser Fehler bei Ihnen bemerkbar, so haben Sie folgende Mög-
lichkeiten zur Lösung dieses Problems:
•Machen Sie ein Update Ihres Betriebssystems und beginnen wieder mit Schritt 1.)
•Kontrollieren Sie, ob Ihr BIOS-System USB-Tastaturen unterstützt (*). Manche Hersteller bieten BIOS-Updates
im Internet zum Downloaden an.
•Fahren Sie das Betriebssystem herunter und schließen die Tastatur über den PS/2-USB-Adapter an einen frei-
en PS/2-Anschluß für Tastaturen (siehe obiges Foto, Symbol / Farbe violett) an.
•Sollten andere Buchstaben oder Zahlen auf dem Bildschirm erscheinen, als Sie eingegeben haben, so kontrol-
lieren Sie in Ihrem Betriebssystem die Ländereinstellung (*).
5.) Spezial-Funktionen:
Die Tastatur ist mit 3 ACPI-Tasten ausgestattet (*):
(Funktionalität muss vom BIOS bzw. Betriebssystem unterstützt werden.)
•Power Hochfahren bzw. Herunterfahren des PCs
•Sleep Herunterfahren des PCs in den Standby-Zustand
•Wake up Hochfahren des PCs aus dem Standby-Zustand
Optional ist die Tastatur mit blauer Tastaturfeldbeleuchtung ausgestattet:
•EL on/off Schaltet die Tastaturfeldbeleuchtung ein bzw. aus.
(*) Einzelheiten entnehmen Sie der Dokumentation Ihres PCs.
Reinigung der Tastatur
•Groben Schmutz entfernen Sie mit einem Pinsel,
einer weichen Bürste, Druckluft oder einem Staubsauger
•Feinen Schmutz entfernen Sie mit einem feuchten Lappen,
mit Spiritus oder mit Desinfektionsmittel
Warnung — Beschädigung der Tastatur bei folgenden Anwendungen:
•Kontakt mit scharfen Gegenständen
•Offenes Feuer oder Wärme über +80 °C
•Extreme Temperaturen unter –40 °C
•Vollständiges Eintauchen in Wasser einschließlich Tastaturkabel
•Tastatur im gerollten Zustand quetschen
•Starke Formverzerrungen (extrem verdrehen oder langziehen)
•Unter schweren Gegenständen über eine längere Zeit lagern
•Kontakt mit folgenden Stoffen aussetzen: Ölen, Kohlenwasserstoffen (Benzin, Petroleum, Tuluol etc.), Azeton,
aggressiven Oxidationsmitteln, hochkonzentrierten Säuren oder Laugen
Specyfikacje produktu
| Marka: | KeySonic |
| Kategoria: | klawiatura |
| Model: | ACK-109 BL |
Potrzebujesz pomocy?
Jeśli potrzebujesz pomocy z KeySonic ACK-109 BL, zadaj pytanie poniżej, a inni użytkownicy Ci odpowiedzą
Instrukcje klawiatura KeySonic

1 Października 2024
1 Października 2024
1 Października 2024
1 Października 2024
1 Października 2024
1 Października 2024
1 Października 2024
1 Października 2024
1 Października 2024
1 Października 2024
Instrukcje klawiatura
Najnowsze instrukcje dla klawiatura
5 Kwietnia 2025
5 Kwietnia 2025
5 Kwietnia 2025
4 Kwietnia 2025
4 Kwietnia 2025
4 Kwietnia 2025
30 Marca 2025
30 Marca 2025
30 Marca 2025
30 Marca 2025