Instrukcja obsługi Epson WorkForce Pro WF-M5194
Przeczytaj poniżej 📖 instrukcję obsługi w języku polskim dla Epson WorkForce Pro WF-M5194 (225 stron) w kategorii drukarka. Ta instrukcja była pomocna dla 20 osób i została oceniona przez 2 użytkowników na średnio 4.5 gwiazdek
Strona 1/225

WF-M5194 User's Guide


3
Contents
WF-M5194 User's Guide............................................................................................................................ 11
Product Basics .......................................................................................................................................... 12
Using the Control Panel ..................................................................................................................... 12
Control Panel Buttons and Lights .................................................................................................. 12
Status Icons .............................................................................................................................. 13
Setting a Password and Locking the Control Panel ....................................................................... 14
Entering Characters on the LCD Screen................................................................................... 15
Changing LCD Screen Language.................................................................................................. 15
Adjusting the Screen Contrast ....................................................................................................... 16
Product Parts Locations ..................................................................................................................... 17
Printer Parts - Top ......................................................................................................................... 17
Printer Parts - Inside...................................................................................................................... 19
Printer Parts - Back........................................................................................................................ 19
Using Eco Mode................................................................................................................................. 20
Changing the Eco Settings ............................................................................................................ 20
Changing the Sleep Timer Settings ............................................................................................... 21
Changing the Power Off Timer Settings ........................................................................................ 22
Epson Connect Solutions for Smartphones, Tablets, and More......................................................... 23
Using Epson Email Print ............................................................................................................... 23
Using the Epson iPrint Mobile App ................................................................................................ 24
Using the Epson Creative Print Mobile App................................................................................... 24
Using Epson Remote Print ........................................................................................................... 25
Using Google Cloud Print................................................................................................................... 25
Setting Up Google Cloud Print on a Chromebook .............................................................................. 26
Android Printing Using the Epson Print Enabler ................................................................................ 27
Using Fire OS Printing ....................................................................................................................... 28
Using Epson Print and Scan App with Windows Tablets ................................................................... 28
Wi-Fi or Wired Networking........................................................................................................................ 30
Wi-Fi Infrastructure Mode Setup......................................................................................................... 30
Selecting Wireless Network Settings From the Control Panel ....................................................... 31

4
Wi-Fi Direct Mode Setup .................................................................................................................... 33
Enabling Wi-Fi Direct Mode........................................................................................................... 34
Wi-Fi Protected Setup (WPS)............................................................................................................. 36
Using WPS to Connect to a Network ............................................................................................. 36
Printing a Network Status Sheet......................................................................................................... 37
Changing or Updating Network Connections ..................................................................................... 38
Accessing the Web Config Utility ................................................................................................... 38
Changing a USB Connection to a Wi-Fi Connection...................................................................... 39
Changing a Wi-Fi Connection to a Wired Network Connection...................................................... 39
Connecting to a New Wi-Fi Router ................................................................................................ 40
Disabling Wi-Fi Features ............................................................................................................... 40
Enabling Epson Universal Print Driver (PCL) or PostScript Printing.................................................... 42
Installing the Epson Universal Print Driver - Windows ....................................................................... 42
Installing the PostScript (PS3) Printer Software - Windows ............................................................... 46
Installing the PostScript (PS3) Printer Software - OS X...................................................................... 46
Selecting PDL (Page Description Language) Settings ....................................................................... 47
PDL Print Configuration Options.................................................................................................... 48
Selecting Printer Language and Interface Settings ............................................................................ 50
Printer Language and Interface Options........................................................................................ 51
Loading Paper ........................................................................................................................................... 53
Loading Paper for Documents in the Cassette ................................................................................... 53
Loading Paper or Envelopes in the Rear Paper Feed Slot ................................................................ 58
Paper Loading Capacity ..................................................................................................................... 62
Available Epson Papers ..................................................................................................................... 63
Selecting the Paper Settings for Each Source - Control Panel ........................................................... 64
Paper Type Settings - Control Panel ............................................................................................. 65
Paper or Media Type Settings - Printing Software ......................................................................... 66
Selecting Default Paper Settings - Administrator................................................................................ 66
Selecting the Paper Source Settings - Administrator..................................................................... 67
Paper Source Settings Options................................................................................................. 68
Selecting Universal Print Settings.................................................................................................. 68
Universal Print Settings Options ............................................................................................... 69
Installing and Enabling the Optional Second Paper Cassette ............................................................ 70

5
Installing the Optional Second Paper Cassette ............................................................................. 70
Enabling the Optional Paper Cassette - Windows ......................................................................... 71
Enabling the Optional Paper Cassette - OS X .............................................................................. 73
Printing from a Computer ......................................................................................................................... 75
Printing with Windows ........................................................................................................................ 75
Selecting Basic Print Settings - Windows ...................................................................................... 75
Paper Source Options - Windows ............................................................................................. 77
Print Quality Options - Windows ............................................................................................... 78
Multi-Page Printing Options - Windows..................................................................................... 78
Selecting Double-sided Printing Settings - Windows ..................................................................... 78
Double-sided Printing Options - Windows................................................................................. 81
Print Density Adjustments - Windows ....................................................................................... 82
Selecting Additional Layout and Print Options - Windows ............................................................. 83
Image Options and Additional Settings - Windows.................................................................... 84
Header/Footer Settings - Windows ........................................................................................... 85
Selecting a Printing Preset - Windows........................................................................................... 86
Selecting Extended Settings - Windows ........................................................................................ 88
Printing Your Document or Photo - Windows................................................................................. 89
Selecting Default Print Settings - Windows.................................................................................... 90
Changing the Language of the Printer Software Screens ......................................................... 91
Changing Automatic Update Options ............................................................................................ 92
Printing with OS X .............................................................................................................................. 93
Selecting Basic Print Settings - OS X ........................................................................................... 94
Paper Source Options - OS X ................................................................................................... 97
Print Quality O ptions - OS X ...................................................................................................... 97
Selecting Page Setup Settings - OS X........................................................................................... 98
Selecting Print Layout Options - OS X........................................................................................... 99
Selecting Double-sided Printing Settings - OS X ........................................................................... 99
Double-sided Printing Options and Adjustments - OS X ......................................................... 101
Managing Color - OS X................................................................................................................ 101
Color Matching Options - OS X............................................................................................... 102
Selecting Printing Preferences - OS X......................................................................................... 102
Printing Preferences - OS X.................................................................................................... 103

6
Printing Your Document or Photo - OS X..................................................................................... 104
Checking Print Status - OS X .................................................................................................. 104
Printing with the Epson Universal Print Driver - Windows................................................................. 105
Synchronizing Printer Settings - Epson Universal Print Driver - Windows ................................... 106
Selecting Basic Print Settings - Epson Universal Print Driver - Windows .................................... 108
Selecting Additional Layout and Print Options - Epson Universal Print Driver - Windows ........... 110
Selecting Maintenance Options - Epson Universal Print Driver - Windows.................................. 112
Extended Settings - Epson Universal Print Driver - Windows ................................................. 113
Selecting Default Print Settings - Epson Universal Print Driver - Windows.................................. 114
Locking Printer Settings - Epson Universal Print Driver - Windows ............................................. 116
Epson Universal Print Driver Locked Setting Options ............................................................. 117
Adding Network Printers - Epson Universal Print Driver - Windows............................................. 118
Printing with the PostScript (PS3) Printer Software - Windows ........................................................ 121
Enabling the Optional Paper Cassette - PostScript Printer Software - Windows ......................... 121
Selecting Basic Print Settings - PostScript Printer Software - Windows ...................................... 123
Selecting Additional Layout and Print Options - PostScript Printer Software - Windows ............. 125
Selecting Default Print Settings - PostScript Printer Software - Windows.................................... 126
Printing with the PostScript (PS3) Printer Software - OS X .............................................................. 127
Enabling the Optional Paper Cassette - PostScript Printer Software - OS X ............................... 128
Selecting Basic Print Settings - PostScript Printer Software - OS X ............................................ 129
Selecting Page Setup Settings - PostScript Printer Software - OS X ........................................... 133
Selecting Print Layout Options - PostScript Printer Software - OS X ........................................... 134
Sizing Printed Images - PostScript Printer Software - OS X ....................................................... 135
Managing Color - PostScript Printer Software - OS X ................................................................. 135
Printing Your Document or Photo - PostScript Printer Software - OS X....................................... 136
Checking Print Status - PostScript Printer Software - OS X ................................................... 137
Cancelling Printing Using a Product Button...................................................................................... 138
Replacing the Ink Cartridge and Maintenance Box .............................................................................. 139
Check Status of the Ink Cartridge and Maintenance Box ................................................................. 139
Checking Cartridge Status on the LCD Screen............................................................................ 139
Checking Cartridge and Maintenance Box Status with Windows ................................................ 140
Checking Cartridge and Maintenance Box Status with OS X....................................................... 143
Purchase Epson Ink Cartridges and Maintenance Box .................................................................... 144

7
Ink Cartridge and Maintenance Box Part Numbers...................................................................... 144
Removing and Installing the Ink Cartridge........................................................................................ 145
Replacing the Maintenance Box....................................................................................................... 149
Adjusting Print Quality............................................................................................................................ 152
Print Head Maintenance................................................................................................................... 152
Print Head Nozzle Check............................................................................................................. 152
Checking the Nozzles Using the Product Control Panel ......................................................... 153
Checking the Nozzles Using a Computer Utility...................................................................... 155
Print Head Cleaning .................................................................................................................... 158
Cleaning the Print Head Using the Product Control Panel ...................................................... 158
Cleaning the Print Head Using a Computer Utility................................................................... 159
Print Head Alignment ....................................................................................................................... 162
Aligning the Print Head Using the Product Control Panel ............................................................ 162
Aligning the Print Head Using a Computer Utility......................................................................... 163
Cleaning the Paper Guide ................................................................................................................ 165
Cleaning and Transporting the Product ................................................................................................ 166
Cleaning the Product........................................................................................................................ 166
Transporting Your Product ............................................................................................................... 166
Solving Problems .................................................................................................................................... 168
Checking for Software Updates........................................................................................................ 168
Product Status Messages ................................................................................................................ 169
Running a Product Check ................................................................................................................ 170
Resetting Control Panel Defaults ..................................................................................................... 171
Solving Setup Problems................................................................................................................... 172
Noise After Ink Installation........................................................................................................... 172
Software Installation Problems .................................................................................................... 173
Solving Network Problems ............................................................................................................... 173
Product Cannot Connect to a Wireless Router or Access Point .................................................. 174
Network Software Cannot Find Product on a Network................................................................. 175
Product Does Not Appear in OS X Printer Window...................................................................... 176
Cannot Print Over a Network....................................................................................................... 176
Solving Paper Problems................................................................................................................... 178
Paper Feeding Problems............................................................................................................. 178

8
Paper Jam Problems Inside the Product ..................................................................................... 179
Paper Jam Problems in the Cassette .......................................................................................... 181
Paper Jam Problems in the Duplexer (Rear Cover)..................................................................... 183
Paper Ejection Problems ............................................................................................................. 185
Solving PCL/PostScript Problems .................................................................................................... 185
Nothing Prints Using the PCL/Postscript Printer Software........................................................... 185
Settings Are Missing from the PCL or PostScript Printer Software .............................................. 186
Solving Problems Printing from a Computer..................................................................................... 186
Nothing Prints.............................................................................................................................. 186
Product Icon Does Not Appear in Windows Taskbar ................................................................... 187
Printing is Slow ............................................................................................................................ 187
Solving Page Layout and Content Problems.................................................................................... 188
Inverted Image............................................................................................................................. 189
Too Many Copies Print ................................................................................................................ 189
Blank Pages Print ........................................................................................................................ 189
Incorrect Margins on Printout....................................................................................................... 190
Incorrect Characters Print............................................................................................................ 190
Incorrect Image Size or Position.................................................................................................. 191
Slanted Printout........................................................................................................................... 191
Solving Print Quality Problems......................................................................................................... 191
White or Dark Lines in Printout .................................................................................................... 192
Blurry or Smeared Printout .......................................................................................................... 192
Faint Printout or Printout Has Gaps ............................................................................................. 194
Grainy Printout............................................................................................................................. 194
Uninstall Your Product Software....................................................................................................... 195
Uninstalling Printing Software - Standard Epson Printer Software - Windows............................. 196
Uninstalling Product Software - OS X .......................................................................................... 197
Where to Get Help............................................................................................................................ 197
Technical Specifications ........................................................................................................................ 199
Windows System Requirements ...................................................................................................... 199
OS X System Requirements............................................................................................................. 200
Paper Specifications ........................................................................................................................ 200
Printable Area Specifications ........................................................................................................... 201

9
Ink Cartridge Specifications.............................................................................................................. 203
Dimension Specifications ................................................................................................................. 204
Electrical Specifications ................................................................................................................... 204
Environmental Specifications ........................................................................................................... 205
Interface Specifications .................................................................................................................... 205
Network Interface Specifications ...................................................................................................... 205
Safety and Approvals Specifications ................................................................................................ 206
PostScript Fonts............................................................................................................................... 207
PCL Fonts ........................................................................................................................................ 208
Symbol Sets ..................................................................................................................................... 211
Notices ..................................................................................................................................................... 219
Important Safety Instructions............................................................................................................ 219
General Printer Safety Instructions.............................................................................................. 219
Ink Cartridge Safety Instructions.................................................................................................. 221
LCD Screen Safety Instructions................................................................................................... 221
Wireless Connection Safety Instructions ..................................................................................... 222
FCC Compliance Statement............................................................................................................. 222
Trademarks...................................................................................................................................... 223
Copyright Notice............................................................................................................................... 223
libTIFF Software Acknowledgment.............................................................................................. 224
A Note Concerning Responsible Use of Copyrighted Materials................................................... 225
Default Delay Times for Power Management for Epson Products ............................................... 225
Copyright Attribution.................................................................................................................... 225


11
WF-M5194 User's Guide
Welcome to the WF-M5194 User's Guide.
For a printable click PDF copy of guide, this here.

12
Product Basics
See these sections to learn about the basic features of your product.
Using the Control Panel
Product Parts Locations
Using Eco Mode
Epson Connect Solutions for Smartphones, Tablets, and More
Using Google Cloud Print
Setting Up Google Cloud Print on a Chromebook
Android Printing Using the Epson Print Enabler
Using Fire OS Printing
Using Epson Print and Scan App with Windows Tablets
Using the Control Panel
See these sections to learn about the control panel and select control panel settings.
Control Panel Buttons and Lights
Setting a Password and Locking the Control Panel
Changing LCD Screen Language
Adjusting the Screen Contrast
Parent topic: Product Basics
Control Panel Buttons and Lights
13
1The power button and light
2 The buttonPaper Setup
3 The and lightsError Data
4 The LCD screen
5 The buttonBack
6 The arrow buttons and the buttonOK
7The buttonStop
Status Icons
Parent topic: Using the Control Panel
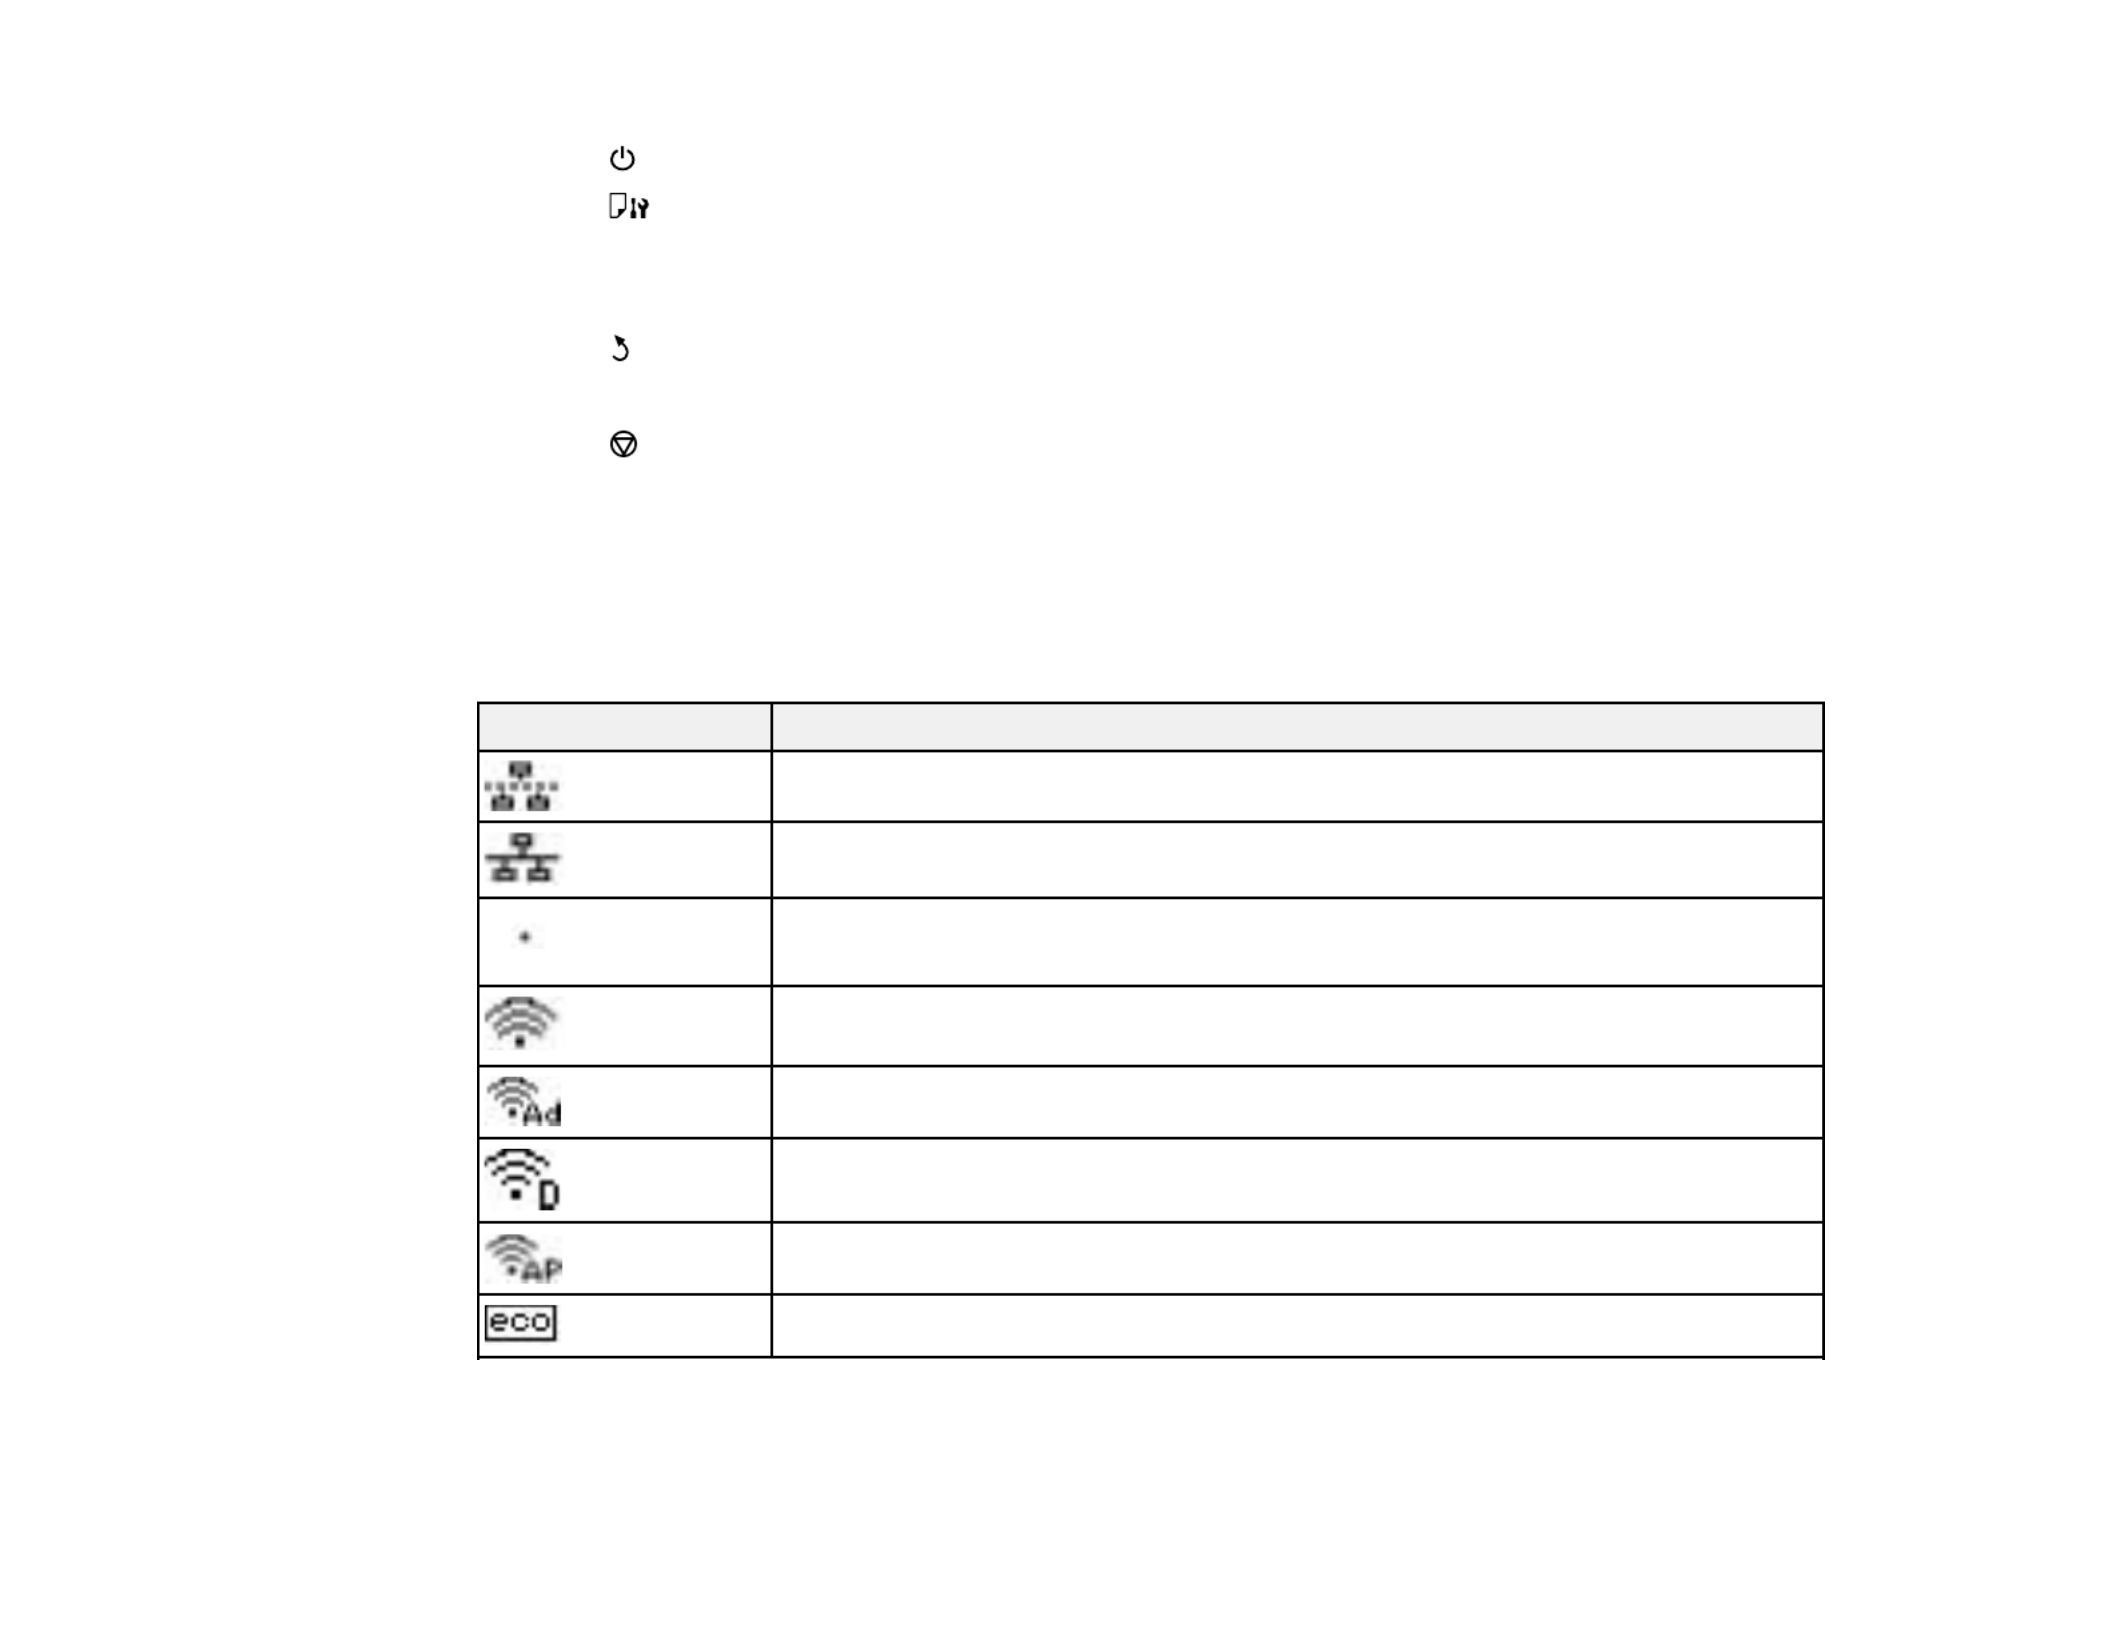
Status Icons
Status icons may be displayed on the LCD screen depending on the product's status.
Icons Description
There is no Ethernet connection.
An Ethernet connection has been established.
A Wi-Fi network error has occurred or the product is searching for a connection.
A Wi-Fi connection has been established. The number of bars indicates the
connection's signal strength.
An Ad hoc connection has been established.
A Wi-Fi Direct mode connection has been established.
A Simple AP mode connection has been established.
One of the Eco Mode settings is enabled.
Parent topic: Control Panel Buttons and Lights

16
2. Press the down arrow button, select , and press the button. Enter theSystem Administration OK
administrator password, if necessary.
You see a screen like this:
3. Press the down arrow button, select , and press the button.Common Settings OK
4. Press the down arrow button, select , and press the button.Language OK
5. Select a language and press the button.OK
Parent topic: Using the Control Panel
Adjusting the Screen Contrast
You can adjust the contrast of the LCD screen.
1. Press the up or down arrow buttons, select , and press the button.Menu OK
2. Press the down arrow button, select , and press the button. Enter theSystem Administration OK
administrator password, if necessary.
You see a screen like this:

17
3. Select and press the button.Common Settings OK
4. Select and press the button.LCD Contrast OK
5. Press the up or down arrow buttons to adjust the screen contrast.
6. Press the button to exit.OK
Parent topic: Using the Control Panel
Product Parts Locations
See these sections to identify the parts on your product.
Printer Parts - Top
Printer Parts - Inside
Printer Parts - Back
Parent topic: Product Basics
Printer Parts - Top

18
1 Rear sheet feeder edge guides
2 Rear paper support
3 Rear paper feed cover
4 Output tray
5 Cassette edge guides
6 Output tray extension and paper stopper
1 Paper cassette 1
2 Paper cassette unit (optional)
3 Paper cassette 2 (optional)
Parent topic: Product Parts Locations

19
Printer Parts - Inside
1 Ink cartridge holder
2 Print head (do not remove)
3 Front cover (opened)
Parent topic: Product Parts Locations
Printer Parts - Back
1 portUSB

20
2 Ethernet portLAN
3 Service port
4 Maintenance box
5 Rear cover
6 AC inlet
Parent topic: Product Parts Locations
Using Eco Mode
Your product enters sleep mode automatically and turns off the LCD screen if it is not used for a period
of time. You can make the time period shorter and select other options to save energy and resources.
Changing the Eco Settings
Changing the Sleep Timer Settings
Changing the Power Off Timer Settings
Parent topic: Product Basics
Changing the Eco Settings
You can use the product control panel to change the Eco settings.
Note: The Sleep Timer setting in Eco Mode overrides the Sleep Timer setting in Common Settings. This
setting can be locked by an administrator. If you cannot access or change this setting, contact your
administrator for assistance.
1. Press the up or down arrow buttons, select , and press the button.Menu OK
2. Press the up or down arrow buttons, select , and press the button. EnterSystem Administration OK
the administrator password, if necessary.
3. Press the up or down arrow buttons, select , and press the button.Eco Mode OK
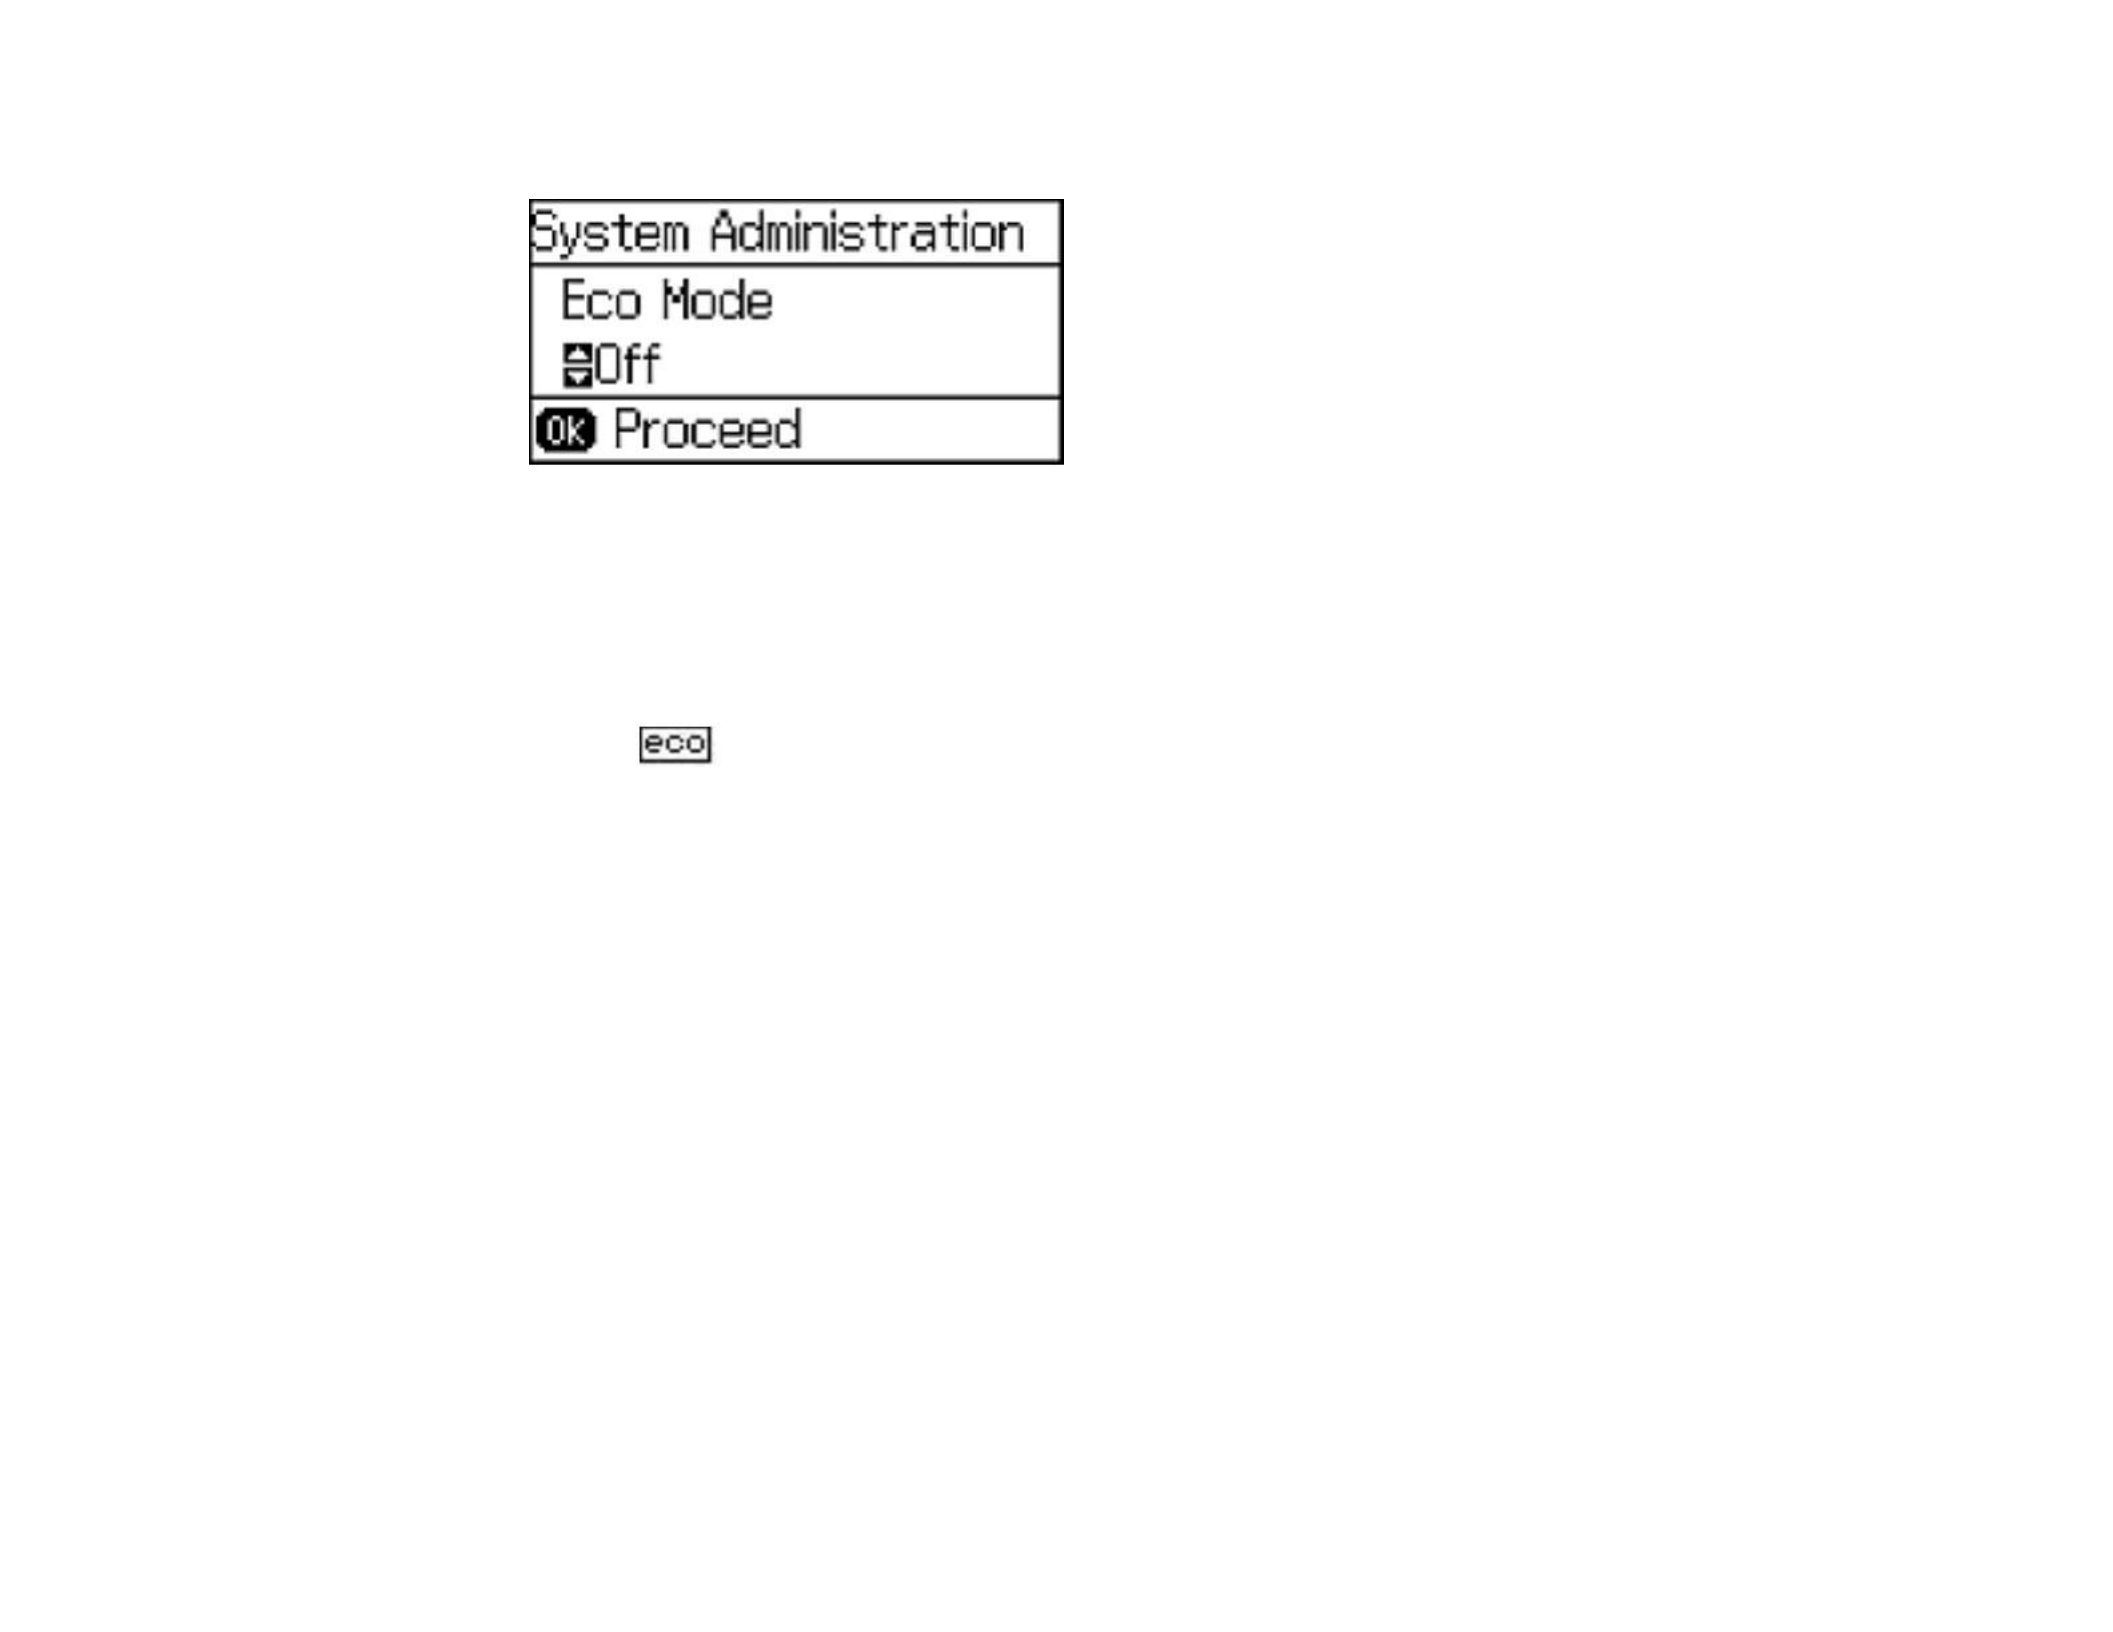
21
You see a screen like this:
4. Select and press the button.On OK
5. Press the up arrow button.
6. Change settings as necessary.
7. Press the button to exit.OK
You see the icon on the LCD screen to indicate that Eco settings are enabled.
Parent topic: Using Eco Mode
Changing the Sleep Timer Settings
You can adjust the time period before your product enters sleep mode and turns off the LCD screen.
Note: The Sleep Timer setting in Eco Mode overrides the Sleep Timer setting in Common Settings. This
setting can be locked by an administrator. If you cannot access or change this setting, contact your
administrator for assistance.
1. Press the up or down arrow buttons, select , and press the button.Menu OK
2. Press the up or down arrow buttons, select , and press the button. EnterSystem Administration OK
the administrator password, if necessary.
3. Press the down arrow button, select , and press the button.Common Settings OK
4. Press the down arrow button, select , and press the button.Sleep Timer OK

22
You see a screen like this:
5. Press the up or down arrow buttons to increase or reduce the number of minutes.
6. Press the left or right arrow buttons to move the cursor.
7. Press the button.OK
Parent topic: Using Eco Mode
Changing the Power Off Timer Settings
You can have the product turn off automatically if it is not used for a specified period of time.
Note: This setting can be locked by an administrator. If you cannot access or change this setting,
contact your administrator for assistance.
1. Press the up or down arrow buttons, select , and press the button.Menu OK
2. Press the down arrow button, select , and press the button. Enter theSystem Administration OK
administrator password, if necessary.
You see a screen like this:

23
3. Press the down arrow button, select , and press the button.Common Settings OK
4. Press the down arrow button, select , and press the button.Power Off Timer OK
5. Select a time period between and (12 hours), and press the button.30minutes 12h OK
Parent topic: Using Eco Mode
Epson Connect Solutions for Smartphones, Tablets, and More
Use your smartphone, tablet, or computer to print documents, photos, emails, and web pages from your
home, office, or even across the globe.
Using Epson Email Print
Using the Epson iPrint Mobile App
Using the Epson Creative Print Mobile App
Using Epson Remote Print
Parent topic: Product Basics
Using Epson Email Print
With Epson Email Print, you can print from any device that can send email, such as your smartphone,
tablet, or laptop. Just activate your product's unique email address. When you want to print, attach a
PDF, Microsoft Office document, or photo to an email and send it to your product. Both the email and the
attachments will print automatically.
1. Connect your product to your network. See the link below.
2. If you did not already set up Email Print when you installed your product software, visit
epsonconnect.com to learn more about Email Print, create your Epson Connect account, and
register your product to the Epson Connect service.
3. Now you are ready to send and print emails to your product's Email Print address.
Note: Go to and log into your Epson connect account to personalize your product's
epsonconnect.com
email, adjust print settings, and set up other Epson Connect services.
Parent topic: Epson Connect Solutions for Smartphones, Tablets, and More
Related topics
Wi-Fi or Wired Networking

24
Using the Epson iPrint Mobile App
Use this free Apple and Android app to print with networked Epson products. Epson iPrint lets you print
PDFs, Microsoft Office documents, photos, and web pages from your device or from popular cloud
services such as Box, Dropbox, Evernote, Google Drive, or Microsoft OneDrive.
1. Connect your product to your wireless network. See the link below.
2. Visit to learn more about Epson iPrint and check the compatibility of your mobile
epson.com/connect
device.
3. Download Epson iPrint from the Apple App Store or Google Play.
4. Connect your mobile device to the same wireless network as your product.
5. Open Epson iPrint and select your Epson product.
Now you are ready to print with your mobile device and your Epson product.
Parent topic: Epson Connect Solutions for Smartphones, Tablets, and More
Related topics
Wi-Fi or Wired Networking
Using the Epson Creative Print Mobile App
Use this free Apple and Android app to do the following:
• Access and print your Facebook photos
• Create custom greeting cards and stationery
• Print onto CD/DVDs
• Turn photos into coloring book templates
1. Connect your product to your wireless network. See the link below.
2. Visit to learn more about Epson Creative Print and check the compatibility of
epson.com/connect
your mobile device and your Epson product.
3. Download Epson Creative Print from the Apple App Store or Google Play.
4. Connect your mobile device to the same wireless network that your product is using.
5. Open Epson Creative Print.
Now you are ready to get creative with your mobile device and your Epson product.
Parent topic: Epson Connect Solutions for Smartphones, Tablets, and More

25
Related topics
Wi-Fi or Wired Networking
Using Epson Remote Print
With Epson Remote Print software, you can print from your laptop or desktop computer to an Epson
Email-enabled product anywhere in the world.
1. Connect your Epson product to your wireless network. See the link below.
2. If you did not already set up an Epson Connect account when you installed your product software,
visit to create your account and register your product to the Epson Connectepsonconnect.com
service.
Note: Make a note of your product's email address.
3. Visit to learn more about Remote Print and how to download the Remote Print
epsonconnect.com
Driver software.
4. Download and install the Remote Print software.
5. Enter the email address and optional access key of your Epson product during Remote Print setup.
6. Now you are ready to print remotely. Select the print command in your laptop or desktop computer
application and choose the Remote Print option for your Epson product.
Parent topic: Epson Connect Solutions for Smartphones, Tablets, and More
Related topics
Wi-Fi or Wired Networking
Using Google Cloud Print
With a Google Account, you can print from your Apple or Android device to your Epson product. You can
also print from Chromebooks and the Google Chrome browser without drivers or cables.
1. Connect your Epson product to your wireless network. See the link below.
2. Note your product's IP address by checking your network status. See the link below.
3. Connect your computer or your Apple or Android device to the same wireless network as your Epson
product.
4. Enter your product's IP address into the address bar of a web browser.

26
5. Select the option.Google Cloud Print Services
Note: Google Cloud Print ServicesIf you don't see the option, turn your product off and back on. If
the option still doesn't appear, select the option and follow the on-screenFirmware Update
instructions to update your product.
6. Click .Register
7. Select the checkbox to agree to the Usage Advisory and click .Next
8. Click to launch the sign-in page.OK
A separate browser window opens.
9. Enter your Google Account username and password and click , or, if you don't have anSign in
account, click and follow the on-screen instructions.Sign up for a new Google Account
10. Click to complete setup and print a test page.Finish printer registration
Your product is now linked to your Google Account and can be accessed from any Chromebook,
computer, Apple or Android device with Internet access. Visit for more information on
Epson Support
using Google Cloud Print, or the website for a list of .Google Cloud Print supported apps
Parent topic: Product Basics
Related topics
Wi-Fi or Wired Networking
Setting Up Google Cloud Print on a Chromebook
With a Google Account, you can print from a Chromebook without drivers or cables.
1. Connect your Epson product to your wireless network. See the link below.
2. Turn on your Chromebook and connect it to the same wireless network as your product.
Note: See your Chromebook's documentation for details on connecting to a network.
3. Do one of the following:
• Click in the notification that appears in the corner of your ChromebookAdd to Cloud Print
screen.
Note: If you do not see a notification, check to see if a number appears in the status area at the
lower-right corner of the screen. Click this number to open the notifications menu, then click Add
to Cloud Print.

27
• Open a web browser and enter in the address bar. Skip to step 4.chrome://devices
• If you see a registration confirmation screen instead, click .Register
4. Click .Add Device
5. Click the button that appears next to your product.Register
6. Click on the confirmation screen. Your product's LCD screen displays a confirmationRegister
message.
7. Select or press the button on your product to confirm the Google Cloud Print connection andOK OK
print a test page.
Your product is now linked to your Google Account and can be accessed from any Chromebook, iPhone,
or Android phone with Internet access. Visit for more information on using Google Cloud
Epson Support
Print, or the website for a list ofGoogle Cloud Print supported apps
Parent topic: Product Basics
Related topics
Wi-Fi or Wired Networking
Android Printing Using the Epson Print Enabler
You can wirelessly print your documents, emails, photos, and web pages right from your Android phone
or tablet (Android v4.4 or later). With a few taps, your Android device will discover your nearby Epson
product and print.
1. Connect your Epson product to your wireless network. See the link below.
2. On your Android device, download the Epson Print Enabler plug-in from Google Play.
3. Go to settings on your Android device, select printers, and enable the Epson plug-in.
4. Connect your Android device to the same wireless network as your product.
5. Now you are ready to print. From an Android application such as Chrome or Gmail, tap the menu
icon and print whatever is on the screen.
Note: All PrintersIf you do not see your product, tap and select your product.
Parent topic: Product Basics
Related topics
Wi-Fi or Wired Networking

28
Using Fire OS Printing
You can wirelessly print from Amazon Fire tablets and phones to your nearby networked Epson product.
There is no software to download, no drivers to install, and no cables to connect. With just a few taps in
Email, Calendar, Contacts, and WPS Office, you can send whatever is on the screen to an Epson
product.
1. Connect your Epson product to your wireless network. See the link below.
2. Connect your Amazon device to the same wireless network as your product.
3. Now you are ready to print. From your Amazon application, tap the print option and select your
product to print whatever is on the screen.
Note: OK DownloadIf you see a message telling you that a plug-in is required, tap and tap . If your
Amazon Fire product uses Fire OS 5 and above, your device automatically uses the built-in Mopria
Print Service app to print.
Visit to learn more about Fire OS Printing (one of many Epson Connect Partner
epson.com/connect
Solutions) and check the compatibility of your mobile device.
Parent topic: Product Basics
Related topics
Wi-Fi or Wired Networking
Using Epson Print and Scan App with Windows Tablets
You can use this free app to print photos and scan from your Windows (Windows 8 or higher) Surface
RT or Pro tablet with networked Epson products. Epson Print and Scan App allows you to scan and
capture images right to your tablet or to Microsoft OneDrive.
Note: The Epson Print and Scan App does not support Windows 10 Mobile printing.
1. Connect your Epson product to your wireless network. See the link below.
2. Download Epson Print and Scan App from the Microsoft Windows Store.
3. Connect your Windows tablet to the same wireless network as your product.
4. Open Epson Print and Scan App and select your Epson product.
Now you are ready to print photos or scan.
Visit to learn more about Epson Print and Scan App.
epson.com/connect

29
Parent topic: Product Basics
Related topics
Wi-Fi or Wired Networking

30
Wi-Fi or Wired Networking
See these sections to use your product on a Wi-Fi or wired network.
Wi-Fi Infrastructure Mode Setup
Wi-Fi Direct Mode Setup
Wi-Fi Protected Setup (WPS)
Printing a Network Status Sheet
Changing or Updating Network Connections
Wi-Fi Infrastructure Mode Setup
You can set up your product to communicate with your computer using a wireless router or access point.
The wireless router or access point can be connected to your computer over a wireless or wired network.
1 Epson product
2 Wireless router or access point

31
3 Computer with a wireless interface
4 Computer
5 Internet
6 Ethernet cable (used only for wired connection to the wireless router or access point)
Selecting Wireless Network Settings From the Control Panel
Parent topic: Wi-Fi or Wired Networking
Selecting Wireless Network Settings From the Control Panel
You can select or change wireless network settings using your product control panel.
To install your product on a wireless network, follow the instructions on the sheet and installStart Here
the necessary software. The installer program guides you through network setup.
Note: Breakdown or repair of this product may cause loss of network data and settings. Epson is not
responsible for backing up or recovering data and settings during or after the warranty period. We
recommend that you make your own backup or print out your network data and settings.
1. Press the up or down arrow buttons, select , and press the button.Wi-Fi Setup OK
You see this screen:
2. Select and press the button.Wi-Fi Setup Wizard OK
Note: If you need to disable the wireless network to set up your product on an Ethernet network,
press the down arrow button, select , and press the button. Then follow theDisable Wi-Fi OK
instructions on changing to a wired network connection in this guide.

33
Related tasks
Entering Characters on the LCD Screen
Wi-Fi Direct Mode Setup
You can set up your product to communicate directly with your computer or another device without
requiring a wireless router or access point.
1 Epson product
2 Computer with a wireless interface
3 Other wireless device
Your product automatically selects one of these modes to communicate with your computer or device:
Access point mode
If your product is not already connected to a wireless network, it enters access point mode and the
product itself acts as the network access point for up to 4 devices. When operating in this mode, your
product displays an connection symbol on the LCD screen.AP
Peer-to-peer mode
If your product is already connected to a wireless network, it enters peer-to-peer mode and
disconnects from any other networks. This also disables any other product features requiring access
to the Internet. When operating in this mode, your product displays a or connection symbolDirect D
on the LCD screen.
Note: To disconnect a peer-to-peer mode connection, release the connection to your product from
your computer or other device. Your product will reconnect to the previously used network.

35
6. Enter a Wi-Fi Direct password using the control panel buttons.
Note: Your password must be at least 8 and no more than 22 characters long.
• To enter letters or symbols, press the up or down arrow buttons to scroll through characters, and
press the right arrow button to select one.
• To enter numbers or change the case of letters, press the button.Stop
• To delete the previous character, press the left arrow button.
• To enter a space, press the right arrow button.
7. Press the button when you’re finished entering your password.OK
8. Press the up arrow button.
You see this screen:
9. Press the button to view the SSID (Wi-Fi network name) and password.OK
10. Use your computer or wireless device to select the Wi-Fi network name (SSID) displayed on the
LCD screen, and enter the password shown.

36
11. Press the button to return to the Home screen.Back
You see the connection symbol on the LCD screen and should be able to print directly to your
product from your computer or device.
Note: If the connection symbol is not displayed on the LCD screen, Wi-Fi Direct mode is not
enabled. Repeat these steps to try again.
Parent topic: Wi-Fi Direct Mode Setup
Related tasks
Entering Characters on the LCD Screen
Wi-Fi Protected Setup (WPS)
If your network uses a WPS-enabled wireless router or access point, you can quickly connect your
product to the network using Wi-Fi Protected Setup (WPS).
Note: WPSTo check if your router is WPS-enabled, look for a button labeled on your router or access
point. If there is no hardware button, there may be a virtual WPS button in the software for the device.
Check your network product documentation for details.
Using WPS to Connect to a Network
Parent topic: Wi-Fi or Wired Networking
Using WPS to Connect to a Network
If you have a WPS-enabled wireless router or access point, you can use Wi-Fi Protected Setup (WPS) to
connect your product to the network.
1. Press the down arrow button, select , and press the button.Wi-Fi Setup OK

37
You see this screen:
2. Press the down arrow button, select , and press the button.Push Button Setup (WPS) OK
3. Follow the instructions on the LCD screen to complete WPS setup.
4. Press the button to return to the Home screen.Back
If the network connection is successful, the Wi-Fi icon ( ) will appear in the upper-right corner of
the LCD screen.
Parent topic: Wi-Fi Protected Setup (WPS)
Printing a Network Status Sheet
You can print a network status sheet to help you determine the causes of any problems you may have
using your product on a network.
1. Press the up or down arrow buttons, select , and press the button.Menu OK
You see this screen:

38
2. Press the down arrow button, select , and press the button.Network Status OK
3. Press the down arrow button, select , and press the button.Wi-Fi/Network Status OK
You see a screen like this:
4. Press the button to print the network status sheet.OK
5. Press the up arrow button to begin printing the network status sheet.
Examine the settings shown on the network status sheet to diagnose any problems you have.
Parent topic: Wi-Fi or Wired Networking
Changing or Updating Network Connections
See these sections to change or update how your product connects to a network.
Accessing the Web Config Utility
Changing a USB Connection to a Wi-Fi Connection
Changing a Wi-Fi Connection to a Wired Network Connection
Connecting to a New Wi-Fi Router
Disabling Wi-Fi Features
Parent topic: Wi-Fi or Wired Networking
Accessing the Web Config Utility
You can select your product's network settings and confirm its operating status using a web browser.
You do this by accessing your product's built-in Web Config utility from a computer or other device that is
connected to the same network as your product.
Note: For more information on the Web Config utility, see the .Administrator's Guide

39
1. Print a network status sheet.
2. Locate the IP address for your product that is listed on the network status sheet.
3. On a computer or other device connected to the same network as your product, open a web
browser.
4. Enter your product's IP address into the address bar.
You see the available Web Config utility options.
Parent topic: Changing or Updating Network Connections
Related tasks
Printing a Network Status Sheet
Changing a USB Connection to a Wi-Fi Connection
If you have already connected your product to your computer using a USB connection, you can change
to a Wi-Fi connection.
1. Disconnect the USB cable from your product.
2. Uninstall your product software.
3. Download and install your product software from the Epson website using the instructions on the
Start Here sheet.
Parent topic: Changing or Updating Network Connections
Related concepts
Uninstall Your Product Software
Changing a Wi-Fi Connection to a Wired Network Connection
If you have already connected your product to your computer wirelessly, you can change to a wired
network connection if necessary.
1. Disable your product's Wi-Fi features.
2. Connect one end of an Ethernet network cable to the product's port.LAN
3. Connect the other end to any available LAN port on your router or access point.
4. Uninstall your product software.
5. Download and install your product software from the Epson website.
6. Follow the on-screen instructions to install the software.
7. When you see the Select Your Connection screen, select .Wired network connection

40
8. If you see a Select Setup Option screen, select .Set up printer for the first time
9. Continue following the rest of the on-screen instructions.
Parent topic: Changing or Updating Network Connections
Related tasks
Disabling Wi-Fi Features
Connecting to a New Wi-Fi Router
If you change the wireless router you have been using on your network, you need to update your
product's Wi-Fi connection to the new router.
Note: If you switch to a 5 GHz wireless router, set the router to operate in dual band (2.4 GHz and
5 GHz) mode. See your router documentation for instructions.
1. Do one of the following:
• : Uninstall your product software.Windows
• : Go to the next step.OS X
2. Download and install your product software from the Epson website using the instructions on the
Start Here sheet.
Parent topic: Changing or Updating Network Connections
Related concepts
Uninstall Your Product Software
Disabling Wi-Fi Features
You may need to disable your product's Wi-Fi features if you change your network connection type or
need to solve a problem with your network connection.
Note: Before disabling Wi-Fi features, make a note of your product's SSID (network name) and
password, and any network settings selected for the Epson Connect services you may use.
1. Press the down arrow button, select , and press the button.Wi-Fi Setup OK

41
You see this screen:
2. Press the down arrow button, select , and press the button.Disable Wi-Fi OK
3. Press the up arrow button to disable Wi-Fi.
4. Press the button when complete.OK
Parent topic: Changing or Updating Network Connections

42
Enabling Epson Universal Print Driver (PCL) or PostScript
Printing
Before enabling Epson Universal Print Driver (PCL) or PostScript printing on your product, make sure
you have installed the software as described on the sheet.Start Here
Installing the Epson Universal Print Driver - Windows
Installing the PostScript (PS3) Printer Software - Windows
Installing the PostScript (PS3) Printer Software - OS X
Selecting PDL (Page Description Language) Settings
Selecting Printer Language and Interface Settings
Installing the Epson Universal Print Driver - Windows
The Epson Universal Print Driver supports multiple printer languages, such as PCL and ESC/P-R, and
can be installed on a Windows computer.
Note: Make sure your product is turned on and connected to the same network as your computer before
installing the printer software. Depending on your model, not all printer languages may be supported.
1. Download the from .EPSON Universal Print Driver epson.com/support/wfm5194downloads
2. Double-click the downloaded package.

44
After the software finishes searching for products, you see a screen like this:
5. Do one of the following:
• If you are installing one product, make sure is selected andAdd EPSON Universal Print Driver
continue with the next step.
• If you are installing more than one product, select and go to step 9.Add found printers
Note: Display SettingsYou can customize and filter your product search results by clicking .

45
6. Open the menu and select an existing printer port, if necessary.Select a port to connect a printer
Otherwise, skip this option to create a new port automatically.
7. Select the product you want to install from the Found Printers list.
Note: Set as default printerDeselect the checkbox if you do not want the product to be set as your
default printer.
8. Click , then skip the remaining steps.OK
9. If you are installing more than one product, select the products from the Found Printers list and click
Add to Printer Folder.

46
The selected products appear in the lower section of the screen.
10. Select the checkbox next to the product you want to make your default printer, if necessary.
11. Click .OK
Parent topic: Enabling Epson Universal Print Driver (PCL) or PostScript Printing
Installing the PostScript (PS3) Printer Software - Windows
If you did not install the standard Epson printer software, you need to install the PostScript (PS3) printer
software before you can adjust the print settings and print to your network printer.
Note: Make sure your product is turned on and connected to the same network as your computer before
installing the printer software.
1. Download the fromDrivers and Utilities Combo Package - PS3 PostScript
epson.com/support/wfm5194downloads.
2. Double-click the downloaded package.
3. Click .OK
4. Click .Accept
5. Click .Install
6. Click and follow the on-screen instructions.Next
Parent topic: Enabling Epson Universal Print Driver (PCL) or PostScript Printing
Installing the PostScript (PS3) Printer Software - OS X
If you did not install the standard Epson printer software, you need to install the PostScript (PS3) printer
software before you can adjust the print settings and print to your network printer.
Note: Make sure your product is turned on and connected to the same network as your computer before
installing the printer software.
1. Download the fromDrivers and Utilities Combo Package - PS3 PostScript
epson.com/support/wfm5194downloads.
2. Double-click the downloaded package.
3. Double-click .EPSON
4. Click on the next two screens.Continue

47
5. Click .Agree
6. Click .Install
7. If necessary, enter the administrator password.
8. Click and follow the on-screen instructions.Start
Parent topic: Enabling Epson Universal Print Driver (PCL) or PostScript Printing
Selecting PDL (Page Description Language) Settings
You can select settings for PCL and PostScript printing using the control panel on the product.
Note: These settings can be locked by an administrator. If you cannot access these settings, contact
your administrator for assistance.
1. Press the arrow buttons to select and press the button.Menu OK
You see a screen like this:
2. Select and press the button. Enter the administrator password, ifSystem Administration OK
necessary.
3. Select and press the button.Universal Print Settings OK
4. Select and press the button.PDL Print Configuration OK

49
PDL Print Configuration
option
Available
settings
Description
Print Order Last Page on
Top
Starts printing from the first page of a file.
First Page on
Top
Starts printing from the last page of a file.
Number of Copies 1 to 999 Selects the number of copies to print.
Binding Margin Left Edge Specifies the binding edge for double-sided documents.
Top Edge
Auto Paper Ejection On/Off Ejects paper automatically when printing is stopped
during a print job.
2-Sided Printing On/Off Selects duplex printing.
PCL Menu
Font Source Resident Uses a font preinstalled on the printer.
Download Uses a font you have downloaded.
Font Number 1 to 111 Selects the default font number for the default font
source.
Pitch 0.44 to 99.99 cpi Selects the default font pitch if the font is scalable and
fixed-pitch (availability depends on font source and
number settings).
Height 4.00 to 999.75 pt Selects the default font height if the font is scalable and
proportional (availability depends on font source and
number settings).
Symbol Set Various Selects the default symbol set. If the selected font is not
available for the selected symbol set, the font source
and number are replaced with (the defaultIBM-US
setting).
Form 5 to 128 lines Sets the number of lines for the selected paper size and
orientation. Changes the line spacing (VMI) stored in
the printer. Later changes in page size or orientation
cause changes in the value based on the storedForm
VMI.

50
PDL Print Configuration
option
Available
settings
Description
CR Function CR Selects the line feed command when printing with a
driver from a specific operating system.
CR+LF
LF Function LF
CR+LF
Paper Source Assign 4 Makes the paper source select command compatible
with HP LaserJet 4
4K Makes the paper source select command compatible
with HP LaserJet 4000, 5000, and 8000
5S Makes the paper source select command compatible
with HP LaserJet 5S
PS3 Menu
Error Sheet On/Off Prints a sheet showing the status when errors occur
during PostScript or PDF printing.
Binary On/Off Enable when printing files that contain binary images
(available when the product is connected to the
network). Allows you to print binary images even if the
driver is set to ASCII.
PDF Page Size AutoVarious sizes Selects the paper size when printing a PDF file. If
is selected, the paper size is determined based on the
size of the first page.
Parent topic: Selecting PDL (Page Description Language) Settings
Selecting Printer Language and Interface Settings
You can select printer language and interface settings using the control panel on the product.
Note: These settings can be locked by an administrator. If you cannot access these settings, contact
your administrator for assistance.
1. Press the arrow buttons to select and press the button.Menu OK
51
You see a screen like this:
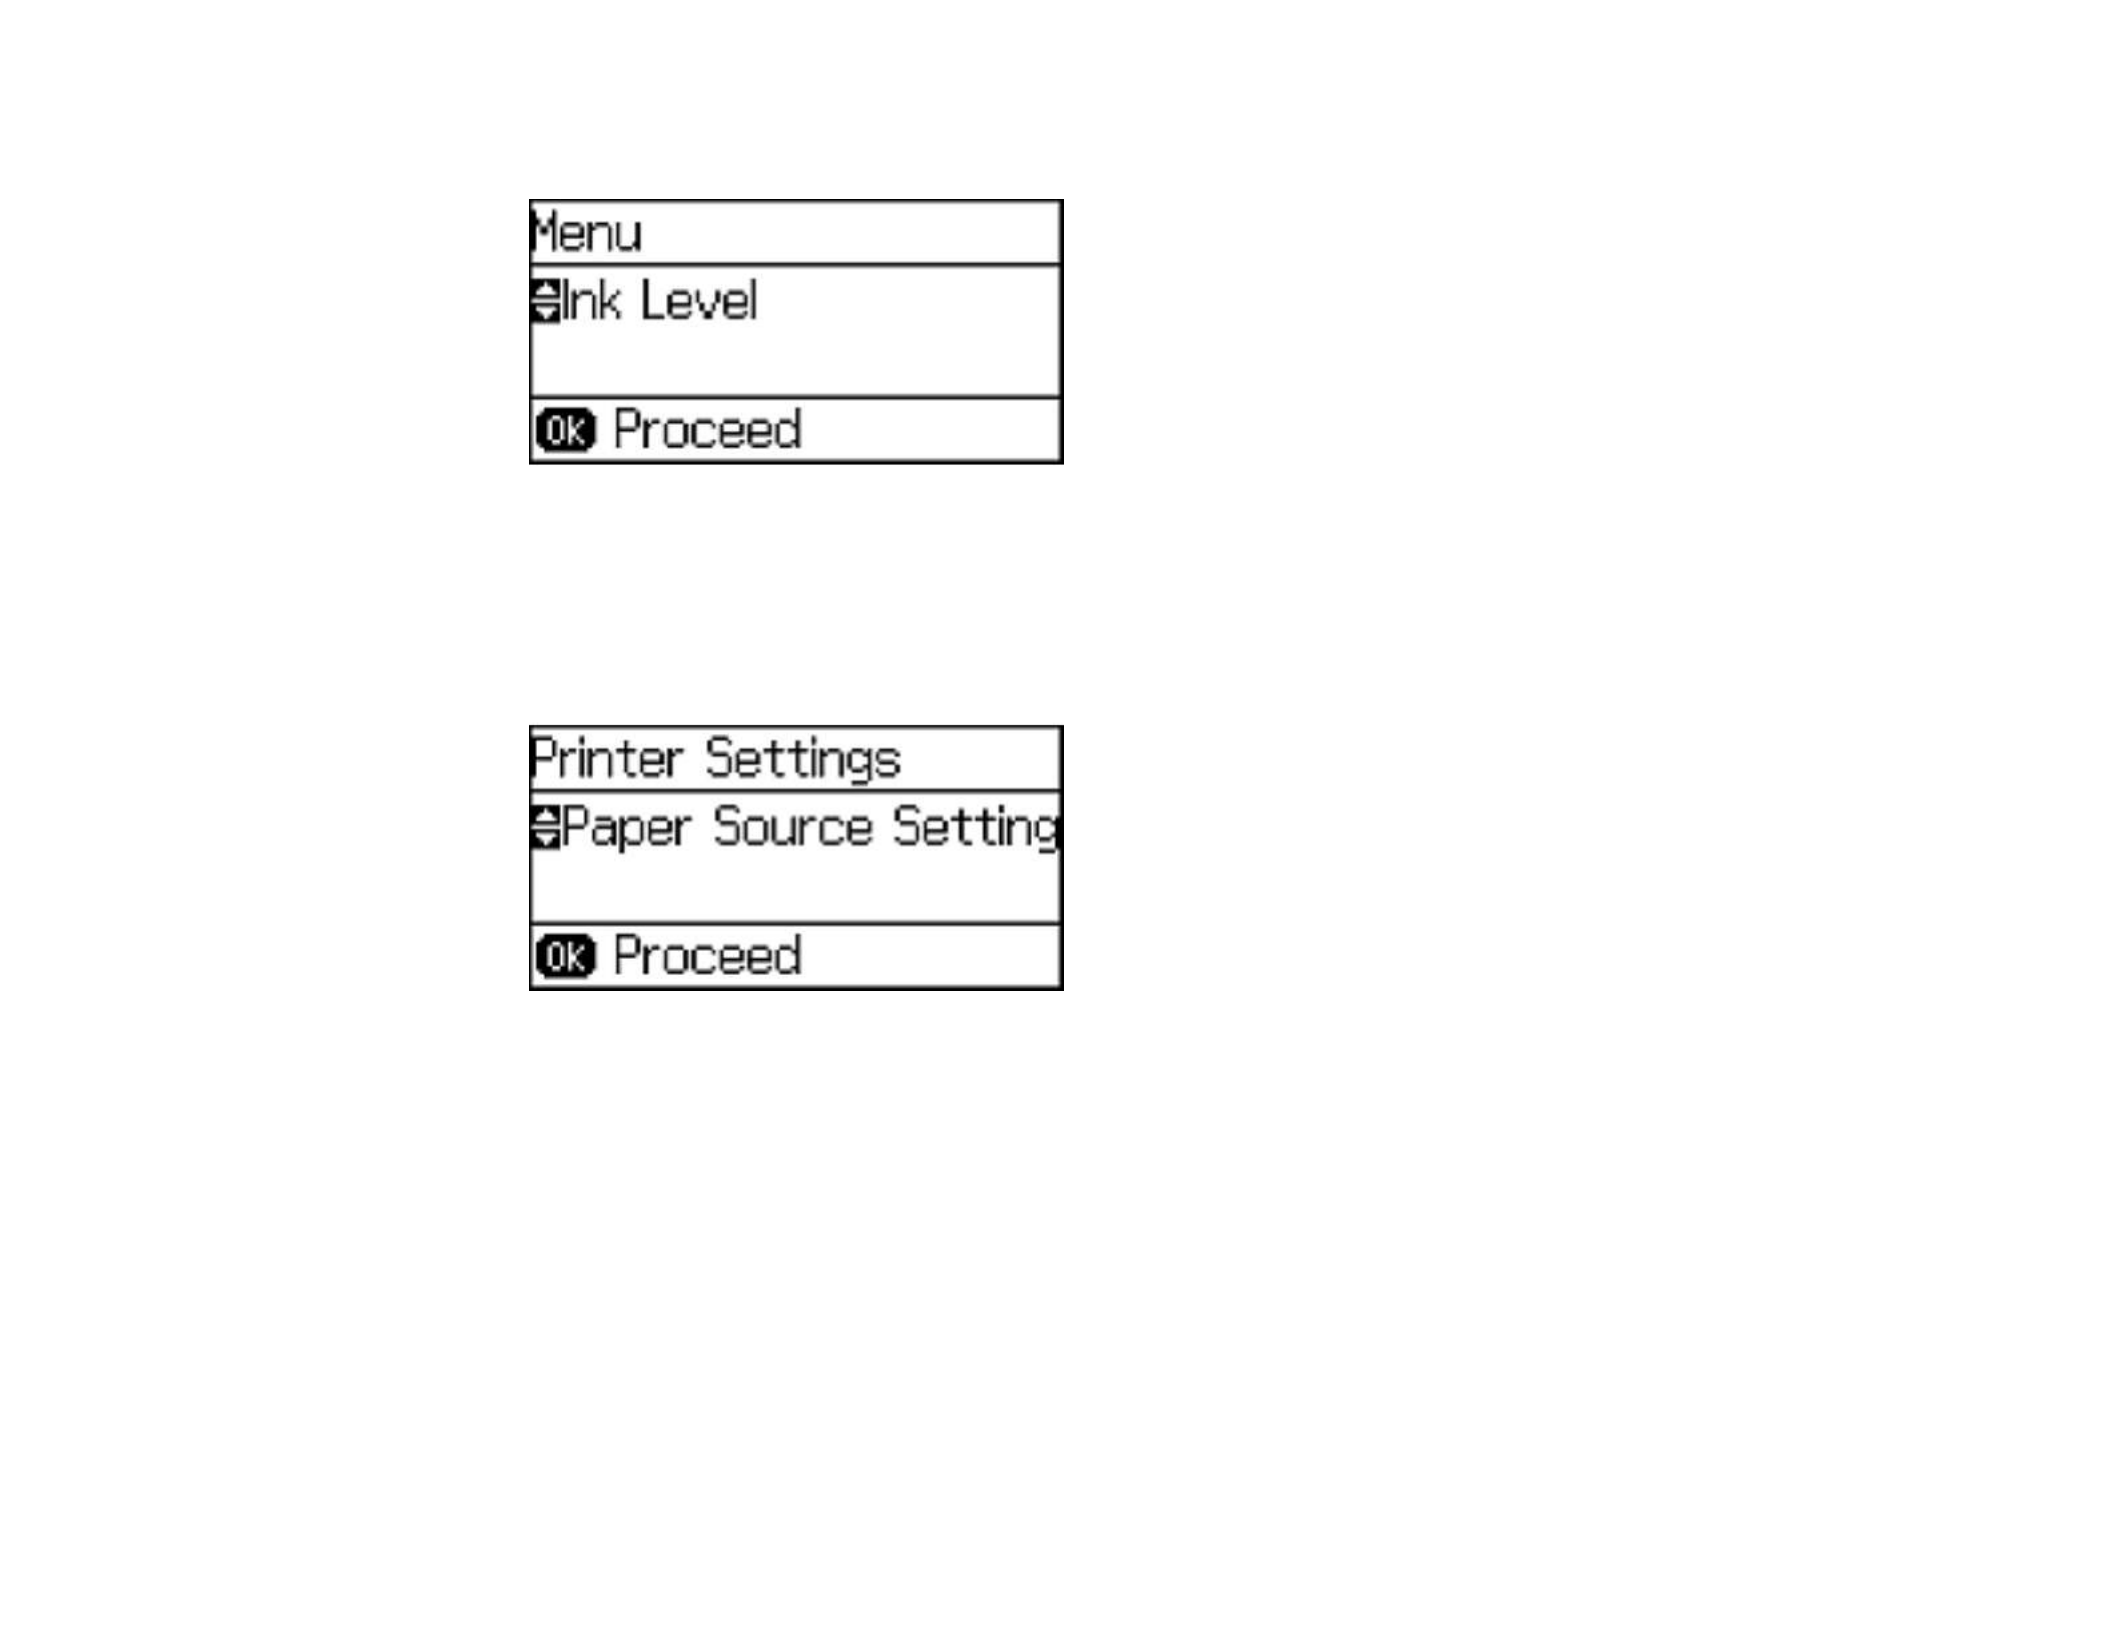
2. Select and press the button. Enter the administrator password, ifSystem Administration OK
necessary.
3. Select .Printer Settings
You see a screen like this:
4. Select the and other settings you want to use.Printing Language
Printer Language and Interface Options
Parent topic: Enabling Epson Universal Print Driver (PCL) or PostScript Printing
Printer Language and Interface Options
Select the settings you want to use.

52
Printer Settings option Available
settings
Description
USB I/F Timeout Setting 0.5 to 300
seconds
Specify the length of time before ending USB
communication from a computer using the PCL or
PostScript driver. This setting is necessary to avoid
endless USB communication.
Printing Language Auto Select the language for the USB or network interface.
PCL
PS3
PDF
PC Connection via USB Enable Select whether to allow USB communication with the
product.
Disable
Parent topic: Selecting Printer Language and Interface Settings

54
2. Pull out the paper cassette.
3. Slide the edge guides outward.

55
Note: If you are using legal-size paper or larger, squeeze the tab and extend the paper cassette.
4. Slide the edge guide to your paper size.
56
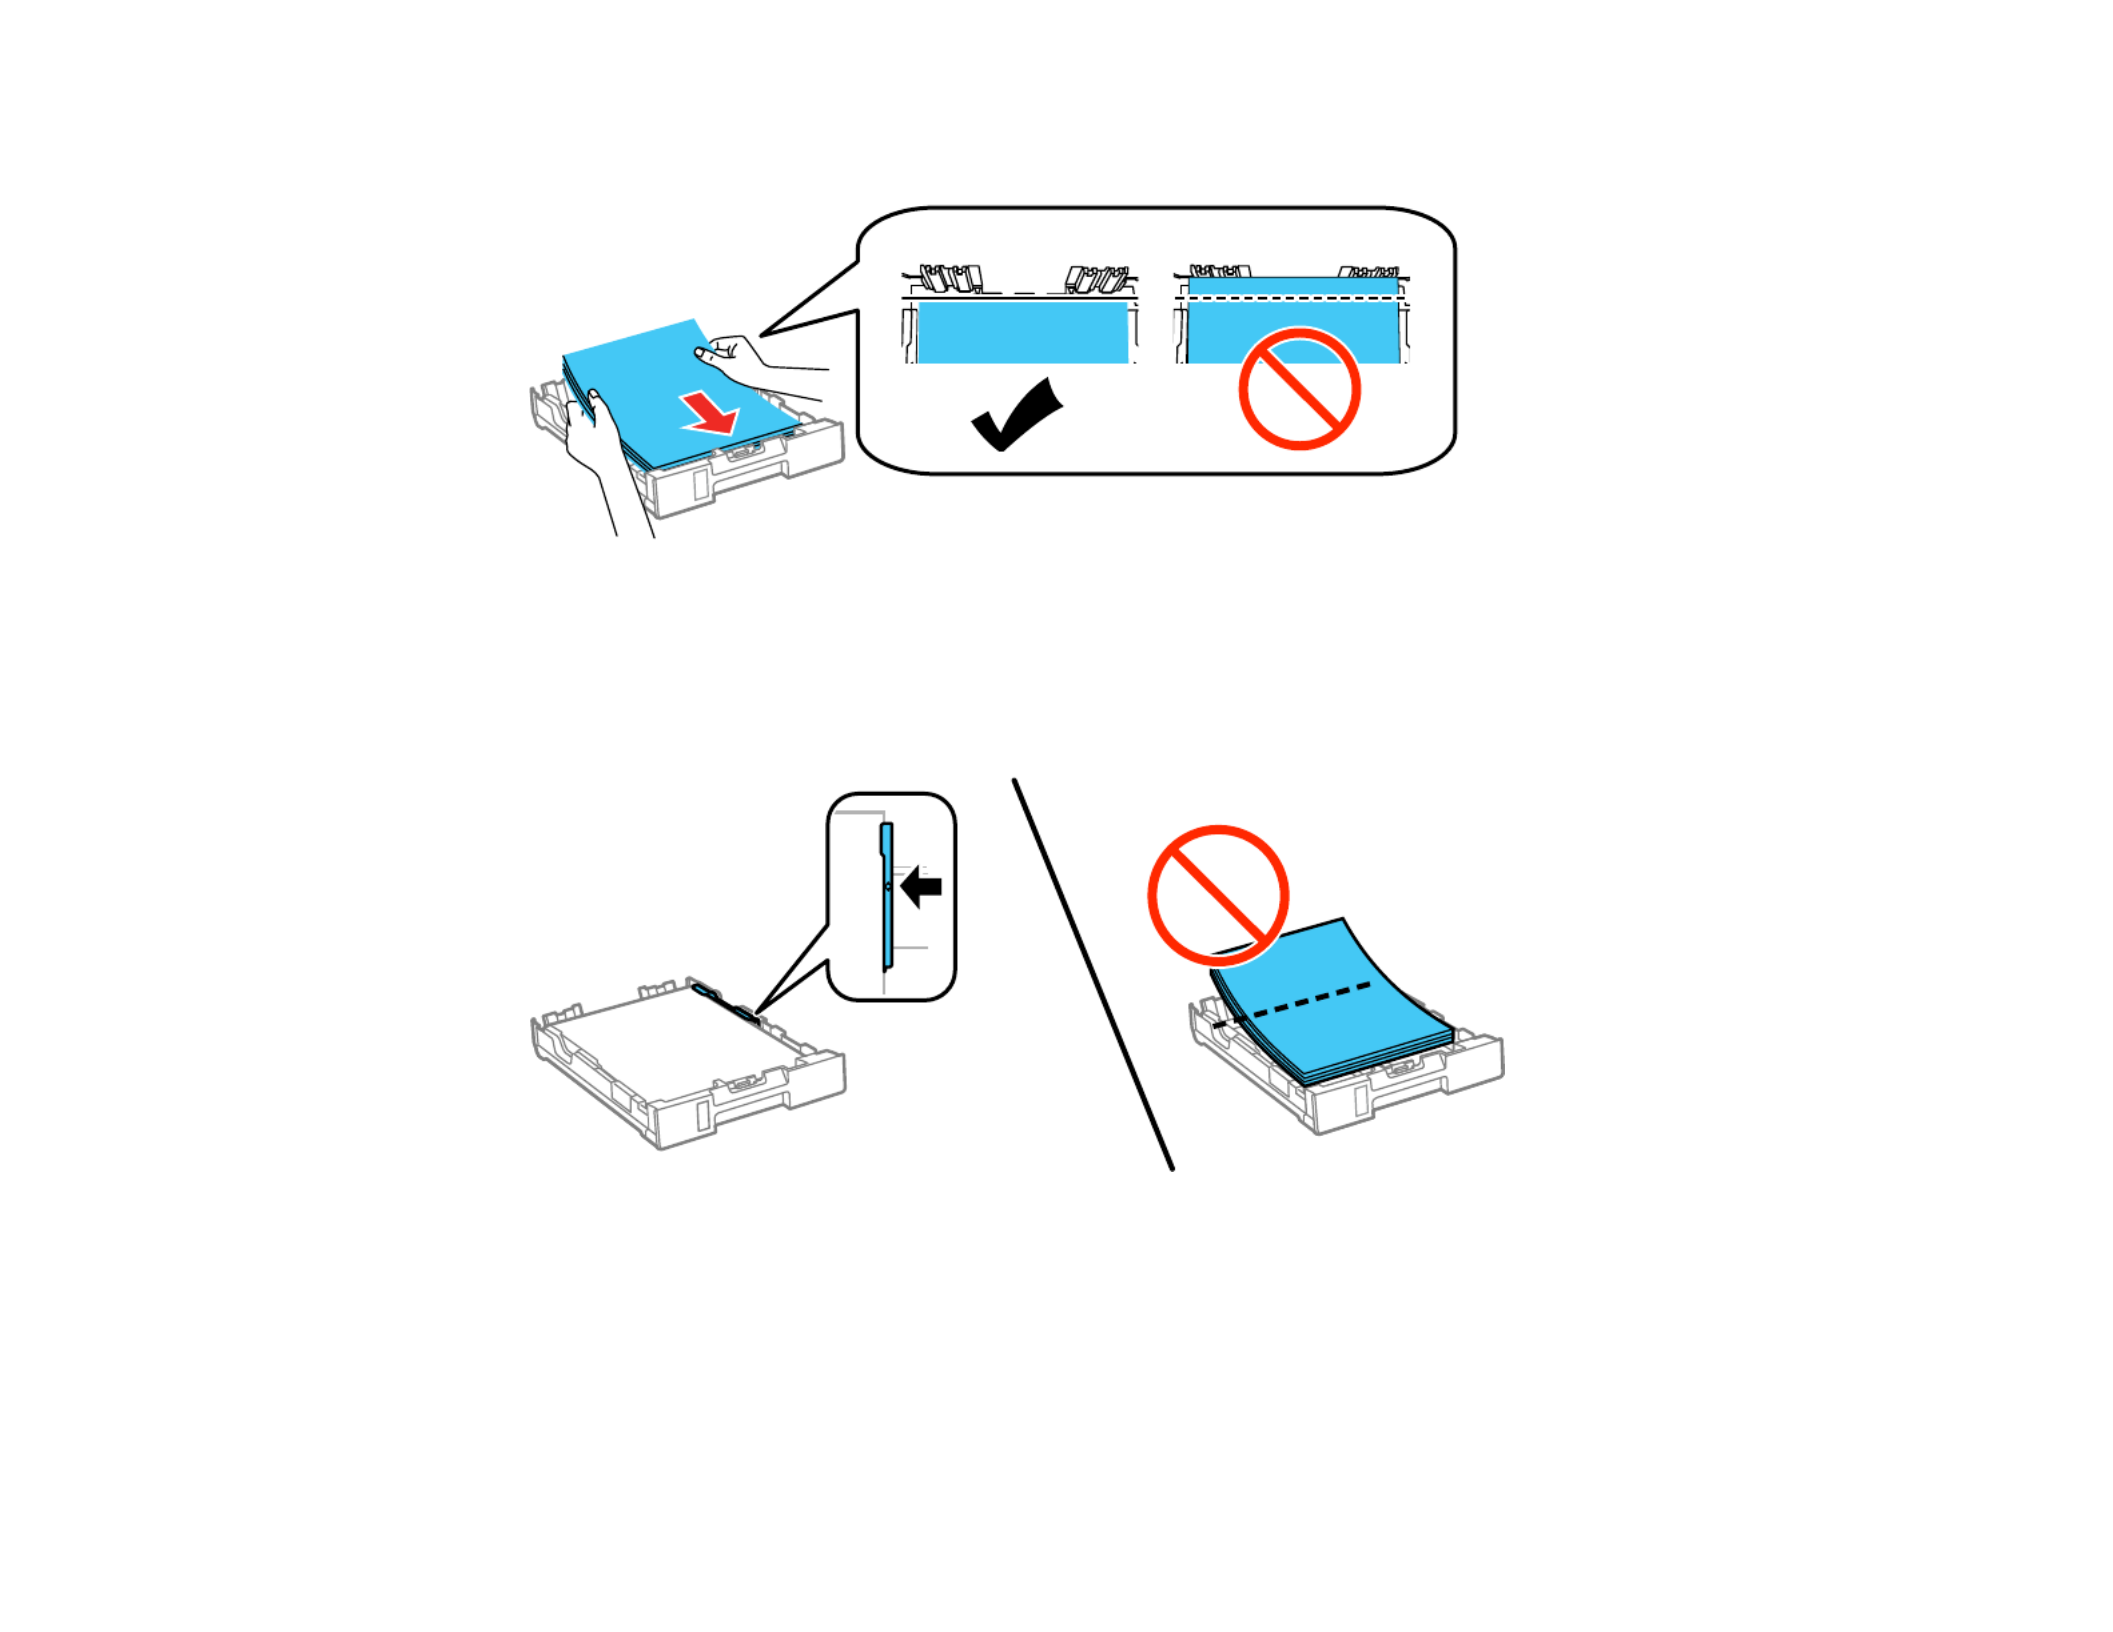
5. Load a stack of paper, printable side down, against the edge guide as shown.
Note: Make sure the paper is loaded against the edge guide and not sticking out from the end of the
cassette.
6. Slide the edge guides against the paper, but not too tightly.
Note: Make sure the paper fits beneath the top edges of the guides.
Caution: To prevent paper feeding problems, make sure you do not load too much paper in the
cassette.

57
7. Gently insert the paper cassette.
Note: The paper may slide forward slightly as you insert the cassette. This is normal.
8. When prompted by the product's LCD screen, select the size and type of the paper you just loaded
and press the button.OK
9. Extend the output tray and open the paper stopper.

58
Note: If you are using legal-size or longer paper, do not open the paper stopper. Do not remove or
insert the paper cassette during printing.
Always follow these paper loading guidelines:
• Load only the recommended number of sheets.
• Load paper short edge first, no matter which way your document faces.
• Load the printable side facedown.
• Load letterhead or pre-printed paper top edge first.
• Do not load paper above the arrow mark inside the edge guide.
• Check the paper package for any additional loading instructions.
Parent topic: Loading Paper
Related references
Paper Loading Capacity
Related tasks
Loading Paper or Envelopes in the Rear Paper Feed Slot
Loading Paper or Envelopes in the Rear Paper Feed Slot
You can print envelopes or documents in a variety of paper types and sizes in the rear paper feed slot.
1. Extend the output tray and open the paper stopper.
Note: If you are using legal-size or longer paper, do not open the paper stopper.

59
2. Pull up the paper support for the rear paper feed slot.
3. Flip the feeder guard forward, then slide the edge guides outward.
4. If you are inserting a stack of paper, fan the sheets first and tap the stack on a flat surface to even
the edges.

60
5. Do one of the following:
• Insert paper, printable side up and short edge first, in the center of the tray.
Caution: To prevent paper feeding problems, make sure you do not load too much paper in the
slot.
Note: You can load one sheet of binder paper with holes on one of the long edges as shown. Do
not select automatic 2-sided printing for this type of paper.

61
• Load up to 10 envelopes short edge first, with the flap facing down and the flap edge to the left, in
the center of the slot.
6. Slide the edge guides against the paper or envelope, but not too tightly.
7. Select the size and type of paper you just loaded in the menu.Paper Setup
Always follow these paper loading guidelines:
• Load only the recommended number of sheets.
• Load paper short edge first, no matter which way your document faces.
• Load the printable side faceup.
• Load letterhead or pre-printed paper top edge first.
• Do not load paper above the arrow mark inside the edge guides.

62
• If you have trouble loading a stack of envelopes, press each envelope flat before loading it or load one
envelope at a time.
• If print quality declines when printing multiple envelopes, try loading one envelope at a time.
• Do not load envelopes that are curled, folded, or too thin.
• Check the paper package for any additional loading instructions.
Parent topic: Loading Paper
Related references
Paper Loading Capacity
Related tasks
Loading Paper for Documents in the Cassette
Paper Loading Capacity
Paper type Loading capacity - paper
cassette
Loading capacity - rear paper
feed slot
Plain paper
Copy paper
Letterhead
Recycled paper
Color paper
Preprinted paper
250 sheets
Letter (8.5 × 11 inches
[216 × 279 mm]) or A4
(8.3 × 11.7 inches
[210 × 297 mm])
80 sheets
250 sheets
Legal (8.5 × 14 inches
[216 × 356 mm])
1 sheet
Epson Bright White Paper 200 sheets 50 sheets
20 sheets for manual two-sided
printing
Epson Presentation Paper Matte — 80 sheets
Specyfikacje produktu
| Marka: | Epson |
| Kategoria: | drukarka |
| Model: | WorkForce Pro WF-M5194 |
Potrzebujesz pomocy?
Jeśli potrzebujesz pomocy z Epson WorkForce Pro WF-M5194, zadaj pytanie poniżej, a inni użytkownicy Ci odpowiedzą
Instrukcje drukarka Epson

1 Kwietnia 2025
18 Lutego 2025
12 Lutego 2025
3 Lutego 2025
3 Lutego 2025
3 Lutego 2025
3 Lutego 2025
3 Lutego 2025
3 Lutego 2025
2 Lutego 2025
Instrukcje drukarka
- drukarka Sony
- drukarka Samsung
- drukarka LG
- drukarka Xiaomi
- drukarka Sharp
- drukarka Huawei
- drukarka Lenovo
- drukarka Fujitsu
- drukarka Roland
- drukarka Panasonic
- drukarka StarTech.com
- drukarka Canon
- drukarka Fujifilm
- drukarka MSI
- drukarka Toshiba
- drukarka D-Link
- drukarka Citizen
- drukarka HP
- drukarka Brother
- drukarka Honeywell
- drukarka Kodak
- drukarka Testo
- drukarka Primera
- drukarka Xerox
- drukarka Godex
- drukarka Olivetti
- drukarka Zebra
- drukarka Dell
- drukarka Digitus
- drukarka AgfaPhoto
- drukarka Kyocera
- drukarka Ricoh
- drukarka Seiko
- drukarka Renkforce
- drukarka Thomson
- drukarka AVM
- drukarka Velleman
- drukarka Dymo
- drukarka Panduit
- drukarka Olympus
- drukarka OKI
- drukarka Mitsubishi
- drukarka Intermec
- drukarka NEC
- drukarka Polaroid
- drukarka Konica Minolta
- drukarka Bixolon
- drukarka Pantum
- drukarka Olympia
- drukarka Datamax O'Neil
- drukarka DNP
- drukarka Equip
- drukarka ZKTeco
- drukarka TSC
- drukarka HiTi
- drukarka Microboards
- drukarka Triumph-Adler
- drukarka Fargo
- drukarka Entrust
- drukarka Kern
- drukarka Brady
- drukarka Tomy
- drukarka Lexmark
- drukarka Sagem
- drukarka Nilox
- drukarka Argox
- drukarka Royal Sovereign
- drukarka Minolta
- drukarka Oce
- drukarka Paxar
- drukarka IDP
- drukarka Metapace
- drukarka Ultimaker
- drukarka Ibm
- drukarka CSL
- drukarka Toshiba TEC
- drukarka Frama
- drukarka Builder
- drukarka Kogan
- drukarka Star Micronics
- drukarka Posiflex
- drukarka Dascom
- drukarka GG Image
- drukarka Vupoint Solutions
- drukarka Elite Screens
- drukarka DTRONIC
- drukarka Phoenix Contact
- drukarka Videology
- drukarka Epson 7620
- drukarka Star
- drukarka EC Line
- drukarka Colop
- drukarka Approx
- drukarka Fichero
- drukarka Raspberry Pi
- drukarka Unitech
- drukarka Middle Atlantic
- drukarka Evolis
- drukarka Tally Dascom
- drukarka Custom
- drukarka Nisca
- drukarka Sawgrass
- drukarka Mutoh
Najnowsze instrukcje dla drukarka

9 Kwietnia 2025

9 Kwietnia 2025
9 Kwietnia 2025

9 Kwietnia 2025

9 Kwietnia 2025
4 Kwietnia 2025

3 Kwietnia 2025
3 Kwietnia 2025
3 Kwietnia 2025

2 Kwietnia 2025