Instrukcja obsługi Dymo LabelWriter SE300
Dymo
drukarka etykiet
LabelWriter SE300
Przeczytaj poniżej 📖 instrukcję obsługi w języku polskim dla Dymo LabelWriter SE300 (132 stron) w kategorii drukarka etykiet. Ta instrukcja była pomocna dla 15 osób i została oceniona przez 2 użytkowników na średnio 4.5 gwiazdek
Strona 1/132

LabelWriter SE300
User Manual
Dymo-CoStar Corp.
599 W. Putnam Ave.
Greenwich, CT 06830-6092

ii
Declaration of Conformity
Manufacturer
Name: Dymo-CoStar Corporation
599 West Putnam Avenue
Greenwich, CT 06830
Phone: 203-661-9700
Fax: 203-661-1540
Equipment Information
Description: Direct Thermal Printer
Model: SE300
This equipment has been tested and found to comply with the limits for a Class B
digital device, pursuant to Part 15 of the FCC (Federal Communications Committee)
rules. These limits are designed to provide reasonable protection against harmful
interference in a residential installation. This equipment generates, uses, and can
radiate radio frequency energy, and, if not installed and used in accordance with the
instructions, may cause harmful interference to radio communications.
However, there is no guarantee that interference will not occur in a particular
installation. If this equipment does cause harmful interference to radio or television
reception, which can be determined by turning the equipment off and on, the user is
encouraged to try correcting the interference by one or more of the following
measures:
• Reorient or relocate the receiving antenna.
• Increase the separation between the equipment and the receiver.
• Connect the equipment into an outlet on a circuit different from that to which
the receiver is connected.
• Use shielded cables to connect this device to computers.
• Consult the dealer or an experienced radio/TV technician for help.
You may find helpful the following booklet, prepared by the FCC: Interference
Handbook. This booklet is available from the U.S. Government Printing Office,
Superintendent of Documents, Washington, DC 20402-9325.
Warning: Changes or modifications to this unit not expressly approved by the party
responsible for compliance could void the user’s authority to operate the
equipment.
CE Certification
This device has been tested and complies with the requirements of:
The EMC Directive
EN55022: Radiated and Conducted Emissions B
EN50082-1: Generic Immunity ESD, RF, and Transient Susceptibility
and
Low Voltage Directive
Product Safety EN60950

iv
INTERIOR MAINTENANCE ....................................................................... 106
C L JLEARING ABEL AMS ......................................................................... 107
TROUBLESHOOTING ...............................................................................107
APPENDIX C.................................................................................. 111
APPENDIX D.................................................................................. 113
H SARDWARE PECIFICATIONS.................................................................. 113
INTERFACE............................................................................................. 113
PRINT HEAD........................................................................................... 113
SERIAL INTERFACE SPECIFICATIONS.......................................................115
APPENDIX E.................................................................................. 117
ORDERING INFORMATION ...................................................................... 118
APPENDIX F.................................................................................. 119
O L WNE (1) YEAR IMITED ARRANTY...................................................... 119
EXCLUSIONS .......................................................................................... 119
SERVICE.................................................................................................119
O - RUT OF-WARRANTY EPAIRS................................................................ 120
APPENDIX G ................................................................................. 121
INDEX ............................................................................................ 125
This publication is copyrighted by Dymo-CoStar Corporation, and may not be
copied in whole or in part without the written permission of Dymo-CoStar
Corporation.
All trademarks are trademarks of their respective holders.
Manual version 1.0 8/99

1-2
thermal print head to specially treated labels to print. The only
supplies you will ever need to replace with this printer are labels.
Connecting the Power
You connect the power cord to the rear of the printer as shown in
Figure 1-2. Plug the other end to a power outlet. The LabelWriter
printer has an internal power supply that can accept any voltage
between 100 and 250 volts (50/60Hz). As a result, the printer can
be used worldwide.
Connecting the Serial Cable
Your printer and computer communicate through the special
serial cable that comes with your LabelWriter. (A parallel cable
option is also available. Call Dymo-CoStar for details.) The serial
cable has a telephone-like connector at one end that plugs into the
back of the LabelWriter, and two serial connectors at the other
end – a 9-pin connector and a 25-pin connector. Your PC will use
one or the other of these two connectors, not both.
Follow the steps below while referring to Figure 1-2 to make the
proper connections:
1. Turn off your computer and printer.
Figure 1-2.
2. Connect the printer end of the serial cable to the port in the
rear of the printer. It fits only one way, just like a telephone.

4-8
Cabling
RS-232 Signal Levels
The serial interface uses standard RS-232 signal levels as shown
in Table 2-1.
Table 2-1. RS-232 signal levels.
Signal Level Input Output
MARK (1) -27V to -5V -5V
SPACE (0) +5V to +27V +12V
4-13
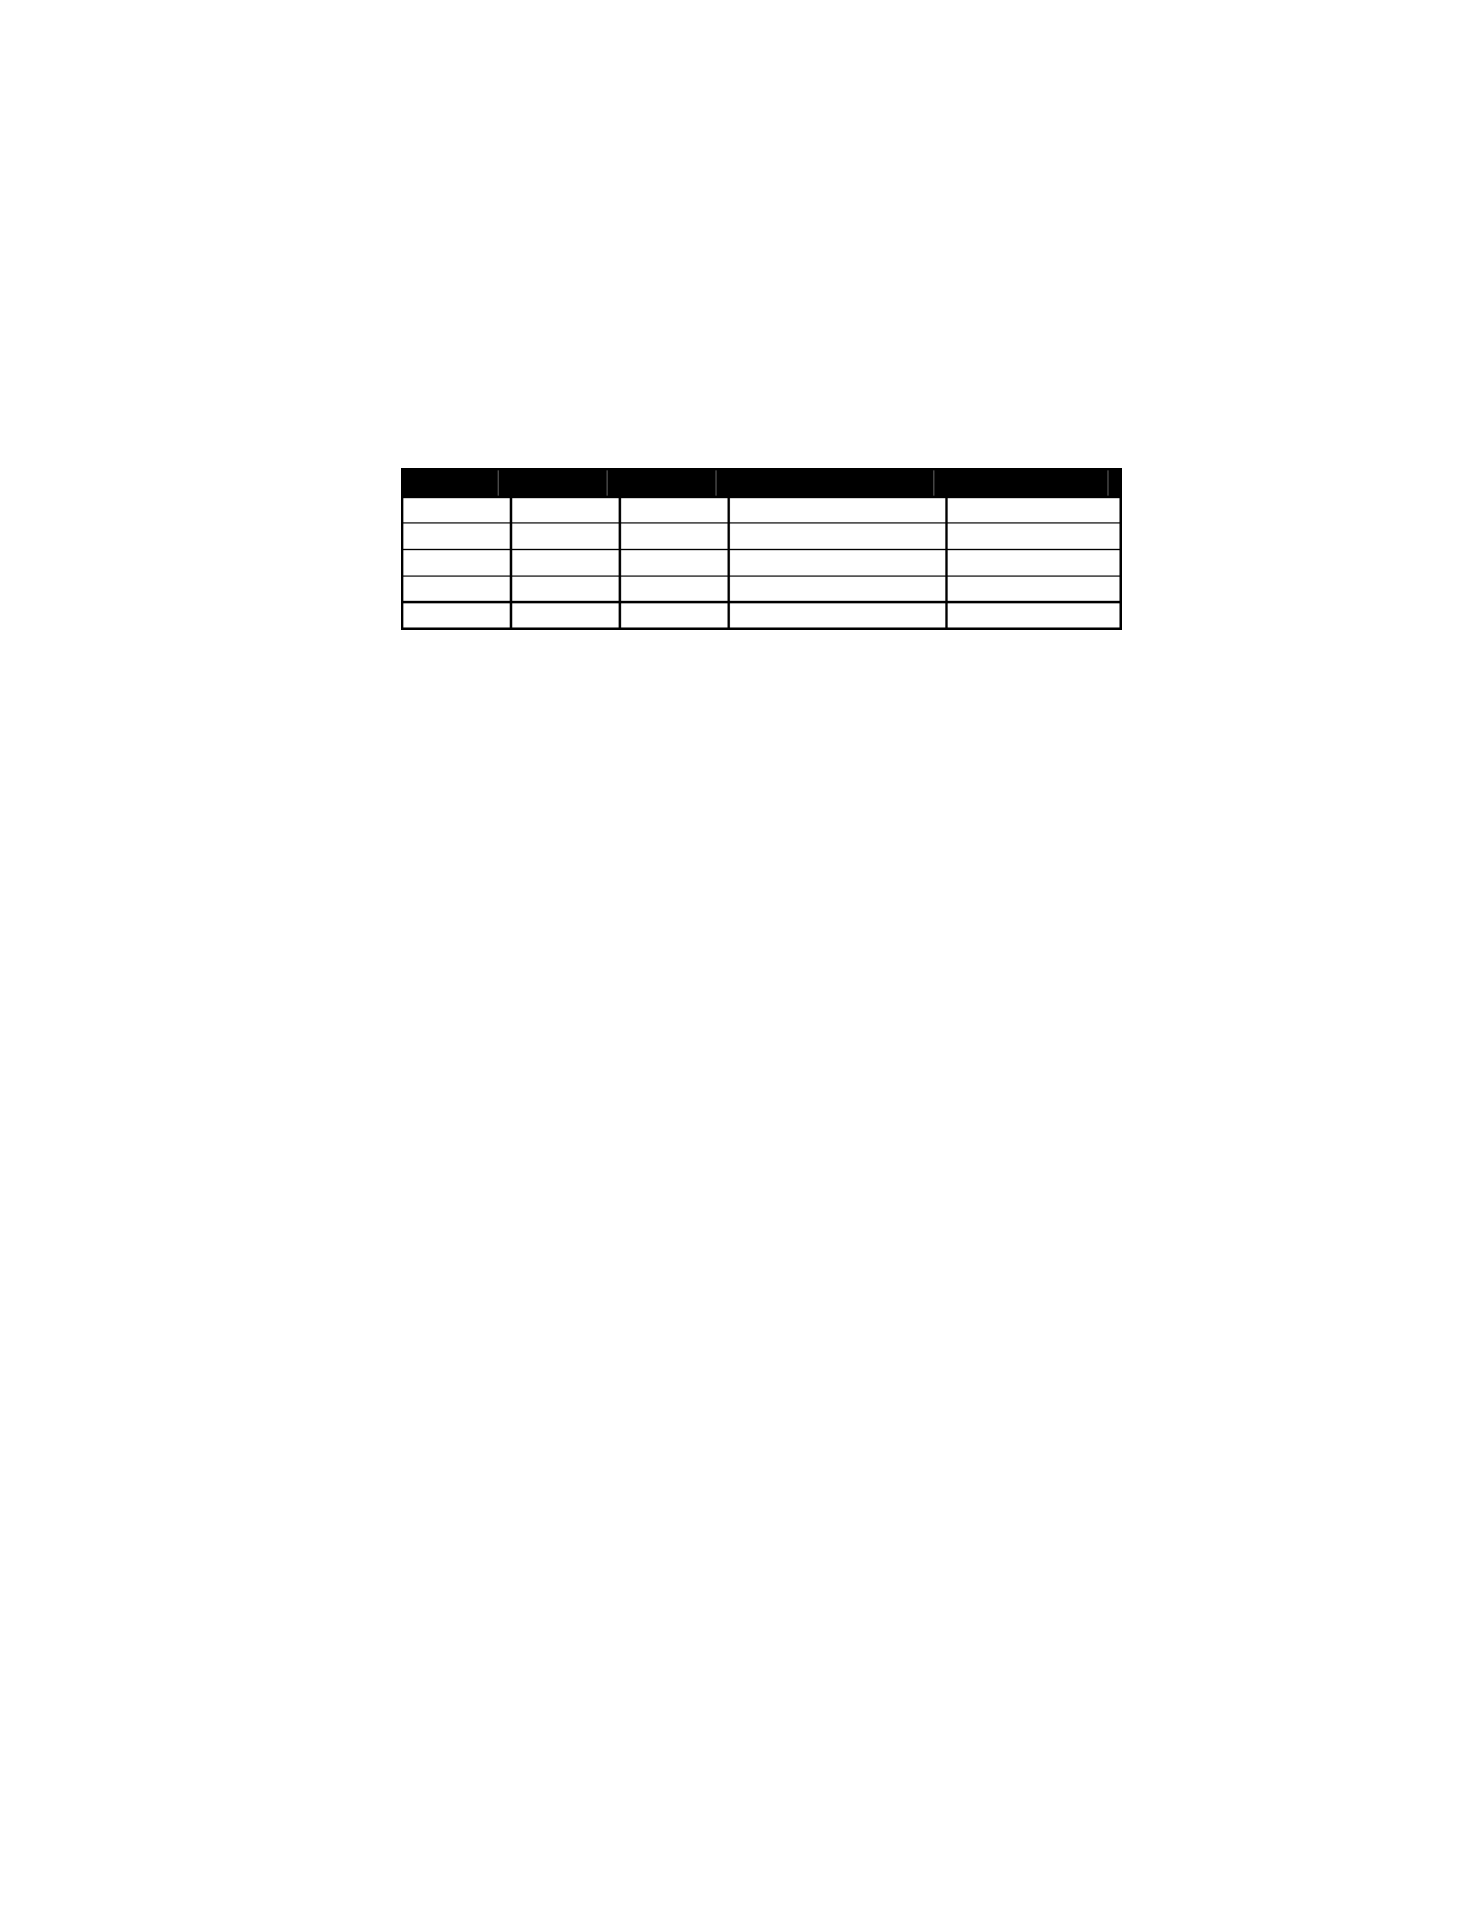
Font Statistics
The table below lists the statistics for the 5 internal fonts the
LabelWriter supports. Height and Width are expressed in terms of
dots.
Font Height Width Horizontal cpi Vertical cpi
ESC S 16 10 20.3 12.7
ESC P 24 12 16.9 8.4
ESC M 32 16 12.7 6.4
ESC U 32 20 10.2 6.4
ESC T 56 28 7.3 3.6
Objects
Objects are the basic units that the LabelWriter prints. An object
can be either a line of text characters, a bar code, a landscape
graphic, a landscape line, or an EL dot line. Each of these objects
has different rules relating to them, as discussed below.
Objects can also be either active or completed. An active object is
one that is still receiving the data that composes it. A completed
object is one that has been terminated. A line of text that has not
yet received a line feed or carriage return is a good example of an
active object. Until a terminator character, like a line feed, is sent,
more text characters can be added to the text object. Bar code
and graphic objects do not require special terminator characters
(such as line feeds). Instead they are considered complete as soon
as they receive the correct amount of data.
Print Modes
Before we move on to discuss the specific objects that the
LabelWriter supports, it is important to cover the different print
modes in which the LabelWriter may print the objects.
The LabelWriter possesses three modes of printing: EL (bitmap
graphics) mode, portrait printing mode, and landscape printing
mode. Each mode operates under very different rules. These rules
are detailed below.

4-15
Portrait Mode
On power-up, the LabelWriter is set for portrait printing. In
portrait mode, text characters travel out of the printer from the top
of the character to the bottom. It is also possible to switch to this
mode using the set print orientation command (GS V).
Portrait mode is also referred to as immediate mode printing,
because each object that is sent to the printer while the printer is
in portrait mode is printed as soon as the object is completed. No
two objects may be printed on the same line in this mode because
the paper is advanced as each object is completed and printed.
Certain commands are disabled or work differently while the
LabelWriter is in portrait mode. Exact details can be found under
each command’s description.
Landscape Mode
By using the set print orientation command (GS V), you can
configure the LabelWriter for landscape printing. In landscape
printing, text characters travel out of the printer from the left side
of the character to the right. Before the LabelWriter can be
switched to landscape printing, though, you must send the set
characters per line command (GS t). The set characters per line
command defines the width of the landscape page.
A landscape page is defined as the area allocated by the
LabelWriter in which landscape text, graphic, bar code, and line
objects may be printed. The height of this landscape page always
equals the width of the Label Writer’s print head. The width of
the landscape page is calculated when the set characters per line
command (GS t) is sent. The width of the page is equal to the
number of characters per line multiplied by the width of the
current font. The default font is 16 dots wide (2mm) and the
default number of characters per line is 80.
In landscape mode, completed objects are placed within a
memory buffer in the LabelWriter and are only printed when the
landscape page is terminated. A form feed (FF) character is
usually used to terminate a landscape page. This causes the
LabelWriter to print the objects that have been placed on the
landscape page and advance to the next label.

4-24
Bar Codes
GS A n1 n2 Bar Code Start Position 62
GS W Thin Thick Set Bar Code Element Width 68
GS h n Set Bar Code Height 70
GS k n m d1…dk Print Bar Code 71
GS w n Set Bar Code Module Width 79
GS x Print MaxiCode Bar Code 80
Miscellaneous
ESC @ Reset to Power-up Condition 38
ESC V Return Firmware Revision 52
ESC W n1 n2 Wrap Data 53
GS ~ Enter Debug Mode 81
GS * n1 n2 t h w d1…dm Landscape Mode Graphics 61
GS L n1 n2 Set Feed Length 64
GS S Return Printer Status 65
GS l n1 n2 l1 l2 m Draw Line in Landscape Mode 73
EL Compatibility
SYN EL Mode Graphics 32
ETB EL Mode Compressed Graphics 34
ESC * Reset to Defaults 37
ESC @ Reset Printer to Power-up Condition 38
ESC A Return Printer Status 39
ESC B Set Dot Tab 40
ESC D Set Bytes per Line 41
ESC E Form Feed 42
ESC L Set Feed Length 45
ESC Q Set Top Margin 48
ESC a Return Hardware Status 56
ESC F 1 Feed Sublines 43
ESC y Set 203 x 203 dpi 56
ESC z Set 138 x 203 dpi 56
Command Reference
The commands are listed by name in alphabetical order. Each
section contains a description of the command. The ASCII,

4-25
hexadecimal, and decimal values for each command are also
provided.
See Appendix A for examples (in the BASIC computer language)
of how the commands are used
See Appendix G for a list of ASCII, hexadecimal, and binary
codes.

4-29
CR Carriage Return
DESCRIPTION
Prints the current line of text and advances the text position to the
beginning of the next line. Note that the linefeed,
linefeed/carriage return, carriage return, and carriage
return/linefeed instructions all behave as a single linefeed. If the
current line extends beyond the printable area, the text will wrap
to the next printable area.
All character attributes (including inverse and double-wide text)
will be cleared after the line is printed.
EXPRESSION
ASCII CR
Decimal 13
Hex 0D
PARAMETERS
None
EXAMPLE
For an example of this command’s usage, see Appendix A, page
83, Example 4.
For an example of this command using the Caret feature see page
94, Example 4.

4-30
SO Set Font to Double Wide
DESCRIPTION
Causes all the text that follows the command on the same line to
be printed as double-wide characters. Double-wide characters are
canceled by a line feed (CR or LF) or the DC4 command.
Double wide is a character attribute and is available on a
character-by-character basis. Double-wide text can be canceled at
any point on the line. Double-wide text is automatically canceled
at the end of the line. Therefore, subsequent lines will not be
printed as double-wide text unless the SO command is re-issued
at the beginning of each line.
SEE ALSO
DC4
EXPRESSION
ASCII SO
Decimal 14
Hex 0E
PARAMETERS
None
EXAMPLE
For an example of this command’s usage, see Appendix A, page
84, Example 5.
For an example of this command using the Caret feature see page
94, Example 5.

4-34
ETB EL Mode Compressed Graphics
DESCRIPTION
Provided for LabelWriter EL compatibility.
The ETB command is a synchronization character used to encode
compressed EL bitmap print data. Print data is encoded in strings
of 8-bit bytes preceded by a singe ETB (Hex 17) character. The
control electronics in the printer do not check the validity of the
bitmap data.
Data compression is done via a form of run-length encoding. Bit
seven (the sign bit) of a compressed character represents the
value to be printed:
0 = white space, 1 = a printed pixel. Bits 6 through 0 represent the
number of consecutive bits of the selected value plus 1.
Examples: 00 = 1 white pixel
80 = 1 printed pixel
0F = 16 white pixels
FF = 128 printed pixels
The data sent to the LabelWriter is handled on a line-by-line
basis, so compressed lines may be intermixed with normal lines.
In addition, the compressed mode also uses the set bytes per line
command (ESC D) to determine how much data from the host to
expect for each line. However, the sum of the pixels must be
equal to the bytes per line variable (ESC D, default on the SE300
is 56) multiplied by 8. No error checking is done on the incoming
data and unexpected results will occur if the above caution is not
observed. Below is a sample compressed line for a ESC D 24
setting:
17 OF 8F 20 A0 20 A0 0F 8F
which would translate to:
16 white pixels
16 printed pixels
32 white pixels
32 printed pixels
32 white pixels
32 printed pixels
16 white pixels
16 printed pixels
Total 192 pixels = 24 bytes x 8
Use of the ETB command, along with the ESC D and ESC B
commands, can drastically reduce the number of data bytes

4-41
ESC D Set Bytes per Line
DESCRIPTION
Provided for LabelWriter EL compatibility.
This command defines the number of bytes in a single line of EL
bitmap data. The LabelWriter SE300 prints up to 56 bytes (448
dots) of bitmap data. Use of this command, along with the ESC B
command, can drastically reduce the number of data bytes
required to skip blank areas.
SEE ALSO
ESC B
SYN
ETB
EXPRESSION
ASCII ESC D n1
Decimal 27 68 n1
Hex 1B 44 n1
PARAMETERS
n1 = number of bytes per line (default = the allowed maximum,
56 bytes)
EXAMPLE
For an example of this command’s usage, see Appendix A,
page 86, Example 13.
For an example of this command using the Caret feature see page
96, Example 13

4-42
ESC E Form Feed
DESCRIPTION
Prints the contents of the text buffer and advances the print
media. The distance the media will advance depends on two
factors: the feed distance specified by the GS L command and the
presence of a punch hole. The LabelWriter will advance until a
punch hole is detected or until the feed distance (specified by the
GS L command) has been reached.
When the printer is powered on, the feed distance stored in
NVRAM is used as the default distance; the factory default is 7½
inches. A new feed distance specified by the GS L command will
override the NVRAM setting until the printer is either powered
down or a reset command is issued (by the ESC @ or ESC *
command).
The FF and ESC E commands are the same and produce the same
result.
SEE ALSO
FF
EXPRESSION
ASCII ESC E
Decimal 27 69
Hex 1B 45
PARAMETERS
None
EXAMPLE
For an example of this command’s usage, see Appendix A,
page 86, Example 14.
For an example of this command using the Caret feature see page
96, Example 14.

4-45
ESC L Set Feed Length
DESCRIPTION
Provided for LabelWriter EL compatibility. See the GS L
command for information.

4-47
ESC P Set Font to 16 cpi
DESCRIPTION
Changes to the 16 cpi mini font. The cell dimension is 24H x
12W.
Fonts may only be changed at the beginning of a line, prior to any
printable characters. This font will remain in effect until the
printer is reset (by the ESC @ or ESC * command) or another
font is selected.
SEE ALSO
ESC M, ESC S, ESC T, ESC U
EXPRESSION
ASCII ESC P
Decimal 27 80
Hex 1B 50
PARAMETERS
None
EXAMPLE
For an example of this command’s usage, see Appendix A,
page 87, Example 17.
For an example of this command using the Caret feature see page
97, Example 17
Font Height Width Horizontal cpi Vertical cpi
ESC S 16 10 20.3 12.7
ESC P 24 12 16.9 8.4
ESC M 32 16 12.7 6.4
ESC U 32 20 10.2 6.4
ESC T 56 28 7.3 3.6

4-57
GS DC2 Set Font to Double Height
DESCRIPTION
Causes the current font to be printed at twice its normal height.
The double-height setting will remain in effect until the current
line attributes are cleared
SEE ALSO
GS DC3
EXPRESSION
ASCII GS DC2
Decimal 29 18
Hex 1D 12
PARAMETERS
None
EXAMPLE
For an example of this command’s usage, see Appendix A,
page 88, Example 25.
For an example of this command using the Caret feature see page
98, Example 25.

4-70
GS h Set Bar Code Height
DESCRIPTION
Defines the height of the bars (in dots) for bar codes. The height
is defined in n/203 inch increments. For example, specify 203 as
the value for n to print a 1-inch high bar code. The bar code
height is always rounded up to the next multiple of 8.
EXPRESSION
ASCII GS h n
Decimal 29 104 n
Hex 1D 68 n
PARAMETERS
n = the desired height (in dot lines) of the bar code
EXAMPLE
For an example of this command’s usage, see Appendix A,
page 91, Example 37.
For an example of this command using the Caret feature see page
101, Example 37.

4-72
Character Value Bar Code Selected
n = 0 POSTNET
n = 1 reserved
n = 2 EAN/UPC Auto
m = 6 UPC - E
m = 7 EAN-8
m = 8 invalid
m = 9 UPC-E + 2
m = 10 UPC Auto (UPC-E/UPC-A)
m = 11 UPC-A
m = 12 UPC-E + 5, EAN-13
m = 13 UPC-Auto + 2
m = 14 UPC-A + 2
m = 15 EAN-13 + 2
m = 16 UPC-Auto + 5
m = 17 UPC-A + 5
m = 18 EAN-13 + 5
n = 3 reserved
n = 4 Code 3 of 9
n = 5 MSI Plessey
n = 6 Codabar
n = 7 Interleaved 2 of 5
n = 8 Code 128-A
n = 9 Code 128-B
n = 10 Code 128-C
n = 11 Code 128-Auto
n = 12 reserved
n = 13 reserved
n = 14 reserved
n = 15 reserved
EXAMPLE
For an example of this command’s usage, see Appendix A,
page 92, Example 38.

A-100
GS L Set Feed Length Example
OPEN "COM1:9600,N,8,1" FOR OUTPUT AS #1
PRINT #1, “^027*";
PRINT #1, “^029t^036^029V^001";
PRINT #1, “This is Line One^010";
PRINT #1, “This is Line Two^010";
PRINT #1, “^012”;
Example 31: GS L Set Feed Length
GS T Select Line Wrap/Truncate Modes Example
OPEN "COM1:9600,N,8,1" FOR OUTPUT AS #1
PRINT #1, “^027*";
PRINT #1, “^029T^003^029u^014";
PRINT #1, “This is Line 1 This is Line 2^010";
PRINT #1, “^012”;
Example 33: GS T Select Line Wrap/Truncate Modes
GS V Set Print Orientation Example
OPEN "COM1:9600,n,8,1" FOR OUTPUT AS #1
PRINT #1, “^027";
PRINT #1, “*^029t^011^029V^001";
PRINT #1, “This is in^010";
PRINT #1, “203 x 203^010Landscape^010Mode^010";
PRINT #1, “^029V^000This is in^010Portrait Mode^010";
PRINT #1, “^029t^011^029V^002";
PRINT #1, “This is in^010138 x 203";
PRINT #1, “^010Landscape^010Mode^010";
PRINT #1, “^012”;
Example 34: GS V Set Print Orientation
GS W Set Bar Code Element Width Example
OPEN "COM1:9600,N,8,1" FOR OUTPUT AS #1
PRINT #1, “^029A^000^203";
PRINT #1, “^029h^203^029W^003^005";
PRINT #1, “^029k^004^006DYMODYMO^010";
PRINT #1, “^012”;
Example 35: GS W Set Bar Code Element Width
Specyfikacje produktu
| Marka: | Dymo |
| Kategoria: | drukarka etykiet |
| Model: | LabelWriter SE300 |
Potrzebujesz pomocy?
Jeśli potrzebujesz pomocy z Dymo LabelWriter SE300, zadaj pytanie poniżej, a inni użytkownicy Ci odpowiedzą
Instrukcje drukarka etykiet Dymo

15 Października 2024
13 Października 2024
11 Października 2024
16 Września 2024
15 Września 2024
11 Września 2024
10 Września 2024
10 Września 2024
9 Września 2024
9 Września 2024
Instrukcje drukarka etykiet
- drukarka etykiet Epson
- drukarka etykiet Toshiba
- drukarka etykiet Casio
- drukarka etykiet Citizen
- drukarka etykiet Brother
- drukarka etykiet Honeywell
- drukarka etykiet Primera
- drukarka etykiet Godex
- drukarka etykiet Olivetti
- drukarka etykiet Zebra
- drukarka etykiet Seiko
- drukarka etykiet Renkforce
- drukarka etykiet Panduit
- drukarka etykiet Intermec
- drukarka etykiet Bixolon
- drukarka etykiet Datamax O'Neil
- drukarka etykiet TSC
- drukarka etykiet 3M
- drukarka etykiet Qian
- drukarka etykiet Brady
- drukarka etykiet Argox
- drukarka etykiet Phoenix
- drukarka etykiet Leitz
- drukarka etykiet POSline
- drukarka etykiet Kroy
- drukarka etykiet Metapace
- drukarka etykiet Datacard
- drukarka etykiet Labelmate
- drukarka etykiet Star Micronics
- drukarka etykiet Dascom
- drukarka etykiet DULA
- drukarka etykiet EC Line
- drukarka etykiet Tach-It
- drukarka etykiet Colop
- drukarka etykiet Qoltec
- drukarka etykiet SATO
- drukarka etykiet SII
- drukarka etykiet Start International
- drukarka etykiet Custom
- drukarka etykiet Ruggard
Najnowsze instrukcje dla drukarka etykiet
9 Marca 2025
7 Marca 2025
3 Marca 2025
17 Lutego 2025
17 Lutego 2025

6 Lutego 2025
28 Stycznia 2025
13 Stycznia 2025
13 Stycznia 2025
12 Stycznia 2025