Instrukcja obsługi Canon MV960
Canon
kamera wideo
MV960
Przeczytaj poniżej 📖 instrukcję obsługi w języku polskim dla Canon MV960 (129 stron) w kategorii kamera wideo. Ta instrukcja była pomocna dla 12 osób i została oceniona przez 2 użytkowników na średnio 4.5 gwiazdek
Strona 1/129
English
English
PUB.DIE-252
PAL
Introduction
Basic
Functions
Advanced
Functions
Editing
Using a
Memory Card
Direct Printing
Transferring
Images
Additional
Information
Digital Video Camcorder
Instruction Manual
Mini Digital
Video
Cassette
Please read also the following instruction manual (electronic
version on PDF file). For further details refer to the
installation guide.
• Digital Video Software
Digital Video So f t ware
Vers ion 19
Inst ruct ion Ma nual
PUB. DIE-245
This instruction ma nua l exp lains how to ins tall the s oftwa re, conne ct t he
ca mcorder to a computer, a nd downlo ad s till image s f rom a disc or a
memory ca rd to a computer.
If you a re using Windows opera ting syste m, use the supplie d
DIGITAL VI DEO SOLUTI ON DIS K For Window s.
If you a re using Macintosh operating system, use the supplied
DIGITAL VI DEO S OLUTI ON DIS K For Mac intosh.
E

2
Intro ducti o n
Important Usage Instructions
WARNING!
TO REDUCE THE RISK OF FIRE OR ELECTRIC SHOCK, DO NOT REMOVE
COVER (OR BACK) NO USER SERVICEABLE PARTS INSIDE. REFER
SERVICING TO QUALIFIED SERVICE PERSONNEL.
WARNING!
TO REDUCE THE RISK OF FIRE OR ELECTRIC SHOCK, DO NOT EXPOSE
THIS PRODUCT TO RAIN OR MOISTURE.
CAUTION:
TO REDUCE THE RISK OF ELECTRIC SHOCK AND TO REDUCE
ANNOYING INTERFERENCE, USE THE RECOMMENDED ACCESSORIES
ONLY.
CAUTION:
DISCONNECT THE MAINS PLUG FROM THE SUPPLY SOCKET WHEN NOT IN USE.
CA-570 identification plate is located on the bottom.

3
Introduction
E
Using this Manual
Thank you for purchasing the Canon MV960/MV950/MV940/MV930. Please read this
manual carefully before you use the camcorder and retain it for future reference. Should
your camcorder fail to operate correctly, refer to the Troubleshooting table ( 119).
Change the display language before you begin ( 66).
Symbols and References Used in This Manual
: Precautions related to the camcorder operation.
: Additional topics that complement the basic operating procedures.
: Reference page number.
: Option or feature that applies or is available only with this model.
Capital letters are used to refer to buttons on the camcorder or the wireless controller.
[ ] are used to refer to menu items displayed on the screen.
“Screen” refers to the LCD and the viewfinder screen.
Please note that the illustrations mainly refer to the .
About the Joystick and the Joystick Guide
The mini joystick allows you to control many of the camcorder’s operations and to select
and change setting options in menus.
The functions assigned to the joystick change according to the operation mode. You can
display the joystick guide to remind you of the joystick’s functions in each operating mode.
Push the joystick up, down, left or right ( , ) to select an
item or change settings.
Press the joystick itself ( ) to save the settings or confirm an
action.
Recording movies: Playing back movies: Recording still images:
Playing back still images:
Basic Functions
Preparations
E
Setting the Time Zone, Date and Time
Set the time zone, date and time when you first start using your camcorder, or when you
have replaced the backup battery.
Setting the Time Zone/Daylight Saving Time
1. Press the FUNC. button to open the FUNC. menu.
The FUNC. menu will open. Continue the procedure with the
multi selector to open the setup menus.
2. With the multi selector select ( ) the icon and
press ( ).
3. Select ( ) the [DATE/TIME SETUP] menu and
press ( ). Then, select ( ) the [T.ZONE/DST]
option and press ( ).
The time z one setting appears (see table on the next page) The def a ult setting is
MENU
( 36)
DATE
DATE
DATE
DATE
DATEDATE
/TIM
/TIM
/TIM
/TIM
/TIM/TIM
E SET
E S
E S
E S
E SE SE
E
E
EET
T
T
TT
UP
UP
UP
UP
UPUP
T.ZO
T.ZO
T.ZO
T.ZO
T.ZOT.ZO
NE/D
NE/D
NE/D
NE/D
NE/DNE/D
ST P
ST P
ST P
ST P
ST PST P
ARIS
ARIS
ARIS
ARIS
ARISARIS
Operating modes (see below)
Menu item shown at its default
position
Buttons and switches to be operated
EXP
FOCUS
EXP
FOCUS

4
About the Operating Modes
The operating modes are determined by the position of the switch and the TAPE/
CARD switch.
: Function can be used in this mode.
: Function cannot be used in this mode.
Trademark Acknowledgments
• is a trademark.
• is a trademark.
• Windows® is either a registered trademark or trademark of Microsoft Corporation in the United
States and/or other countries.
• Macintosh and Mac OS are trademarks of Apple Computer, Inc., registered in the United
States and other countries.
• Other names and products not mentioned above may be registered trademarks or trademarks
of their respective companies.
Operating
Modes Switch
TAPE/CARD
Switch
Icon
Display Operation
CAMERA
(TAPE)
Recording movies on a
tape 21
PLAY Playing movies from a
tape 29
CAMERA
(CARD)
Recording still images or
movies on a card
85,
89
PLAY Playing movies or viewing
still images from a card 92
5
E
Introduction
Table of contents
Introduction
Using this Manual ............................................................................................3
Checking the Supplied Accessories ................................................................7
Components Guide..........................................................................................8
Basic Functions
Preparations
Preparing the Power Supply..........................................................................12
Loading/Unloading a Cassette ......................................................................15
Preparing the Camcorder ..............................................................................16
Using the Wireless Controller ..................................17
Adjusting the LCD Screen .............................................................................18
Setting the Time Zone, Date and Time..........................................................19
Recording
Recording Movies on a Tape.........................................................................21
Zooming.........................................................................................................25
Tips for Making Better Videos........................................................................28
Playback
Playing Back a Tape......................................................................................29
Adjusting the Volume.....................................................................................31
Playing Back on a TV Screen........................................................................32
Advanced Functions
Menus and Settings.......................................................................................36
Recording
Using the Recording Programs .....................................................................41
Adjusting the Exposure Manually ..................................................................45
Adjusting the Focus Manually........................................................................46
Setting the White Balance .............................................................................48
Selecting an Image Effect..............................................................................49
Setting the Shutter Speed..............................................................................50
Using the LED Light .............................................................52
Using the Self-Timer......................................................................................53
Changing the Recording Mode (SP/LP) ........................................................54
Audio Recording ............................................................................................55
Using Digital Effects.......................................................................................56
Widescreen TV Recording (16:9) ..................................................................60
Playback
Magnifying the Image ....................................................................................61
Displaying the Data Code..............................................................................62
End Search....................................................................................................63
Returning to a Pre-marked Position.........................64
Date Search .............................................................65
Other Functions
Changing the Display Language ...................................................................66
Other Camcorder Settings.............................................................................67
Editing
Recording to a VCR or Digital Video Device .................................................70
Recording from Analog Video Devices (VCR, TV or Camcorder)....72

6
Recording from Digital Video Devices (DV Dubbing)...........73
Converting Analog Signals into Digital Signals
(Analog-Digital Converter) ..........................................................................75
Audio Dubbing .....................................................................77
Transferring Video Recordings to a Computer ..............................................80
Using a Memory Card
Inserting and Removing a Memory Card.......................................................81
Selecting the Image Quality/Size...................................................................82
File Numbers .................................................................................................84
Recording Still Images on a Memory Card ....................................................85
Recording Movies on a Memory Card ...........................................................89
Selecting the Focusing Point .........................................................................91
Playing Back a Memory Card ........................................................................92
Protecting Images..........................................................................................94
Erasing Images..............................................................................................95
Initializing a Memory Card .............................................................................96
Direct Printing
Printing Still Images .......................................................................................97
Selecting the Print Settings ...........................................................................99
Printing with Print Order Settings ................................................................101
Transferring Images
Transferring Memory Card Images to a Computer......................................103
Direct Transfer .............................................................................................104
Selecting Images for Transfer (Transfer Order)...........................................106
Additional Information
Screen Displays...........................................................................................107
List of Messages..........................................................................................110
Maintenance/Others ....................................................................................113
Troubleshooting...........................................................................................119
System Diagram ..........................................................................................122
Optional Accessories...................................................................................123
Specifications...............................................................................................125
Index............................................................................................................127

7
E
Introduction
Checking the Supplied Accessories
* Europe only.
CA-570 Compact
Power Adapter
(incl. power cord)
NB-2LH Battery Pack BP-2L5 Battery Pack
Lithium Button Battery
CR1616
WL-D85
Wireless Controller
Lithium Button Battery
CR2025 for Wireless
Controller
SS-900 Shoulder Strap STV-250N Stereo
Video Cable
PC-A10 SCART
Adapter*
IFC-300PCU USB
Cable
DIGITAL VIDEO
SOLUTION DISK
For Windows
For Macintosh

8
Components Guide
MV960/MV950/MV940/MV930
Left side view
Right side view
Lens cover switch ( 21, 85)
( open, closed)
LCD BACKLIGHT button ( 18)
Speaker ( 31)
CHARGE indicator ( 12) /
CARD access indicator ( 85, 89)
Memory card slot ( 81)
switch ( 4)
Grip belt ( 16)
Terminal cover
AV terminal ( 32, 72, 75, 77)
USB terminal ( 97, 103)
DV terminal ( 70, 73, 75, 80)

9
E
Introduction
Front view
Rear view
Remote sensor ( 17)
White LED light
(assist lamp) ( 52)
Stereo microphone
Viewfinder ( 16)
Dioptric adjustment lever ( 16)
BATT. (battery release) button ( 12)
LCD screen ( 18)
Joystick ( 3)
FUNC. button ( 36)
D.EFFECTS button ( 56)/
P.SET button ( 97)
WIDE SCR button ( 60) /
DATA CODE button ( 62)
LIGHT button ( 52)
Backup battery compartment ( 14)
Start/stop button ( 21, 89)
Battery attachment unit ( 12) /
Serial number
DC IN terminal ( 12)

10
Top view
Bottom view
TAPE/CARD switch ( 4)
Program selector ( 41)
Easy recording
Recording programs
Zoom lever ( 25)
PHOTO button ( 85)
Cassette compartment ( 15)
Cassette compartment cover ( 15)
OPEN/EJECT switch ( 15)
Tripod socket ( 28)

11
E
Introduction
WL-D85 Wireless Controller
START/STOP button ( 21, 89) PHOTO button ( 85)
CARD –/+ buttons ( 92) Zoom buttons ( 25)
DATE SEARCH / buttons ( 65) PLAY button ( 29)
REW button ( 29) FF button ( 29)
–/ button ( 30) STOP button ( 29)
PAUSE button ( 30) +/ button ( 30)
SLOW button ( 30) button ( 30)
AUDIO DUB. button ( 77) TV SCREEN button ( 107)
ZERO SET MEMORY button ( 64)
WIRELESS CONTROLLER WL-D85
START/
STOP PHOTO ZOOM
CARD
DATE SEARCH
REW PLAY FF
STOP
PAUSE SLOW
AUDIO DUB.
ZERO SET
MEMORY TV SCREEN

12
Basic Functio ns
Preparatio ns
Preparing the Power Supply
Attaching the Battery Pack
1. Turn the switch to .
2. Attach the battery pack to the
camcorder.
• Remove the terminal cover of the
battery pack.
• Press lightly and slide the battery pack
in the direction of the arrow until it clicks.
Charging the Battery Pack
1. Connect the power cord to the
adapter.
2. Plug the power cord into a power
outlet.
3. Connect the power adapter to the
camcorder’s DC IN terminal.
The CHARGE indicator starts flashing.
The indicator will stay on when the
charging is completed.
4. When the charging is completed,
disconnect the power adapter
from the camcorder. Unplug the
power cord from the power outlet
and disconnect it from the adapter.
5. Remove the battery pack after use.
Press the BATT. button to remove the battery.
DC IN terminal
CHARGE indicator

13
Basic Functions
Preparations
E
Using a Household Power Source
Connect to a household power source to use the camcorder without worrying about the
battery power. You can keep the battery pack attached; the battery power will not be
consumed.
1. Turn the switch to .
2. Connect the power cord to the
power adapter.
3. Plug the power cord into a power
outlet.
4. Connect the power adapter to the
camcorder’s DC IN terminal.
Turn off the camcorder before connecting or disconnecting the power adapter.
If the adapter is used close to a TV, it may cause picture interference. Move the
adapter away from the TV or the antenna cable.
Do not connect any products that are not expressly recommended to the
camcorder’s DC IN terminal or to the power adapter.
You may hear some noise from the power adapter during use. This is not a
malfunction.
Do not disconnect and reconnect the power cord while charging a battery pack.
Charging may stop. The battery pack may not be charged correctly even if the
CHARGE indicator is continuously on. The battery pack may also not be
charged correctly when a power outage occurs during charging. Remove the
battery pack and attach it back to the camcorder.
When the power adapter or the battery pack is defective, the CHARGE
indicator flashes rapidly (at about 2 flashes/second) and charging stops.
The CHARGE indicator informs you about the charge status.
0-50%: Flashes once every second
More than 50%: Flashes twice every second
100%: Continuously on
We recommend charging the battery pack in temperatures between 10 °C and
30 °C. Outside the temperature range of 0 °C to 40 °C, the charging will not
start. If the battery temperature goes outside this temperature range while
charging, the CHARGE indicator will start flashing rapidly and the charging will
stop.
A lithium ion battery pack can be charged at any charge state. Unlike
conventional battery packs, you do not need to completely use or discharge it
before charging.
We recommend that you prepare battery packs 2 to 3 times longer than you
think you might need.
To conserve battery power, turn off the camcorder instead of leaving it in record
pause mode.

14
Charging, Recording and Playback Times
The following times are approximate and vary according to the charging,
recording or playback conditions.
\
* Approximate times for recording with repeated operations such as start/stop,
zooming, power on/off. Actual time may be shorter.
Installing the Backup Battery
The backup battery (lithium button battery CR1616) allows the camcorder to retain the
date, time ( 19) and other camcorder settings while the power source is disconnected.
Connect a power source to the camcorder when replacing the backup battery to retain the
settings.
1. Open the backup battery cover.
2. Insert the backup battery with the + side
facing out.
3. Close the cover.
The backup battery has a life span of about a year. “ ” flashes in red to inform
you that it needs to be replaced.
Battery Pack BP-2L5 NB-2L NB-2LH BP-2L12 BP-2L14
Charging Time 95 min. 110 min. 125 min. 195 min. 220 min.
Max. Recording Time
Viewfinder 90 min. 105 min. 125 min. 220 min. 270 min.
LCD normal 85 min. 100 min. 120 min. 215 min. 260 min.
bright 80 min. 90 min. 110 min. 200 min. 240 min.
Typical RecordingTime*
Viewfinder 50 min. 55 min. 65 min. 120 min. 150 min.
LCD normal 50 min. 55 min. 65 min. 120 min. 145 min.
bright 45 min. 50 min. 60 min. 110 min. 140 min.
Playback Time 90 min. 105 min. 125 min. 225 min. 275 min.
15
Basic Functions
Preparations
E
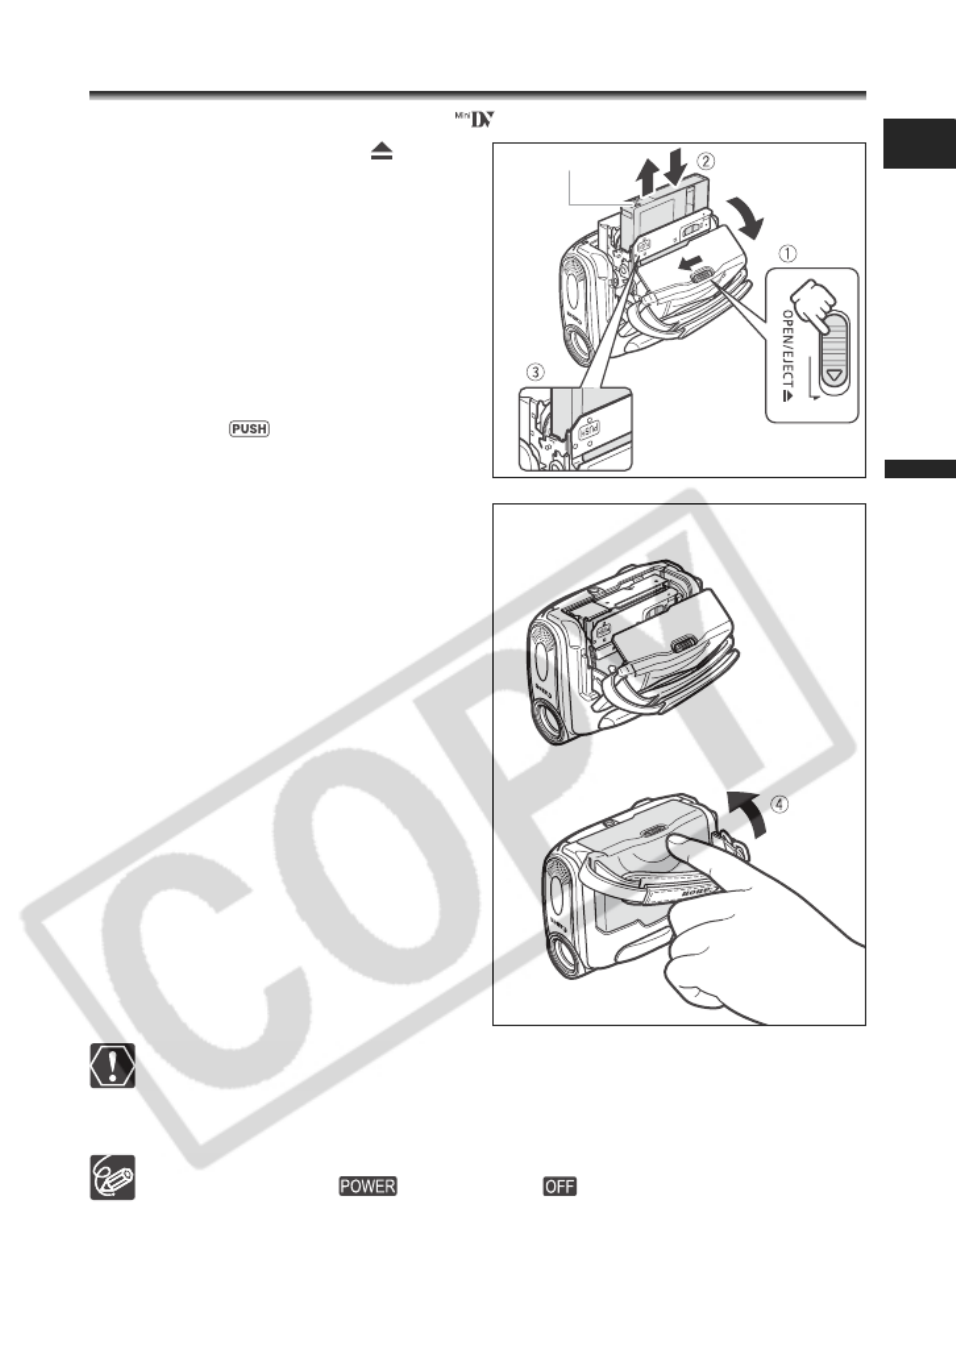
Loading/Unloading a Cassette
Use only videocassettes marked with the logo.
1. Slide the OPEN/EJECT switch
and open the cassette
compartment cover.
The cassette compartment opens
automatically.
2. Load/unload the cassette.
• Load the cassette with the window
facing the grip belt.
• Unload the cassette by pulling it straight
out.
3. Press the mark on the
cassette compartment until it
clicks.
4. Wait for the cassette compartment
to retract automatically and close
the cassette compartment cover.
Do not interfere with the cassette compartment while it is opening or closing
automatically, or attempt to close the cover before the cassette compartment
has fully retracted.
Be careful not to get your fingers caught in the cassette compartment cover.
If the camcorder is connected to a power source, cassettes can be loaded/
unloaded even if the switch is set to .
Tape protection tab
16
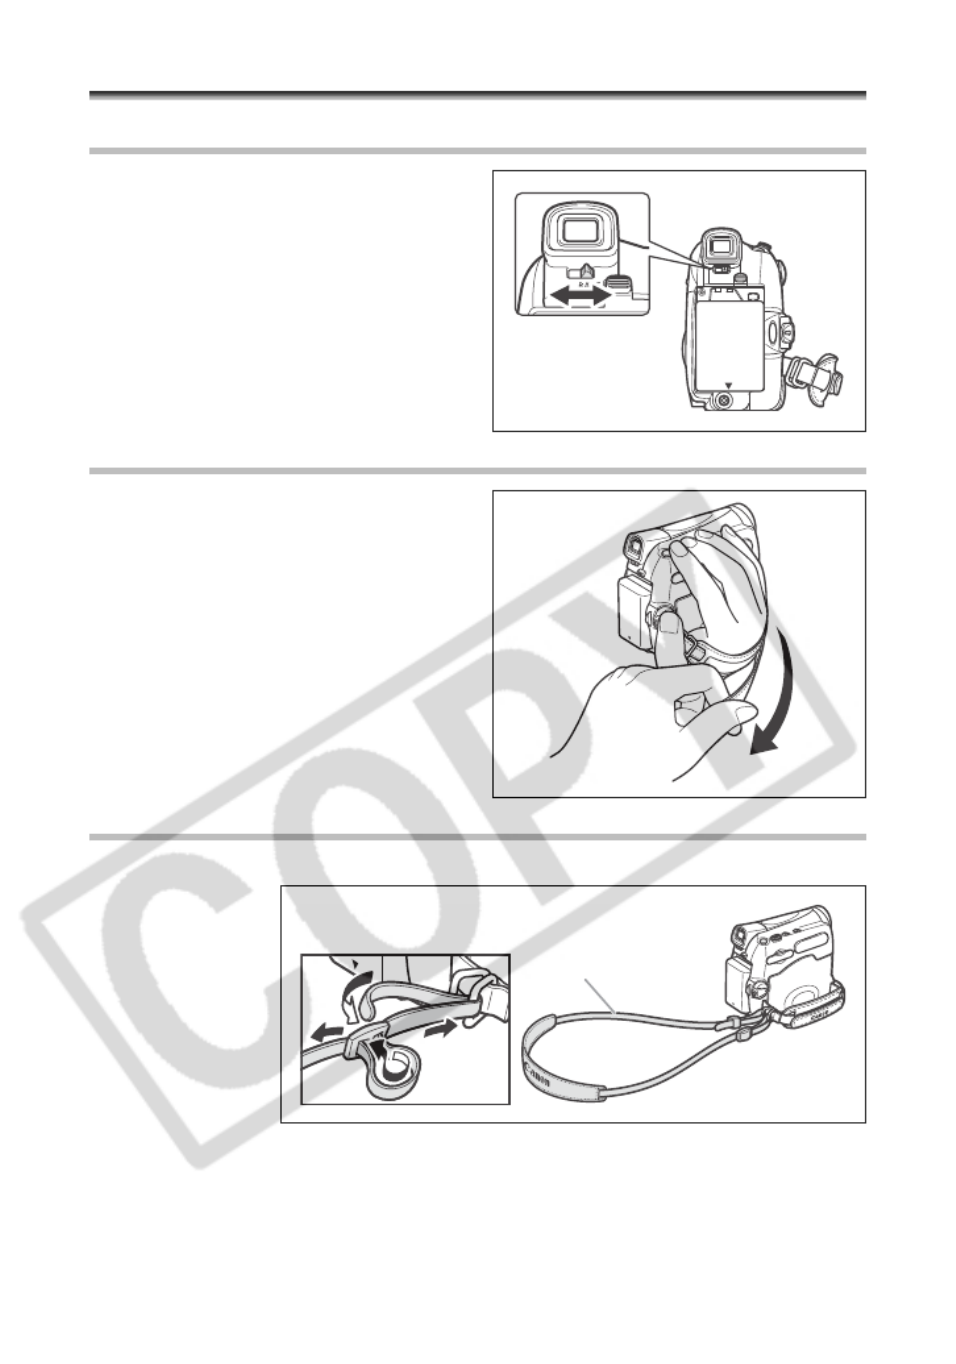
Preparing the Camcorder
Adjusting the Viewfinder (Dioptric Adjustment)
1. Turn on the camcorder and keep
the LCD panel closed.
2. Adjust the dioptric adjustment
lever.
Fastening the Grip Belt
Adjust the grip belt so that you can reach the
zoom lever with your index finger, and the
start/stop button with your thumb.
Attaching the Shoulder Strap
Pass the ends through the strap mount and adjust the length of the strap.
SS-900 Shoulder
Strap
17
Basic Functions
Preparations
E
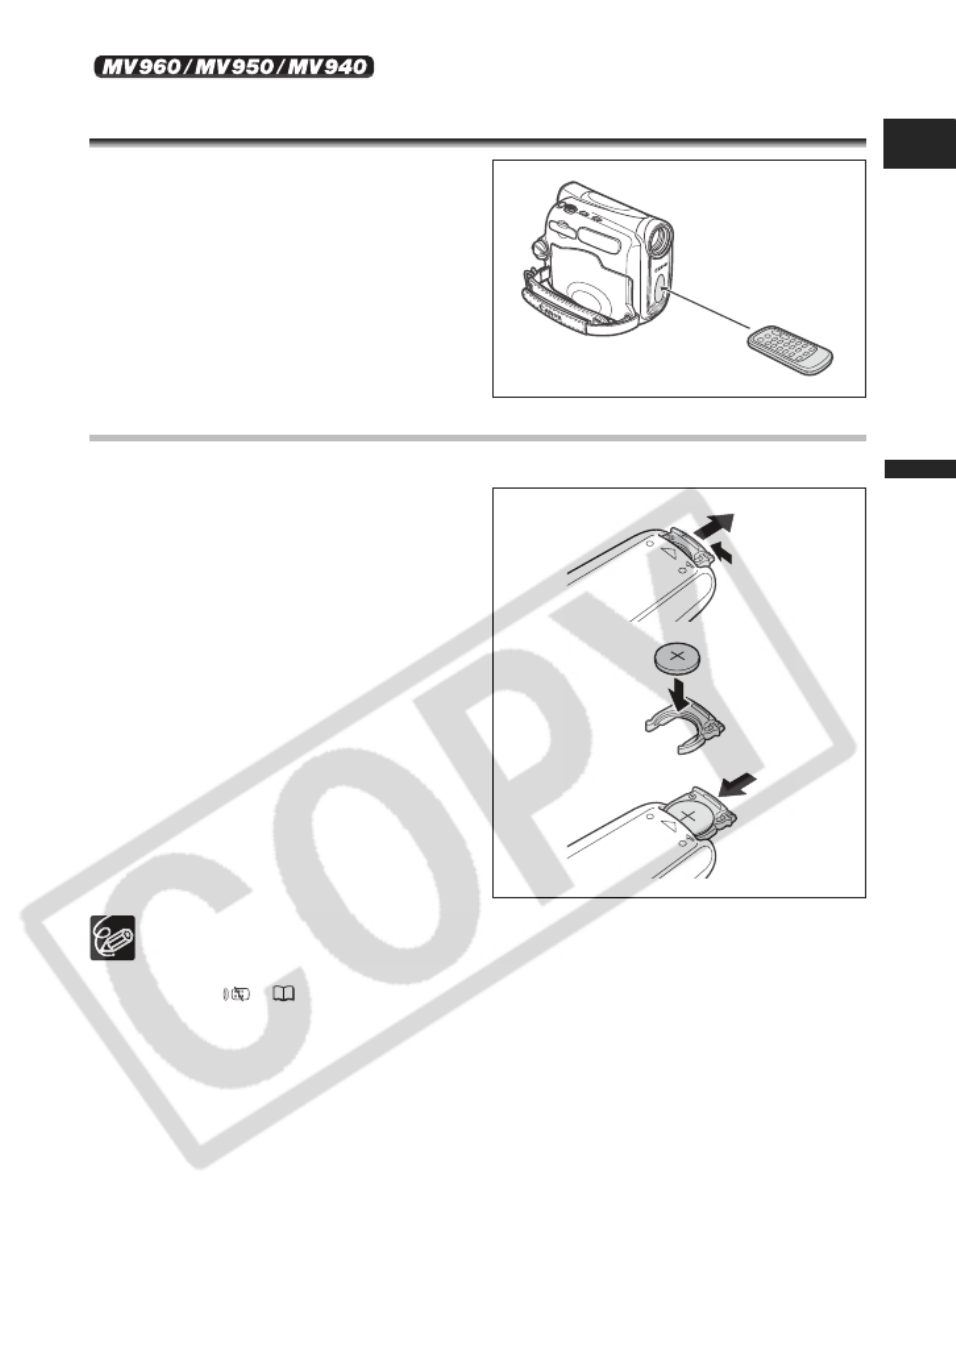
Using the Wireless Controller
Point it at the camcorder’s remote
sensor when you press the buttons.
Inserting the Battery
The wireless controller operates with a lithium button battery CR2025.
1. Pull out the battery holder.
2. Place the lithium button battery
with the + side facing up.
3. Insert the battery holder.
The wireless controller may not work properly when the remote sensor is
subjected to strong light sources or direct sunlight.
If the wireless controller does not work, check if the remote sensor is set to
[OFF ] ( 67).
When the camcorder cannot be operated with the wireless controller, or when it
can only be operated at a very close range, replace the battery.
19
Basic Functions
Preparations
E
Setting the Time Zone, Date and Time
Set the time zone, date and time when you first start using your camcorder, or when you
have replaced the backup battery.
Setting the Time Zone/Daylight Saving Time
1. Press the FUNC. button to open the FUNC. menu.
The FUNC. menu will open. Continue the procedure with the
joystick to open the setup menus.
2. With the joystick select ( ) the icon and press
( ).
3. Select ( ) the [DATE/TIME SETUP] menu and
press ( ). Then, select ( ) the [T.ZONE/DST]
option and press ( ).
The time zone setting appears (see table on the next page). The default setting is
Paris or Singapore depending on the region.
4. Select ( ) your time zone and press ( ).
To adjust for daylight saving time, select the time zone with the “ ” next to the area.
Setting the Date and Time
5. Select ( ) the [DATE/TIME] option and press ( ).
A selection frame will be displayed around the date and the
selection arrows around the day will flash.
6. With the joystick change ( ) the day as required
and move ( ) to the next field.
• The selection arrows will flash around the next field of the date/time.
• Set the month, year, hours and minutes in the same way.
• If you do not need to change all settings, you can use the joystick to move ( ) to
the specific setting you want to change.
7. Press ( ) to start the clock.
MENU
( 36)
DATE/
DATE/
DATE/
DATE/DATE/TIME
TIME
TIME
TIME TIME SETUP
SETUP
SETUP
SETUPSETUP T.ZON
T.ZON
T.ZON
T.ZONT.ZONE/DST
E/DST
E/DST
E/DSTE/DST PARI
PARI
PARI
PARI PARIS
S
S
SS
MENU
( 36)
DATE/
DATE/
DATE/
DATE/DATE/TIME
TIME
TIME
TIME TIME SETUP
SETUP
SETUP
SETUPSETUP DATE/
DATE/
DATE/
DATE/DATE/TIME
TIME
TIME
TIME TIME 1.JAN
1.JAN
1.JAN
1.JAN1.JAN.2006
.2006
.2006
.2006.2006
12:00
12:00
12:00
12:0012:00AM
AM
AM
AMAM

20
8. Press the FUNC. button to close the menu.
Time Zones and Difference from GMT/UTC.
Once you have set time zone, date and time, you do not need to reset the clock
each time you travel to another time zone. Just set the time zone to the one of
your destination, and the camcorder automatically adjusts the clock.
London GMT/UTC Wellington (WELLGTN) +12
Paris +1 Samoa -11
Cairo +2 Honolulu -10
Moscow +3 Anchorage -9
Dubai +4 Los Angeles (L.A.) -8
Karachi +5 Denver -7
Dacca +6 Chicago -6
Bankok +7 New York -5
Singapore +8 Caracas -4
Tokyo +9 Rio de Janeiro (RIO) -3
Sydney +10 Fernando de Noronha (FERNANDO) -2
Solomon +11 Azores -1

21
Basic Functions
Recording
E
Recording
Recording Movies on a Tape
Recording
1. Open the lens cover (move the
lens cover switch down to ).
2. Set the camcorder to
mode.
Set the switch to CAMERA and
the TAPE/CARD switch to .
3. Open the LCD panel.
4. Press the start/stop button to
begin recording.
Press the start/stop button again to pause
the recording.
When You Have Finished Recording
1. Turn the switch to .
2. Close the LCD panel.
3. Close the lens cover (move the lens cover switch
to ).
4. Unload the cassette.
5. Disconnect the power source.
Before You Begin Recording
Make a test recording first to check if the camcorder operates correctly. If necessary,
clean the video heads ( 114).
22
About the LCD and viewfinder screen: The screens are produced with
extremely high-precision manufacturing techniques, with more than
99.99% of the pixels operating to specification. Less than 0.01% of the
pixels may occasionally misfire or appear as black or green dots. This has
no effect on the recorded image and does not constitute a malfunction.
When powered by a battery pack, the camcorder shuts off to save power if
left without any operation for 5 minutes. Approximately 30 seconds before
the camcorder shuts off the message “ AUTO POWER OFF” will
appear. To continue recording, turn the switch to and then
back to CAMERA.
Wait until the tape counter stops completely before you start recording.
When you do not remove the cassette, you can record the next scene without
producing any noise or blank sections between the recordings even if you turn
the camcorder off.
Bright light may make it difficult to use the LCD screen. In such case, use the
viewfinder instead.
When recording near loud sounds (such as fireworks, drums or concerts),
sound may become distorted or may be recorded not in the actual sound level.
This is not a malfunction.
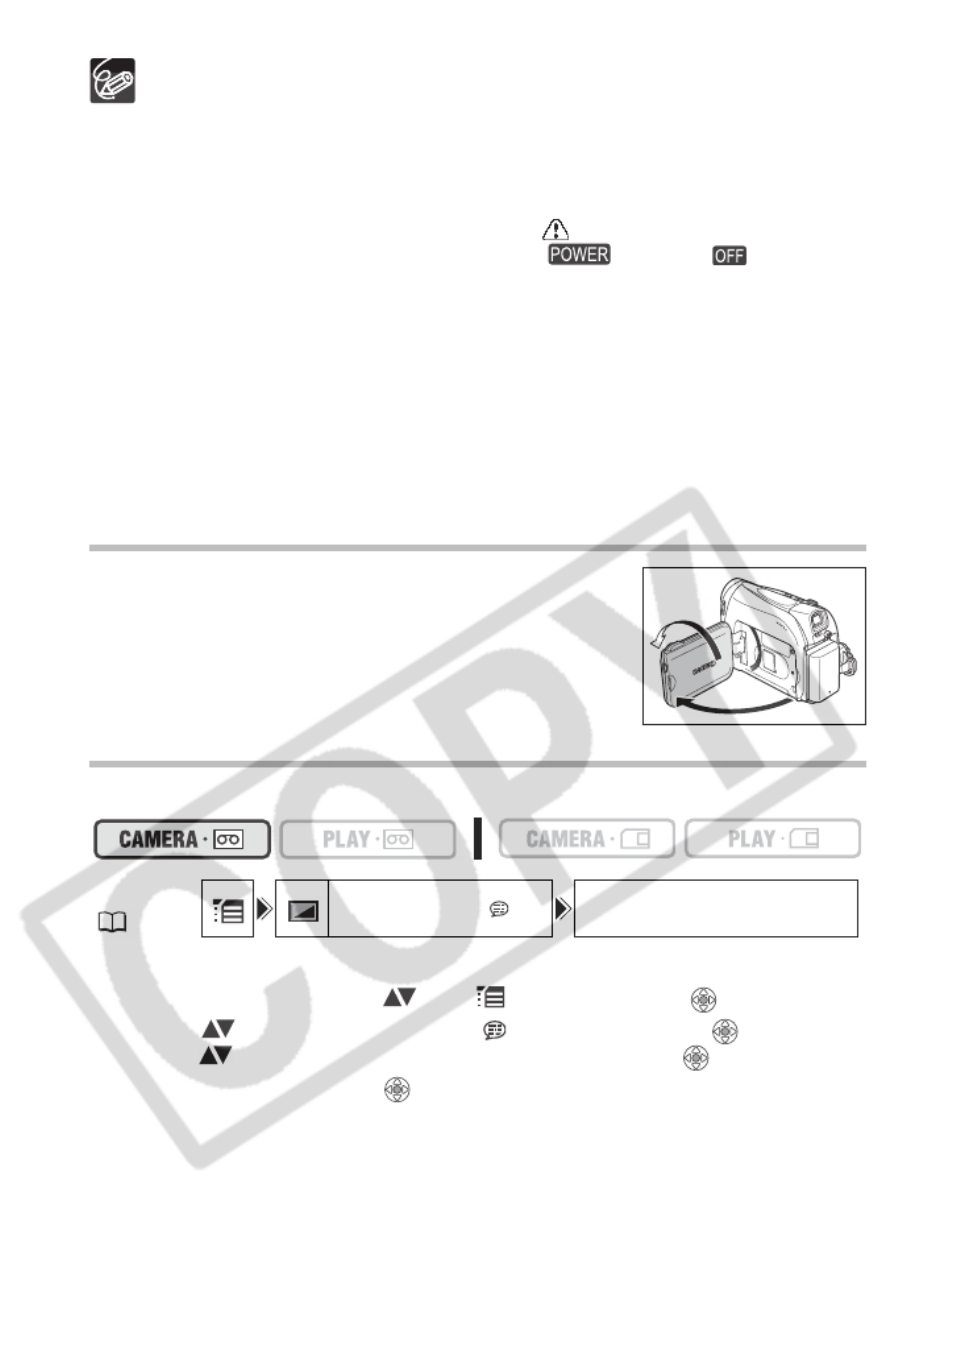
Allowing the Subject to Monitor the LCD Screen
You can rotate the LCD panel so that the screen faces in the
same direction as the lens. The viewfinder switches on allowing
you to use the viewfinder while the subject can monitor the
screen.
Displaying the Level Marker
Use the level marker as a horizontal guideline to frame subjects more accurately.
1. Press the FUNC. button to open the FUNC. menu.
2. With the joystick select ( ) the icon and press ( ).
3. Select ( ) the [DISPLAY SETUP/ ] menu and press ( ). Then,
select ( ) the [LEVEL MARKER] option and press ( ).
4. Set it to [ON] and press ( ) to save the changes.
5. Press the FUNC. button to close the menu.
The level marker will appear.
MENU
( 36)
DISPL
DISPL
DISPL
DISPLDISPLAY SE
AY SE
AY SE
AY SEAY SETUP/
TUP/
TUP/
TUP/TUP/ LEVEL
LEVEL
LEVEL
LEVELLEVEL MARK
MARK
MARK
MARK MARKER OF
ER OF
ER OF
ER OFER OFF
F
F
FF
23
Basic Functions
Recording
E
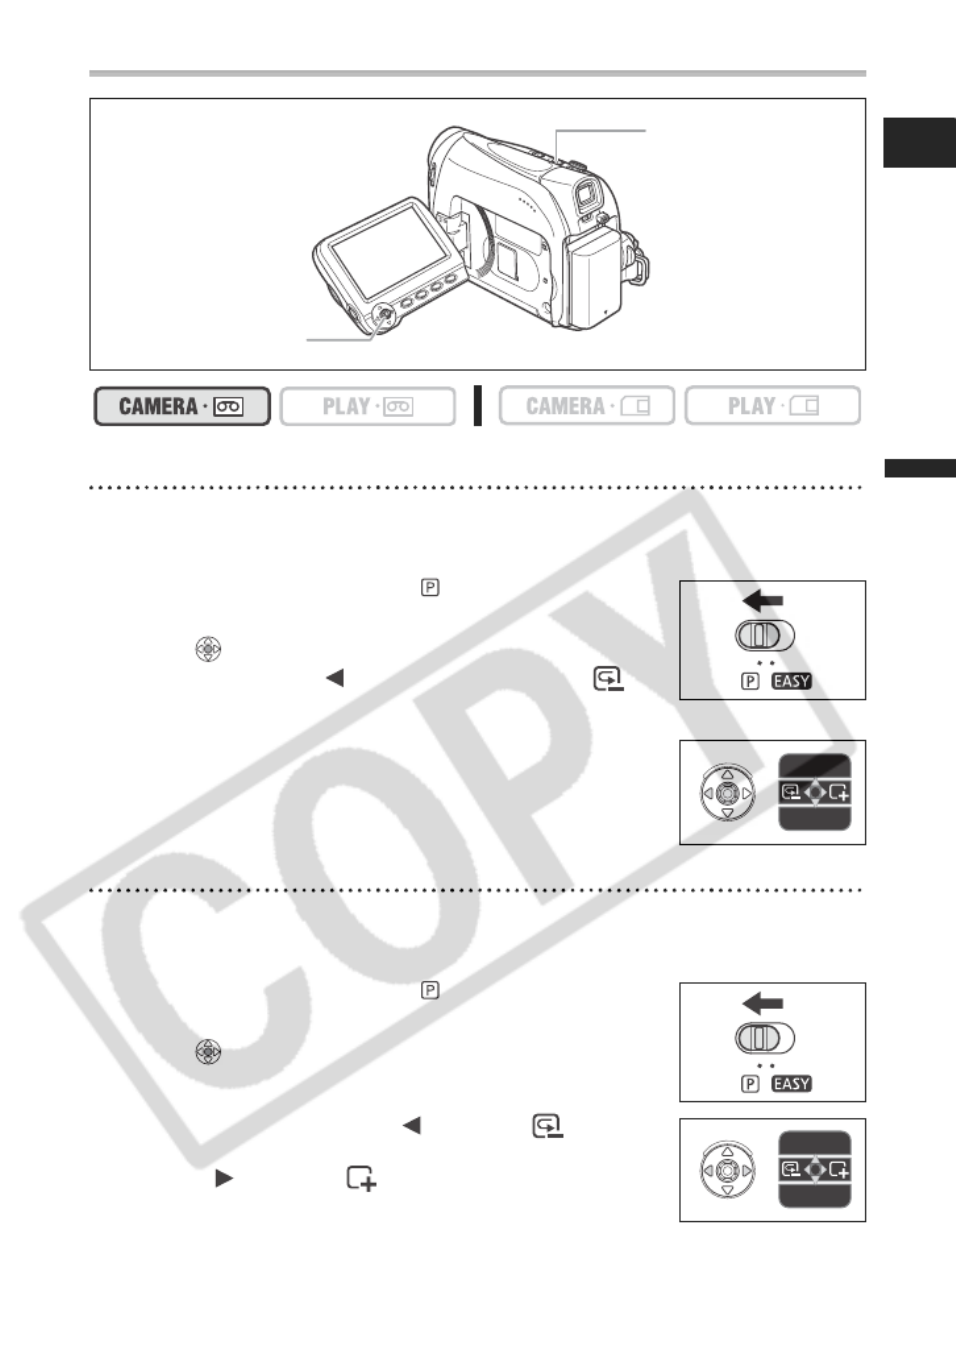
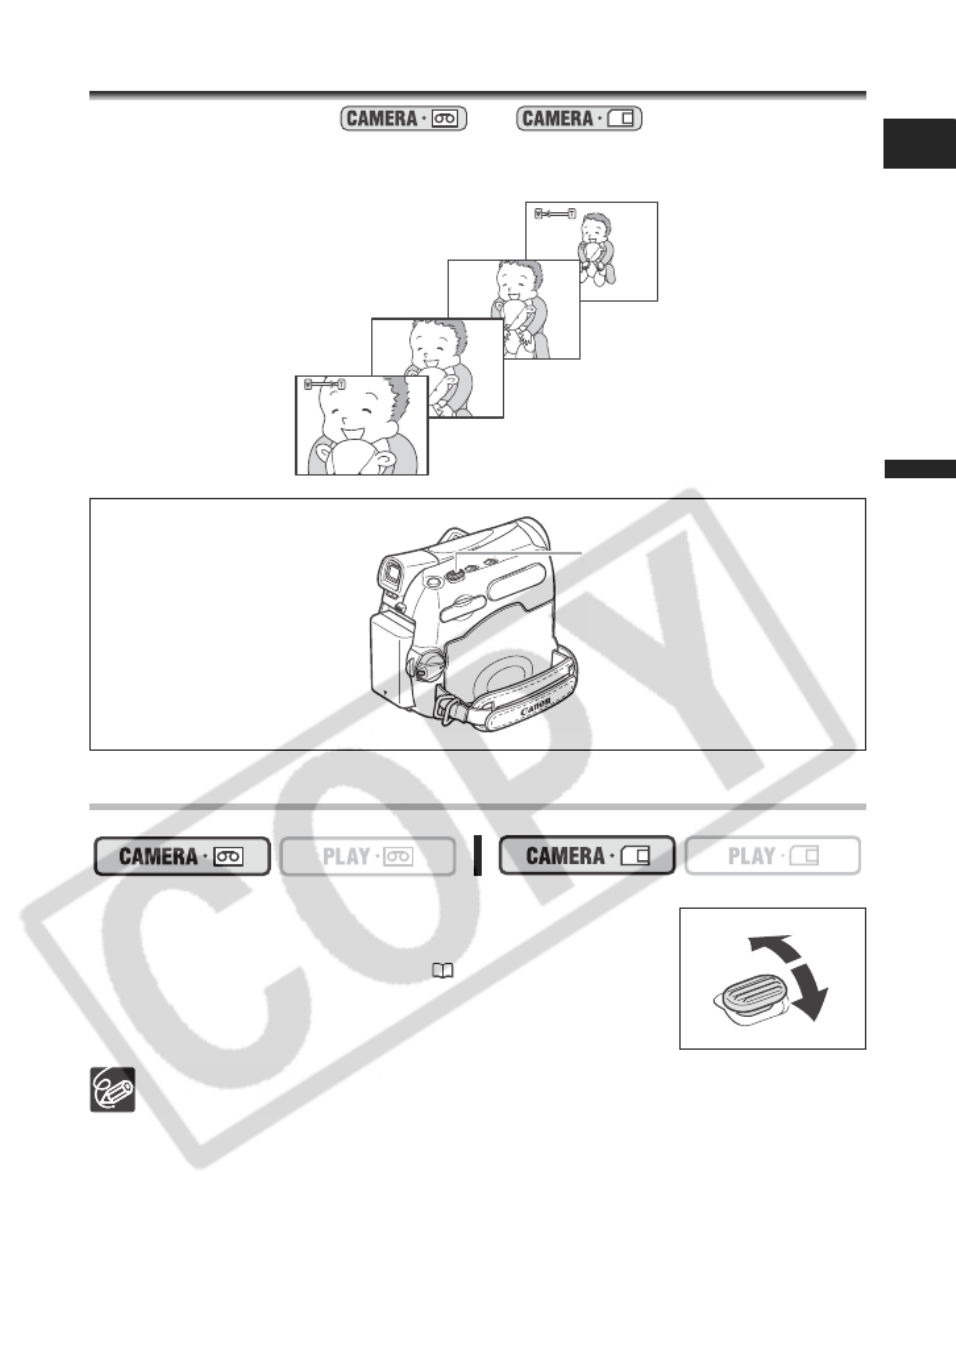
Reviewing and Searching when Recording
Record Review
In record pause mode, this function allows you to review the last few seconds of your
recording to check if it has been recorded properly.
1. Set the program selector to .
2. If the joystick guide does not appear on screen,
press ( ) to display it.
3. Push the joystick ( ) momentarily towards and
release it.
The camcorder rewinds the tape, plays back the last few
seconds, and returns to record pause mode.
Record Search
In record pause mode, this function allows you to play back the tape (forward or reverse)
to locate the point where you wish to begin recording.
1. Set the program selector to .
2. If the joystick guide does not appear on screen,
press ( ) to display it.
3. Hold the joystick pushed ( ) towards to search
back towards the beginning of the recording or
pushed ( ) towards to search forward towards
the end of the recording.
• Release the joystick at the point where you wish to begin recording.
• The camcorder returns to record pause mode.
Joystick
Program selector
EXP
FOCUS
EXP
FOCUS
24
When the camcorder shuts off automatically, the record review and record search
functions will not work. To resume normal operation turn the switch to
and then back to CAMERA.
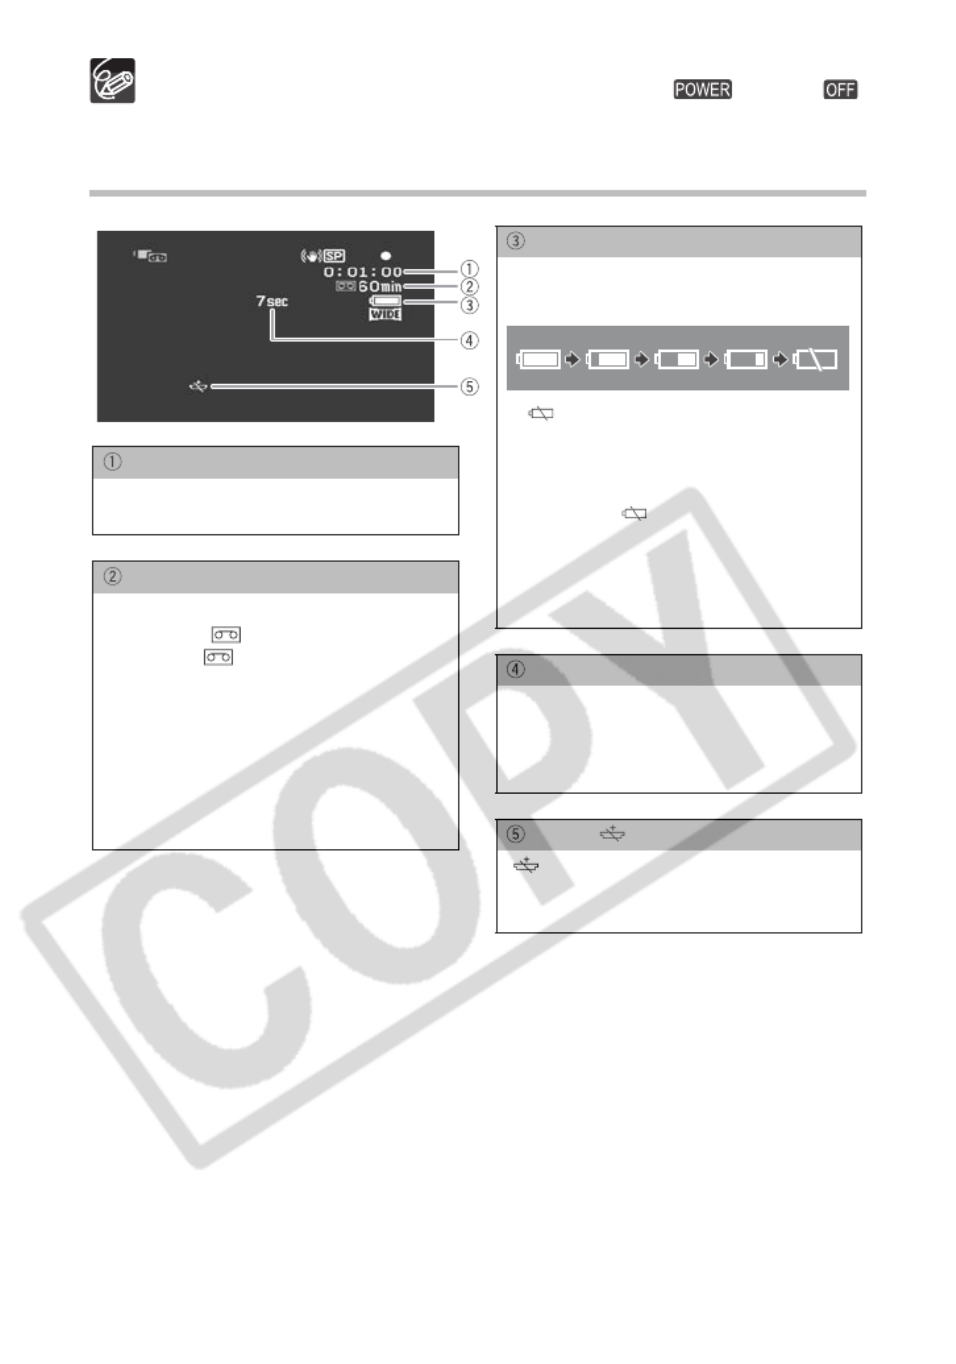
Screen Displays during Recording
Time Code
Indicates the recording time in hours,
minutes and seconds.
Remaining tape
Indicates the remaining time of the tape
in minutes. “ ” moves during
recording. “ END” flashes when the
tape reaches the end.
• When the time left is less than 15
seconds, the remaining tape time may
not appear.
• Depending on the type of the tape, the
indication may not be displayed
correctly.
Remaining battery charge
The battery symbol indicates the charge
status of the battery pack.
• “ ” starts flashing in red when the
battery pack is empty.
• When you attach an empty battery
pack, the power may turn off without
displaying “ ”.
• The actual battery charge may not be
indicated accurately depending on the
conditions under which the battery
pack and the camcorder are used.
Recording reminder
The camcorder counts from 1 to 10
seconds when you start recording. This
is helpful to avoid scenes that are too
short.
When “ ” flashes
“ ” flashes in red when the lithium
button battery is not installed, or when it
needs replacing.
25
Basic Functions
Recording
E
Zooming
The zoom is available in the and modes. When recording
on the tape, in addition to the 25x optical zoom you can also use the digital zoom.
25x Optical Zoom
Move the zoom lever toward Wto zoom out (wide-
angle). Move it toward T to zoom in (telephoto).
You can also change the zoom speed ( 27).
You can also use the T
and W
buttons on the wireless controller. The zoom
speed with the wireless controller will be the same as with the camcorder (when
one of the fixed zoom speed levels is selected) or fixed at [SPEED 3] (when
[VARIABLE] is selected).
Keep at least 1 m to the subject. At wide-angle, you can focus on a subject as
close as 1 cm.
The zoom speed is slightly faster in record pause mode.
Zoom out
Zoom in
Zoom lever

26
Digital Zoom
When the digital zoom is activated, the camcorder automatically switches between optical
and digital zoom. With digital zoom, image resolution becomes lower the more you zoom
in.
1. Press the FUNC. button to open the FUNC. menu.
2. With the joystick select ( ) the icon and press
( ).
3. Select ( ) the [CAMERA SETUP] menu and press ( ). Then, select
( ) the [D.ZOOM] option and press ( ).
4. Select either [100x] or [1000x] ( ) or [800x]
( ) and press ( ) to save the changes.
5. Press the FUNC. button to close the menu.
Digital zoom cannot be used in the Night recording program.
A zoom indicator appears for 4 seconds. It extends in light blue when the digital
zoom is set to 100x, and extends further in dark blue when set to 1000x
( ) or 800x ( ).
100x/1000x digital zoom 100x/800x digital zoom
MENU
( 36)
CAMER
CAMER
CAMER
CAMERCAMERA SETU
A SETU
A SETU
A SETUA SETUP
P
P
PP D.ZOO
D.ZOO
D.ZOO
D.ZOOD.ZOOM OFF
M OFF
M OFF
M OFFM OFF
27
Basic Functions
Recording
E
Selecting the Zoom Speed
You can set the zoom speed to variable or to one of 3 levels of fixed zoom speeds. When
set to [VARIABLE], the zoom speed depends on how you activate the zoom lever. Press
softly for a slower zoom or press more strongly for a faster zoom.
1. Press the FUNC. button to open the FUNC. menu.
2. With the joystick select ( ) the icon and press
( ).
3. Select ( ) the [CAMERA SETUP] menu and press
( ). Then, select ( ) the [ZOOM SPEED] option
and press ( ).
4. Select a setting option and press ( ) to save the changes.
5. Press the FUNC. button to close the menu.
The fastest zoom speed can be achieved with the [VARIABLE] setting. Among the
fixed zoom speeds [SPEED 3] is the fastest, and [SPEED 1] the slowest.
MENU
( 36)
CAMER
CAMER
CAMER
CAMERCAMERA SET
A SET
A SET
A SETA SETUP
UP
UP
UPUP ZOOM
ZOOM
ZOOM
ZOOM ZOOM SPEED
SPEED
SPEED
SPEEDSPEED VARIAB
VARIAB
VARIAB
VARIAB VARIABLE
LE
LE
LELE

28
Tips for Making Better Videos
Holding the Camcorder
For maximum stability, grip the camcorder in your right hand and keep your
right elbow pressed against your body. If necessary, support the camcorder
with your left hand. Be careful that your fingers do not touch the microphone
or lens.
For More Stability
Lighting
When recording outdoors, we
recommend recording with the sun at
your back.
When using a tripod, do not leave the viewfinder exposed to direct sunlight as it
may melt (due to concentration of the light by the lens).
Do not use tripods with fastening
screws longer than 5.5 mm as it
may damage the camcorder. The
camcorder cannot be mounted on
tripods with fixed (non-retractable)
camera positioning pins.
Lean against a wall Put the camcorder on a table
Lie on your elbow
Kneel on one knee Use a tripod
Camera positioning pin
29
Basic Functions
Playback
E
Playback
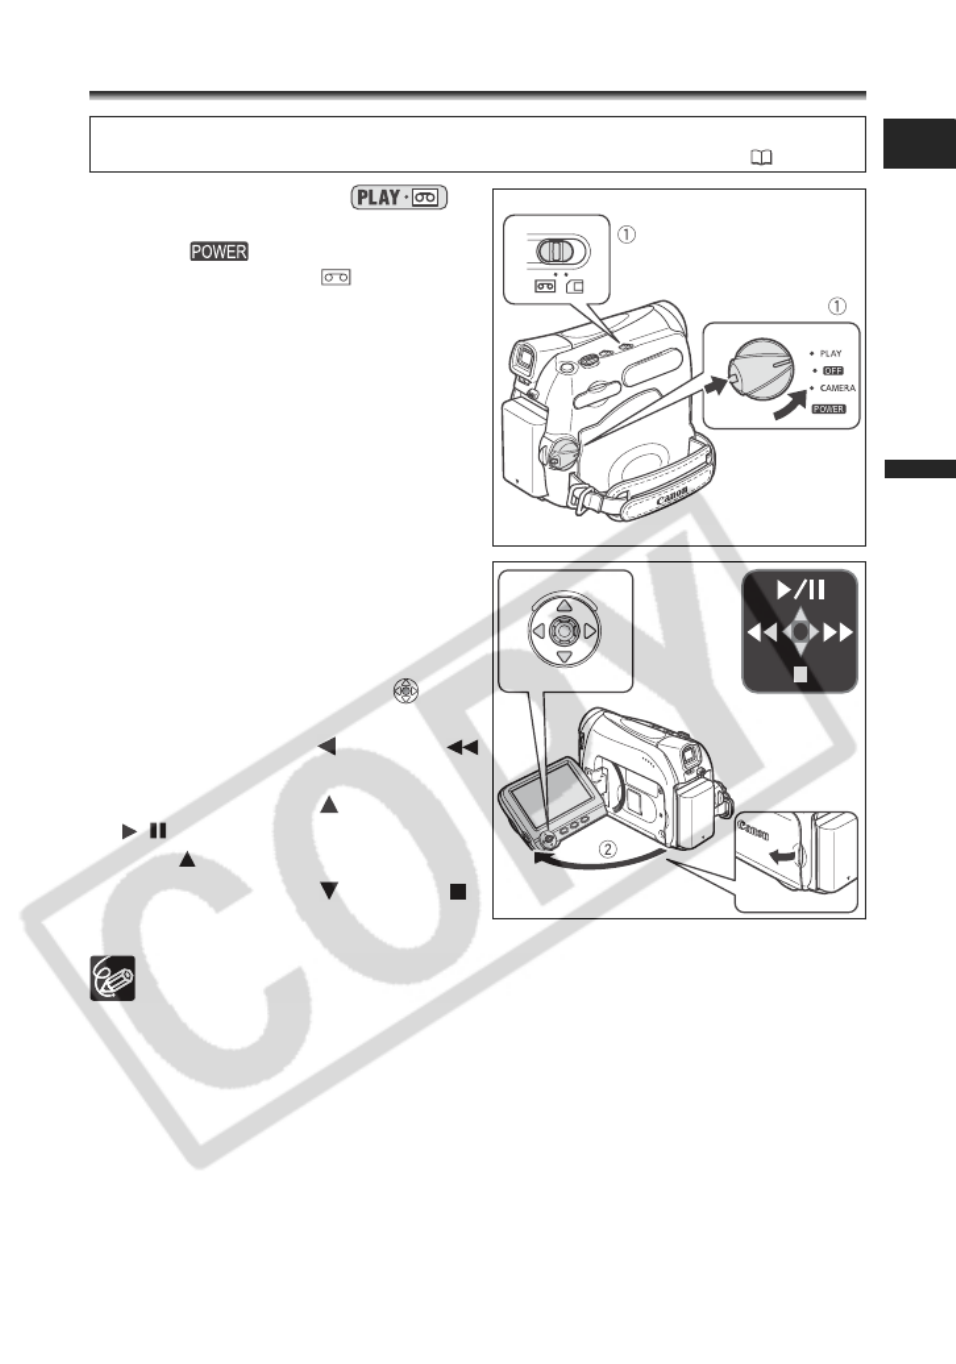
Playing Back a Tape
1. Set the camcorder to
mode.
Set the switch to PLAY and the
TAPE/CARD switch to .
2. Open the LCD panel.
You can also close the LCD panel with the
screen facing out.
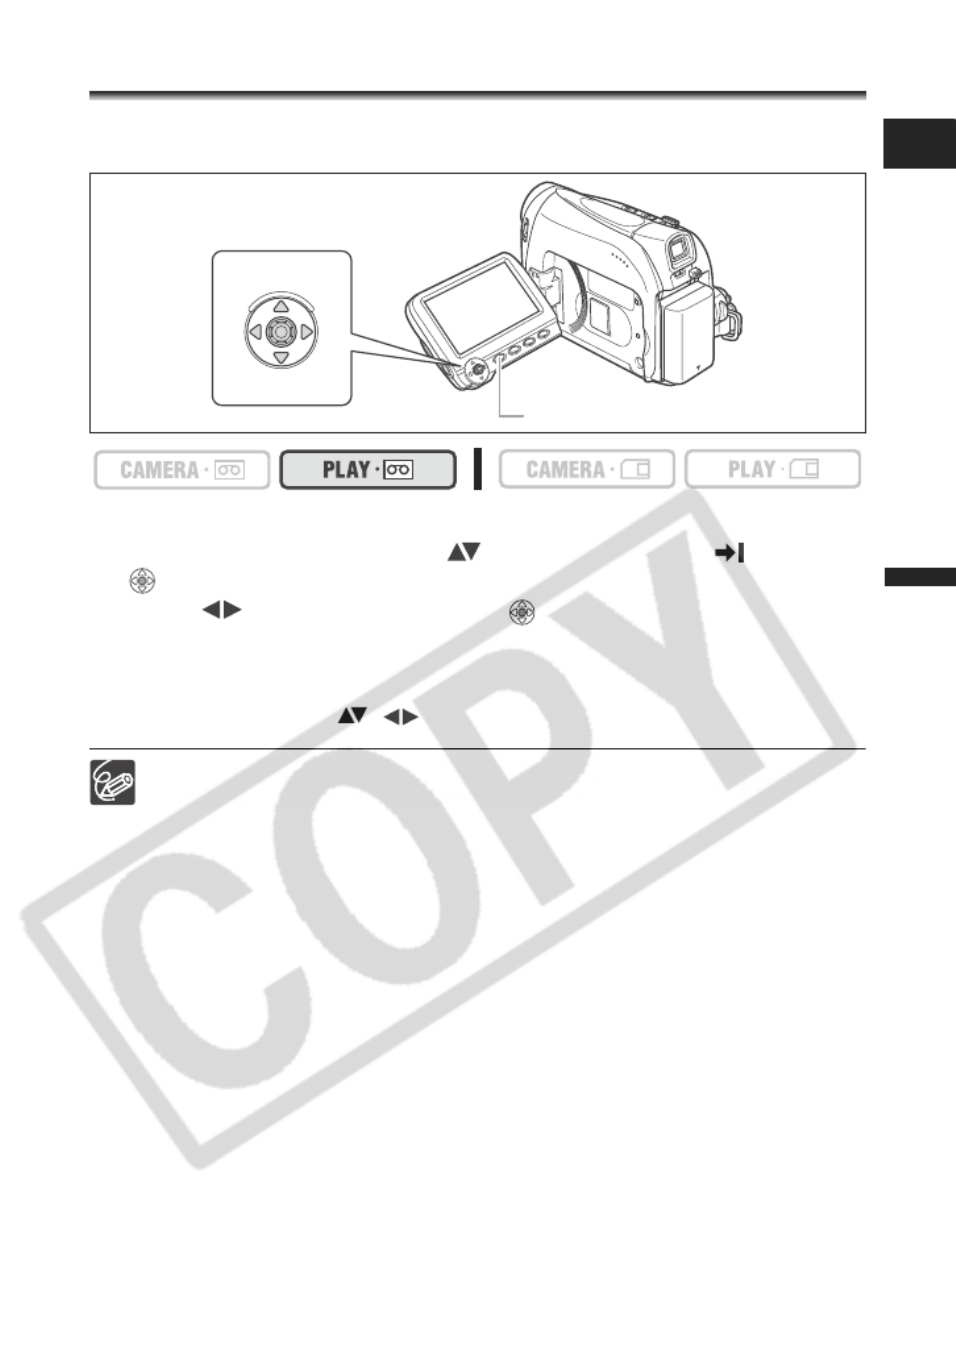
3. If the joystick guide does not
appear on screen, press ( ) to
display it.
4. Push the joystick ( ) towards
to rewind the tape.
5. Push the joystick ( ) towards
/ to play back the tape.
Push ( ) again to pause the playback.
6. Push the joystick ( ) towards
to stop the playback.
To use the viewfinder, close the LCD panel.
About the screen display: During playback, the time code gives the hours,
minutes, seconds and frames. The remaining tape time may not appear when
the time left is less than 15 seconds.
If the playback picture is distorted, clean the video heads using a Canon Head Cleaning
Cassette or a commercially available digital video head-cleaning cassette ( 114).
Joystick
30
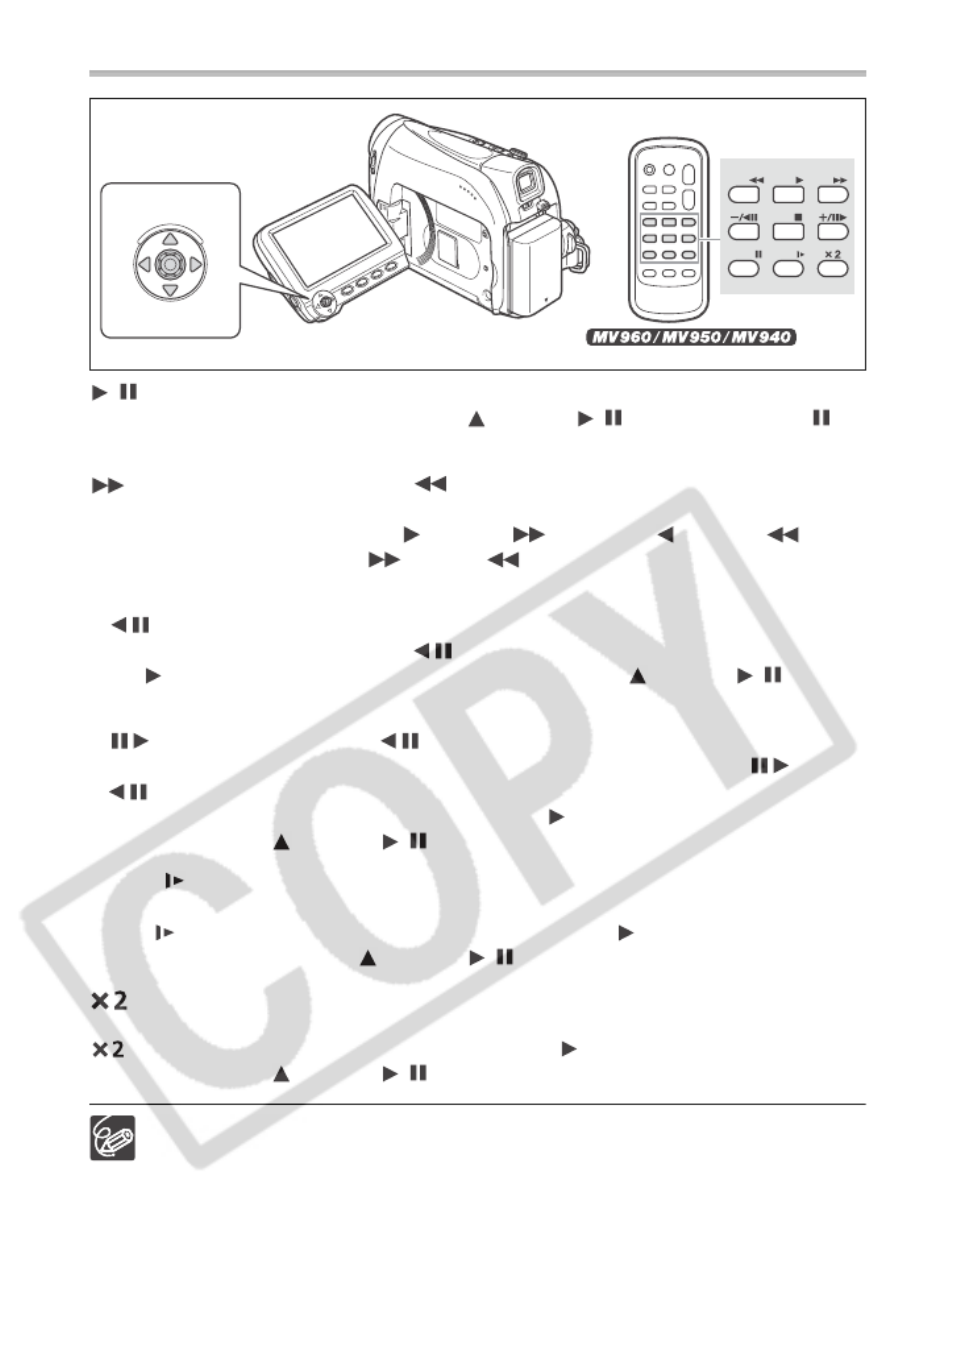
Special Playback Modes
/ (Playback Pause)
During normal playback, push the joystick ( ) towards / or press the PAUSE
button on the wireless controller.
(Fast Forward Playback) / (Rewind Playback)
Plays back the tape at 11.5 times normal speed (forward or reverse). During normal
playback, hold the joystick pushed ( ) towards or pushed ( ) towards . You
can also press and hold the FF or REW button on the wireless controller
instead. Release the joystick or wireless controller button to return to normal playback.
–/ (Reverse Playback)
During normal playback, press the –/ button on the wireless controller. Press the
PLAY button on the wireless controller or push the joystick ( ) towards / to return
to normal playback.
+/ (Frame Advance) / –/ (Frame Reverse)
Plays back frame-by-frame. During playback pause, repeatedly press the +/ or
–/ button on the wireless controller. Hold the button pressed down to play back in
continuous frame advance/reverse. Press the PLAY button on the wireless controller
or push the joystick ( ) towards / to return to normal playback.
SLOW (Slow Forward)/(Slow Reverse)
Plays back at about 1/3 normal speed. During normal or reverse playback, press the
SLOW button on the wireless controller. Press the PLAY button on the wireless
controller or push the joystick ( ) towards / to return to normal playback.
(Forward p30-x2 Playback)/(Reverse p30-x2 Playback)
Plays back at 2 times the normal speed. During normal or reverse playback, press the
button on the wireless controller. Press the PLAY button on the wireless controller
or push the joystick ( ) towards / to return to normal playback.
There is no sound during special playback.
The picture may become distorted during some special playback modes.
The camcorder stops the tape automatically after 5 minutes in playback pause
to protect the tape and video heads.
REW PLAY FF
STOP
PAUSE SLOW
Joystick
Wireless controller
31
Basic Functions
Playback
E
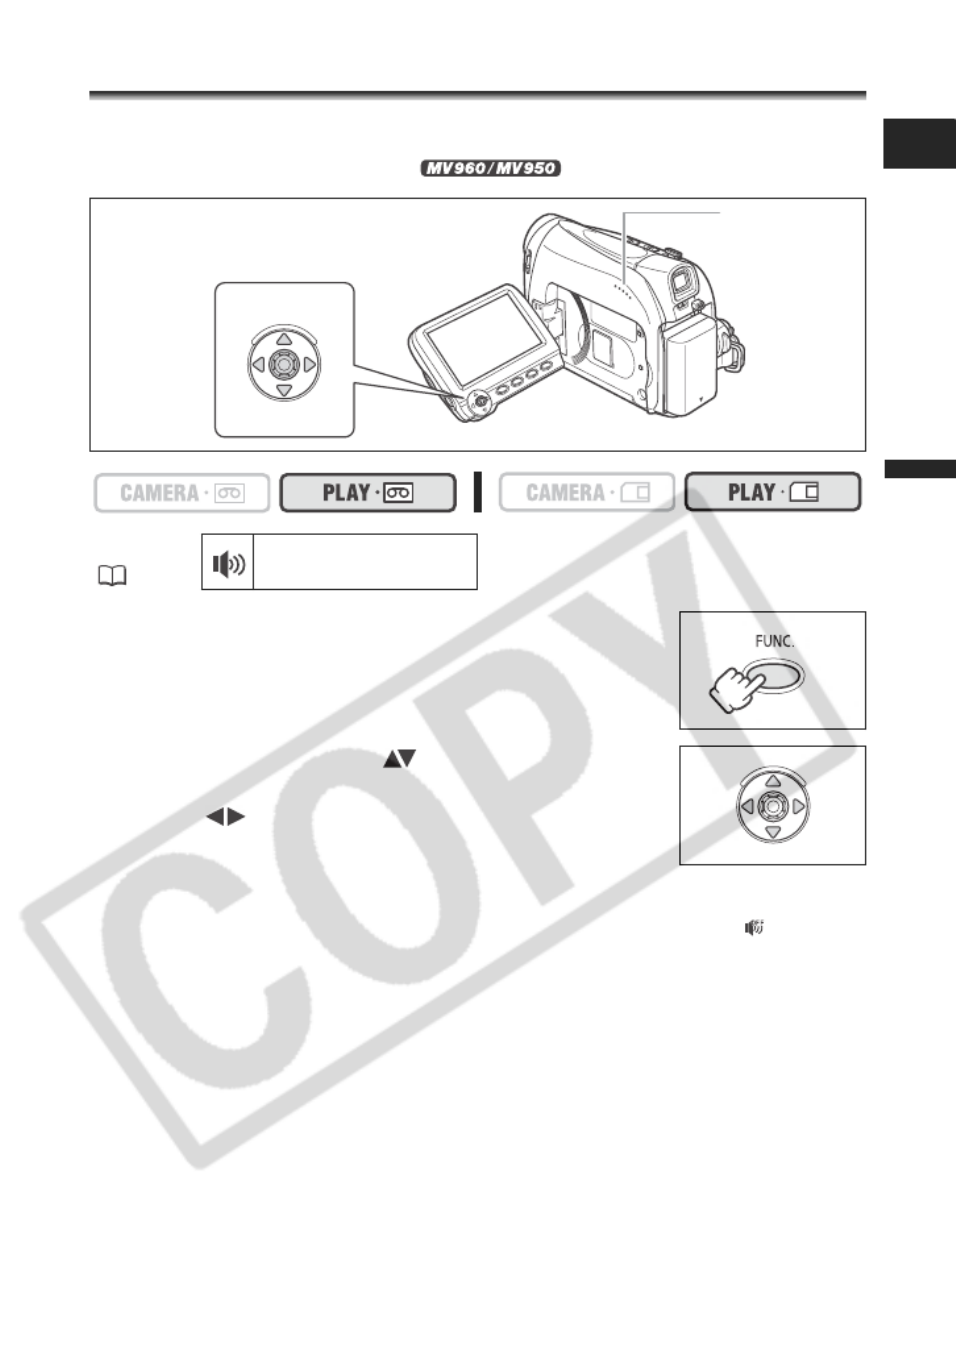
Adjusting the Volume
When you use the LCD screen for playback, the camcorder plays back the sound using
the built-in speaker. The sound will be muted when the LCD panel is closed or when there
is a video input from the AV terminal ( only).
1. Press the FUNC. button to open the FUNC. menu.
2. With the joystick select ( ) the speaker volume
icon.
3. Adjust ( ) the volume as required.
4. Press the FUNC. button to save the setting and close
the menu.
If you turn off the volume completely the volume display will change to “ ”.
MENU
( 36)
SPEAK
SPEAK
SPEAK
SPEAKSPEAKER VOL
ER VOL
ER VOL
ER VOLER VOLUME
UME
UME
UMEUME
Speaker
Joystick
32
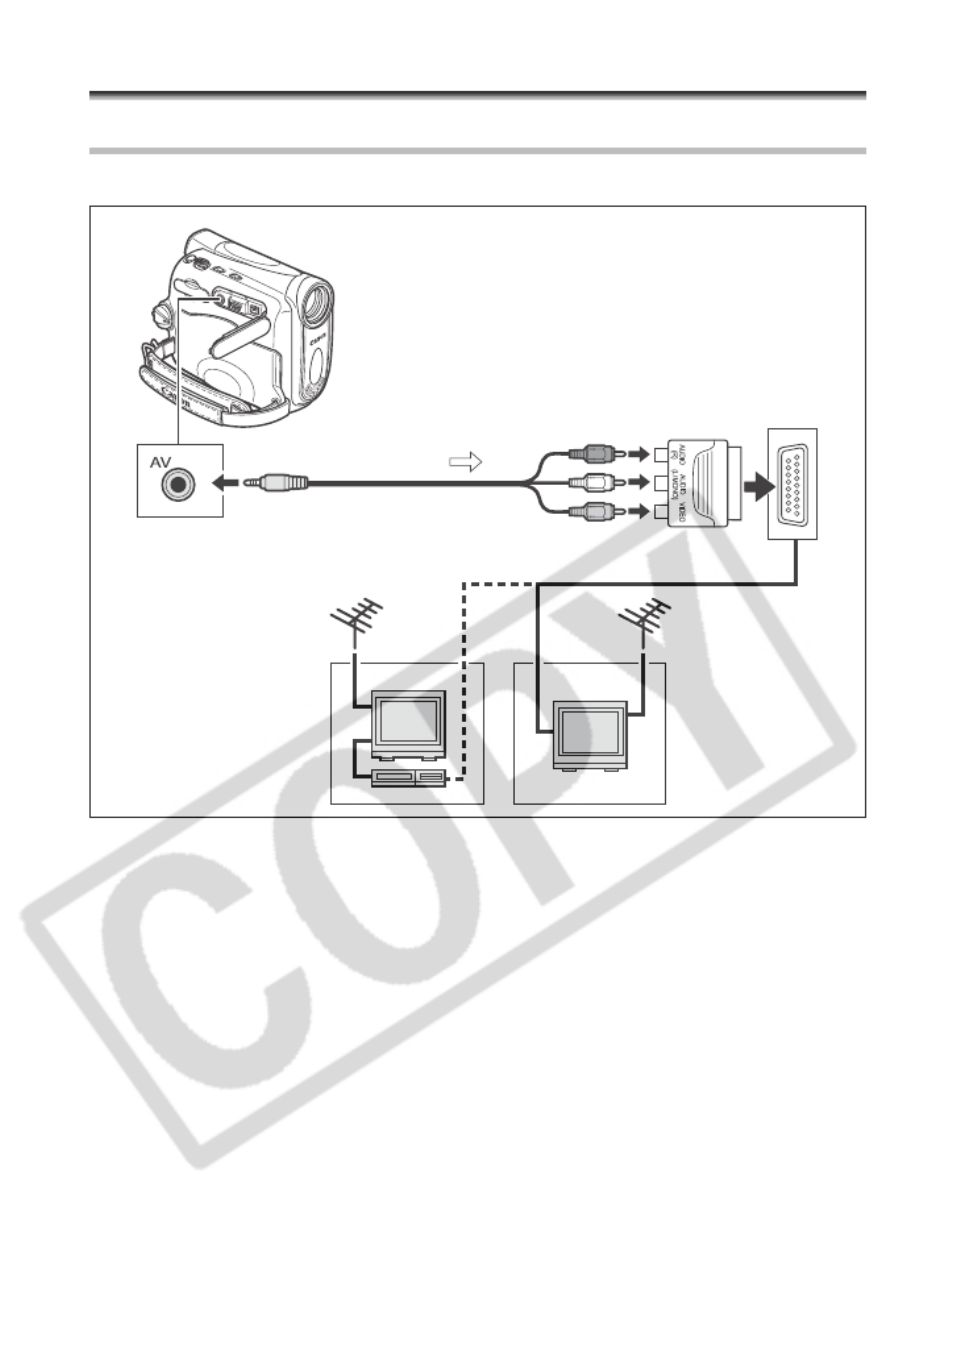
Playing Back on a TV Screen
TVs with SCART Terminal
Refer also to the TV or VCR instruction manual.
1. Turn off all the devices before starting the connections.
2. Connect the PC-A10 SCART Adapter to the TV or VCR’s SCART
terminal.
3. Connect the STV-250N Stereo Video Cable to the camcorder’s AV
terminal and the audio terminals on the SCART Adapter.
Connect the white plug to the white AUDIO terminal L (left), and the red plug to the red
AUDIO terminal R (right) and the yellow plug to the yellow VIDEO terminal.
4. If connecting to a TV, set the input selector to VIDEO. If connecting to
a VCR, set the input selector to LINE.
Signal flow
STV-250N Stereo Video
Cable (supplied)
Open the terminal cover
PC-A10 SCART
Adapter

33
Basic Functions
Playback
E
TVs with Audio/Video Terminals
Refer also to the TV or VCR instruction manual.
1. Turn off all the devices before starting the connections.
2. Connect the STV-250N Stereo Video Cable to the camcorder’s AV
terminal and the audio/video terminals on the TV/VCR.
Connect the white plug to the white audio terminal L (left), the red plug to the red audio
terminal R (right) and the yellow plug to the yellow video terminal VIDEO.
3. If connecting to a TV, set the input selector to VIDEO. If connecting to
a VCR, set the input selector to LINE.
We recommend powering the camcorder from a household power source.
Signal flow
STV-250N Stereo Video Cable
(supplied)
Open the terminal cover

34
Selecting the Type of TV
During playback set the [TV TYPE] option according to the TV set to which you connect
the camcorder.
1. Press the FUNC. button to open the FUNC. menu.
2. With the joystick select ( ) the icon and press
( ).
3. Select ( ) the [VCR SETUP] menu and press ( ).
Then, select ( ) the [TV TYPE] option and press
( ).
4. Select a setting option and press ( ) to save the changes.
• WIDE TV: TV sets with 16:9 aspect ratio.
• NORMAL TV: TV sets with 4:3 aspect ratio
5. Press the FUNC. button to close the menu.
Playing back recordings made in the widescreen mode on a normal TV: If the
TV type is set to [NORMAL TV] the recording will be played back in “letterbox”
display. If the TV type is set to [WIDE TV] the image will appear horizontally
squeezed.
If you connect the camcorder to a TV with Video ID-1 system, recordings made
in the widescreen mode will be automatically played back in widescreen mode.
When the TV type is set to [NORMAL TV] the digital effects are not available in
mode.
MENU
( 36)
VCR S
VCR S
VCR S
VCR SVCR SETUP
ETUP
ETUP
ETUPETUP TV TY
TV TY
TV TY
TV TYTV TYPE WI
PE WI
PE WI
PE WIPE WIDE T
DE T
DE T
DE TDE TV
V
V
VV

35
Basic Functions
Playback
E
Selecting the Audio Output Channel
You can select the output channels when playing back a tape with audio recorded on two
channels.
1. Press the FUNC. button to open the FUNC. menu.
2. With the joystick select ( ) the icon and press
( ).
3. Select ( ) the [AUDIO SETUP] menu and press
( ). Then, select ( ) the [OUTPUT CH] option and
press ( ).
4. Select ( ) a setting option and press ( ) to save the changes.
• L/R: Stereo: L+R channels, Bilingual: Main+Sub.
• L/L: Stereo: L channel, Bilingual: Main.
• R/R: Stereo: R channel, Bilingual: Sub.
5. Press the FUNC. button to close the menu.
The setting resets to the [L/R] setting when you turn the camcorder off.
MENU
( 36)
AUDIO
AUDIO
AUDIO
AUDIOAUDIO SETU
SETU
SETU
SETU SETUP
P
P
PP OUTPU
OUTPU
OUTPU
OUTPUOUTPUT CH
T CH
T CH
T CH T CH L/R
L/R
L/R
L/RL/R
36
Advanced Functio ns
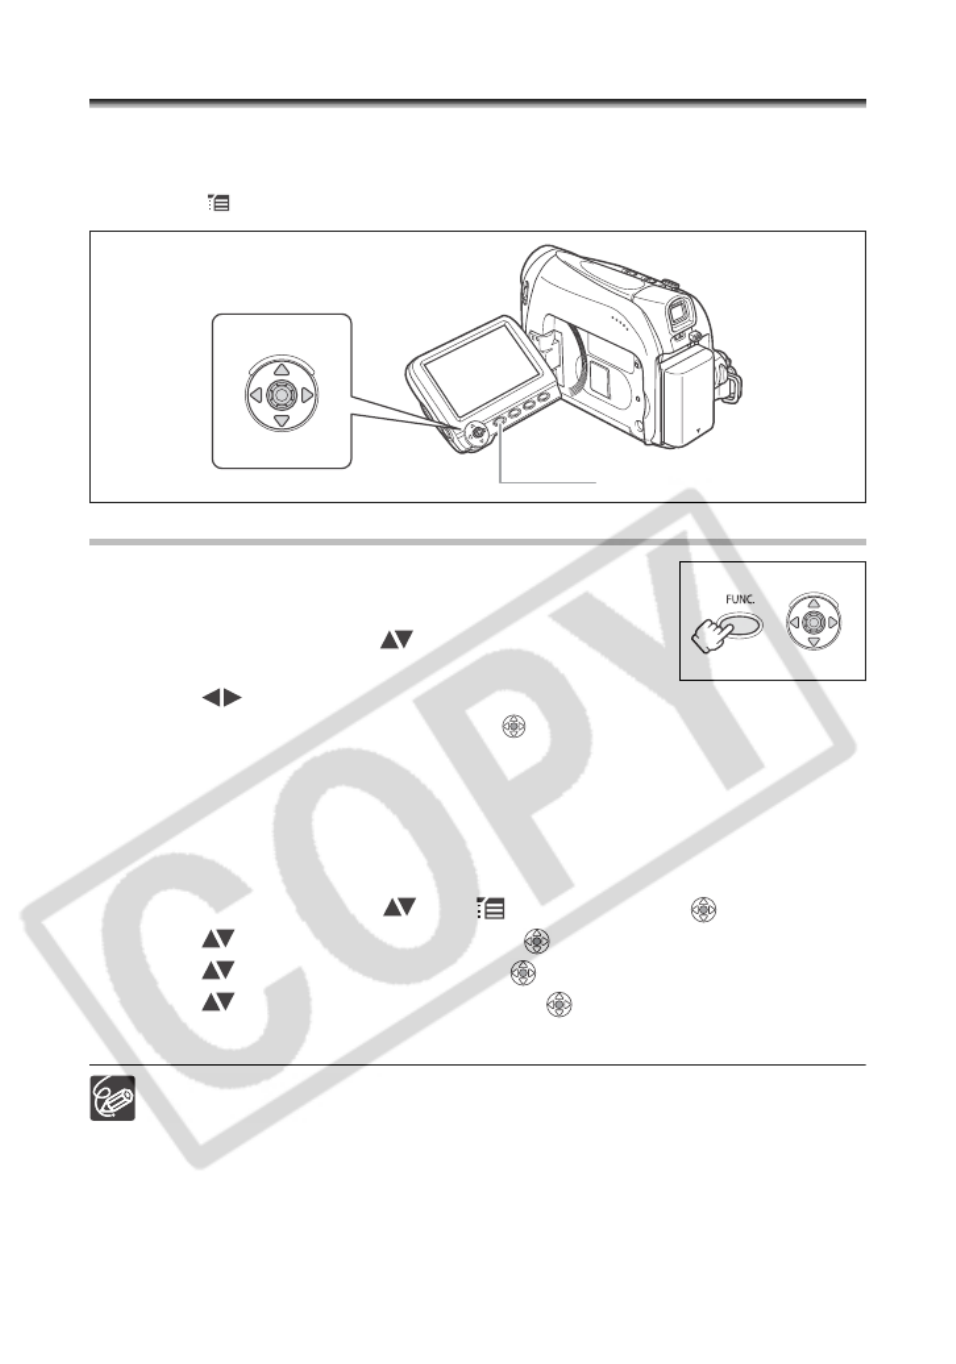
Menus and Settings
The camcorder’s functions and settings are controlled from a series of menus that appear
when you press the FUNC. button. Most basic functions appear on the first menu screen
- the FUNC. menu. For more advanced settings you have to open the setup menus by
selecting the [MENU] option from the FUNC. menu.
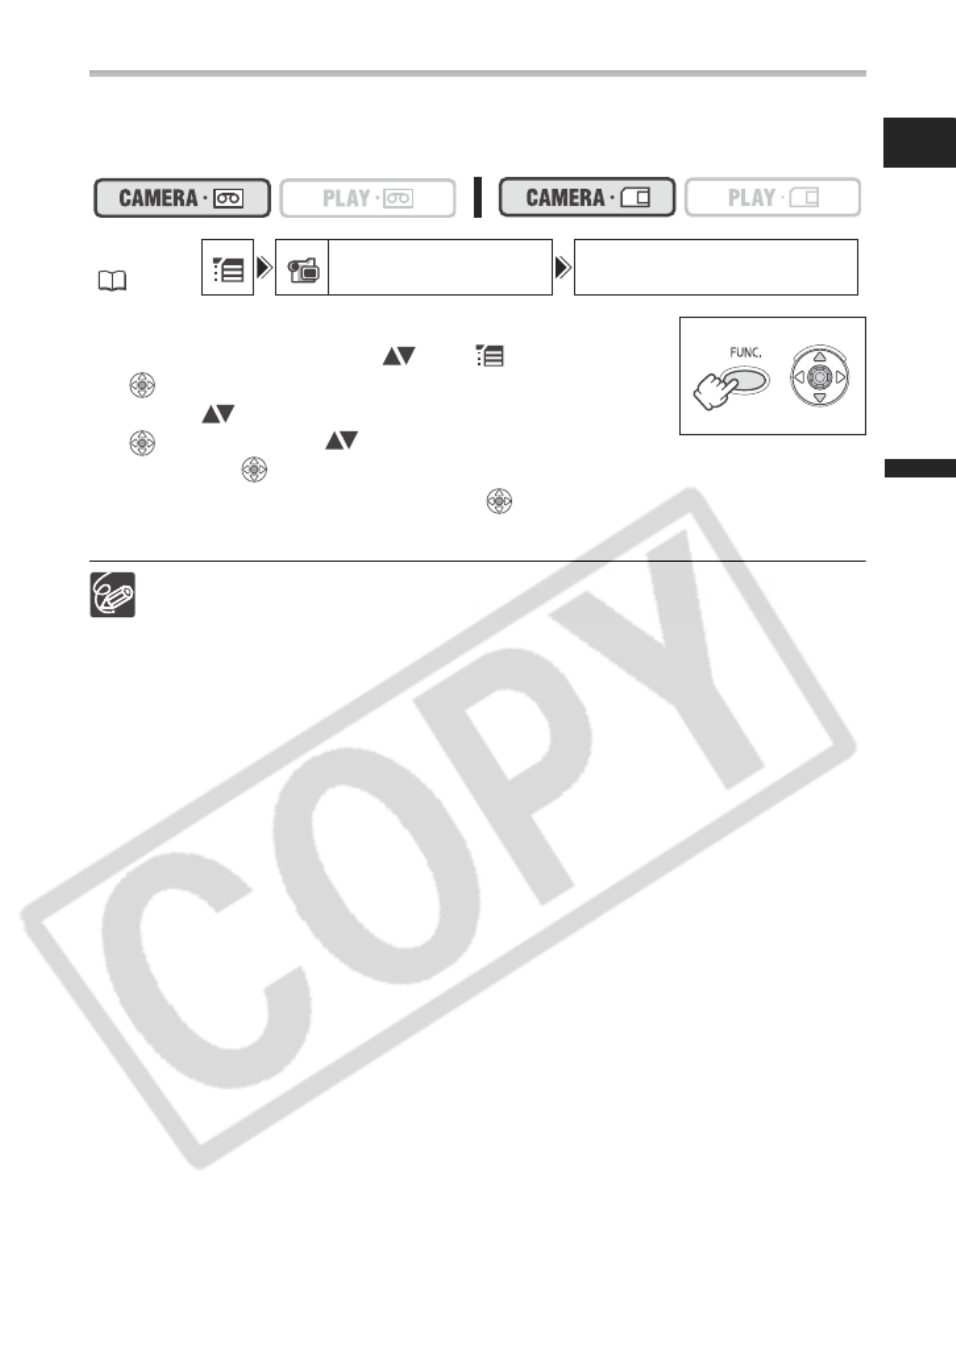
Selecting Menus and Settings
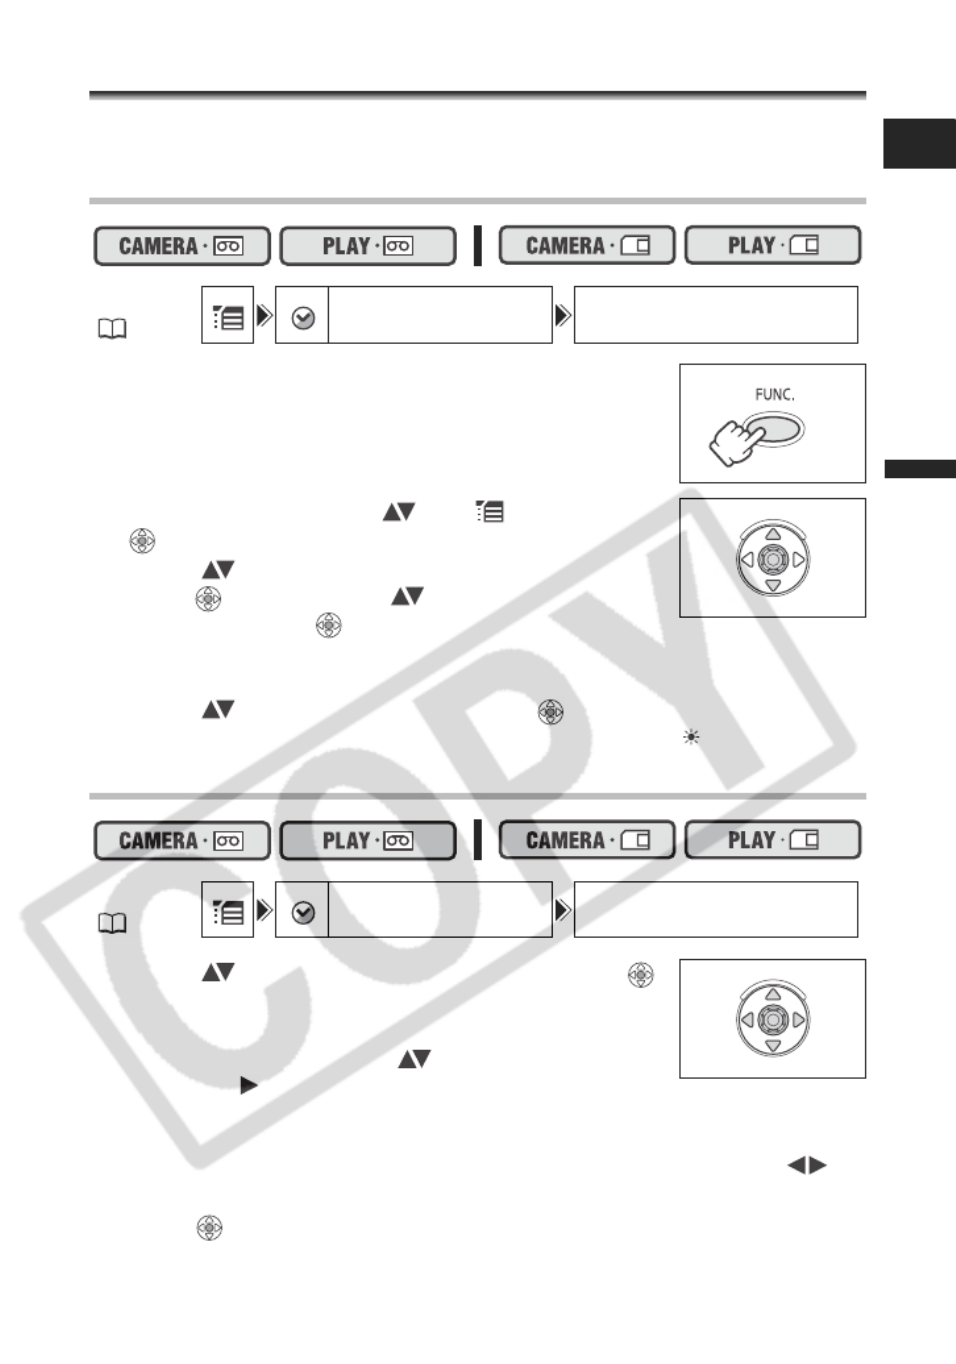
FUNC. menu:
1. Press the FUNC. button to open the FUNC. menu.
2. With the joystick select ( ) the icon of the function
you want to change.
3. Select ( ) a setting option from the bottom bar.
With some settings, you will need to press ( ) or make further selections with the
joystick. In such cases, a joystick icon (next to the bottom bar) or small arrows (around
the setting option) will be displayed as an additional operation guide.
4. Press the FUNC. button to save the setting and close the menu.
Setup menus:
1. Press the FUNC. button to open the FUNC. menu.
2. With the joystick select ( ) the icon and press ( ).
3. Select ( ) a setup menu and press ( ).
4. Select ( ) a menu item and press ( ).
5. Select ( ) a setting option and press ( ) to save the changes.
6. Press the FUNC. button to close the menu.
Pressing the FUNC. button at any time closes the menu.
Items that are not available appear grayed out.
The menu will not appear when you press the FUNC. button while recording
movies.
You can open the menu directly on the setup menus screen by holding the
FUNC. button pressed for more than 2 seconds.
Joystick
FUNC. button
37
Advanced Functions
E
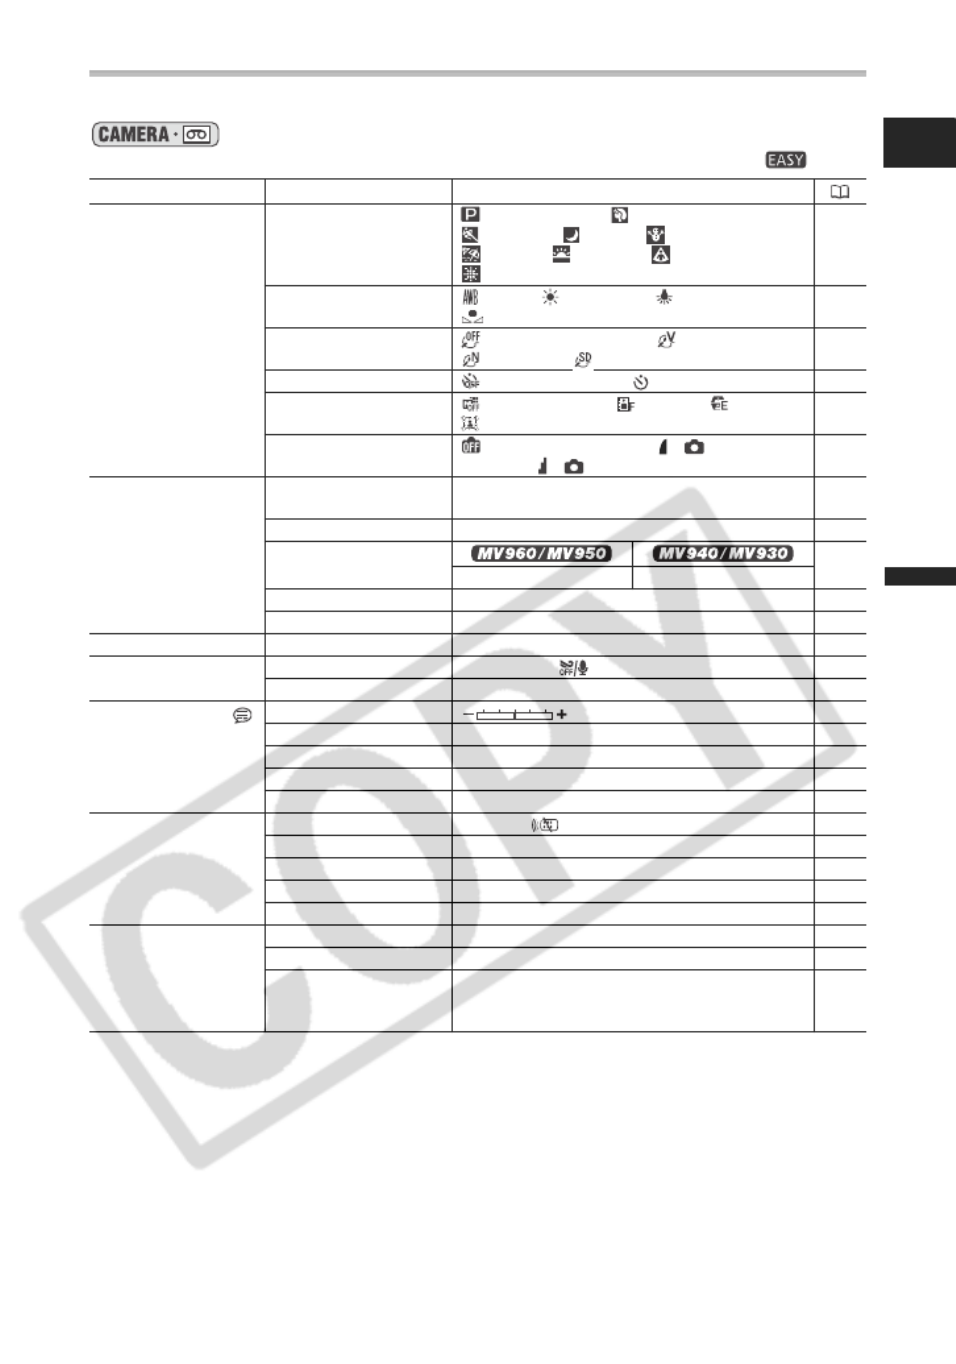
Menu and Default Settings
Default settings are shown in boldface.
* The item will not appear in mode.
Submenu Menu Item Setting Options
FUNC. menu Recording Programs* PROGRAM AE, PORTRAIT,
SPORTS, NIGHT, SNOW,
BEACH, SUNSET, SPOTLIGHT,
FIREWORKS
41
White Balance AUTO, DAYLIGHT, TUNGSTEN,
SET
48
Image Effect IMAGE EFFECT OFF, VIVID,
NEUTRAL, SOFT SKIN DETAIL
49
Self Timer SELF TIMER OFF, SELF TIMER ON 53
Digital Effects D.EFFECT OFF, FADER, EFFECT,
CARD MIX
56
Still Image Recording STILL IMG REC OFF,
S
FINE/
640x480,
S
NORMAL/640x480
85
CAMERA SETUP SHUTTR SPEED* AUTO, 1/50, 1/120, 1/250, 1/500, 1/1000,
1/2000
50
A.SL SHUTTER ON, OFF 51
D.ZOOM 26
OFF, 100x, 1000x OFF, 100x, 800x
ZOOM SPEED VARIABLE, SPEED 3, SPEED 2, SPEED 1 27
IMG STAB* , OFF 68ON
VCR SETUP REC MODE STD PLAY, LONG PLAY 54
AUDIO SETUP WIND SCREEN* AUTO, OFF 55
AUDIO MODE 16bit, 12bit 55
DISPLAY SETUP
/ BRIGHTNESS 67
TV SCREEN ON, OFF 107
LEVEL MARKER ON, OFF 22
LANGUAGE See list of languages. 66
DEMO MODE ON, OFF 69
SYSTEM SETUP WL.REMOTE ON, OFF 67
BEEP HIGH VOLUME, LOW VOLUME, OFF 67
START-UP IMG ON, OFF 68
POWER SAVE ON, OFF 22
FILE NOS. RESET, CONTINUOUS 84
DATE/TIME SETUP T.ZONE/DST See list of time zones. 19
DATE/TIME - 19
DATE FORMAT Y.M.D : 2006.1.1 AM12:00
M.D,Y : JAN.1,2006 12:00AM
D.M.Y : 1.JAN.2006 12:00AM
66

38
1 only.
2 only.
Submenu Menu Item Setting Options
FUNC. menu Speaker Volume 31
Recording Pause2 - 72,
73
End Search - 63
Digital Effects D.EFFECT OFF, FADER, EFFECT 56
Card Movie Size 320x240, 160x120 83
Still Image Quality
S
S.FINE/640x480,
S
FINE/
640x480,
S
NORMAL/640x480
82
VCR SETUP REC MODE2 STD PLAY, LONG PLAY 54
AV DV1 ON, OFF 75
TV TYPE NORMAL TV, WIDE TV 34
AUDIO SETUP OUTPUT CH L/R, L/L, R/R 35
AUDIO DUB.2 AUDIO IN, MIC. IN 77
WIND SCREEN AUTO, OFF 55
12bit AUDIO STEREO1, STEREO2, MIX/FIXED,
MIX/VAR.
79
MIX BALANCE 79
AUDIO MODE 16bit, 12bit 55
DISPLAY SETUP/
BRIGHTNESS 67
TV SCREEN ON, OFF 107
DISPLAYS ON, OFF <PLAYBK> 107
6SEC.DATE ON, OFF 62
DATA CODE DATE, TIME, DATE & TIME 62
LANGUAGE See list of languages. 66
SYSTEM SETUP WL.REMOTE ON, OFF 67
BEEP HIGH VOLUME, LOW VOLUME, OFF 67
START-UP IMG ON, OFF 68
FILE NOS. RESET, CONTINUOUS 84
DATE/TIME SETUP T.ZONE/DST See list of time zones. 19
DATE/TIME - 19
DATE FORMAT Y.M.D : 2006.1.1 AM12:00
M.D,Y : JAN.1,2006 12:00AM
D.M.Y : 1.JAN.2006 12:00AM
66
ST-1 ST-2

39
Advanced Functions
E
* The item will not appear in mode.
Submenu Menu Item Setting Options
FUNC. menu Recording Programs* PROGRAM AE, PORTRAIT,
SPORTS, NIGHT, SNOW,
BEACH, SUNSET, SPOTLIGHT,
FIREWORKS
41
White Balance AUTO, DAYLIGHT, TUNGSTEN,
SET
48
Image Effect IMAGE EFFECT OFF, VIVID,
NEUTRAL, SOFT SKIN DETAIL
49
Self Timer SELF TIMER OFF, SELF TIMER ON 53
Digital Effects D.EFFECT OFF, BLK&WHT 56
Movie Recording MOVIE REC OFF, 320x240,
160x120
89
Still Image Size/
Quality
L 1024x768, S 640x480 82
SUPER FINE, FINE,
NORMAL
CAMERA SETUP SHUTTR SPEED* AUTO, 1/50, 1/120, 1/250 50
A.SL SHUTTER ON, OFF 51
ZOOM SPEED VARIABLE, SPEED 3, SPEED 2, SPEED 1 27
FOCUS PRI.* ON: AiAF, ON: CENTER, OFF 91
REVIEW OFF, 2sec, 4sec, 6sec, 8sec, 10sec 88
AUDIO SETUP* WIND SCREEN* AUTO, OFF 55
DISPLAY SETUP/
BRIGHTNESS 67
TV SCREEN ON, OFF 107
LANGUAGE See list of languages. 66
DEMO MODE ON, OFF 69
SYSTEM SETUP WL.REMOTE ON, OFF 67
BEEP HIGH VOLUME, LOW VOLUME, OFF 67
START-UP IMG ON, OFF 68
POWER SAVE ON, OFF 22
FILE NOS. RESET, CONTINUOUS 84
DATE/TIME SETUP T.ZONE/DST See list of time zones. 19
DATE/TIME - 19
DATE FORMAT Y.M.D : 2006.1.1 AM12:00
M.D,Y : JAN.1,2006 12:00AM
D.M.Y : 1.JAN.2006 12:00AM
66

40
Submenu Menu Item Setting Options
FUNC. menu Speaker Volume 31
Slideshow - 93
Still Image Protection PROTECT OFF, PROTECT ON 94
Print Order 0-99 COPIES 101
Transfer Order TRANS.ORDER OFF,
TRANS.ORDER ON
106
CARD
OPERATIONS
(Single Image
Display)
PRINT ORD. ALL
ERASE
NO, YES 102
TRANS.ORD. ALL
ERASE
NO, YES 106
ERASE ALL IMAGES NO, YES 95
INITIALIZE NO, YES 96
CARD
OPERATIONS
(Index Screen)
PROTECT - 94
PRINT ORDER - 101
TRANSFER
ORDER
- 106
DISPLAY SETUP/
BRIGHTNESS 67
TV SCREEN ON, OFF 107
DISPLAYS ON, OFF <PLAYBK> 107
DATA CODE DATE, TIME, DATE & TIME 62
LANGUAGE See list of languages. 66
SYSTEM SETUP WL.REMOTE ON, OFF 67
BEEP HIGH VOLUME, LOW VOLUME, OFF 67
START-UP IMG ON, OFF 68
DATE/TIME SETUP T.ZONE/DST See list of time zones. 19
DATE/TIME - 19
DATE FORMAT Y.M.D : 2006.1.1 AM12:00
M.D,Y : JAN.1,2006 12:00AM
D.M.Y : 1.JAN.2006 12:00AM
66
PRINT Appears when connecting a PictBridge compatible printer. 102

43
Advanced Functions
Recording
E
Availability of Functions in Each Mode:
: Available : Not available A: Auto setting
: Can be used only in mode.
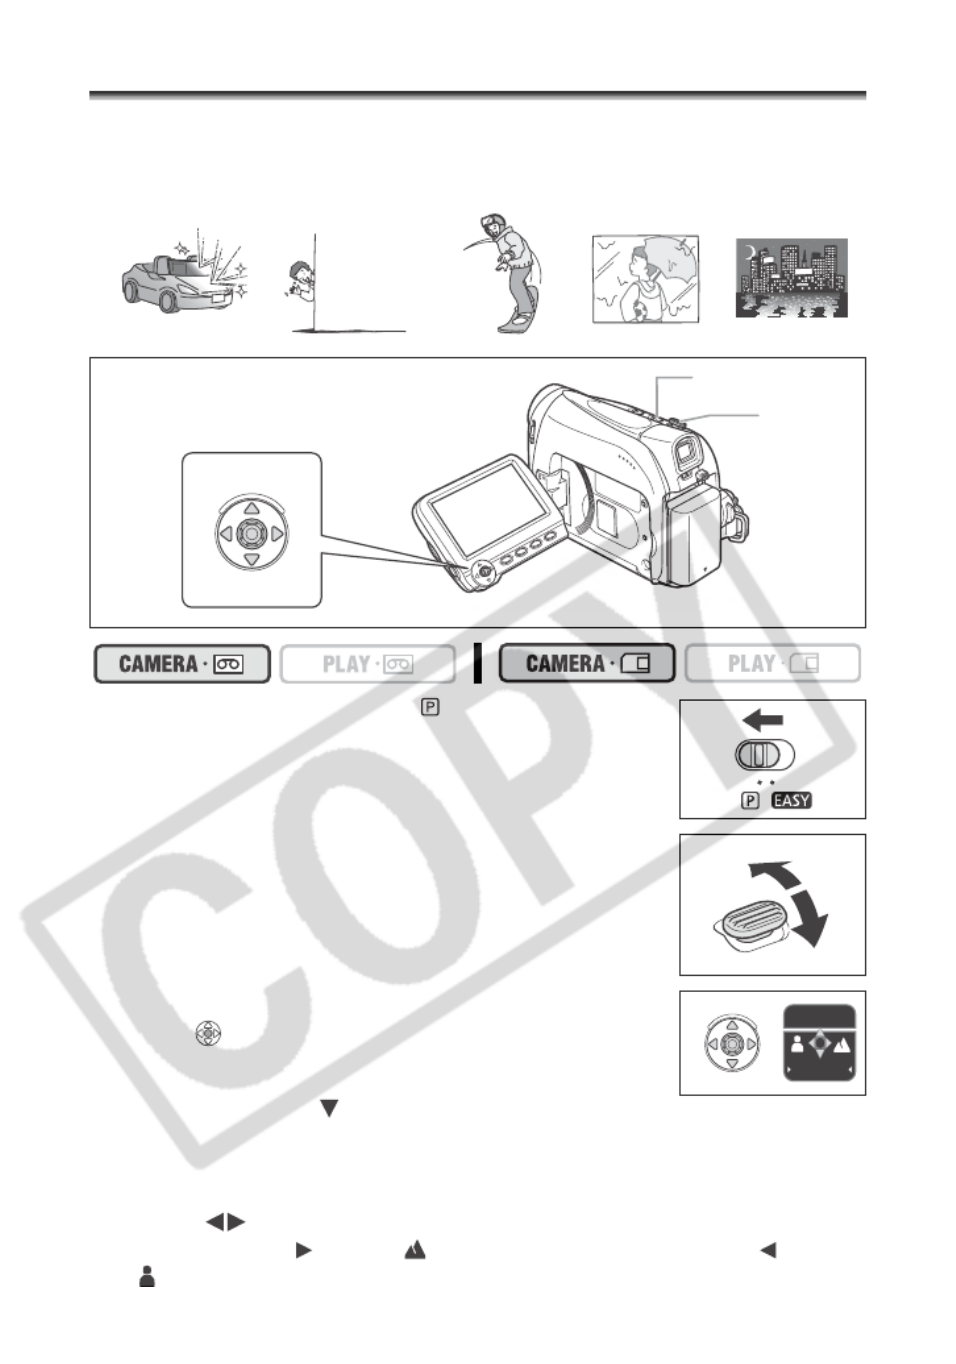
Selecting the Easy Recording Program
Set the program selector to .
“ ” appears.
Program Selector
Recording
Program
Image Stabilizer (on)
Focus (A)
White Balance (A)
Wind Screen (A)
Shutter Speed (A) (A)
Exposure
Adjustment (A)
Digital Effects
Card Mix
Program selector
Joystick
Shaded area

44
Selecting a Recording Program
1. Set the program selector to .
2. Press the FUNC. button to open the FUNC. menu.
3. With the joystick select ( ) the recording
programs icon.
4. Select ( ) the recording program from the options
on the bottom bar.
5. Press the FUNC. button to save the setting and close the menu.
The symbol of the recording program selected appears.
Do not change the recording program while recording as the brightness of the
image may change abruptly.
Portrait/Sports mode:
The picture may not appear smooth when played back.
Snow/Beach mode:
- The subject may become overexposed in dark surroundings. Check the
image on the screen.
- The picture may not appear smooth when played back.
Night mode:
- Moving subjects may leave a trailing afterimage.
- Picture quality may not be as good as in other modes.
- White points may appear on the screen.
- Autofocus may not work as well as in other modes. In such case, adjust the
focus manually.
- The digital zoom cannot be used with this recording program.
Fireworks mode:
To avoid camcorder shake, we recommend using a tripod. Use a tripod when
recording in mode as the shutter speed slows down.
MENU
( 36)
PROGR
PROGR
PROGR
PROGRPROGRAM AE
AM AE
AM AE
AM AEAM AE

45
Advanced Functions
Recording
E
Adjusting the Exposure Manually
Adjust the exposure when a backlit subject becomes underexposed, or overexposed due
to bright light.
1. Set the program selector to .
2. If the joystick guide does not appear on screen,
press ( ) to display it.
3. Push the joystick ( ) towards [EXP] to enter the
exposure lock mode.
[EXP] on the joystick guide will be displayed in light blue and the
exposure adjustment indicator and the neutral value “±0” appear on the screen.
4. Adjust ( ) the brightness of the image as necessary.
To return to the automatic exposure, push the joystick ( ) towards [EXP] once more.
The exposure adjustment indicator will disappear and [EXP] will turn white again.
5. Push the joystick ( ) towards [BACK] to save the exposure setting.
• When you operate the zoom during exposure lock, the brightness of the image may
change.
• The adjustment range depends on the brightness at the time you locked the
exposure.
6. If necessary, press ( ) again to hide the joystick guide.
The manual exposure setting will reset to auto exposure when you turn the
camcorder off or change the recording program.
Program selector
Joystick
EXP
BACK
46
Adjusting the Focus Manually
Autofocus may not work well on the following subjects. In such case, focus manually.
1. Set the program selector to .
2. Adjust the zoom.
When you operate the zoom after adjusting the focus, the
subject may not stay in focus. Adjust the zoom before the focus.
3. If the joystick guide does not appear on screen,
press ( ) to display it.
4. Push the joystick ( ) towards [FOCUS] to activate
the manual focus.
[FOCUS] on the joystick guide will be displayed in light blue and “MF” appears on the
screen.
5. Adjust ( ) the focus as necessary.
• Push the joystick ( ) towards for a farther focal distance or push it ( ) towards
for a closer focal distance.
Reflective
surfaces
Subjects with low
contrast or without
vertical lines
Fast Moving
Subjects
Through
dirty or wet
windows
Night Scenes
Program selector
Zoom lever
Joystick
BACK
FOCUS

47
Advanced Functions
Recording
E
• To return to autofocus, push the joystick ( ) towards [FOCUS] once more. “MF” will
disappear and [FOCUS] will turn white again.
6. Push the joystick ( ) towards [BACK] to save the focus adjustment.
7. If necessary, press ( ) again to hide the joystick guide.
The manual focus will reset to autofocus when you set the program selector to
.
Infinity Focus
Use this function when you wish to focus on faraway subjects such as mountains or
fireworks.
1. In the manual focus mode press ( ) to display the joystick guide.
2. Keep the joystick pushed ( ) towards [FOCUS] for more than 2
seconds.
• At first, “MF” will appear on the screen and then it will be replaced by the “ ”
symbol.
• In the infinity focus mode: If you operate the zoom or the joystick ( ) or if you turn
the camcorder off, the infinity focus will be canceled and the camcorder will return to
manual focus.
3. Push the joystick ( ) towards [BACK] to save the focus adjustment.
4. If necessary, press ( ) again to hide the joystick guide.
48
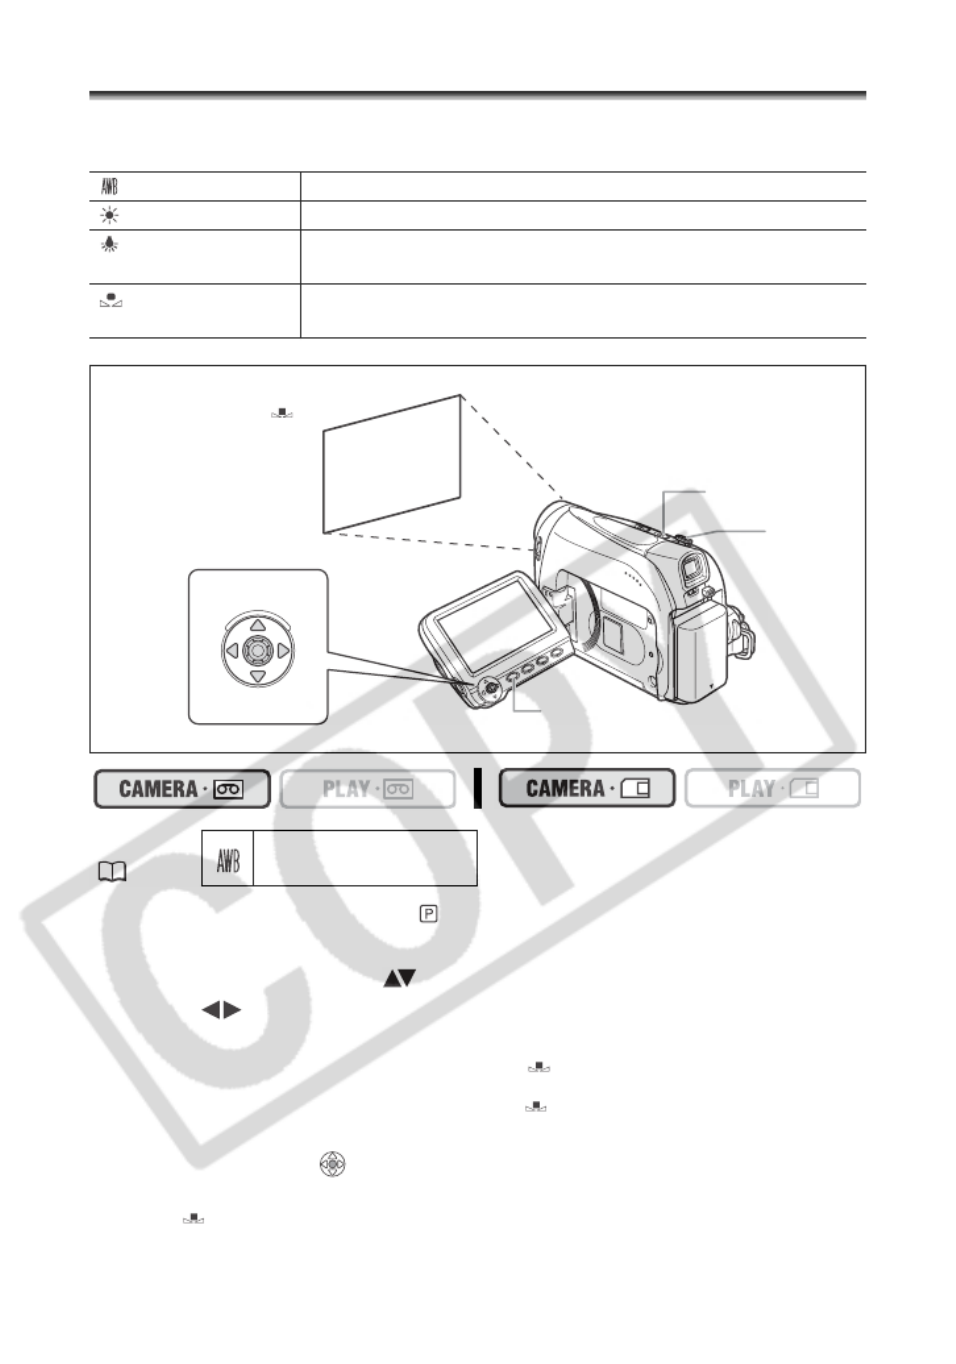
Setting the White Balance
You can use the preset modes to reproduce colors more accurately, or set a custom white
balance to obtain the optimal setting.
1. Set the program selector to .
2. Press the FUNC. button to open the FUNC. menu.
3. With the joystick select ( ) the white balance icon.
4. Select ( ) the white balance setting from the options on the bottom
bar.
If you select a white balance setting other than [SET], continue to directly to step 6.
To set the custom white balance when you select [SET]:
5. Point the camcorder at a white object, zoom in until it fills the whole
screen and press ( ).
• Keep the camcorder zoomed in at the white object until step 6 is completed.
• The “ ” icon flashes and stops flashing when the adjustment is completed.
6. Press the FUNC. button to save the setting and close the menu.
AUTO Settings are automatically set by the camcorder.
DAYLIGHT For recording outdoors on a bright day.
TUNGSTEN For recording under tungsten and tungsten type (3-wavelength)
fluorescent lighting.
SET Use the custom white balance setting to make white subjects
appear white under colored lighting.
MENU
( 36)
AUTO
AUTO
AUTO
AUTOAUTO
Program selector
Zoom lever
FUNC. button
Joystick
White sheet or paper
(if you select SET)
49
Advanced Functions
Recording
E
Use the auto setting for normal outdoor scenes.
When the program selector is set to , the white balance is preset to
[AUTO].
The camcorder retains the custom white balance setting even if you turn it off.
When you have set the custom white balance:
- Depending on the light source, “ ” may keep flashing. The result will still be
better than with the auto setting.
- Reset the white balance when the lighting condition changes.
- Turn off the digital zoom.
Custom white balance may provide better results in the following cases:
- Changing lighting conditions
- Close-ups
- Subjects in a single color (sky, sea or forest)
- Under mercury lamps or certain types of fluorescent lights
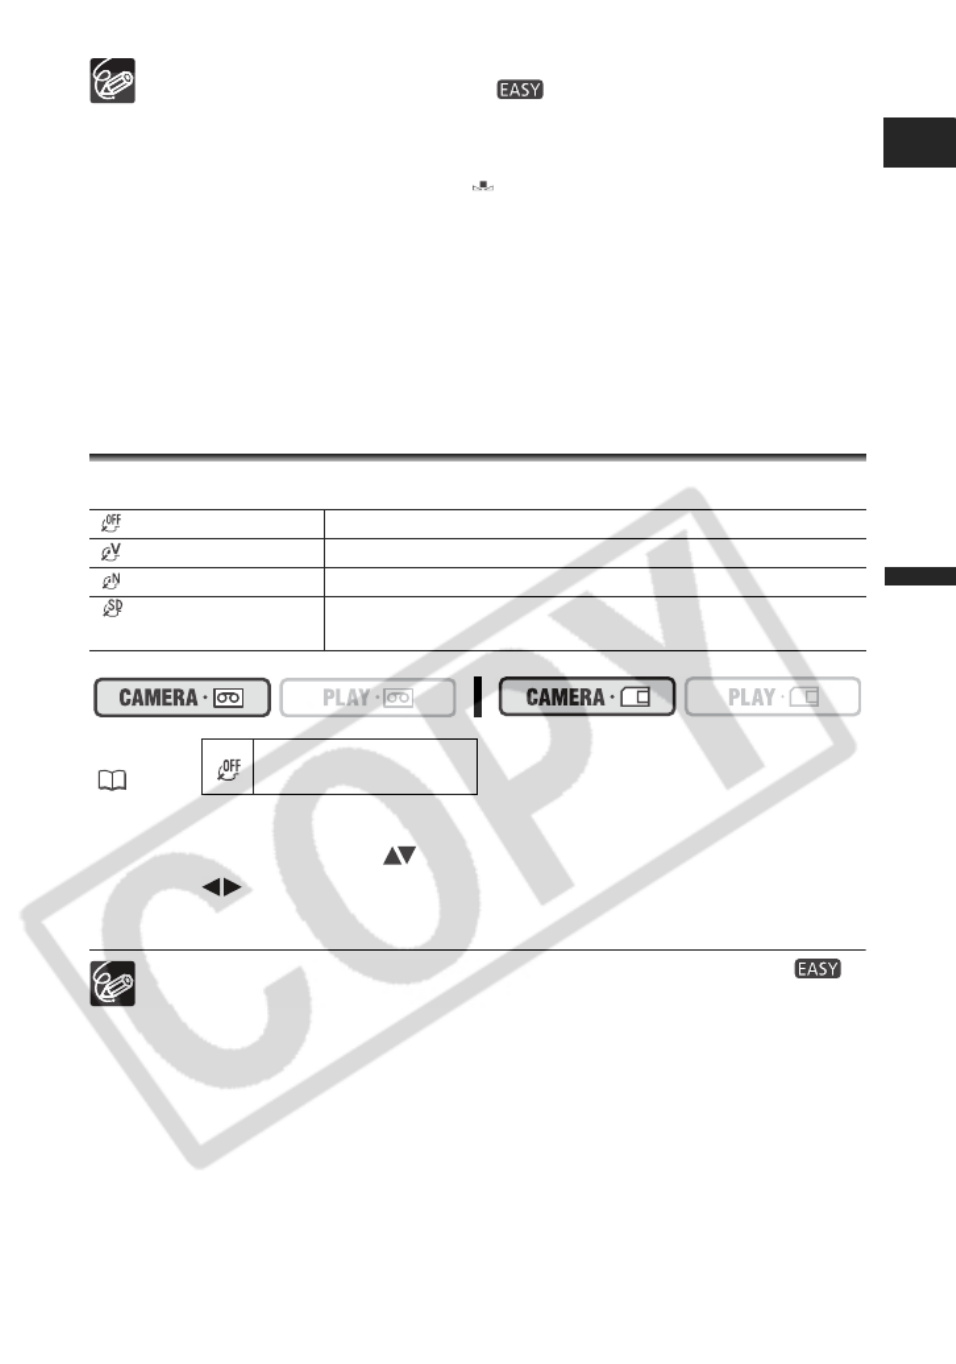
Selecting an Image Effect
You can record with different color saturation and contrast effects.
1. Press the FUNC. button to open the FUNC. menu.
2. With the joystick select ( ) the image effects icon.
3. Select ( ) the image effect from the options on the bottom bar.
4. Press the FUNC. button to save the setting and close the menu.
The image effects cannot be used when the program selector is set to .
[SOFT SKIN DETAIL]: To obtain the best effect, use this function when
recording a person in close-up. Note that areas similar to the skin color may
lack in detail.
IMAGE EFFECT OFF Records with no image enhancing effects.
VIVID Emphasizes the contrast and color saturation.
NEUTRAL Tones down the contrast and color saturation.
SOFT SKIN DETAIL Softens the details in the skin tone area for a more
complimentary appearance.
MENU
( 36)
IMAGE
IMAGE
IMAGE
IMAGEIMAGE EFFEC
EFFEC
EFFEC
EFFEC EFFECT OF
T OF
T OF
T OFT OFF
F
F
FF
50
Setting the Shutter Speed
You can adjust the shutter speed manually to make stable shots of fast moving subjects.
Available shutter speed settings:
AUTO, 1/50, 1/120, 1/250, 1/500, 1/1000, 1/2000
AUTO, 1/50, 1/120, 1/250
1. Set the program selector to .
2. Press the FUNC. button to open the FUNC. menu.
3. With the joystick select ( ) the recording program icon and select
( ) the [PROGRAM AE] program.
4. With the joystick select ( ) the icon and press ( ).
5. Select ( ) the [CAMERA SETUP] menu and press ( ). Then, select
( ) the [SHUTTR SPEED] option and press ( ).
6. Select ( ) a setting option and press ( ) to save the changes.
7. Press the FUNC. button to close the menu.
If the shutter speed is set to 1/500 or higher in mode and you
switch to mode, it automatically changes to 1/250.
Do not point the camcorder directly at the sun when the shutter speed is set to
1/1000 or higher.
The image may flicker when recording with high shutter speeds.
The shutter speed resets to [AUTO] when you set the program selector to
or when you change the recording program.
Guidelines for Recording with High Shutter Speeds:
- Outdoor sports such as golf or tennis: 1/2000
- Moving objects such as cars or roller coasters: 1/1000, 1/500 or 1/250
- Indoor sports such as basketball: 1/120
MENU
( 36)
CAMER
CAMER
CAMER
CAMERCAMERA SET
A SET
A SET
A SETA SETUP
UP
UP
UPUP SHUTT
SHUTT
SHUTT
SHUTTSHUTTR SPE
R SPE
R SPE
R SPER SPEED AU
ED AU
ED AU
ED AUED AUTO
TO
TO
TOTO
51
Advanced Functions
Recording
E
Auto Slow Shutter
In the Easy Recording mode or when the shutter speed is set to [AUTO] in the
Program AE recording program, the camcorder uses shutter speeds down to 1/25
( ) and 1/12.5 ( ). This allows you to obtain a brighter recording
in places with insufficient lighting. However, you can set the camcorder not to use a slow
shutter speed.
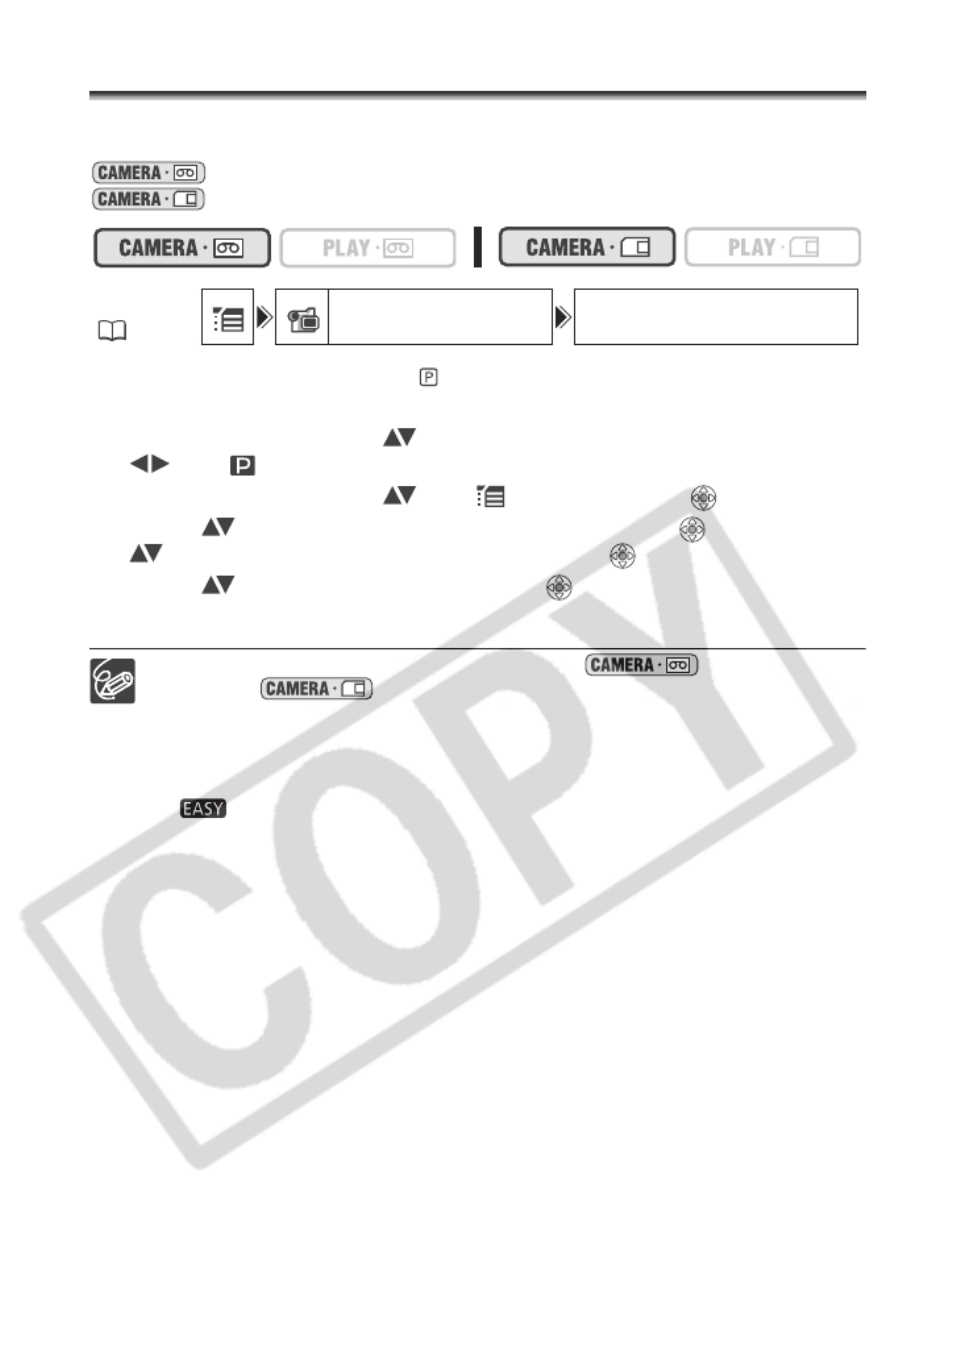
1. Open the FUNC. menu, select ( ) the icon and press ( ).
2. Select ( ) the [CAMERA SETUP] menu and press ( ). Then, select
( ) the [A.SL SHUTTER] option and press ( ).
3. Set ( ) it to [OFF] and press ( ) to save the changes, then close
the menu.
When set to [ON], moving subjects may leave a trailing afterimage.
The camcorder retains the setting separately in and
mode.
If “ ” (camcorder shake warning) appears in mode, stabilize
the camcorder, for example, by mounting it on a tripod or placing it on a table.
MENU
( 36)
CAMER
CAMER
CAMER
CAMERCAMERA SET
A SET
A SET
A SETA SETUP
UP
UP
UPUP A.SL
A.SL
A.SL
A.SL A.SL SHUTT
SHUTT
SHUTT
SHUTTSHUTTER ON
ER ON
ER ON
ER ONER ON

52
Using the LED Light
You can turn on the LED light at any time regardless of the recording program.
Press the LIGHT button.
• “ ” appears on the screen.
• The LED light turns on and off with each press of the button.
Do not point the LED light at persons while they are driving.
Do not look at the LED light for a long time.
Do not use the LED light close to people’s eyes.
LIGHT button
White LED
light
53
Advanced Functions
Recording
E
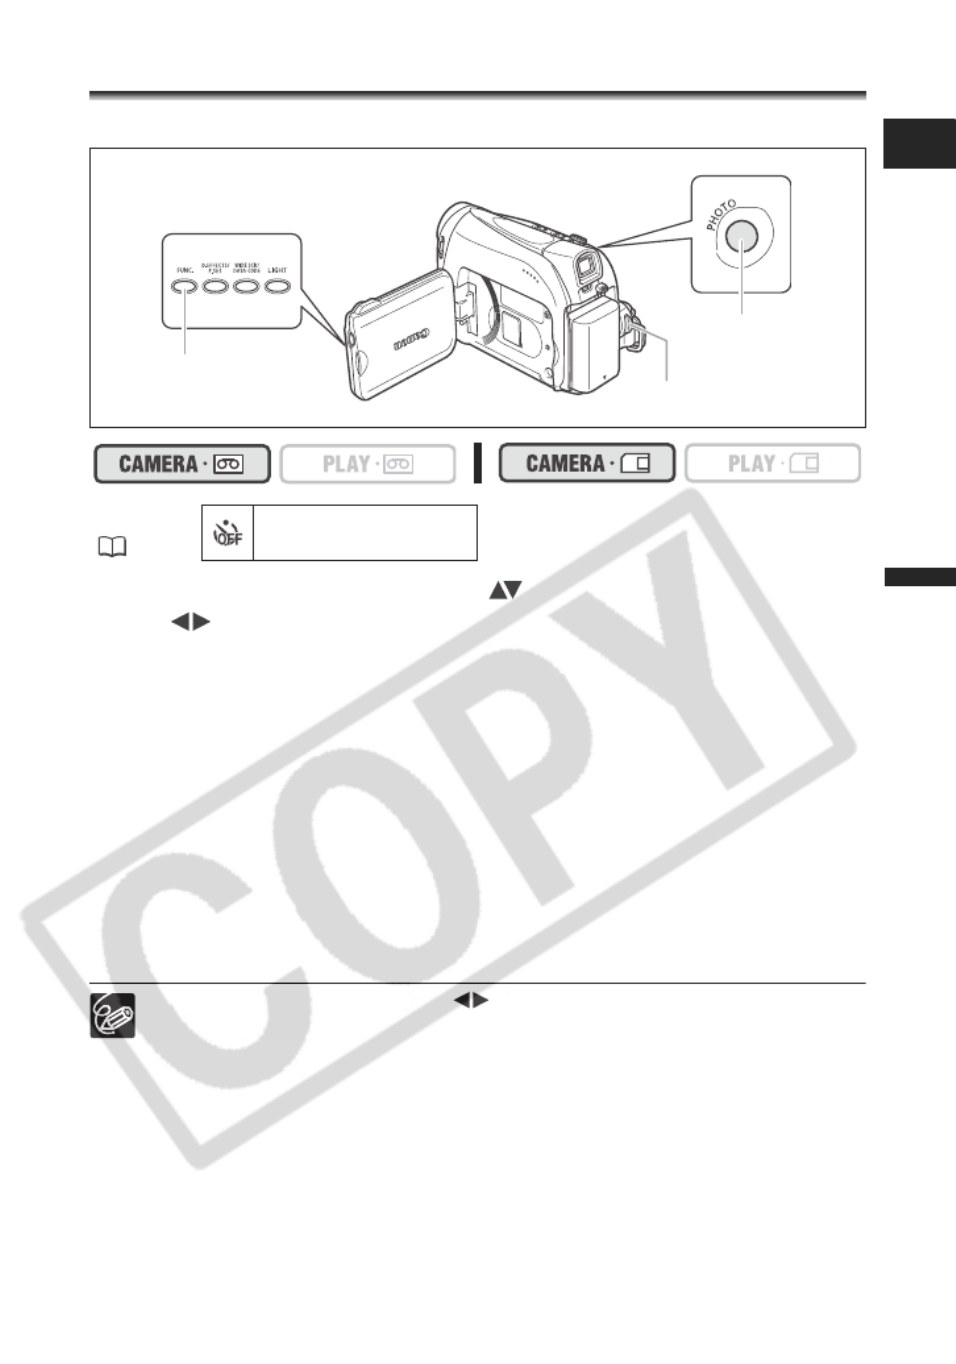
Using the Self-Timer
The self-timer can be used for recording movies or still images.
1. Open the FUNC. menu and select ( ) the self timer icon.
2. Set ( ) it to [SELF TIMER ON] and close the menu.
When recording movies:
3. Press the start/stop button.
The camcorder starts recording after a 10-second countdown (2 seconds when using
the START/STOP button of the wireless controller). The countdown appears on the
screen.
When recording still images:
3. Press the PHOTO button, first halfway to activate the autofocus and
then fully.
The camcorder will record the image after a 10-second countdown (2 seconds when
using the PHOTO button of the wireless controller). The countdown appears on the
screen.
To cancel the self timer, select ( ) [SELF TIMER OFF] in step 2 above.
Once the countdown has begun, you can also press the start/stop button (when
recording movies) or the PHOTO button (when recording still images) to cancel
the self-timer.
The self-timer will be canceled when you turn off the camcorder.
MENU
( 36)
SELF
SELF
SELF
SELF SELF TIMER
TIMER
TIMER
TIMER TIMER OFF
OFF
OFF
OFFOFF
PHOTO button
Start/stop button
FUNC. button
54
Changing the Recording Mode (SP/LP)
You can choose between SP (standard play) and LP (long play). LP extends the tape
usage by 1.5 times.
1. Open the FUNC. menu, select ( ) the icon and press ( ).
2. Select ( ) the [VCR SETUP] menu and press ( ). Then, select ( )
the [REC MODE] option and press ( ).
3. Set ( ) it to [STD PLAY] or [LONG PLAY] and press ( ) to save the
changes, then close the menu.
Tapes recorded in LP mode cannot be used for audio dubbing.
Depending on the nature and usage condition of the tape, picture and
sound recorded in LP mode may be distorted. We recommend using the
SP mode for important recordings.
If you record in both SP and LP modes on the same tape, the playback picture
may become distorted and the time code may not be written correctly.
If you play back a tape that has been recorded in LP mode with another digital
device on this camcorder, or vice versa, picture and sound may become
distorted.
MENU
( 36)
VCR S
VCR S
VCR S
VCR SVCR SETUP
ETUP
ETUP
ETUPETUP REC M
REC M
REC M
REC MREC MODE STD
ODE STD
ODE STD
ODE STD ODE STD PLAY
PLAY
PLAY
PLAYPLAY

55
Advanced Functions
Recording
E
Audio Recording
Changing the Audio Mode
You can record sound in two audio modes—16-bit and 12-bit. The 12-bit mode records
sound on two channels (stereo 1), leaving 2 channels free (stereo 2) for adding new
sound later. Select the 16-bit mode for higher sound quality.
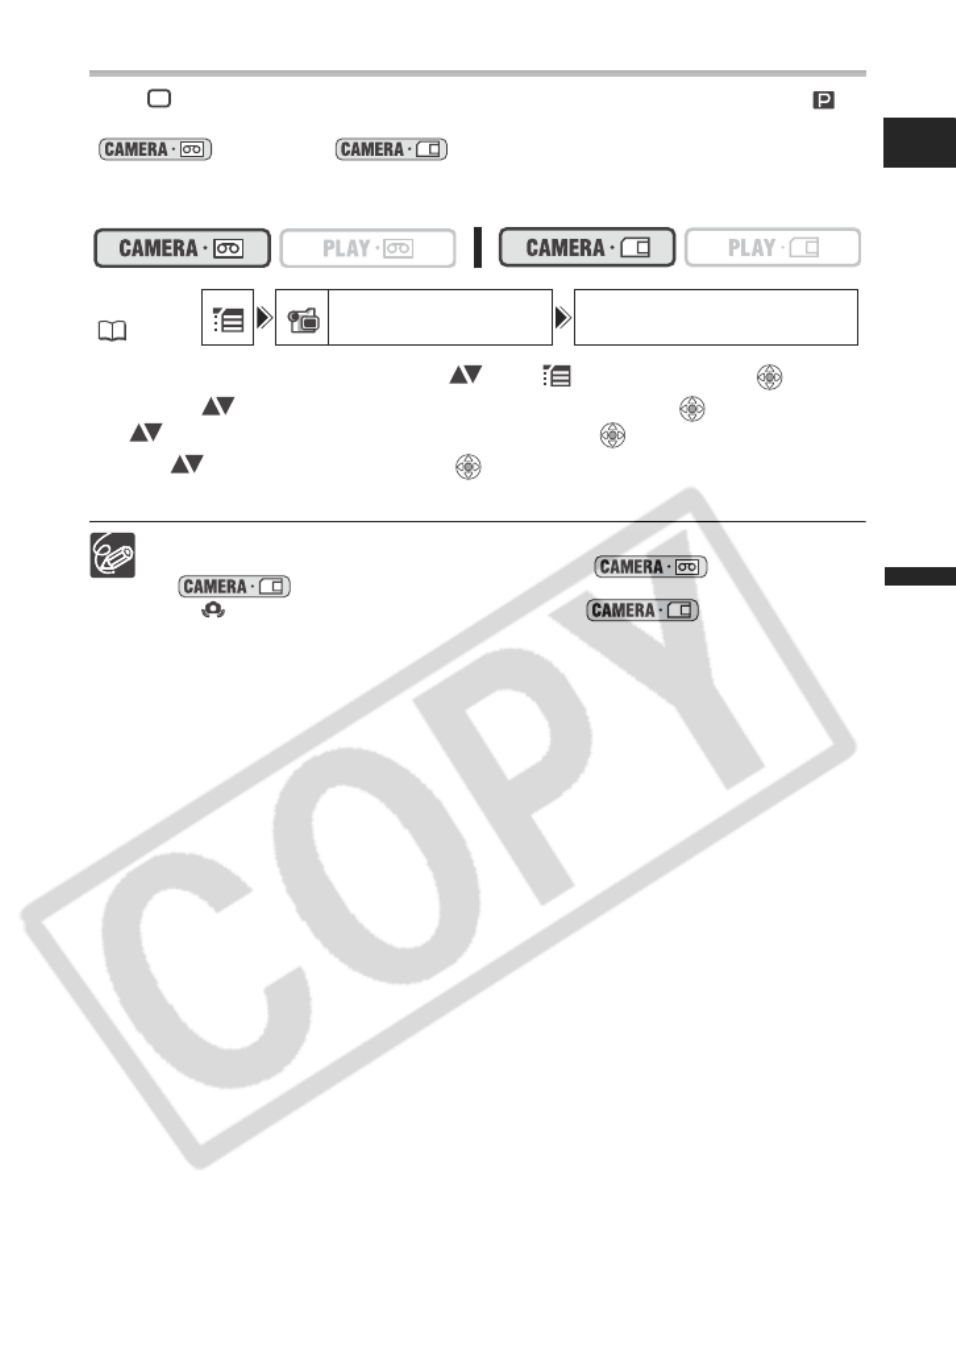
1. Open the FUNC. menu, select ( ) the icon and press ( ).
2. Select ( ) the [AUDIO SETUP] menu and press ( ). Then, select
( ) the [AUDIO MODE] option and press ( ).
3. Set ( ) it to [16bit] or [12bit] and press ( ) to save the changes,
then close the menu.
The selected audio mode is displayed for approximately 4 seconds.
Wind Screen
The camcorder reduces the wind noise automatically. However, you can turn off the wind
screen when recording indoors, or when you want the microphone to be as sensitive as
possible.
* Only when [AUDIO DUB.] is set to [MIC.IN].
1. Open the FUNC. menu, select ( ) the icon and press ( ).
2. Select ( ) the [AUDIO SETUP] menu and press ( ). Then, select
( ) the [WIND SCREEN] option and press ( ).
3. Set ( ) it to [OFF] and press ( ) to save the changes, then close
the menu.
“ ” appears when you turn the wind screen off.
MENU
( 36)
AUDIO
AUDIO
AUDIO
AUDIOAUDIO SETUP
SETUP
SETUP
SETUP SETUP AUDIO
AUDIO
AUDIO
AUDIOAUDIO MODE 12
MODE 12
MODE 12
MODE 12 MODE 12bit
bit
bit
bitbit
MENU
( 36)
AUDIO
AUDIO
AUDIO
AUDIOAUDIO SETUP
SETUP
SETUP
SETUP SETUP WIND
WIND
WIND
WIND WIND SCREEN A
SCREEN A
SCREEN A
SCREEN ASCREEN AUTO
UTO
UTO
UTOUTO
*

56
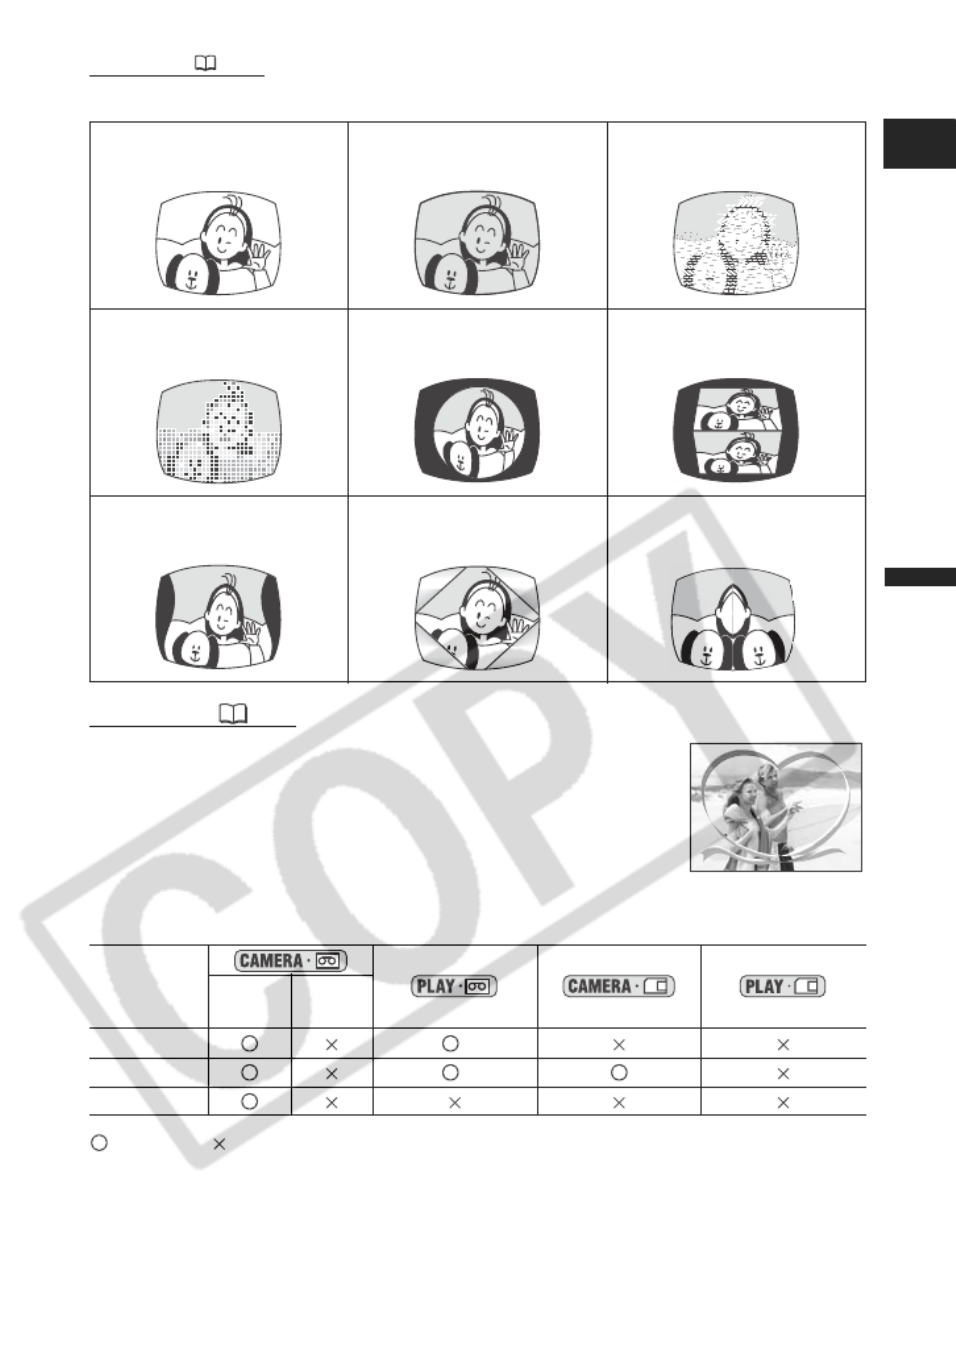
Using Digital Effects
Faders ( 58)
Begin or end scenes with a fade to or from black.
Fade Trigger (FADE-T) Wipe (WIPE)
Corner Wipe (CORNER) Jump (JUMP)
Flip (FLIP) Puzzle (PUZZLE)
Zigzag (ZIGZAG) Beam (BEAM)
Tide (TIDE)
57
Advanced Functions
Recording
E
Effects ( 58)
Add flavor to your recordings.
Card Mix ( 59)
You can choose one of the sample images from the collection on the
supplied disk (picture frames and backgrounds) and combine it with
the live video recording. The live video recording will appear in place
of the light area of the card mix image.
Availability of Digital Effects by Operating Modes:
: Available : Not available
1: Not available if the TV type is set to [NORMAL TV].
2: Black and White only.
Black and White
(BLK&WHT)
Sepia (SEPIA) Art (ART)
Mosaic (MOSAIC) Ball (BALL) Cube (CUBE)
Wave (WAVE)
Color Mask (COLOR M.)
Mirror (MIRROR)
Movies Still
Images
Faders 1
Effects 1 2
Card Mix
58
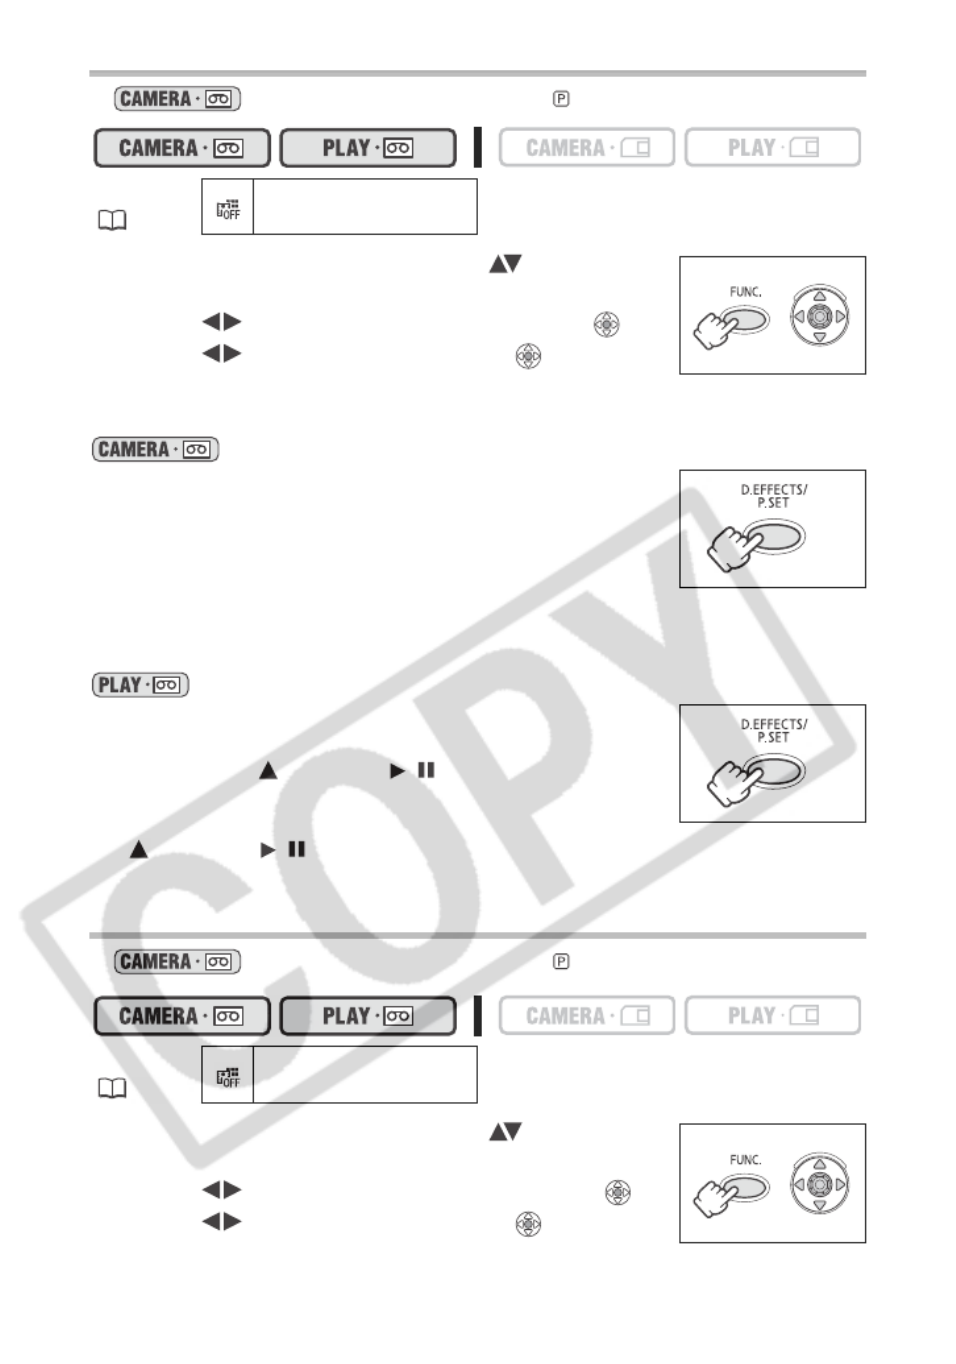
Selecting a Fader
In mode, set the program selector to .
1. Open the FUNC. menu and select ( ) the digital
effects icon.
2. Select ( ) the [FADER] option and press ( ).
3. Select ( ) a setting option, press ( ) and close
the menu.
The symbol of the selected fader will appear on screen.
:
4. Fade in: In record pause mode, press the
D.EFFECTS button and begin recording by pressing
the start/stop button.
Fade out: During recording, press the D.EFFECTS
button and pause recording by pressing the start/
stop button.
The fader can be activated/deactivated by pressing the D.EFFECTS button.
:
4. Fade in: In playback pause mode, press the
D.EFFECTS button and begin playback by pushing
the joystick ( ) towards / .
Fade out: During playback, press the D.EFFECTS
button and pause playback by pushing the joystick
( ) towards / .
The fader can be activated/deactivated by pressing the D.EFFECTS button.
Selecting an Effect
In mode, set the program selector to .
1. Open the FUNC. menu and select ( ) the digital
effects icon.
2. Select ( ) the [EFFECT] option and press ( ).
3. Select ( ) a setting option, press ( ) and close
the menu.
MENU
( 36)
D.EFF
D.EFF
D.EFF
D.EFFD.EFFECT OF
ECT OF
ECT OF
ECT OFECT OFF
F
F
FF
MENU
( 36)
D.EFF
D.EFF
D.EFF
D.EFFD.EFFECT OF
ECT OF
ECT OF
ECT OFECT OFF
F
F
FF

59
Advanced Functions
Recording
E
The symbol of the selected effect will appear on screen.
4. Press the D.EFFECTS button.
• The symbol of the selected effect will turn green.
• The effect can be activated/deactivated by pressing the
D.EFFECTS button.
Selecting an Effect in Mode
When recording still images, only the [BLK&WHT] effect is available. Select it with the
following procedure and activate it as described in step 4 above.
1. Open the FUNC. menu and select ( ) the digital effects icon.
2. Select ( ) the [BLK&WHT] option and close the menu.
“ ” will appear on screen.
Selecting the Card Mix Effect
1. Upload a sample image from the supplied disk to the memory card.
Refer to Adding Still Images from Your Computer to the Memory Card in the Digital
Video Software instruction manual (PDF file).
2. Set the program selector to .
3. Open the FUNC. menu and select ( ) the digital effects icon.
4. Select ( ) the [CARD MIX] option and press ( ).
5. Select ( ) the still image to mix with the recording and push the
joystick ( ) to adjust the mix level.
6. Adjust ( ) the mix level, press ( ) and close the menu.
“ ” will appear on screen.
7. Press the D.EFFECTS button.
• “ ” will turn green.
• The effect can be activated/deactivated by pressing the D.EFFECTS button.
Turn off the digital effect when you do not use it.
The camcorder retains the setting even if you turn it off or change the recording
program. However, you need to select again the still image to be used with the
Card Mix effect.
The image quality may be slightly lower with digital effects.
Digital effects cannot be used in the following cases:
- When the program selector is set to .
- During DV dubbing.
Faders cannot be used when Card Mix is activated.
MENU
( 36)
D.EFF
D.EFF
D.EFF
D.EFFD.EFFECT OF
ECT OF
ECT OF
ECT OFECT OFF
F
F
FF
60
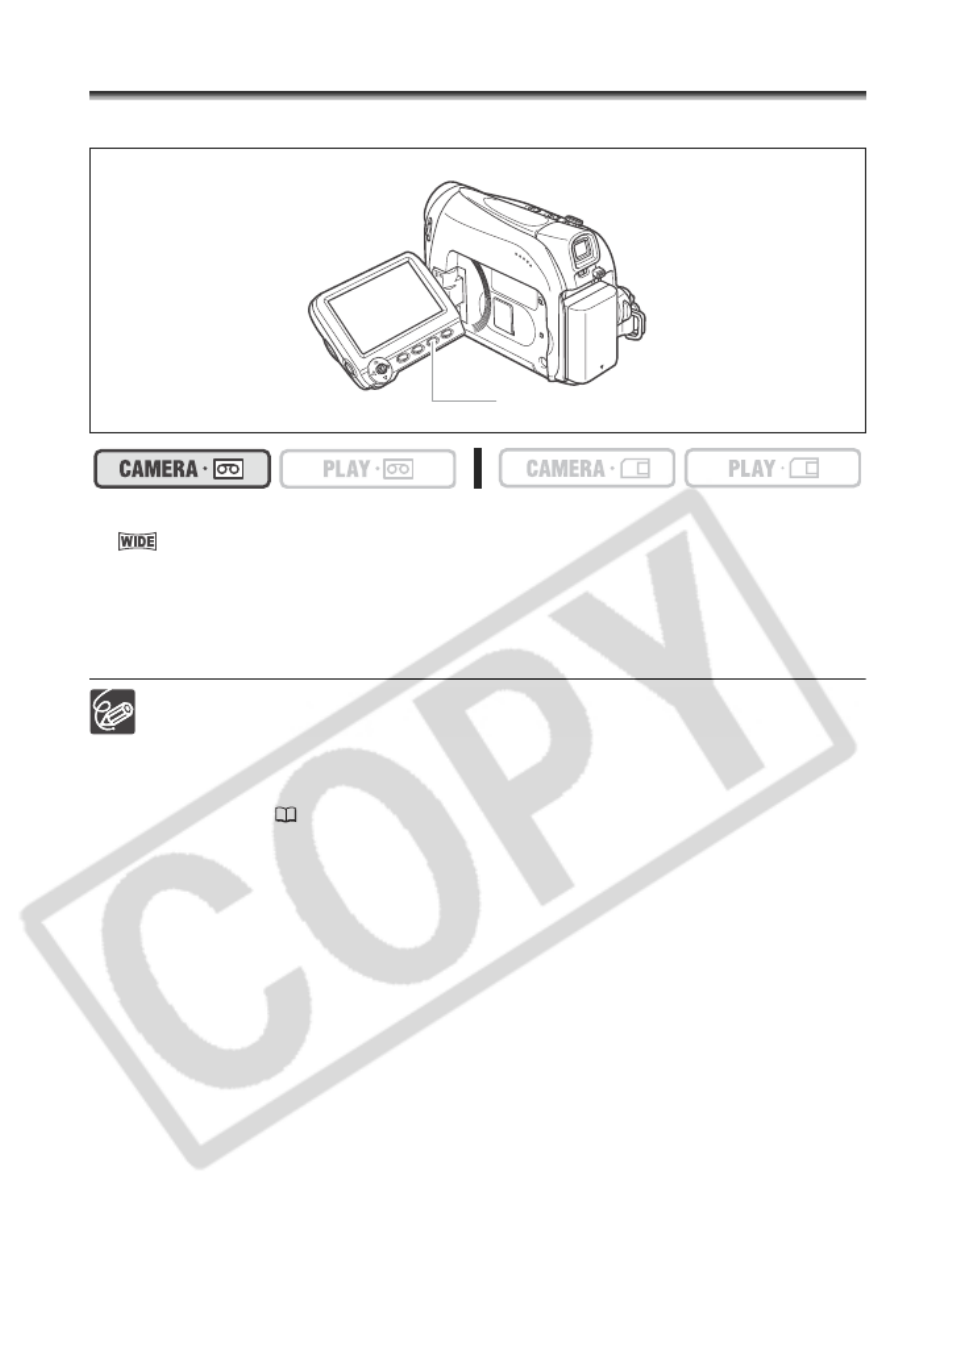
Widescreen TV Recording (16:9)
The camcorder uses the full width of the CCD providing high-resolution 16:9 recording.
Press the WIDE SCR button.
• “ ” disappears and the picture changes to 4:3 aspect ratio.
• On the LCD screen: Widescreen video will display normally; video in 4:3 aspect ratio
will appear with black side bars.
• On the viewfinder screen: Widescreen video will appear in “letterbox” display; video in
4:3 aspect ratio will display normally.
Simultaneous recording on a memory card cannot be used when the
widescreen mode is selected.
Playing back recordings made in the widescreen mode on a normal TV: If the
TV type is set to [NORMAL TV] the recording will be played back in “letterbox”
display. If the TV type is set to [WIDE TV] the image will appear horizontally
squeezed ( 34).
WIDE SCR button

61
Advanced Functions
Playback
E
Playback
Magnifying the Image
The playback image can be magnified up to 5 times.
1. Move the zoom lever toward T
T
T
TT
.
• The image is magnified by 2 times.
• A frame appears indicating the position of the magnified area.
• To further enlarge the image, move the zoom lever toward
T
T
T
TT
.
To shrink the image below 2 times magnification, move the
zoom lever toward W
W
W
WW.
2. Select ( , ) the magnified area with the
joystick.
To cancel the magnification, move the zoom lever toward W until
the frame disappears.
Movies played back from a memory card cannot be magnified.
While the magnification position frame is displayed it will replace the joystick
guide. Cancel the magnification to return to normal playback of movies or still
images.
Zoom lever
Joystick
62
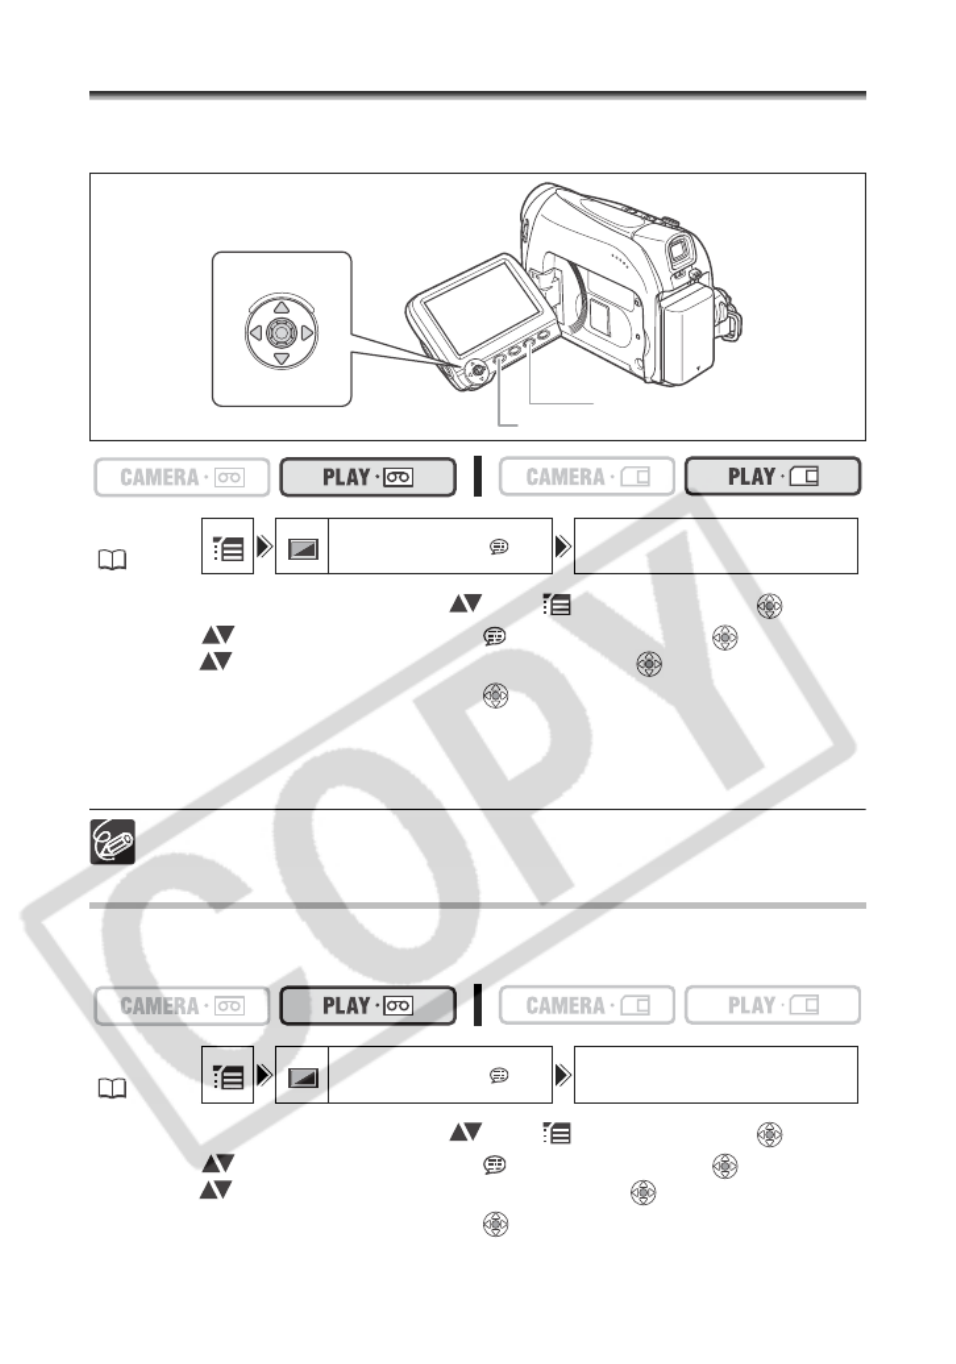
Displaying the Data Code
The camcorder maintains a data code containing the recording date and time. You can
select the data code combination and display it during playback.
1. Open the FUNC. menu, select ( ) the icon and press ( ).
2. Select ( ) the [DISPLAY SETUP/ ] menu and press ( ). Then,
select ( ) the [DATA CODE] option and press ( ).
3. Select a setting option and press ( ) to save the changes, then close
the menu.
4. To display the data code during playback: Press the DATA CODE
button.
The data code will not display the next time you turn on the camcorder.
Six-Second Auto Date
Date and time appear for 6 seconds when you begin playback, or to indicate that date or
time zone has changed.
1. Open the FUNC. menu, select ( ) the icon and press ( ).
2. Select ( ) the [DISPLAY SETUP/ ] menu and press ( ). Then,
select ( ) the [6SEC.DATE] option and press ( ).
3. Select a setting option and press ( ) to save the changes, then close
the menu.
MENU
( 36)
DISPL
DISPL
DISPL
DISPLDISPLAY SE
AY SE
AY SE
AY SEAY SETUP/
TUP/
TUP/
TUP/TUP/ DATA
DATA
DATA
DATA DATA CODE
CODE
CODE
CODE CODE DATE
DATE
DATE
DATEDATE & TI
& TI
& TI
& TI & TIME
ME
ME
MEME
MENU
( 36)
DISPL
DISPL
DISPL
DISPLDISPLAY SE
AY SE
AY SE
AY SEAY SETUP/
TUP/
TUP/
TUP/TUP/ 6SEC.
6SEC.
6SEC.
6SEC.6SEC.DATE
DATE
DATE
DATE DATE OFF
OFF
OFF
OFFOFF
FUNC. button
DATA CODE button
Joystick
63
Advanced Functions
Playback
E
End Search
When you have played back a tape, you can use this function to locate the end of the last
recorded scene.
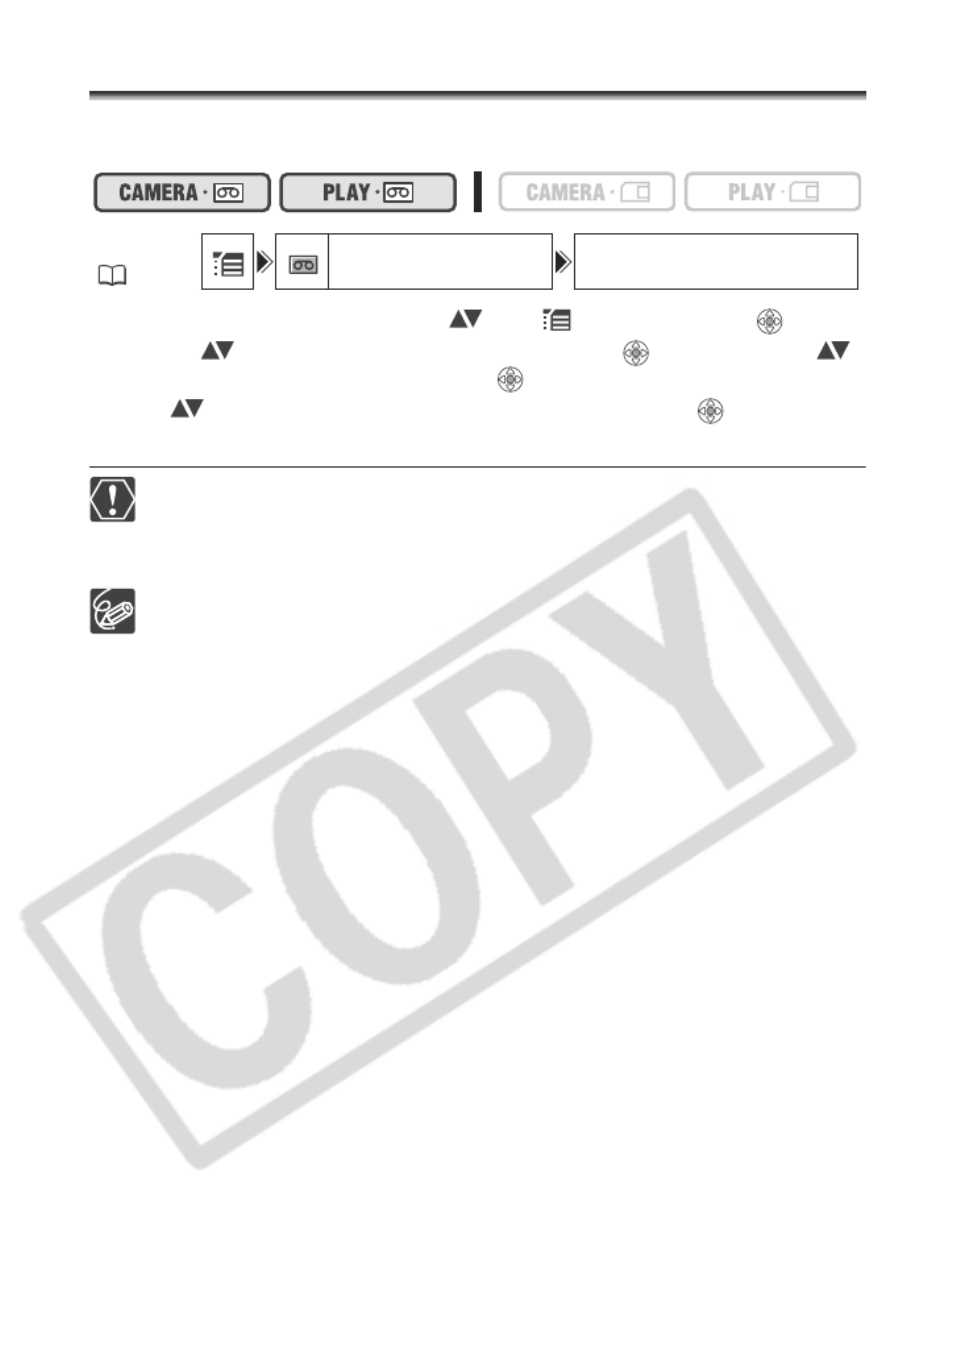
In stop mode:
1. Open the FUNC. menu, select ( ) the end search icon and press
( ).
2. Select ( ) [EXECUTE] and press ( ) to start the search.
• “END SEARCH” appears.
• The camcorder rewinds/fast forwards the tape, plays back the last few seconds of
the recording and stops the tape.
• Operating the joystick ( , ) will cancel the search.
End search cannot be used once you unload the cassette.
End search may not work properly if a blank section exists on the tape.
You cannot use end search to locate the editing end of audio dubbing.
Joystick
FUNC. button
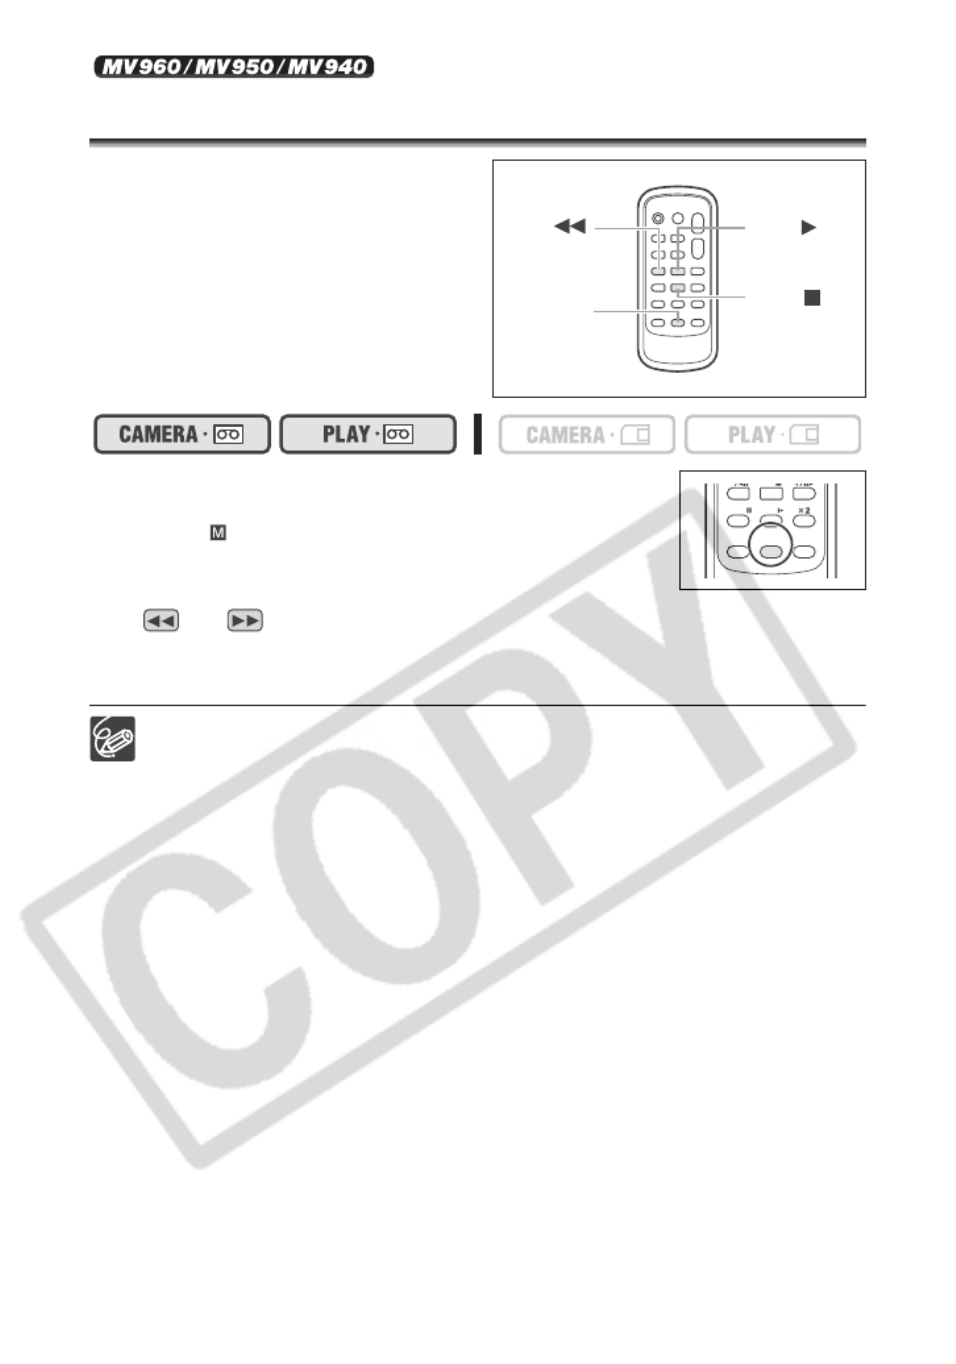
64
Returning to a Pre-marked Position
If you wish to return to a particular scene
later, mark the point with the zero set memory
and the tape will stop at that point when you
rewind/fast forward the tape.
This function is operated with the wireless
controller.
1. Press the ZERO SET MEMORY button at the point
you wish to return to later.
• “0:00:00 ” appears.
• To cancel, press the ZERO SET MEMORY button again.
2. When you have finished playback, rewind the tape.
• “ ” or “ ” is displayed with a blue background.
• The tape stops automatically at “0:00:00”.
• The tape counter changes to time code.
The zero set memory may not function correctly when the time code has not been
recorded consecutively.
REW
button
PLAY
button
STOP
button
ZERO SET
MEMORY
button
STOP
PAU SE SLOW
AUDIO DUB.
ZERO SET
MEMORY
TV SCREEN

65
Advanced Functions
Playback
E
Date Search
You can locate the change of the date/time
zone with the date search function.
This function is operated with the wireless
controller.
Press the or button to begin searching.
• Press more than once to search for further date changes (up to
10 times).
• Press the STOP button to stop searching.
A recording of longer than a minute per date/area is required.
Date search may not function if the data code is not correctly displayed.
STOP button
DATE SEARCH /
buttons
CARD
DAT E SEARCH
REW PLAY FF
STOP
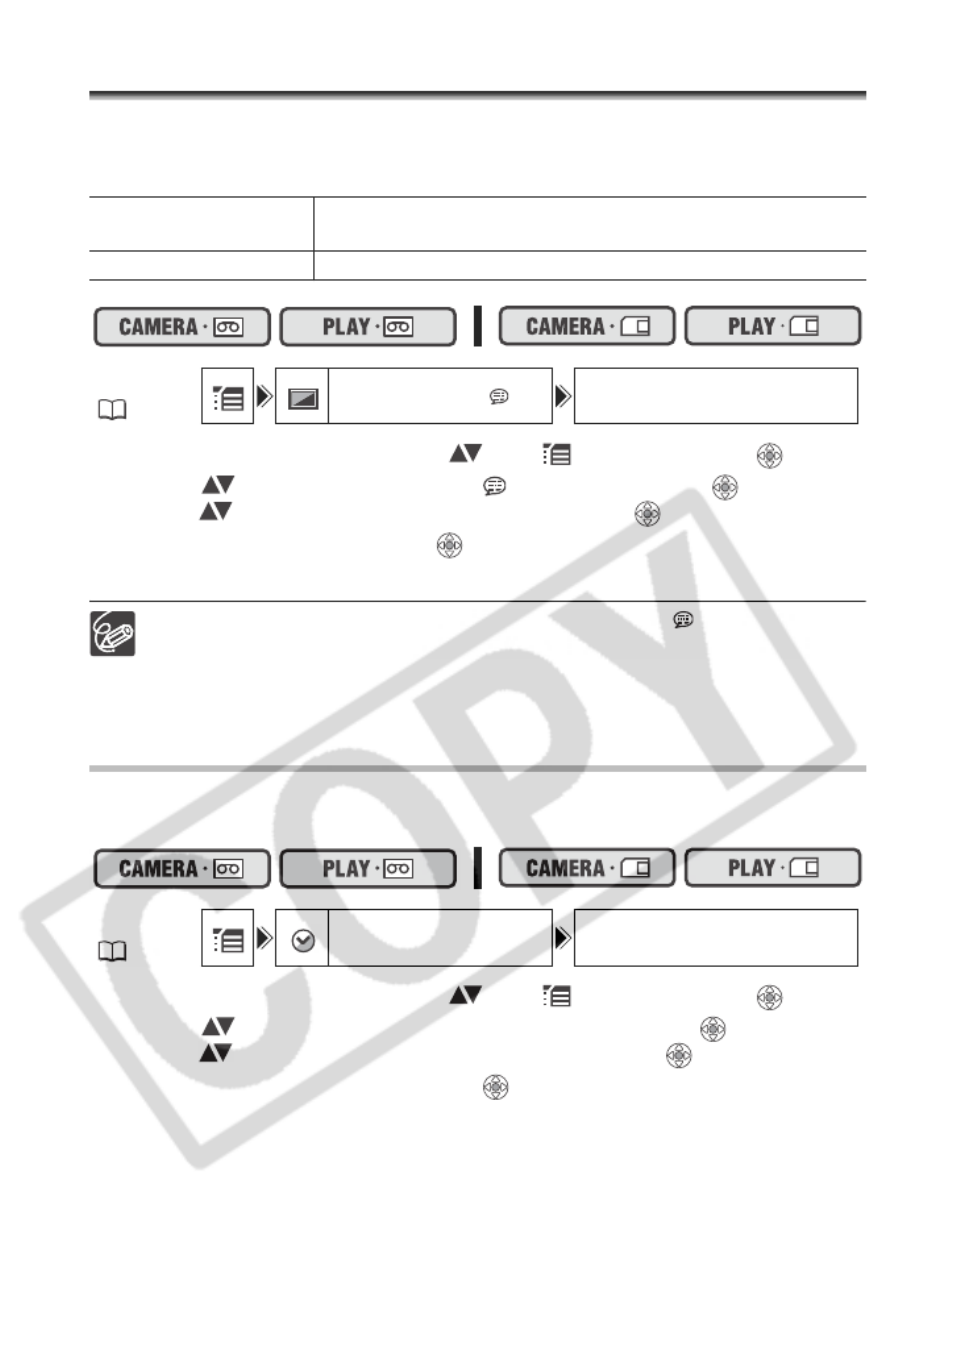
66
Ot her Funct io ns
Changing the Display Language
The language used for screen display and menu items can be changed. The available set
of languages varies depending on the region. Follow the procedure below to check which
set of languages are provided with your camcorder.
1. Open the FUNC. menu, select ( ) the icon and press ( ).
2. Select ( ) the [DISPLAY SETUP/ ] menu and press ( ). Then,
select ( ) the [LANGUAGE] option and press ( ).
3. Select a language and press ( ) to save the changes, then close the
menu.
If you have mistakenly changed the language, follow the mark next to the
menu item to change the setting.
The displays “FUNC.” and “P.SET” at the bottom of the screen refer to the
button names on the camcorder and will not change when you change the
language.
Changing the Date Format
You can select between three date formats. For example, [1. JAN. 2006], [JAN. 1, 2006]
and [2006. 1. 1].
1. Open the FUNC. menu, select ( ) the icon and press ( ).
2. Select ( ) the [DATE/TIME SETUP] menu and press ( ). Then,
select ( ) the [DATE FORMAT] option and press ( ).
3. Select a setting option and press ( ) to save the changes, then close
the menu.
Language Set A English, German, Spanish, French, Italian, Polish, Russian,
Simplified Chinese, Japanese
Language Set B English, Simplified Chinese, Traditional Chinese, Thai
MENU
( 36)
DISPL
DISPL
DISPL
DISPLDISPLAY SE
AY SE
AY SE
AY SEAY SETUP/
TUP/
TUP/
TUP/TUP/ LANGU
LANGU
LANGU
LANGULANGUAGE E
AGE E
AGE E
AGE EAGE ENGLIS
NGLIS
NGLIS
NGLISNGLISH
H
H
HH
MENU
( 36)
DATE/
DATE/
DATE/
DATE/DATE/TIME
TIME
TIME
TIME TIME SETUP
SETUP
SETUP
SETUPSETUP DATE
DATE
DATE
DATE DATE FORMA
FORMA
FORMA
FORMAFORMAT 1.J
T 1.J
T 1.J
T 1.JT 1.JAN.200
AN.200
AN.200
AN.200AN.2006
6
6
66
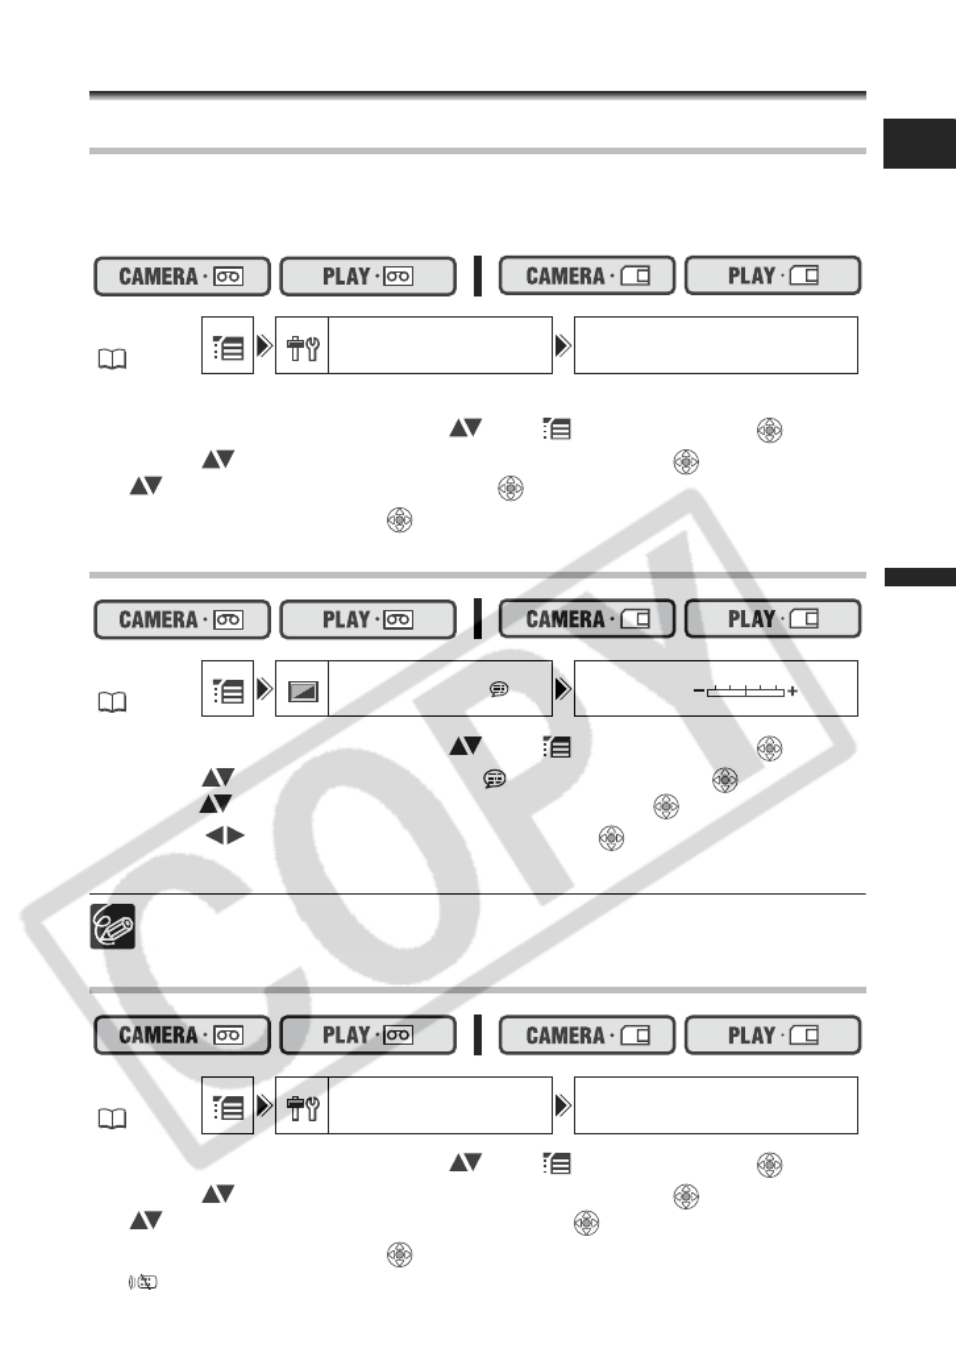
67
Advanced Functions
Other Functions
E
Other Camcorder Settings
Beep
You will hear a beep upon camcorder operations such as power on/off, start/stop, self-
timer countdown, and unusual conditions of the camcorder. If you turn off the beep, all
camcorder sounds will be turned off.
To turn off the beep:
1. Open the FUNC. menu, select ( ) the icon and press ( ).
2. Select ( ) the [SYSTEM SETUP] menu and press ( ). Then, select
( ) the [BEEP] option and press ( ).
3. Set it to [OFF] and press ( ) to save the changes, then close the menu.
Adjusting the Brightness of the LCD Screen
1. Open the FUNC. menu, select ( ) the icon and press ( ).
2. Select ( ) the [DISPLAY SETUP/ ] menu and press ( ). Then,
select ( ) the [BRIGHTNESS] option and press ( ).
3. Adjust ( ) the brightness level and press ( ) to save the changes,
then close the menu.
Changing the brightness of the LCD screen does not affect that of the viewfinder
or the recordings.
Turning the Remote Sensor Off
1. Open the FUNC. menu, select ( ) the icon and press ( ).
2. Select ( ) the [SYSTEM SETUP] menu and press ( ). Then, select
( ) the [WL.REMOTE] option and press ( ).
3. Set it to [OFF] and press ( ) to save the changes, then close the menu.
“ ” appears.
MENU
( 36)
SYSTE
SYSTE
SYSTE
SYSTESYSTEM SET
M SET
M SET
M SETM SETUP
UP
UP
UPUP BEEP
BEEP
BEEP
BEEP BEEP HIGH
HIGH
HIGH
HIGH HIGH VOLUM
VOLUM
VOLUM
VOLUMVOLUME
E
E
EE
MENU
( 36)
DISPL
DISPL
DISPL
DISPLDISPLAY SE
AY SE
AY SE
AY SEAY SETUP/
TUP/
TUP/
TUP/TUP/ BRIGH
BRIGH
BRIGH
BRIGHBRIGHTNESS
TNESS
TNESS
TNESSTNESS
MENU
( 36)
SYSTE
SYSTE
SYSTE
SYSTESYSTEM SET
M SET
M SET
M SETM SETUP
UP
UP
UPUP WL.RE
WL.RE
WL.RE
WL.REWL.REMOTE
MOTE
MOTE
MOTE MOTE ON
ON
ON
ONON

68
Turning Off the Image Stabilizer
The image stabilizer compensates for camcorder shake even at full telephoto. It tries to
compensate for horizontal movements; therefore, you may decide to turn it off when you
mount the camcorder on a tripod.
1. Open the FUNC. menu, select ( ) the icon and press ( ).
2. Select ( ) the [CAMERA SETUP] menu and press ( ). Then, select
( ) the [IMG STAB] option and press ( ).
3. Set it to [OFF] and press ( ) to save the changes, then close the
menu.
“ ” disappears.
The image stabilizer cannot be turned off when the program selector is set to
.
The image stabilizer is designed to compensate a normal degree of camcorder
shake.
The image stabilizer might not be as effective when using the Night
recording program.
Changing the Display of the Start-Up Image
You can set whether the Canon logo will be displayed or not when you turn on the
camcorder.
To turn off the start-up image:
1. Open the FUNC. menu, select ( ) the icon and press ( ).
2. Select ( ) the [SYSTEM SETUP] menu and press ( ). Then, select
( ) the [START-UP IMG] option and press ( ).
3. Set it to [OFF] and press ( ) to save the changes, then close the
menu.
MENU
( 36)
CAMER
CAMER
CAMER
CAMERCAMERA SE
A SE
A SE
A SEA SETUP
TUP
TUP
TUPTUP IMG S
IMG S
IMG S
IMG SIMG STAB
TAB
TAB
TAB TAB ON
ON
ON
ONON
MENU
( 36)
SYSTE
SYSTE
SYSTE
SYSTESYSTEM SE
M SE
M SE
M SEM SETUP
TUP
TUP
TUPTUP START
START
START
STARTSTART-UP
-UP
-UP
-UP -UP IMG O
IMG O
IMG O
IMG OIMG ON
N
N
NN

69
Advanced Functions
Other Functions
E
Demonstration Mode
The demonstration mode displays the camcorder’s main features. It starts automatically
when you leave the camcorder turned on (using the power adapter) without loading a
recording media for more than 5 minutes. However, you can set the camcorder not to
start the demonstration mode.
To deactivate the demonstration mode:
1. Open the FUNC. menu, select ( ) the icon and press ( ).
2. Select ( ) the [DISPLAY SETUP/ ] menu and press ( ). Then,
select ( ) the [DEMO MODE] option and press ( ).
3. Set it to [OFF] and press ( ) to save the changes, then close the
menu.
To cancel the demo mode once it has begun, press any button, turn off the
camcorder or load a recording media.
MENU
( 36)
DISPL
DISPL
DISPL
DISPLDISPLAY SE
AY SE
AY SE
AY SEAY SETUP/
TUP/
TUP/
TUP/TUP/ DEMO
DEMO
DEMO
DEMO DEMO MODE
MODE
MODE
MODE MODE ON
ON
ON
ONON

70
Edit ing
Recording to a VCR or Digital Video
Device
You can copy your recordings by connecting the camcorder to a VCR or a digital video
device. If you connect a digital video device, you can copy recordings with virtually no
generation loss in image and sound quality.
Connecting the Devices
Connecting a VCR
See Playing Back on a TV Screen ( 32).
Connecting a Digital Video Device
Use the optional CV-150F (4 pin-4 pin) or CV-250F (4 pin-6 pin) DV Cable.
Refer also to the instruction manual of the digital video device.
Recording
1. Set the camcorder to mode and load a recorded cassette.
2. Connected device: Load a blank cassette and set the device to record
pause mode.
3. Locate the scene you wish to copy and pause playback shortly before
the scene.
4. Play back the tape.
5. Connected device: Begin recording when the scene you wish to copy
appears. Stop recording when copying is complete.
6. Stop playback.
Signal flow
DV cable (optional)

71
E
Editing
We recommend powering the camcorder from a household power source.
When connecting a VCR, the quality of the edited tape will be slightly lower than
that of the original.
When connecting a digital video device:
- If the picture does not appear, reconnect the DV cable or turn the camcorder
off and back on again.
- Proper operation cannot be guaranteed for all digital video devices equipped
with a DV terminal. If operation does not work, use the AV terminal.

72
Recording from Analog Video
Devices (VCR, TV or Camcorder)
You can record videos or TV programs from a VCR or analog camcorder on the tape in
the camcorder.
1. Connect the camcorder to the analog video device.
See Playing Back on a TV Screen ( 32).
2. Set the camcorder to mode and load a blank cassette.
3. Connected device: Load the recorded cassette.
4. Open the FUNC. menu, select ( ) the record pause
icon and press ( ).
5. Select ( ) [EXECUTE] and press ( ).
In record pause and during recording, you can check the picture
on the screen.
6. Connected device: Play back the tape.
7. If the joystick guide does not appear on screen,
press ( ) to display it.
8. Push the joystick ( ) towards / when the scene
you wish to record appears.
• Recording starts.
• Push the joystick ( ) towards / again to pause/resume the recording.
9. Push the joystick ( ) towards to stop recording.
10.Connected device: Stop playback.
When connecting to a TV/Video with SCART terminal, use a SCART adapter
with input capability (commercially available). The supplied SCART Adapter
PC-A10 is for output only.
Depending on the signal sent from the connected device, dubbing may not work
properly (e.g. signals that include copyright protective signals or anomalous
signals such as ghost signals).
We recommend powering the camcorder from a household power source.
73
E
Editing
Recording from Digital
Video Devices (DV Dubbing)
You can record from other digital video devices equipped with a DV terminal with virtually
no loss in picture and sound quality.
1. Connect the camcorder to the digital video device.
See Connecting a Digital Video Device ( 70).
2. Set the camcorder to mode and load a blank cassette.
Make sure that [AV DV] is set to [OFF] ( 76).
3. Connected device: Load the recorded cassette or disc.
4. Open the FUNC. menu, select ( ) the recording
pause icon and press ( ).
5. Select ( ) [EXECUTE] and press ( ).
In record pause and during recording, you can check the picture
on the screen.
6. Connected device: Play back the tape or disc.
7. If the joystick guide does not appear on screen,
press ( ) to display it.
8. Push the joystick ( ) towards / when the scene
you wish to record appears.
• Recording starts.
• Push the joystick ( ) towards / again to pause/resume the recording.
9. Push the joystick ( ) towards to stop recording.
10.Connected Device: Stop playback.
Blank sections may be recorded as anomalous picture.
If the picture does not appear, reconnect the DV cable or turn the camcorder off
and back on again.
You can only record video signals from devices with the logo from
recordings in SD (standard definition) standard, in SP or LP recording mode.
Note that signals from identically shaped DV (IEEE1394) terminals may be in
different video standards.
We recommend powering the camcorder from a household power source.

74
Concerning Copyright
Copyright Precaution
Certain pre-recorded video tapes, films and other materials, as well as some television
programmes are copyrighted. Unauthorised recording of these materials may violate
copyright protection laws.
Copyright Signals
During playback: If you try to play back a tape that contains copyright control signals for
protection of software, “COPYRIGHT PROTECTED PLAYBACK IS RESTRICTED”
appears for a few seconds and the camcorder displays a blank blue screen. You cannot
playback the contents of the tape.
During recording: If you try to record from software that contains copyright control signals
for protection of software, “COPYRIGHT PROTECTED DUBBING RESTRICTED”
appears. You cannot record the contents of the software.
You cannot record copyright protection signals to a tape using this camcorder.

75
E
Editing
Converting Analog Signals into Digital
Signals (Analog-Digital Converter)
By connecting the camcorder to a VCR or 8mm video camcorder, you can convert analog
video/audio signals to digital signals and output the digital signals via the DV terminal.
The DV terminal serves as output terminal only.
Connecting the Devices
Turn off all the devices before starting the connections. Unload the tape from the
camcorder. Refer also to the instruction manual of the connected device. Use the optional
CV-150F (4 pin-4 pin) or CV-250F (4 pin-6 pin) DV Cable.
R
L
Signal flow
DV cable (optional)
Signal flow
STV-250N Stereo Video
Cable (supplied)
76
Turning On the Analog-Digital Converter
1. Open the FUNC. menu, select ( ) the icon and press ( ).
2. Select ( ) the [VCR SETUP] menu and press ( ). Then, select ( )
the [AV DV] option and press ( ).
3. Set it to [ON] and press ( ) to save the changes, then close the
menu.
Depending on the signal sent from the connected device, the conversion from
analog to digital signals might not work properly (e.g., signals that include
copyright protective signals or anomalous signals such as ghost signals).
When connecting to a TV/Video with SCART terminal, use a SCART adapter
with input capability (commercially available). The supplied SCART Adapter
PC-A10 is for output only.
For normal use, set [AV DV] to [OFF]. If it is set to [ON], digital signals cannot
be input via the camcorder’s DV terminal.
Depending on the software and the specifications of your computer, you may
not be able to transfer converted signals via the DV terminal.
We recommend powering the camcorder from a household power source.
MENU
( 36)
VCR S
VCR S
VCR S
VCR SVCR SETUP
ETUP
ETUP
ETUPETUP AV
AV
AV
AVAV DV OF
DV OF
DV OF
DV OFDV OFF
F
F
FF

77
E
Editing
Audio Dubbing
You can add sound to a recording using the built-in microphone (MIC.IN). only:
You can also record additional sound from external audio devices (AUDIO IN).
This function is operated with the wireless controller.
Connecting an External Audio Device
Refer also to the instruction manual of the connected device.
Dubbing
1. Set the camcorder to mode and load a recorded cassette.
Use a tape recorded in SP, 12-bit mode with this camcorder.
2. Open the FUNC. menu, select ( ) the icon and press ( ).
3. Select ( ) the [AUDIO SETUP] menu and press ( ). Then, select
( ) the [AUDIO DUB.] option and press ( ).
4. Set it to [AUDIO IN] or [MIC.IN] and press ( ) to save the changes,
then close the menu.
: Make sure the [MIC.IN] setting is selected.
5. Locate the scene you wish to start audio dubbing.
6. Press the PAUSE button on the wireless
controller.
MENU
( 36)
AUDIO
AUDIO
AUDIO
AUDIOAUDIO SETU
SETU
SETU
SETU SETUP
P
P
PP AUDIO
AUDIO
AUDIO
AUDIOAUDIO DUB.
DUB.
DUB.
DUB. DUB. AUD
AUD
AUD
AUD AUDIO IN
IO IN
IO IN
IO INIO IN
R
R
R
RR
L
L
L
LL
AUDIO
OUTPUT
Signal flow
STV-250N Stereo Video Cable
(supplied)
Audio device
(e.g. CD player)
STOP
PAUSE SLOW
AUDIO DUB.
ZERO SET
MEMORY
TV SCREEN

78
7. Press the AUDIO DUB. button on the wireless
controller.
“AUDIO DUB.” and “ ” appear.
8. Press the PAUSE button on the wireless controller
to begin dubbing.
• Audio device: Begin playback.
• Microphone: Speak into the microphone.
9. Press the STOP button on the wireless controller
to stop dubbing.
Audio device: Stop playback.
Use only tapes recorded in SP mode 12-bit audio sound with this camcorder.
Audio dubbing will stop if the tape has a blank section or a section recorded in
LP mode or 16-bit mode.
You cannot use the DV terminal for audio dubbing.
If you add sound to a tape not recorded with this camcorder, sound quality may
decrease.
Sound quality may decrease when you add sound to the same scene for more
than 3 times.
When you connect an audio device, check the picture on the LCD screen and
the sound via built-in speaker or audio device.
When you use the microphone, you can check the picture on a TV connected
via the AV terminal and the sound via headphones connected to the TV.
Set the zero set memory at the end of the scene you wish to audio dub. The
camcorder will automatically stop audio dubbing at that point.
PAUSE SLOW
AUDIO DUB.
ZERO SET
MEMORY
TV SCREEN
PLAY
STOP
PAUSE SLOW
AUDIO DUB.
ZERO SET
MEMORY
TV SCREEN
STOP
PAUSE SLOW
AUDIO DUB.
ZERO SET
MEMORY
TV SCREEN

79
E
Editing
Playing Back the Added Sound
You can select to play back Stereo 1 (original sound), Stereo 2 (added sound), or adjust
the balance of both sounds.
1. Open the FUNC. menu, select ( ) the icon and press ( ).
2. Select ( ) the [AUDIO SETUP] menu and press ( ). Then, select
( ) the [12bit AUDIO] option and press ( ).
3. Select a setting option and press ( ) to save the changes.
• STEREO1: Plays back the original sound.
• STEREO2: Plays back the added sound.
• MIX/FIXED: Plays back Stereo 1 and Stereo 2 in the same level.
• MIX/VAR.: Plays back Stereo 1 and Stereo 2. The mix balance can be adjusted.
• If you select an audio setting other than [MIX/VAR.], close the menu.
To adjust the mix level when you select [MIX/VAR.]:
4. From the [AUDIO SETUP] menu select ( ) the [MIX BALANCE]
option and press ( ).
5. Adjust ( ) the mix level between ST-1 and ST-2 and press ( ) to
save the changes, then close the menu.
The camcorder resets to [STEREO1] when you turn the camcorder off. However,
the mix balance is memorized by the camcorder.
MENU
( 36)
AUDIO
AUDIO
AUDIO
AUDIOAUDIO SETU
SETU
SETU
SETU SETUP
P
P
PP 12bit
12bit
12bit
12bit12bit AUDI
AUDI
AUDI
AUDI AUDIO ST
O ST
O ST
O STO STEREO1
EREO1
EREO1
EREO1EREO1
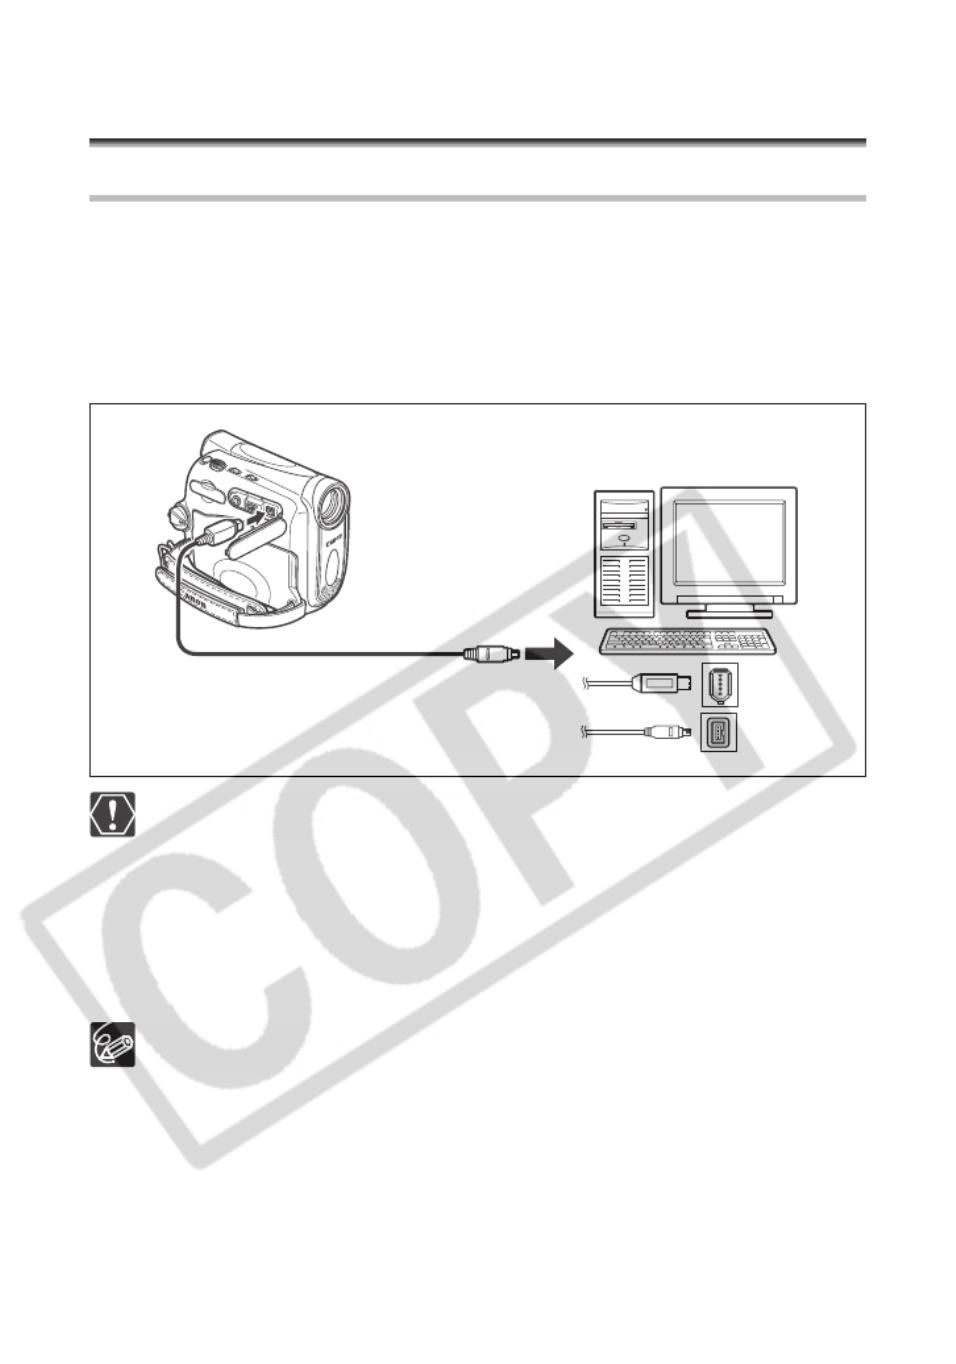
80
Transferring Video Recordings to a
Computer
Transferring Using a DV Cable
You can transfer recordings to a computer equipped with a IEEE1394 (DV) terminal or
IEEE1394 capture board. Use the editing software supplied with your computer/capture
board to transfer video recording from tape to computer. Refer to the instruction manual of
the software. A driver is preinstalled on Windows operating systems later than Windows
98 Second Edition and Mac operating systems later than Mac OS 9, and will be installed
automatically.
Use the optional CV-150F (4 pin-4 pin) or CV-250F (4 pin-6 pin) DV Cable.
Operation may not work correctly depending on the software and the
specifications/settings of your computer.
If the computer freezes while you have connected the camcorder, disconnect
and reconnect the DV cable. If the problem persists, disconnect the interface
cable, turn off camcorder and computer, turn camcorder and computer back on
and reconnect them.
Make sure that camcorder and computer are not connected with a USB cable
before connecting the camcorder to the computer using the DV cable.
Otherwise, the computer may not operate properly.
We recommend powering the camcorder from a household power source while
it is connected to the computer.
Refer also to the instruction manual of the computer.
6-pin
DV cable (optional)
IEEE1394 (DV) terminal
4-pin

83
E
Using a Memory Card
Changing the Still Image Quality during a Tape’s
Playback
While playing back a tape you can capture a scene as a still image on the memory card.
In the still image size will be S 640x480, but you can select the still image
quality.
1. Open the FUNC. menu and select ( ) the image quality icon.
2. Select ( ) the desired image quality.
• The still image size is S 640x480 and cannot be changed.
• The number on the right indicates the approximate number of images that can be
recorded on the memory card at the current image quality setting.
3. Close the menu.
Changing the Movie Size
You can choose between 320 x 240 pixels and 160 x 120 pixels.
1. Open the FUNC. menu and select ( ) the movie size icon.
2. Select ( ) a setting option and close the menu.
Movies are recorded with Motion JPEG compression.
Maximum recording time of a movie on a memory card:
MENU
( 36)
FINE/
FINE/
FINE/
FINE/ FINE/640x48
640x48
640x48
640x48640x480
0
0
00
MENU
( 36)
320x
320x
320x
320x 320x240
240
240
240240
Image Size Recording Time File Size per Second
16MB 128MB 512MB
320 x 240 50 sec. 8 min. 32 min. 250KB
160 x 120 1 min. 17 min. 67 min. 120KB
Specyfikacje produktu
| Marka: | Canon |
| Kategoria: | kamera wideo |
| Model: | MV960 |
Potrzebujesz pomocy?
Jeśli potrzebujesz pomocy z Canon MV960, zadaj pytanie poniżej, a inni użytkownicy Ci odpowiedzą
Instrukcje kamera wideo Canon

19 Stycznia 2025
18 Stycznia 2025
4 Stycznia 2025
12 Października 2024
29 Września 2024
28 Września 2024
16 Września 2024
14 Września 2024
14 Września 2024
13 Września 2024
Instrukcje kamera wideo
- kamera wideo Sony
- kamera wideo Samsung
- kamera wideo Leica
- kamera wideo Logitech
- kamera wideo Xiaomi
- kamera wideo Sharp
- kamera wideo Braun
- kamera wideo Voltcraft
- kamera wideo Milwaukee
- kamera wideo Philips
- kamera wideo SilverCrest
- kamera wideo Xblitz
- kamera wideo Panasonic
- kamera wideo Mio
- kamera wideo Viewsonic
- kamera wideo Nedis
- kamera wideo Medion
- kamera wideo OK
- kamera wideo Lenco
- kamera wideo Fujifilm
- kamera wideo Toshiba
- kamera wideo Hazet
- kamera wideo Garmin
- kamera wideo Salora
- kamera wideo Evolveo
- kamera wideo HP
- kamera wideo Soundmaster
- kamera wideo Hyundai
- kamera wideo SJCAM
- kamera wideo Creative
- kamera wideo Swann
- kamera wideo Nikon
- kamera wideo Kodak
- kamera wideo Cisco
- kamera wideo SBS
- kamera wideo Kenwood
- kamera wideo DJI
- kamera wideo Gembird
- kamera wideo Minox
- kamera wideo Cobra
- kamera wideo JVC
- kamera wideo Trust
- kamera wideo Linksys
- kamera wideo Thinkware
- kamera wideo AgfaPhoto
- kamera wideo Vimar
- kamera wideo Ricoh
- kamera wideo Renkforce
- kamera wideo Rollei
- kamera wideo Marshall
- kamera wideo Trotec
- kamera wideo Uniden
- kamera wideo DataVideo
- kamera wideo Pyle
- kamera wideo Zoom
- kamera wideo Midland
- kamera wideo Speco Technologies
- kamera wideo Samson
- kamera wideo ARRI
- kamera wideo Olympus
- kamera wideo Navitel
- kamera wideo GoClever
- kamera wideo ION
- kamera wideo Maginon
- kamera wideo Intenso
- kamera wideo Polaroid
- kamera wideo Prestigio
- kamera wideo Konica Minolta
- kamera wideo Sanyo
- kamera wideo Oregon Scientific
- kamera wideo Bresser
- kamera wideo Jay-Tech
- kamera wideo Hama
- kamera wideo GoPro
- kamera wideo Insignia
- kamera wideo Extech
- kamera wideo TomTom
- kamera wideo Denver
- kamera wideo Bushnell
- kamera wideo Berger & Schröter
- kamera wideo Hitachi
- kamera wideo Tracer
- kamera wideo RCA
- kamera wideo Klein Tools
- kamera wideo Genius
- kamera wideo BenQ
- kamera wideo Trevi
- kamera wideo Magellan
- kamera wideo Lexibook
- kamera wideo Overmax
- kamera wideo Sencor
- kamera wideo Insta360
- kamera wideo EasyMaxx
- kamera wideo Blackmagic Design
- kamera wideo DOD
- kamera wideo Steinberg
- kamera wideo Best Buy
- kamera wideo Lamax
- kamera wideo Transcend
- kamera wideo Elmo
- kamera wideo Vitek
- kamera wideo Laserliner
- kamera wideo Vivitar
- kamera wideo Quintezz
- kamera wideo Aiptek
- kamera wideo AEE
- kamera wideo Airis
- kamera wideo ATN
- kamera wideo Activeon
- kamera wideo Energy Sistem
- kamera wideo Easypix
- kamera wideo Nilox
- kamera wideo Flir
- kamera wideo Coby
- kamera wideo Envivo
- kamera wideo TacTic
- kamera wideo Macally
- kamera wideo Bauer
- kamera wideo Naxa
- kamera wideo Mamiya
- kamera wideo Ricatech
- kamera wideo Konig
- kamera wideo Tronje
- kamera wideo Mpman
- kamera wideo Nikkei
- kamera wideo T'nB
- kamera wideo Ematic
- kamera wideo Minolta
- kamera wideo Zagg
- kamera wideo Veho
- kamera wideo Dnt
- kamera wideo Zorki
- kamera wideo Contour
- kamera wideo Iget
- kamera wideo RunCam
- kamera wideo Drift
- kamera wideo SeaLife
- kamera wideo Sakar
- kamera wideo Jobo
- kamera wideo Dragon Touch
- kamera wideo Mediacom
- kamera wideo Kreator
- kamera wideo Contax
- kamera wideo EE
- kamera wideo Traveler
- kamera wideo Contour Design
- kamera wideo Kaiser Baas
- kamera wideo Bluetech
- kamera wideo Braun Phototechnik
- kamera wideo Spypoint
- kamera wideo Kitvision
- kamera wideo Praktica
- kamera wideo MMTC
- kamera wideo Flip
- kamera wideo Kogan
- kamera wideo BlackVue
- kamera wideo Brinno
- kamera wideo DXG
- kamera wideo Storex
- kamera wideo MD 80
- kamera wideo Vupoint Solutions
- kamera wideo Leotec
- kamera wideo Skytronic
- kamera wideo Whistler
- kamera wideo Curve
- kamera wideo PCE Instruments
- kamera wideo CamOne
- kamera wideo Mobius
- kamera wideo ISAW
- kamera wideo Beaulieu
- kamera wideo Revier Manager
- kamera wideo Kobian
- kamera wideo FHD 1080P
- kamera wideo RSC
- kamera wideo Stealth Cam
- kamera wideo Aqua-Vu
- kamera wideo Hamlet
- kamera wideo Qoltec
- kamera wideo Replay
- kamera wideo Akaso
- kamera wideo Hamilton Buhl
- kamera wideo Aida
- kamera wideo Rexing
- kamera wideo IOPLEE
- kamera wideo Moultrie
- kamera wideo Microtek
- kamera wideo Teslong
- kamera wideo Izzo
Najnowsze instrukcje dla kamera wideo

30 Marca 2025
30 Marca 2025
30 Marca 2025
30 Marca 2025
28 Marca 2025
28 Marca 2025
28 Marca 2025
27 Marca 2025
14 Marca 2025
12 Marca 2025