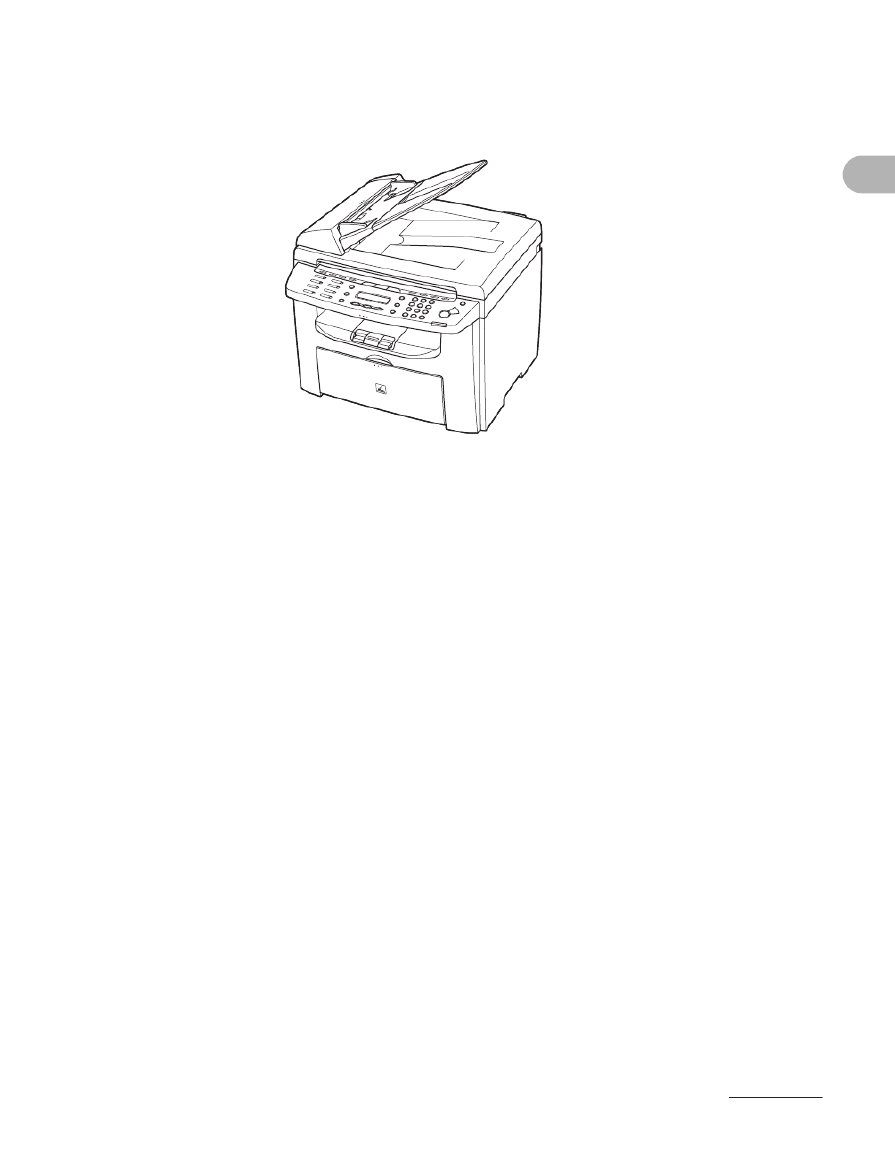
Instrukcja obsługi Canon i-SENSYS MF4150
Przeczytaj poniżej 📖 instrukcję obsługi w języku polskim dla Canon i-SENSYS MF4150 (165 stron) w kategorii drukarka. Ta instrukcja była pomocna dla 20 osób i została oceniona przez 2 użytkowników na średnio 4.5 gwiazdek
Strona 1/165

ENG
Basic Guide
Please read this guide before operating this product.
After you finish reading this guide, store it in a safe place for future reference.
Before Using the Machine
Document Handling
Print Media
Sending Faxes (MF4140/MF4150
Only)
Receiving Faxes (MF4140/MF4150
Only)
Copying
Printing
Scanning
PC Faxing (MF4140/MF4150 Only)
Troubleshooting
Machine Settings
Appendix
Maintenance
Series
What Can I Do with This Machine?

i
Manuals for the Machine
●Machine Set-Up
●Software Installation Starter Guide
●Basic Features
●Maintenance
●Machine Settings
●Specifications
Basic Guide
(This Document)
●Advanced Features
●System Monitor
●Reports and Lists Advanced Guide
●Scanning Features
Scanner Driver Guide
Indicates the manual is supplied in PDF format in the accompanying CD-ROM.
●To view the manual in PDF format, Adobe Reader/Adobe Acrobat Reader is required. If Adobe
Reader/Adobe Acrobat Reader is not installed on your system, please download it from the Adobe
Systems Incorporated website.
●Considerable effort has been made to ensure that this manual is free of inaccuracies and omissions.
However, as we are constantly improving our products, if you need an exact specification, please
contact Canon.
●The machine illustration on the cover may differ slightly from your machine.
CD-ROM
CD-ROM
CD-ROM

ii
What Can I Do with This Machine?
What Can I Do with This
Machine?
Fax Features (MF4140/MF4150 Only)
Specify a recipient with a single key
One-Touch Speed Dialing
→p. 4-7
Specify a recipient with a two-digit
code
Coded Dialing
→p. 4-14
Specify multiple recipients with a
single key
Group Dialing
→p. 4-21
Look up a particular recipient
Using Address Book
→Advanced Guide
Redial when the line is busy
Redialing
→Advanced Guide
AAAAA
BBBBB
CCCCC

iv
What Can I Do with This Machine?
Copy Features
Select a scan mode depending on
the type of image
Image Quality
→p. 6-3
Adjust the density level of scanned
images
Density
→p. 6-4
Enlarge or reduce copied images
Zoom Ratio
→p. 6-6
Sorts copies by page order
Collate Copy
→Advanced Guide
Make two-sided copies
Two-Sided Copying
→Advanced Guide
ABC
ABC
ABC
ABC
AA
DDDD
DDDD
DDDD
DDDD
4
CCCC
CCCC
CCCC
CCCC
3
BBBB
BBBB
BBBB
BBBB
2
AAAA
AAAA
AAAA
AAAA
1
AAAA
AAAA
AAAA
AAAA
1
AAAA
AAAA
AAAA
AAAA
1
AAAA
AAAA
AAAA
AAAA
1
AAAA
AAAA
AAAA
AAAA
1
D
D
D
DE
E
E
EF
F
F
F
D
D
D
DE
E
E
EF
F
F
F
D
D
D
DE
E
E
EF
F
F
F
D
D
D
DE
E
E
EF
F
F
F
2
ABC
ABC
ABC
ABC
1
ABC
ABC
ABC
ABC
1
D
D
D
DE
E
E
EF
F
F
F
D
D
D
DE
E
E
EF
F
F
F
E
E
E
EF
F
F
F

vi
What Can I Do with This Machine?
PC Fax Feature (MF4140/MF4150 Only)
Send a fax from a PC
PC Faxing
→Online Help

vii
What Can I Do with This Machine?
Contents
Manuals for the Machine.................................................................i
What Can I Do with This Machine? ...............................................ii
Fax Features (MF4140/MF4150 Only) ............................ ii
Copy Features ................................................................ iv
Printer Feature................................................................. v
Scanner Feature .............................................................. v
PC Fax Feature (MF4140/MF4150 Only) ....................... vi
Contents ........................................................................................vii
How to Use This Guide.................................................................xii
Symbols Used in This Manual .................... ........xii............
Illustrations Used in This Manual...................................xiii
Legal Notices ................................. ................................. .............xiv
Trademarks............ ............................................... .........xiv
Copyright .......................................................................xiv
Disclaimers ....................................................................xiv
Users in New Zealand...................................................................xv
Caution (New Zealand Only) ......................................... xv
1 Before Using the Machine ......................................................1-1
Machine Components .................................................................1-1
Operation Panel ...........................................................................1-4
Main Operation Panel ...................................................1-4
Facsimile Operation Panel (MF4140/MF4150 Only) ....1-8

viii
What Can I Do with This Machine?
LCD (Standby Mode) ...................................................................1-9
Fax Mode (MF4140/MF4150 Only)...............................1-9
Copy Mode ...................................................................1-9
Scan Mode....................................................................1-9
Optional Handset (MF4140/MF4150 Only) ...............................1-10
Maintaining the Handset .............................................1-10
Toner Cartridge..........................................................................1-11
Maintaining the Toner Cartridge .................................1-12
Checking the toner level .............................................1-13
Timer Settings............................................................................1-14
Setting the Sleep Mode ..............................................1-14
Setting Daylight Saving Time
(MF4140/MF4150 Only)..............................................1-17
2 Document Handling.................................................................2-1
Document Requirements ............................................................2-1
Scanning Area..............................................................................2-3
Loading Documents ....................................................................2-4
On the Platen Glass......................................................2-4
In the ADF (MF4150 Only)............................................2-6
3 Print Media ...............................................................................3-1
Paper Requirements....................................................................3-1
Printable Area ..............................................................................3-2
Paper Guidelines .........................................................................3-3

ix
What Can I Do with This Machine?
Loading Paper..............................................................................3-4
Into the Multi-Purpose tray............................................3-4
Setting Paper Size and Type.......................................................3-7
4 Sending Faxes (MF4140/MF4150 Only) .................................4-1
Scan Settings ................................. ................................. .............4-3
Image Quality................................................................4-3
Density..........................................................................4-5
Speed Dialing ...............................................................................4-6
Registering Recipients for Speed Dialing .....................4-6
Using Speed Dialing ...................................................4-30
Manual Sending (MF4150 Only)................................................4-32
5 Receiving Faxes (MF4140/MF4150 Only)...............................5-1
6 Copying ....................................................................................6-1
Scan Settings ................................. ................................. .............6-3
Image Quality................................................................6-3
Density..........................................................................6-4
Zoom Ratio ...................................................................6-6
7 Printing.....................................................................................7-1
8 Scanning ..................................................................................8-1
9 PC Faxing (MF4140/MF4150 Only) .........................................9-1

xi
What Can I Do with This Machine?
12 Machine Settings .................................................................12-1
Machine Settings .......................................................................12-1
Printing User’s Data List (MF4140/MF4150 Only) ......12-1
Accessing the Setting Menu .......................................12-3
Setting Menu ..............................................................................12-5
PAPER SETTINGS ....................................................12-5
COMMON SETTINGS ...............................................12-5
COPY SETTINGS ......................................................12-6
TIMER SETTINGS .....................................................12-7
FAX SETTINGS (MF4140/MF4150 Only) ..................12-8
BROADCAST (MF4140/MF4150 Only) ...................12-12
ADDRESS BOOK SET. (MF4140/MF4150 Only) ....12-13
ADJUST./CLEANING ..................... .........12-14................
REPORT SETTINGS (MF4140/MF4150 Only) ........12-15
13 Appendix ..............................................................................13-1
Specifications ............................................................................13-1
General .......................................................................13-1
Copier .........................................................................13-3
Printer .........................................................................13-4
Facsimile (MF4140/MF4150 Only) .............................13-4
Telephone (MF4140/MF4150 Only)............................13-5
Index .................................... .............................................. .........13-6
xiii
What Can I Do with This Machine?
Illustrations Used in This Manual
Unless otherwise mentioned, illustrations used in this manual are those taken when no
optional equipment is attached to the MF4150.
The model MF4150 is used for illustration purposes in this manual.
When there is any difference among MF4122, MF4140, MF4150, it is clearly indicated
in the text, e.g., “MF4150 Only.”
1-1
Before Using the Machine
Before Using the
Machine
Machine Components
A ADF (Automatic Document Feeder)*
Holds documents and feeds them
automatically into the scanning area.
* MF4150 Only
B Slide guides
Adjust to the width of the document.
C Document feeder tray
Holds documents.
D Document delivery tray
Receives documents.
E Operation panel
Controls the machine.
F Output tray
Receives copies, prints and faxes.
G Paper feeding tray
Loads the paper supply.
H Platen glass cover*
Open this cover when placing a document on
the platen glass.
* MF4122/MF4140 Only
A
G F E
CB D
H

1-2
Before Using the Machine
I Scanning area
Scans documents from the ADF.
J Platen glass
Place documents.
K Output tray extension
Extension for the output tray.
L Paper stopper
Prevents the paper from falling off the output
tray.
Open the paper stopper from its original
position for A4 paper.
M Slide guides for multi-purpose tray
Adjusts to the width of the paper.
N Paper guide rail
Holds the paper supply.
O Dust cover
Protects the paper supply in the paper
feeding tray from the dirt and dust.
P Multi-purpose tray
Feeds paper when you insert one by one
manually.
Q Scanning platform
open this platform when replacing the toner
cartridge or clearing paper jams.
R Main power switch
Turn the power on or off.
M
I J K
NR
L
OPQ
1-3
Before Using the Machine
S USB port
Connect the USB (Universal Serial Bus)
cable.
T Rear cover
Open this cover when clearing paper jams.
U Power socket
Connect the power cord.
V Telephone line jack*
Connect the external telephone cable.
W External device jack*
Connect the external device.
X Handset jack*
Connect an optional handset cable.
*MF4140/MF4150 Only
S
T
VU
WX

1-4
Before Using the Machine
Operation Panel
Main Operation Panel
●MF4140/MF4150
A [System Monitor] key
Press to check print status, fax status, print
and scan counts, remaining memory, or print
transmission/reception results.
B [View Settings] key
Press to confirm settings of the copy function.
C [COPY] key
Press to switch to the Copy mode.
D [FAX] key
Press to switch to the Fax mode.
E [SCAN] key
Press to switch to the Scan mode.
F [Additional Functions] key
Press to select or cancel the modes in
Additional Functions.
G [2-Sided] key
Press to set two-sided copying.
H [Enlarge/Reduce] key
Press to enlarge or reduce copy ratio.
I [Density] key
Press to adjust copy or fax density.
J [Image Quality] key
Press to select image quality for copy or fax.
K [Collate/2 on 1] key
Press to collate copies, or press to set 2 on 1
copying.
L [Energy Saver] key
Press to set or cancel the Sleep mode
manually. The key lights green when the
Sleep mode is set, and goes off when the
mode is canceled.
A B C D FE G H J K LI
X V U T S R Q P O N MW

1-6
Before Using the Machine
●MF4122
A [System Monitor] key
Press to check print status, print and scan
counts.
B [View Settings] key
Press to confirm settings of the copy function.
C [COPY] key
Press to switch to the Copy mode.
D [SCAN] key
Press to switch to the Scan mode.
E [Additional Functions] key
Press to select or cancel the modes in
Additional Functions.
F [2-Sided] key
Press to set two-sided copying.
G [Enlarge/Reduce] key
Press to enlarge or reduce copy ratio.
H [Density] key
Press to adjust copy.
I [Image Quality] key
Press to select image quality for copy.
J [Collate/2 on 1] key
Press to collate copies, or press to set 2 on 1
copying.
K [Energy Saver] key
Press to set or cancel the Sleep mode
manually. The key lights green when the
Sleep mode is set, and goes off when the
mode is canceled.
L [Stop/Reset] key
Press to stop a current job. Also, press to
return the machine to the standby mode.
A B C D FE G H J KI
V T S R Q O N M LPU

1-7
Before Using the Machine
M Error indicator
Flashes when an error has occurred.
N Processing/Data indicator
Lights when the machine has waiting jobs.
O [Start] key
Press to start copying and scanning.
P Numeric keys
Enter numbers.
Q [Clear] key
Press to clear entered alphanumeric characters.
R [ ] key
Press to increase the value for various
settings. Also press to see the next item in
the menu.
S [OK] key
Press to accept a set function or mode.
T [ ] key
Press to decrease the value for various
settings. Also press to see the previous item
in the menu.
U LCD display
Displays messages and prompts during
operation. Displays selection, text, and
numbers when adjusting the settings.
V [Toner Gauge] key
Press to check the toner remaining in the
toner cartridge.

1-8
Before Using the Machine
Facsimile Operation Panel (MF4140/MF4150 Only)
A [Hook] key
Press when you want to dial without lifting up
the optional handset or the handset of the
external telephone.
B [Redial/Pause] key
Press to redial the last dialed number when
fax is standing by, or press to insert a pause
when entering a fax number.
C [Coded Dial] key
Press to perform coded dialing.
D [Address Book] key
Press to search pre-registered destinations
under one-touch speed dialing keys or coded
dialing numbers by name.
E [R] key
Press to dial an outside line access number
or an extension number when the unit is
connected through a switchboard (PBX).
F One-Touch Speed Dial keys
Press to use one-touch speed dialing (Pre-
registered frequently used numbers or group
dialing).
A
F
B C D
E
1-9
Before Using the Machine
LCD (Standby Mode)
Fax Mode (MF4140/MF4150 Only)
A Date & Time
B Receive mode
C Image quality
Copy Mode
A Zoom ratio
B Paper size
C Quantity
D Density
E Image quality
Scan Mode
NOTE
– Depending on your needs, you can change the
standby display which appears when the main
power switch is turned on. For details, see
“Setting Menu,” on p. 12-5.
– When the main power switch is turned on, the
LCD displays <PLEASE WAIT> first, and then
displays <INITIALIZING...> until the standby
display appears. It is also possible to see the
standby display without having
<INITIALIZING...> shown.
– If the machine remains idle for one minute, the
display returns to the standby mode (Auto Clear
Function).
31/12 2006 SUN 10:50
FaxOnly STANDARD
A
B C
100% A4
T E X T / P H O T O 1
A
D E
B C
SCANNING MODE

1-10
Before Using the Machine
Optional Handset
(MF4140/MF4150 Only)
If you want to use the machine as a telephone and a fax machine, or if you want to
receive faxes manually, install the optional handset available from your local authorized
Canon dealer or the Canon help line.
NOTE
For how to install the handset, see “Connect Telephone Cables and Install Handset,” in the Starter Guide.
Maintaining the Handset
– Do not leave the handset exposed to direct sunlight.
– Do not install the handset in hot or humid conditions.
– Do not spray aerosol polish on the handset as it may cause damage.
– Use a damp cloth to wipe clean the handset.
Use a sharp object (i.e., pen) to select the ring volume of the handset.

1-14
Before Using the Machine
Timer Settings
Setting the Sleep Mode
When the machine remains idle for a certain period of time, it automatically enters the
Sleep mode.
1
1
1
11 Press [Additional Functions].
2
2
2
22 Press [ ] or [ ] to select <TIMER SETTINGS>, then press [OK].
3
3
3
33 Press [ ] or [ ] to select <AUTO SLEEP>, then press [OK].
1
2
3
[OK]

1-17
Before Using the Machine
Setting Daylight Saving Time (MF4140/MF4150 Only)
In some countries or areas, time is advanced throughout the summer season. This is
called “Daylight Saving Time.”
1
1
1
11 Press [Additional Functions].
2
2
2
22 Press [ ] or [ ] to select <TIMER SETTINGS>, then press [OK].
3
3
3
33 Press [ ] or [ ] to select <DAYLIGHT SV.TIME>, then press [OK].
4
4
4
44 Press [ ] or [ ] to select <ON>, then press [OK].
5
5
5
55 Press [Stop/Reset] to return to the standby mode.
[OK]
5
1
2
4
3
Specyfikacje produktu
| Marka: | Canon |
| Kategoria: | drukarka |
| Model: | i-SENSYS MF4150 |
Potrzebujesz pomocy?
Jeśli potrzebujesz pomocy z Canon i-SENSYS MF4150, zadaj pytanie poniżej, a inni użytkownicy Ci odpowiedzą
Instrukcje drukarka Canon

9 Kwietnia 2025
4 Kwietnia 2025
4 Marca 2025
3 Marca 2025
1 Marca 2025
13 Lutego 2025
8 Lutego 2025
2 Lutego 2025
18 Stycznia 2025
18 Stycznia 2025
Instrukcje drukarka
- drukarka Sony
- drukarka Samsung
- drukarka LG
- drukarka Xiaomi
- drukarka Sharp
- drukarka Huawei
- drukarka Lenovo
- drukarka Epson
- drukarka Fujitsu
- drukarka Roland
- drukarka Panasonic
- drukarka StarTech.com
- drukarka Fujifilm
- drukarka MSI
- drukarka Toshiba
- drukarka D-Link
- drukarka Citizen
- drukarka HP
- drukarka Brother
- drukarka Honeywell
- drukarka Kodak
- drukarka Testo
- drukarka Primera
- drukarka Xerox
- drukarka Godex
- drukarka Olivetti
- drukarka Zebra
- drukarka Dell
- drukarka Digitus
- drukarka AgfaPhoto
- drukarka Kyocera
- drukarka Ricoh
- drukarka Seiko
- drukarka Renkforce
- drukarka Thomson
- drukarka AVM
- drukarka Velleman
- drukarka Dymo
- drukarka Panduit
- drukarka Olympus
- drukarka OKI
- drukarka Mitsubishi
- drukarka Intermec
- drukarka NEC
- drukarka Polaroid
- drukarka Konica Minolta
- drukarka Bixolon
- drukarka Pantum
- drukarka Olympia
- drukarka Datamax O'Neil
- drukarka DNP
- drukarka Equip
- drukarka ZKTeco
- drukarka TSC
- drukarka HiTi
- drukarka Microboards
- drukarka Triumph-Adler
- drukarka Fargo
- drukarka Entrust
- drukarka Kern
- drukarka Brady
- drukarka Tomy
- drukarka Lexmark
- drukarka Sagem
- drukarka Nilox
- drukarka Argox
- drukarka Royal Sovereign
- drukarka Minolta
- drukarka Oce
- drukarka Paxar
- drukarka IDP
- drukarka Metapace
- drukarka Ultimaker
- drukarka Ibm
- drukarka CSL
- drukarka Toshiba TEC
- drukarka Frama
- drukarka Builder
- drukarka Kogan
- drukarka Star Micronics
- drukarka Posiflex
- drukarka Dascom
- drukarka GG Image
- drukarka Vupoint Solutions
- drukarka Elite Screens
- drukarka DTRONIC
- drukarka Phoenix Contact
- drukarka Videology
- drukarka Epson 7620
- drukarka Star
- drukarka EC Line
- drukarka Colop
- drukarka Approx
- drukarka Fichero
- drukarka Raspberry Pi
- drukarka Unitech
- drukarka Middle Atlantic
- drukarka Evolis
- drukarka Tally Dascom
- drukarka Custom
- drukarka Nisca
- drukarka Sawgrass
- drukarka Mutoh
Najnowsze instrukcje dla drukarka

9 Kwietnia 2025

9 Kwietnia 2025
9 Kwietnia 2025

9 Kwietnia 2025

3 Kwietnia 2025
3 Kwietnia 2025
3 Kwietnia 2025

2 Kwietnia 2025
2 Kwietnia 2025

2 Kwietnia 2025