Instrukcja obsługi Canon BJC-620
Przeczytaj poniżej 📖 instrukcję obsługi w języku polskim dla Canon BJC-620 (97 stron) w kategorii drukarka. Ta instrukcja była pomocna dla 2 osób i została oceniona przez 2 użytkowników na średnio 4.5 gwiazdek
Strona 1/97

BJC-620
USER’S
MANUAL
Canon

BJC-620 Table of Contents
1. Introduction 1 – 1
Supplies and Accessories 1 – 2
Ink Tanks 1 – 2
Canon Specialty Papers 1 – 2
Getting Help From Canon 1 – 3
Servicing the Printer 1 – 4
2. Using the Microsoft Windows Printing System 2 – 1
Understanding the Microsoft Windows Printing System 2 – 2
Checking the Computer Requirements 2 – 2
Printing With the Microsoft Printing System 2 – 3
Using On-Line Help 2 – 4
Using the Microsoft Windows Printing System Program Group 2 – 5
The Microsoft Windows Printing System Dialog Boxes 2 – 6
Opening the Microsoft Windows Printing System Dialog Boxes 2 – 6
Overview of the Microsoft Windows Printing System 2 – 8
Microsoft Windows 95 2 – 8
Microsoft Windows 3.1 or Microsoft Windows for Workgroups 3.1 2 – 11
Checking the Status of a Print Job 2 – 13
Using the Status Window 2 – 14
Opening the Status Window 2 – 14
Using the Toolbar 2 – 15
Using the Status Window as an Icon 2 – 15
Messages Displayed in the Status Window 2 – 17
Customizing the Status Window 2 – 18
Customizing Display Options 2 – 18
Maintaining the Printer From the Status Window 2 – 19
The Printer Options Dialog Box 2 – 20
3. Paper Handling 3 – 1
Selecting Paper Types 3 – 2
Paper Guidelines 3 – 4
Before Loading Paper 3 – 5
Setting the Paper Thickness Lever 3 – 5
Setting the Paper Selection Lever and the Paper Support 3 – 6
Printer Settings for Various Print Media 3 – 8
Automatically Feeding Paper 3 – 9
Auto Feed Guidelines 3 – 13
Manually Feeding Paper 3 – 15
Printing on Envelopes 3 – 18
Preparing Your Software 3 – 18
Loading Envelopes 3 – 19
Using Canon Specialty Paper 3 – 22

Canon’s High Resolution Paper HR-101 3 – 22
Fabric Sheets FS-101 3 – 24
4. Maintaining the Printer 4 – 1
Printer Guidelines 4 – 1
Cleaning the Printer 4 – 3
Cleaning the Print Head Unit 4 – 4
Using the Microsoft Windows Printing System 4 – 5
Using the Operator Panel 4 – 5
Ink Tank Guidelines 4 – 7
Replacing an Ink Tank 4 – 8
Replacing the Print Head Unit 4 – 12
Print Head Unit Guidelines 4 – 12
Removing the Used Print Head Unit 4 – 13
Installing a New Print Head Unit 4 – 14
Transporting the Printer 4 – 18
5. Troubleshooting 5 – 1
Using Canon’s Support Services 5 – 1
Identifying Your Printer Problem 5 – 2
General Problems 5 – 3
Initialization Errors 5 – 3
Clearing Paper Jams 5 – 5
Ink Problems 5 – 6
Ink Tanks Continually Run Out of Ink 5 – 6
Ink Tank Incorrectly Installed 5 – 7
Troubleshooting the Microsoft Windows Printing System 5 – 7
Technical Notes 5 – 11
Bios Setups for Various Systems 5 – 11
Appendix
ASpecifications A – 1
Appendix
BUsing the BJC-620 in a Network Environment B – 1
Glossary G – 1
Index I – 1
FCC Regulations FCC –
1
Warranty W – 1

Congratulations on your purchase of the Canon BJC-620 Color Bubble Jet Printer. We appreciate
your choosing this printer to meet your printing needs.
Your printer features the Microsoft Windows Printing System, which makes printing from
Microsoft Windows faster and easier than ever before. With the Microsoft Windows Printing
System, your printer is able to print faster than traditional approaches. As soon as the Microsoft
Windows Printing System accepts a document for printing, you can return to your application.
You receive instant notification of printer information and you can see the printer's status on your
computer screen.
The BJC-620 offers exceptionally high print quality and fast print speed using both color and
black inks. We are certain you will be satisfied with its advanced Bubble Jet technology.
This chapter:
Lists the supplies and accessories you can purchase for the printer
Describes Canon's customer support services
Chapter 1

Your BJC-620 printer supports excellent and unique print media options that will allow
you to produce dazzling, professional, and fun presentations. All of these print media
are specially designed and manufactured to work with your Canon color printer so you
can produce the finest output possible.
Canon has an extensive dealer network equipped to offer you supplies as you need
them. To find a dealer near you, call the Canon Referral Service at 1-800-848-4123.
If supplies are not available from your local dealer, you can order directly from Canon
by calling 1-800-671-1090.
Your BJC-620 comes with the following ink tanks:
Canon Ink Tank BJI-201 Bk HC (black, high capacity)
Canon Ink Tank BJI-201 C (cyan)
Canon Ink Tank BJI-201 M (magenta)
Canon Ink Tank BJI-201 Y (yellow)
Canon manufactures various specialty papers, including:
Bubble Jet Paper LC-301 (water resistant)
Coated Paper LC-101
High Resolution Paper HR-101
Transparency CF-102
Back Print Film BF-102
High Gloss Film HG-101
Fabric Sheet FS-101
T-Shirt Tranfers TR-101
Greeting Cards GC-101
Brochure Paper BP-101
See Chapter 3, Paper Handling, for details on Canon's specialty papers.
Chapter 1
Canon provides experienced support personnel to help you in every way
You can easily contact Canon on the World Wide Web. Our address is:
http://www.ccsi.canon.com
Canon provides a bulletin board service (BBS), which is useful for obtaining newly
developed third-party drivers. Call 1-757-420-2000. The protocol for the BBS is up to
28,800 bps, eight data bits, one stop bit, and no parity.
If you use CompuServe®, You can access the Canon Peripherals Forum. This allows
you to talk with other users, send a message to Canon, or download printer drivers.
Just type GO CANON at any CompuServe prompt.
If you have a modem, you can connect to Canon through the Web, its BBS, or
Compuserve. Through these on-line services, you can retrieve general
information about specific products.
If you are looking for information about any Canon printer driver for a unique
situation, you can contact one of the Canon on-line services.
You can retrieve information from the on-line services at any hour of the day or
night.
Canon provides a 24-hour, toll-free Fax Retrieval System. You can use this service to
get helpful documents faxed directly to your fax machine. These documents contain
useful information to assist you in the operation of your Canon printer. To access this
service, call 1-800-526-4345.
One of the first things you may want to do after setting up your printer is call the
Canon Fax Retrieval System and request an index of the documents available to
you through this service. Documents will be faxed directly to your fax machine.
The Fax Retrieval System offers up-to-date information about specific products.
By reviewing the index, you can determine what information would be beneficial
to your installation.
Chapter 1

Canon provides customer support and service for all Canon printer products. If you
have any questions regarding your new printer, call the Canon Computer Systems
Customer Care Center at 1-800-423-2366. Support is available from 6 A.M. to 12
MIDNIGHT Eastern Standard Time. (EST) Seven days a week except holidays.
If you seem to have an operational problem, try to solve it by using the Super
Solver. If you cannot quickly resume normal operation, contact Canon's
experienced support personnel at the Customer Care Center.
The Canon BJC-620 Color Bubble Jet Printer is designed with the latest technology to
provide trouble-free operation. The warranty information at the back of the manual
describes Canon's limited one-year warranty for its Bubble Jet printers. Be sure to read
the warranty information to find out about the different service options available to
you.
Save your sales receipt for proof of purchase. In the event that your printer needs
service, you will need your proof of purchase to obtain warranty service.
If you feel your BJC-620 Color Bubble Jet Printer needs servicing, contact Canon on
the World Wide Web to locate the Canon Authorized Service Facility (ASF) nearest
you or to find out about the exclusive Canon Instant Exchange warranty program. If
you do not have access to the Web, call the Customer Care Center.
Chapter 1
This chapter introduces you to the Microsoft Windows Printing System
for the BJC-620. It includes:
Understanding the Microsoft Windows Printing System
Printing with the Microsoft Windows Printing System
Using the Microsoft Windows Printing System program group
The Microsoft Windows Printing System dialog boxes
Overview of the Microsoft Windows Printing System
Checking the status of a print job
Using the Status Window
Customizing display options
Maintaining the printer from the Status Window
Chapter 2

The Microsoft Windows Printing System manages the communications between your
computer and printer. It divides the work between the two, helping the printer and
computer work together to optimize performance.
The Microsoft Windows Printing System processes documents from Microsoft Windows
applications faster than traditional methods, and lets you quickly see the status of your
print job. If you install the included sound files, your computer will actually tell you
verbally what your printer is doing.
Your Quick Start Guide describes how to install the Microsoft Windows Printing
System. To use the system, make sure your computer system has the following minimum
configuration:
386SX 16MHz personal computer
10 MB of physical and virtual memory combined, of which at least 4 MB must be
physical RAM
VGA or super VGA color graphics monitor
6 MB of available disk space for full installation of Microsoft Windows Printing
System
Microsoft Windows 95, Microsoft Windows 3.1, or Microsoft Windows for
Workgroups 3.1
Parallel printer port with bi-directional communication capability
The printer may not print some pages at high resolution with the system above. In this
case, the following are suggested.
486SX 25MHz personal computer
16 MB of physical and virtual memory combined, of which at least 8 MB must be
physical RAM
You need a sound card to play sounds with the Microsoft Windows Printing System
messages.
Chapter 2

One-way communication from computer to printer has been the standard for years.
The Microsoft Windows Printing System offers dynamic two-way communication.
With the Microsoft Windows Printing System, your computer knows what your
printer is doing.
To take advantage of the dynamic two-way communication, one end of a bi-
directional parallel cable connects to the printer and the other end connects directly
to your computer
You must use a bi-directional cable for proper operation. Also, your computer's
interface must have bi-directional capability. If your computer tells you that it cannot
find the BJC-620 printer, but the printer is plugged in, turned on, and connected to
the computer, see the Technical Notes starting on page 5-11.
Every time you print, the Microsoft Windows Printing System displays the Status
Window. This window shows you the paper moving through the printer, how long it
will take to print the document, and how much of the document has printed. From
the Status Window you can pause, resume, force, or delete the print job, print the
self test, or clean the print heads.
Chapter 2

If a printing problem occurs, the Status Window automatically opens and tells you
what the problem is.
Before using the Microsoft Windows Printing System, make sure you have selected it
as your current Microsoft Windows printer driver. The Setup program makes the
Microsoft Windows Printing System the default printer driver. If you have not
changed drivers since running the Setup program, you are ready to print.
To verify that the Microsoft Windows Printing System is your printer driver, use the
Printers option in the Microsoft Windows Control Panel. The highlighted driver is the
current printer driver. Change drivers by clicking on the one you want.
The Microsoft Windows Printing System includes extensive on-line help that
describes the printer and its basic operation. You can get on-line help as follows.
In the Properties dialog box:
Use the right mouse button to click an item on the screen.
Click the ? button (on the upper right corner of the screen) and then click
an item.
Press F1.
Select Programs from the Start menu, then click on Canon BJC-620 Help in the
Microsoft Windows Printing System folder.
Choose the Help button or press F1 while in the Setup dialog box.
Double-click on the Canon BJC-620 Help icon in the Microsoft Windows
Printing System group.
Chapter 2

When you install the Microsoft Windows Printing System, you create the
Microsoft Windows Printing System program group, from which you can select
the following:
Starts the installation program for the Microsoft Windows Printing
System. You can use this program to add features to the Microsoft
Windows Printing System that you did not originally install.
Provides you with the latest information about using the Microsoft
Windows Printing System with your printer.
Opens the BJC-620 Properties dialog boxes, which you can use to
set the printing options for Microsoft Windows 95.
Displays the Status Window so you can check the status of a print
j
ob.
Selects the Canon BJC-620 Help file for the
Microsoft Windows Printing System.
Selects the Printer Setup dialog box, which
you can use to set the printing options in
Microsoft Windows 3.1 or Microsoft Windows for
Workgroups 3.1.
Selects the Microsoft Windows Print
Manager for Microsoft Windows 3.1 or
Microsoft Windows for Workgroups 3.1.
Starts the program to uninstall the Microsoft
Windows Printing System.
Chapter 2

From the Microsoft Windows 95 Printer folder:
1. Click the Start button, point to Settings, and then click Printers.
2. Click the icon for the printer you are using.
3. On the File menu, click Properties to open the Properties dialog box.
Use the Control Panel or Print Manager:
1. Open the Control Panel, then double-click on the Printers icon to open the
Printers dialog box. Or open the Print Manager, then choose the Printer
Setup... command from the Options menu to open the Printers dialog box.
You can open the Control Panel or the Print Manager by doubleclicking on the
Control Panel or Print Manager icons in the Main group of the Program
Manager.
2. In the Printers dialog boxes, make sure BJC-620 on LPTl is highlighted and
then choose the Setup... button to open the Setup dialog box.
You can open the Printer Setup dialog box, Print Manager, or Printers folder from
the Microsoft Windows Printing System group.
The way you get to the dialog boxes determines how long the printing options remain
in effect:
If you start from an application's Print... command, your choices apply only to
that print job. The next time you print, you have to choose the print settings
again.
If you start from an application's Print Setup... command, the application stores
your choices with the document.
If you start from the Control Panel or Print Manager, the settings apply to all
Microsoft Windows applications and remain in effect until you change those
settings.
Chapter 2

Many applications do not follow the above Microsoft Windows
guidelines. Until you are familiar with how your Microsoft Windows
application uses the Microsoft Windows Printing System settings, it's a
good idea to verify the settings each time you print.
The Microsoft Windows Printing System dialog boxes, where you
select printing options, differ depending on whether you are using
Microsoft Windows 95 or Microsoft Windows 3.1 or Microsoft
Windows for Workgroups 3.1.
You select printing options with the following tabs.
Prints a test page and a separator page.
Chapter 2

Specifies printer port settings and timeout settings.
Specifies multiple copies, collated or not, and the print orientation.
Chapter 2

Chooses the paper source and paper size.
Chooses the paper source and paper size.
Chapter 2

Chooses the resolution setting, print media, and print quality. The resolution
settings are Draft (180 x 180 dpi), Normal (360 x 360 dpi), and Best (720 x
720 dpi).
For detailed information on the Microsoft Windows Printing System
printer options settings, refer to the on-line help.
You select printing options in the following dialog boxes.
This is the first dialog box you open from your application
program. You can select multiple copies, collated or not collated,
paper orientation, paper source, and paper size.
Chapter 2

You open the Quality and Graphics dialog boxes from the Printer Setup dialog box.
Selects media type. printer resolution, and print quality. The resolution
settings are Draft (180 x 180 dpi), Normal (360 x 360 dpi), and Best (720 x
720 dpi).
Selects the haiftoning method, adjusts brightness. contrast, and saturation,
enables gray scale printing, and disables the Microsoft Windows Printing
System color matching
Chapter 2

For detailed information on the Microsoft Windows Printing System printer options
settings, refer to the on-line Help by pressing the Help button or by pressing Fl.
When your computer is connected to a network, you can also open the
Sharing tab.
For optimum print quality when you select 720 x 720 dpi, choose Smooth
haiftoning from the Graphics dialog box or Graphics & Color tab. We also
recommend using Canon High Resolution Paper (HG-101).
With the Microsoft Windows Printing System, you can keep track of and control
your print jobs using the Status Window. It tells you exactly what is happening with
the current print job. You can use the Status Window to pause, resume, or delete
the current print job, and you can access on-line help for the Microsoft Windows
Printing System.
While you are working in the Status Window, remember that you can get on-line
help at any time by choosing commands from the Microsoft Windows Help menu or
by pressing Fl.
When you install the Microsoft Windows Printing System into Microsoft
Windows 3.1 or Microsoft Windows for Workgroups 3.1, the Print Manager
helps you control and manage all print jobs in a queue for all printers installed
for Microsoft Windows.
When your computer is connected to a network printer, the "Status Not
Available Network Printer" message always appears in the Status Window.
That is, you cannot check the status of the printer or control the printer,
except to print a test page. The Status Window for the network printer
appears on the network printer server, which is connected locally to the
printer.
Chapter 2

The Status Window uses animated 3-D graphics to illustrate the printer and the
document being printed.
The Status Window opens automatically in the following cases:
When you print with the Microsoft Windows Printing System-unless you
previously turned off the Display Printer Status While Printing option (see
page 2-18).
When the Microsoft Windows Printing System encounters an alert that
requires your intervention before you continue printing (see page 2-17).
The Status Window always opens the way you left it last, either full size or as an
icon that indicates the general condition of the printer (printing, idle, and so on).
When you install the Microsoft Windows Printing System into Microsoft Windows
3.1 or Microsoft Windows for Workgroups 3.1, the Print Manager is enhanced and
you can open the Status Window by clicking the printer info button on the toolbar
in the Print Manager.
Chapter 2

The toolbar has six buttons:
To temporarily halt printing the current
document, click this button. The Microsoft
Windows Printing System finishes printing the
current page, but will not print the remaining
pages until you click the Resume Printing button.
To continue printing after a pause, click this
button.
To force printing of the current print job, click
this button. The Microsoft Windows Printing
System forces printing on a paper size that is
different from the one originally selected for the
document.
To cancel printing the current print job, click this
button.
To print the test page, click this button.
To clean the print head unit, click this button.
The printer performs Quick Cleaning. See
Chapter 4, Maintaining the Printei; for details.
You can make the Status Window appear as an icon by clicking on the Minimize
button in the upper right corner of the window. The icon tells you all you want to
know about the print job.
A progress bar appears above the icon when a document is printing. When the job is
finished, the icon changes to show a stack of printed pages. Other icons indicate
when the printer is idle, when the Microsoft Windows Printing System has detected a
condition that requires either your eventual or immediate attention, and when the
status of the printer is not available.
Chapter 2

When the printer is ready, the icon looks like it does during printing,
but without the progress bar.
When the printing has finished, a stack of pages appears on the
printer.
When printing is paused, the icon shows a II mark.
When the printer is preparing for printing, the icon shows an
hourglass.
When the Microsoft Windows Printing System has an information
message, the icon shows a large (i) and blinks to get your attention.
To read the text of the message, restore the Status Window to its full
size.
When the Status Window displays an alert, the window automatically
opens to its full size. You can, however, minimize the window to an
icon showing the exclamation mark (!) that identifies an alert.
Even if you minimize the alert, you will not be able to resume printing
until you take the action specified in the full-size window.
Chapter 2

The Microsoft Windows Printing System gives you complete
information about your print job and the printer itself. There are three
categories of messages:
Information messages notify you of a condition that does not
I require immediate action.
Alerts require your intervention before printing can proceed.
During operations such as print head cleaning, messages
inform you that the printer is preparing for printing. When
these messages appear, wait for a moment.
Other messages, such as Printer Ready, appear to keep you informed
about your printer.
The messages are easy to understand and the solution to the problem is
generally straightforward.
For on-line help, you can always press Fl or use the Help menu.
If you installed the sound files, the Microsoft Windows Printing System
accompanies each message with a distinctive sound or spoken message.
You can turn the sounds off by using the Display Options dialog box
(see the Customizing Display Options section on page 2-18).
Chapter 2

The Status Window always displays job information. However, the
View menu allows you to set the four components (Toolbar, Printer
animation, Progress bar, and Status bar) to display in the Status
Window.
You cannot resize the Status Window, but you can make more room on
the screen by showing fewer components. For example, you could limit
the Status Window to the Toolbar and the Progress bar.
Use the Status Options dialog box to control when the Microsoft
Windows Printer System displays the Status Window and whether
sound accompanies each message.
Chapter 2

You can open the Status Options dialog box from the Option menu in the
Status Window.
You can use the Microsoft Windows Control Panel to turn individual sounds
on or off.
You can change display options even as a document prints, but the changed
settings will not take effect until the next print job.
You can perform the following operations for maintaining the printer
from the Status Window:
You can print the same test page as that printed out when
installing the Microsoft Windows Printing System. You can check
the printer and software operation by printing a test page. You
can also check the condition of the print head.
Since the test page is printed with the currently selected printing
options, such as Dots Per Inch or Print ~uality, you can verify the
output with the settings.
You can align the print head unit. Print head alignment is
necessary when you have print quality problems with the initial
printing after installing or replacing the print head unit.
You can clean the print head unit with three kinds of cleaning
procedures: Thorough, quick, and Custom.
You can print a test page with the Print Test Page button and perform
the quick cleaning with the quick Clean button on the Toolbar in the
Status Window.
You can also perform the above operations in the Printer Options dialog
box, which can be opened from the Status Window.
Chapter 2

You can perform the printer maintenance operations from the Printer Options dialog
box.
To display the Printer Options dialog box, open the Status Window and then select
Printer Options... from the Options menu.
Chapter 2

3DSHU+DQGOLQJ
This chapter describes how to use the printer for all your printing operations. It
includes:
Selecting paper
Setting the paper thickness lever
Setting the paper selection lever and the paper support
Summary of printer settings for various print media
Automatically feeding paper
Manually feeding paper
Printing on envelopes
Using Canon's specialty papers
To ensure the best performance of your printer, you'll want to select the best
paper and load it correctly. You can stack paper in the sheet feeder to load it
automatically, or you can manually feed one sheet at a time. The path that the
paper travels through the printer is the same for automatic and manual feeding.
Chapter 3
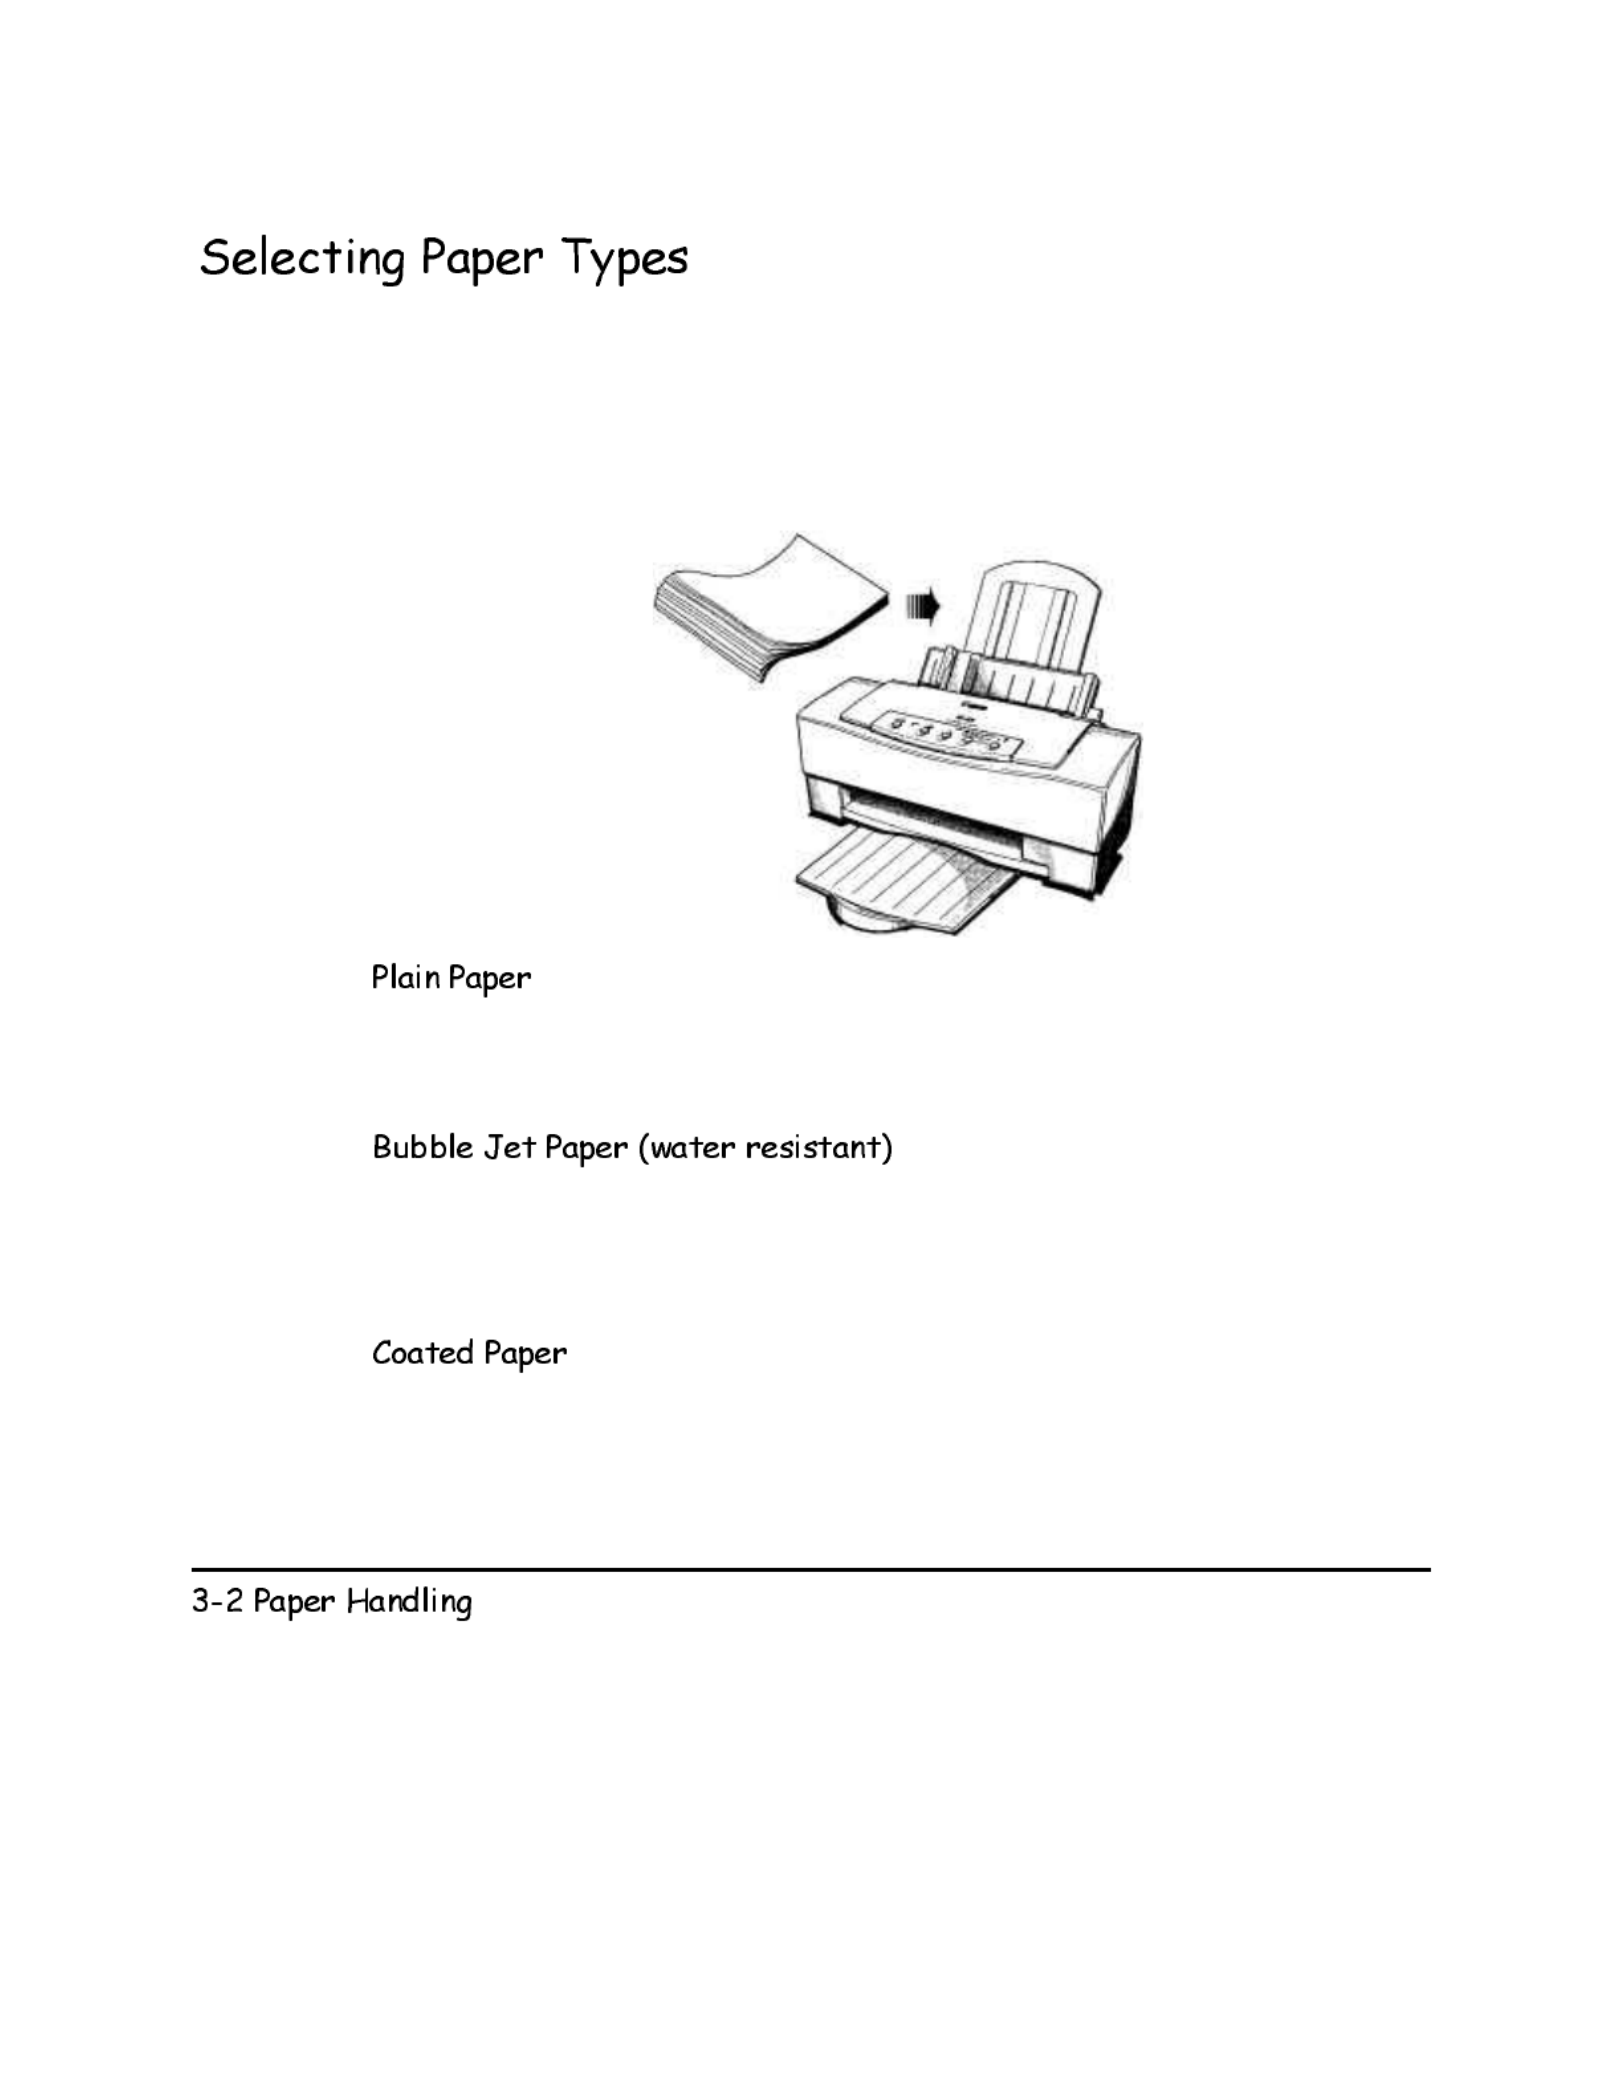
One of the most important things you can do to assure the best possible print
quality from your Bubble Jet printer is to select the correct paper. Your printer
produces letter quality output on most plain bond papers, including cotton bond
and photocopying papers; it does not require special ink jet papers. However, the
print quality varies with different paper types. Be sure to test a type of paper
before you purchase a large quantity.
The printer supports paper sizes of letter, legal, and A4 in portrait orientation. You
can use regular copier paper, cotton bond papers, and typical letterhead. Always
use paper without curls, folds, staples, or damaged edges.
The Canon Bubble Jet Paper LC-301 has been developed for high quality printing
with minimal or no smearing or running when in contact with water or damp
surfaces, making it a good choice for damp or rainy environments. The paper is
specially coated and printable on both sides.
Canon's Coated Paper LC-1O1 is specially designed for your BJC-620 printer,
which will produce sharp and vivid color output on this high grade matte paper.
The coating used on this paper is a unique formula that ensures full compatibility
with your Canon color inks. Use this paper for your printer output that requires
crisp color rendering on a high quality, nonglossy paper.
Chapter 3

The Canon High Resolution Paper HR-1O1 is designed to produce photographic
quality print output with sharp and vivid graphics.
Transparency CF-102 from Canon is recommended. These transparencies produce
excellent contrast, sharpness, and color.
Canon Back Print Film BF-102 has been specially developed for Canon Color Bubble
Jet printers. The film is designed to deliver brilliant, high intensity color images
suitable for business presentations, design work, or professional reports. Back print
film is printed on the back (nonglossy) side of the film in mirror image and then
viewed from the front or glossy side using a backlighting device. For more details,
ask a Canon Authorized Dealer for information or refer to the manual supplied with
the film.
The Canon High Gloss Film HG-1O1 features a bright white finish that lends striking
visual power to charts, graphs, and photographic images. Use this film to make your
presentation materials and graphics look professional.
Use Fabric Sheet FS-1O1 for Canon Bubble Jet printers to print banners, pillow
covers, scarves, flags, and other textile items. Use these sheets for applique and other
craft and sewing projects. Fabric sheets are 9.5 x 14 inches.
Use Canon's popular T-Shirt Transfers TR-1O1 to create and personalize T-shirts,
sweatshirts, aprons, tablecloths, napkins, tote bags, and anything else your
imagination allows! Use on any cotton or cotton/poly blend fabric. Your image is
printed in mirror image (when you use T-Shirt Transfer mode through the BJC-620
Printer Driver) so when you iron it onto the T-shirt, the image is viewed correctly.
Get the most out of your Canon Creative or other card-making software with Canon
Greeting Cards GC-1O1. These cards give your unique, personalized cards the look
and feel of professional cards. You can create cards, invitations, announcements, and
more.
Chapter 3

Canon's Brochure Paper BP-1O1 is specifically designed for creating high quality
brochures on glossy paper. Combined with Design Essentials from Canon
Creative, you have everything you need to create professional half-fold, tn-fold,
and full sheet brochures. Each glossy sheet is coated on both sides to allow manual
duplex printing.
If you are printing in an application outside Windows, your software application or
printer driver must support mirror image printing in order to use Back Print Film
or T-Shirt Transfers.
When selecting or loading paper, keep these guidelines in mind.
Attempting to print on damp, curled, wrinkled, or torn paper can cause
paper jams and poor print quality.
Use cut-sheet paper only. You cannot use multipart paper.
If the print density of your page is very high, light paper stock may curl
slightly due to the large amount of ink. If you need to print heavy graphics,
try printing on a heavier stock.
Do not use thicker paper than meets the specifications for this printer.
Printing with a paper that is thick enough to come in contact with the print
head nozzles may damage the print head unit.
For the best printing results, follow the instructions included with the paper.
Chapter 3

To ensure trouble-free paper handling, you'll want to set the paper thickness lever and the
paper selection lever before loading paper.
You use the paper thickness lever to adjust the distance between the print head and the
paper to accommodate different paper thicknesses. This distance is called the print gap.
Set the lever according to the thickness of the paper you are using:
Down is for printing on plain paper and normal weight (such as 20 lb) print media.
Up is for printing on heavier-weight print media (such as fabric sheets) and envelope
s
(See page 3-8 for details).
Paper Thickness Lever
Always set the paper thickness lever before and after printing on heavier-weight print medi
a
or envelopes.
If you are printing documents with high density graphics or ink and the printed pages are
smudged, try setting the paper thickness lever to the up position. This moves the print hea
d
unit further from the paper. Print quality may diminish slightly but the smudges should go
away.
Chapter 3

Set the paper selection lever and the paper support to their proper
positions before loading paper.
When automatically loading a stack of paper, set the paper
selection lever to the back position and extend the paper support.
When automatically loading a stack of envelopes, set the paper
selection lever to the front position and extend the paper support.
Chapter 3

When manually feeding any type of print media, set the paper
selection lever to the front position and lower the paper support.
Do not move the paper selection lever after loading paper in the
sheet feeder.
This lever is different than the lever on a typewriter or dot matrix
printer. You need not pull it forward to load paper. You set the
paper selection lever to the front position only when loading
envelopes or when manually feeding paper. If it is set to the front
position when you are automatically feeding stacks of normal
paper, the printer may feed multiple sheets or jam.
When the paper selection lever is in the back position, a lever inside the
printer prevents the paper from advancing into the printer. When you
move the paper selection lever to the front position, the lever inside the
printer moves so that the single sheet being manually fed can advance
into the printer.
Chapter 3

The following table summarizes the printer settings for the various types of print media:
Paper
type
Paper
thickness
lever
Paper
selection
lever
Paper
support
Loading
method
Stack
(sheets)
Plain paper Down Back Up Automatic 100
Bubble Jet
Paper
(LC-301) Down Back Up Automatic 100
Coated Paper
(LC-101) Down Back Up Automatic 80
High
Resolution
Paper (HR-
101)
Down Back Up Automatic 80
Transparency
(CF-102) Down Back Up Automatic 50
Back Print
Film
(BF-102) Up Back Up Automatic 50
High Gloss
Film
(HG-101) Down Front Down Manual 1
Fabric Sheet
(FS-101) Up Back Up Automatic 1
T-Shirt
Transfers
(TR-101) Up Front Down Manual 1
Greeting
Cards
(GC-101) Up Front Down Manual 1
Brochure
Paper
(BP-101) Up Front Down Manual 1
Other heavier
weight print
media Up Front Down Manual 1
Envelopes
Stacked
Single Up
Up Front
Front Up
Down Automatic
Manual 15
1
Chapter 3

$XWRPDWLFDOO\)HHGLQJ3DSHU
You can place approximately 100 sheets of plain paper or Bubble Jet
paper (17 lb or 64 g/m2) in the sheet feeder at a time.
You can stack approximately 50 sheets of transparency film, back print
film, or high resolution paper in the sheet feeder. However, these
special print media may not advance correctly under unusual
environmental conditions (such as extreme temperatures and humidity).
If you have trouble with special papers becoming skewed or feeding
multiple sheets, do not stack them in the sheet feeder. Load them
manually as described later in the chapter (page 3-15).
To automatically feed plain paper, follow these steps:
Paper Thickness Lever
Chapter 3
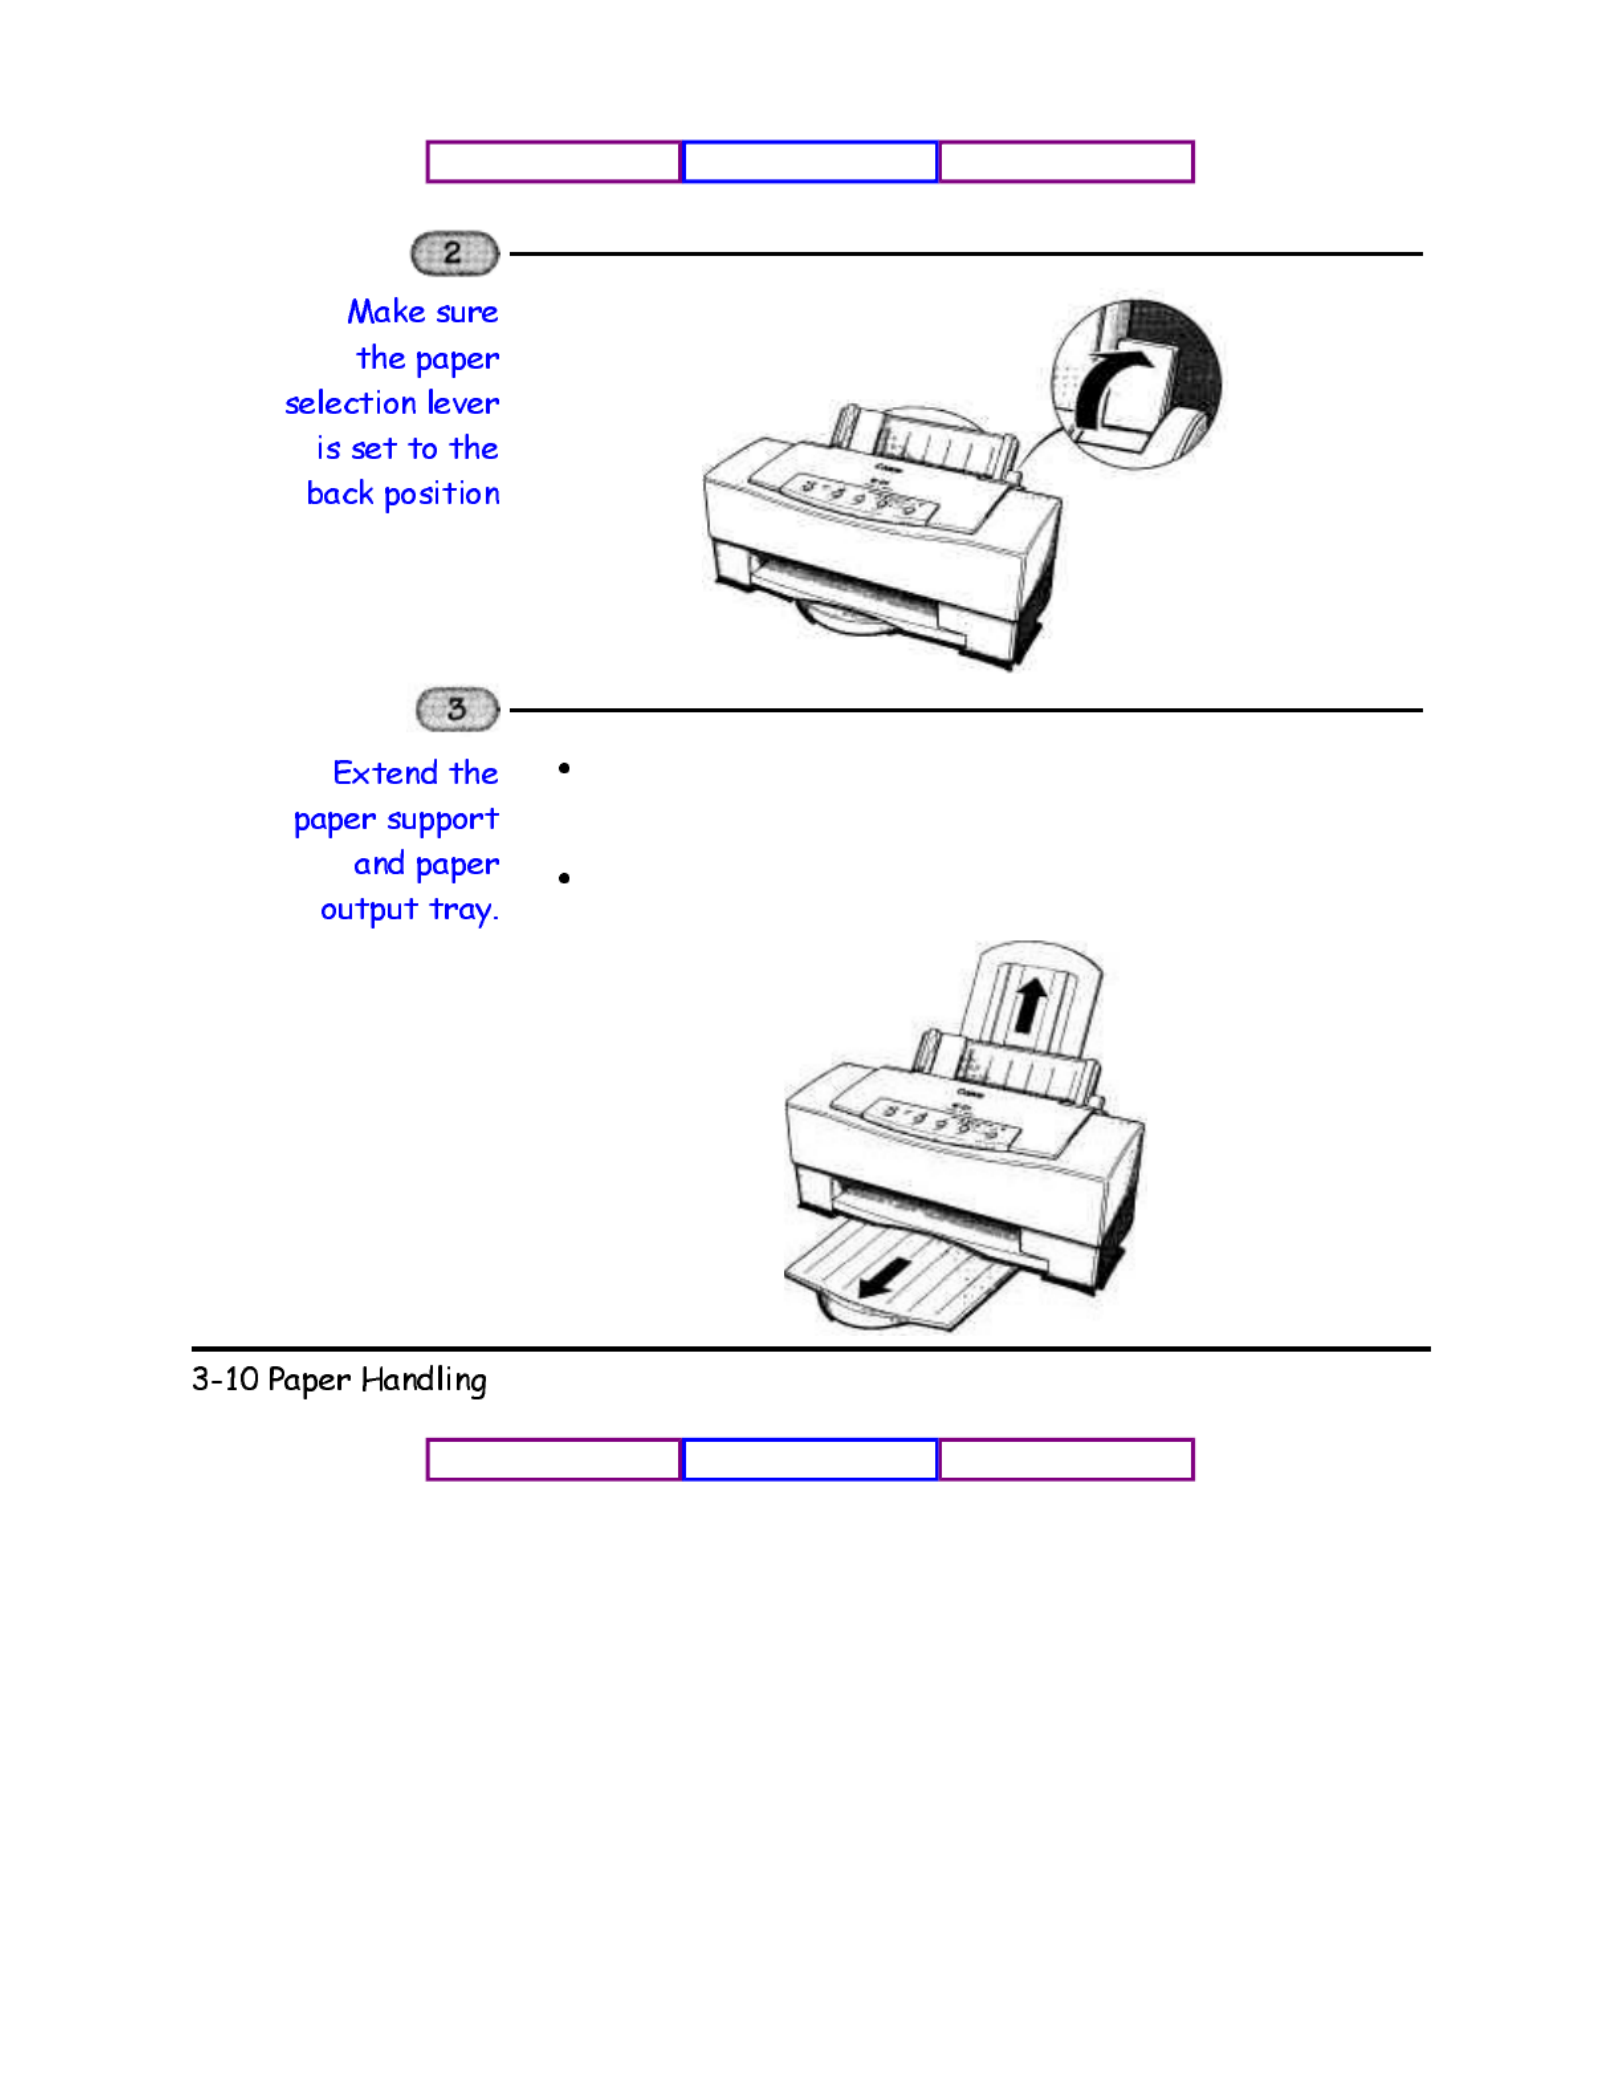
Pull the paper support up until it stops. The paper support keeps
paper straight and limits the possibility of jams.
Extend the paper output tray.
Chapter 3

4
For best results, fan the paper before loading it.
Always fan a stack of paper along the edge that will feed into the
printer first.
5
Align the edge of the paper with the right edge of the sheet
feeder.
Do not force the paper into the printer.
Insert the paper so that the side you want to print on is facing
you. If you are using a preprinted stock, such as letterhead, insert
the top of the paper into the sheet feeder first.
Make sure the stack of paper does not exceed the paper limit
mark on the right side of the sheet feeder.
Chapter 3

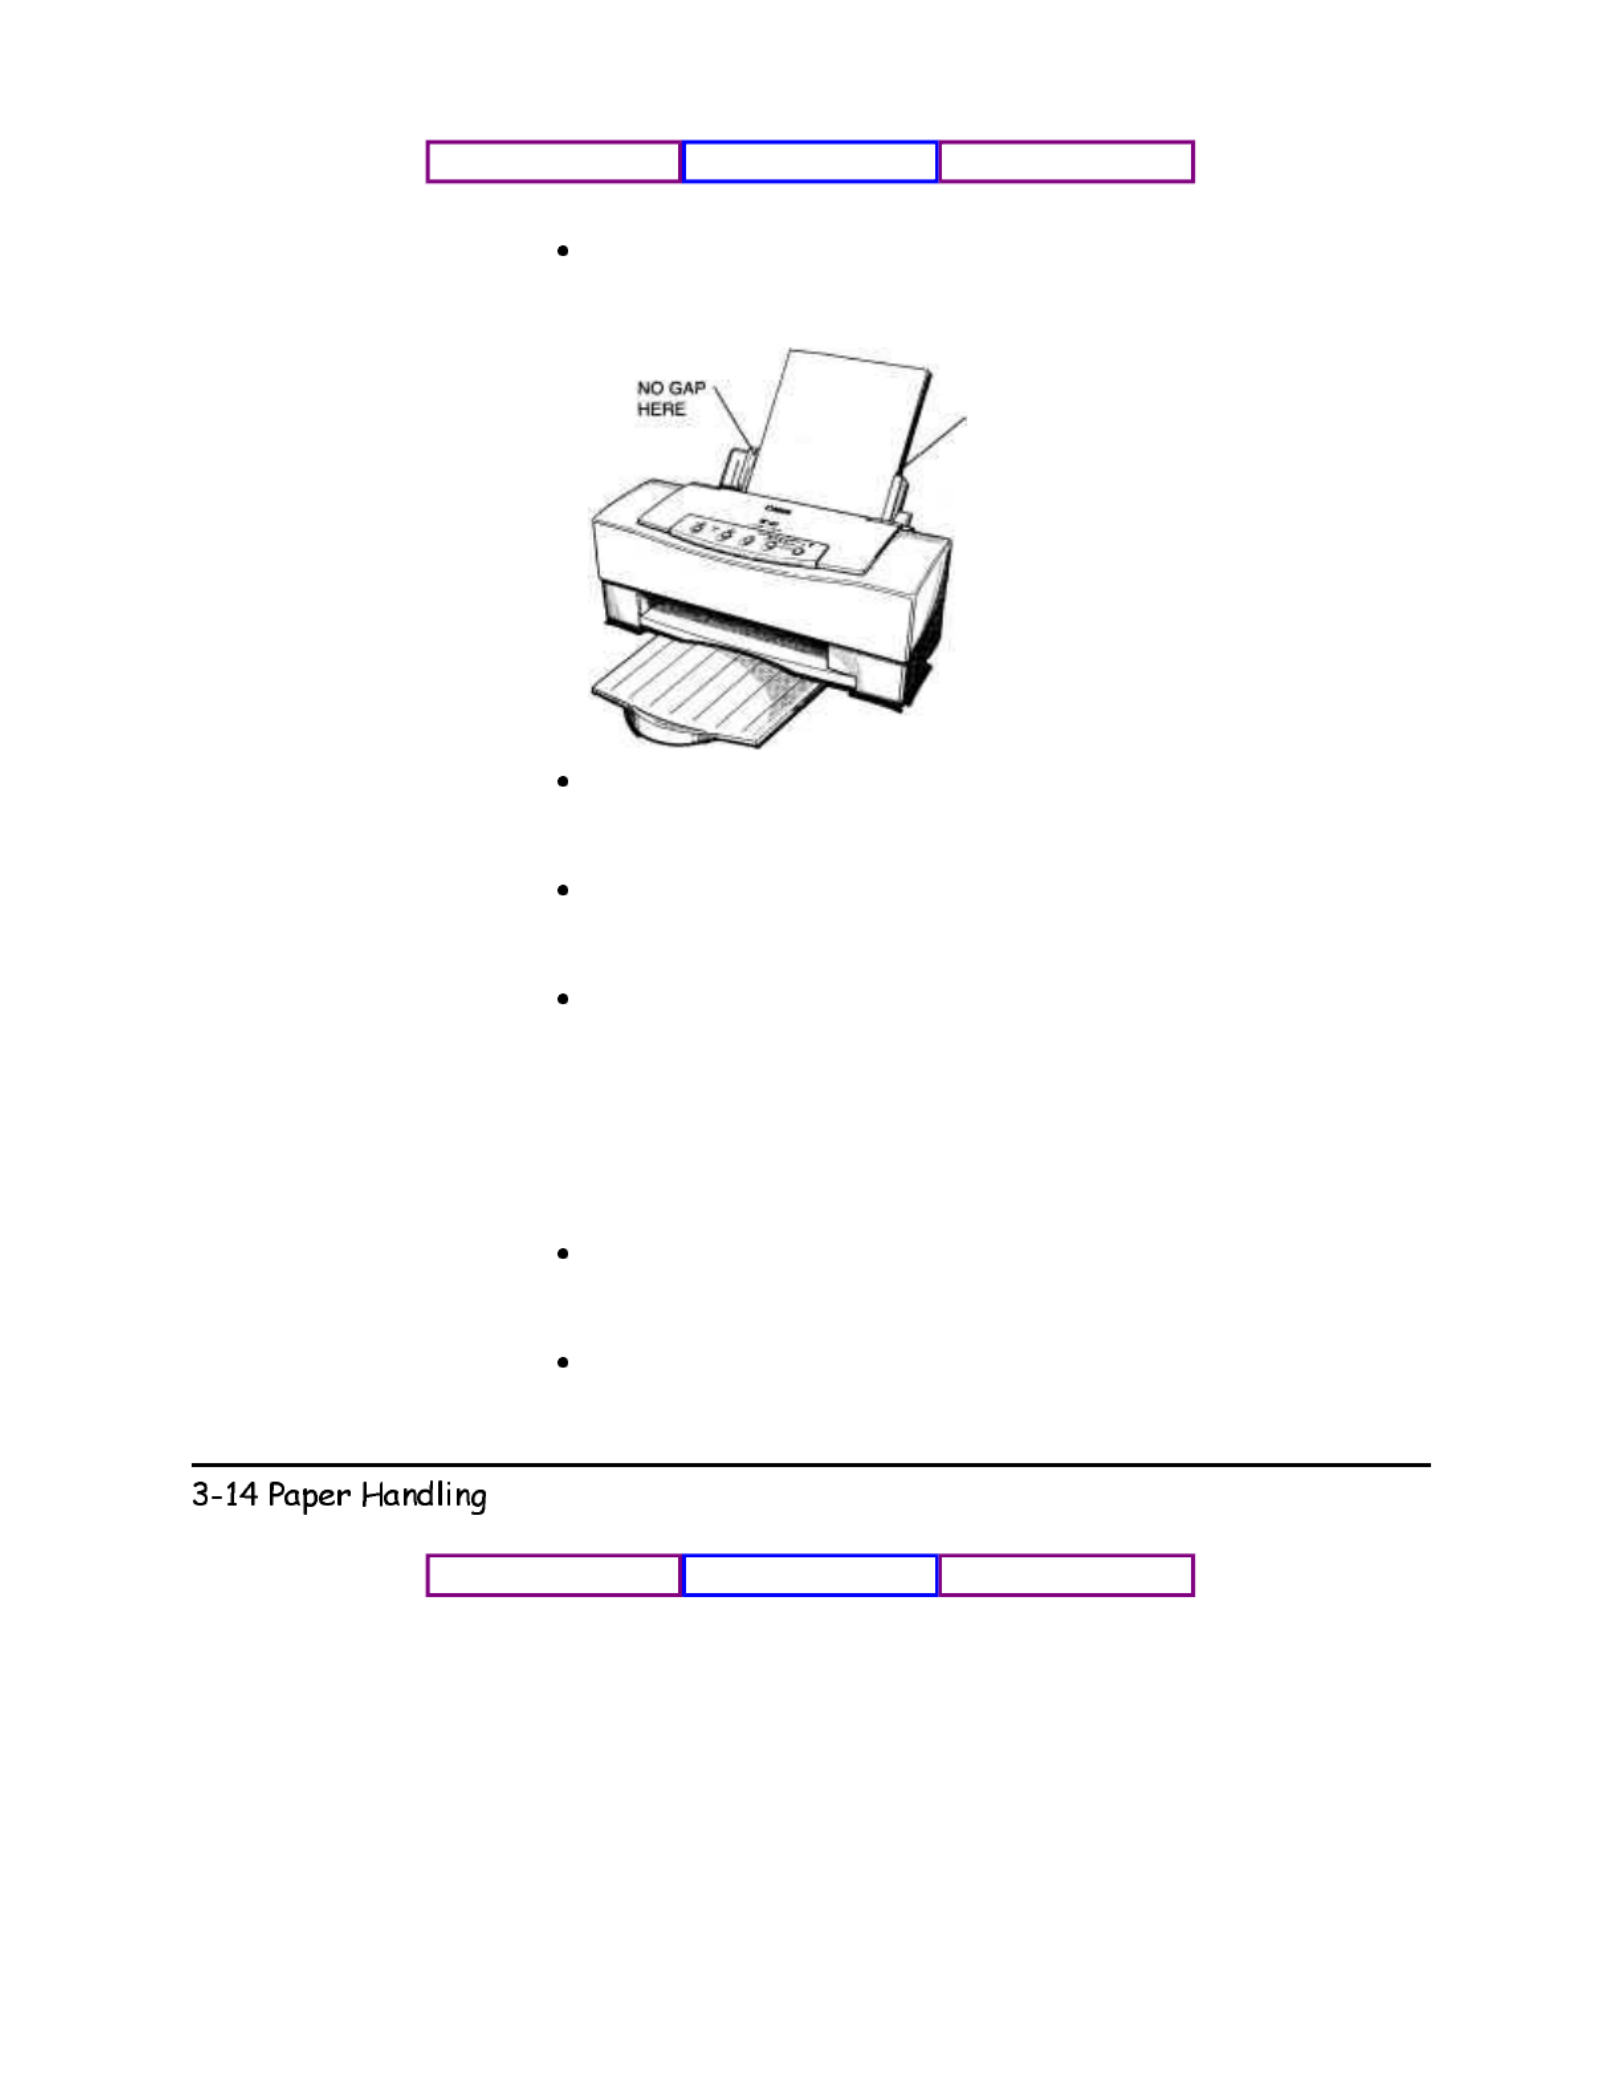
6
This keeps the paper feeding straight into the printer and reduces
skewing.
Be sure there is no gap between the paper guide and the edge of
the stack of paper.
NO GAP
HERE
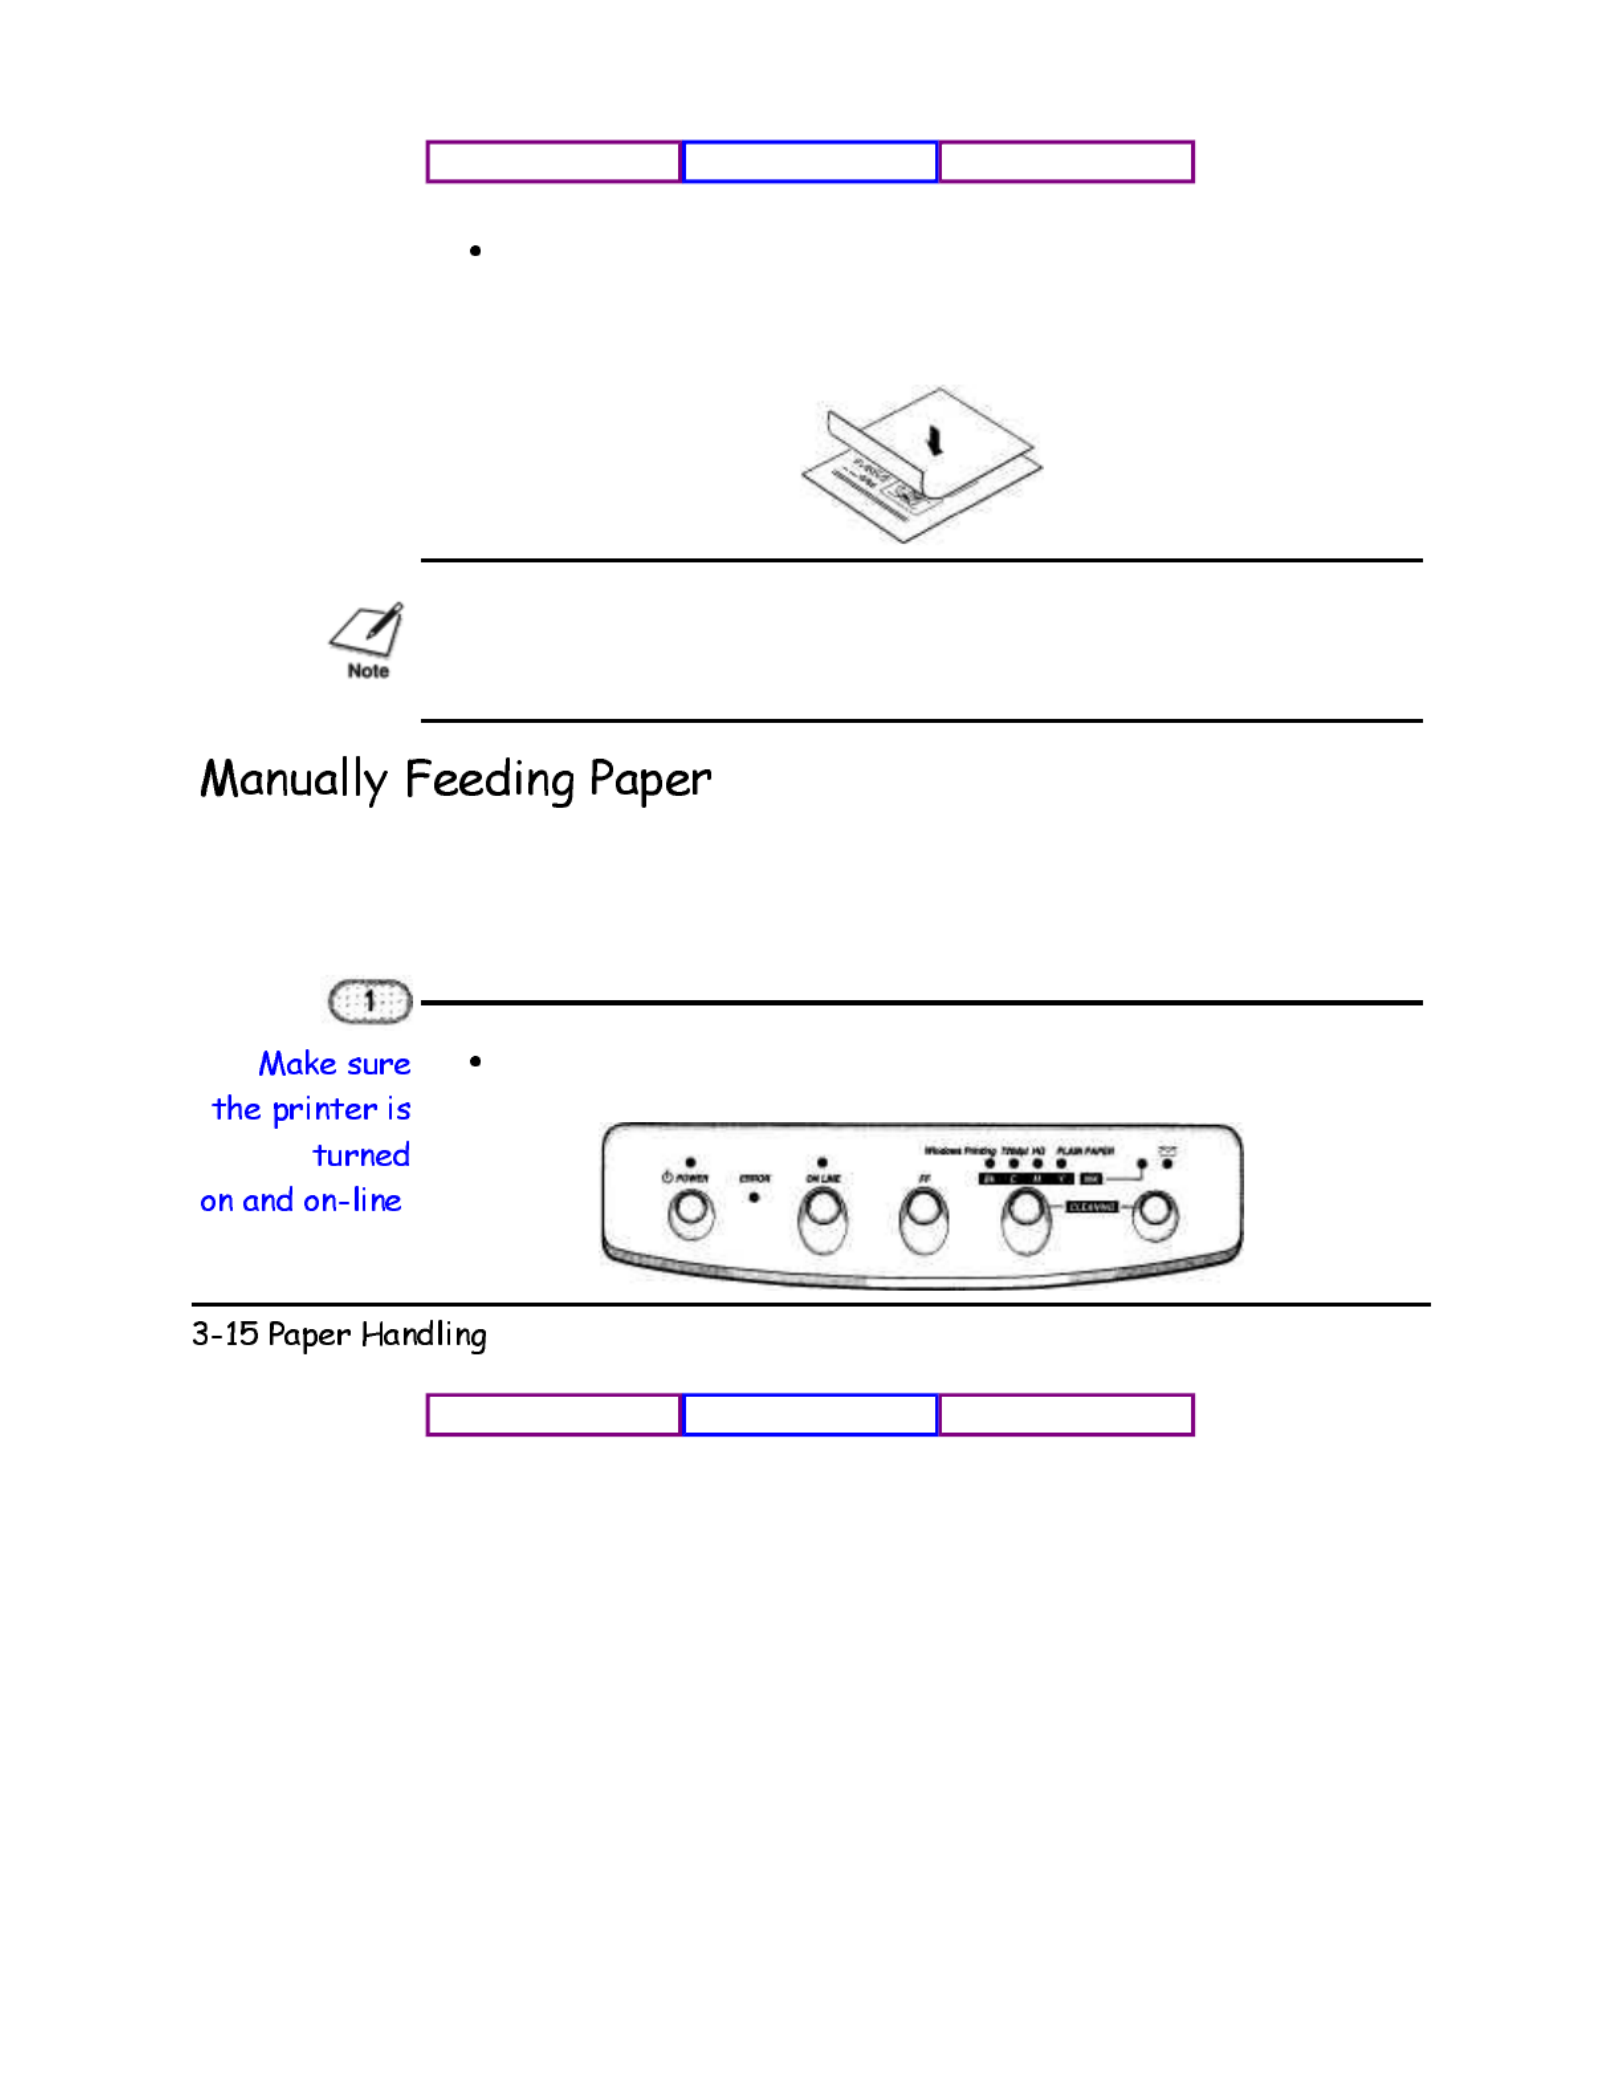
7
.Make sure the printer is turned on and on-line.
Start your print operation.
Chapter 3

When automatically feeding stacks of paper, follow these guidelines.
Do not leave paper stacked in the printer for long periods of time;
longer sheets of paper may become bent or curled over time. This
may cause the paper to misfeed or jam.
If your printed page contains lots of graphics, the ink on the page
may be damp due to the print density. Remove the page right away
and allow the ink to dry.
The capacity of the paper output tray is 20 sheets of paper. To
reduce paper jams, remove paper from the output tray before the
count reaches 20.
If paper curls after printing, remove it immediately; otherwise, paper
jams may occur.
The platen (a roller on the inside of the printer) may become inked if
you print data beyond the width of the page. If this happens, clean
the platen with a soft cloth. (For details on cleaning the platen, see
Chapter 4, Maintaining the Printer.)
Depending on the density of your printed pages, the ink may need
time to dry. Within two to three seconds, the ink becomes smudge
resistant.
Do not try to load paper into the sheet feeder beyond the paper limit
mark on the right side of the sheet feeder; stacking too much paper
may cause paper feeding or printing problems.
Limit Mark
Chapter 3
Make sure there are no gaps between the stack of paper and the
paper guide nor the right edge of the sheet feeder.
NO GAP
HERE
When automatically feeding transparencies or back print film,
remove each sheet after it is delivered. Do not allow film sheets
to stack up in the paper output tray.
Place at least one sheet of plain paper in back of a stack of
transparencies or back print film to avoid paper jams and
misfeeds.
Let the printed sheets of film dry completely before storing them.
The complete drying time required for color printing on Canon's
transparencies or back print film is approximately 15 minutes. The
complete drying time required for solid black printing on this
media is approximately 30 minutes. You may be able to reduce
the drying time if you reduce the density setting in your
application before printing.
If printing at 720 x 720 dpi in black on back print film appears
blurred, switch to 360 x 360 dpi or reduce the density setting in
your application.
If printing in black on transparencies is not as crisp as you
expected, reduce the density setting in your application.
Chapter 3
When a sheet of film has dried completely, cover its printed side with a
sheet of plain (not coated) paper before storing it; this is recommended
even if you place the sheets of film in a clear file.
For best results when printing on special papers, follow the instructions that
come with the paper.
You use the manual feed function when printing on heavier-weight print media
(24 lb to 28 lb or 91 g/m2 to 105 g/m2) or high gloss film.
To manually feed a single sheet, follow these steps:
.
The POWER, ON LINE, and PRINT MODE lights are on.
Chapter 3

.
If you are manually feeding heavier-weight print media, set the
paper thickness lever to the up position. (See page 3-8 for
details).
If you are printing normal weight (20 ib) print media, set the lever
down.
PAPER THICKNESS LEVER
Make sure the paper support is lowered.
Chapter 3
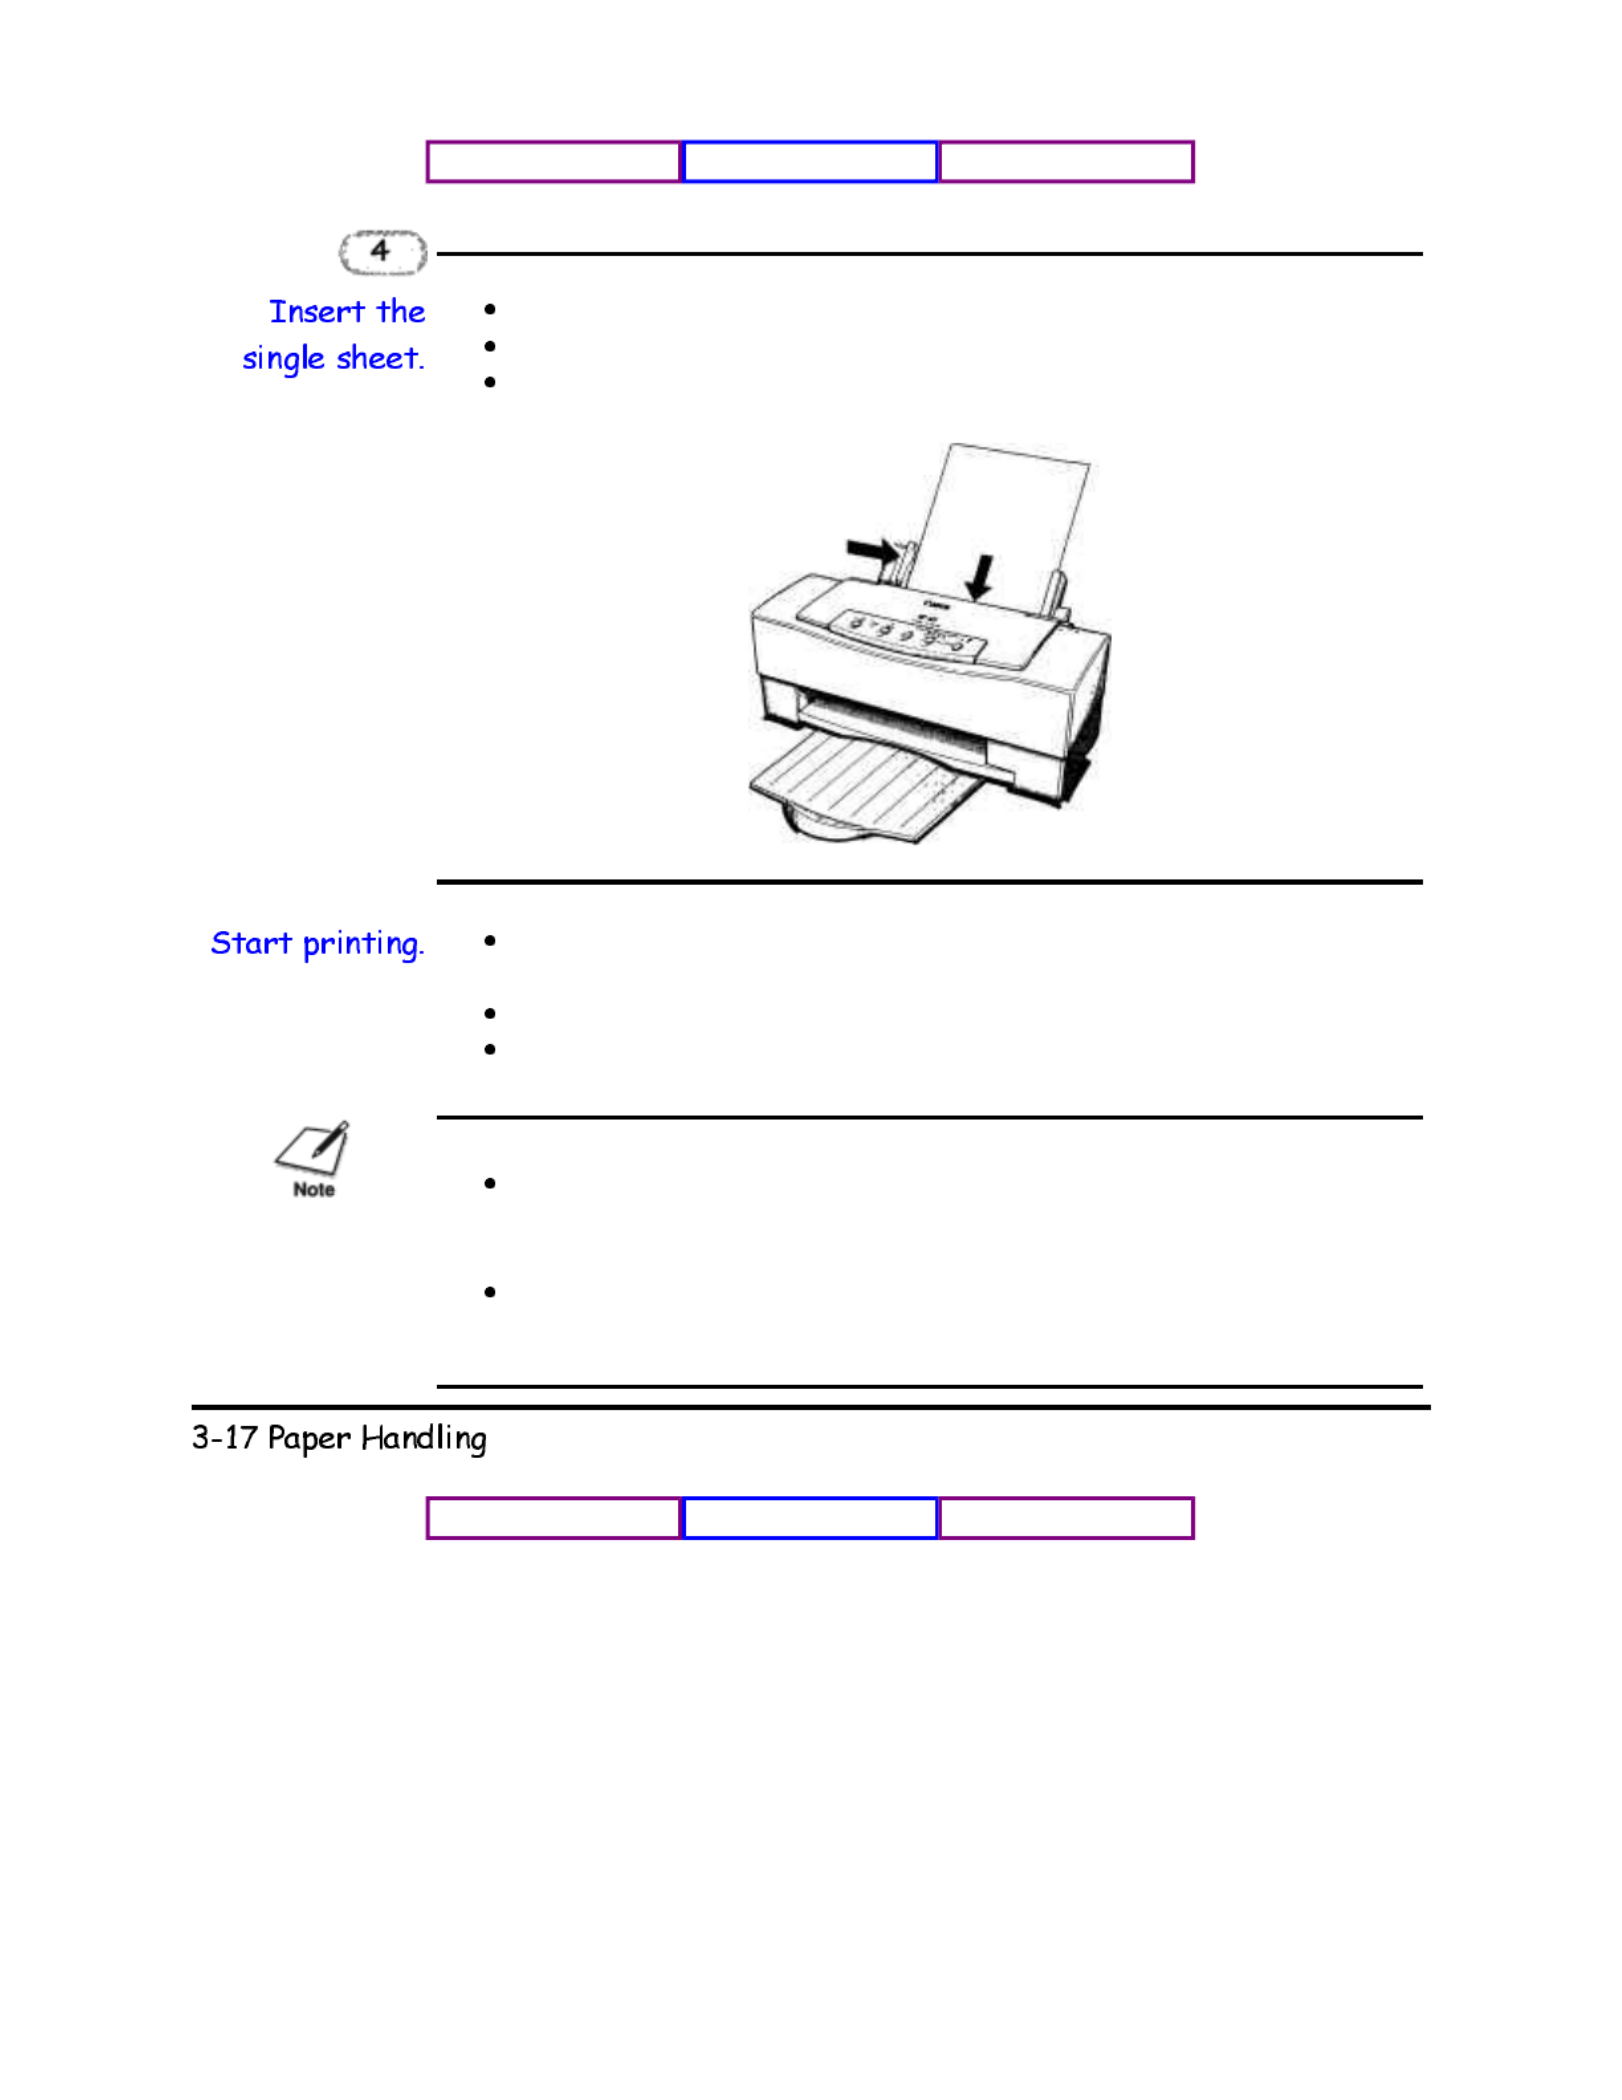
Slide in the paper until it stops inside the sheet feeder.
Align the sheet with the right edge of the sheet feeder.
Adjust the paper guide to the sheet.
5
Be sure to select Manual Feed in the Setup dialog box of the Microsoft
Windows Printing System.
Make sure the printer is on-line.
Start your print operation.
After printing on heavier-weight print media or envelopes, set the paper
thickness lever (inside the printer) to the down position before printing
on normal paper.
After manually feeding a sheet of paper or an envelope, set the paper
selection lever to the back position.
Chapter 3
You can stack up to 15 envelopes in the sheet feeder or you can manually feed
envelopes one at a time.
U.S. Commercial number 10 (COM 10) envelopes and European DL envelopes are
recommended. You may be able to stack envelopes of other sizes in the sheet feeder;
however, Canon cannot guarantee consistent performance on envelope sizes other
than COM10 and DL.
The following envelopes are not recommended because they may cause jams or
smears, or may damage your printer.
Envelopes with windows, holes, perforations, cutouts, and double flaps.
Envelopes made with special coated paper or deeply embossed paper
Envelopes using peel-off sealing strips.
Envelopes in which letters have been enclosed.
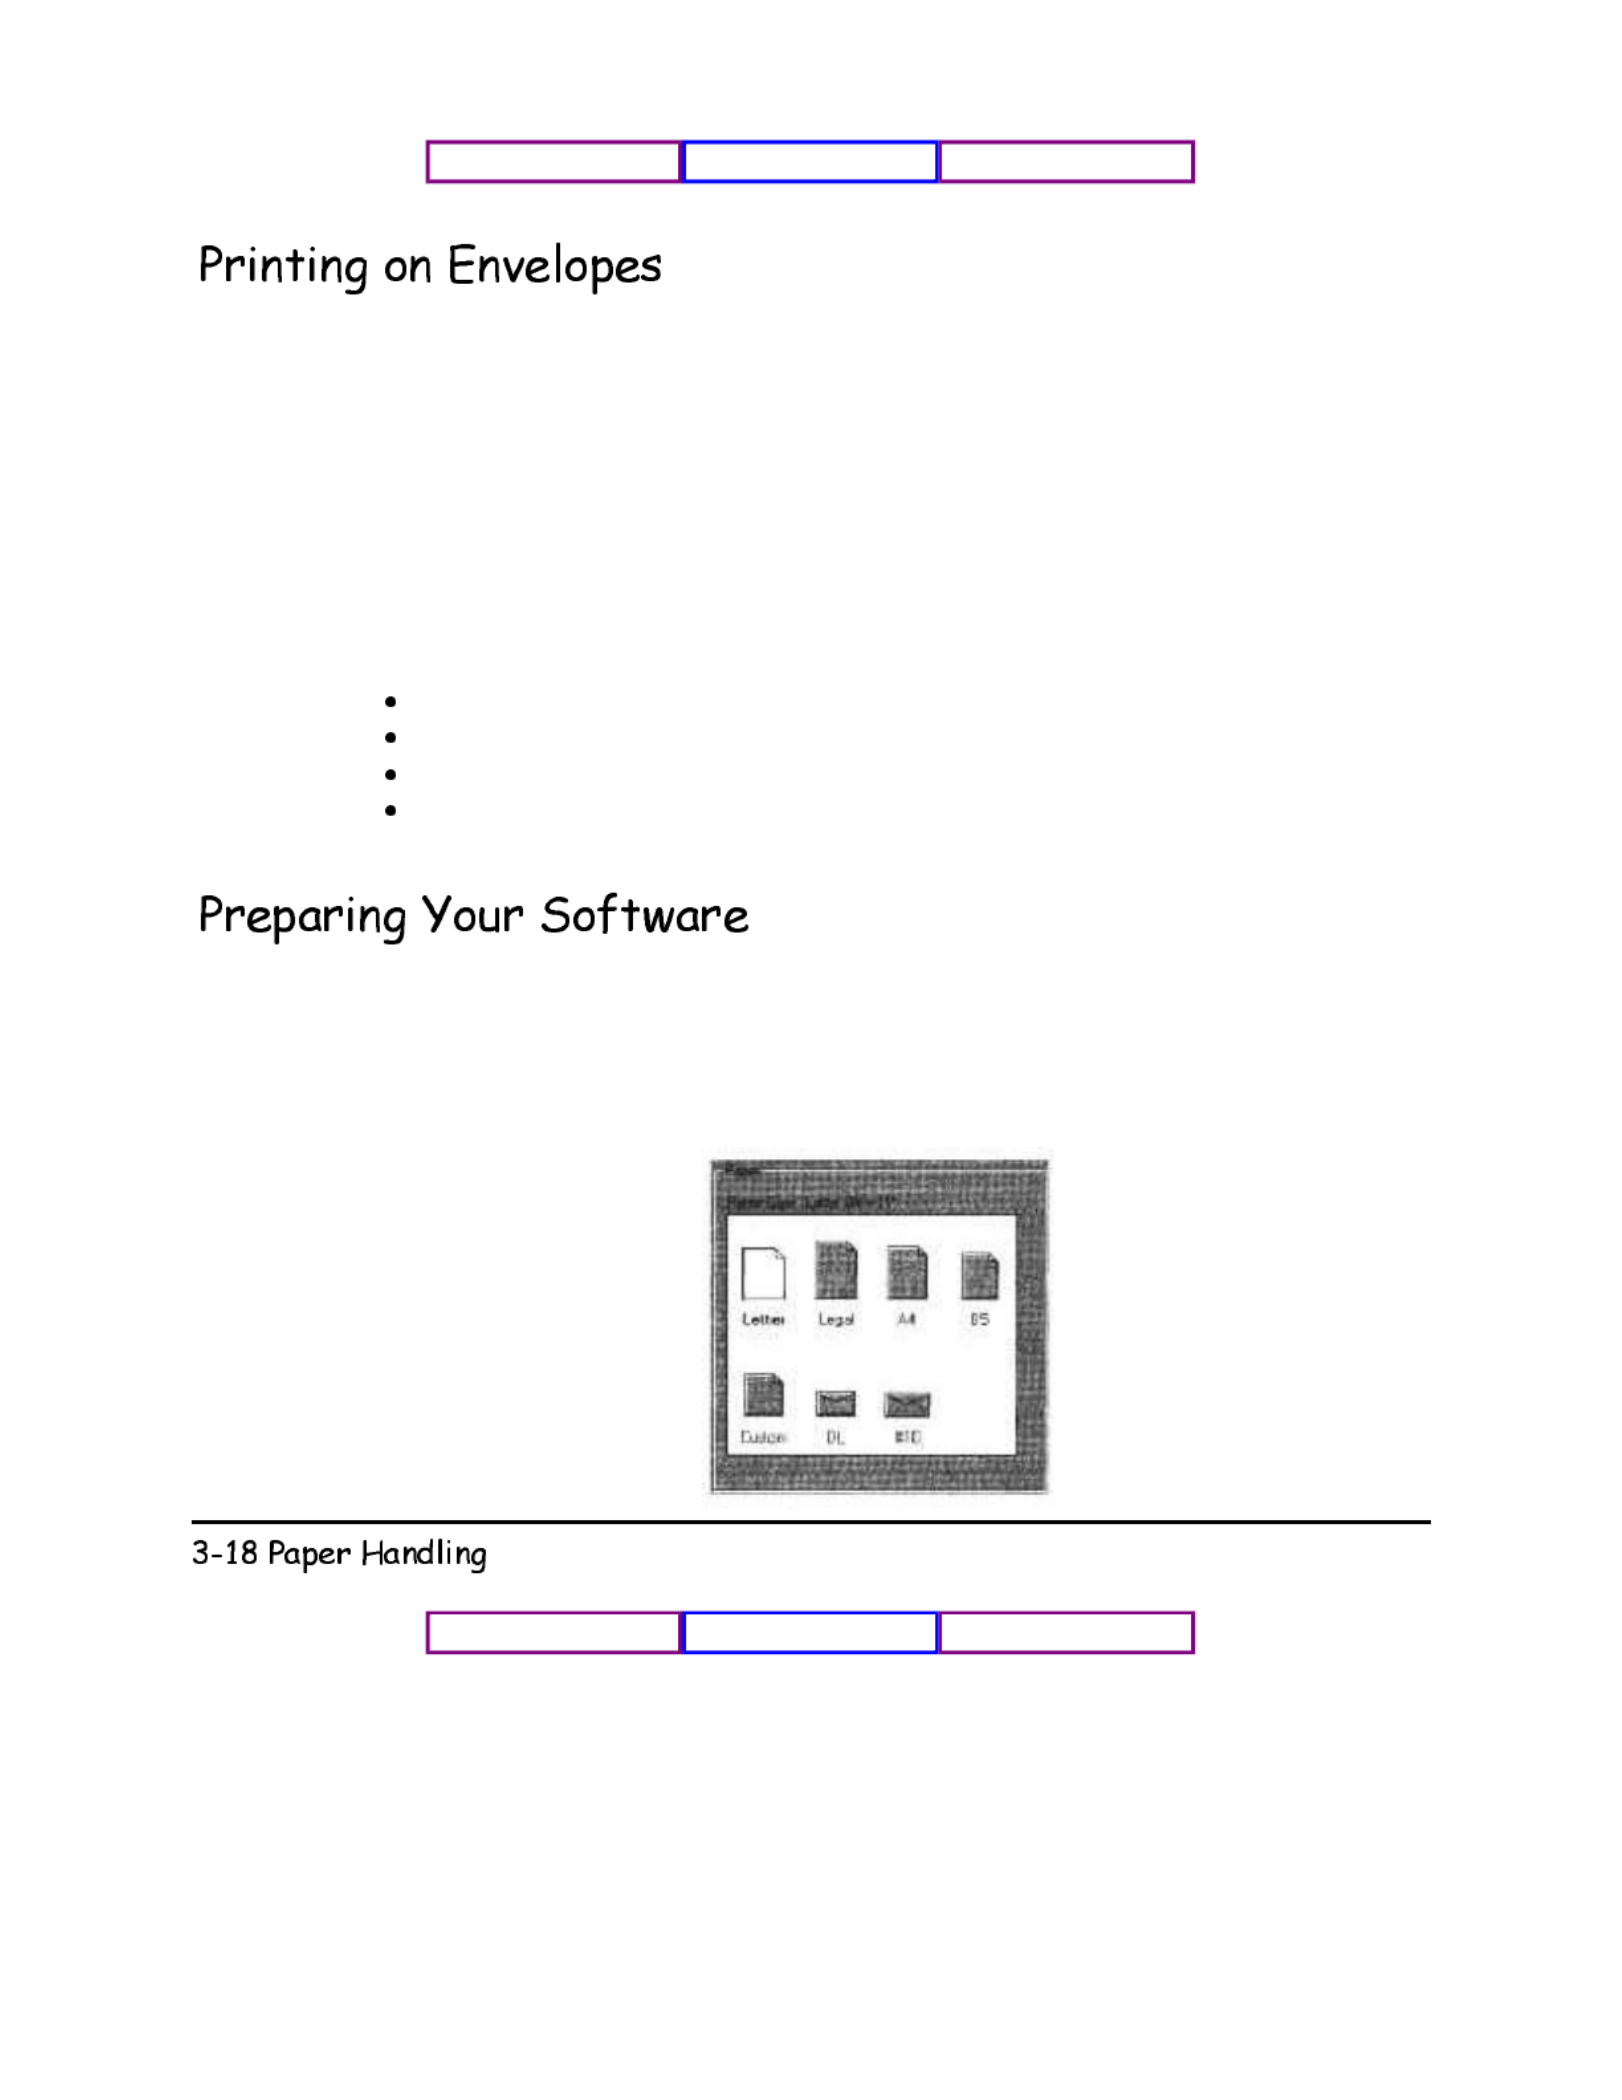
How you create envelopes within your software application depends on the
application. See your application's documentation for details.
If you are using the Microsoft Windows Printing System, change the Paper Size
setting to #10 or DL.
Chapter 3
Check your software to see if it prints envelopes in portrait or landscape
orientation. It's a good idea to print on a sheet of paper before printing on an
envelope to check the orientation.
Printing on envelopes in portrait orientation results in faster printing. However,
several software packages, such as WordPerfect® and Word for Windows,
default to landscape orientation. This requires adjustments in the software to
correctly print on envelopes with this printer. See your software documentation
for details.
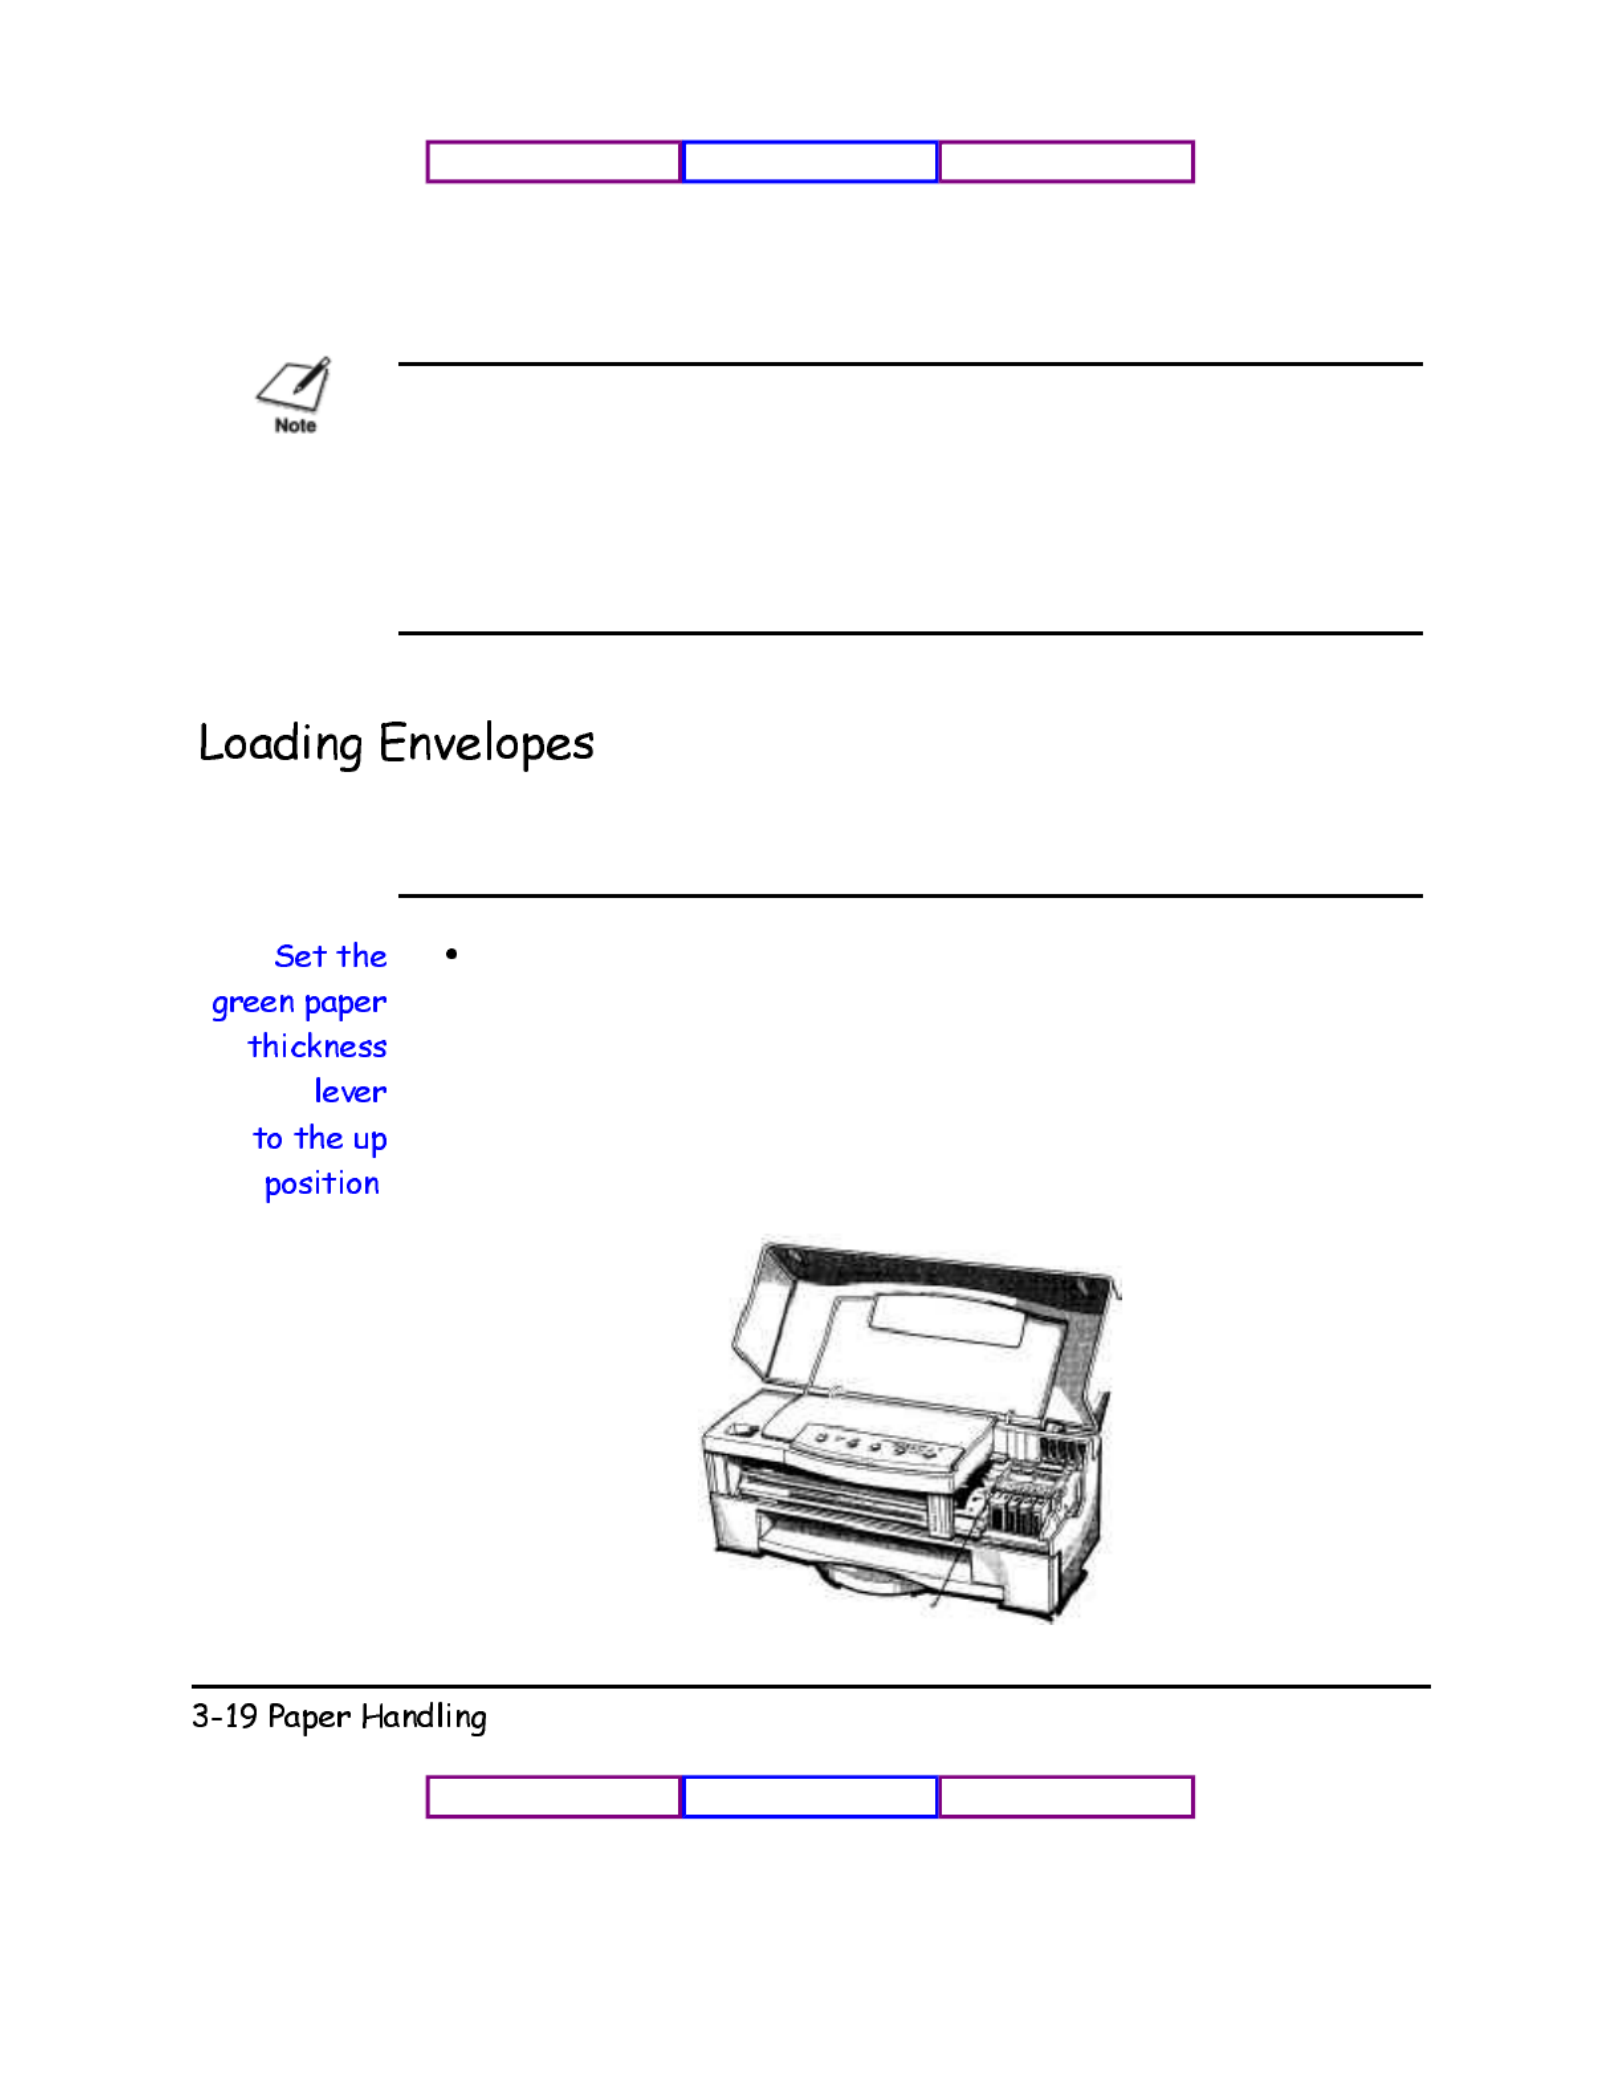
When you are ready to print on envelopes, follow these steps to stack envelopes
in the sheet feeder. (You can also manually feed envelopes one at a time.)
1
.
The lever points upward.
PAPER THICKNESS LEVER
Chapter 3

Make sure the paper support is extended.
Move the paper guide to the left to match the width of the
envelopes.
Arrange the stack of envelopes on a firm surface and press down
firmly on the edges to make the folds crisp.
Press around the envelopes to remove any curls and expel air
from inside the envelopes.
Press firmly on the area that corresponds to the edges of the flap.
Chapter 3

Slide a stack of envelopes into the sheet feeder until it stops
Align the stack of envelopes with the right edge of the sheet
feeder.
.
Make sure the printer is on-line.
Start your print operation.
Chapter 3

When printing on COM10 envelopes, move the paper guide all the way to the left.
Depending on the size and shape of your interface connector, the paper guide may
touch it. If this causes the envelopes to misfeed, use an interface cable with a
smaller connector.
This section describes how to use the cleaning sheet that comes with the Canon
High Resolution Paper and how to use the Fabric Sheets for Canon Printers.
Canon's High Resolution Paper HR-101 is designed for high quality printing. This
paper is specially coated to produce delicate color output. After using a package of
High Resolution Paper (200 sheets), you need to use the cleaning sheet enclosed
with the paper to remove paper dust from the printer's rollers; this will help prevent
paper feed problems.
Make sure the paper thickness lever (inside the printer) is down-for normal
paper.
Make sure the paper selection lever is to the front and the paper support is
lowered-for manual feed.
Make sure the paper output tray is extended.
Chapter 3

Remove the two pieces of tape from the sheet.
Insert the sheet with the sticky side out (toward you) and down
(going into the sheet feeder).
Adjust the paper guide to the edge of the cleaning sheet.
Turn off the printer by pressing the POWER button.
Press and hold the FF and PRINT MODE buttons and press the
POWER button until the printer beeps.
The printer advances the cleaning sheet and starts cleaning.
The printer feeds the sheet and then ejects it.
Use a cleaning sheet once only.
Chapter 3

Fabric sheets FS-101 for Canon printers come with a booklet that describes special
handling procedures. Be sure to look through this booklet for special information
regarding the Fabric Sheets. This section describes specific steps for using Fabric
Sheets with the BJC-620.
Be sure to follow these guidelines.
To avoid paper jams, smearing, and other problems, do not open the printer's
cover during printing.
Use the fixing agent that comes with the Fabric Sheets FS-101.
Do not touch newly printed fabric sheets until the ink is completely dry. This
takes about one hour.
Make sure the paper thickness lever (inside the printer) is up for heavier-
weight print media.
Make sure the paper selection lever is to the front and the paper support is
lowered for manual feed.
Make sure the paper output tray is extended.
Chapter 3

0DLQWDLQLQJWKH
3ULQWHU
This chapter covers the care and maintenance required for your
Canon BJC-620 Color Bubble Jet Printer. It includes:
Printer guidelines
Cleaning the printer
Cleaning the print head unit
Replacing an ink tank
Replacing the print head unit
Transporting the printer
Follow these guidelines to avoid damage to your printer and
harm to you or others:
Set the printer on a stable surface. Do not use an angled
printer stand. Avoid setting the printer in direct sunlight.
Keep the front cover closed when printing.
Do not set anything on top of the printer.
Always use a three-wire, grounded power receptacle
(electrical wall outlet with three holes) for your printer’s
power cord. Do not modify the cord or remove the
ground pin.
Make sure the power is off any time you connect or
disconnect the power cord or interface cable.
When unplugging the power cord, always remove it by
holding the plug and not the cord.
Chapter 4
Do not unplug the printer unnecessarily. The printer may clean
the print head nozzles and consume a small amount of ink when
you plug it into an AC outlet or a power strip.
Never unplug the printer or turn off a power strip to which the
printer is attached when the printer’s power is turned on. This
may prevent the print head unit from returning to the home
position. Once in the home position, the print head unit and the
ink tanks are capped, which prevents them from damage or
drying out. This is critical. If left uncapped, the print head unit
may clog and may need to be replaced.
For reliable data communications between your computer and the
printer, use a short cable, six feet or less in length. The cable must
be bi-directional.
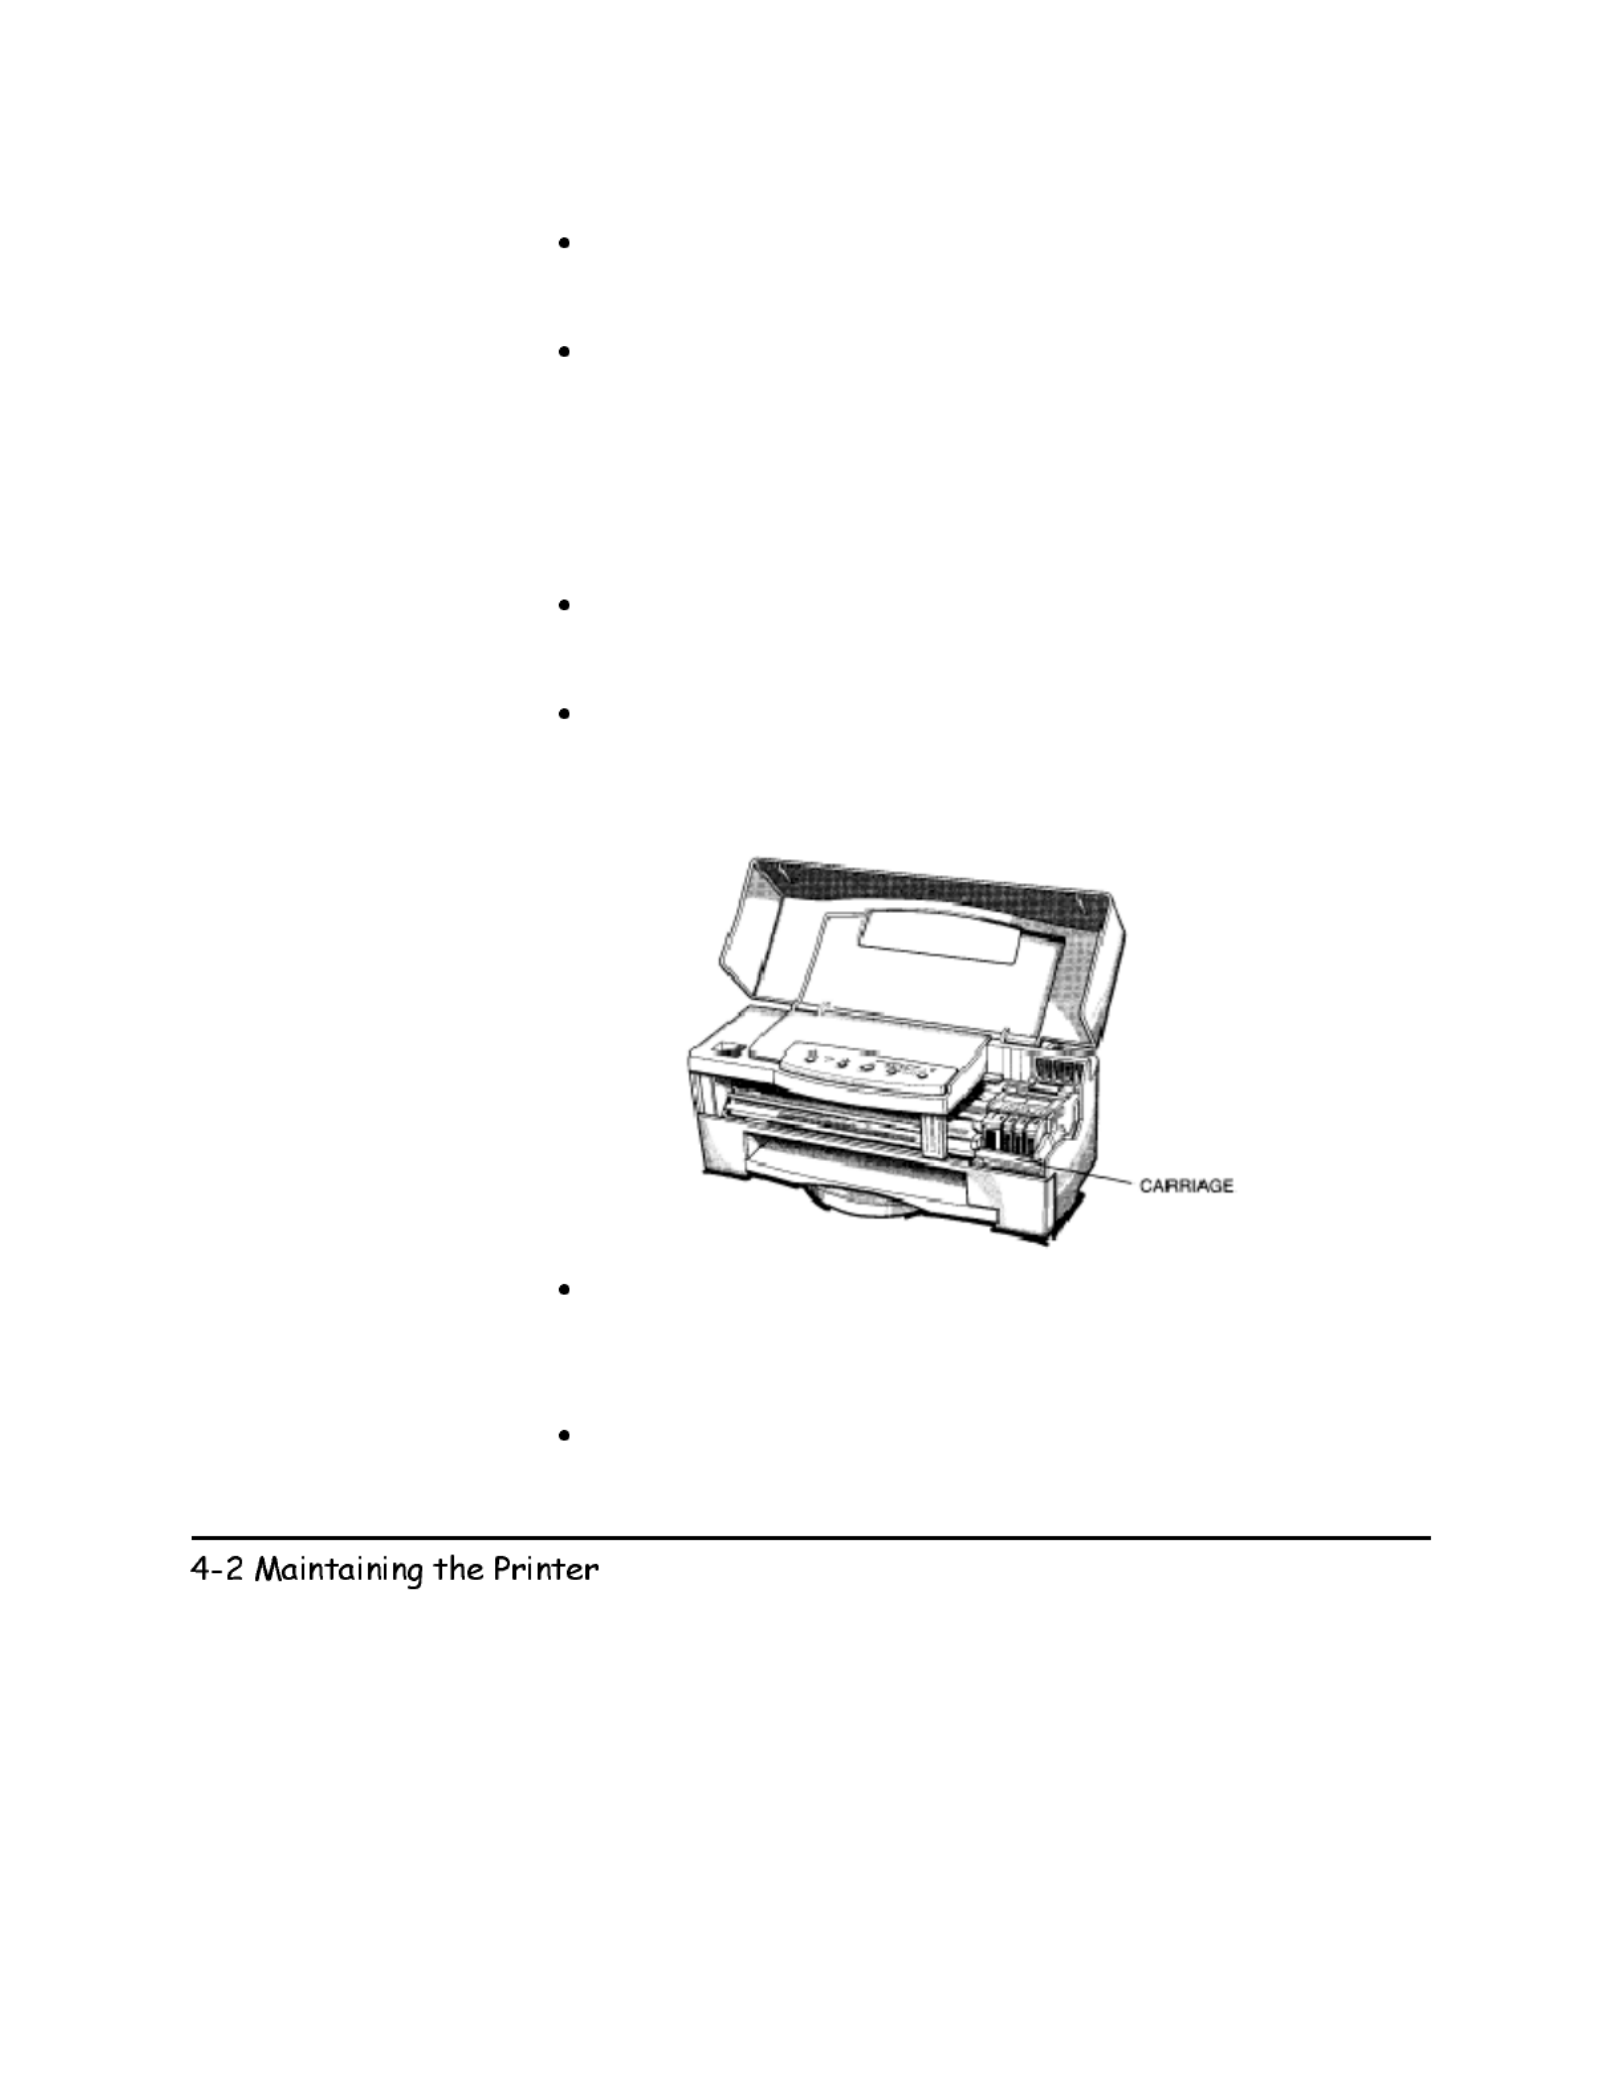
Do not move the mechanism that holds the print head unit and ink
tanks. Attempting to move the carriage may damage delicate
mechanical parts.
Do not touch the print head nozzles on the print head unit. Ink
may leak out and cause stains. Also, you may permanently
damage your print head unit, which would require you to
purchase a replacement.
Do not touch the white padding inside the ink tank. Ink may leak
out and you may damage the tank.
Chapter 4

&OHDQLQJWKH3ULQWHU
Your printer requires little routine maintenance. Perform the following
maintenance, as necessary, to keep your printer in good operating condition.
Be very careful when cleaning the printer. Make sure the printer is turned off;
then unplug it.
Use a soft cloth to remove any ink mist or paper debris.
Do not rub the gear wheels.
Do not use any oil or cleanser inside the printer.
When cleaning inside the printer, avoid the area near the print head unit and
ink tanks. Do not touch the print head nozzles. Ink may leak out and cause
stains.
Do not move the print head unit from the home position.
Do not use paper products (such as paper towels or tissues) to clean the
inside of the printer. They may leave paper particles inside the printer.
Chapter 4
Specyfikacje produktu
| Marka: | Canon |
| Kategoria: | drukarka |
| Model: | BJC-620 |
Potrzebujesz pomocy?
Jeśli potrzebujesz pomocy z Canon BJC-620, zadaj pytanie poniżej, a inni użytkownicy Ci odpowiedzą
Instrukcje drukarka Canon

9 Kwietnia 2025
4 Kwietnia 2025
4 Marca 2025
3 Marca 2025
1 Marca 2025
13 Lutego 2025
8 Lutego 2025
2 Lutego 2025
18 Stycznia 2025
18 Stycznia 2025
Instrukcje drukarka
- drukarka Sony
- drukarka Samsung
- drukarka LG
- drukarka Xiaomi
- drukarka Sharp
- drukarka Huawei
- drukarka Lenovo
- drukarka Epson
- drukarka Fujitsu
- drukarka Roland
- drukarka Panasonic
- drukarka StarTech.com
- drukarka Fujifilm
- drukarka MSI
- drukarka Toshiba
- drukarka D-Link
- drukarka Citizen
- drukarka HP
- drukarka Brother
- drukarka Honeywell
- drukarka Kodak
- drukarka Testo
- drukarka Primera
- drukarka Xerox
- drukarka Godex
- drukarka Olivetti
- drukarka Zebra
- drukarka Dell
- drukarka Digitus
- drukarka AgfaPhoto
- drukarka Kyocera
- drukarka Ricoh
- drukarka Seiko
- drukarka Renkforce
- drukarka Thomson
- drukarka AVM
- drukarka Velleman
- drukarka Dymo
- drukarka Panduit
- drukarka Olympus
- drukarka OKI
- drukarka Mitsubishi
- drukarka Intermec
- drukarka NEC
- drukarka Polaroid
- drukarka Konica Minolta
- drukarka Bixolon
- drukarka Pantum
- drukarka Olympia
- drukarka Datamax O'Neil
- drukarka DNP
- drukarka Equip
- drukarka ZKTeco
- drukarka TSC
- drukarka HiTi
- drukarka Microboards
- drukarka Triumph-Adler
- drukarka Fargo
- drukarka Entrust
- drukarka Kern
- drukarka Brady
- drukarka Tomy
- drukarka Lexmark
- drukarka Sagem
- drukarka Nilox
- drukarka Argox
- drukarka Royal Sovereign
- drukarka Minolta
- drukarka Oce
- drukarka Paxar
- drukarka IDP
- drukarka Metapace
- drukarka Ultimaker
- drukarka Ibm
- drukarka CSL
- drukarka Toshiba TEC
- drukarka Frama
- drukarka Builder
- drukarka Kogan
- drukarka Star Micronics
- drukarka Posiflex
- drukarka Dascom
- drukarka GG Image
- drukarka Vupoint Solutions
- drukarka Elite Screens
- drukarka DTRONIC
- drukarka Phoenix Contact
- drukarka Videology
- drukarka Epson 7620
- drukarka Star
- drukarka EC Line
- drukarka Colop
- drukarka Approx
- drukarka Fichero
- drukarka Raspberry Pi
- drukarka Unitech
- drukarka Middle Atlantic
- drukarka Evolis
- drukarka Tally Dascom
- drukarka Custom
- drukarka Nisca
- drukarka Sawgrass
- drukarka Mutoh
Najnowsze instrukcje dla drukarka

9 Kwietnia 2025

9 Kwietnia 2025
9 Kwietnia 2025

9 Kwietnia 2025

3 Kwietnia 2025
3 Kwietnia 2025
3 Kwietnia 2025

2 Kwietnia 2025
2 Kwietnia 2025

2 Kwietnia 2025