Instrukcja obsługi Arecont Vision ConteraCMR AV-CN1600
Arecont Vision
kamera bezpieczeństwa
ConteraCMR AV-CN1600
Przeczytaj poniżej 📖 instrukcję obsługi w języku polskim dla Arecont Vision ConteraCMR AV-CN1600 (4 stron) w kategorii kamera bezpieczeństwa. Ta instrukcja była pomocna dla 6 osób i została oceniona przez 2 użytkowników na średnio 4.5 gwiazdek
Strona 1/4
+1.818.937.0700 | www.avcostar.com | avsales@arecontvision.com
Plug the supplied power cord into the recorder.
Do not connect the plug to a power source at this time.
Connect the network cable intended for remote
connections to the Client NIC.
Connect the supplied keyboard and mouse using
the USB ports.
Connect a monitor using the HDMI or DVI-I ports.
Note: The Camera NIC is intended for use
with a dedicated camera network.
Note: For models with PoE ports, use the Camera NIC to
connect a camera network. The Camera NIC is equipped
with a DHCP server. Connecting to a network with another
DHCP server will cause signicant network issues.
Connect the cameras to PoE ports, or the external
camera network.
Connect the power cord to a power source, and
then turn the recorder ON.
Windows® Only - Sign in with default log in credentials:
User Accounts: NVRAdmin, NVRUser
Password: Recorder Serial Number
Note: The serial number can be found on the side of
the Recorder.
Note: It is strongly recommended the password
is changed during initial setup.
Windows Only - Open the Contera Server login on
the desktop.
Log in to the Contera® Server Recorder using the
default credentials:
Username: admin
Password: 1234
Follow the Setup Wizard to complete basic setup
of your system.
SETTING UP YOUR RECORDER FOR THE FIRST TIME
Remote Communication Port 80 (8888 used if 80 is blocked)
Client NIC IP Address DHCP
Camera NIC (External Switch) 192.168.51.1 / 255.255.255.0 (Gateway and DNS blank)
Camera NIC/Internal PoE
(NVR Appliance Models)
192.168.51.1 / 255.255.255.0 (Gateway and DNS blank)
Network Information
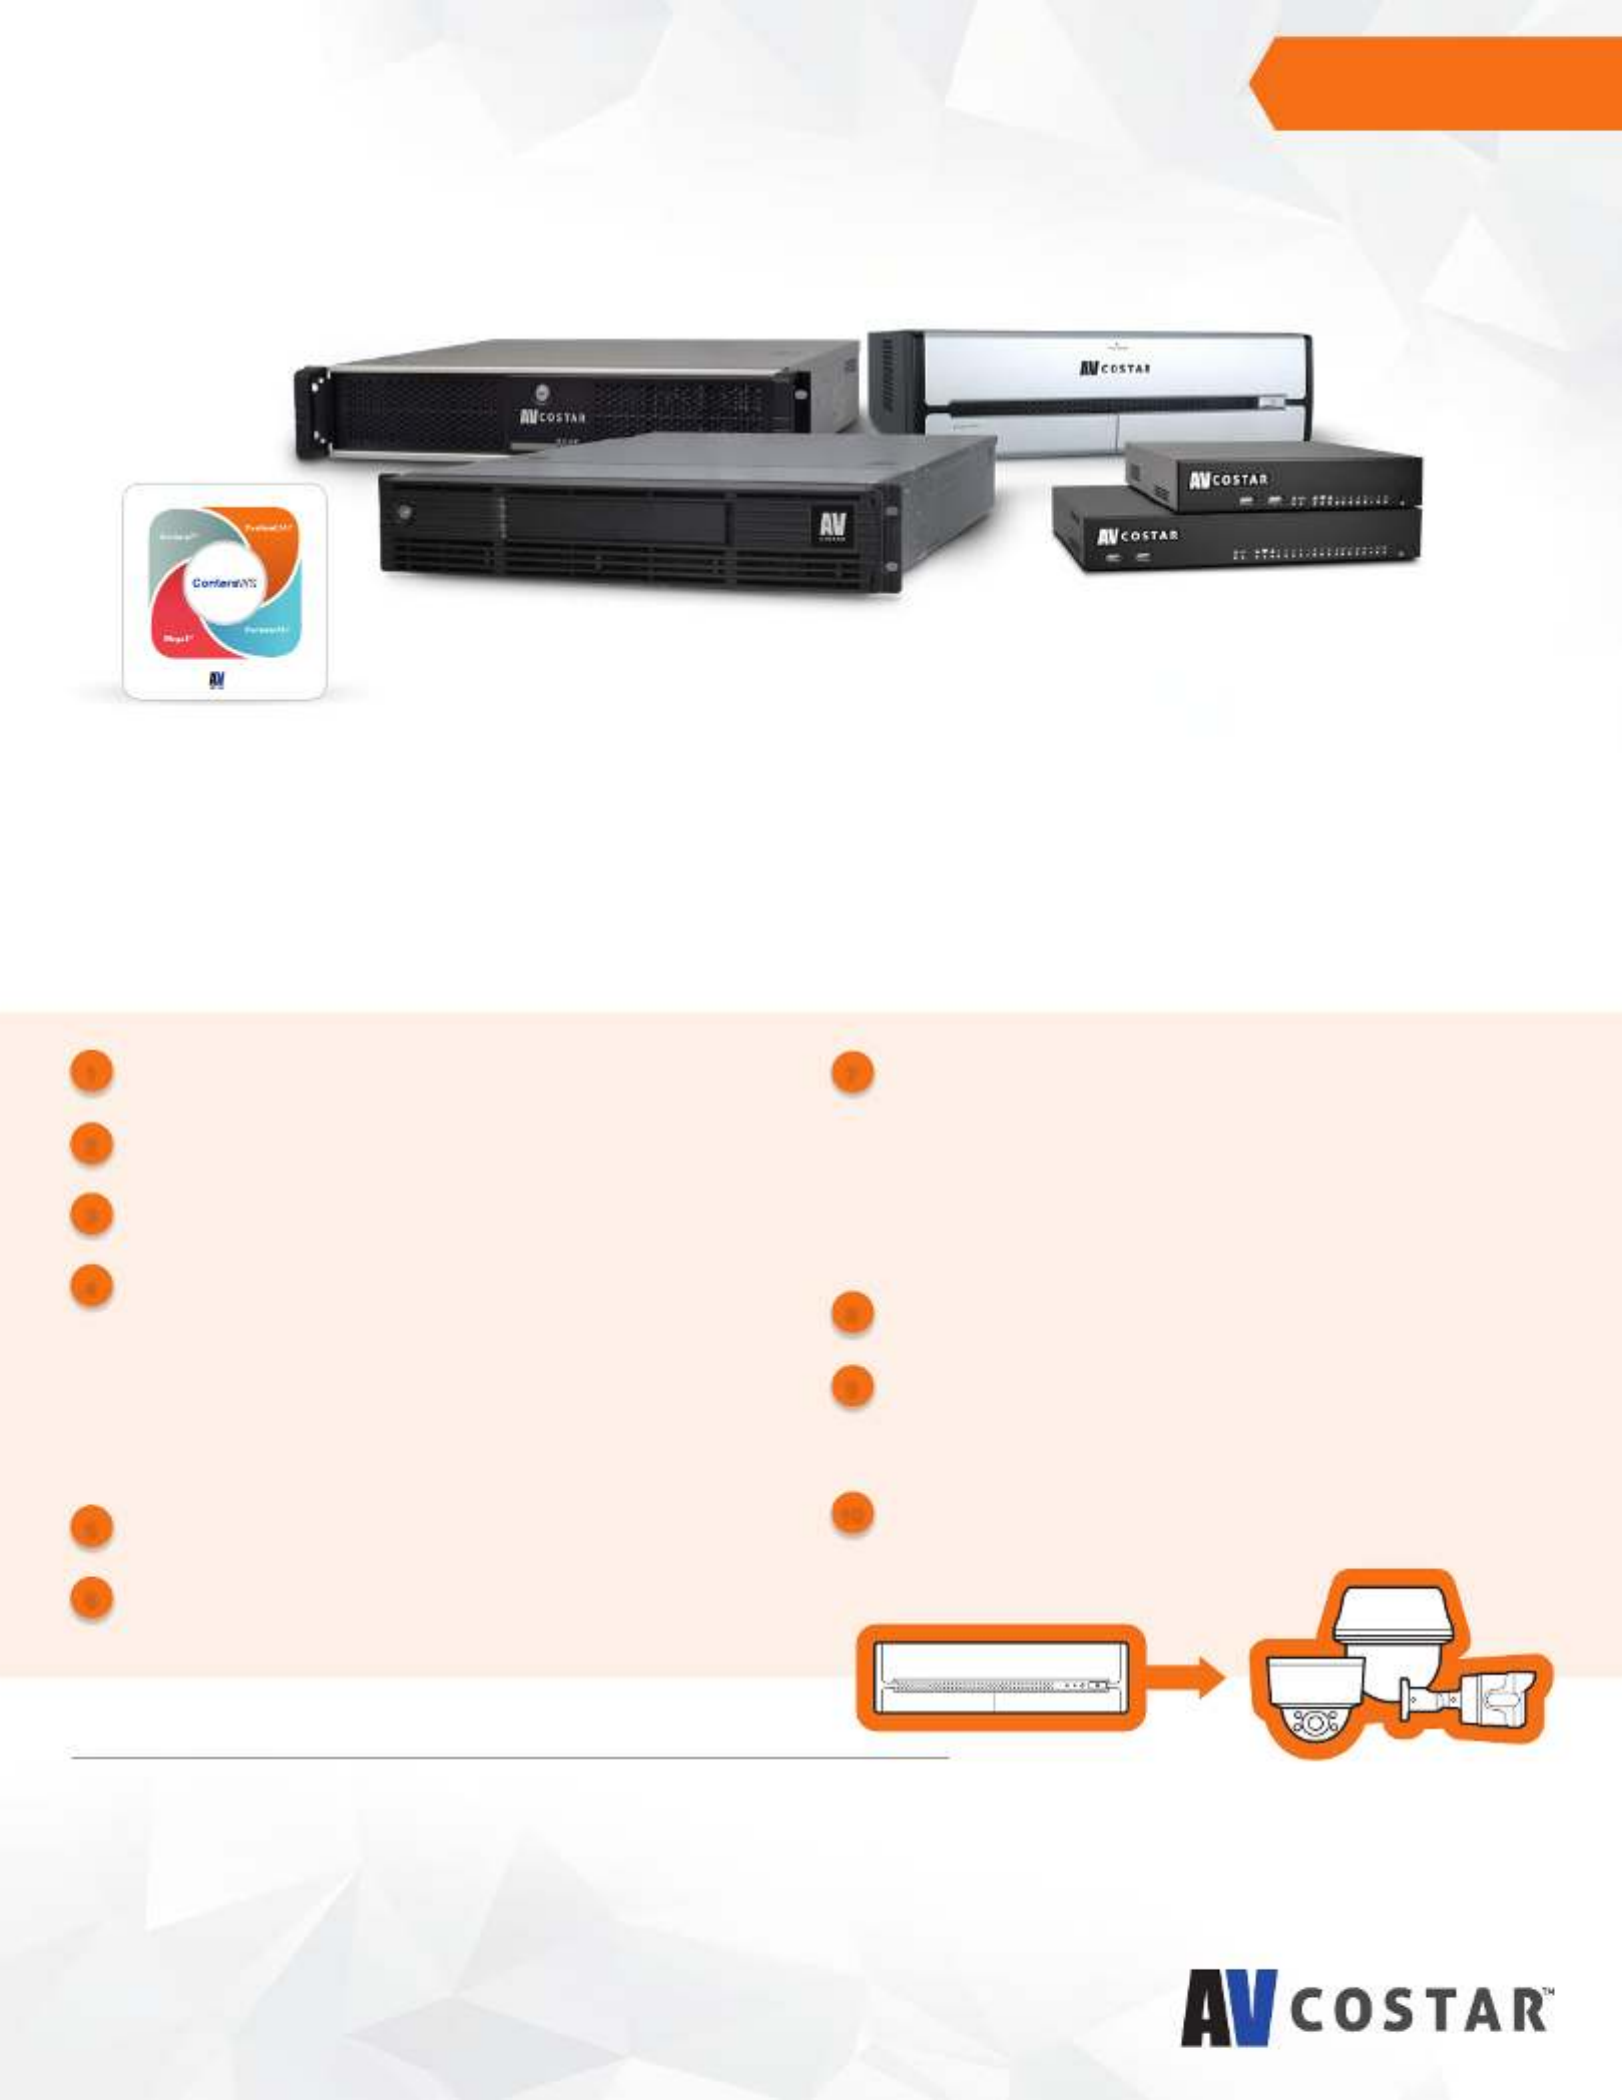
This guide will assist you with the initial setup of your ConteraCMR® cloud managed appliance and recording software. This guide
includes hardware setup, software setup, network conguration, and connecting your appliance to the ConteraWS ® Web Services Portal.
ConteraCMR® Cloud Managed Recorder Series
2
3
4
5
1
6
7
8
9
10
ConteraCMR
Part of the Total Solution
®
Quick Installation Guide
2+1.818.937.0700 | www.avcostar.com | avsales@arecontvision.com
Camera Management
Contera Server software makes it easy to add and congure IP cameras.
Contera recorders will detect cameras connected to the Camera NIC
Note: Third party cameras may need to be congured using a third party
program before being added to the Server. Cameras that don’t support ONVIF
can be congured to record via RTSP streaming.
Adding Auto-Detected Cameras:
Contera Server software automatically detects ONVIF Prole S compliant
cameras set to DHCP. Cameras not meeting these requirements must
be congured manually.
1. Click , and then click
Setup Cameras.
2. Click Add Cameras.
3. For automatically detected cameras, select the camera(s) using the
check boxes, and then type the appropriate and Username Password.
4. Click Add.
Note: The recorder will automatically detect and add most cameras connected
to the on-board PoE switch as long as the cameras are set to DHCP.
Adding Cameras Manually:
1. Click , and then click
Setup Cameras.
2. Click Add Cameras.
3. For cameras not automatically detected, click Add Cameras Manually.
4. Select the ONVIF or the RTSP protocol, and then type the appropriate
Title, IP Address, Username, and Password.
Note: When using RTSP, specify the individual URL streams for your cameras.
For instructions regarding these streams, consult the camera manual.
5. Click Add Cameras.
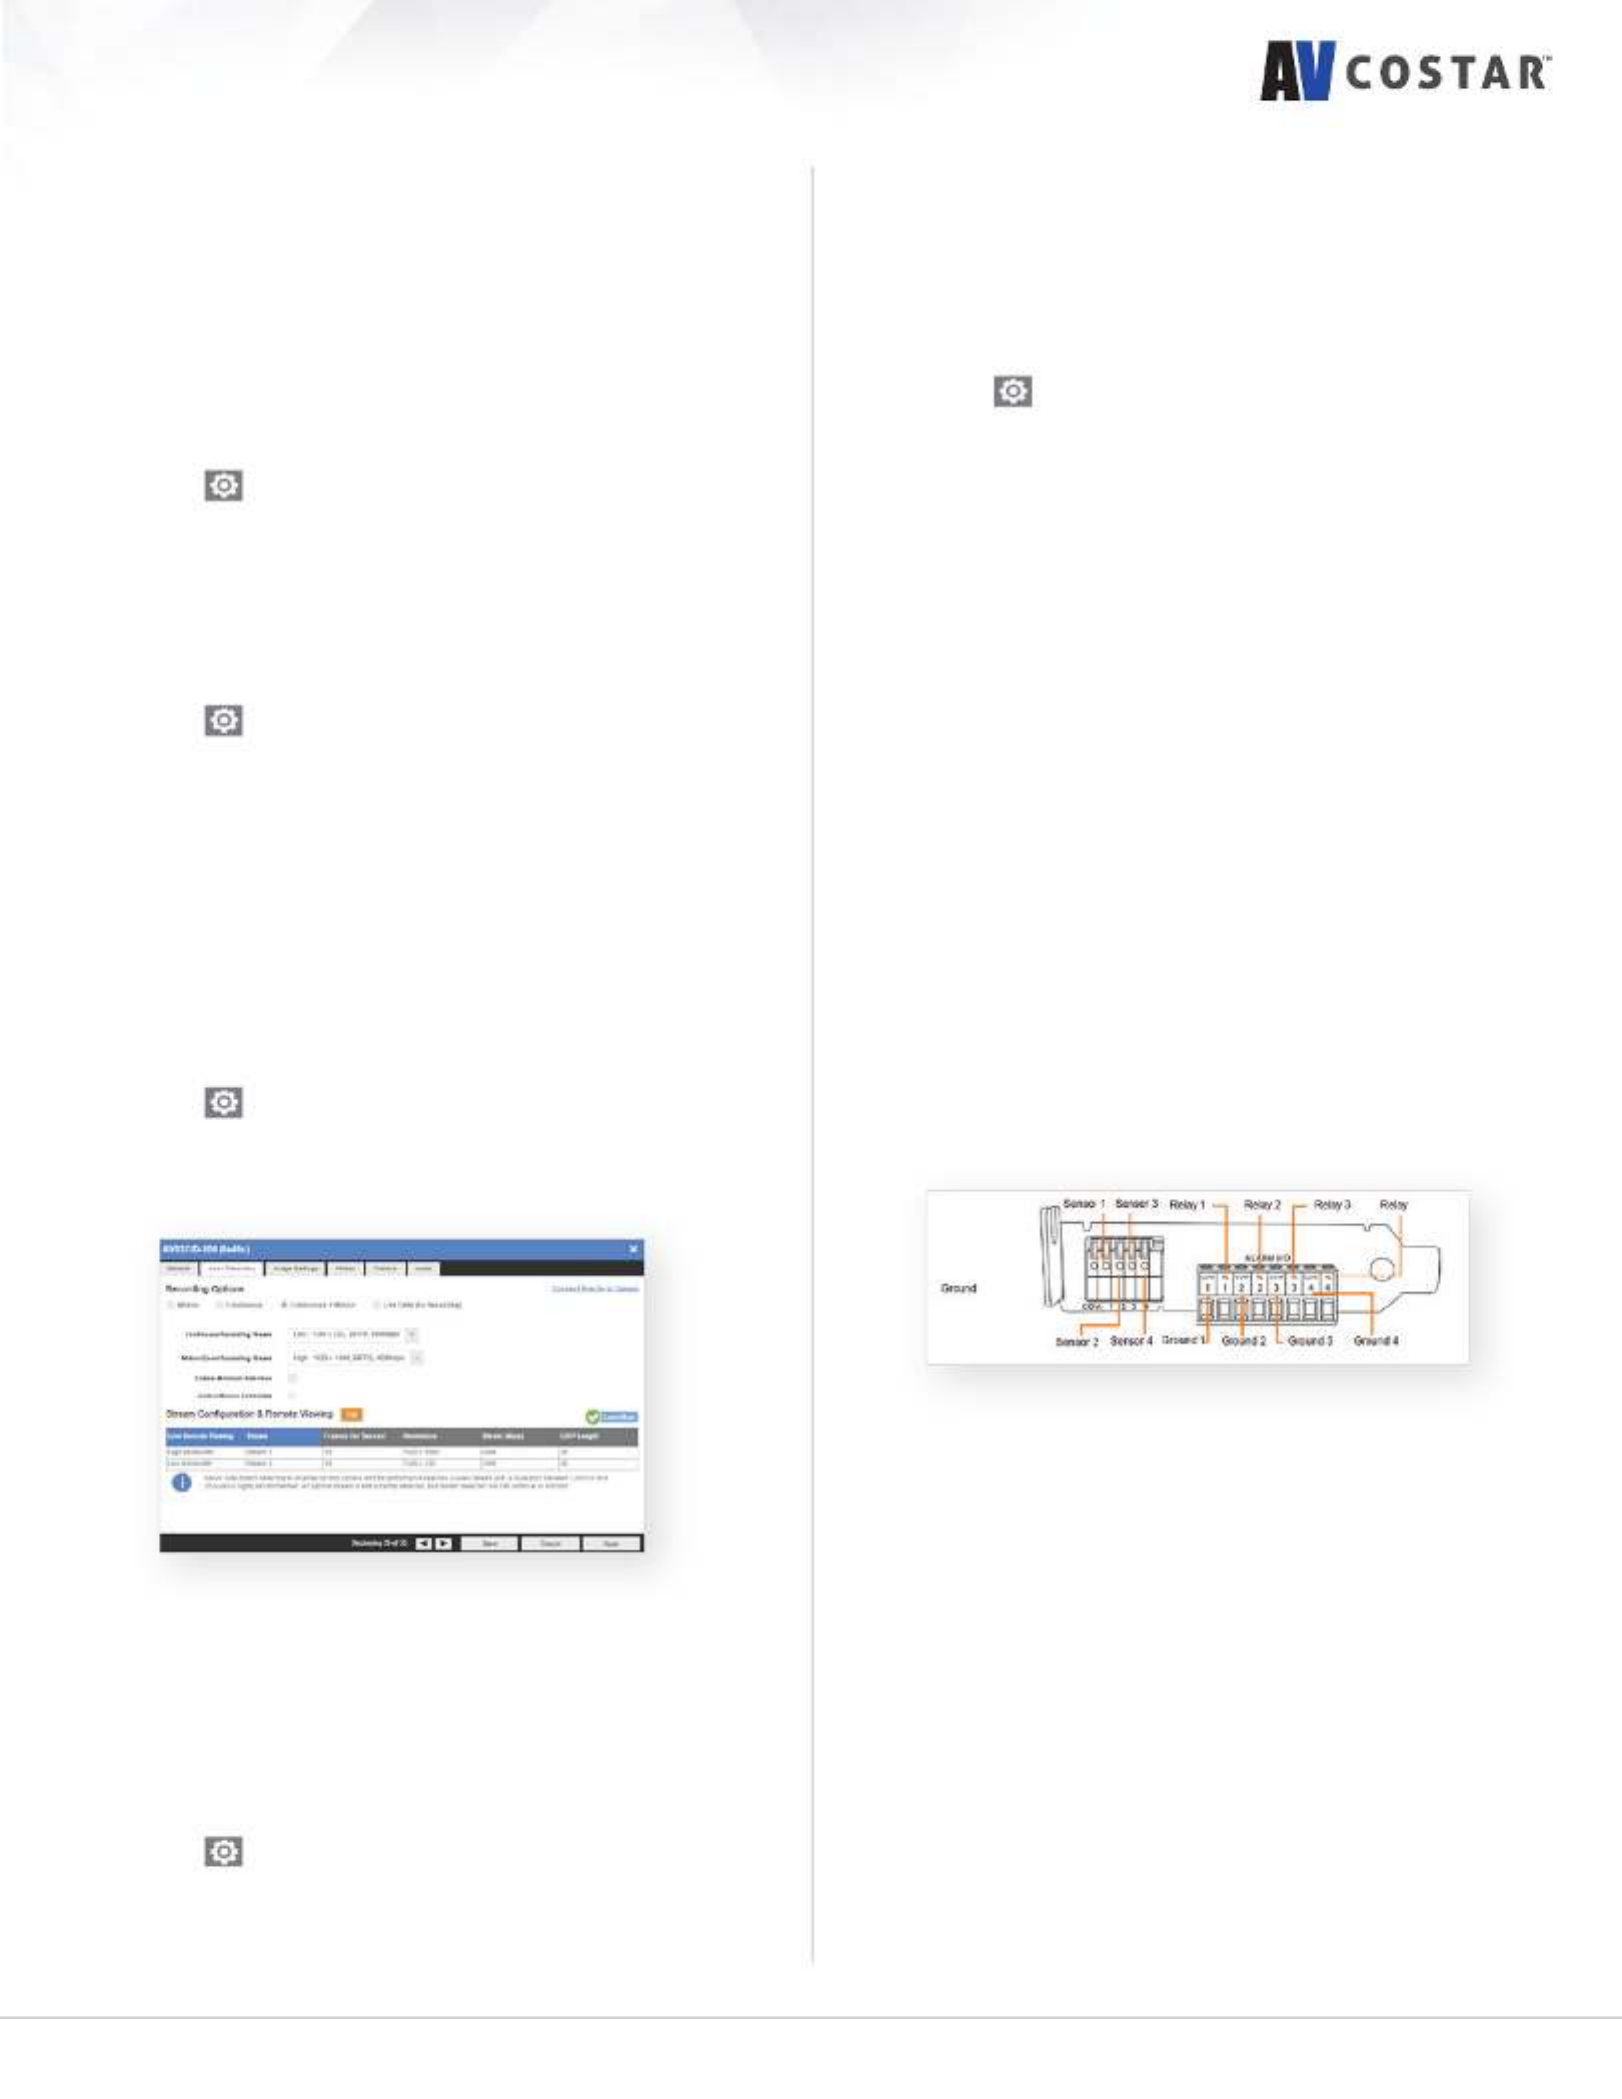
Conguring Recording Settings:
For optimal motion detection, cameras should be congured with a
secondary stream of 720x576 or lower. Contera will still detect motion using
a higher resolution stream if a 720x576 or lower stream is not available, but
this will consume more system resources.
1. Click , and then click
Setup Cameras.
2. Select the desired camera, and then click the Live/Recording tab.
3. Congure the settings as desired.
Note: Continuous + Motion recording is the default setting for all cameras
upon connection to your recorder.
Advanced Camera Management
Cameras set to static IP addresses, third party cameras, and cameras not
supported by ONVIF may not be detected automatically. To congure
cameras not automatically detected by Contera Server software, follow the
steps below.
Conguring AV Costar™ Cameras with a Static IP
Address (Linux® models only):
1. Click , and then click Setup Support Tools.
2. Click Launch Support Tools.
3. Click AV IP Utility
™.
4. Note the discovered for the desired camera.IP address
5. Click to return to Contera Server software.Exit
6. Follow the steps in the Adding Cameras Manually section, typing the
Static IP Address.
Note: Network Camera Manager can be launched from the Windows
desktop icon.
Conguring AV Costar Cameras with DHCP
(Linux models only):
1. Click , and then click
Setup Support Tools.
2. Click Launch Support Tools.
3. Click AV IP Utility.
4. Select your desired cameras, and DHCP, and then click Apply.
5. Click to return to Contera Server software.
Exit
6. Follow the steps in the section to add Adding Auto-Detected Cameras
the camera.
Note: AV Costar cameras on Windows can be congured with DHCP by
launching Network Camera Manager from the Windows desktop icon.
Adding Third Party Cameras:
Third party cameras may require installing a manufacturer camera discovery
tool on a separate PC. Once the camera discovery tool is installed, follow
the steps for adding a camera with a static IP address or using DHCP as
outlined above.
Adding Cameras Not Supported by ONVIF:
You must add cameras that are not ONVIF-compliant using the RTSP
stream of the camera. Consult the manufacturer’s camera manual for more
detailed information regarding RTSP streams. When you know the URL for
the RTSP stream of your camera, follow the steps in the Adding Cameras
Manually section, selecting RTSP protocol.
Sensor/Relay Card
Contera Server version 1.2 or higher is required for use of the Sensor/Relay
Card. See page 36 of the Contera Server Software Manual for instructions
on setting up the Sensor/Relay Card on the software.
Note: Do not remove the Alarm I/O adapter. It is permanently attached to
ensure full integrity of the connections. A small ne-tip screwdriver might be
needed to access the lock screws on the adapter.
Advanced Network Setup
In some cases, advanced network settings may be applied to set up an
optimal local or remote connection. The following steps are optional.
Please contact an AV Costar support technician if you are unsure of your
video network.
Direct Connection:
With direct connection, network trafc bypasses the ConteraWS cloud relay
service, allowing for optimal connection speeds. This conguration requires
additional steps, including router conguration, to forward trafc to the
appropriate Contera recorder.
Note: Visit http://portforward.com/English/routers/port_forwarding/
for instructions on router conguration for direct connection.
1. Access the router used for Internet communication and forward TCP
port 80 to the internal address of the Contera Server recorder.
ConteraCMR
®
| Quick Installation Guide
3
+1.818.937.0700 | www.avcostar.com | avsales@arecontvision.com
2. Use a web browser to log in to your ConteraWS account. Click My
Recorders, and then click Edit in the row of your desired recorder.
3. Click , and then type the or
Remote Network Settings static IP DDNS
entry for the router in the or IP Address Domain eld, and 80 in the
Port eld.
4. Click Save.
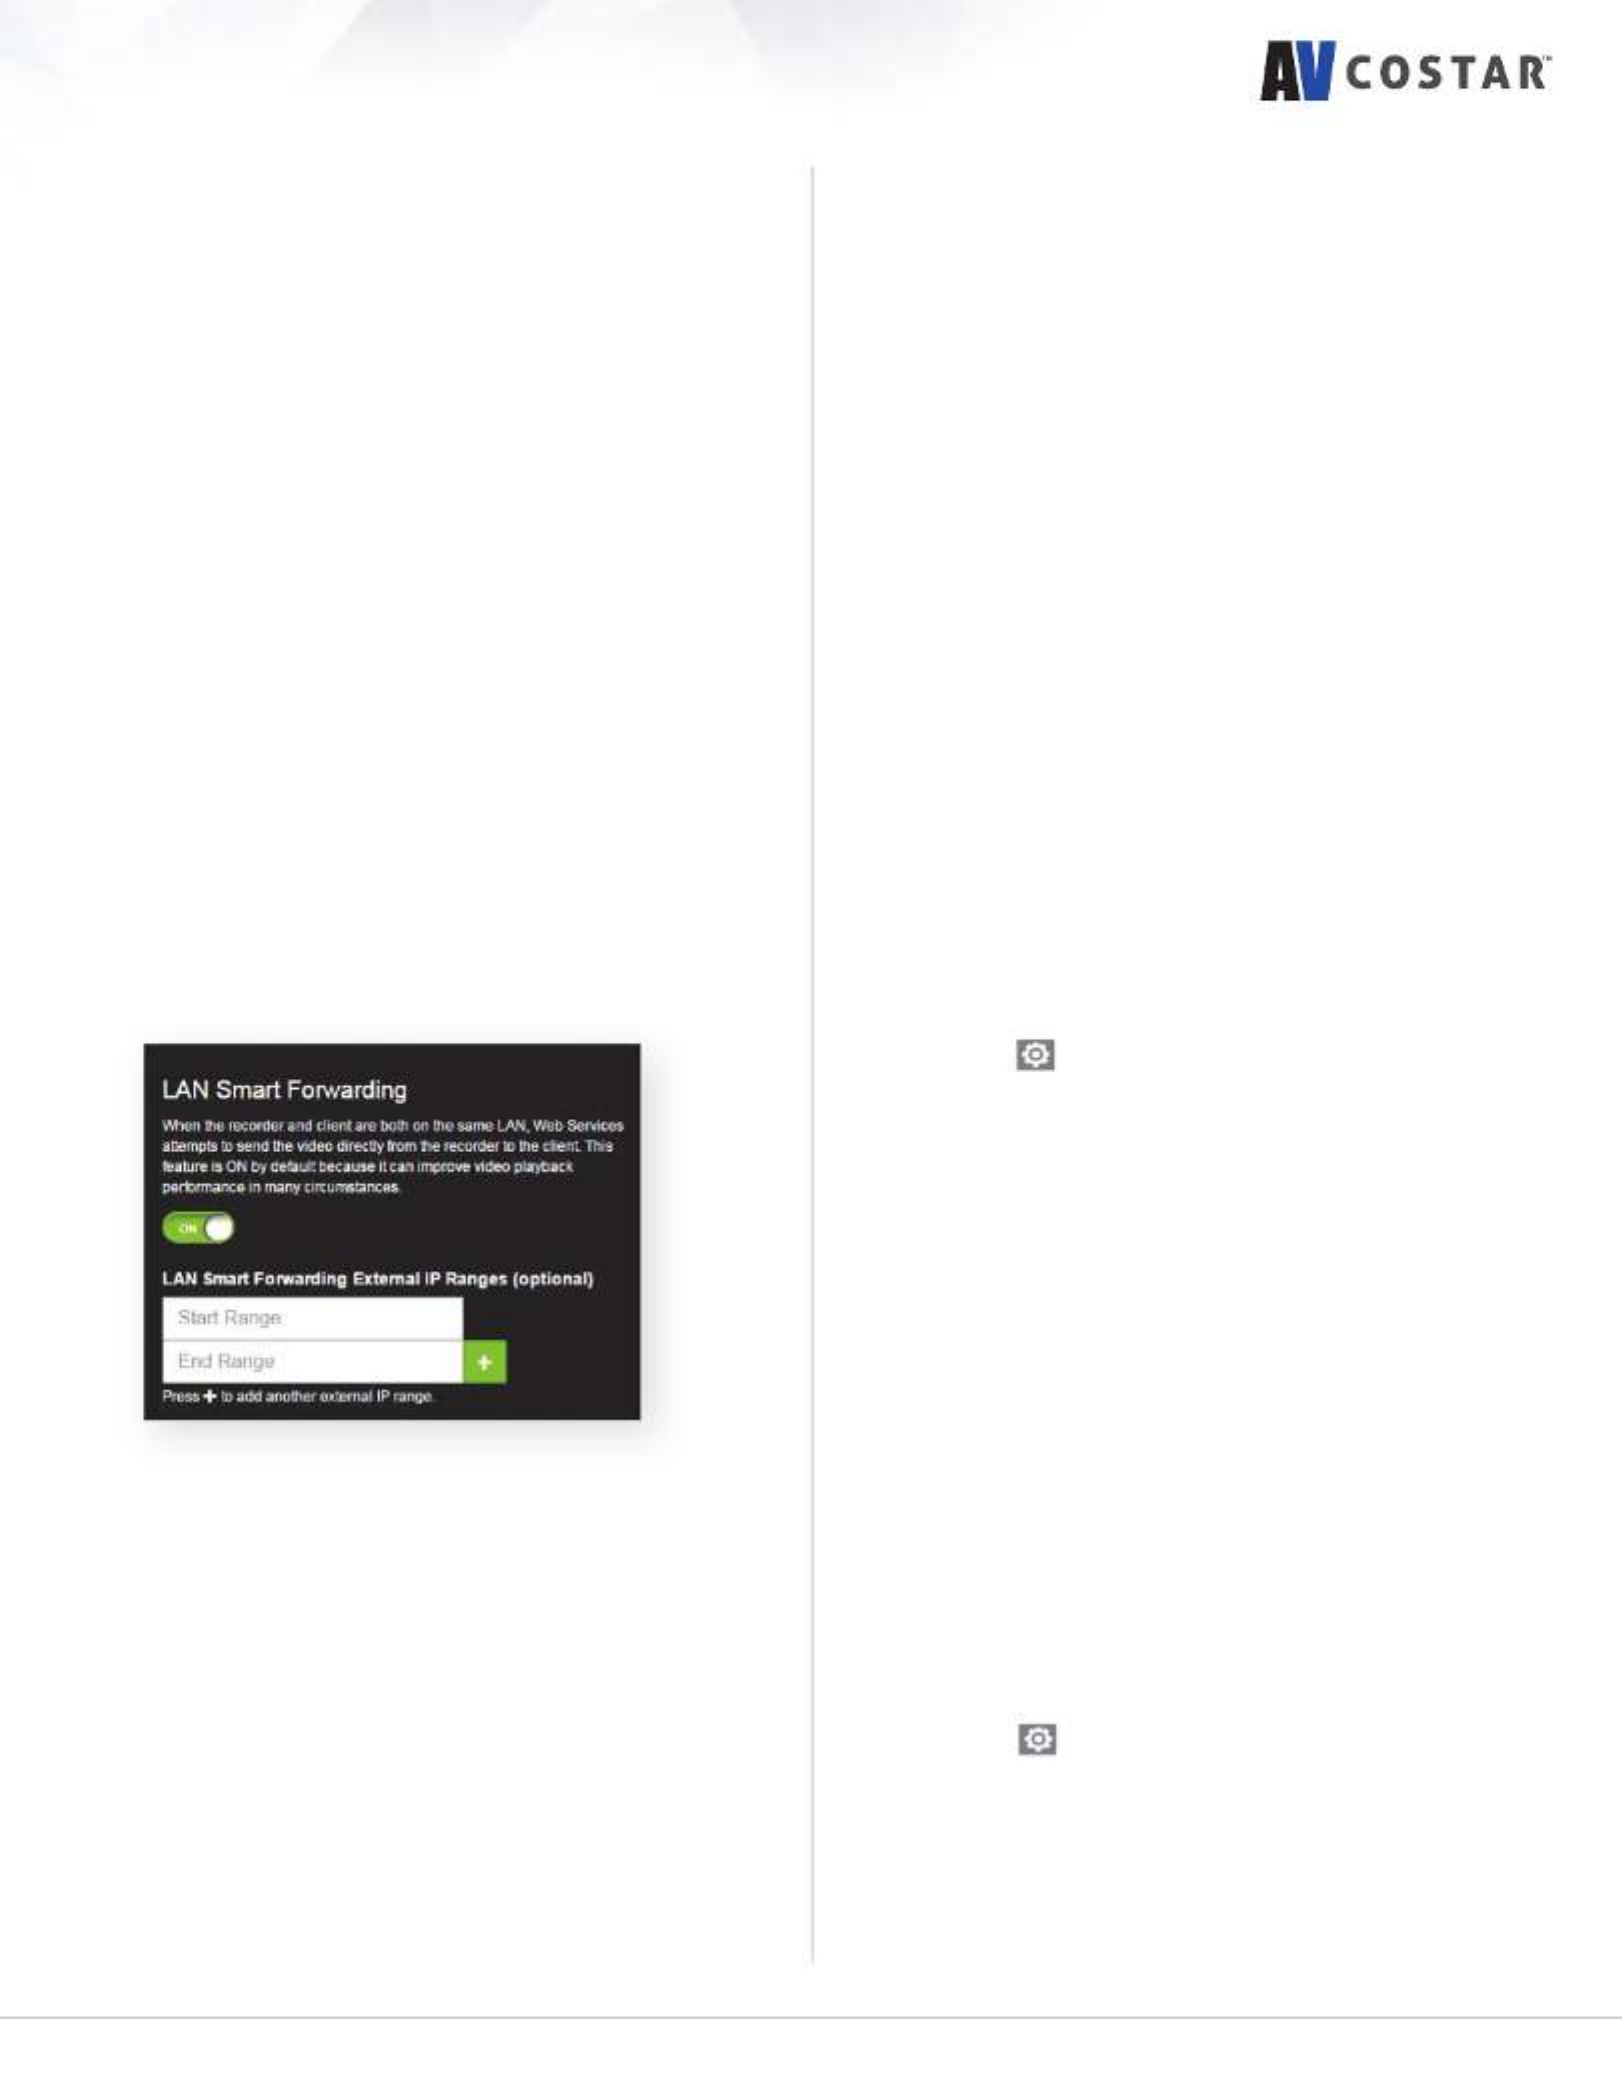
LAN Smart Forwarding:
To optimize local connections, ConteraWS uses a feature called LAN Smart
Forward (LSF). This feature allows ConteraWS to detect if the machine using
the remote client software is on the same local network. ConteraWS then
automatically switches from a cloud relay connection to a direct connection.
This ensures the fastest connection between client and recorder.
The following conditions are required for LAN Smart Forwarding:
• You must already have an ConteraWS account, and the appliance
must be connected to ConteraWS with LAN Smart Forwarding
congured (see the ConteraWS Web Services section for more
information).
• Both client and recorder use the same external IP address, or IP
addresses within an acceptable range.
• The Client NIC port must be used for the Internet connection.
To enable LAN Smart Forwarding:
1. Use a web browser to log in to your ConteraWS account, and then click
on your desired Company Account.
2. Click , and then click in the row of the desired recorder.
My Recorders Edit
3. Click the Remote Network Settings tab.
4. Set LAN Smart Forwarding to On.
Note: If your recorder and client machines have different external IP
addresses, enter the IP range in which the client and recorder reside.
ConteraWS Web Services (ArecontVision-WS.com)
1. On your Recorder, click , and then Setup navigate to the Remote
Services tab.
2. Click Web Services.
3. Type your Registration Code.
Note: If you do not have your Recorder Registration Code, you may enter your
ConteraWS Email and Password instead. It is recommended to use a Recorder
Registration Code if available though.
4. Click Connect.
ConteraWS Web Services Connection
ConteraWS Web Services is a cloud-based management solution which
allows you to administer all your users, recorders, and VMS installations from
one central location. To get the most out of your new web-managed recorder,
we strongly recommend connecting it to the Web Services portal.
Please note that all following instructions are executed at a Channel
Partner level. For more detailed instructions on how to operate at an End
User level, please consult the ConteraWS Software Manual, available at
www.avcostar.com.
To begin using ConteraWS, you will need a Channel Partner ConteraWS
account. If you do not have one already, please contact AV Costar at
www.avcostar.com.
Connecting a Recorder to ConteraWS:
If you entered your Recorder Registration Code in the previous section, your
recorder will be automatically added to your ConteraWS Company Account.
Users associated with your Company Account and with the appropriate
permissions will now be able to remotely access the Server recorder.
Creating a Customer Account:
A Customer Account is an ConteraWS End User account created under
a Channel Partner account and managed by the Channel Partner. Customer
Accounts can only be created by the Channel Partner. Once created, the
Channel Partner can assign recorders to Customer Accounts and create
End User accounts.
1. Log in to your ConteraWS account from a web browser using your
registered Username and Password.
2. On the Management Portal, click Add New Account.
3. Enter an Account Name.
4. (Optional) Enter an Account ID, City, State/Province, and Time Zone.
5. Click Add Company Account.
Creating a Customer Account:
1. Log in to your ConteraWS account from a web browser using your
registered Username and Password.
2. Click , and then click Users.
Settings
3. Click Add New User, and then enter the appropriate user information.
4. Click Add New User.
Note: This method creates users at the Channel Partner level. To create users
at an End User level, complete step 1, then click Connect next to the Company
Account you wish to add users to, then complete steps 2-4.
Managing User Permissions:
User permissions are managed via assignment of individual users to User
Groups. User Groups are classications which grant users permissions
to access various aspects of a Channel Partner or Customer Account.
User and User Group Management should always be performed through
ConteraWS.
Three default permission levels are available:
• User – Basic Live View, Search, and Clip Share functionality.
• Super User – Live View, Search, Clip Sharing, Editing,
Deleting, and Recorder Management.
• Admin – All permissions, including full administrative
access and the ability to manage Users and User Groups.
Note: Default user group permissions cannot be edited. Creating a new user
group will allow customization of available permissions.
Adding a User to a Group:
1. Log in to your ConteraWS account using a web browser using
your registered and
Username Password.
2. Click , then click User Groups.
Settings
3. In the row of your desired User Group, click Edit.
4. Click , and then click
Users Add User.
5. Select the user you want to add to the User Group, and then click Save.
Note: Automatically include all users in the User Group by checking the box so
labeled at the top of the list.
ConteraCMR
®
| Quick Installation Guide
Specyfikacje produktu
| Marka: | Arecont Vision |
| Kategoria: | kamera bezpieczeństwa |
| Model: | ConteraCMR AV-CN1600 |
Potrzebujesz pomocy?
Jeśli potrzebujesz pomocy z Arecont Vision ConteraCMR AV-CN1600, zadaj pytanie poniżej, a inni użytkownicy Ci odpowiedzą
Instrukcje kamera bezpieczeństwa Arecont Vision

3 Lutego 2025
3 Lutego 2025
3 Lutego 2025
3 Lutego 2025
3 Lutego 2025
3 Lutego 2025
3 Lutego 2025
3 Lutego 2025
3 Lutego 2025
3 Lutego 2025
Instrukcje kamera bezpieczeństwa
- kamera bezpieczeństwa Sony
- kamera bezpieczeństwa Samsung
- kamera bezpieczeństwa Tenda
- kamera bezpieczeństwa Motorola
- kamera bezpieczeństwa TP-Link
- kamera bezpieczeństwa Philips
- kamera bezpieczeństwa Bosch
- kamera bezpieczeństwa Hikvision
- kamera bezpieczeństwa EZVIZ
- kamera bezpieczeństwa Conceptronic
- kamera bezpieczeństwa Panasonic
- kamera bezpieczeństwa Canon
- kamera bezpieczeństwa Nedis
- kamera bezpieczeństwa Reolink
- kamera bezpieczeństwa TRENDnet
- kamera bezpieczeństwa Tesla
- kamera bezpieczeństwa D-Link
- kamera bezpieczeństwa Niceboy
- kamera bezpieczeństwa Ring
- kamera bezpieczeństwa Imou
- kamera bezpieczeństwa Blaupunkt
- kamera bezpieczeństwa Evolveo
- kamera bezpieczeństwa Grundig
- kamera bezpieczeństwa APC
- kamera bezpieczeństwa Honeywell
- kamera bezpieczeństwa BLOW
- kamera bezpieczeństwa Manhattan
- kamera bezpieczeństwa Strong
- kamera bezpieczeństwa Swann
- kamera bezpieczeństwa Gembird
- kamera bezpieczeństwa Turing
- kamera bezpieczeństwa Zebra
- kamera bezpieczeństwa DSC
- kamera bezpieczeństwa JVC
- kamera bezpieczeństwa Trust
- kamera bezpieczeństwa Qolsys
- kamera bezpieczeństwa Digitus
- kamera bezpieczeństwa V-TAC
- kamera bezpieczeństwa Dahua Technology
- kamera bezpieczeństwa Eufy
- kamera bezpieczeństwa Marshall
- kamera bezpieczeństwa Somfy
- kamera bezpieczeństwa Uniden
- kamera bezpieczeństwa Netgear
- kamera bezpieczeństwa Thomson
- kamera bezpieczeństwa Velleman
- kamera bezpieczeństwa Ferguson
- kamera bezpieczeństwa Pyle
- kamera bezpieczeństwa Intellinet
- kamera bezpieczeństwa Setti+
- kamera bezpieczeństwa Vivotek
- kamera bezpieczeństwa Speco Technologies
- kamera bezpieczeństwa EtiamPro
- kamera bezpieczeństwa Miniland
- kamera bezpieczeństwa Mitsubishi
- kamera bezpieczeństwa Edimax
- kamera bezpieczeństwa Petcube
- kamera bezpieczeństwa First Alert
- kamera bezpieczeństwa Kerbl
- kamera bezpieczeństwa AirLive
- kamera bezpieczeństwa Maginon
- kamera bezpieczeństwa Planet
- kamera bezpieczeństwa LevelOne
- kamera bezpieczeństwa Axis
- kamera bezpieczeństwa Sanyo
- kamera bezpieczeństwa Lorex
- kamera bezpieczeństwa Milesight
- kamera bezpieczeństwa Abus
- kamera bezpieczeństwa Bresser
- kamera bezpieczeństwa Elro
- kamera bezpieczeństwa Olympia
- kamera bezpieczeństwa Hama
- kamera bezpieczeństwa Netatmo
- kamera bezpieczeństwa Promise Technology
- kamera bezpieczeństwa GVI Security
- kamera bezpieczeństwa Equip
- kamera bezpieczeństwa AVer
- kamera bezpieczeństwa ZKTeco
- kamera bezpieczeństwa Yale
- kamera bezpieczeństwa Ernitec
- kamera bezpieczeństwa Technaxx
- kamera bezpieczeństwa Hanwha
- kamera bezpieczeństwa Overmax
- kamera bezpieczeństwa Y-cam
- kamera bezpieczeństwa Grandstream
- kamera bezpieczeństwa Alecto
- kamera bezpieczeństwa Avidsen
- kamera bezpieczeństwa Burg Wächter
- kamera bezpieczeństwa Foscam
- kamera bezpieczeństwa Lumens
- kamera bezpieczeństwa Monacor
- kamera bezpieczeństwa Smartwares
- kamera bezpieczeństwa Adj
- kamera bezpieczeństwa Wasserstein
- kamera bezpieczeństwa Qian
- kamera bezpieczeństwa Arenti
- kamera bezpieczeństwa Vitek
- kamera bezpieczeństwa Alfatron
- kamera bezpieczeństwa UniView
- kamera bezpieczeństwa Clas Ohlson
- kamera bezpieczeństwa Laserliner
- kamera bezpieczeństwa Megasat
- kamera bezpieczeństwa REVO
- kamera bezpieczeństwa Fenton
- kamera bezpieczeństwa Belkin
- kamera bezpieczeństwa PTZ Optics
- kamera bezpieczeństwa Kramer
- kamera bezpieczeństwa BZBGear
- kamera bezpieczeństwa BirdDog
- kamera bezpieczeństwa KJB Security Products
- kamera bezpieczeństwa Inovonics
- kamera bezpieczeństwa HiLook
- kamera bezpieczeństwa Profile
- kamera bezpieczeństwa Swan
- kamera bezpieczeństwa Acti
- kamera bezpieczeństwa Apeman
- kamera bezpieczeństwa ACME
- kamera bezpieczeństwa ATN
- kamera bezpieczeństwa Eminent
- kamera bezpieczeństwa Sitecom
- kamera bezpieczeństwa Flir
- kamera bezpieczeństwa GeoVision
- kamera bezpieczeństwa Chacon
- kamera bezpieczeństwa Ubiquiti
- kamera bezpieczeństwa Dahua
- kamera bezpieczeństwa Targa
- kamera bezpieczeństwa Humax
- kamera bezpieczeństwa Gira
- kamera bezpieczeństwa Iget
- kamera bezpieczeństwa Lanberg
- kamera bezpieczeństwa Iluv
- kamera bezpieczeństwa Sonoff
- kamera bezpieczeństwa WyreStorm
- kamera bezpieczeństwa Storage Options
- kamera bezpieczeństwa Swisstone
- kamera bezpieczeństwa Moog
- kamera bezpieczeństwa Sinji
- kamera bezpieczeństwa SAB
- kamera bezpieczeństwa Moen
- kamera bezpieczeństwa AViPAS
- kamera bezpieczeństwa Sricam
- kamera bezpieczeństwa Kompernass
- kamera bezpieczeństwa Brinno
- kamera bezpieczeństwa Tenvis
- kamera bezpieczeństwa Nordval
- kamera bezpieczeństwa Jablocom
- kamera bezpieczeństwa Defender
- kamera bezpieczeństwa Feelworld
- kamera bezpieczeństwa Beseye
- kamera bezpieczeństwa InfiRay
- kamera bezpieczeństwa Pelco
- kamera bezpieczeństwa Exacq
- kamera bezpieczeństwa Brickcom
- kamera bezpieczeństwa Tecno
- kamera bezpieczeństwa Home Protector
- kamera bezpieczeństwa Escam
- kamera bezpieczeństwa Mr Safe
- kamera bezpieczeństwa Duramaxx
- kamera bezpieczeństwa British Telecom
- kamera bezpieczeństwa EasyN
- kamera bezpieczeństwa IDIS
- kamera bezpieczeństwa Mobotix
- kamera bezpieczeństwa I-PRO
- kamera bezpieczeństwa Konyks
- kamera bezpieczeństwa YoloLiv
Najnowsze instrukcje dla kamera bezpieczeństwa
9 Kwietnia 2025

5 Kwietnia 2025
5 Kwietnia 2025
5 Kwietnia 2025

2 Kwietnia 2025
2 Kwietnia 2025
30 Marca 2025
30 Marca 2025
30 Marca 2025
30 Marca 2025